Captain’s Galley
Clam Clams
(As I like to call them.)
(Ensure all your clams are still alive. If a clam’s shell isn’t closed, tap the shell to see if it closes. If the shells don’t close, the clam is likely dead and not edible. To cook them simply add ~1/2 Cup water to a medium sized pot and add your clams. Close the pot with a lid and boil the water which will steam the clams for about 3 min. Once the clam is cooked you will see all the clams open up. Once they are open, use long tongs to remove the clams from the pot. In the meantime, saute some minced garlic in some butter over medium heat until the garlic just starts to brown. Chop some chives and spread them over the cooked clams. Remove the butter and garlic and pour it into a small bowl. Dip the clams into the hot butter.) 
————————————————
Ahoy!
Permission to come aboard Sir?
Permission Granted!
——————————————————-
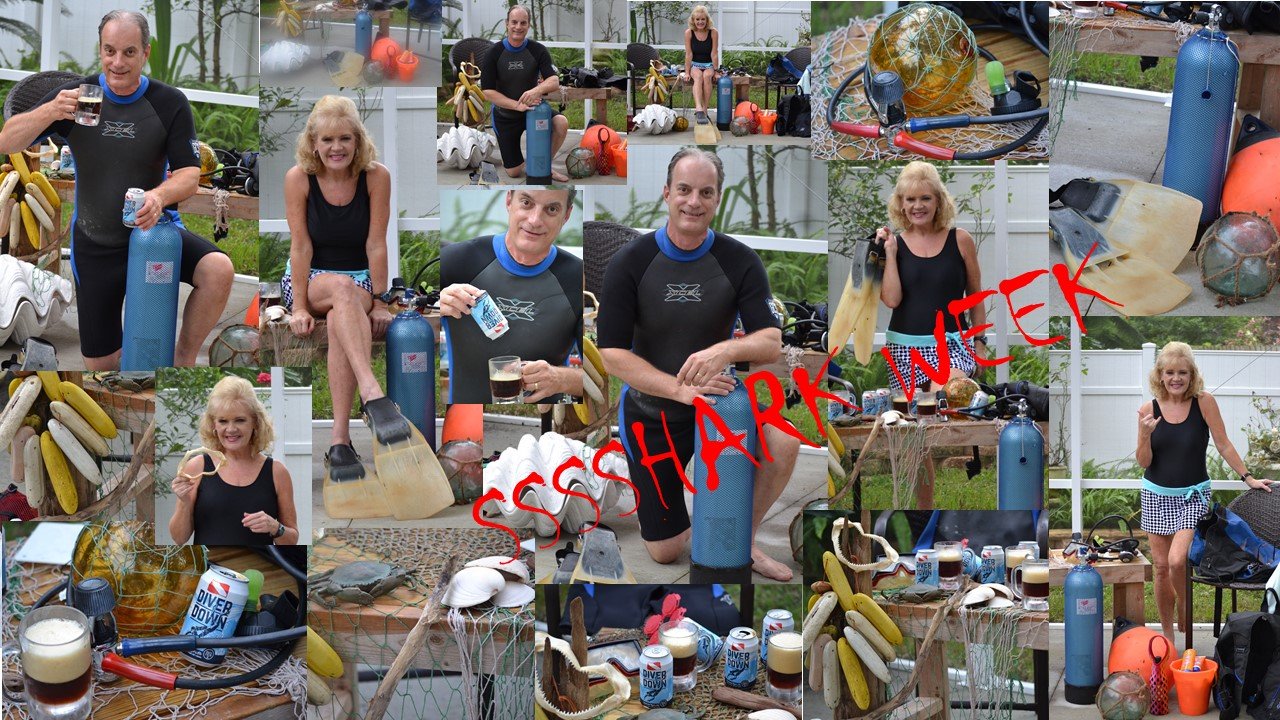
We created this post to go along with our other Shark Week and Seafood Posts.
We are hugs fans of Shark Week and anything Shark related.

Gordon is a PADI Divemaster and was also in the Navy for 20 years and retired as a Navy Chief.
———————————————————-
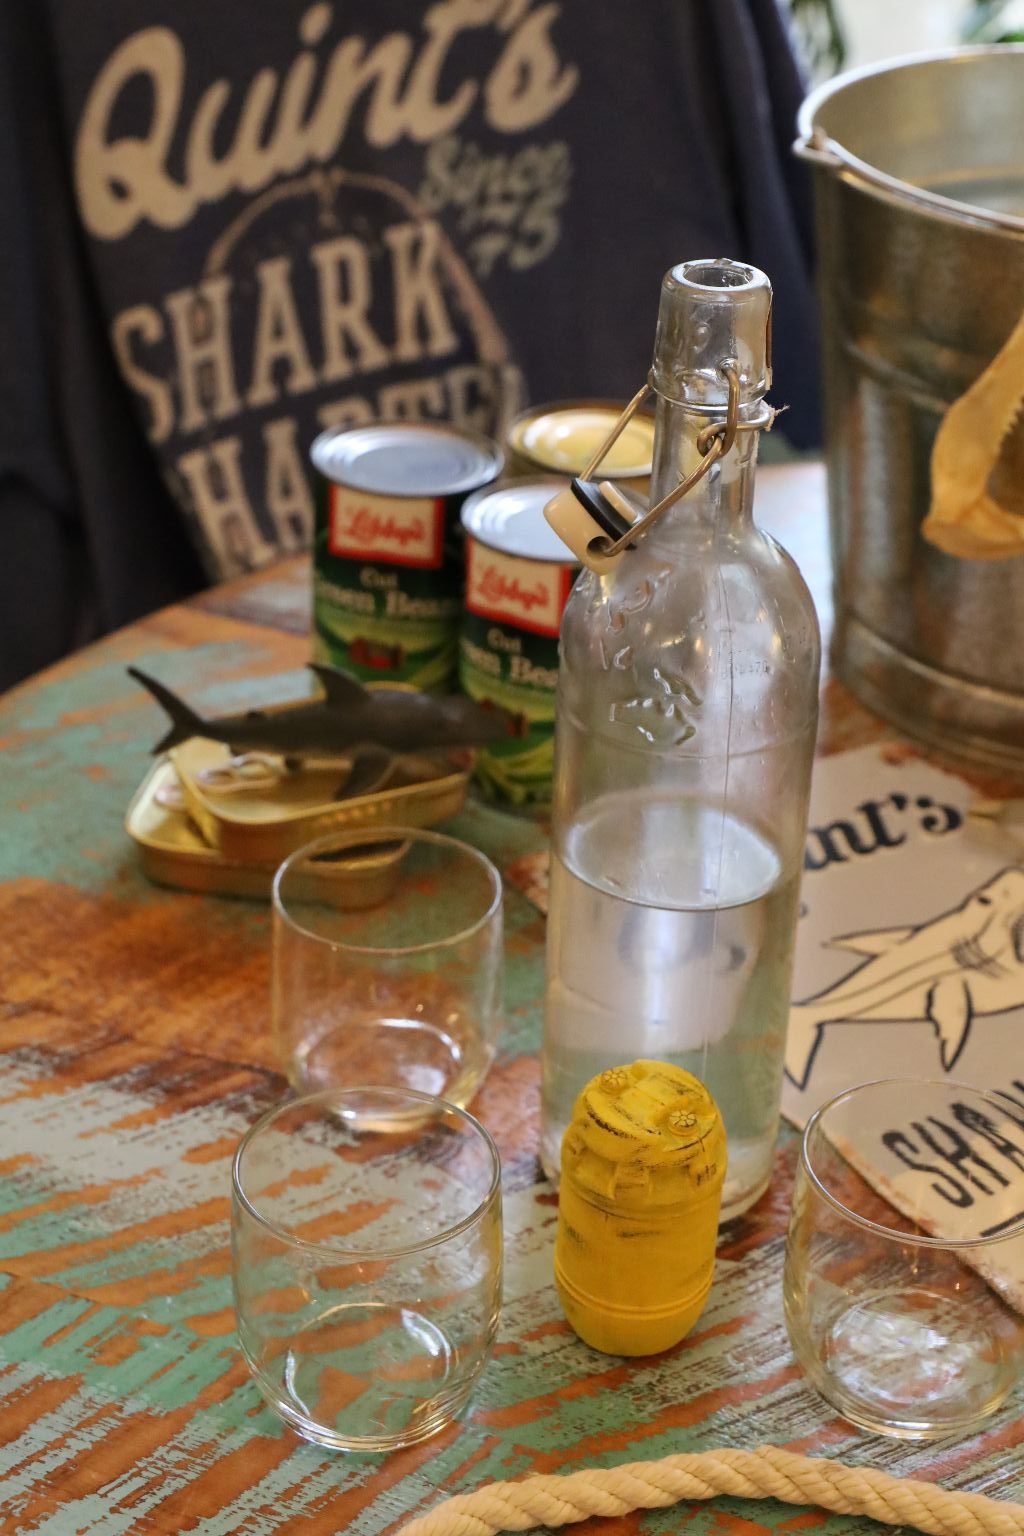
One of our favorite shark movie’s is JAWS (1975), starring the great actor Robert Shaw. It is Robert Shaw’s character Quint, that we are basing this on.

Quint Sharing his Homemade Brew with Chief Brody

Both Hooper and Brody are fascinated with Quint’s business/home.

——————————————————–
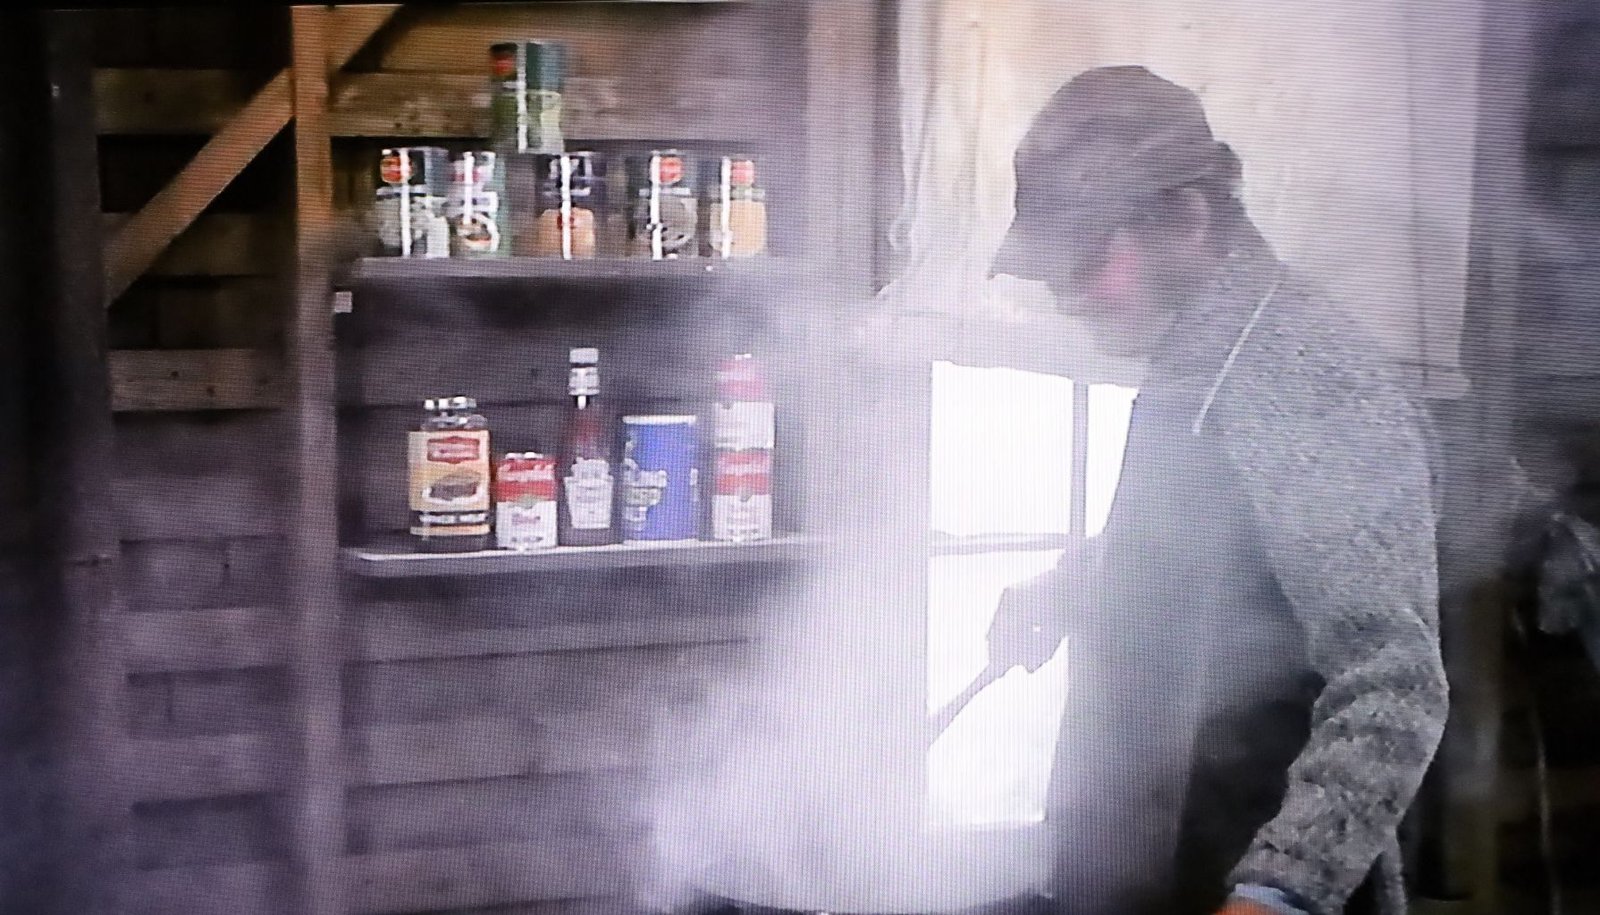
Quint Boiling some JAWS

It is because of these photos that I recreated our homage to the man Quint.
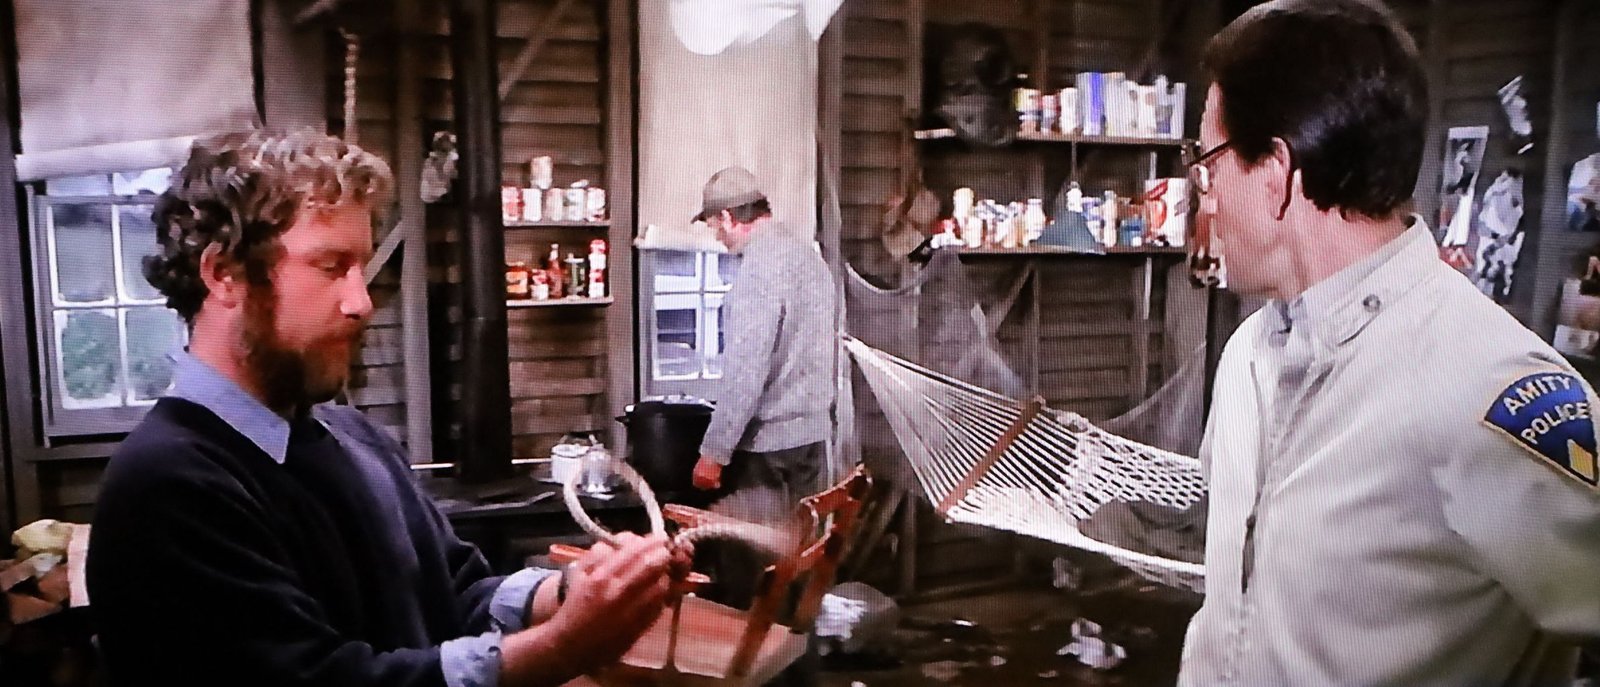
Hooper Tying a SHEEPSHANK Knot
——————————————

Our recreation homemade Quint brew, the JAWS he was boiling, the knot he had Hopper to tie, and some of Quint’s canned goods in his home.
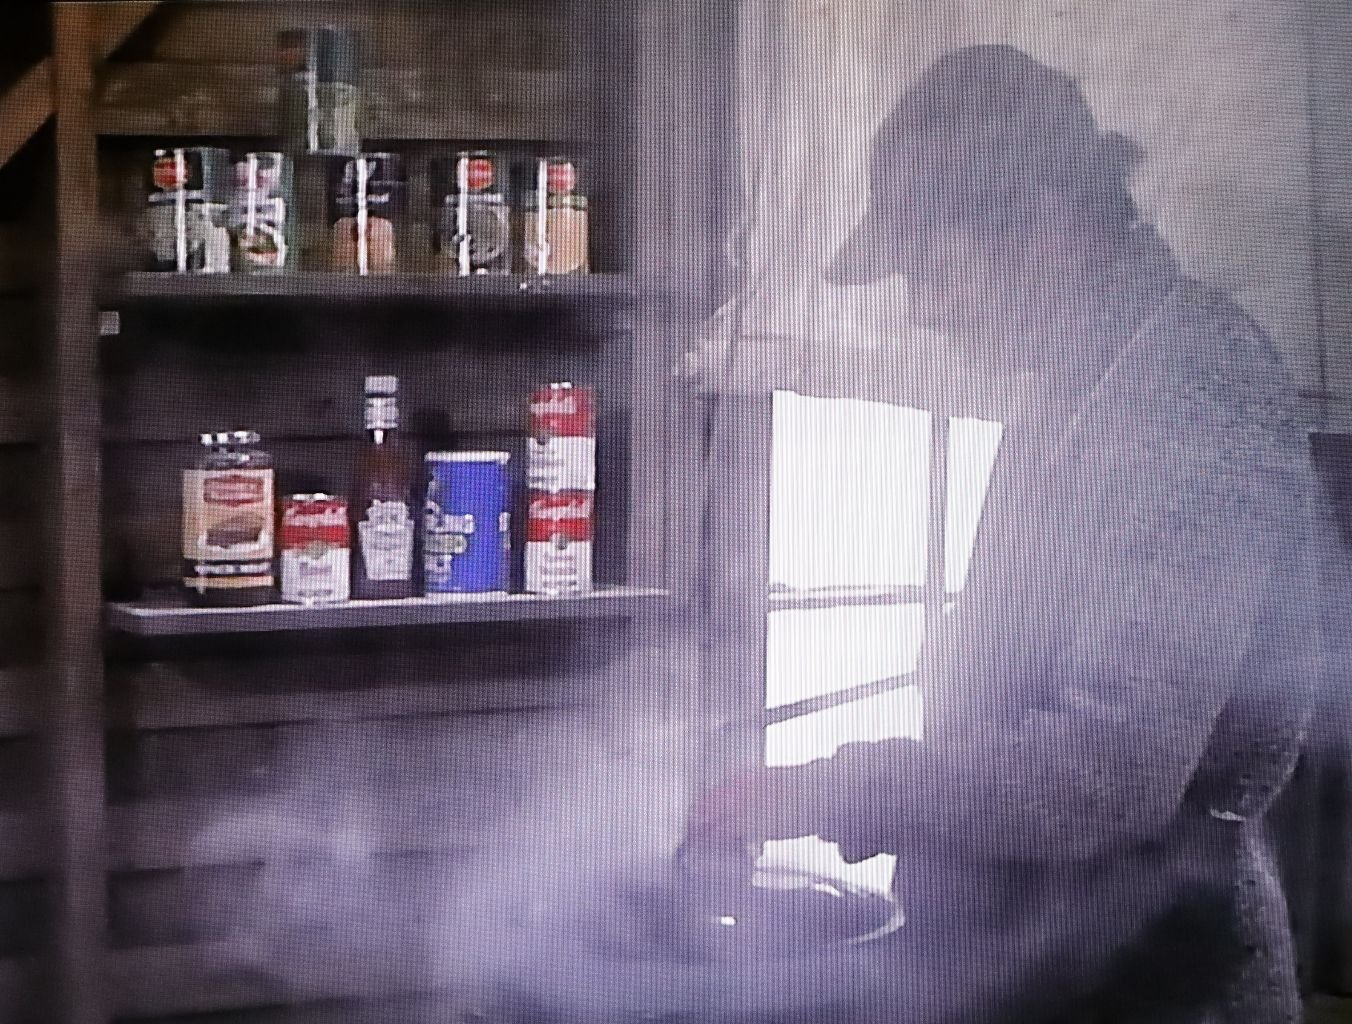
Love the Canned Goods
(Now that is what I expect to find in Quint’s kitchen.)
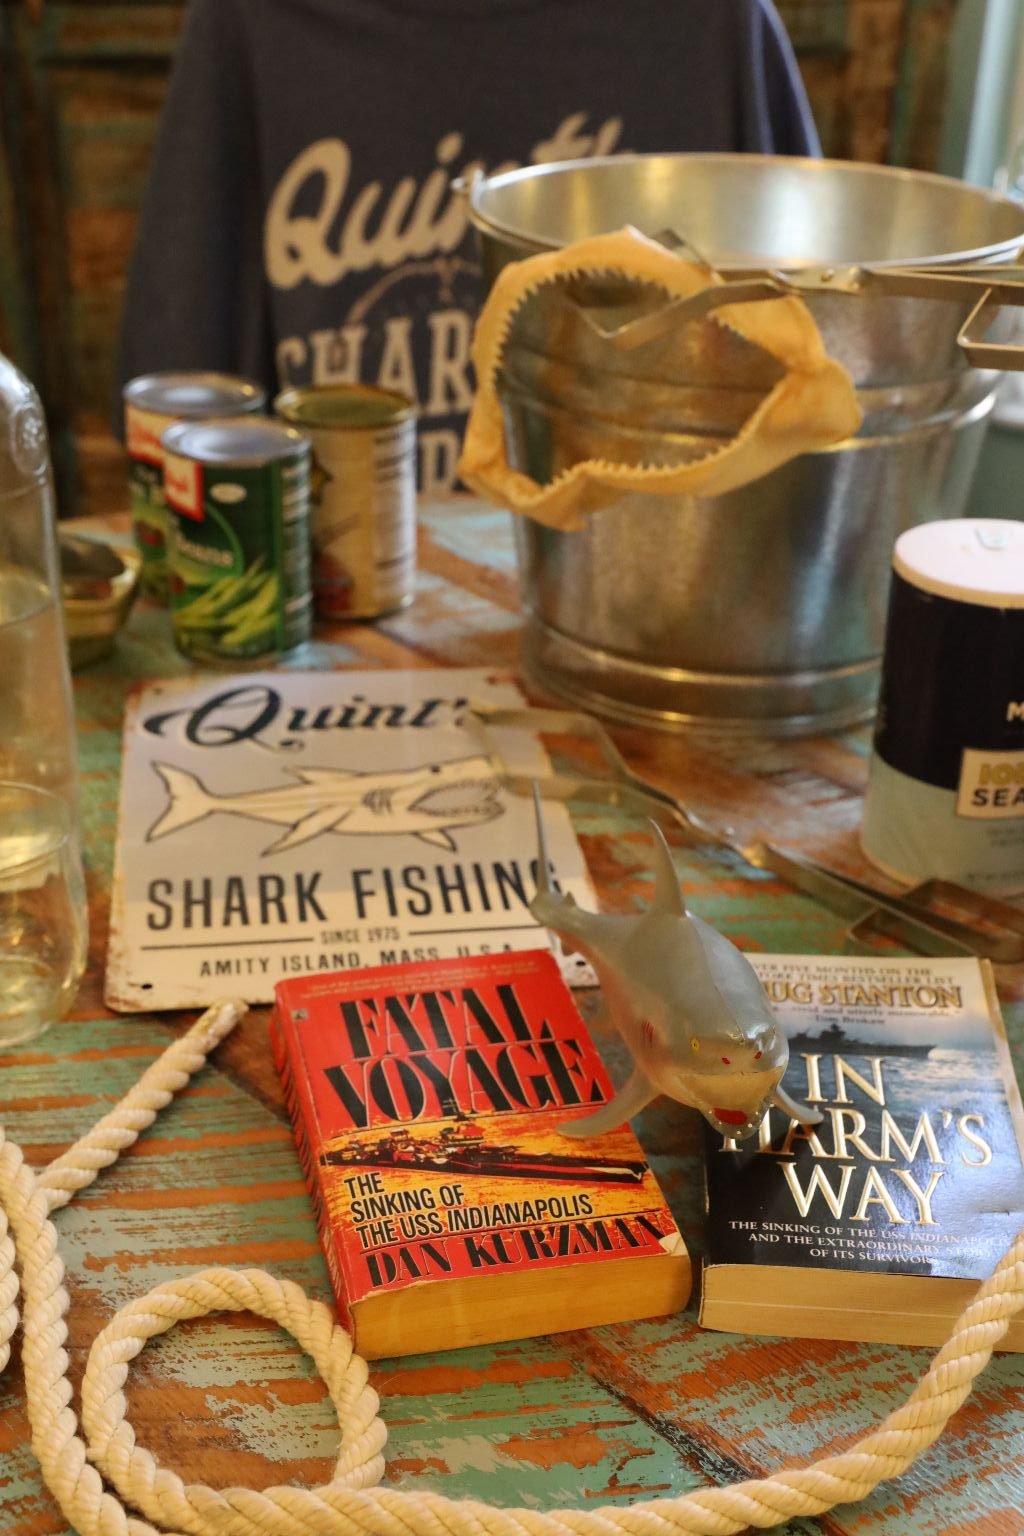
Quint was also a former crew member onboard The Indianapolis. It is a true story of how the Japanese sunk the ship during WW2 and a lot of the sailors were eaten by sharks before they could be rescued.
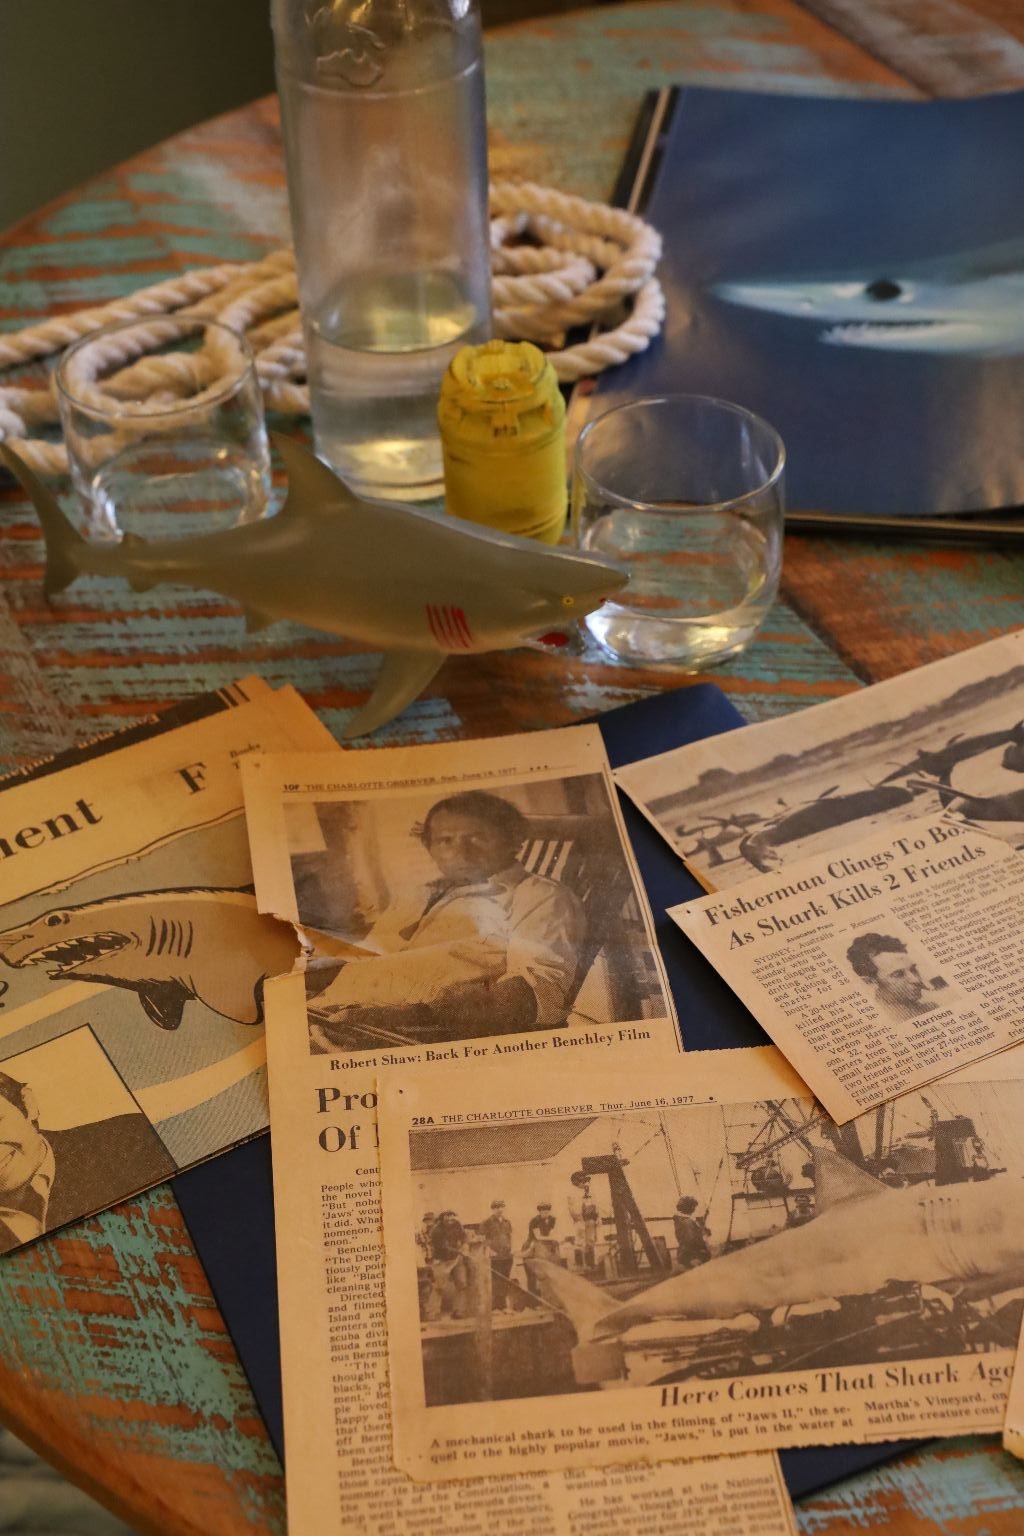
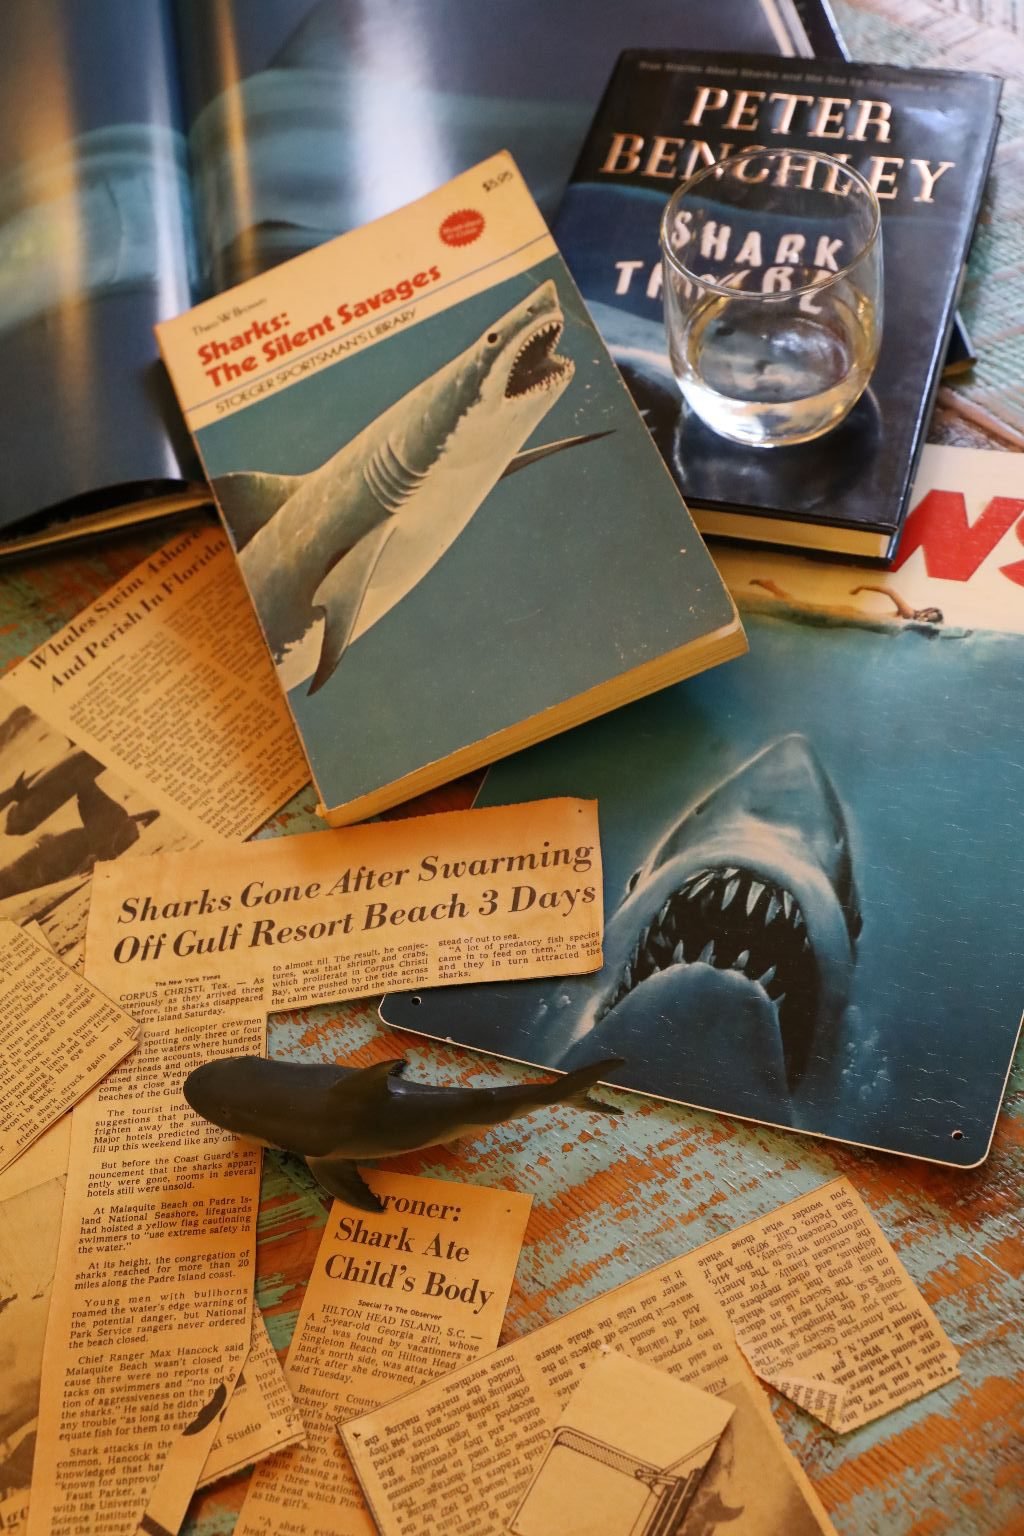
Gordon has always wanted to be a SCUBA Diver since childhood and had a fascination with sharks himself. These are a few of his articles that he cut out many years ago. We found them during our renovations and wanted to use them here.
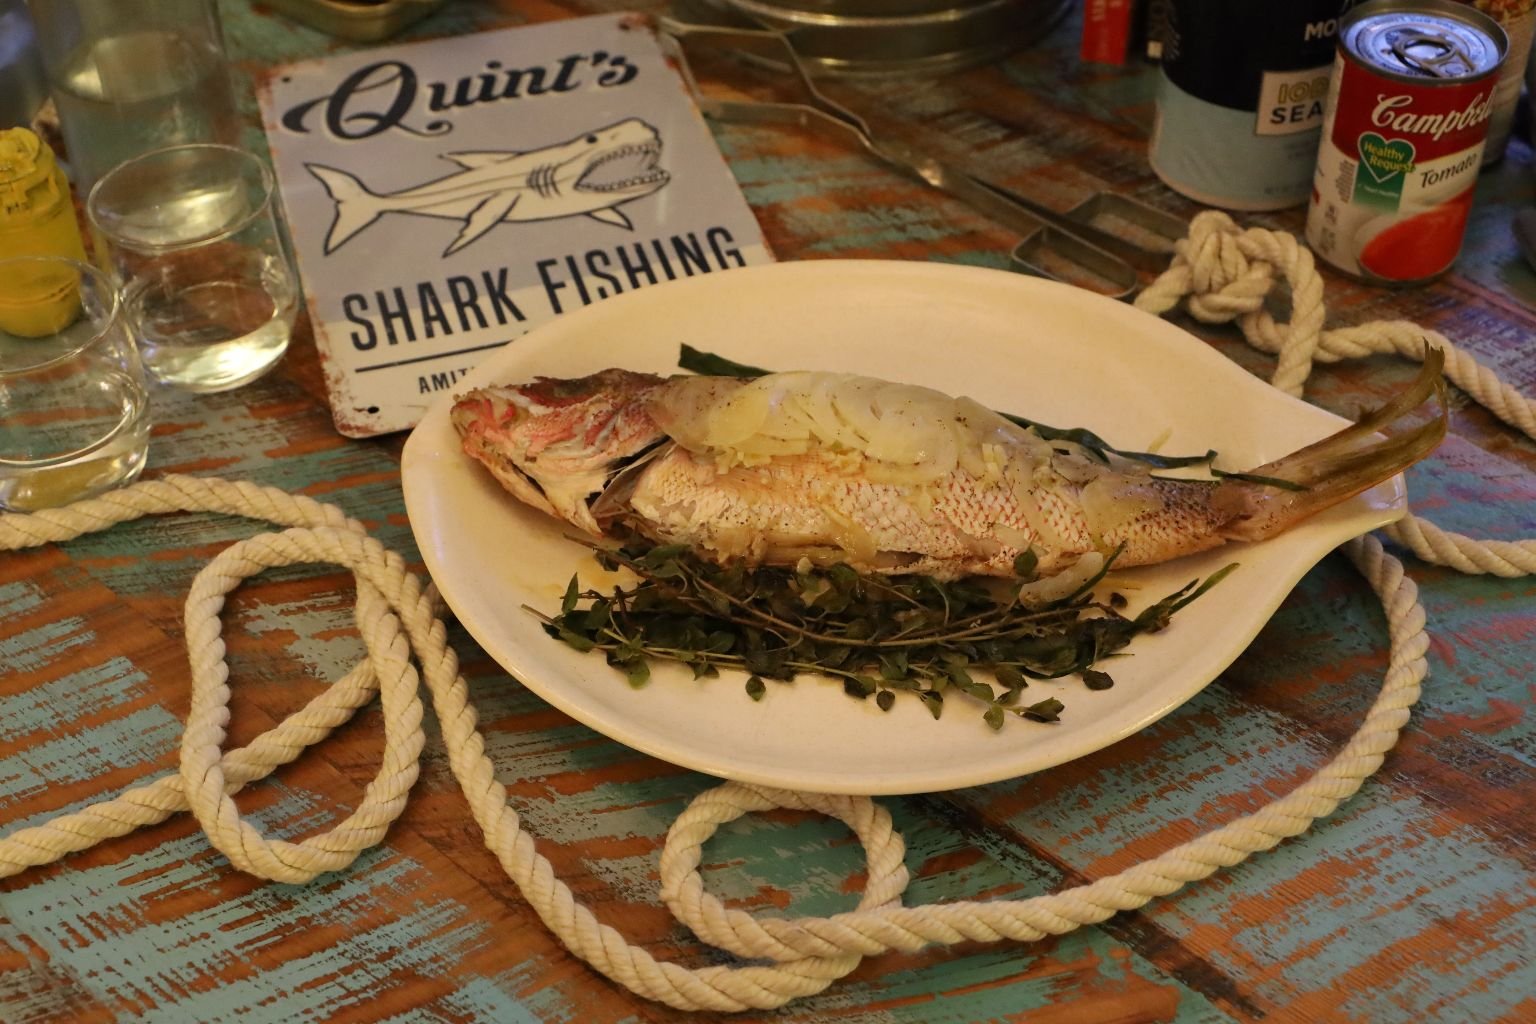
Quint’s Fish Dinner
We tried to imagine what Quint would eat for dinner? We knew it would be a fish but we also knew that it wouldn’t be anything fancy. He would probably not care that a head and a tail were still attached when he cooked it. We also assumed that Quint would use foods like Onion and Garlic and perhaps even a few herbs he had growing. O.k. perhaps not herbs but still…
Quint’s Yellow Tail Fish Dinner
(See Recipe Below)
——————————————————————-
We do plan on adding a few more recipes to this post so stay tuned.
Julie and Gordon
Oh, and be sure to watch Shark Week on the Discovery Channel!
——————————————————-
You may now enter the Captain’s Galley
We hope you brought with you a hardy appetite as we have a few selections here for you to choose from.

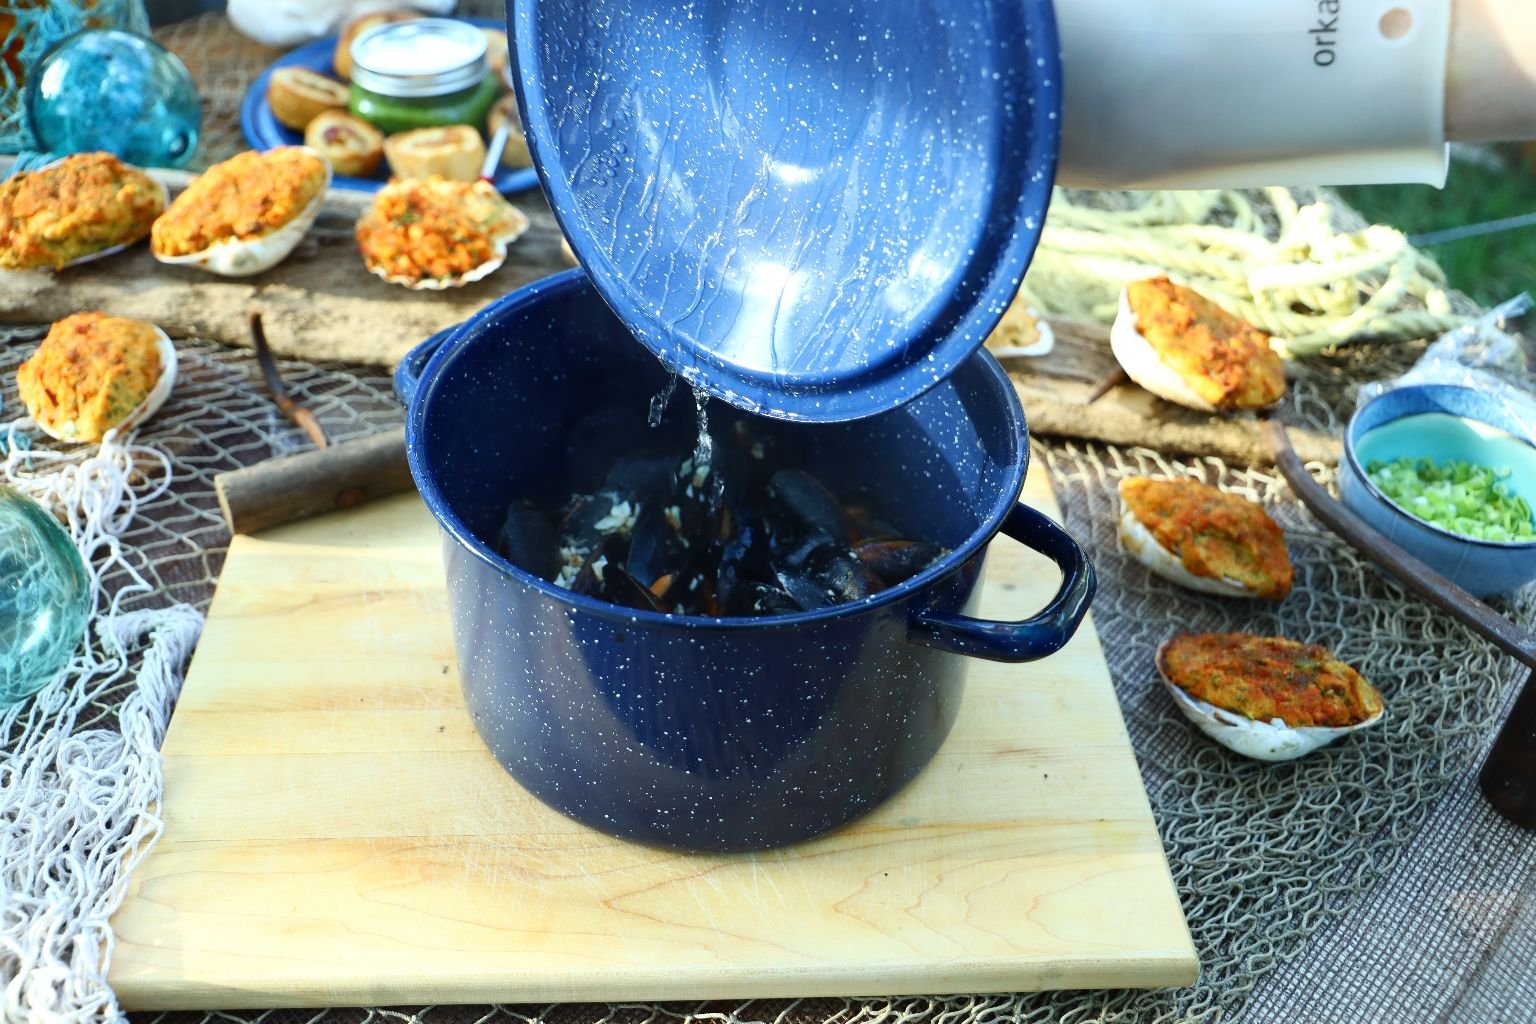
First Up: A Simple Meal of Steamed Mussels, Bread and Cheese
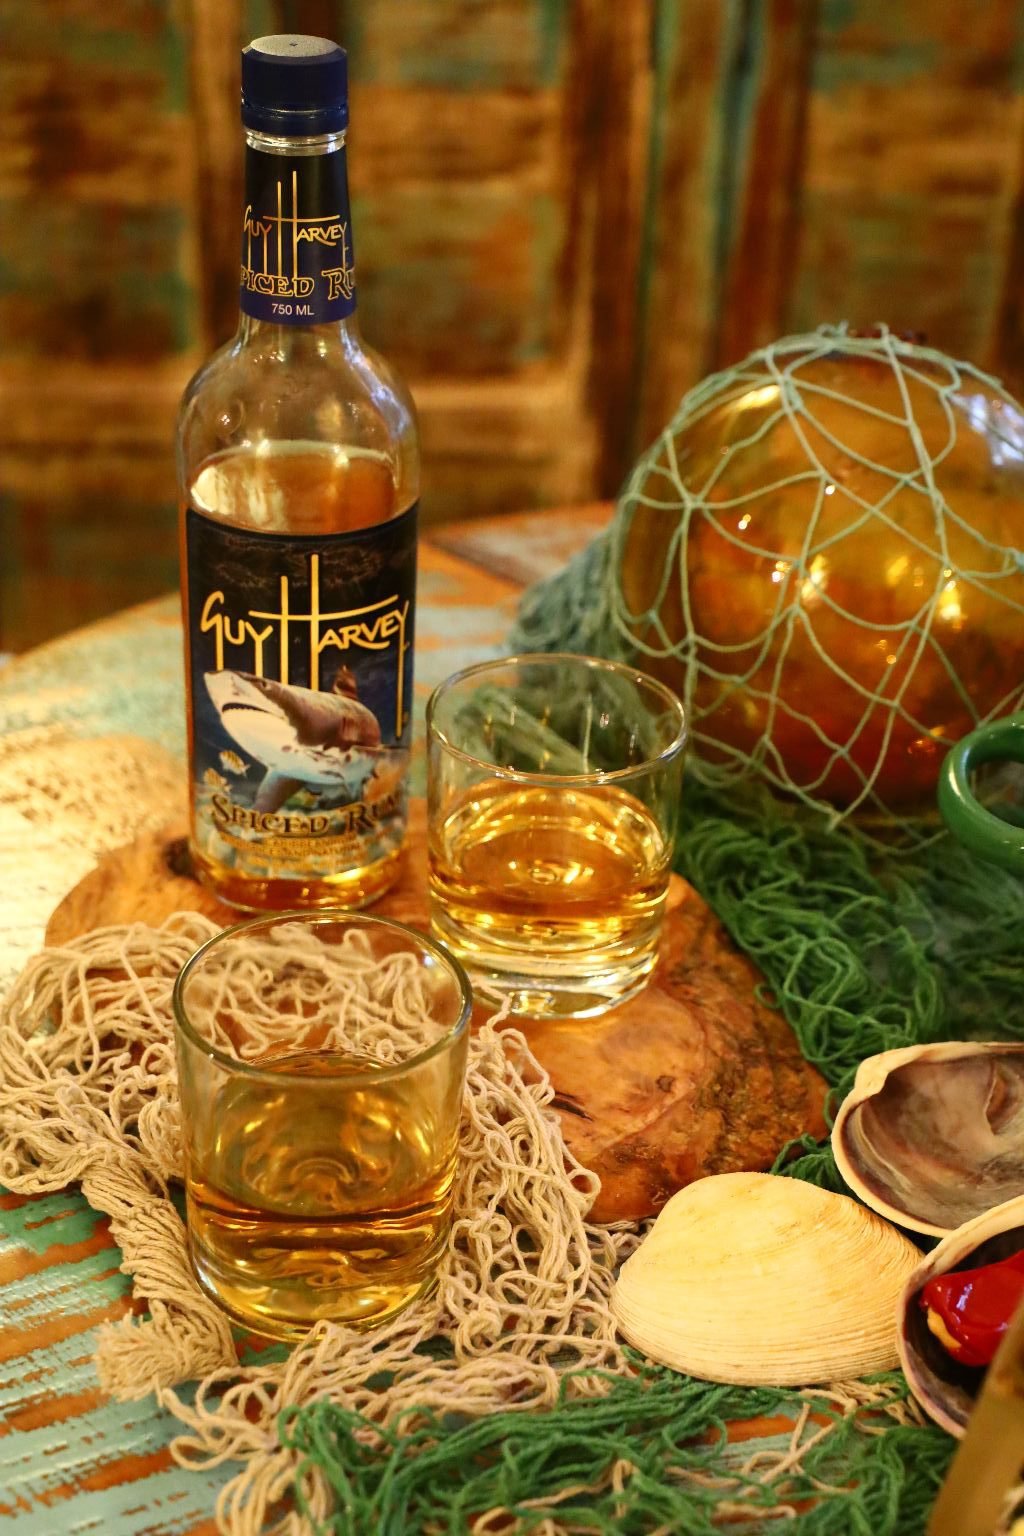
Served with Guy Harvey Rum
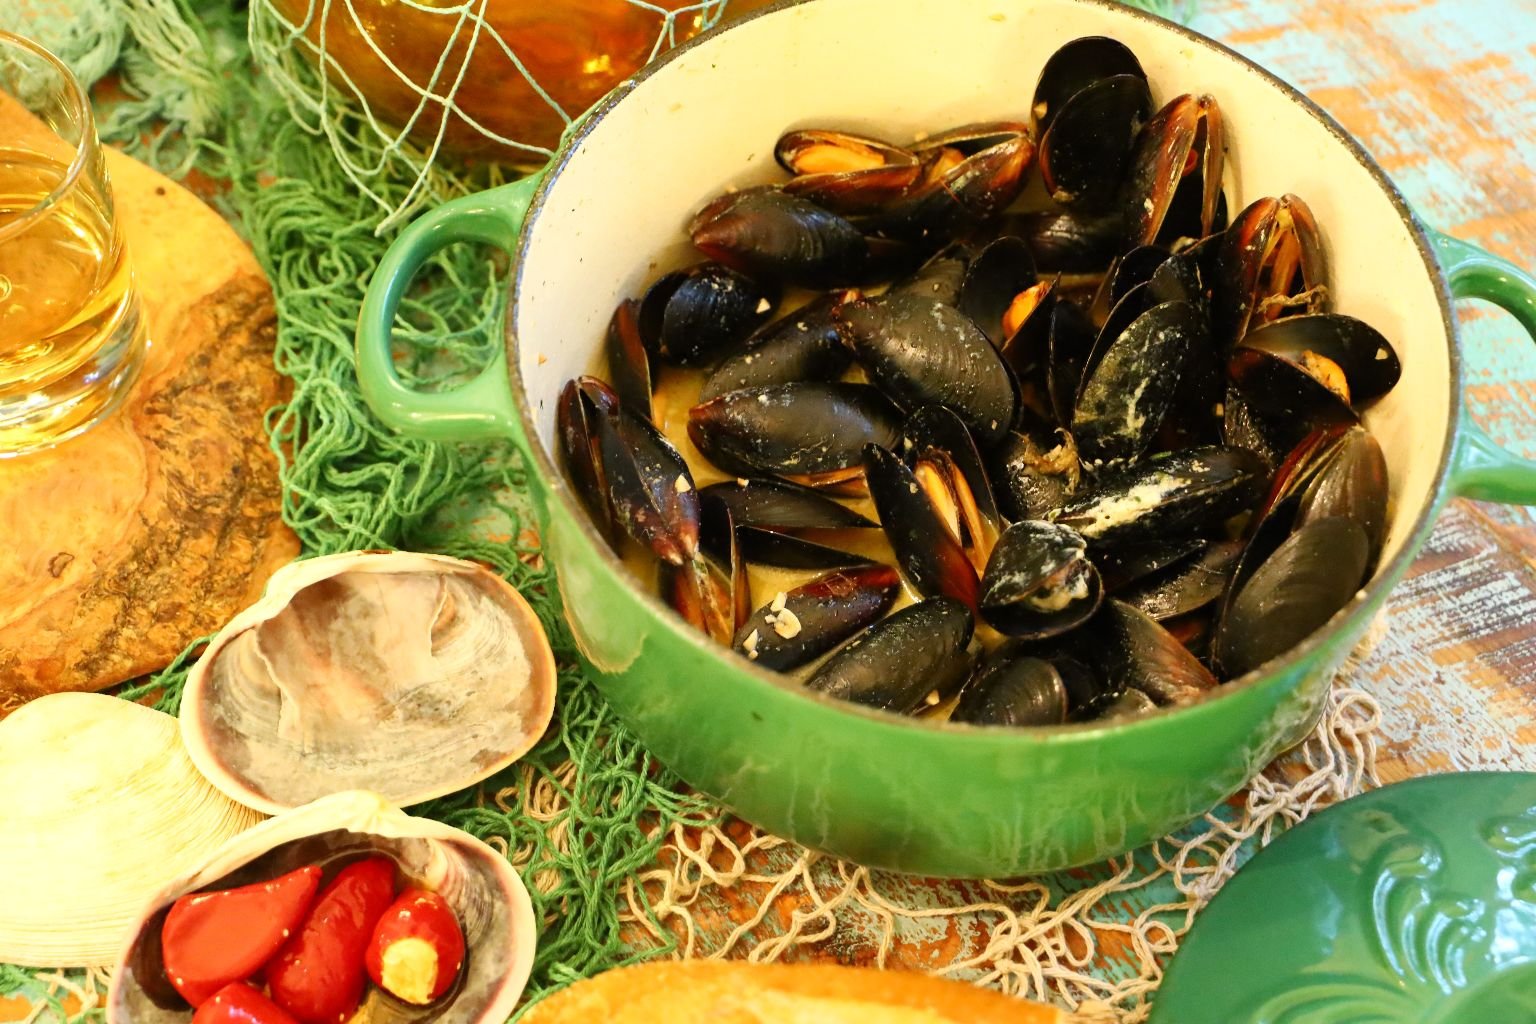
An Excellent Starter
———————————————————————
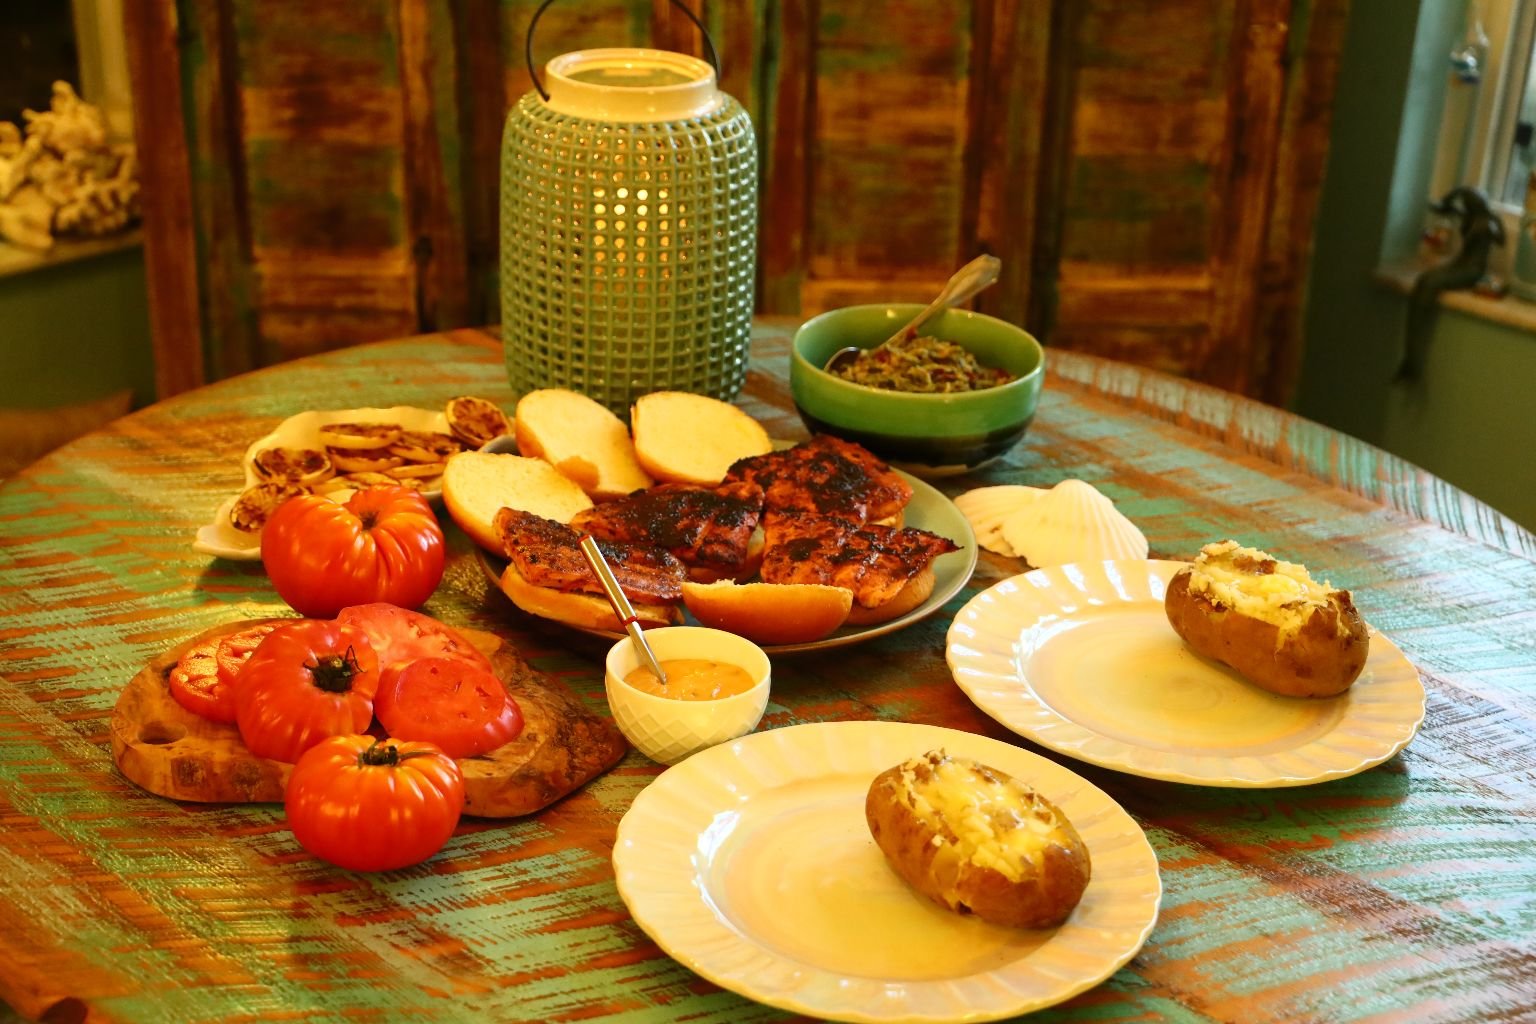
Next Up: Baked Potatoes, Heirloom Tomatoes, and Smokey Salmon Sandwiches with Lemon Pepper and Grilled Lemons
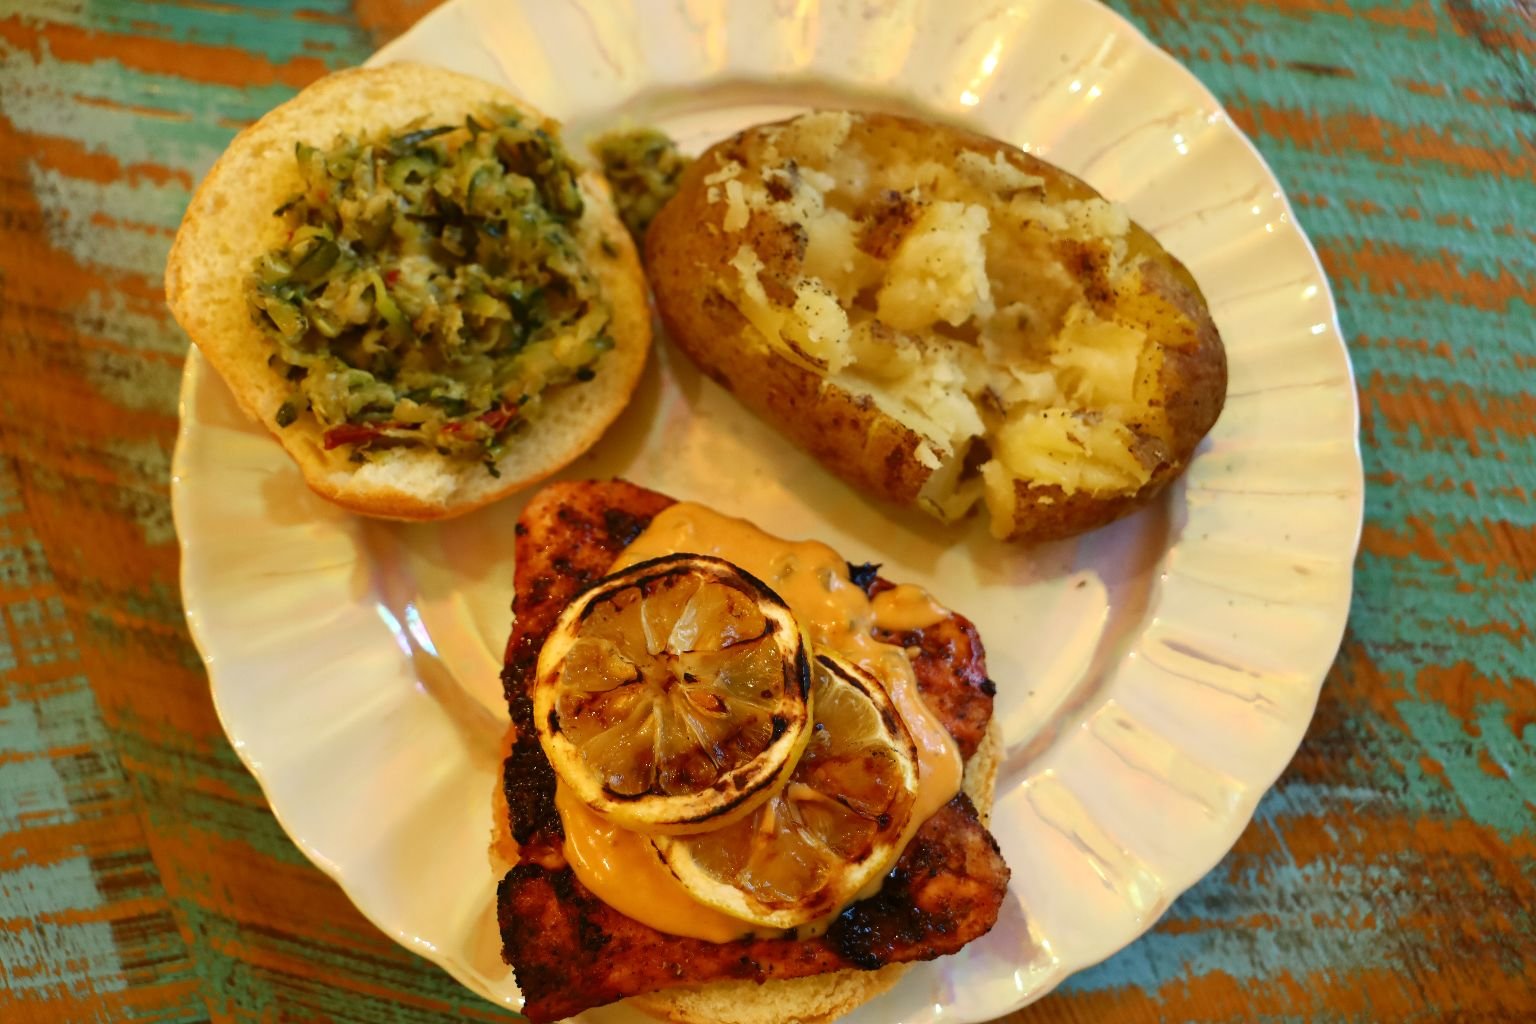
Salmon topped with a Key Lime Tarter Sauce

AND,
Our Italian Zucchini and Sun Dried Tomato Saute
(As a side or topped on our Salmon Sandwiches.)
————————————————————–
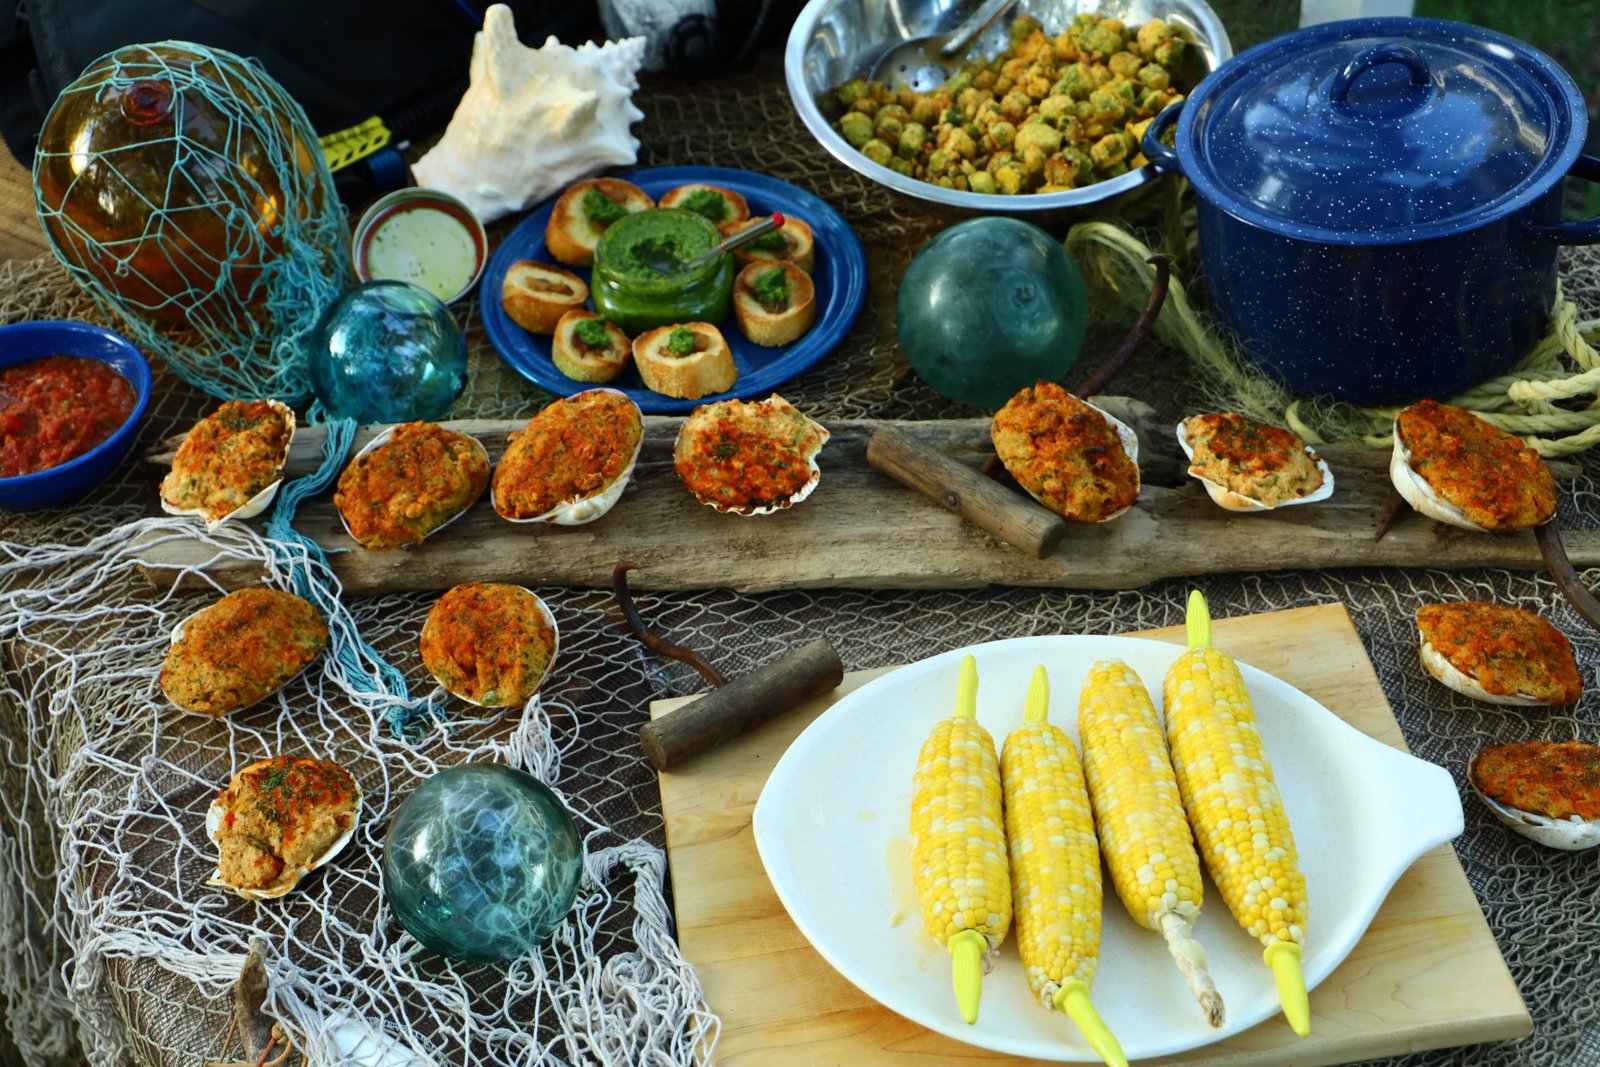
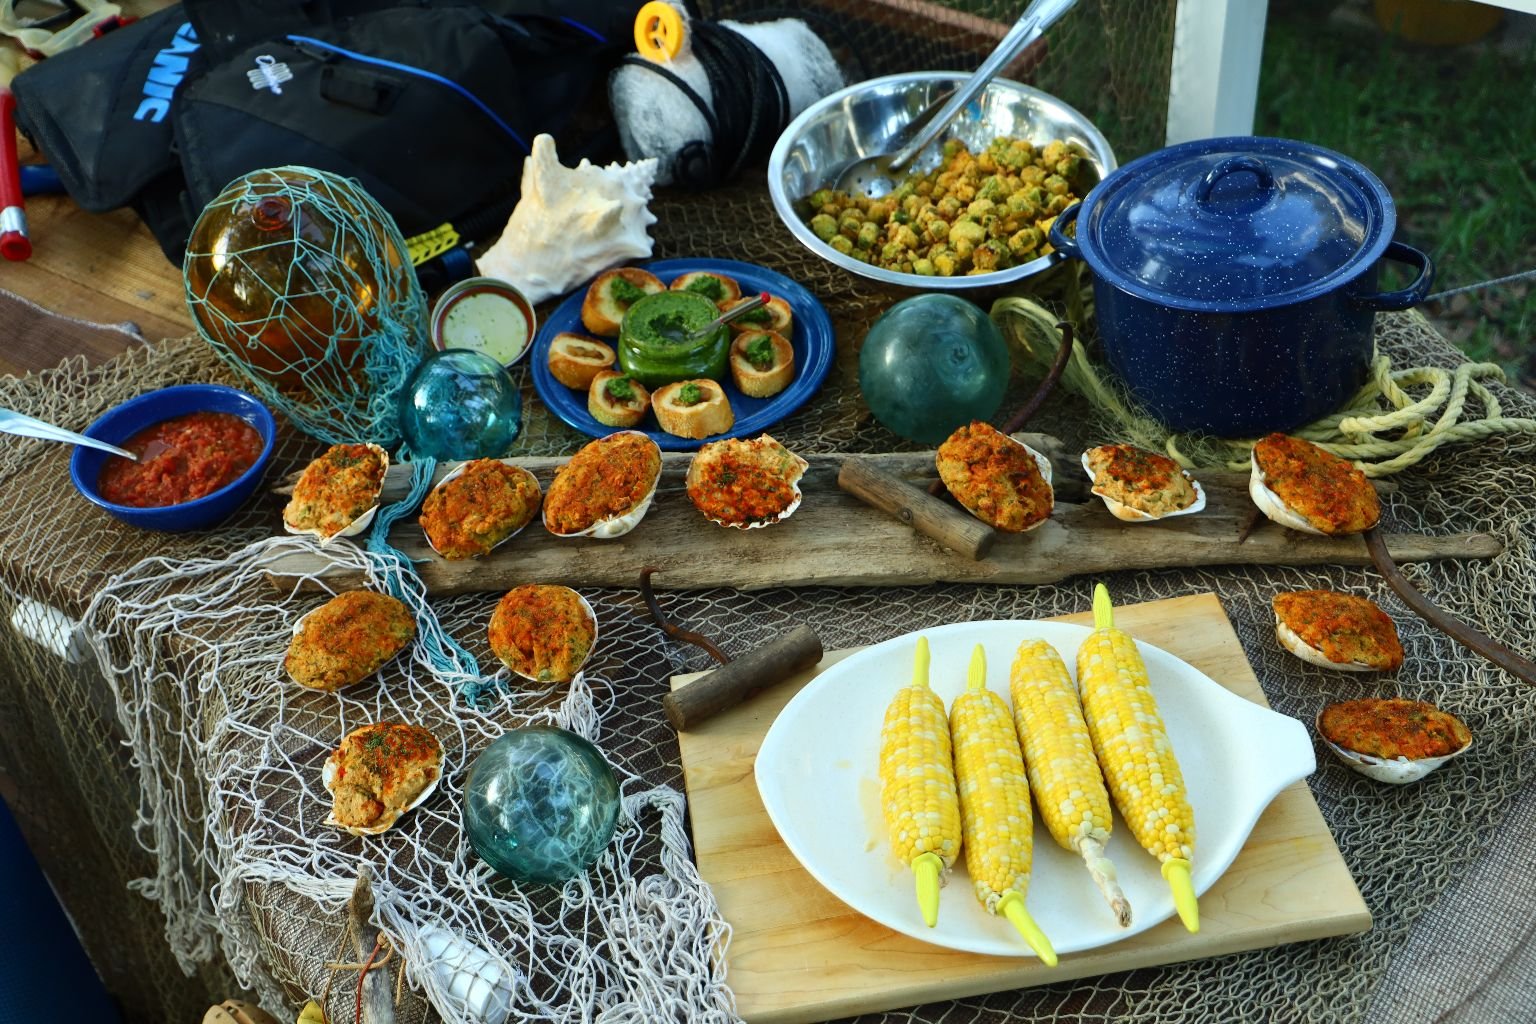
Welcome to the Captain’s Galley
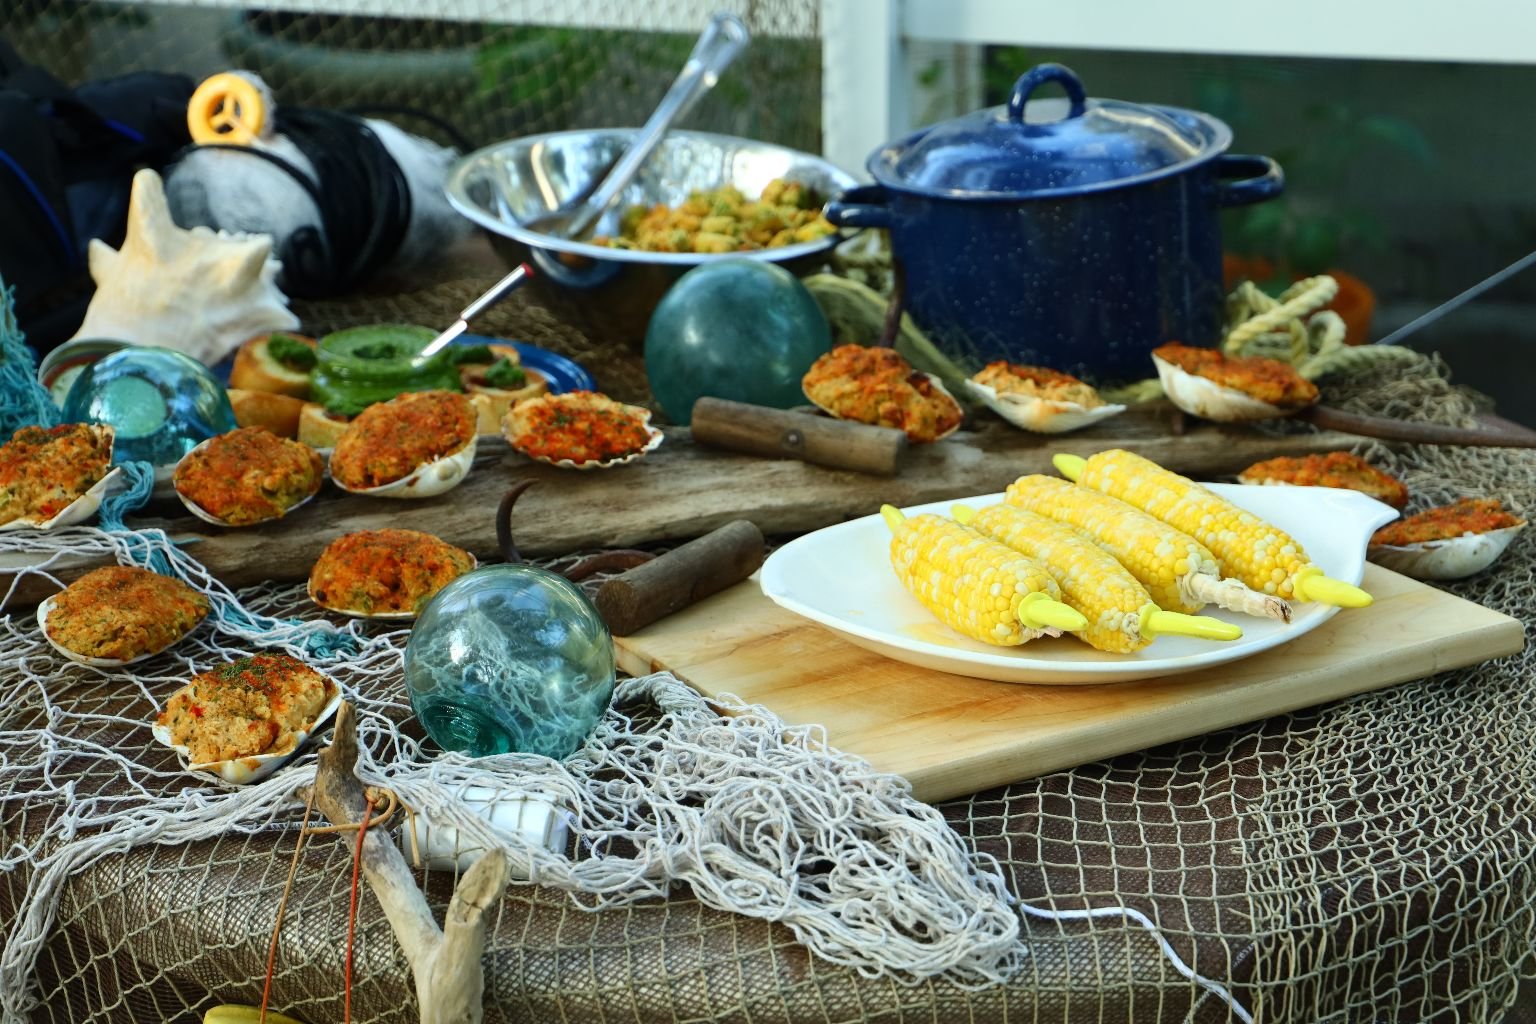
This is the Belly of the Beast
A bit on the light side for the Captain but nonetheless a nice Hearty Chow for the Crew.
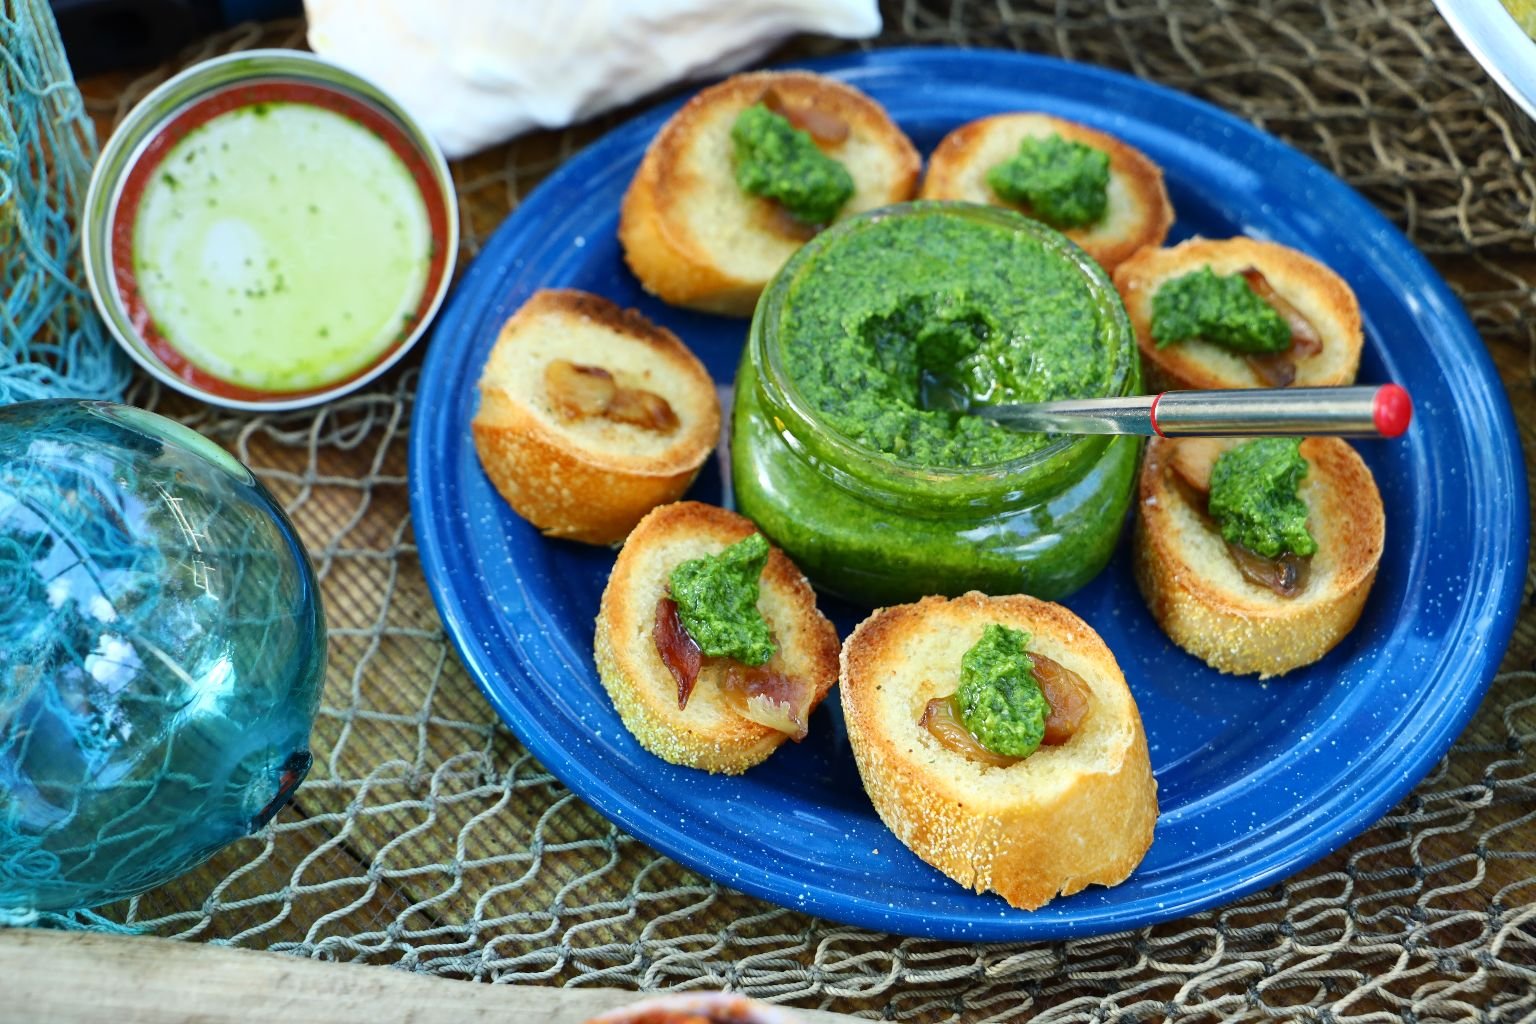

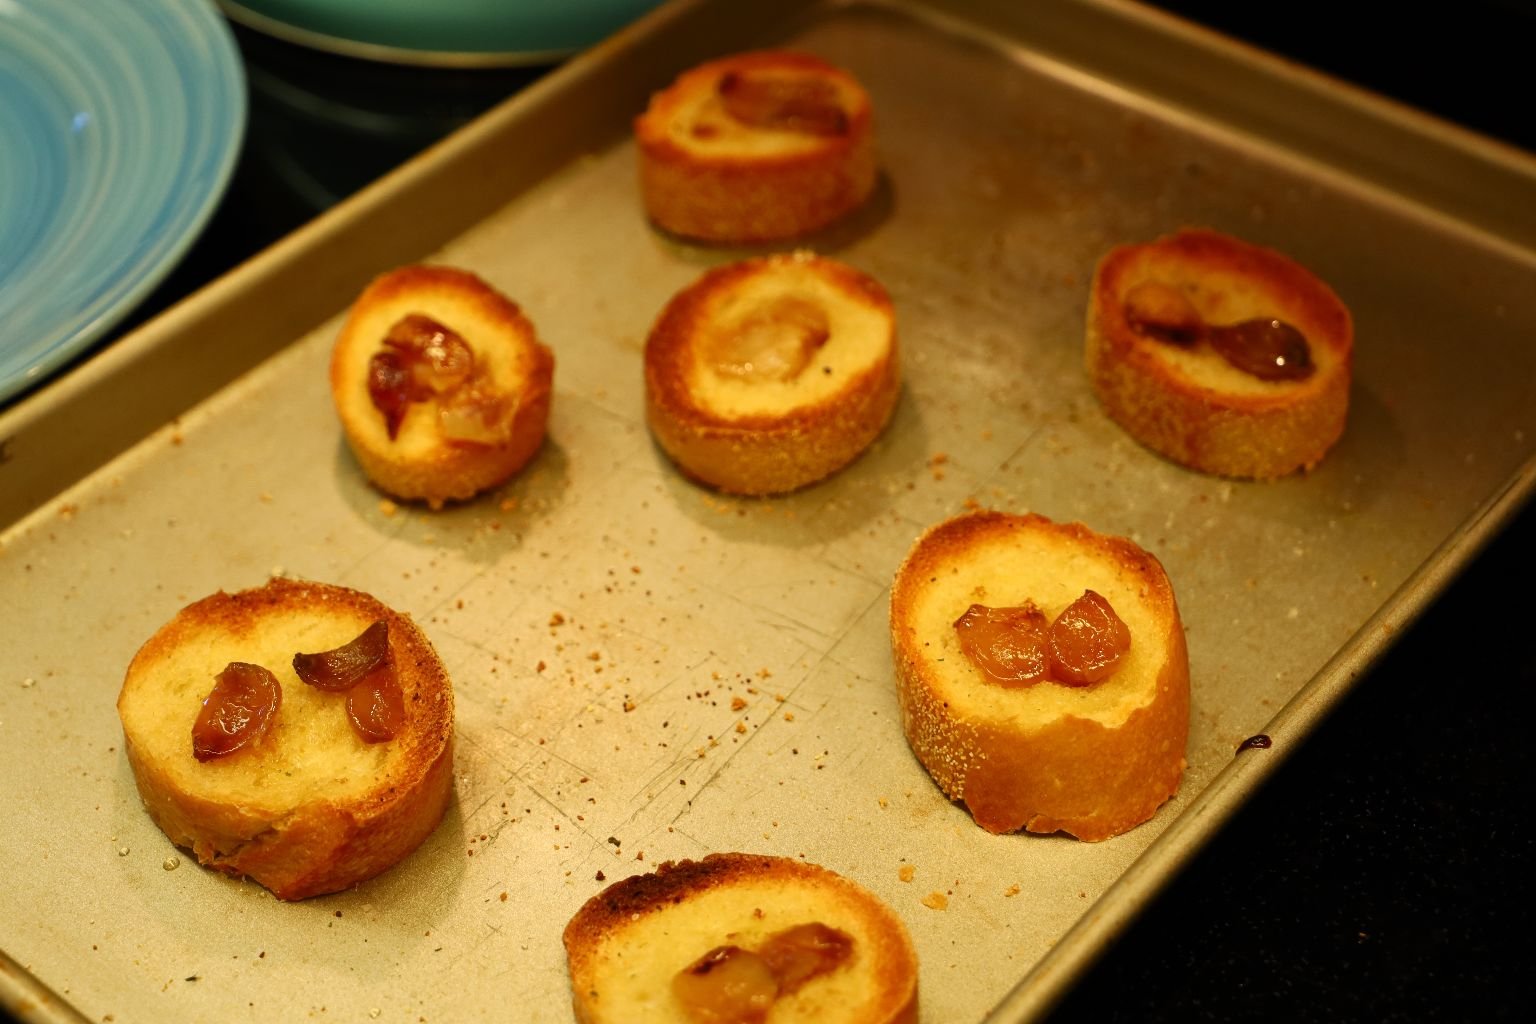
Sliced Baguette with Roasted Garlic and Homemade Pesto
Fried Okra
Our Homemade Pesto
More Steamed Mussels
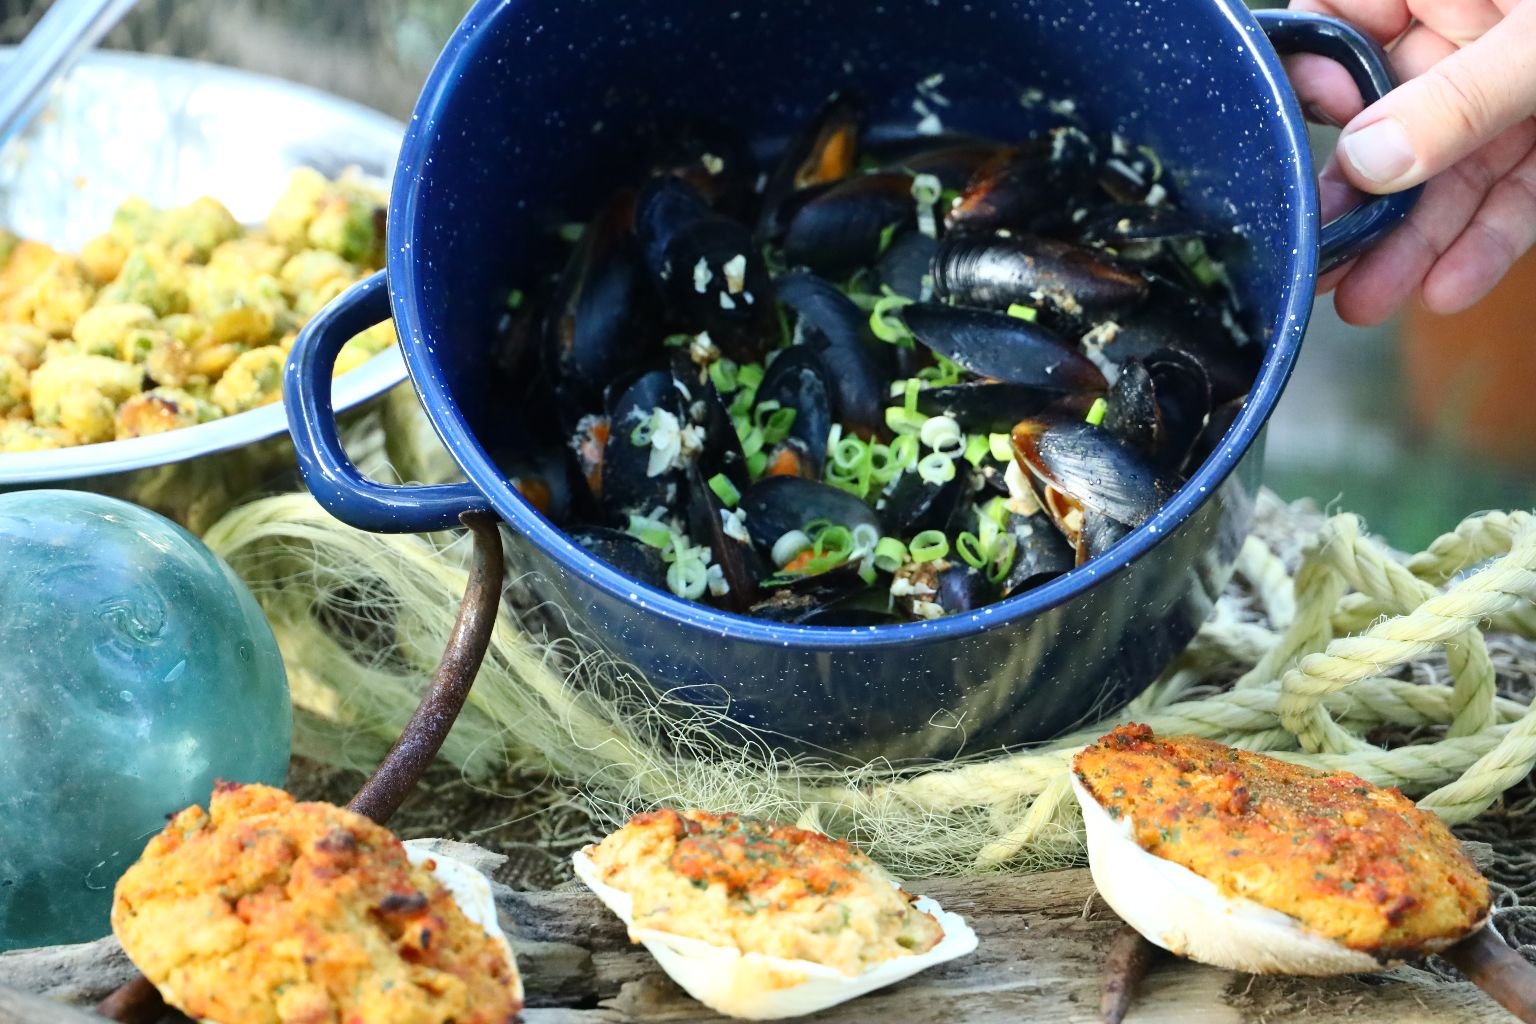
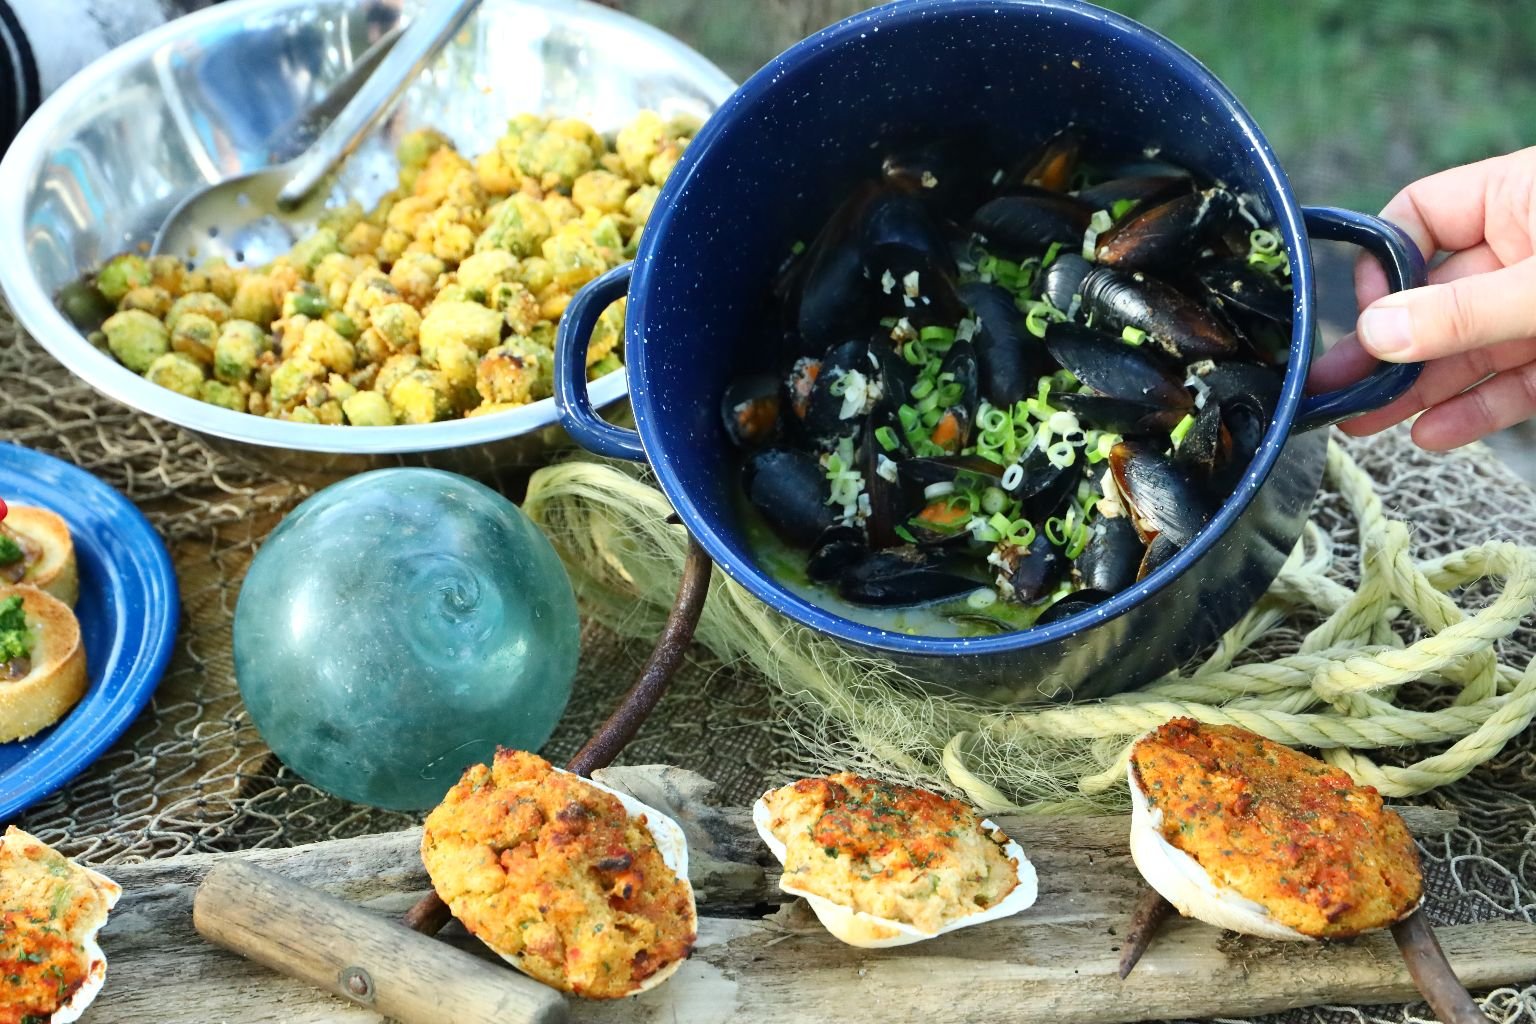
Grilled Stuffed Clams and Scallops
————————————————————-
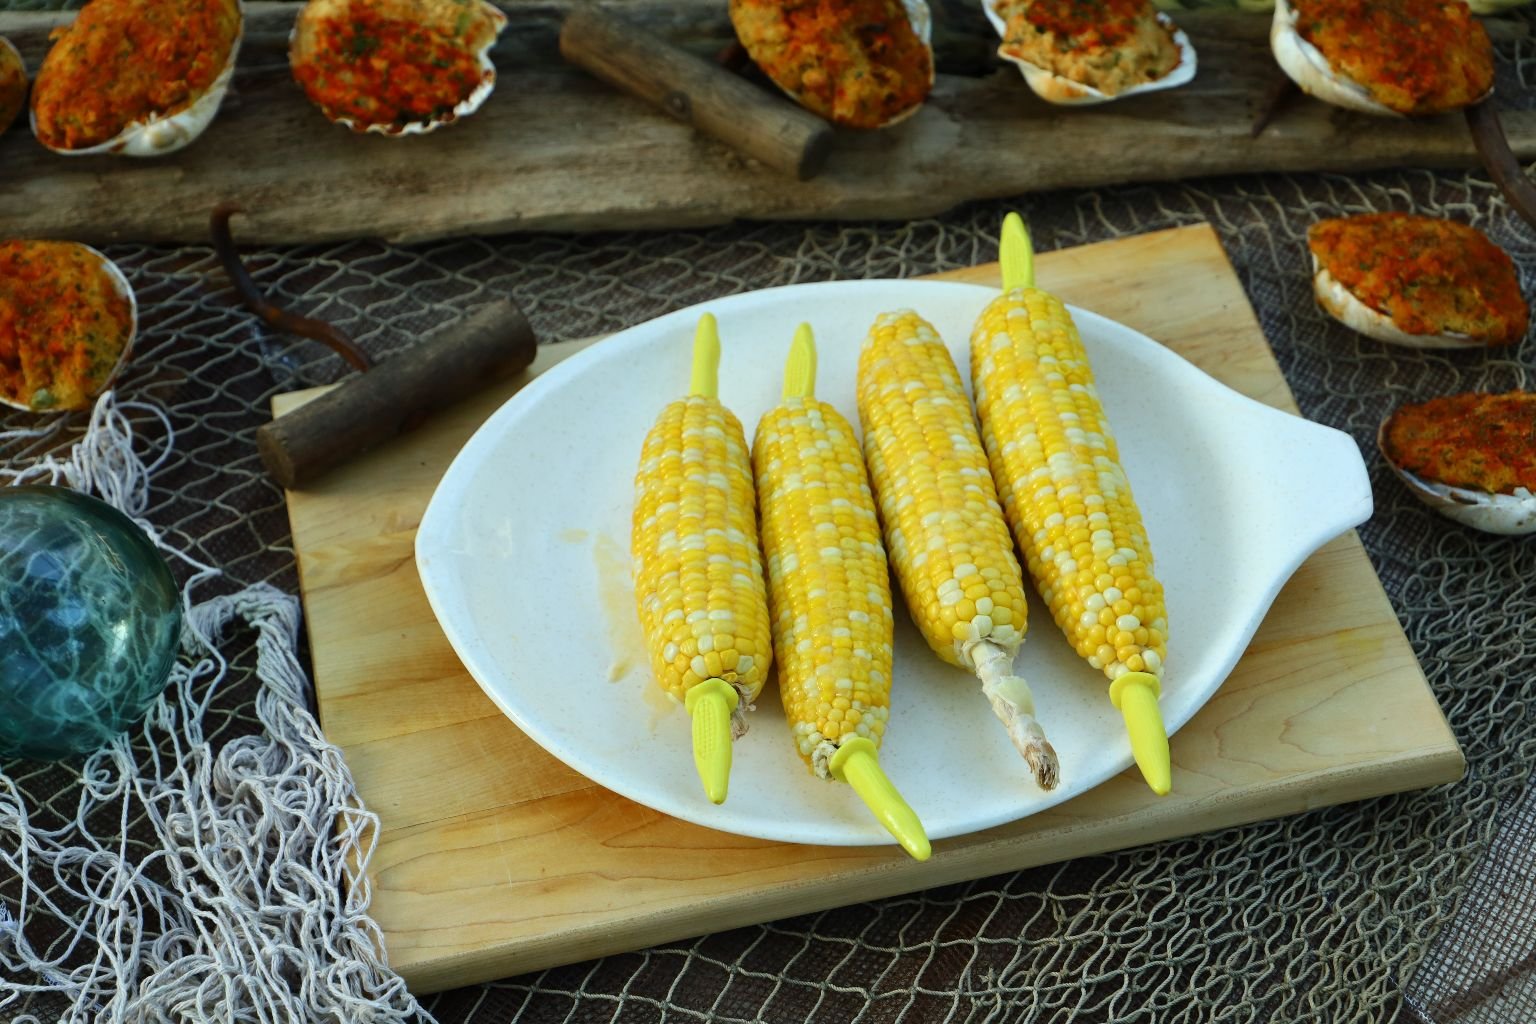
Corn on the Cob

Grab a Tray and Help Yourself
——————————————————————-
A Big Thanks to the Mess Specialists for the Chow
(That would be Gordon.) 🙂
————————————————————
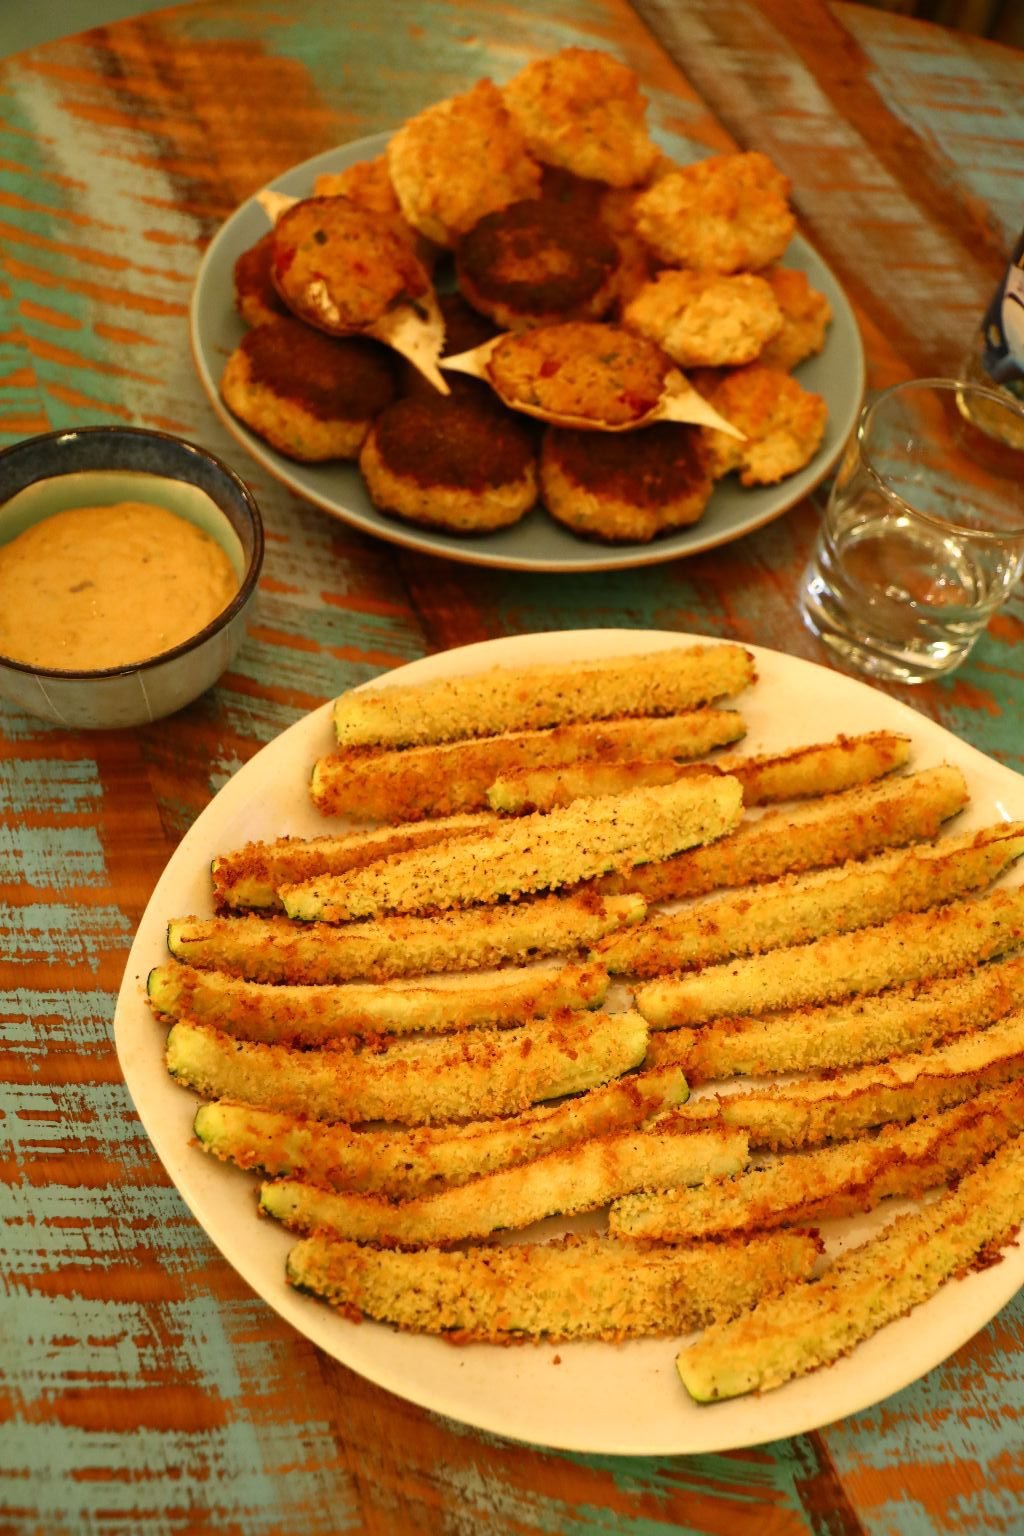
We Also Have:
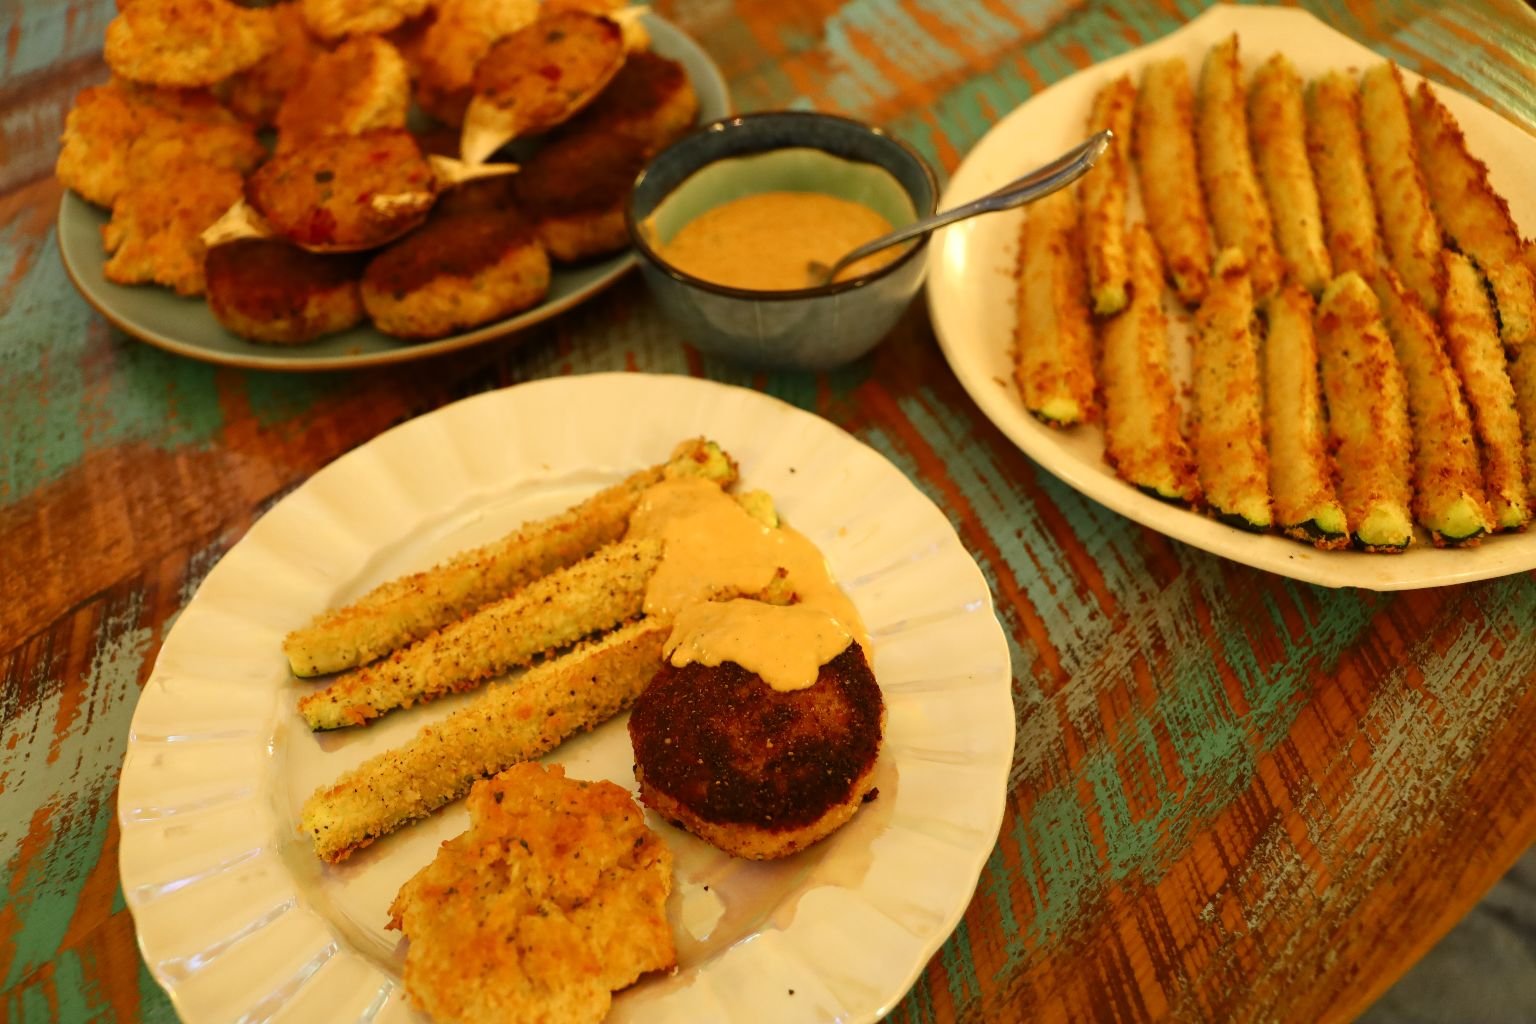
Crab Cakes, Cheddar Biscuits, and Zucchini Fries
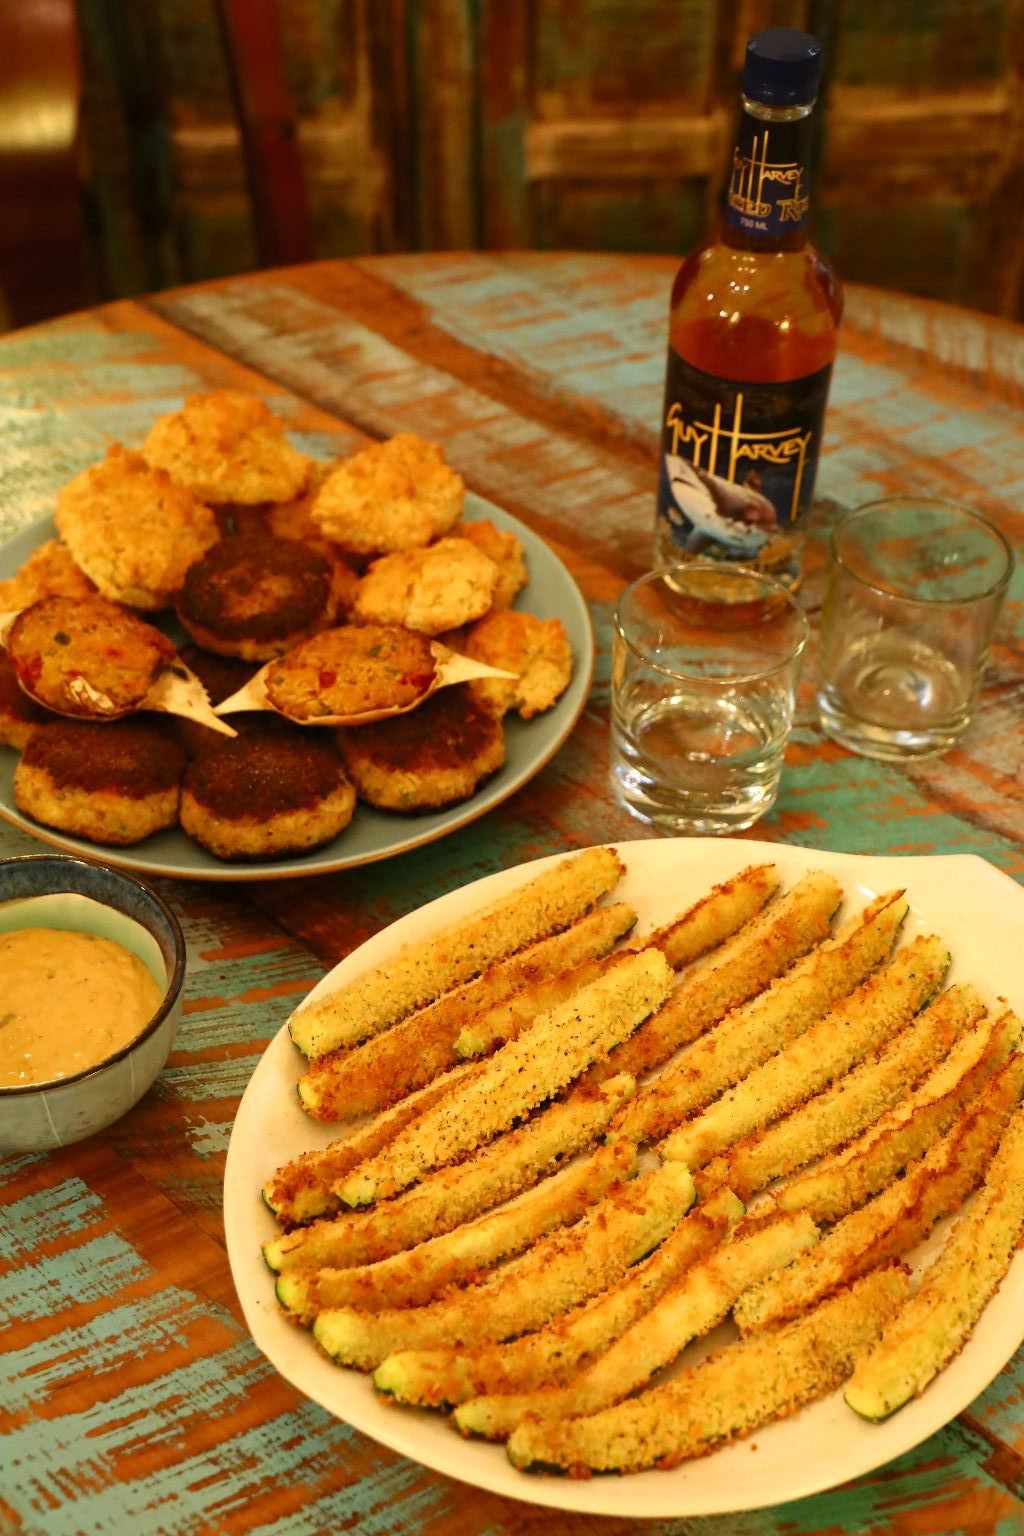

Clean your plates and leave behind only crumbs.
————————————————————
Chow Recipes Start Right Here
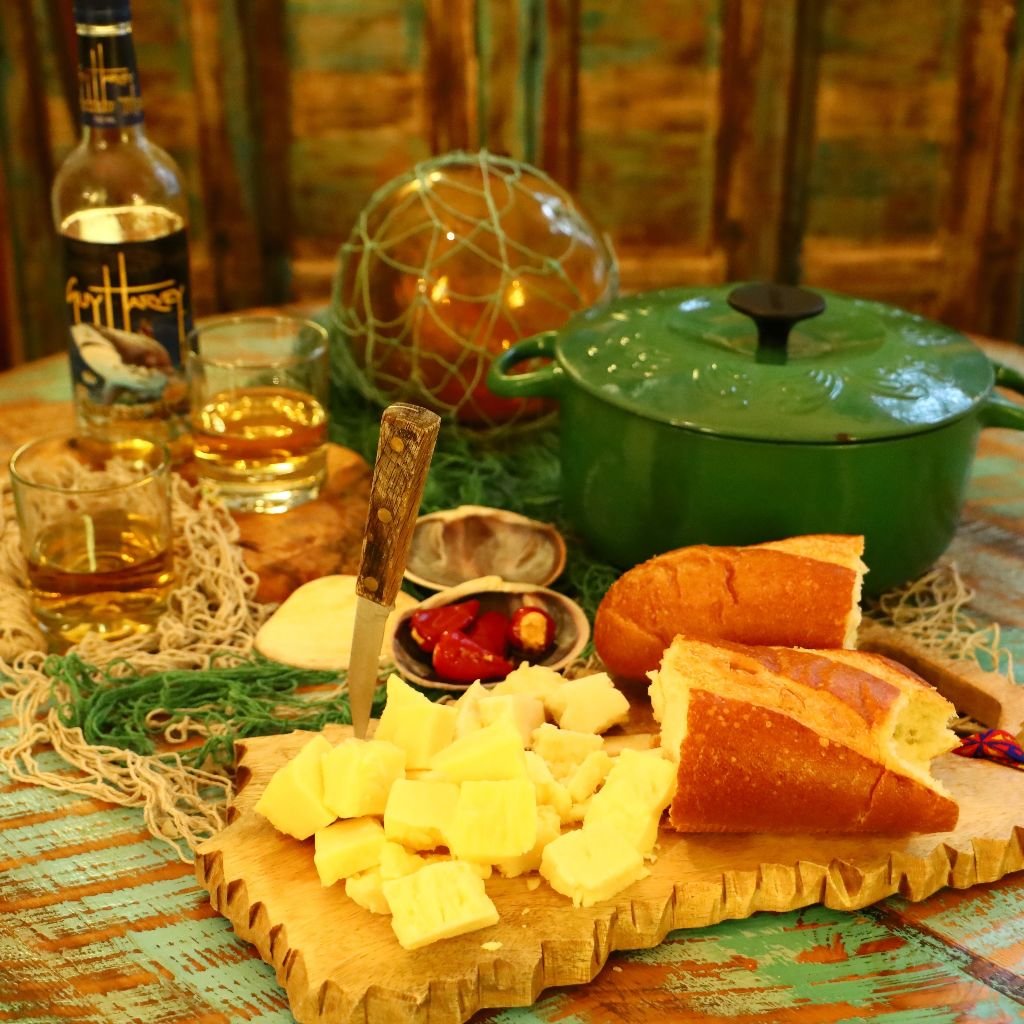
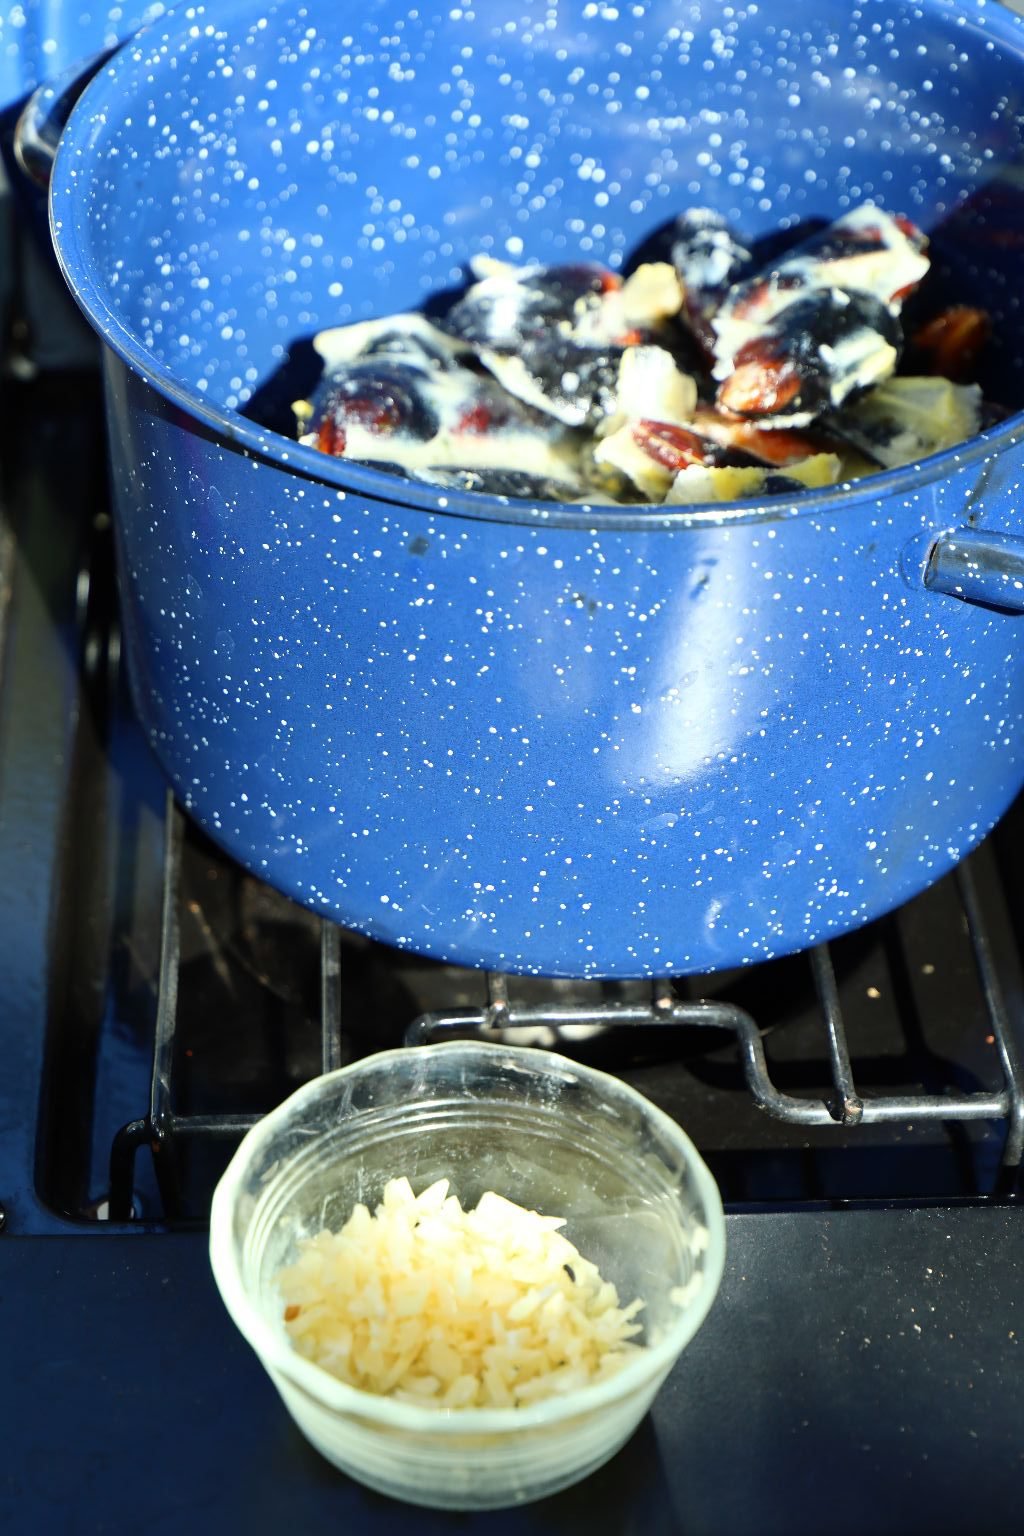
We’ve Got Bread, Cheese, and Mussels
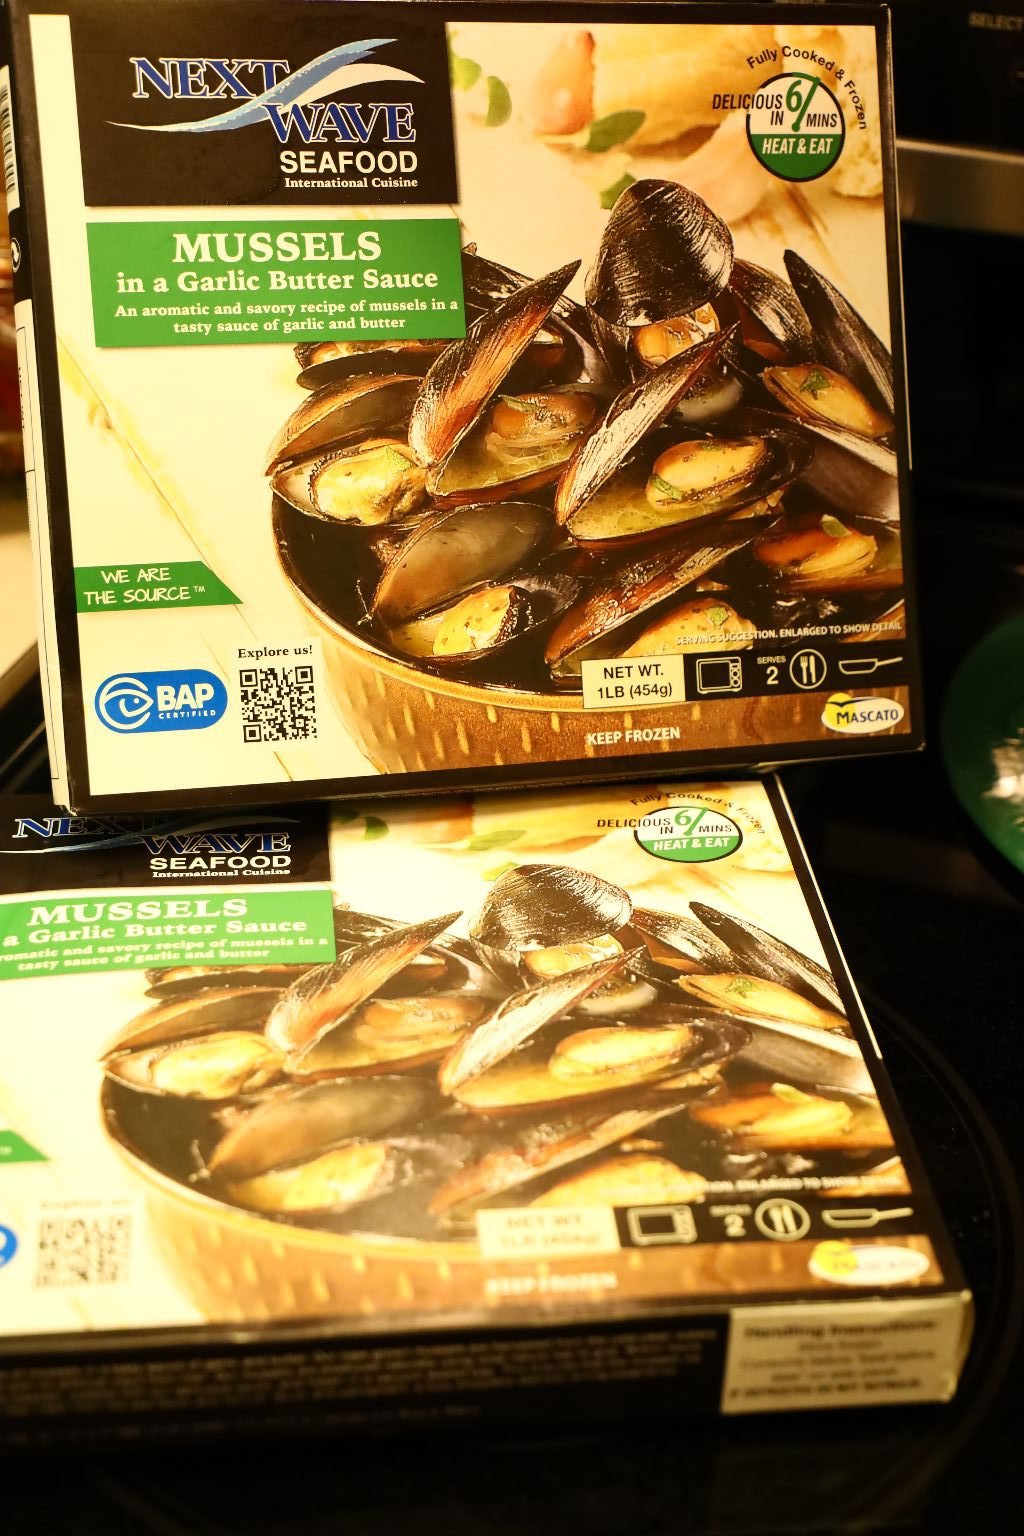
These are New Zealand Green Mussels, some of the best in the world. They aren’t very expensive and cook in no time at all. I can’t think of a better or easier appetizer.
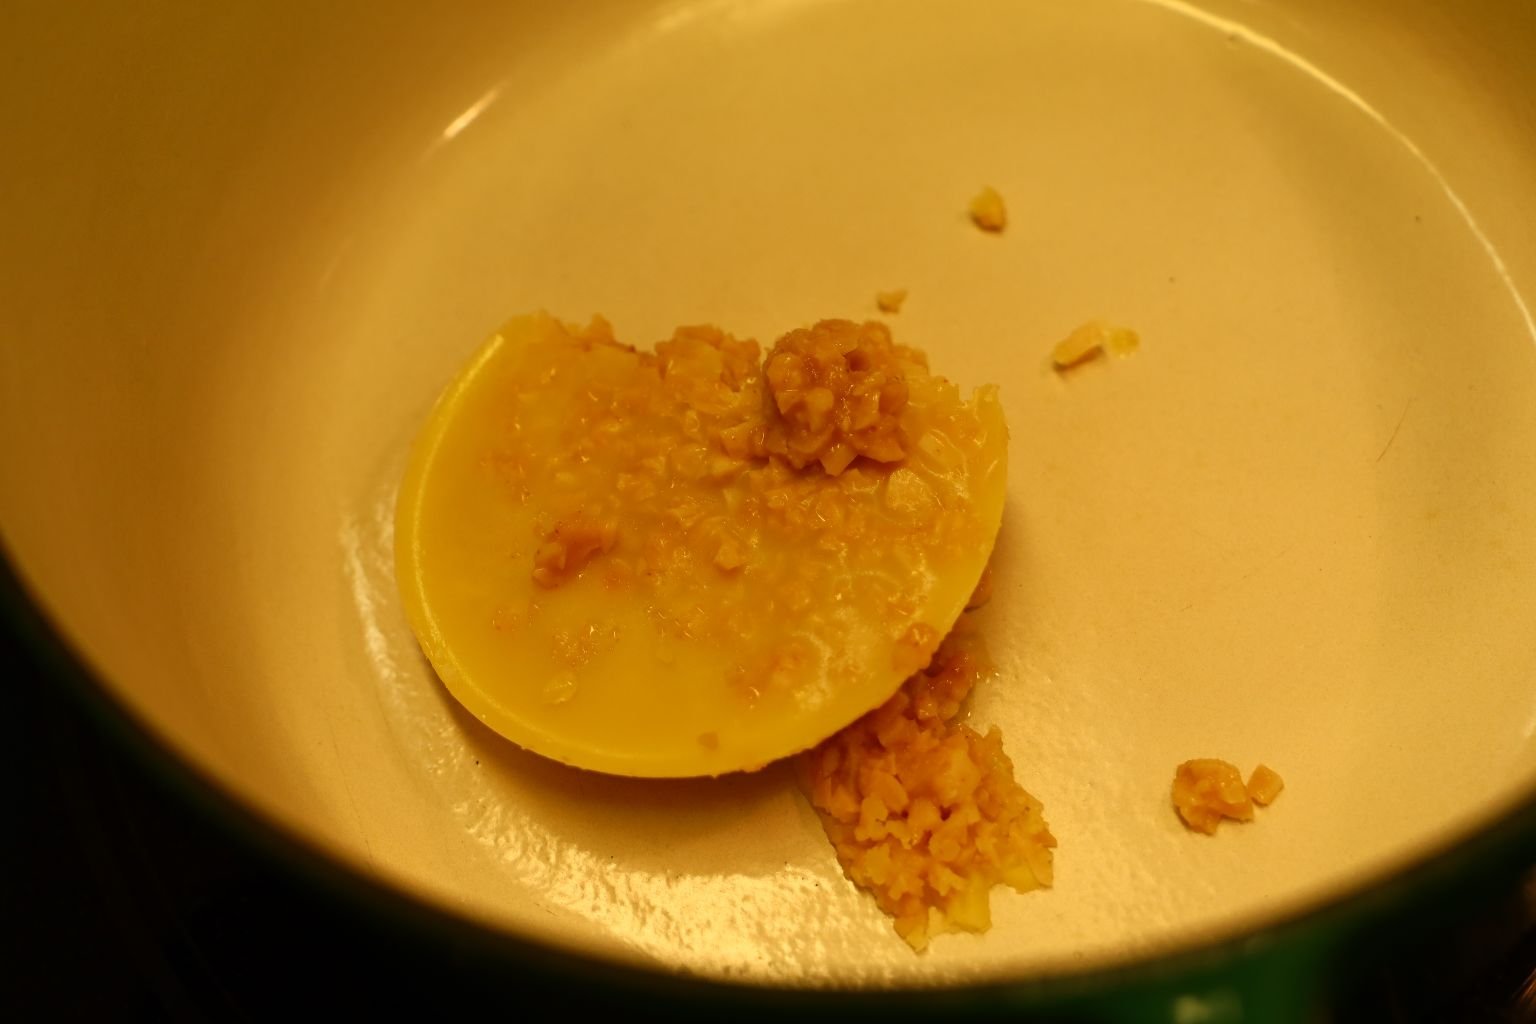
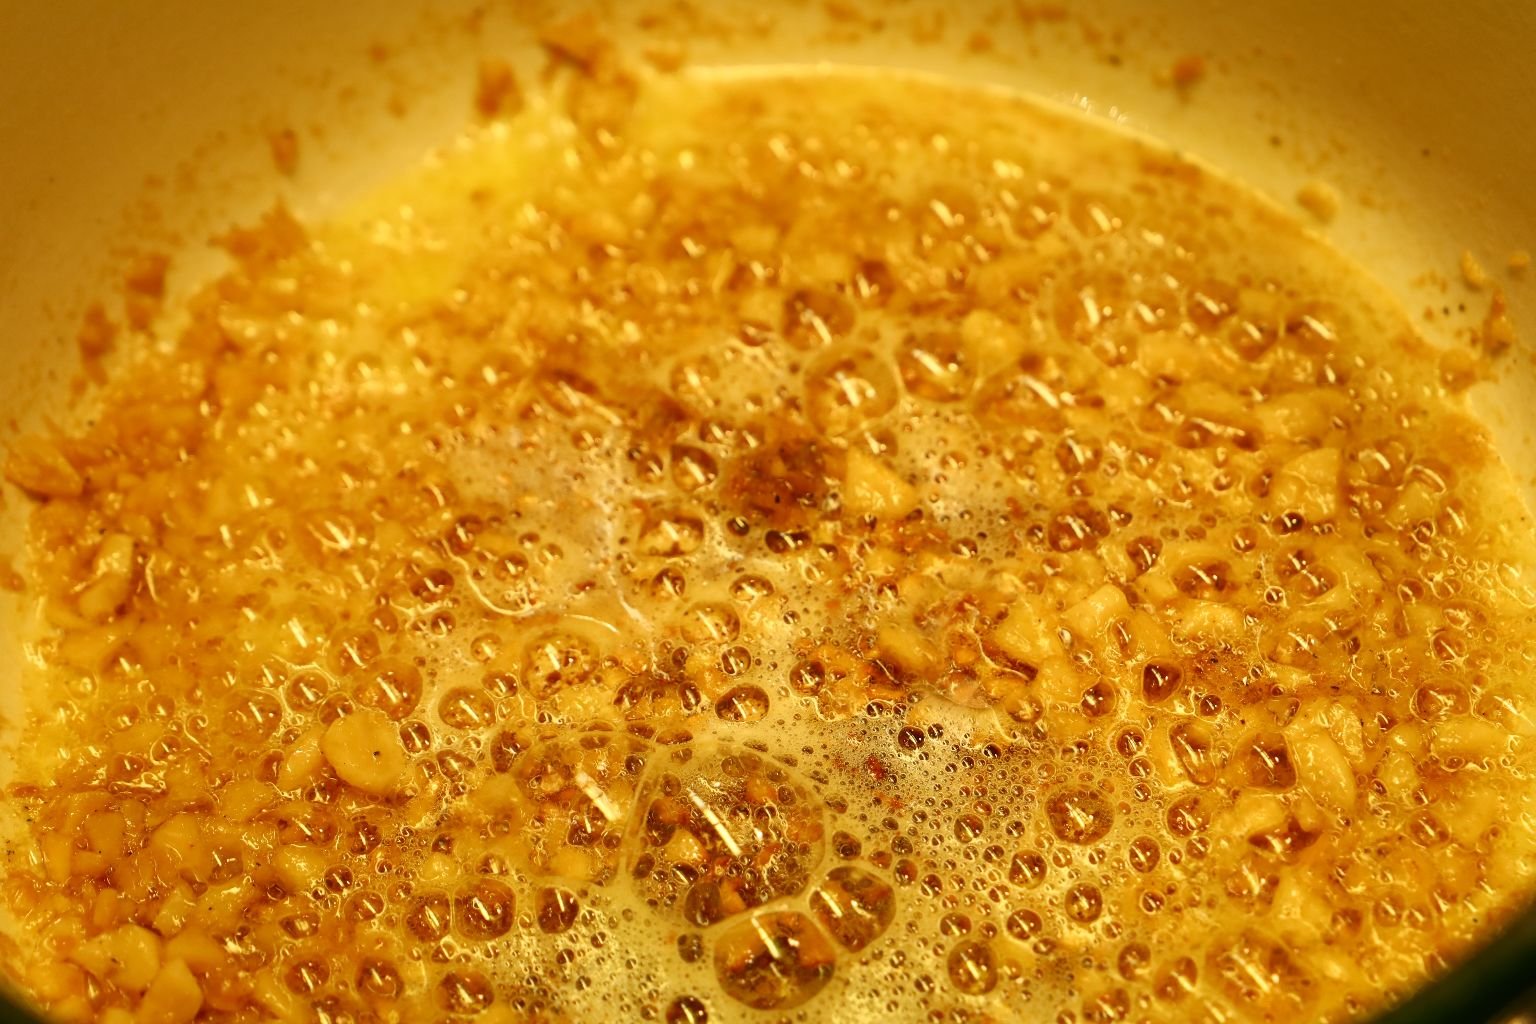
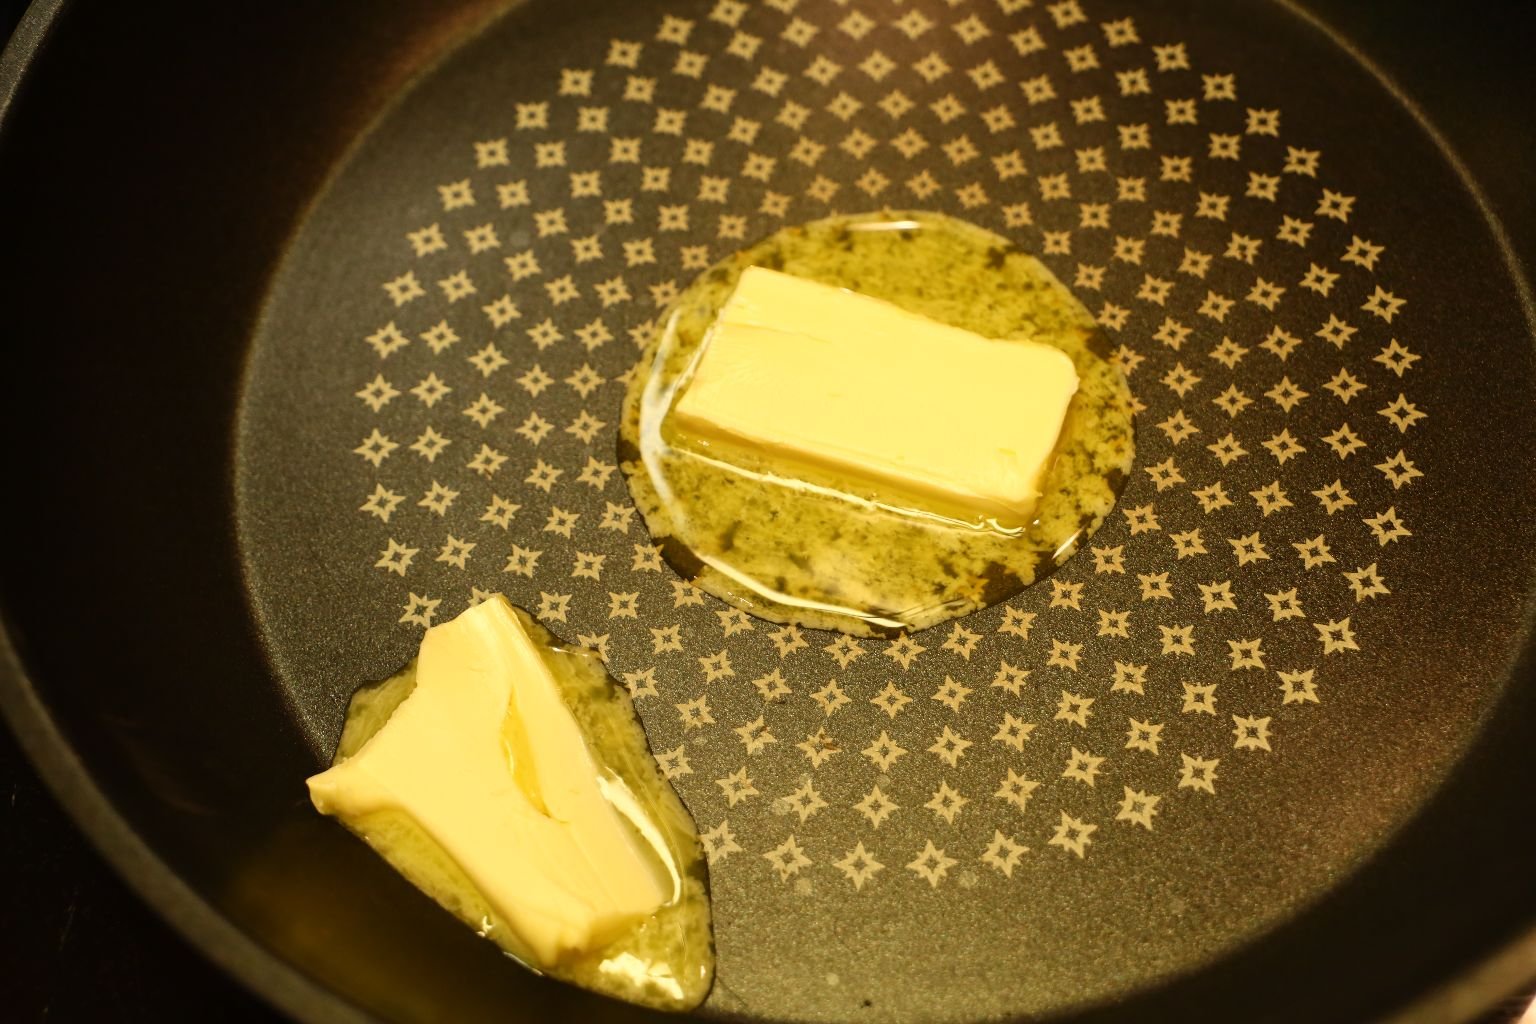
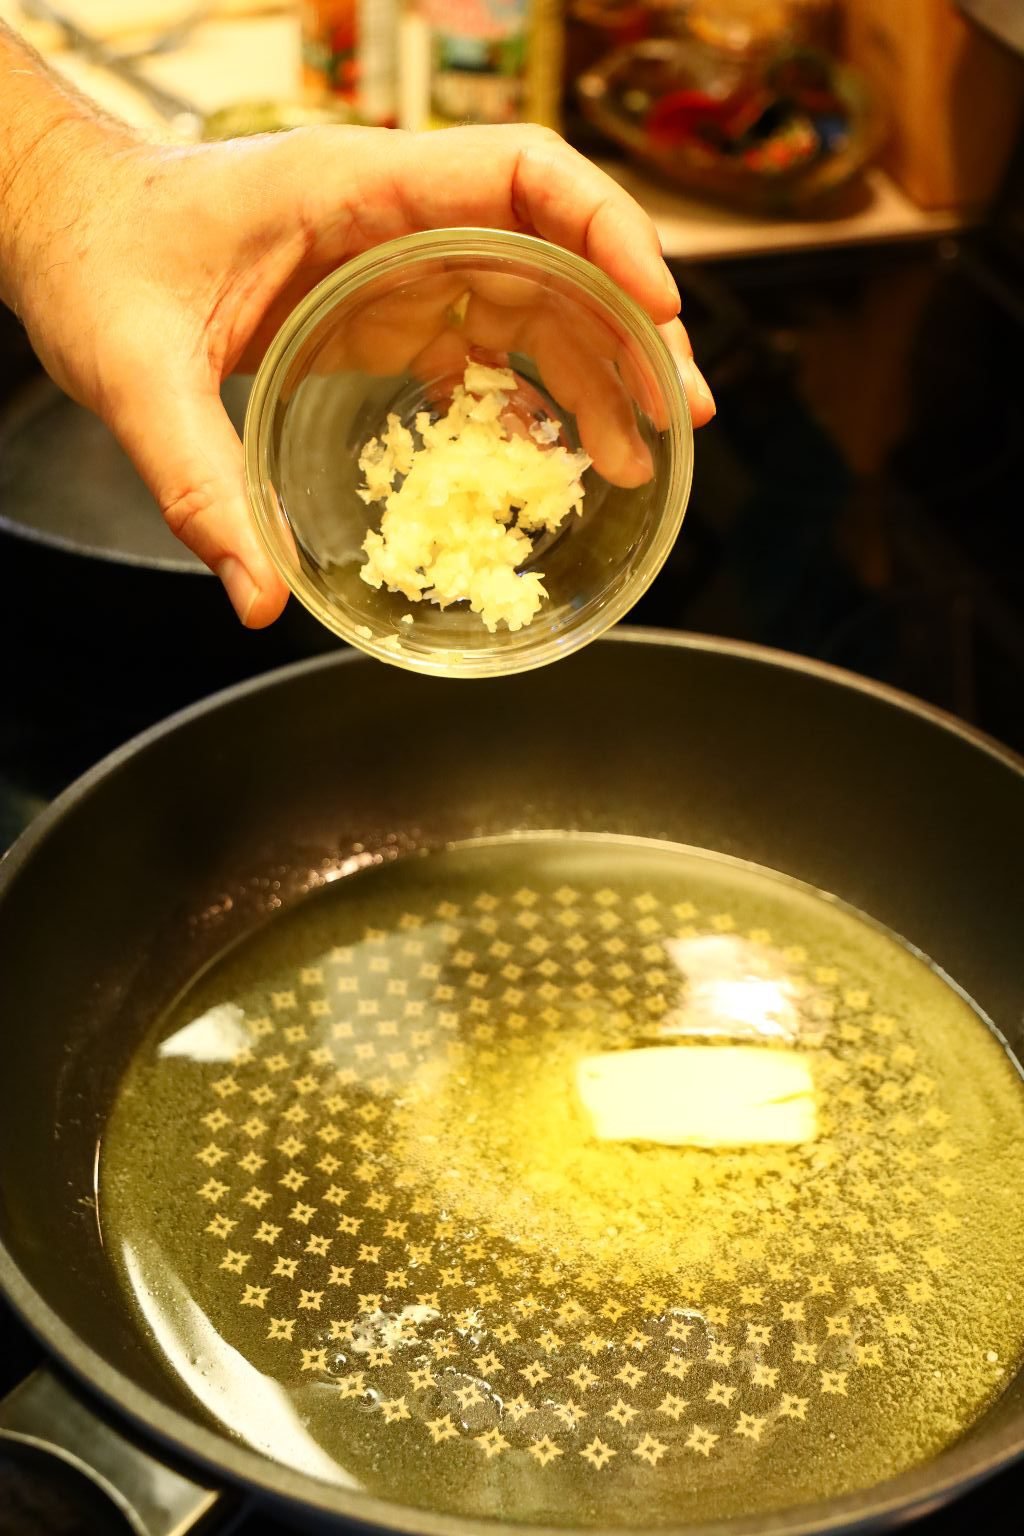
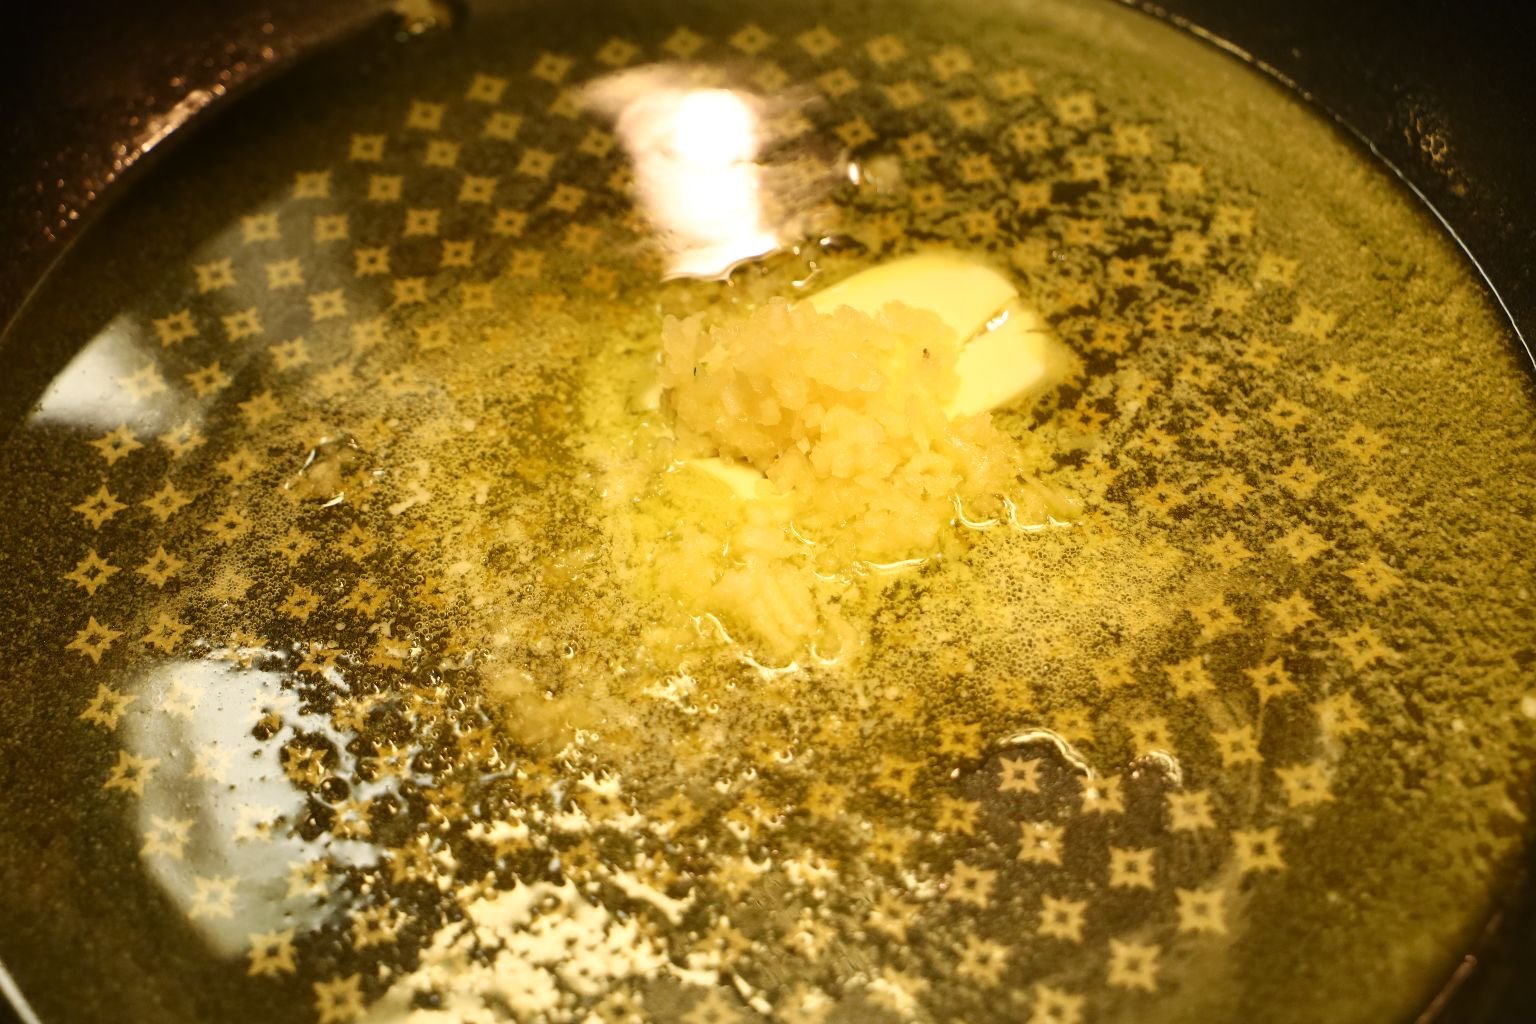
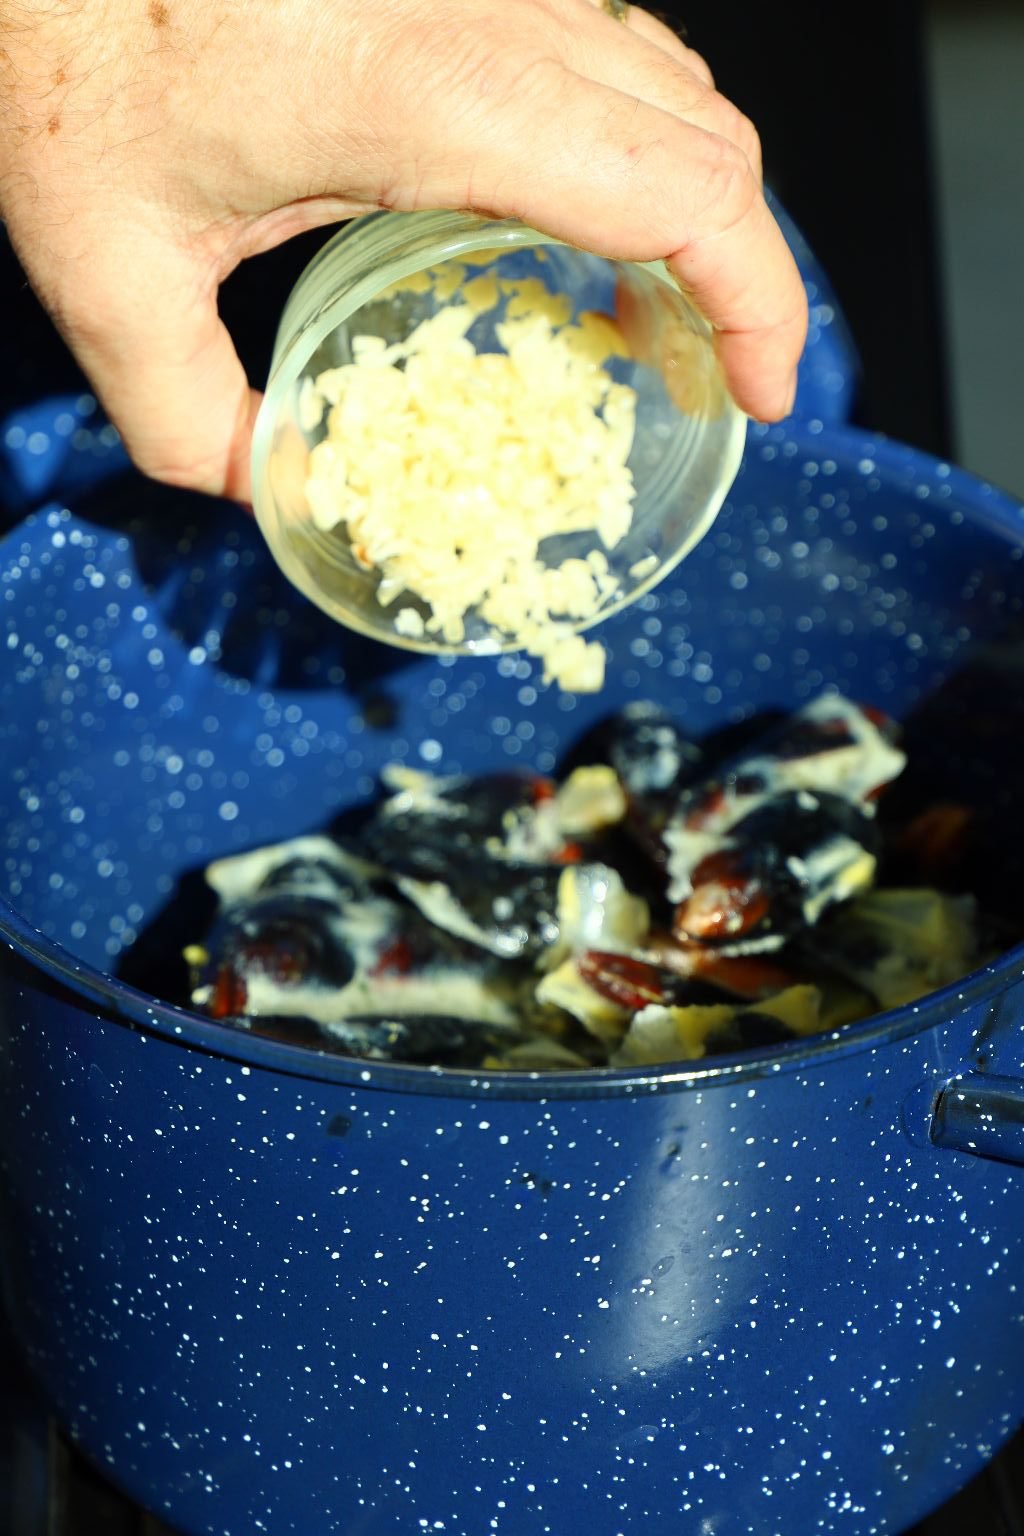
In a large cast iron pot, I placed some previously cooked butter and chopped garlic. To make this, simply chop up 8 cloves of garlic and place them into a saute pan with about 3 to 4 Tbsp. of butter. Cook the chopped garlic on medium heat for about 10 min. or so, just until the garlic starts to brown, then remove them from the heat and let the mixture cool before placing in your refrigerator to use later. Now, bring out the chopped garlic and butter and heat it over medium heat until starting to cook as shown.
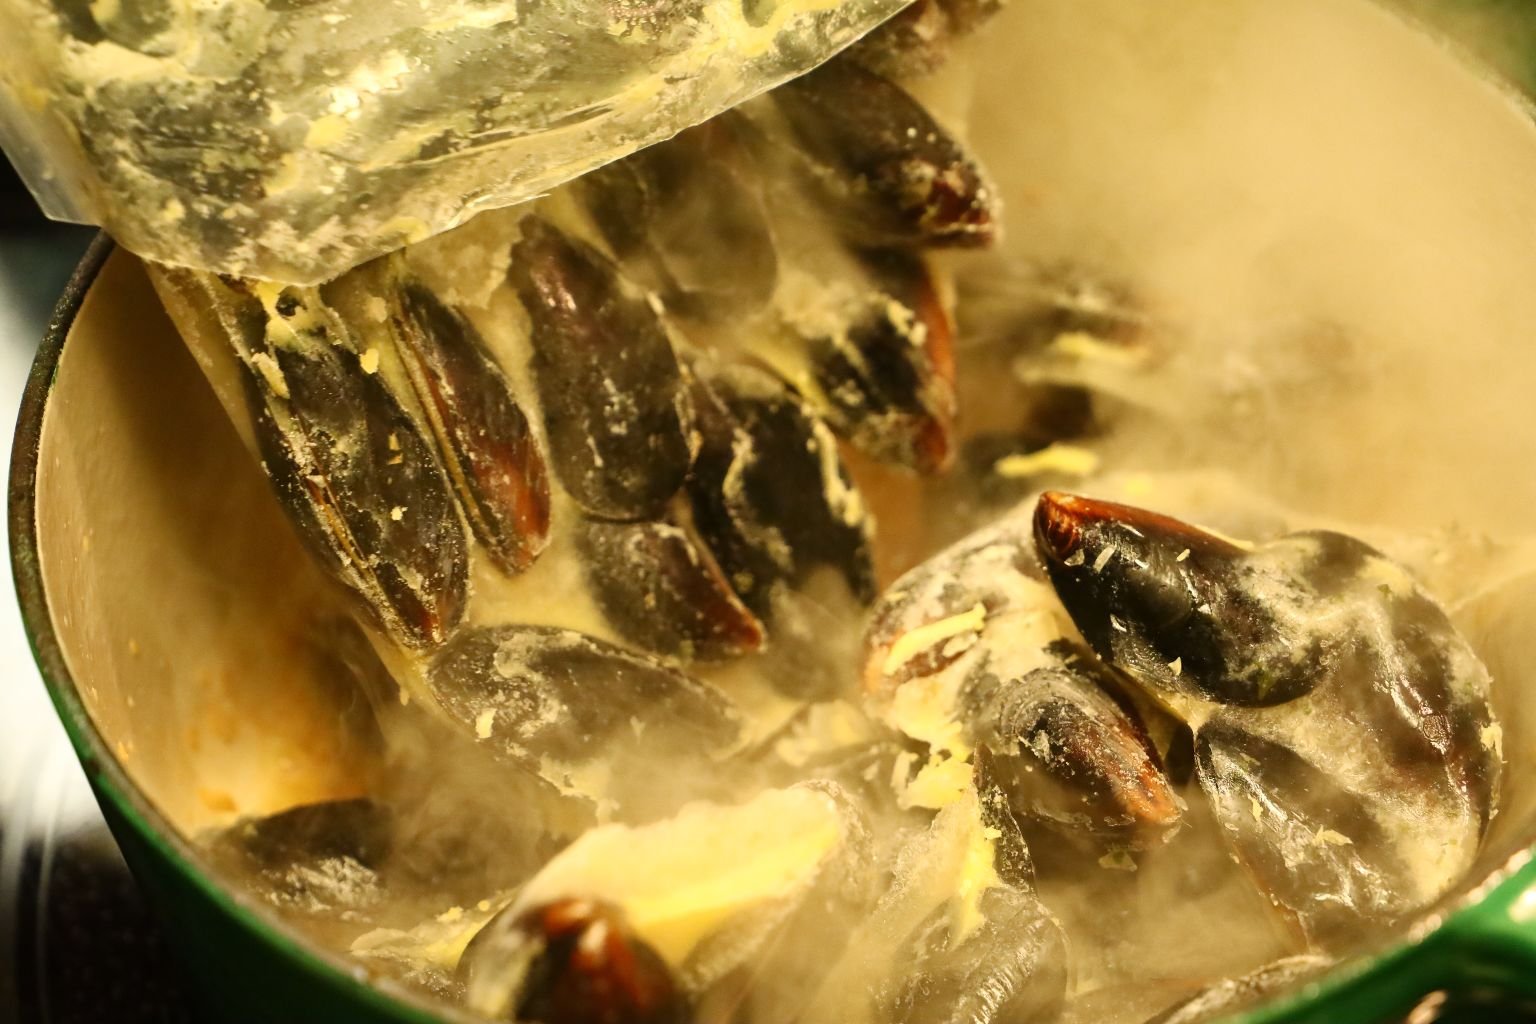
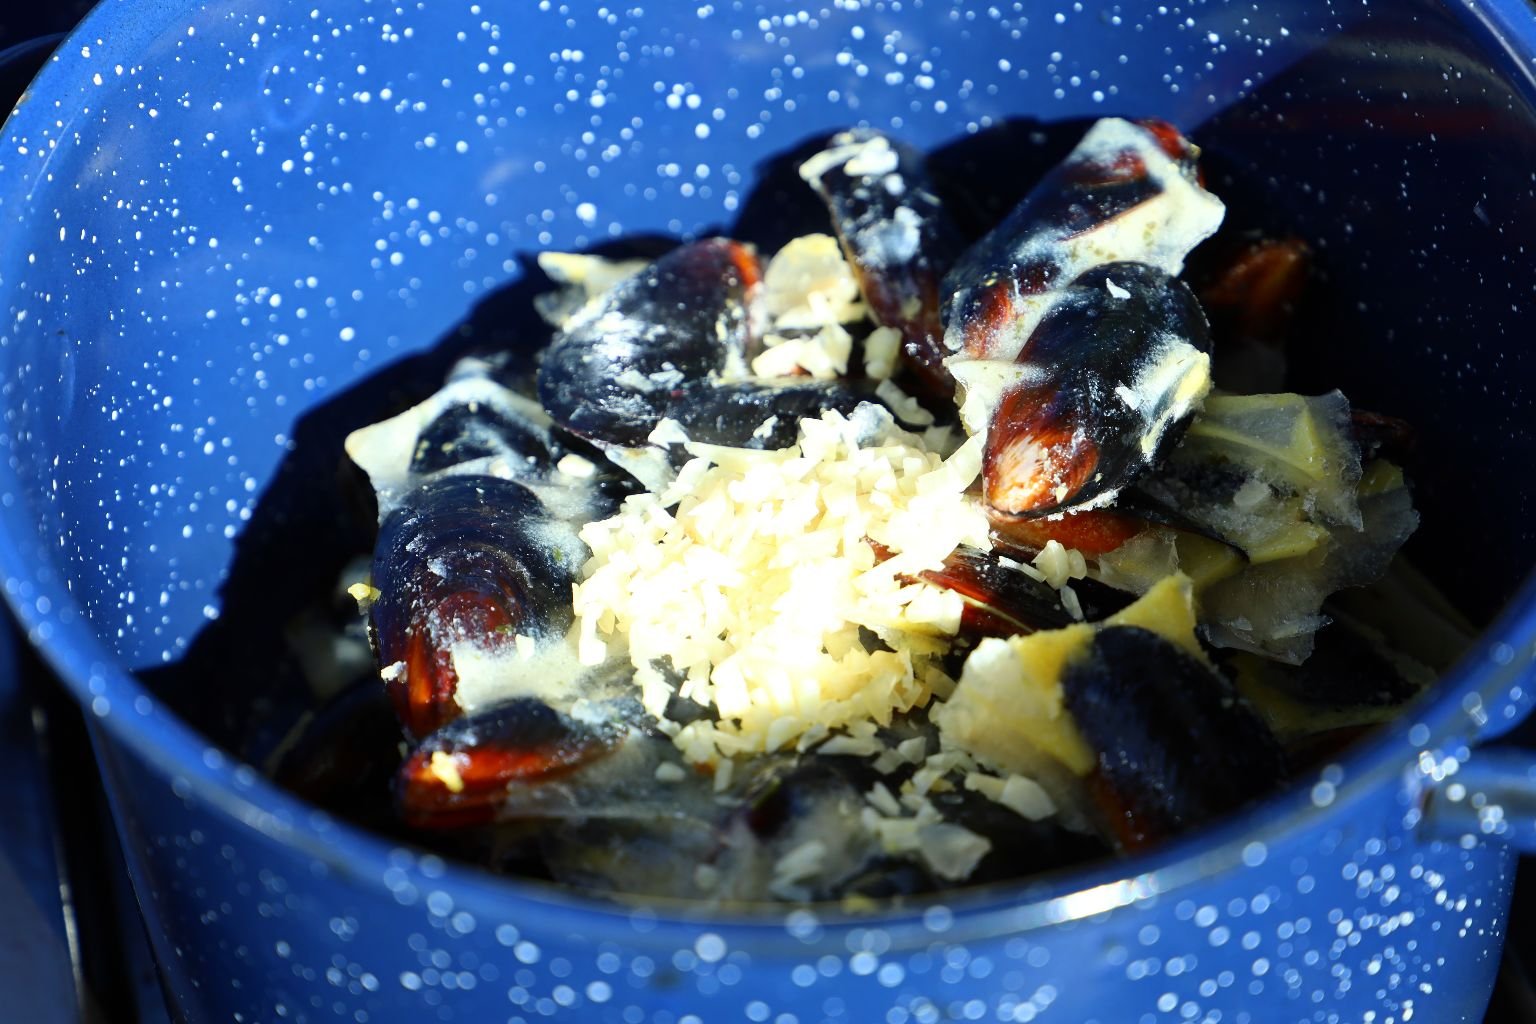
Pour your frozen mussels into the pot with the butter and garlic, stir all the ingredients together, and turn up the heat to medium high heat. Stir the ingredients together again after a few minutes once the ice has melted.
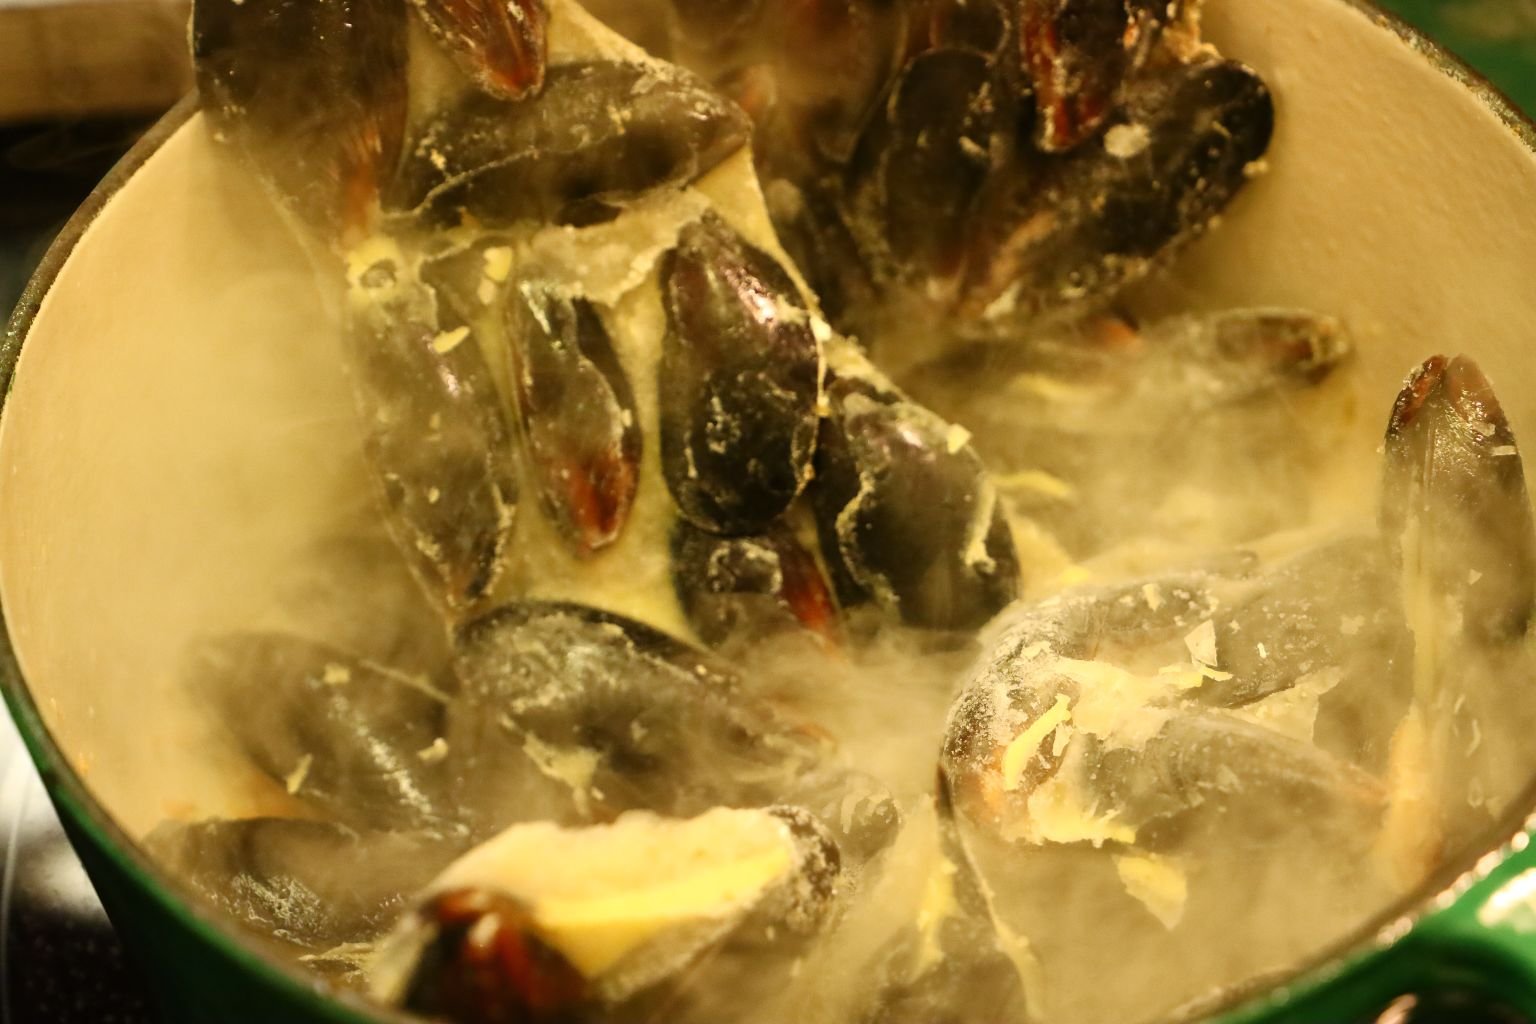
Cover the mussels with the pot’s lid and cook them for about 10 min.. When the time is up, remove the lid and remove the mussels to a large serving bowl, then pour the butter and garlic over the mussels. TIP: You can also add some Old Bay Seasoning and or finely diced onions to enhance the mussels flavor! To garnish, use some finely chopped chives or green onions. Enjoy with some crusty bread and nice cheese as well as your favorite wine!
—————————————————————–
Baked Potatoes, Heirloom Tomatoes, and Smokey Salmon Sandwiches with Lemon Pepper and Grilled Lemons
———————————————————-
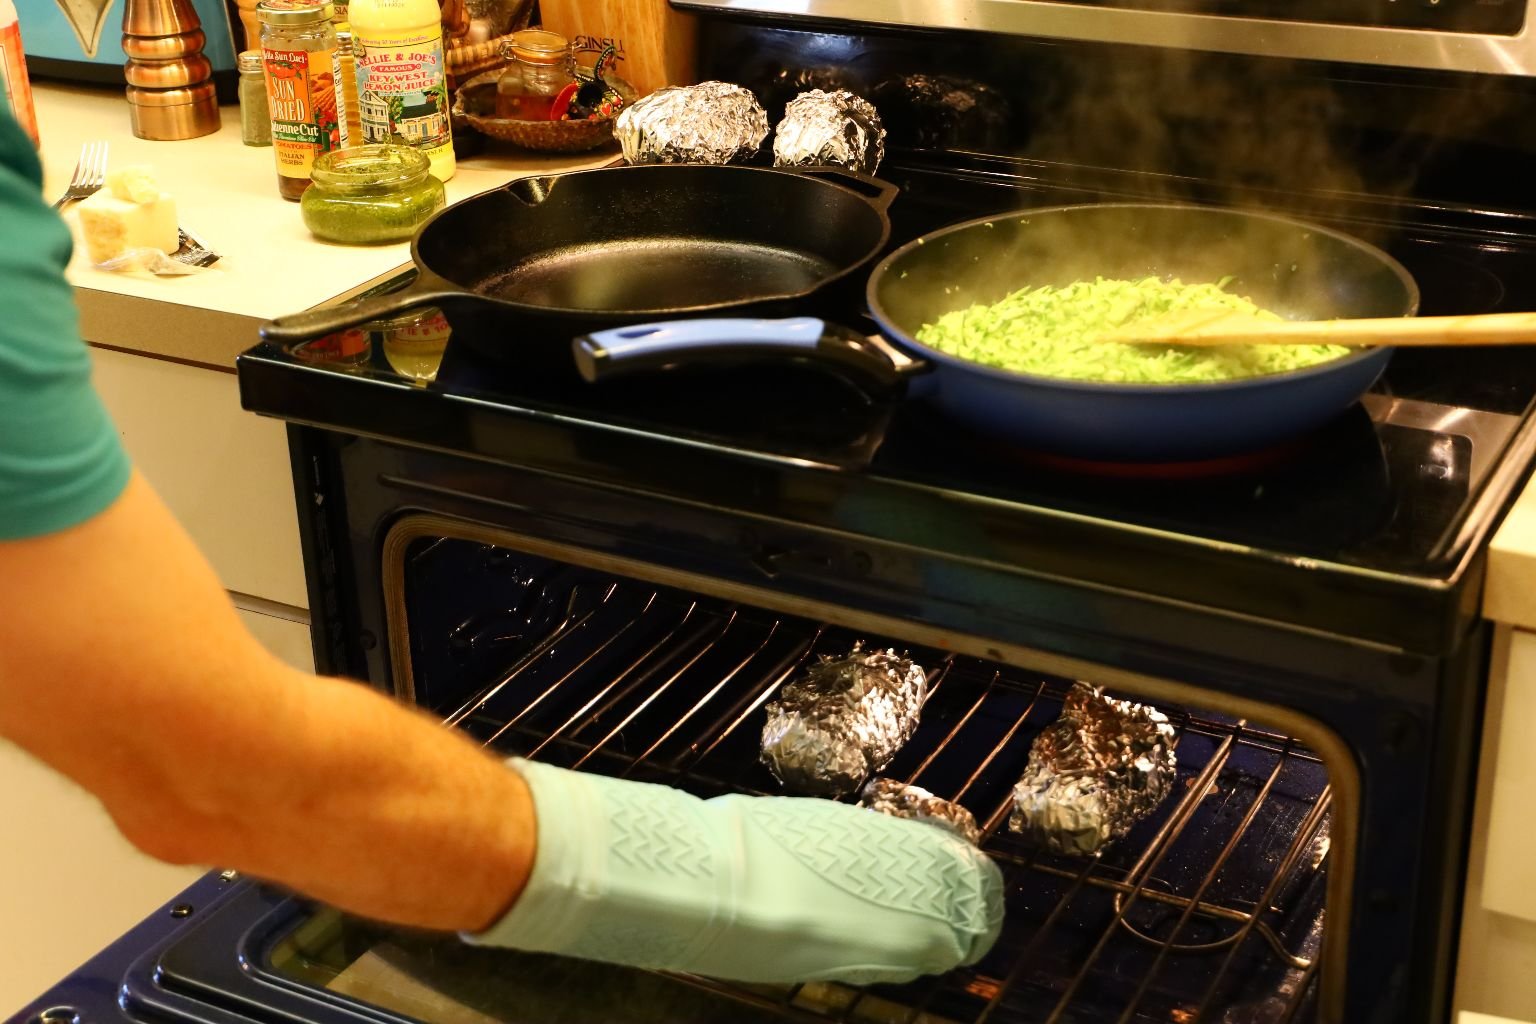
Below, I will be making a few recipes at once as I actually cooked these items.
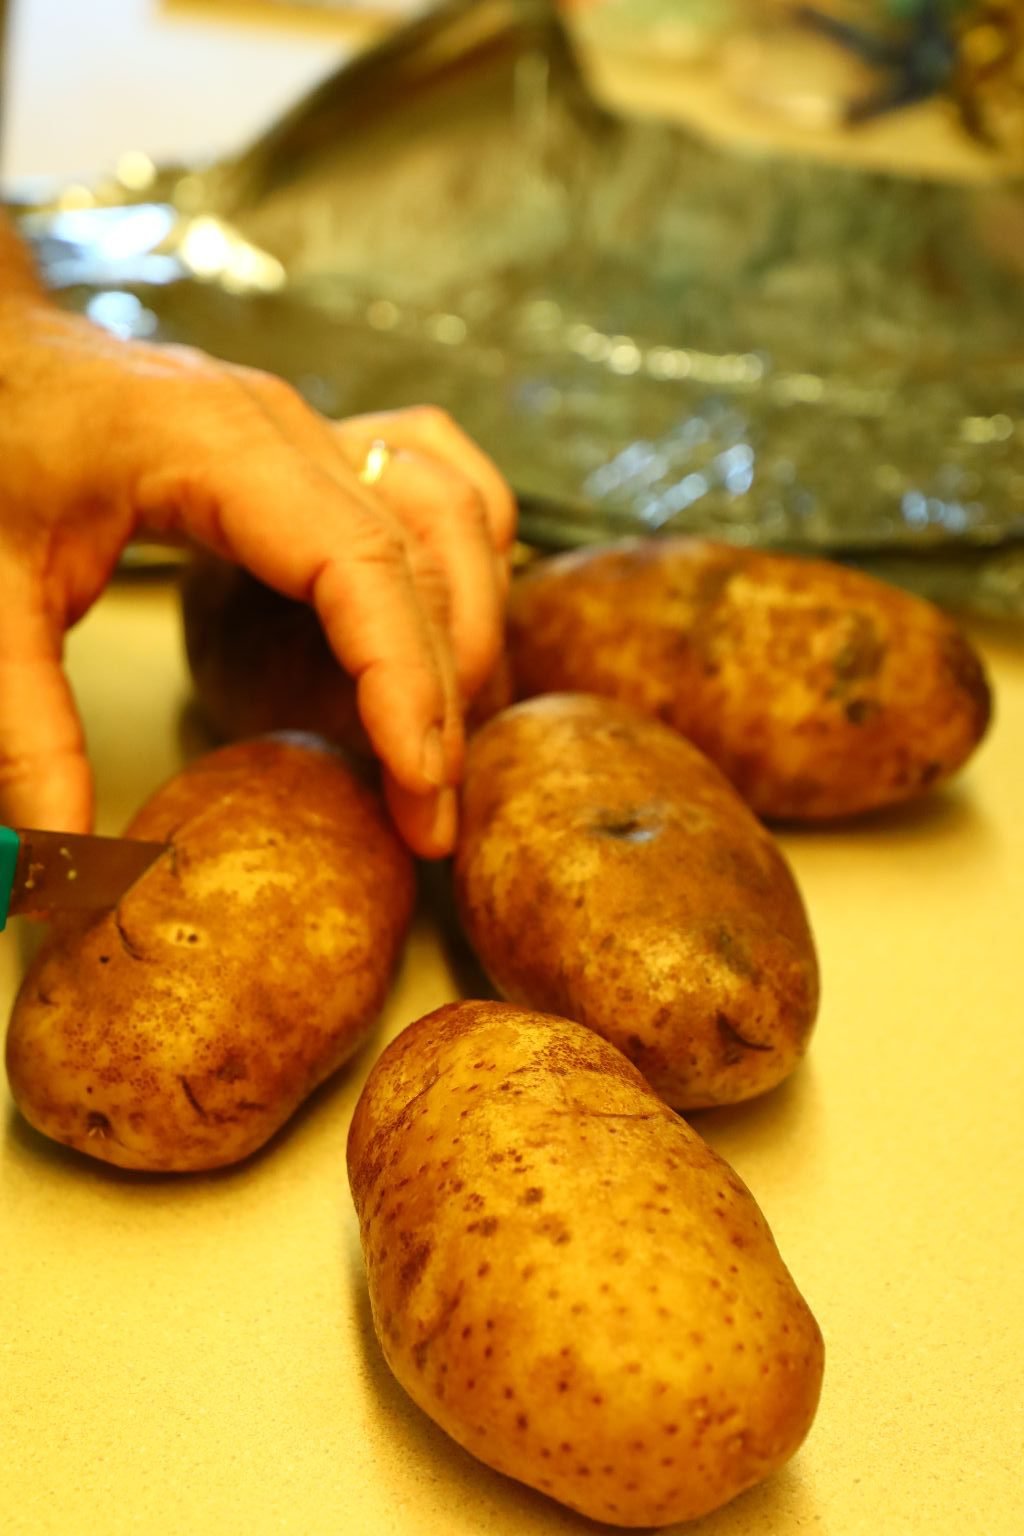
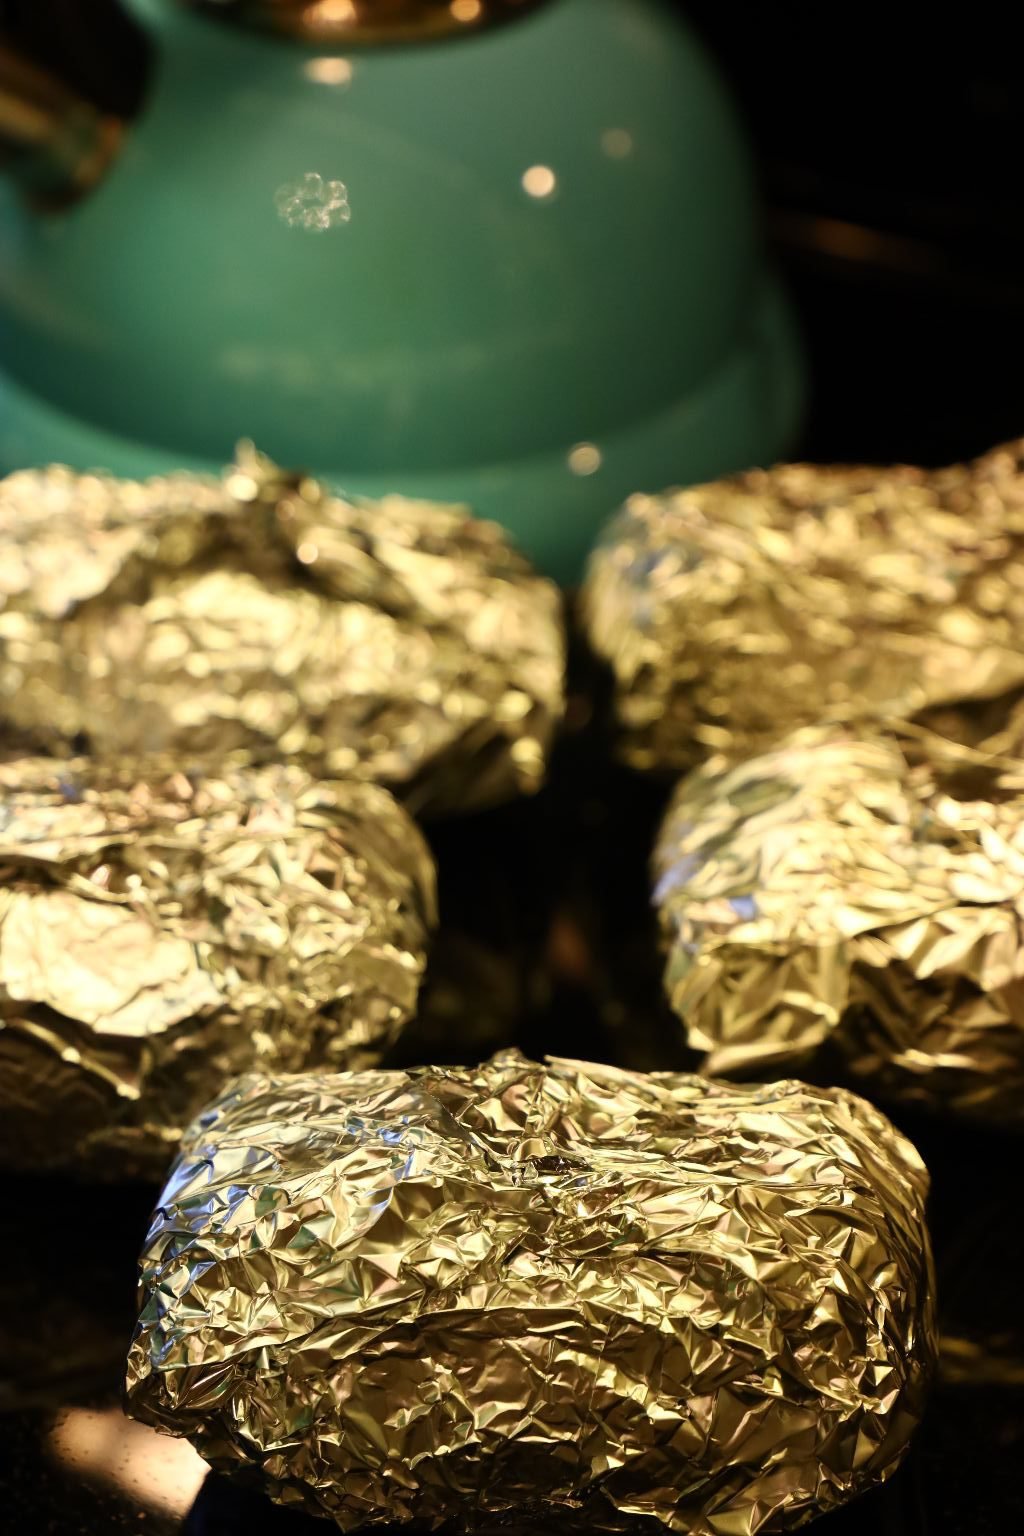
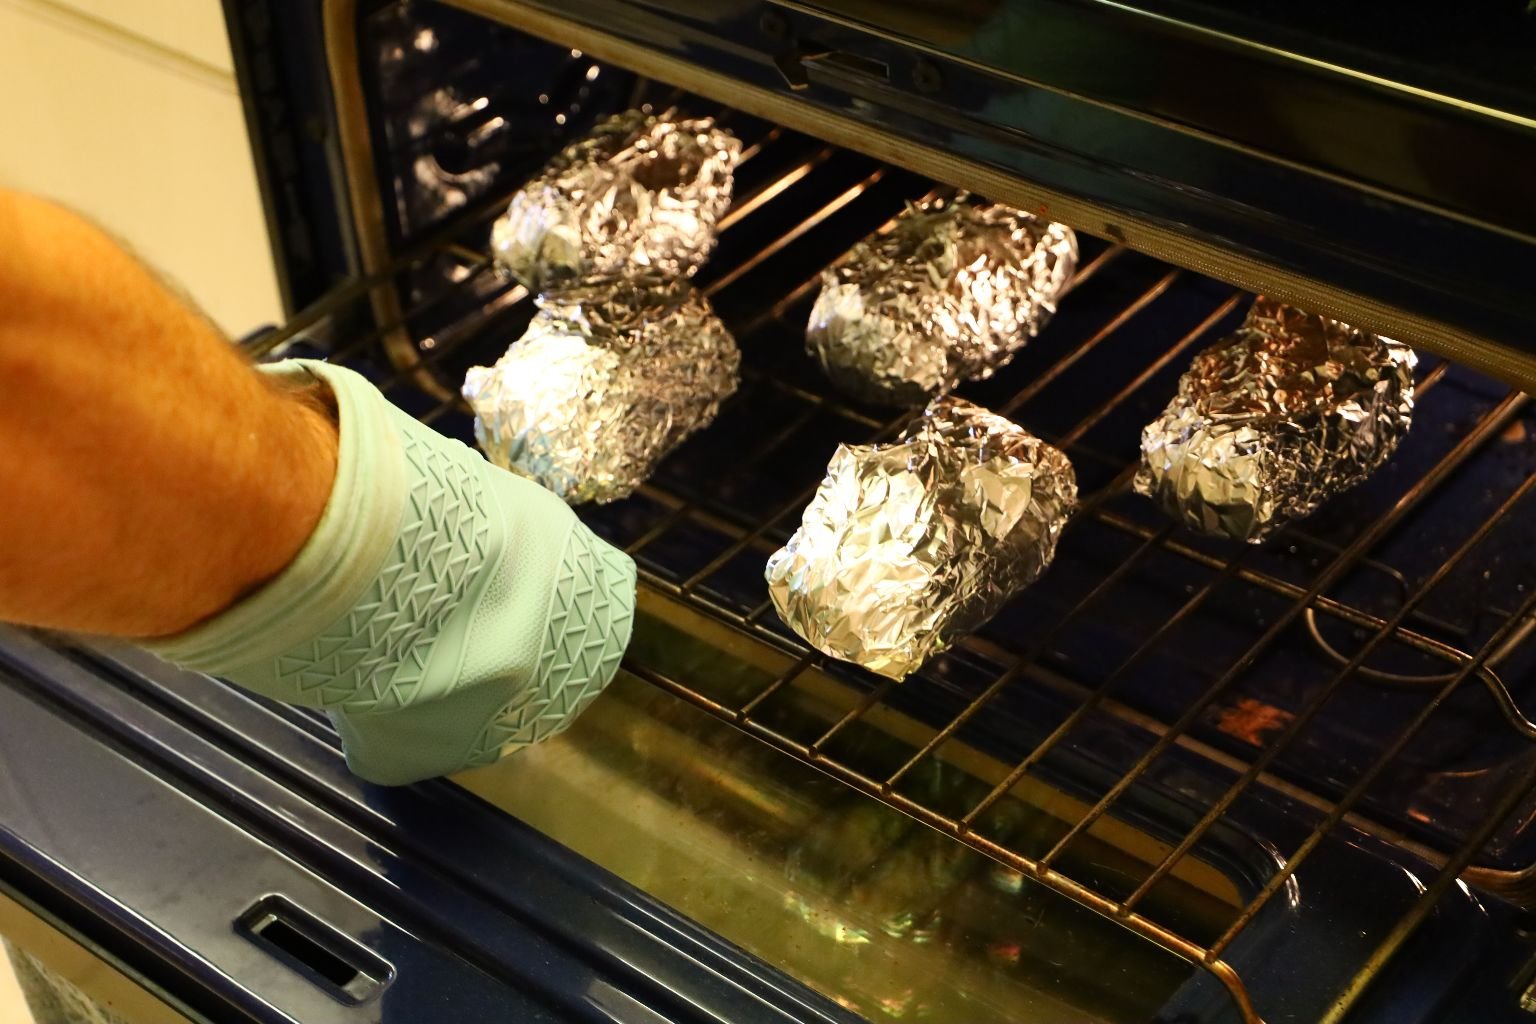
Baked potatoes… easy to fix and great to eat! Wash some Idaho potatoes to remove any excess dirt, then puncture it with your knife about an inch deep and an inch or so long. Place a potato on a large sheet of aluminum foil and season with salt and pepper and about a tsp. of water. Tightly wrap the potato in the foil and repeat with the others. In some cases we also add a bit of butter to the potato before we wrap it up for baking.
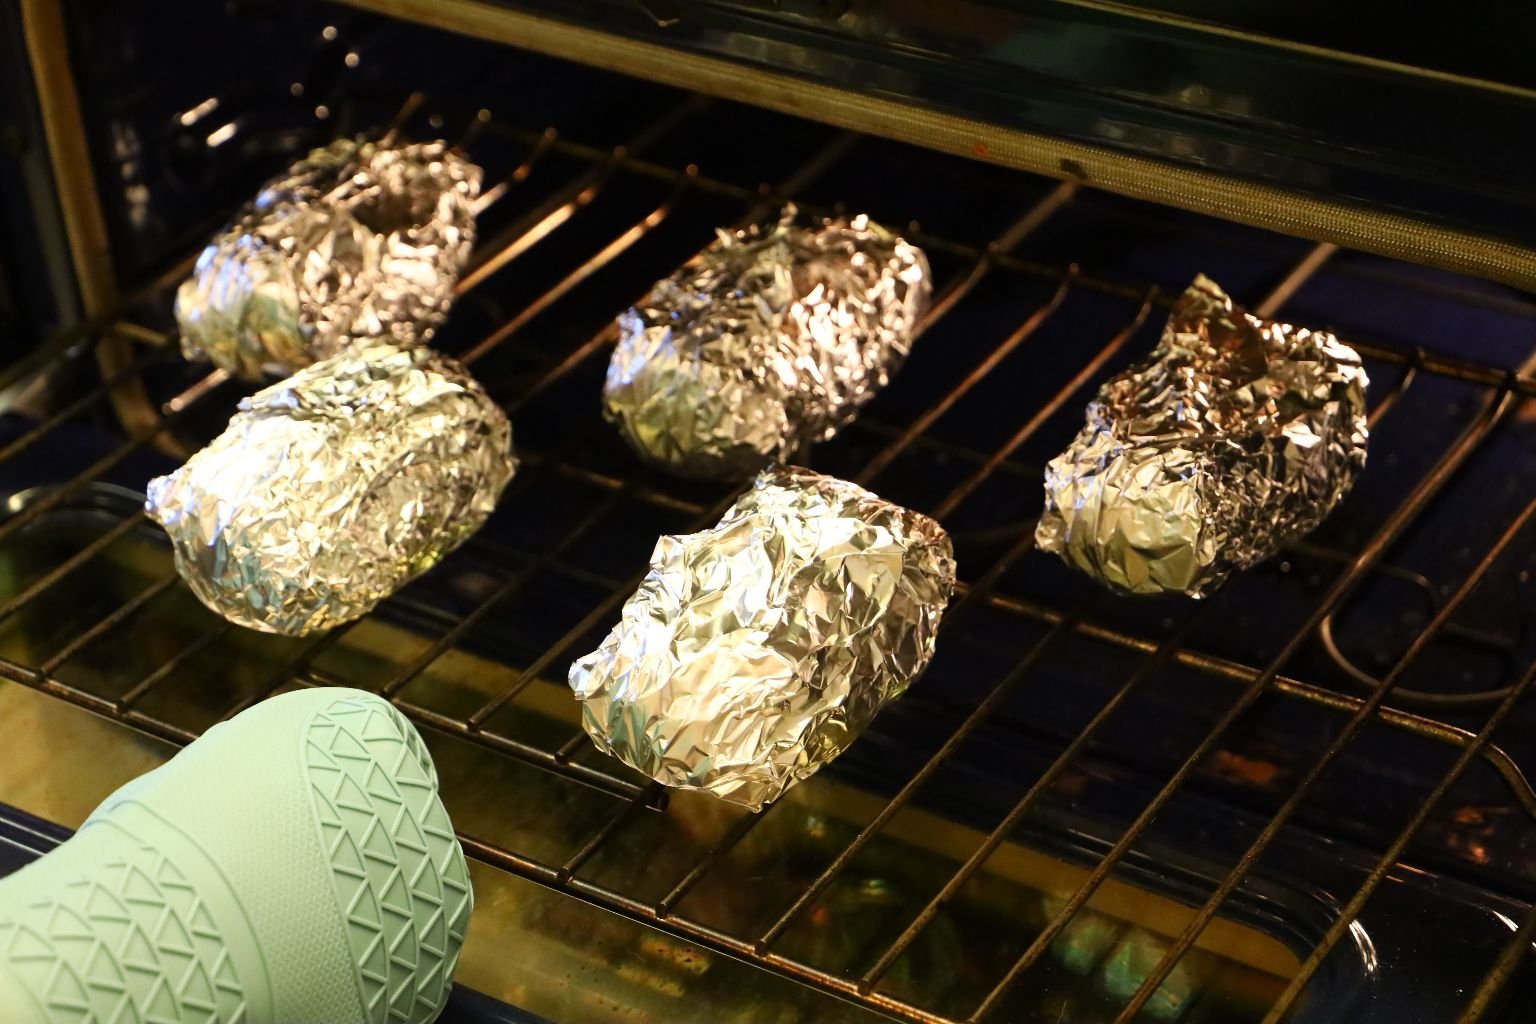
Place the potatoes in a preheated 400’F oven and bake them for about 50 min.
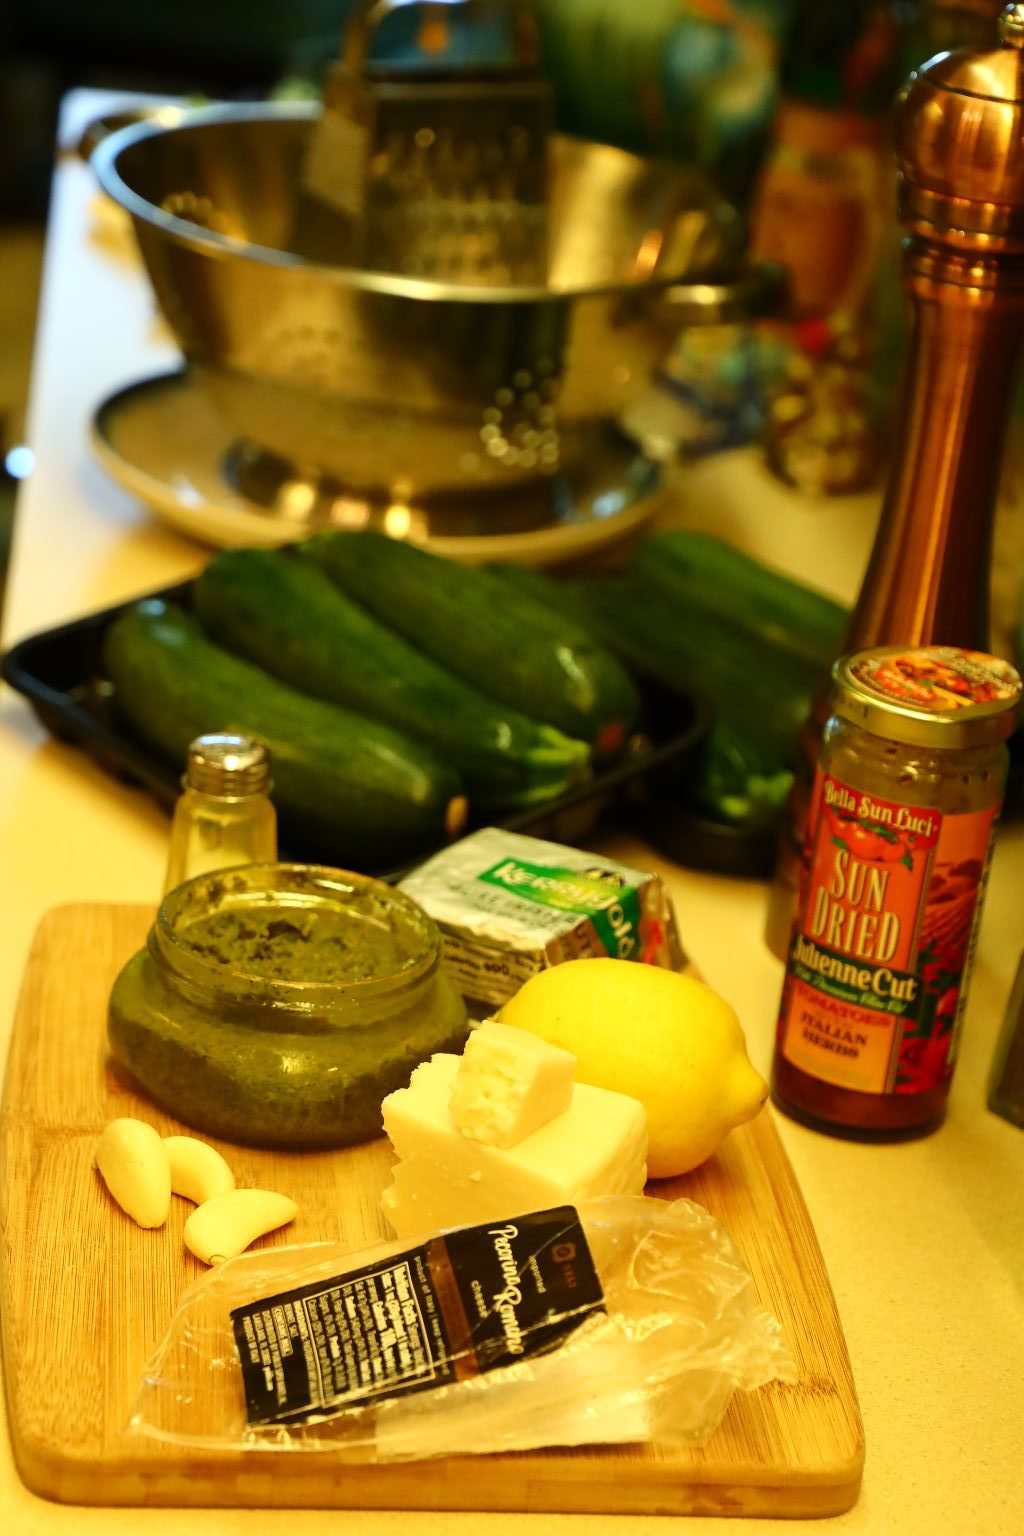
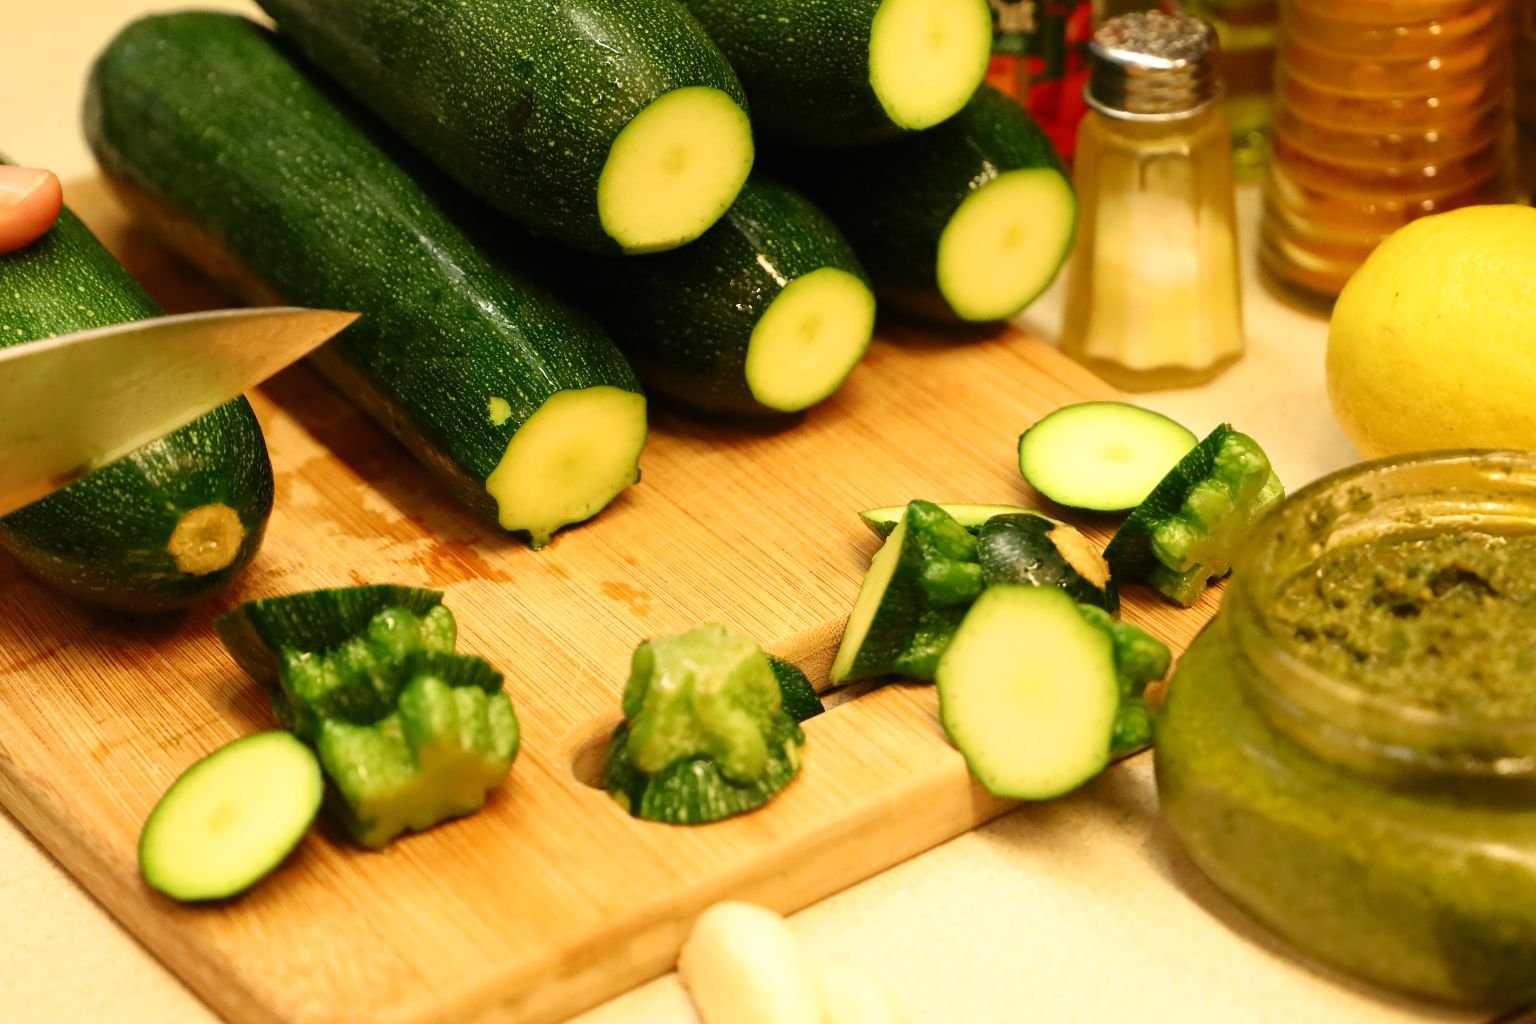
Here are the ingredients for the sauteed zucchini.
6 Zucchini – shredded
1/2 stick of butter or more
3 Garlic cloves
1-2 Tbsp. Lemon Juice
2 or more Tbsp. Pesto
4 to 5 Tbsp. Julienne Sliced Sun Dried Tomatoes
1/2 Cup Mozzarella Cheese
Salt and Pepper to taste
—————————————————————
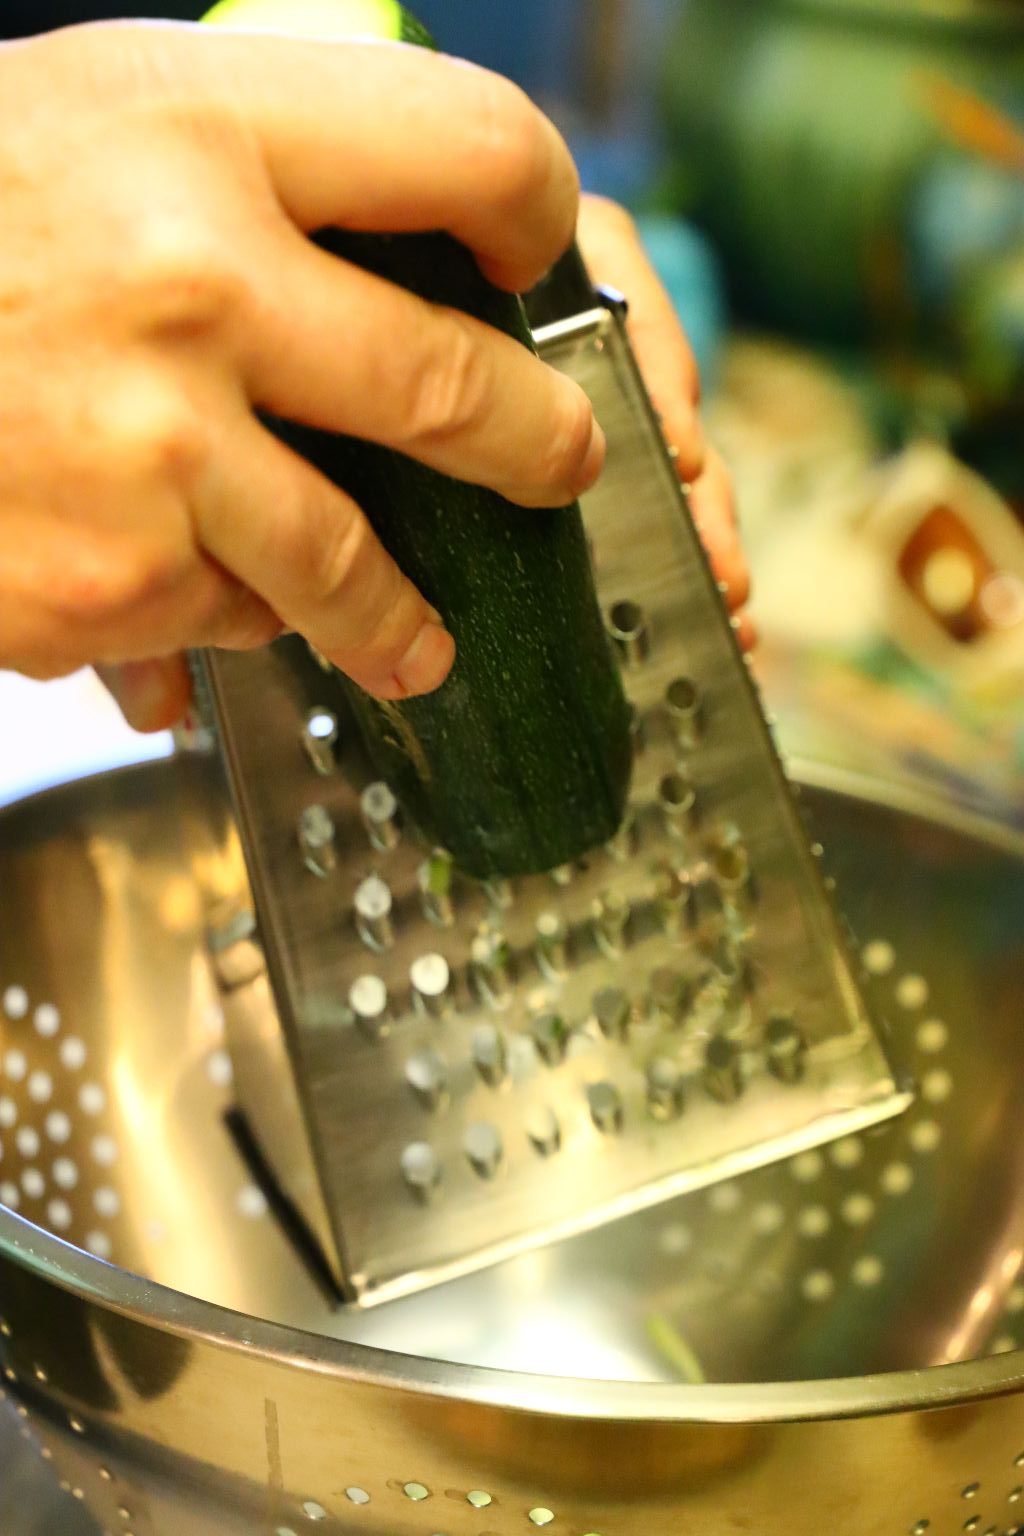
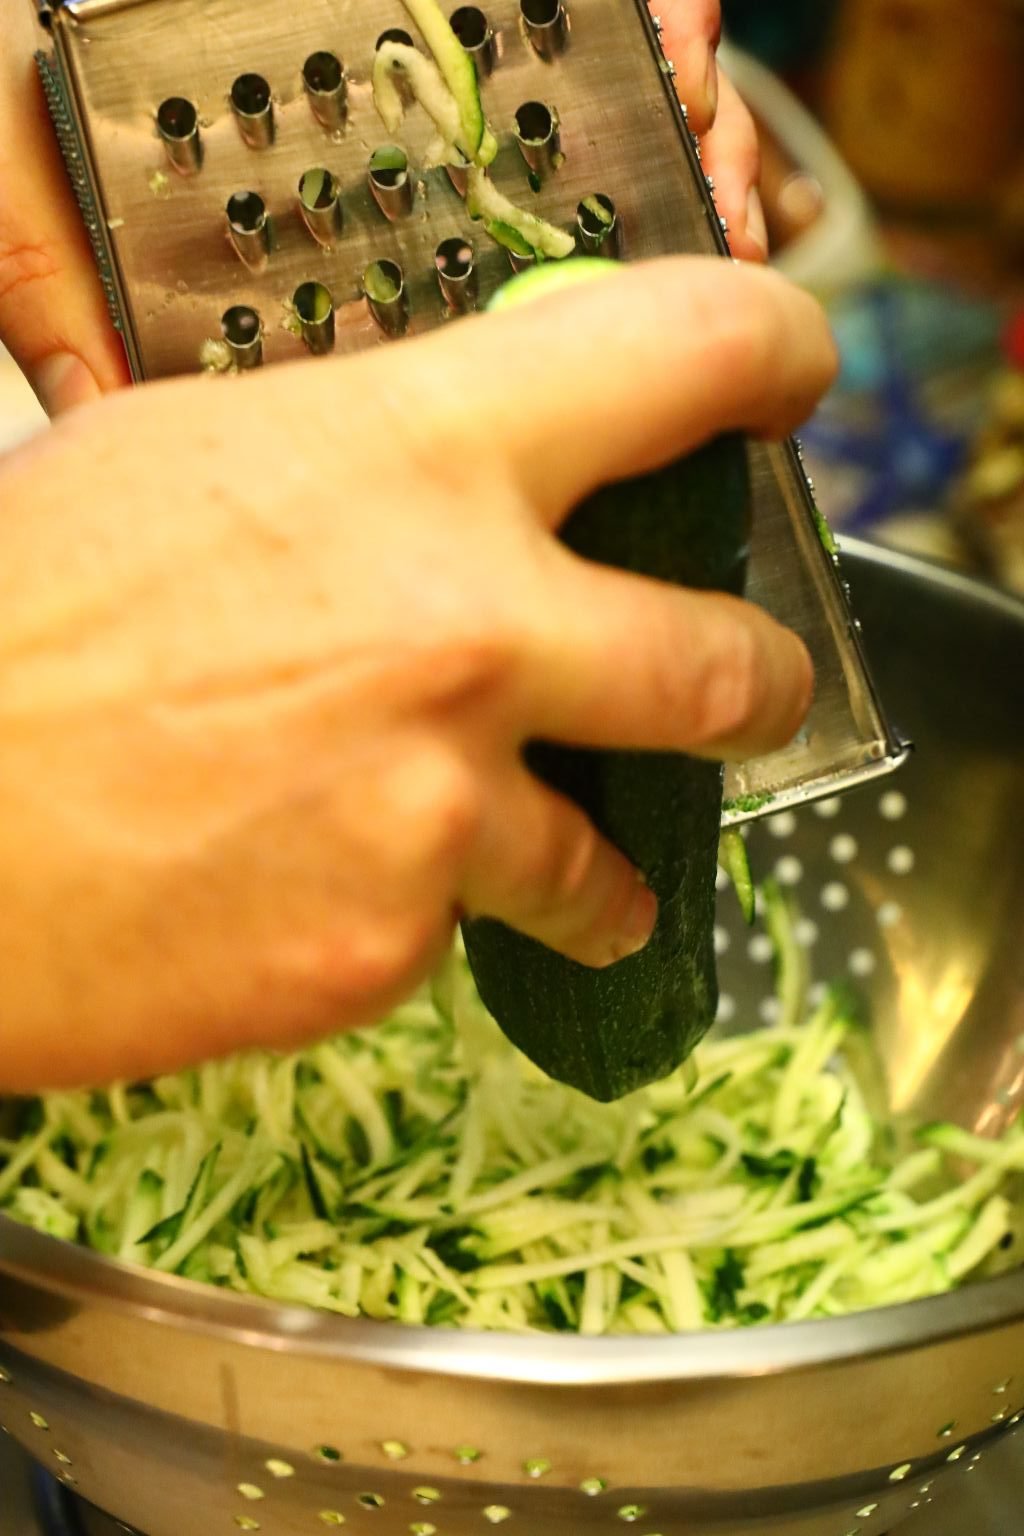
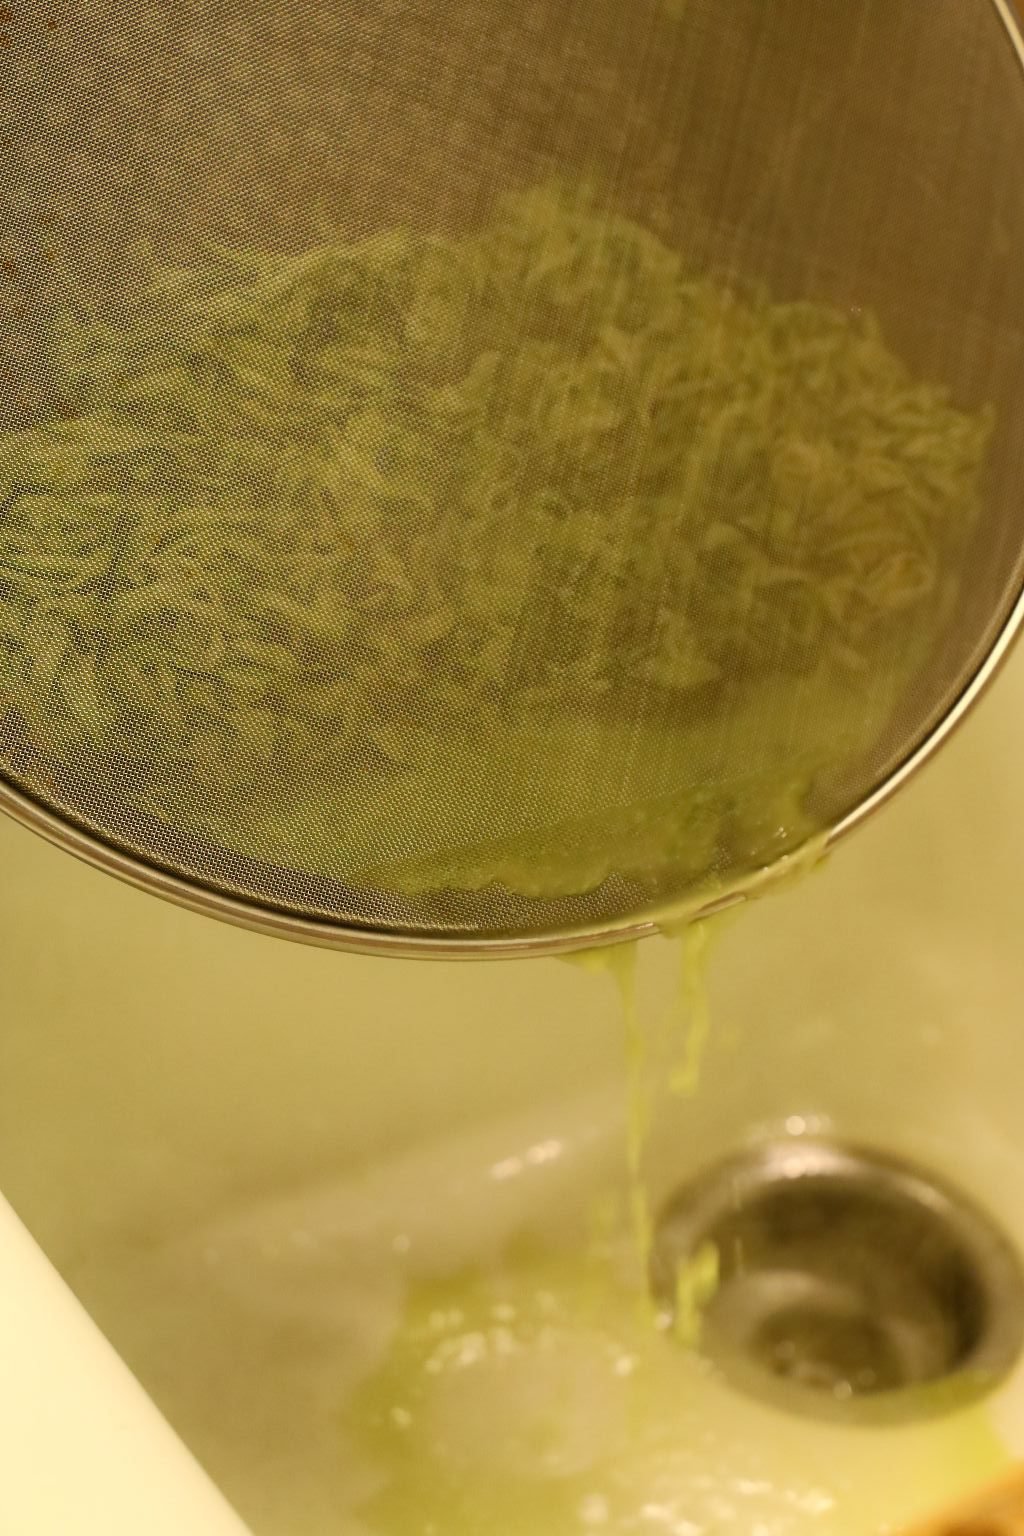
Shred your zucchini into a large colander to let it drain.
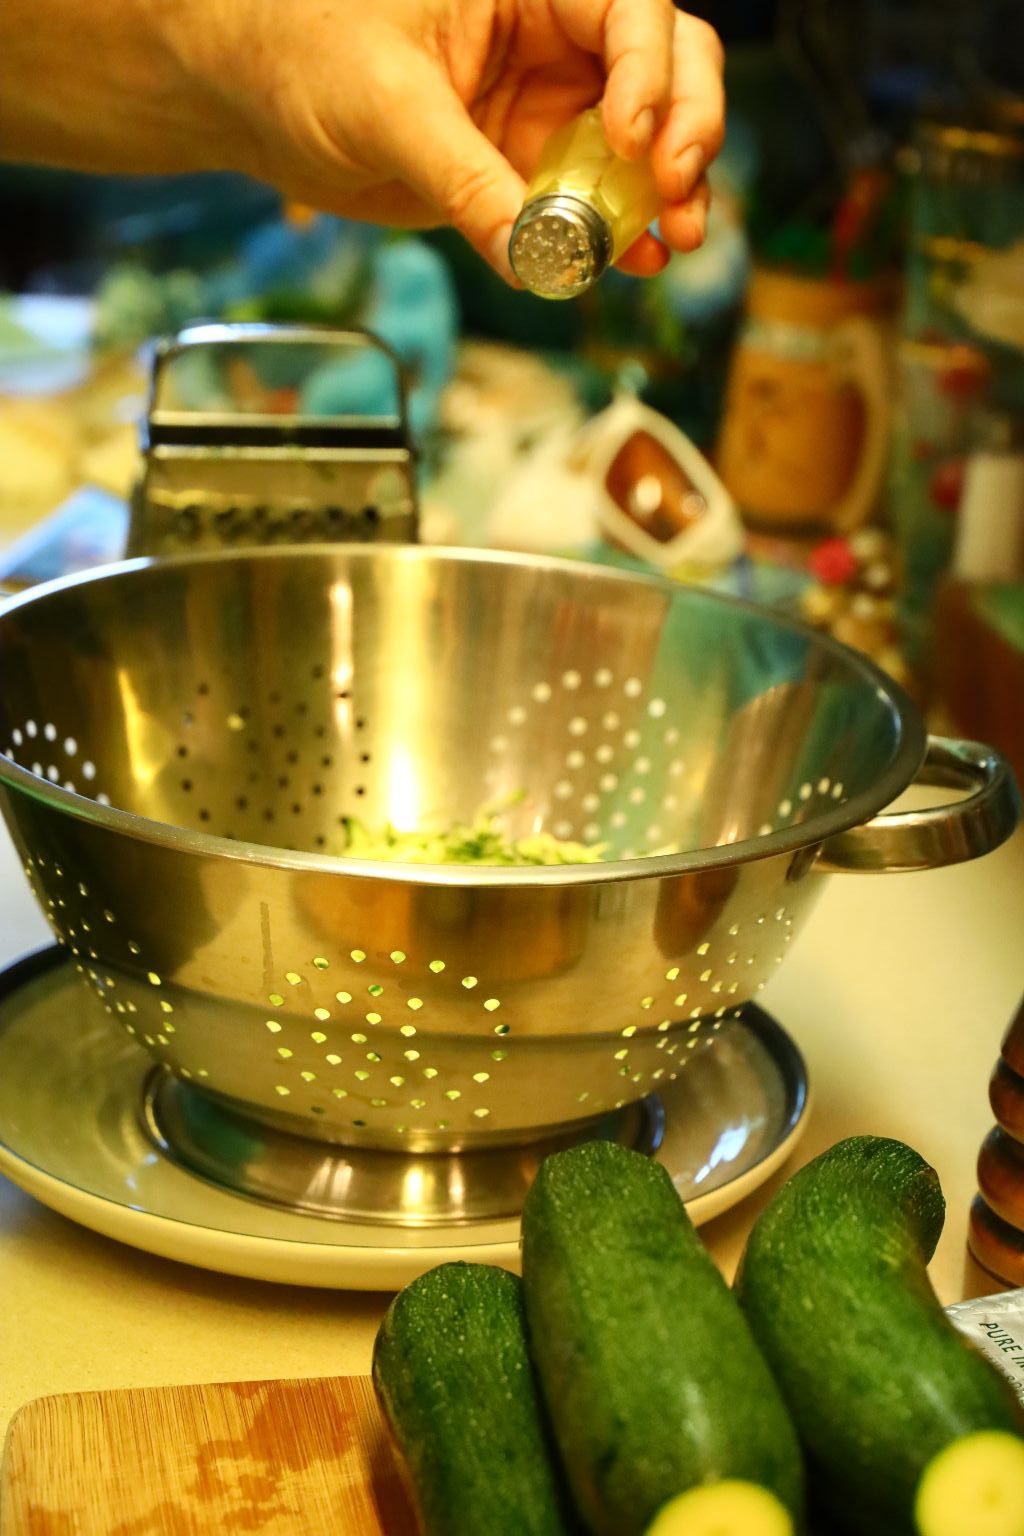
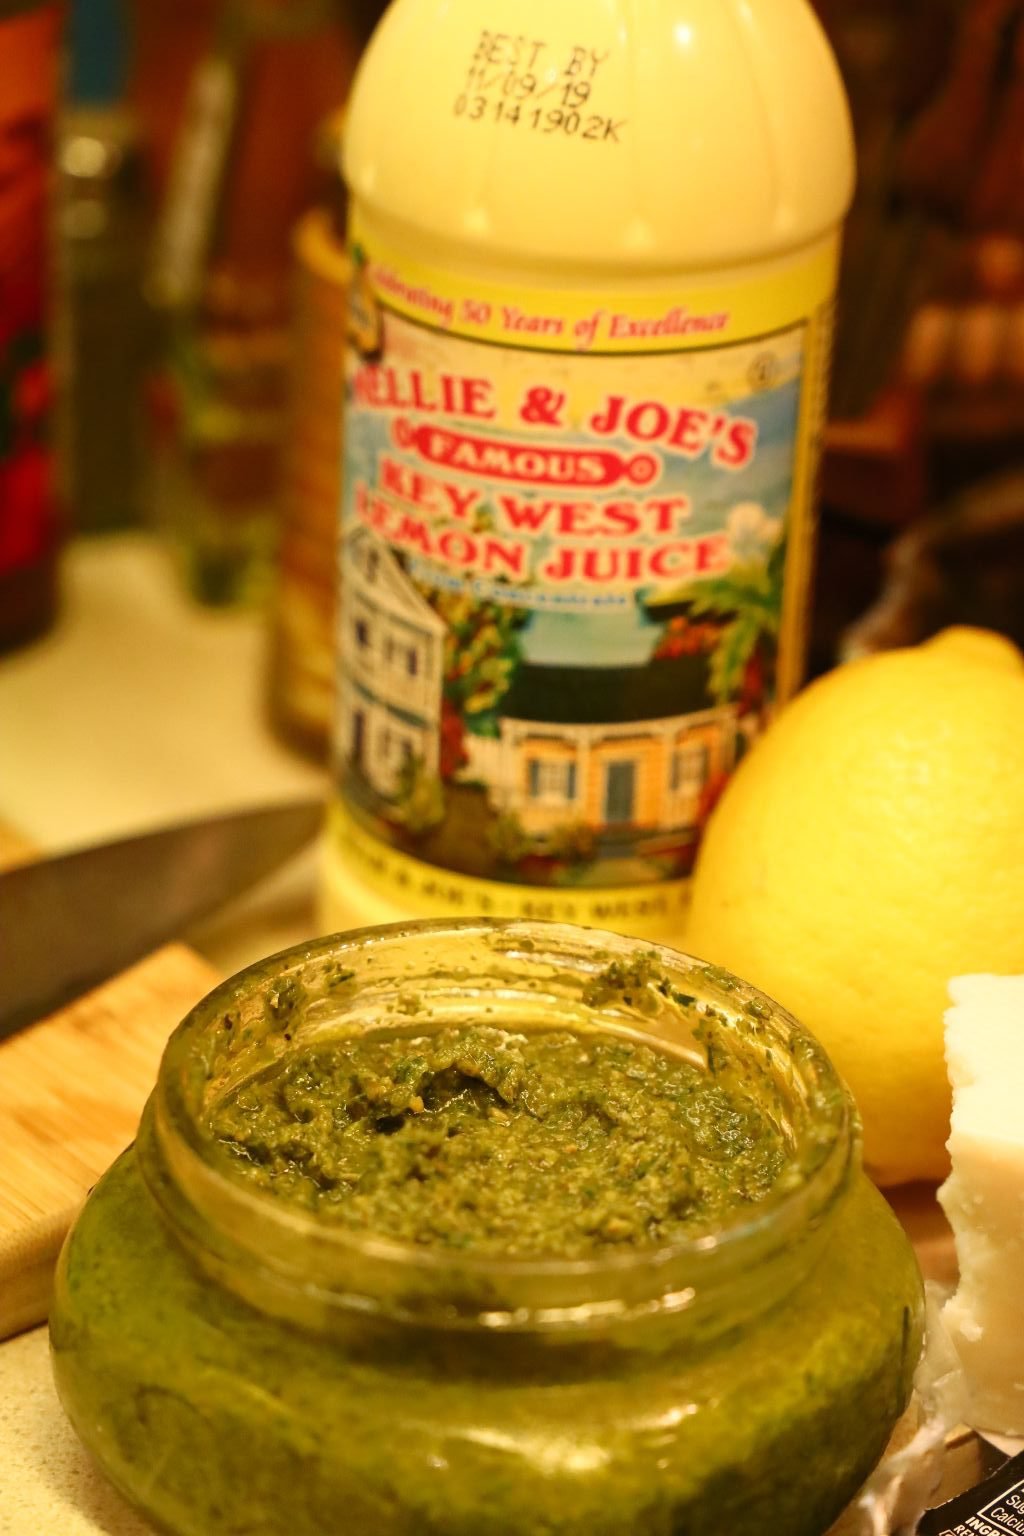
Place a plate under the colander and add a touch of salt to help the shredded zucchini expel its water. Here is a picture of our homemade Pesto we used later on in this recipe.

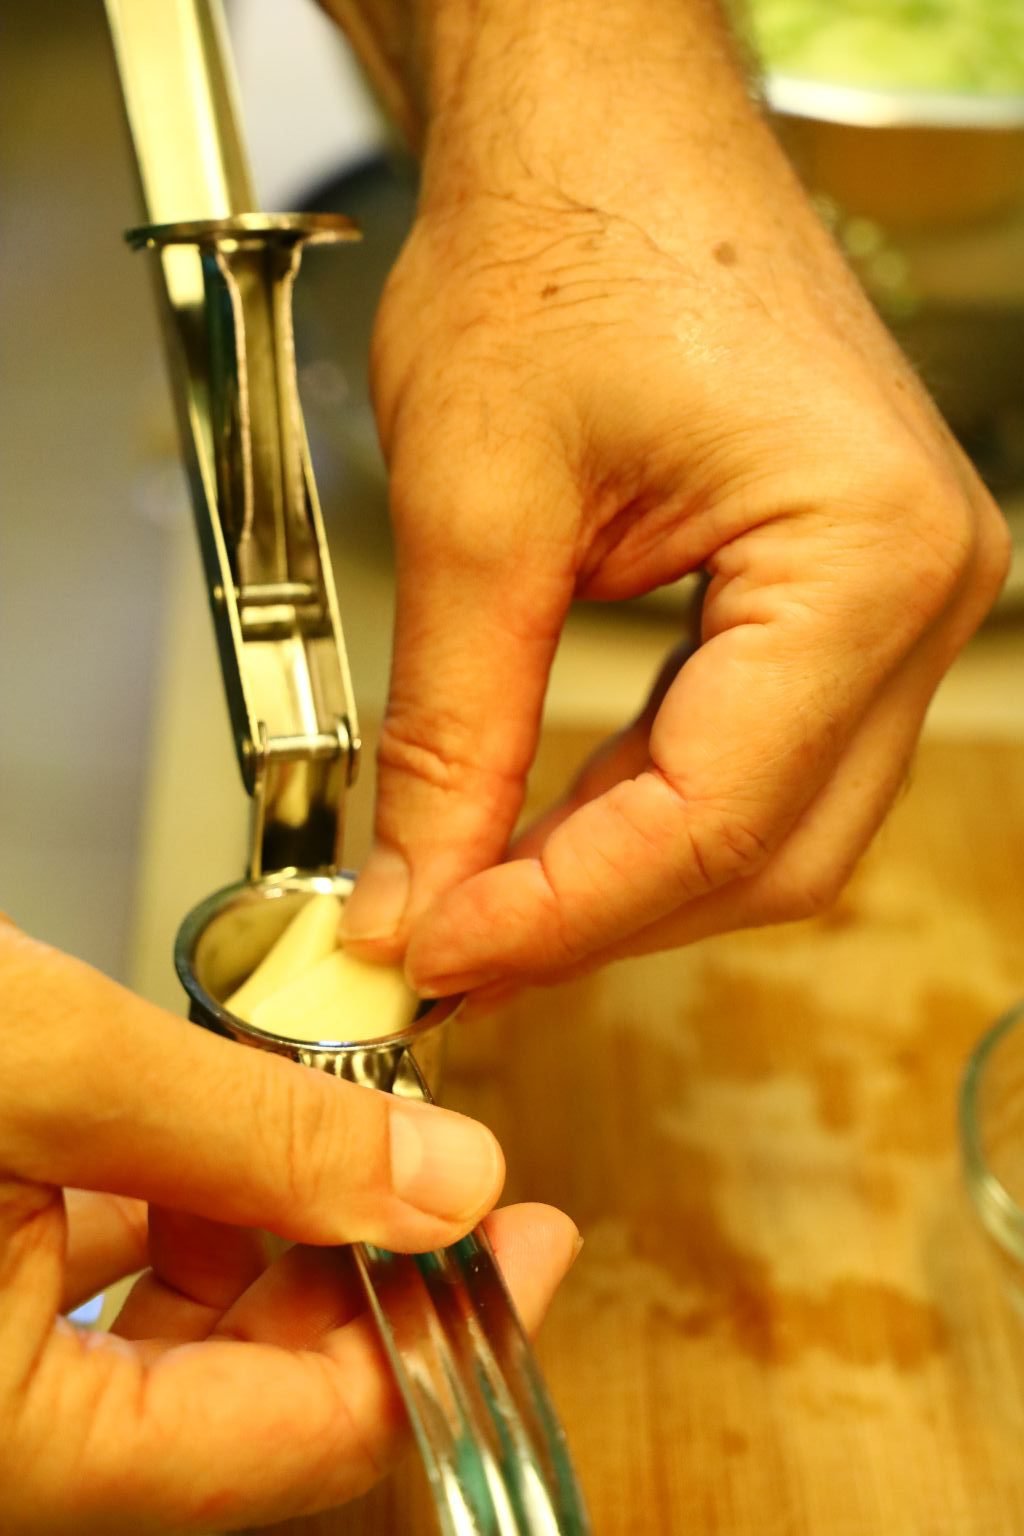
Place your garlic into a garlic press or chop it finely.
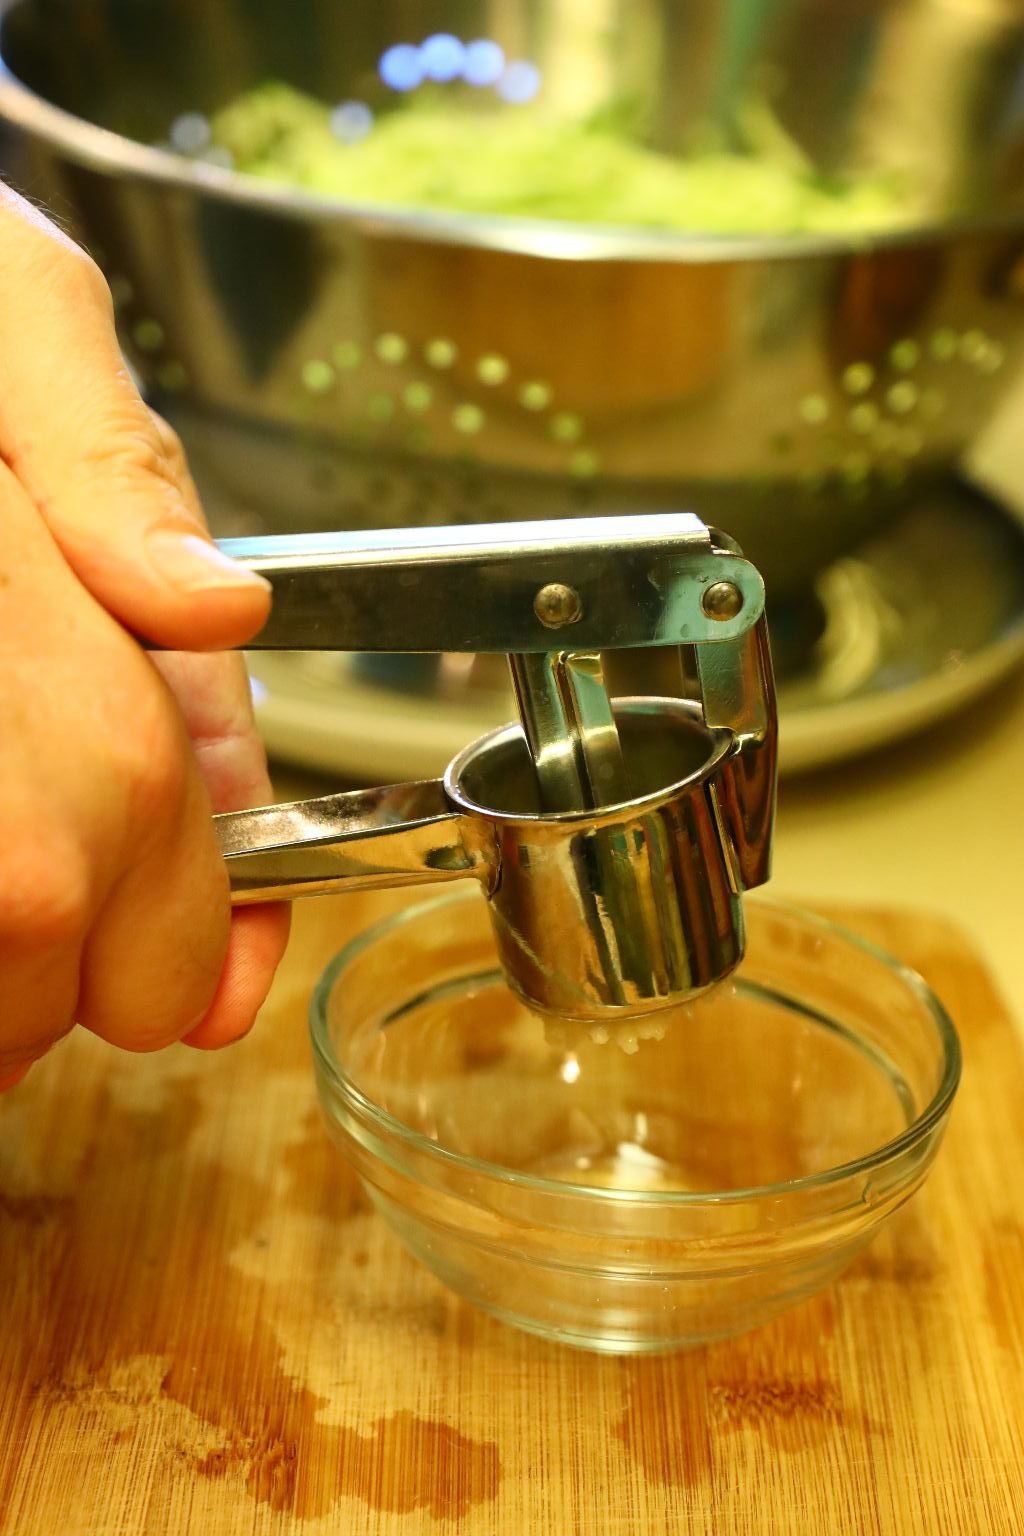
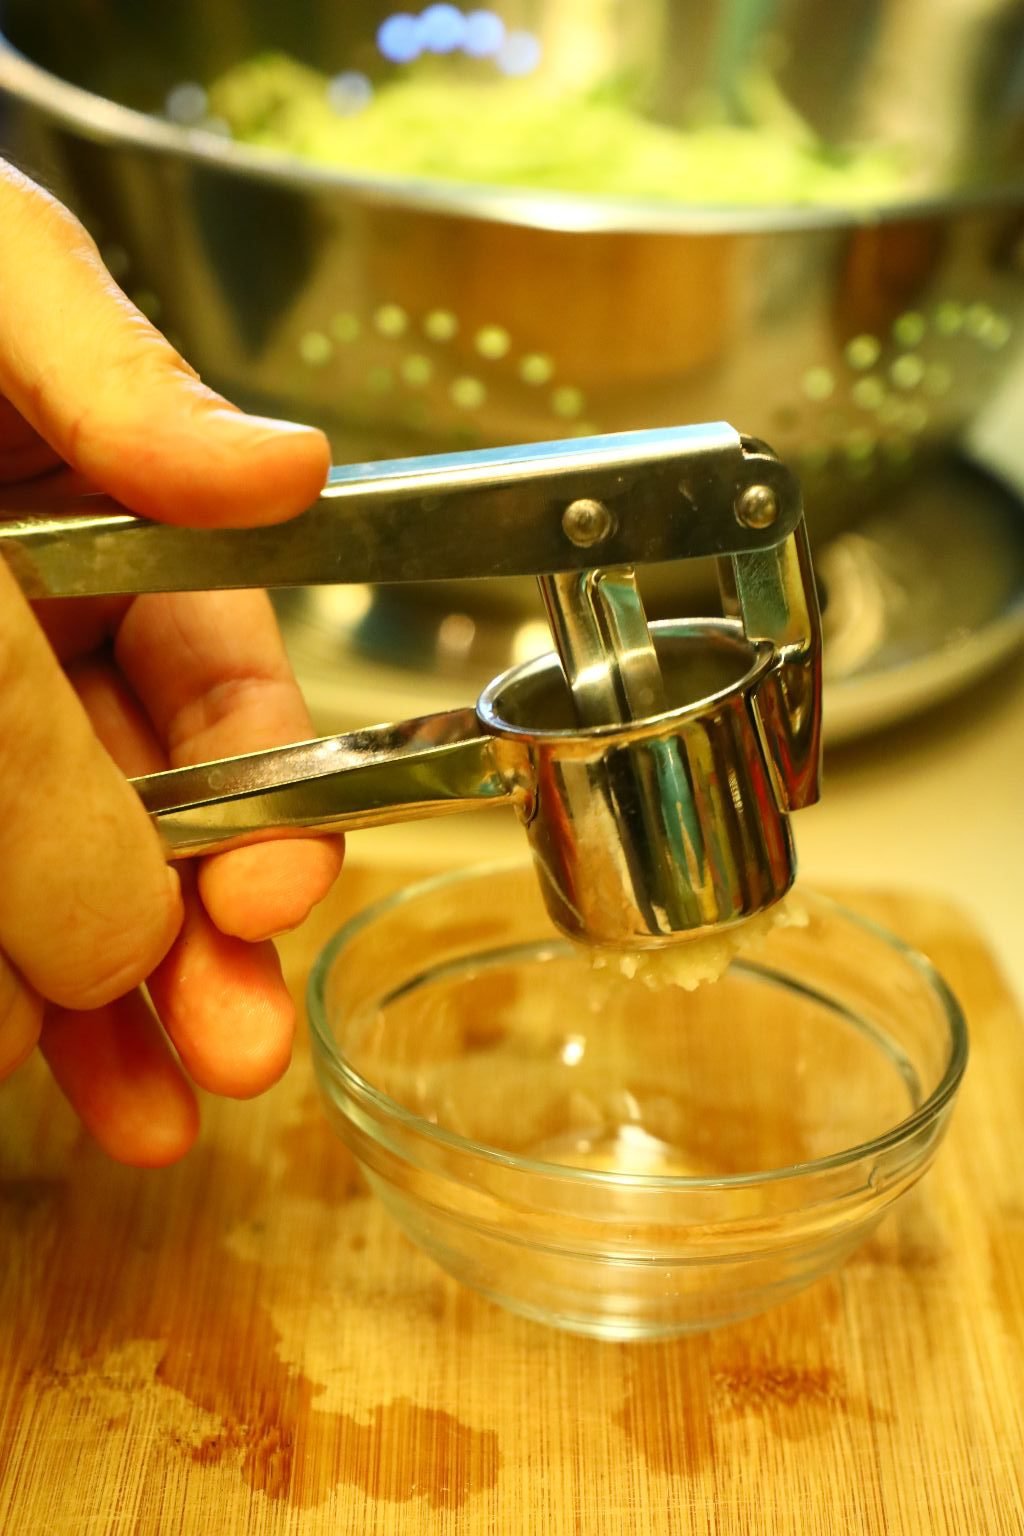
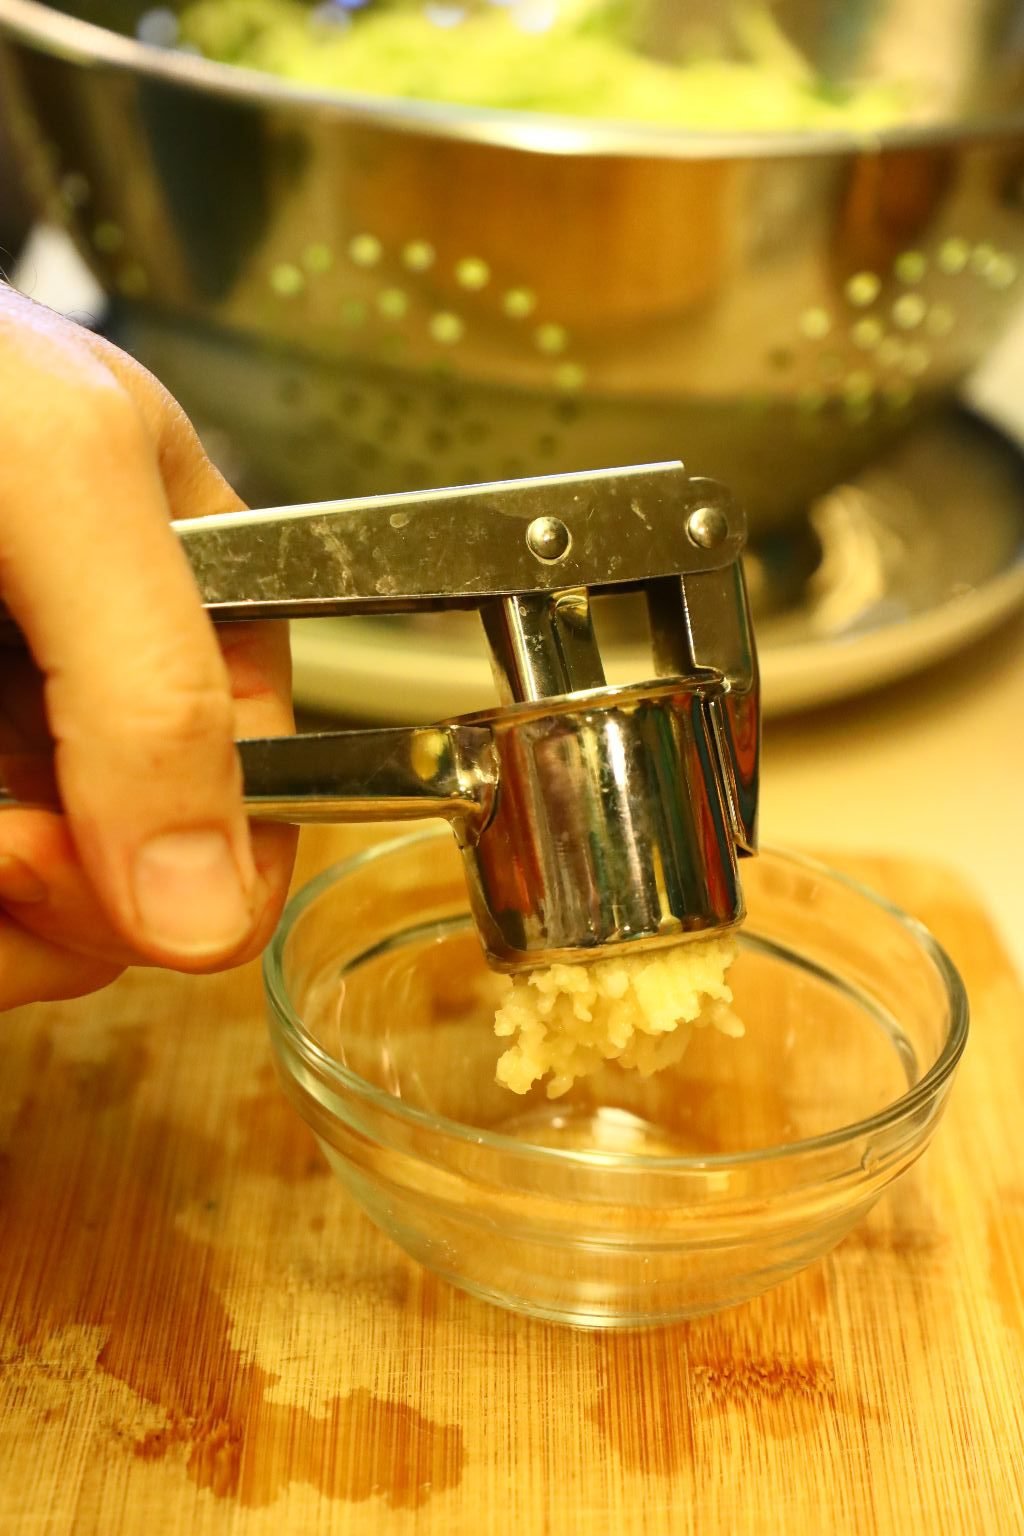
Place the minced garlic into a bowl for later use.
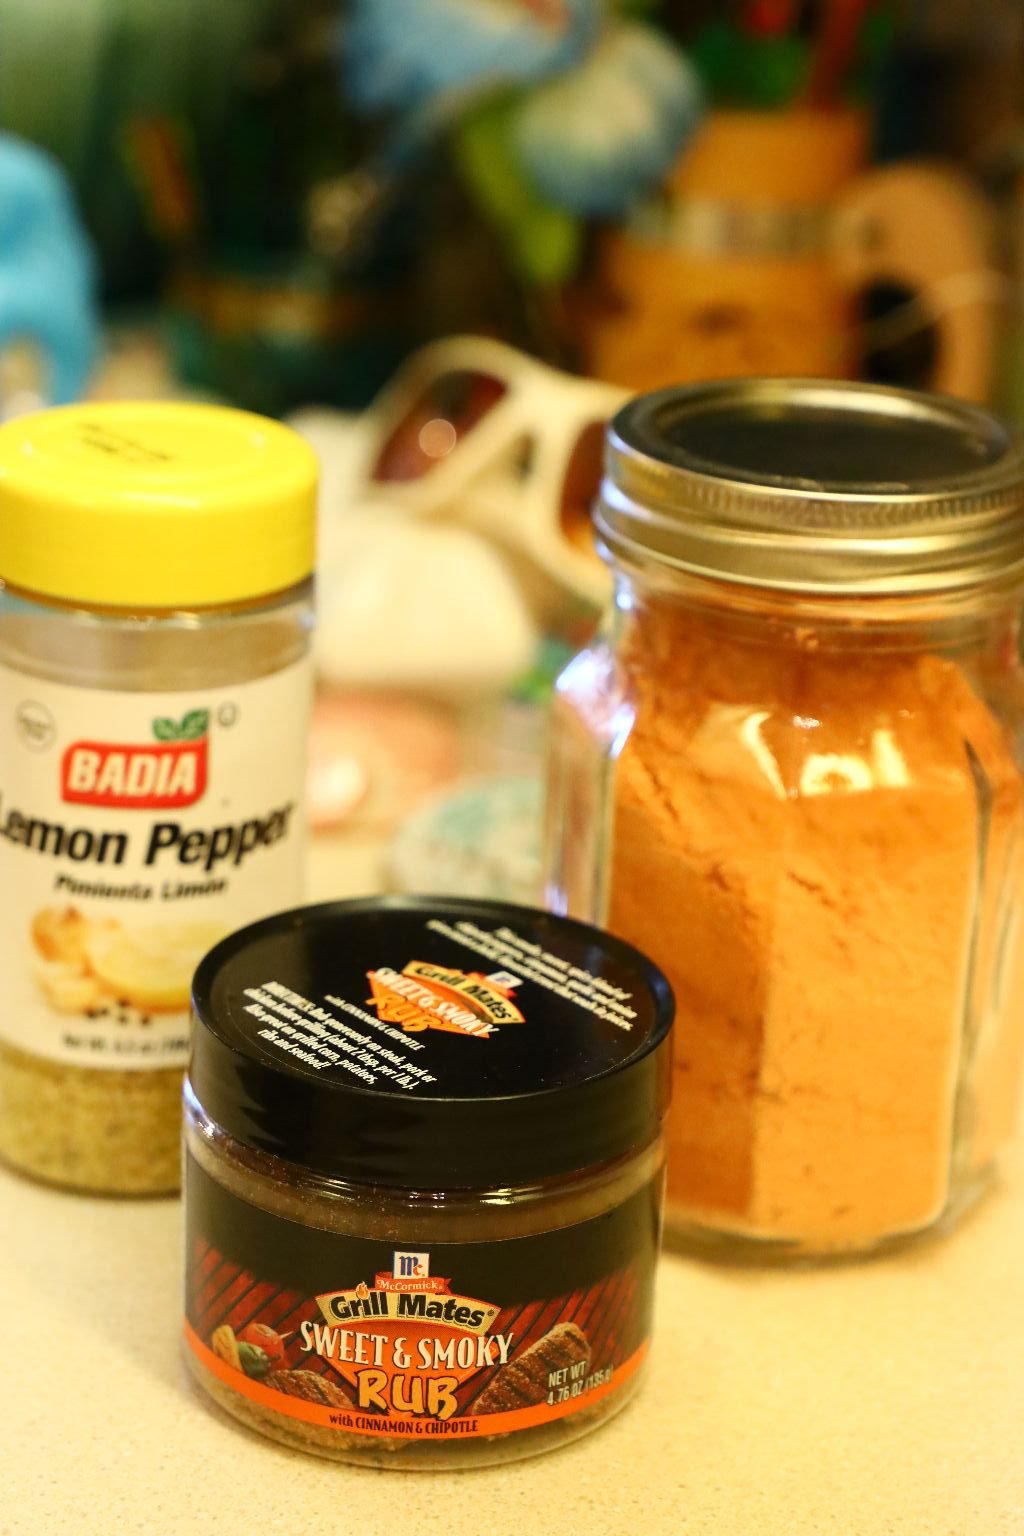
Pictured are my spices for the Salmon fillets… Lemon Pepper, Grill Mates Sweet & Smokey Rub, and some Smoked BBQ powder.
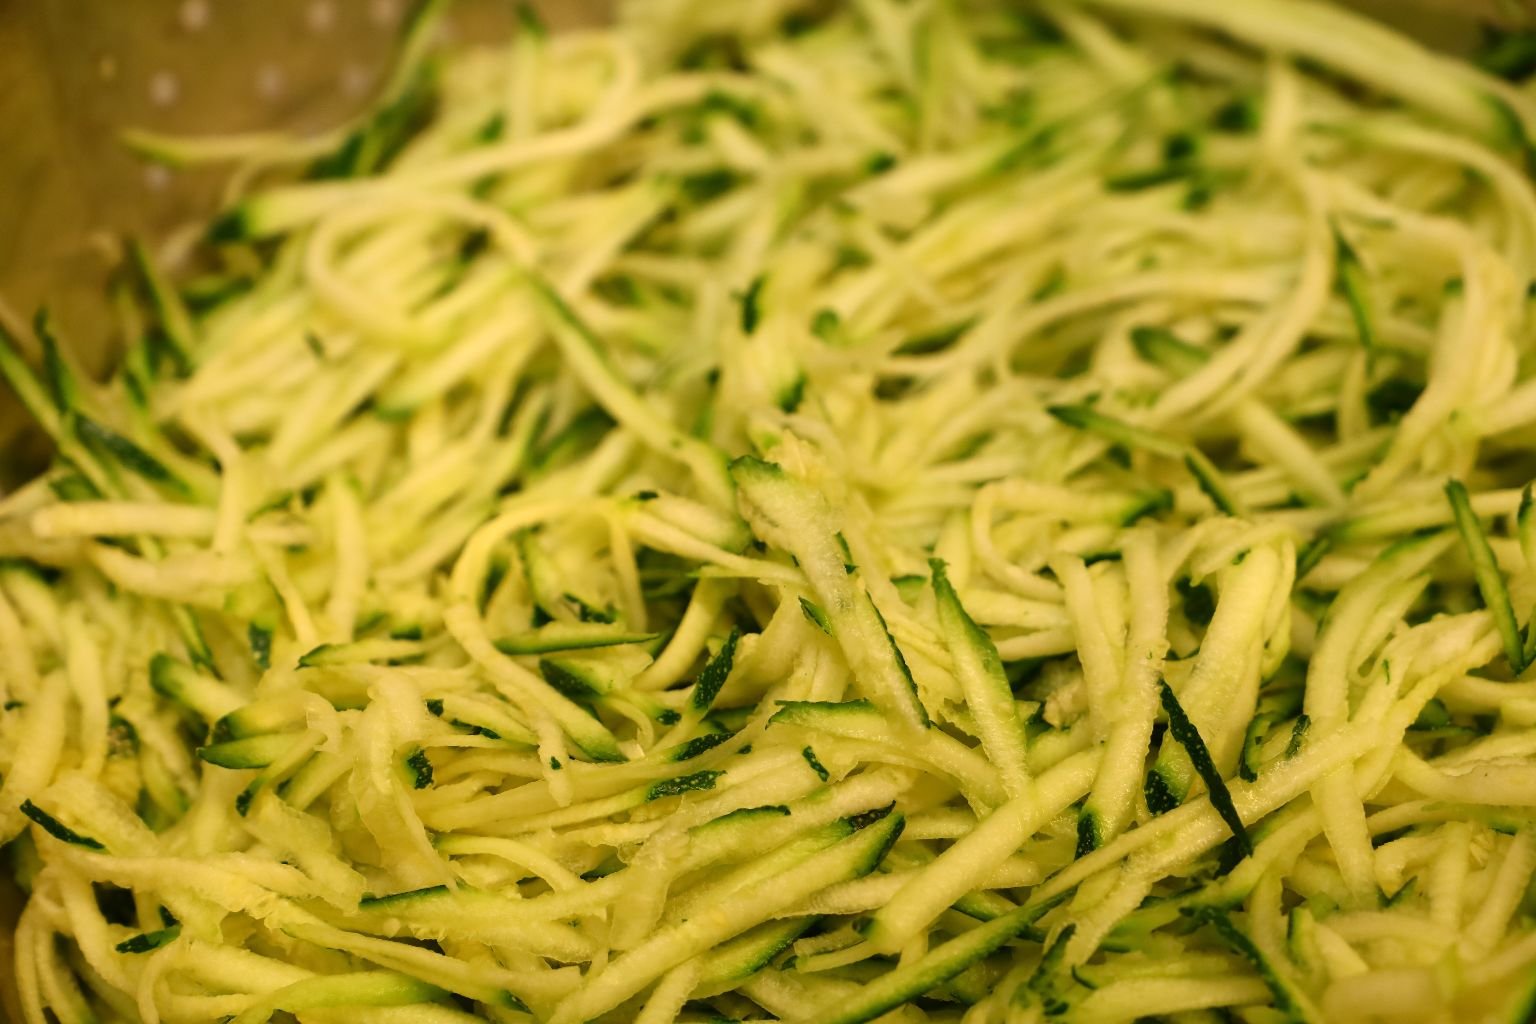
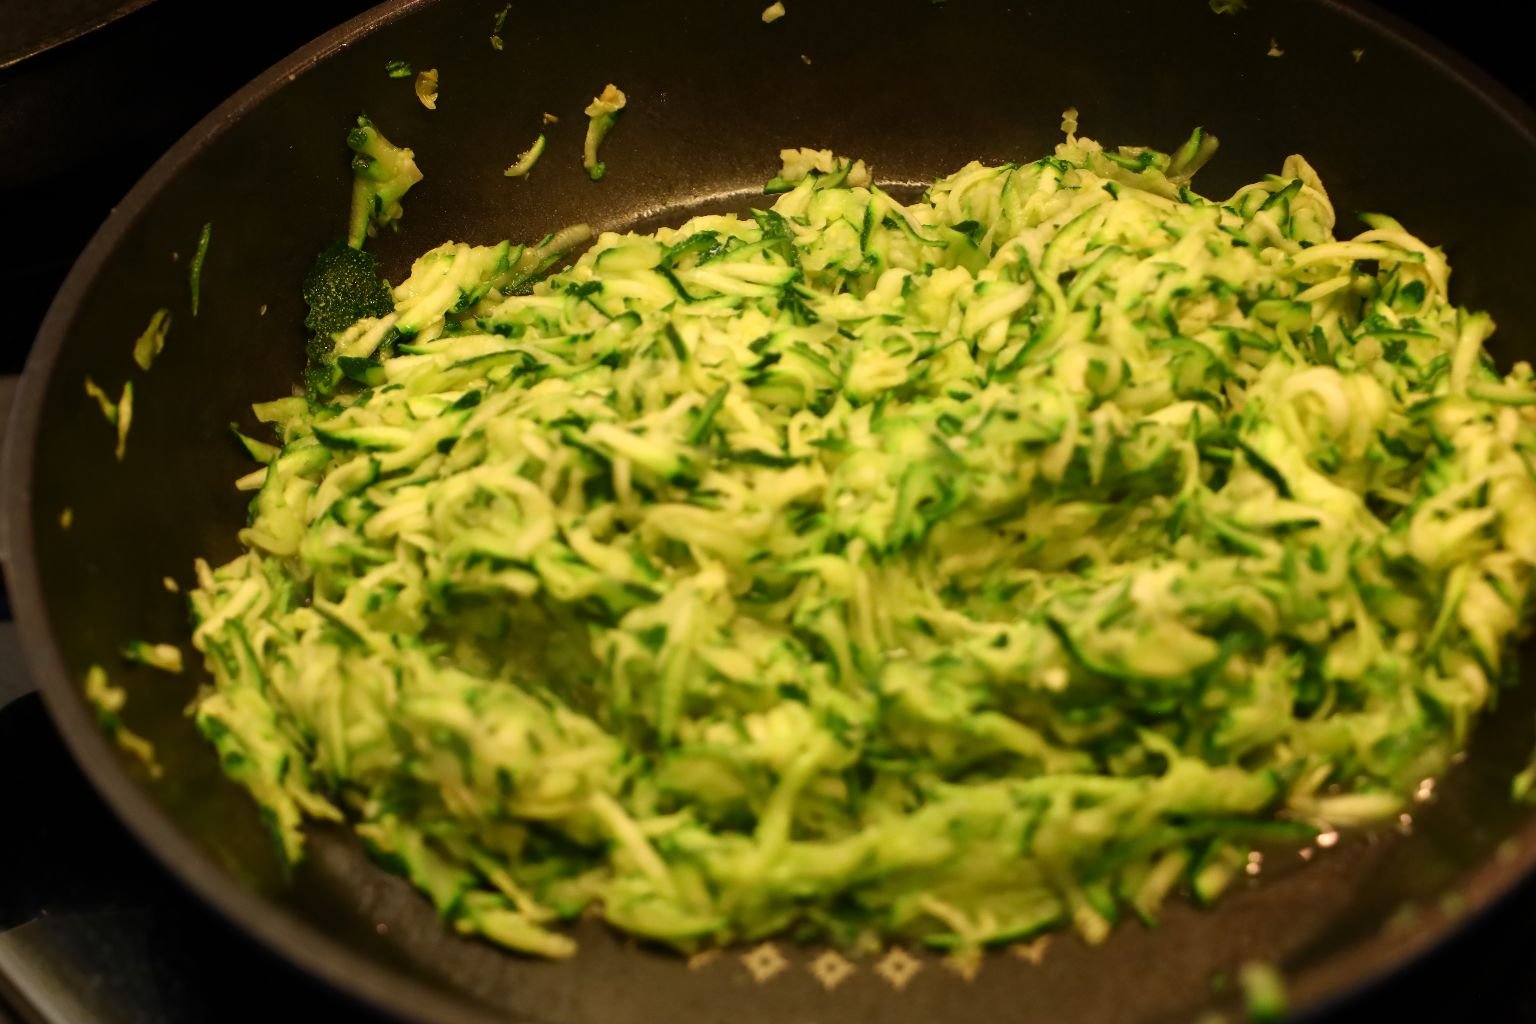
Pictured is the shredded zucchini.
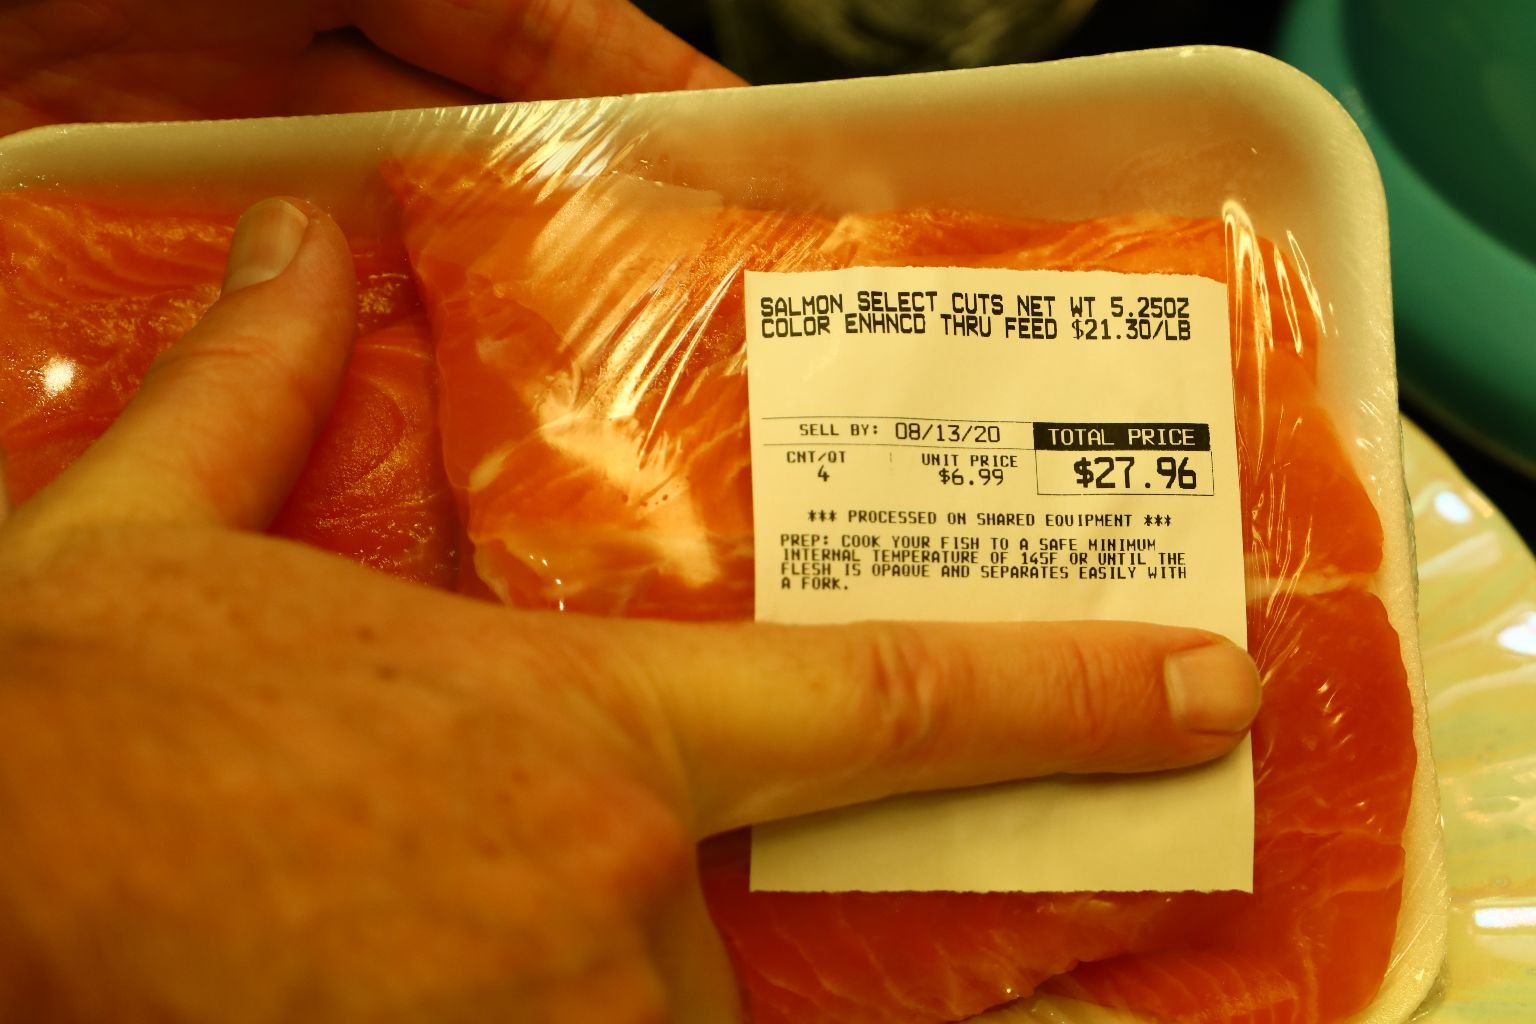
Here are my salmon fillets.

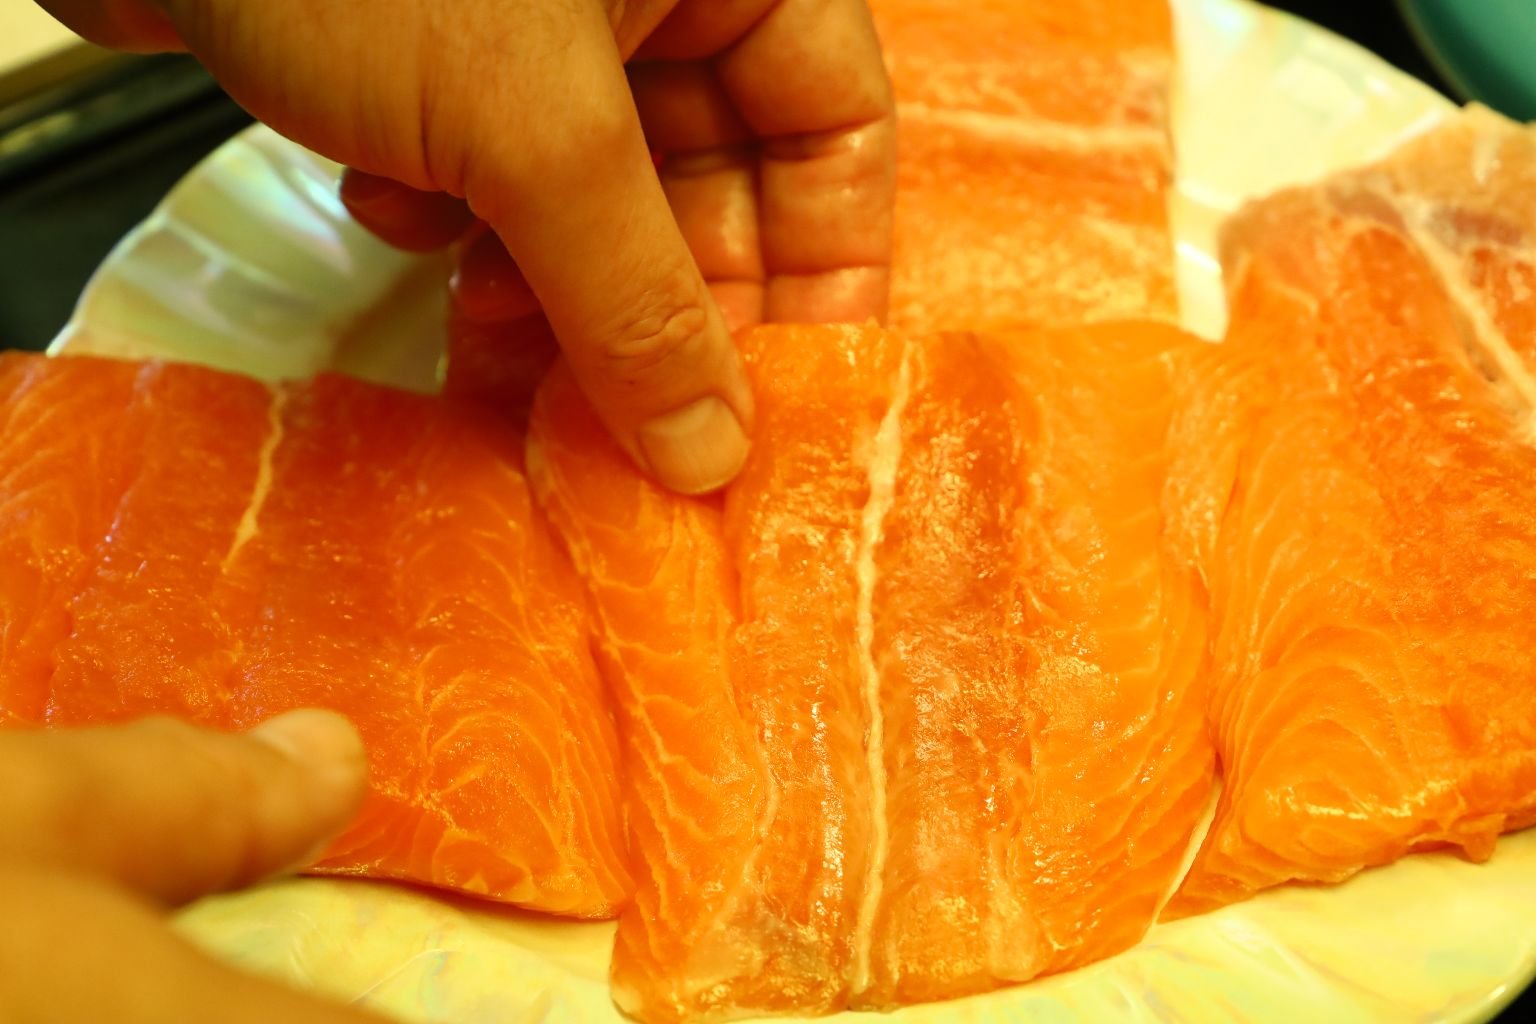
Very nice and de-boned.
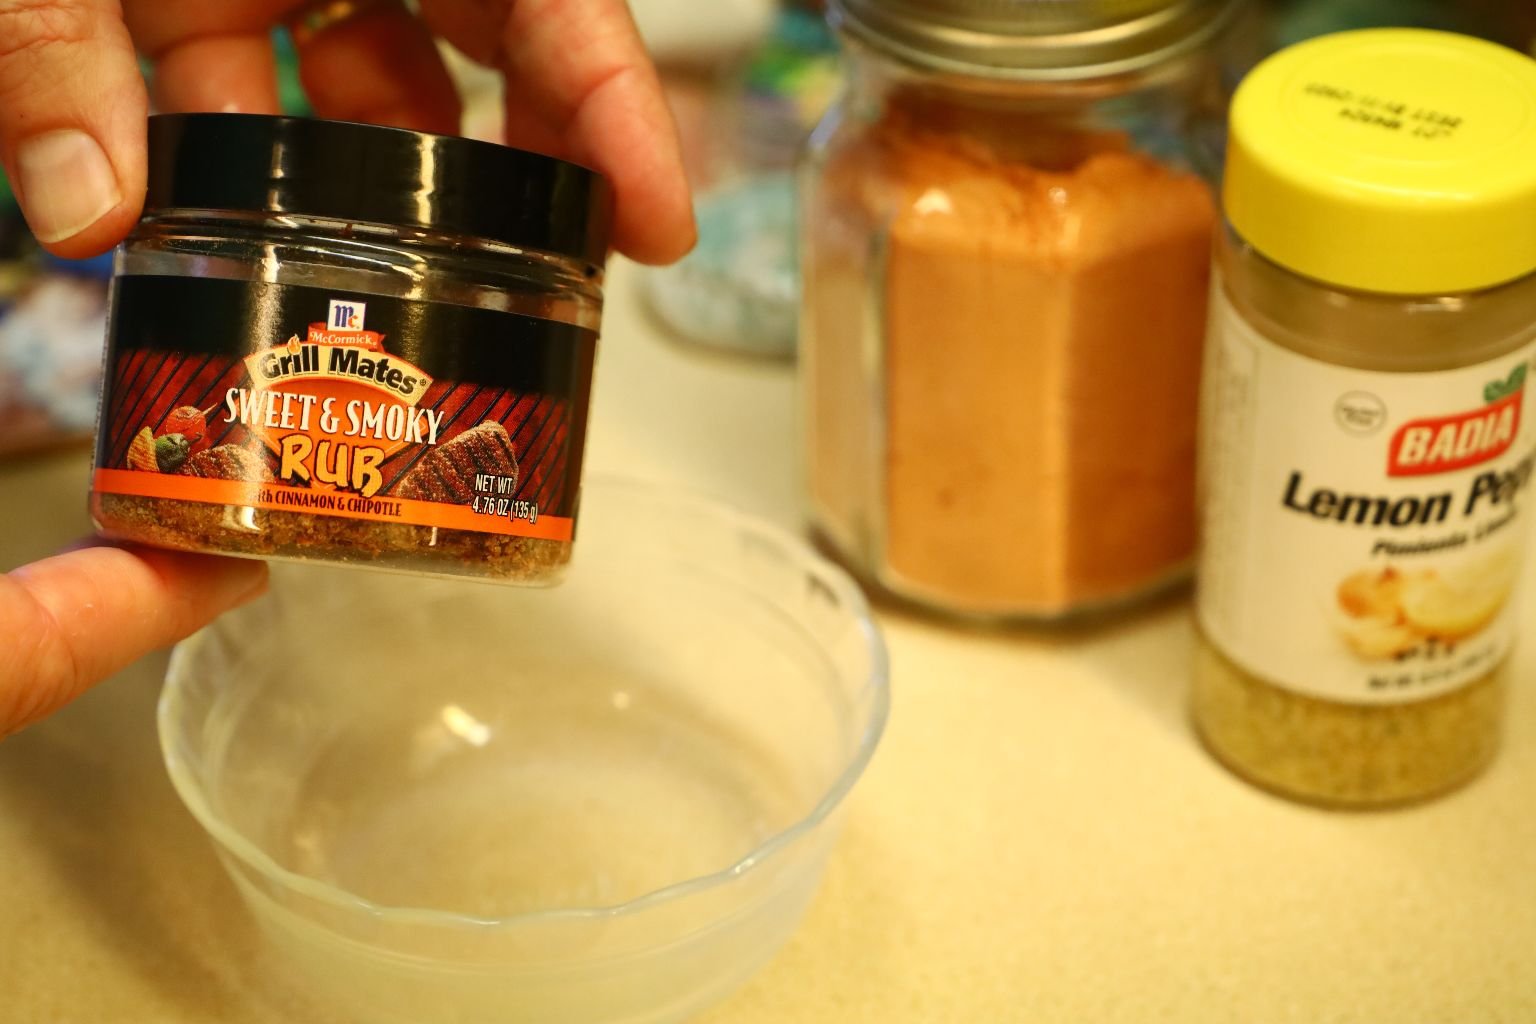
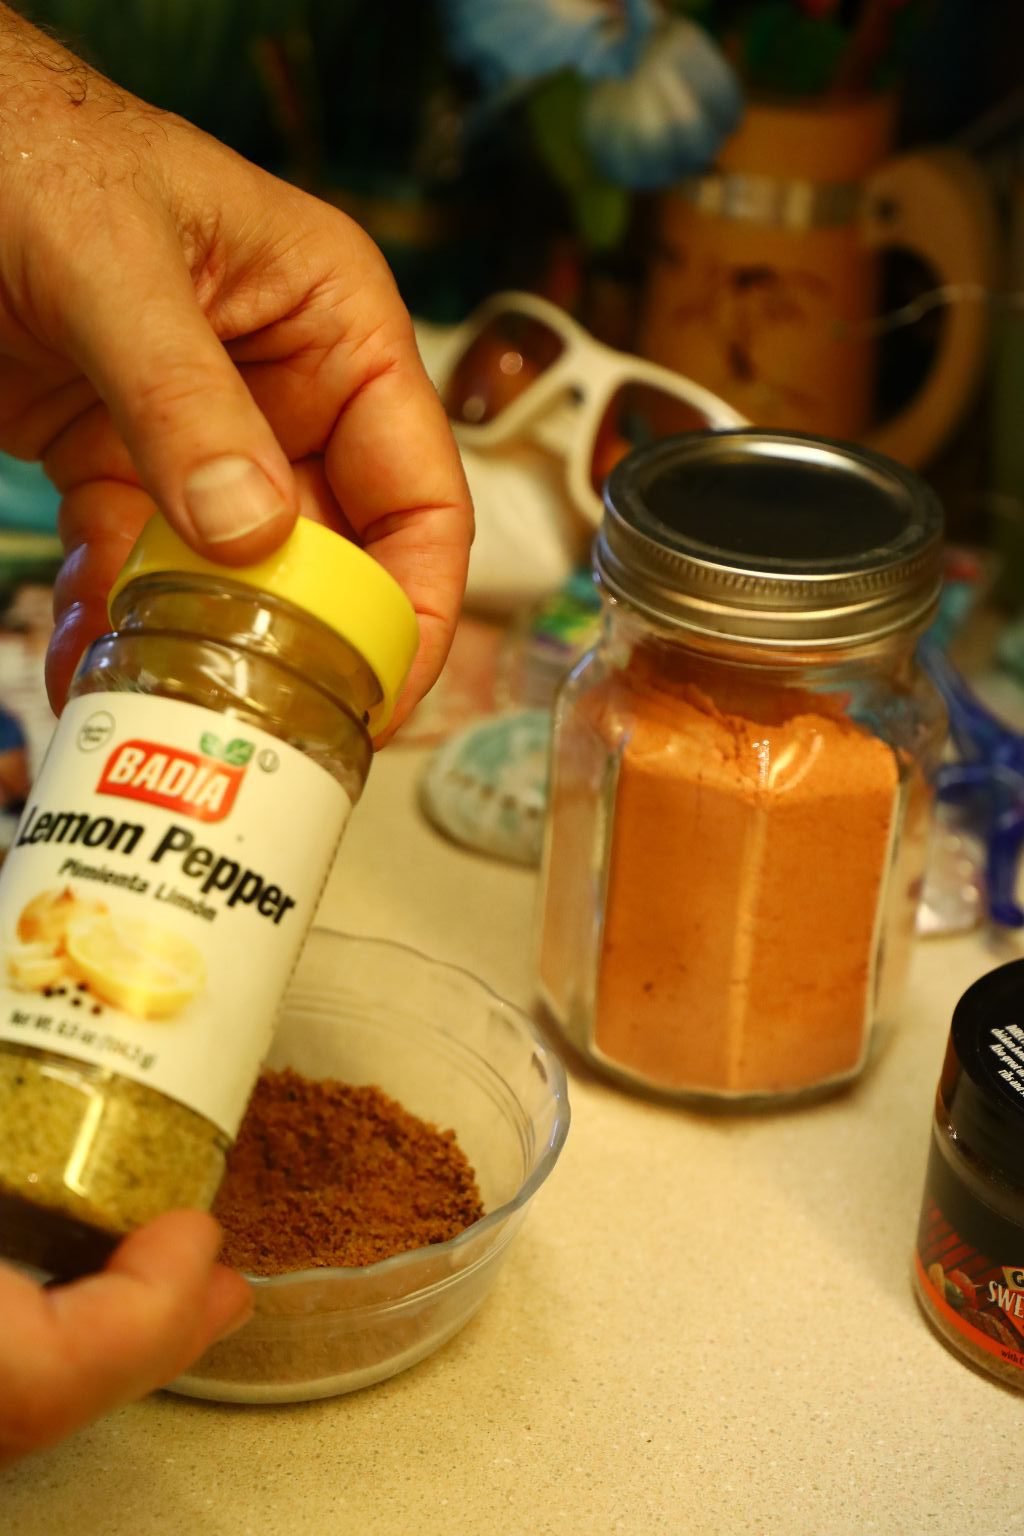
In a small bowl, add your seasoning … about 2 Tbsp. of the Sweet and Smokey Rub
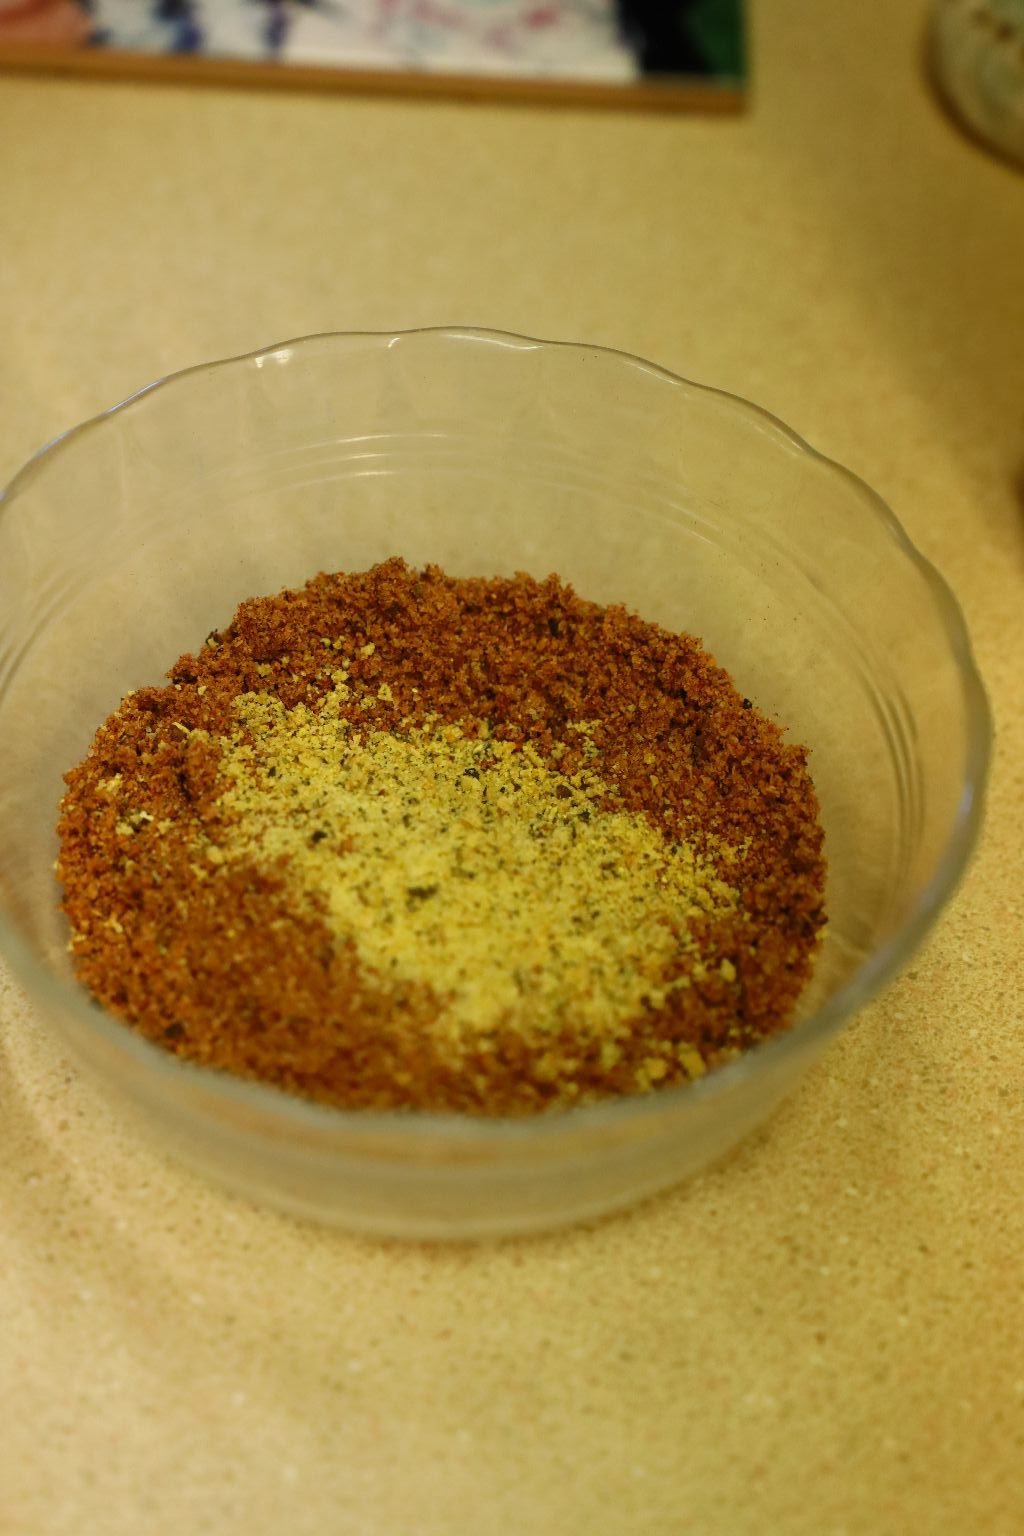
Then about 1 Tbsp. of your Lemon Pepper.
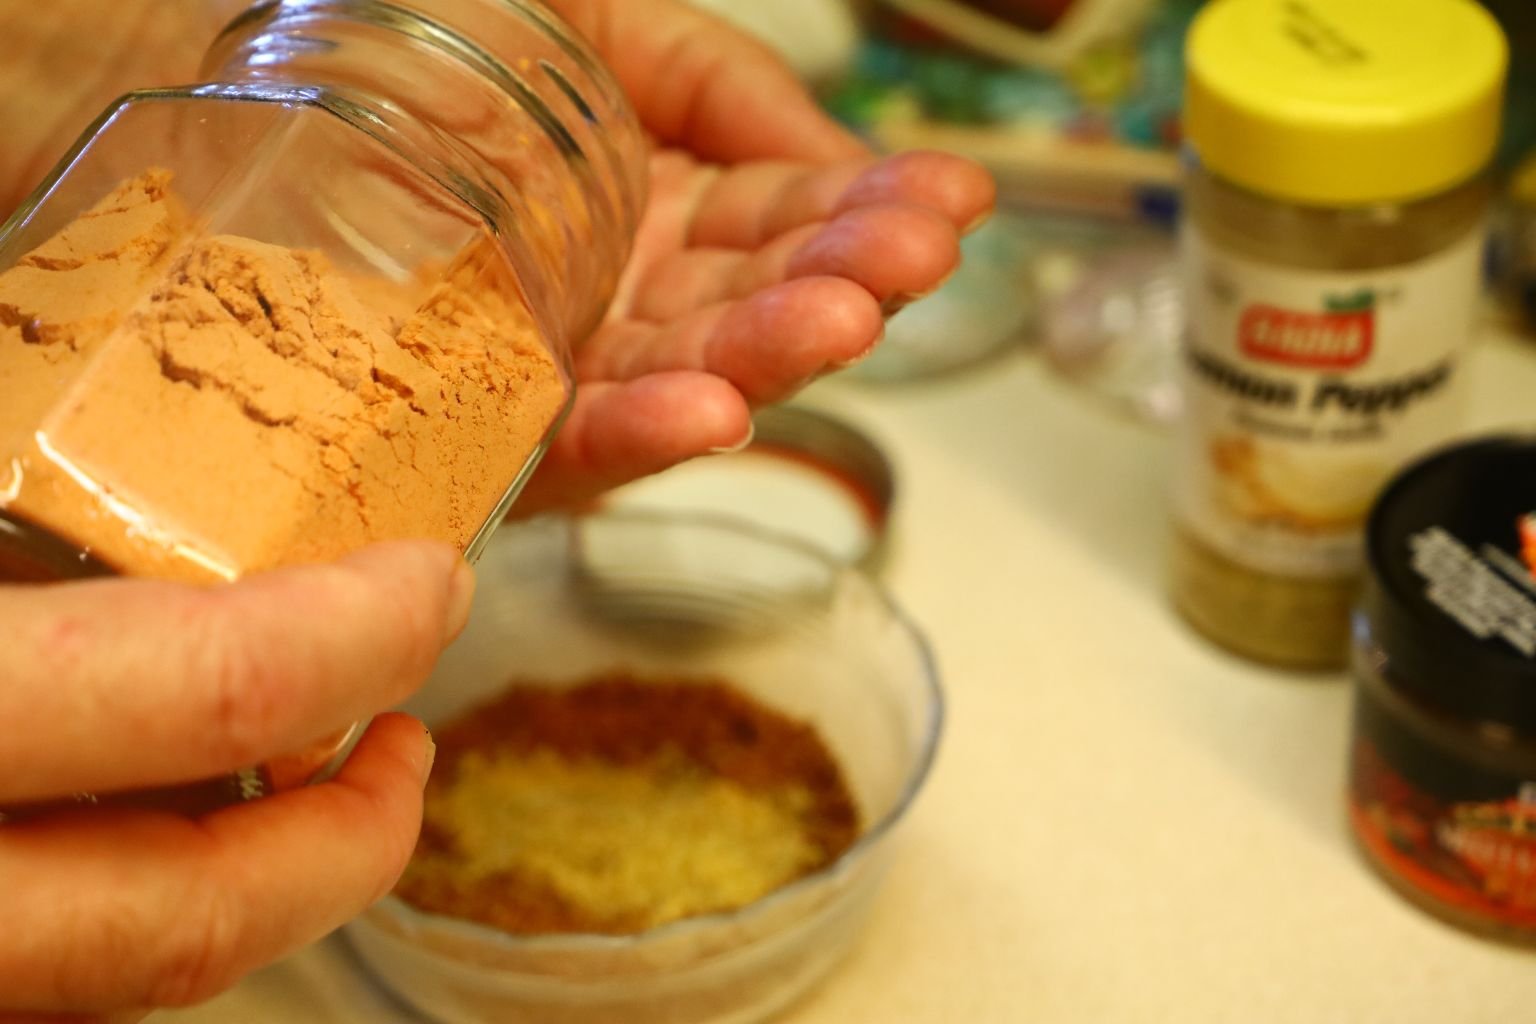

and lastly about 1 tsp. of the BBQ Powder.
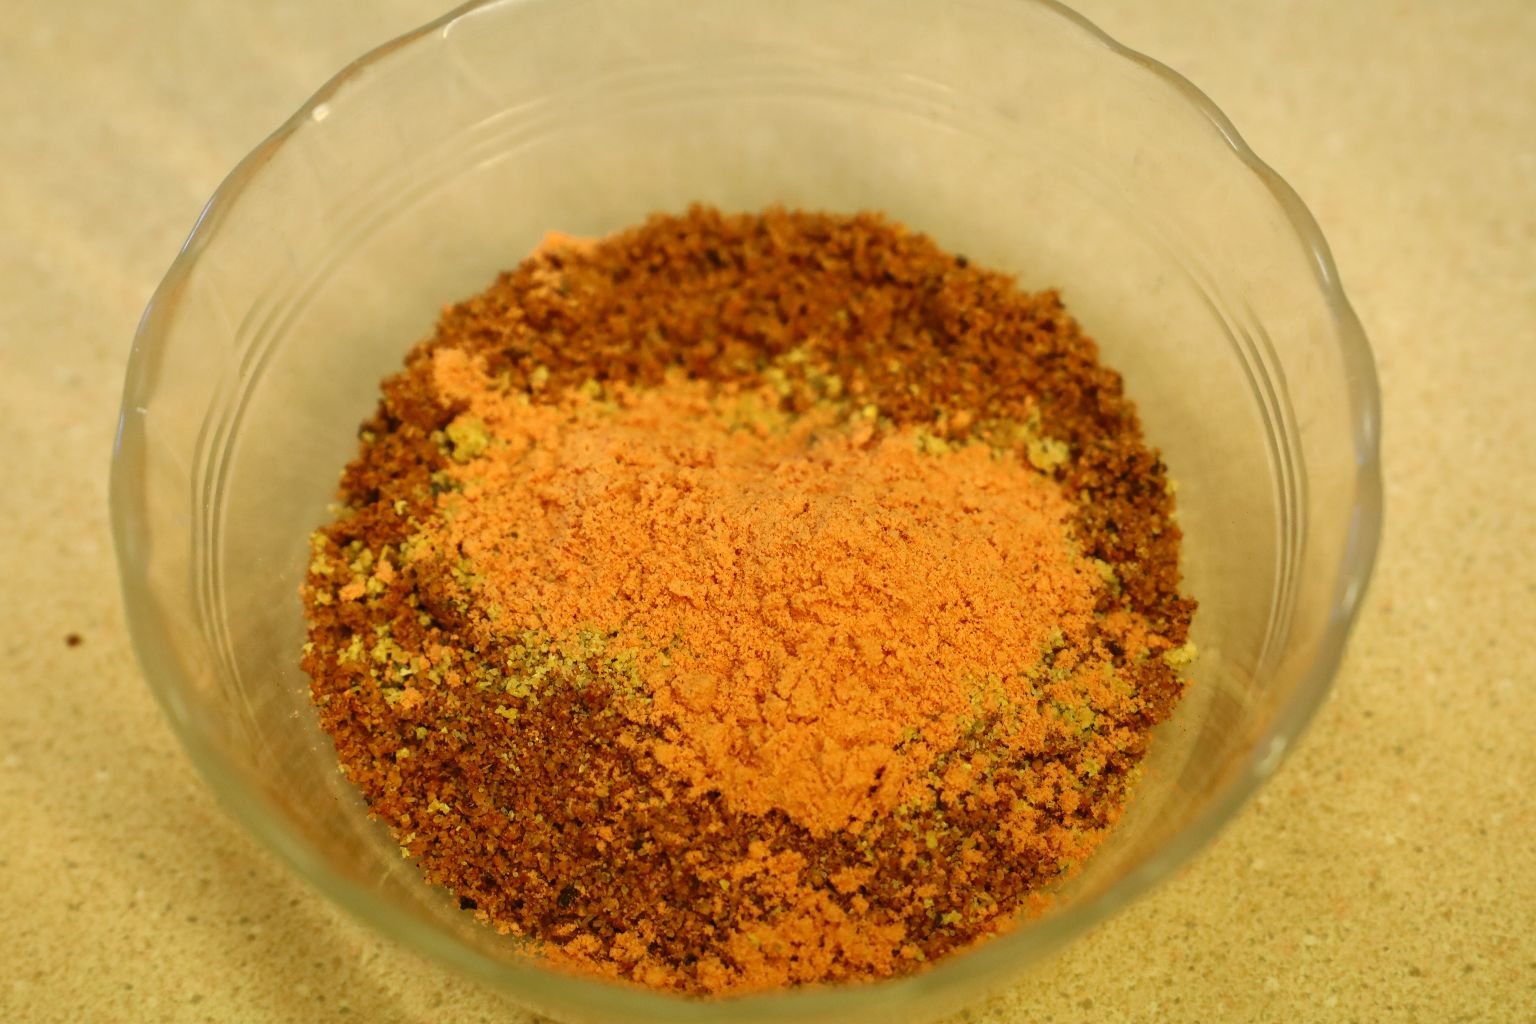
Mix the seasonings together well.
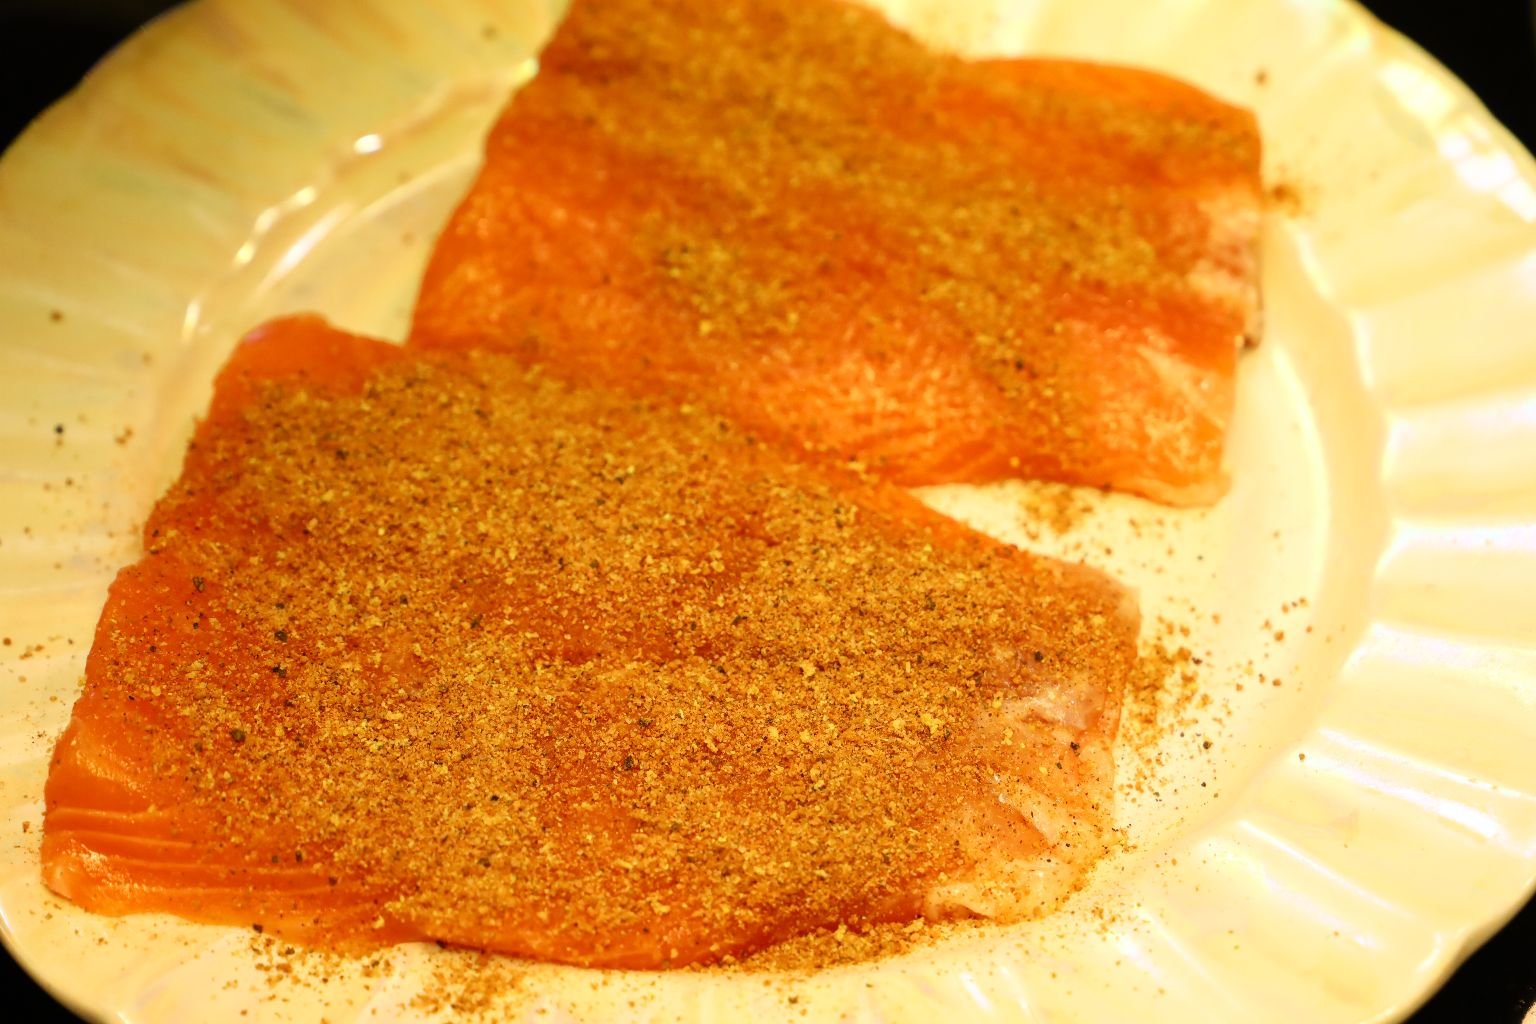
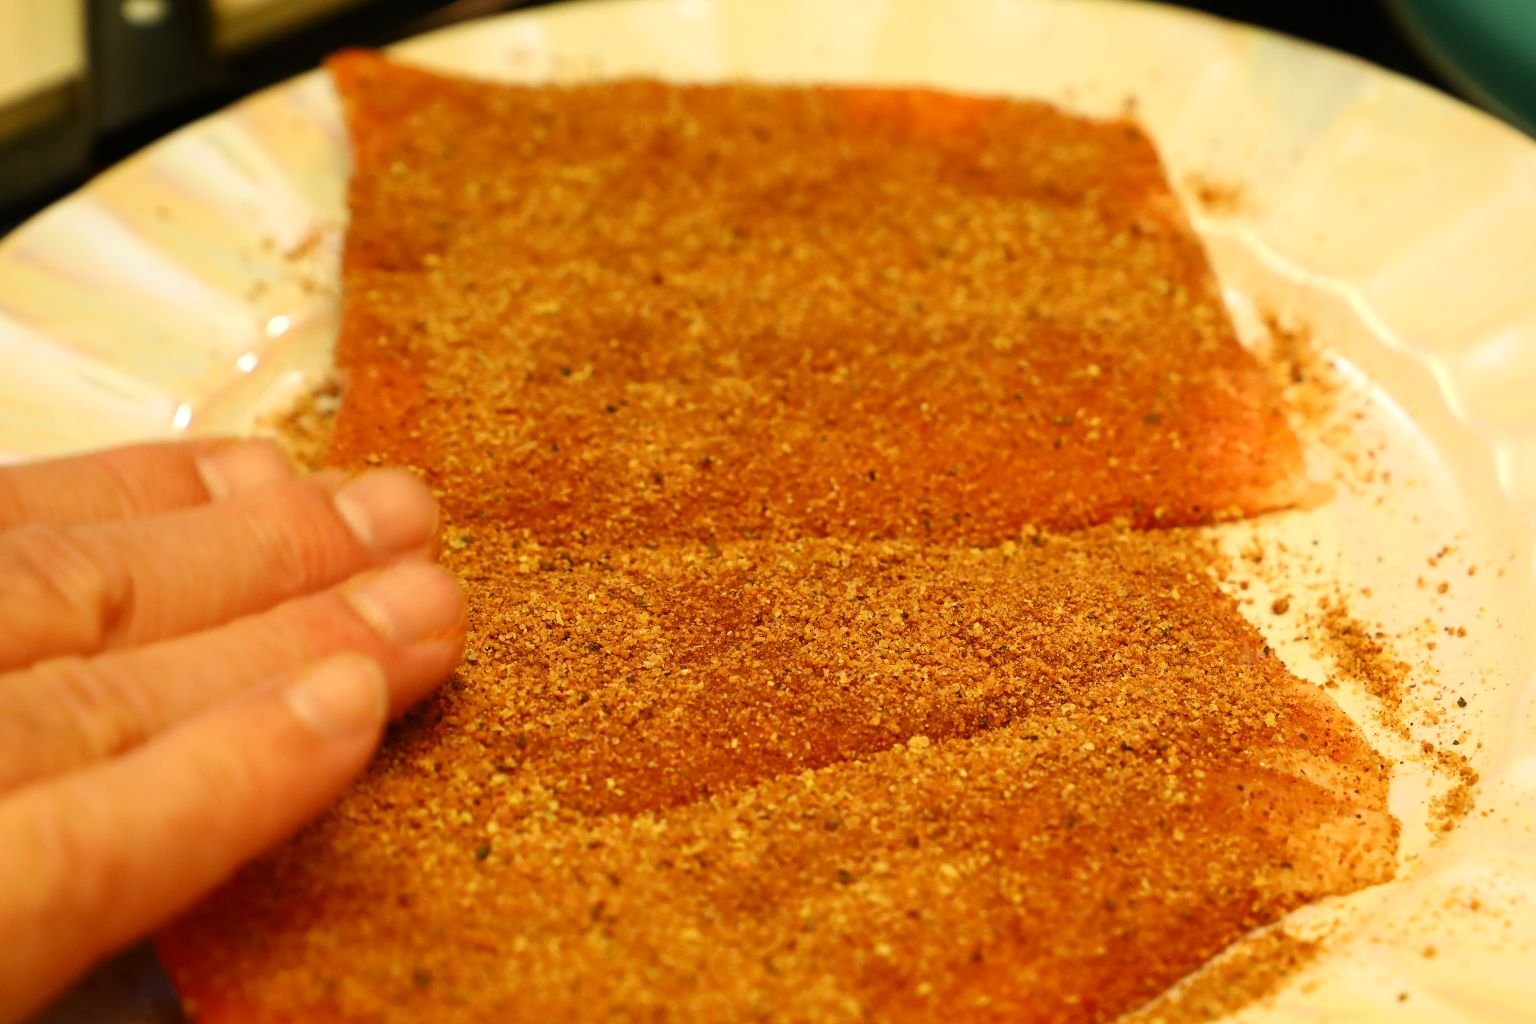
Generously sprinkle the seasoning over your Salmon fillets.
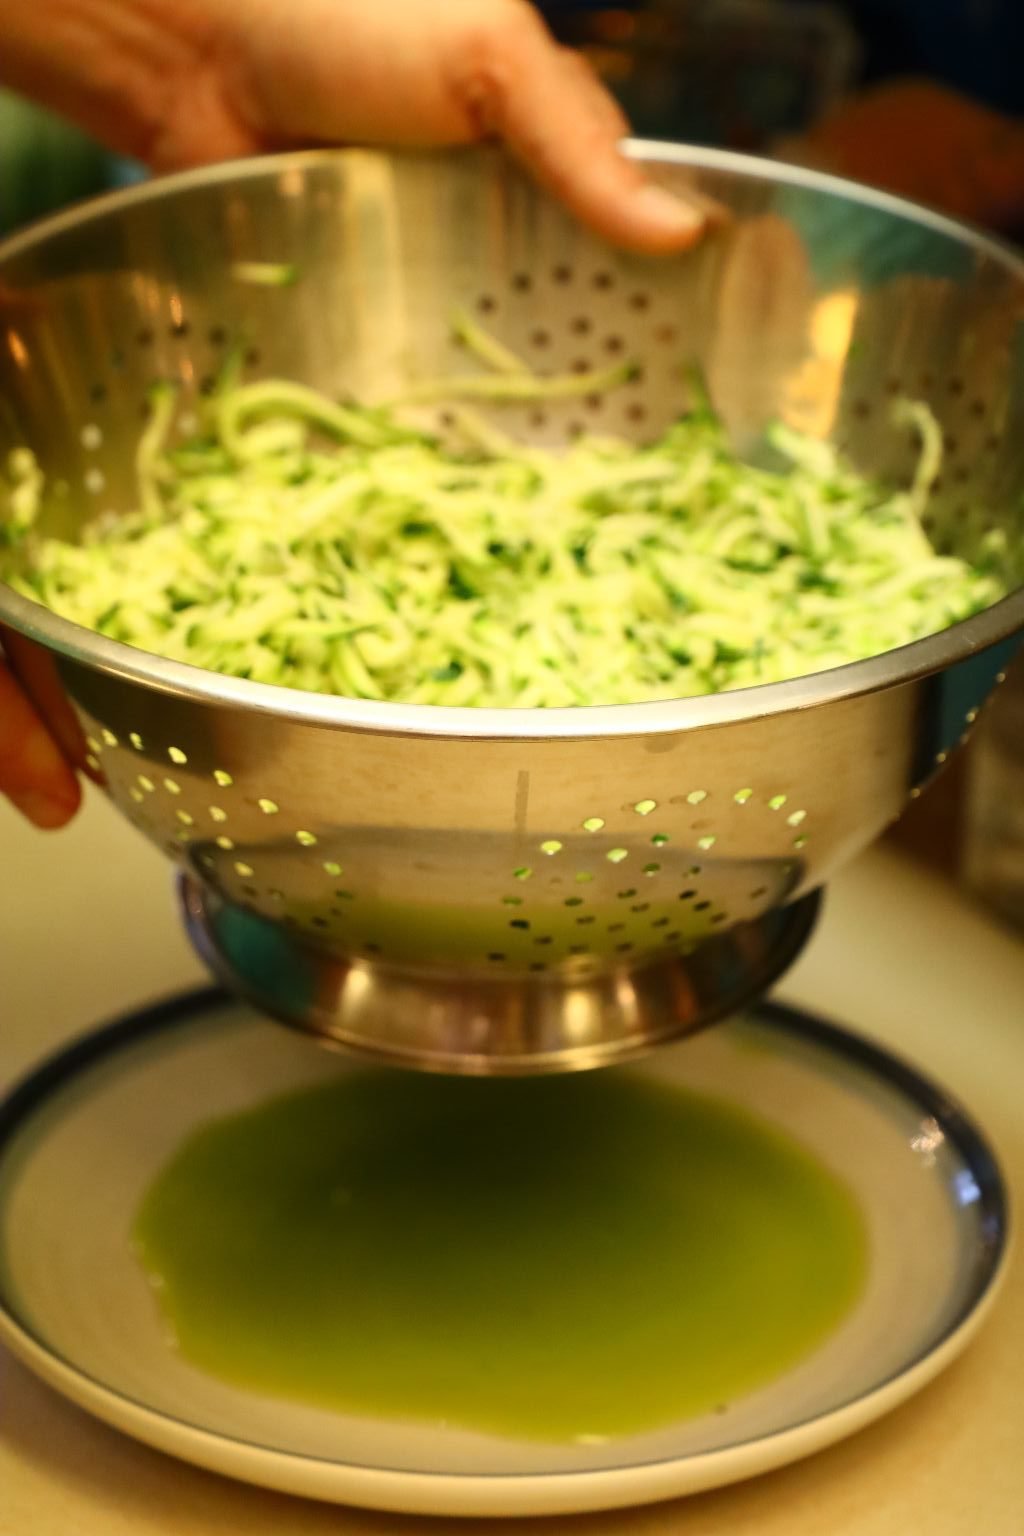
Here you can see all the water that has drained from the zucchini as it sat..
TIP: Now would be a good time to place the zucchini into a kitchen towel and wring out the water. Otherwise, you can cook it out as I did.
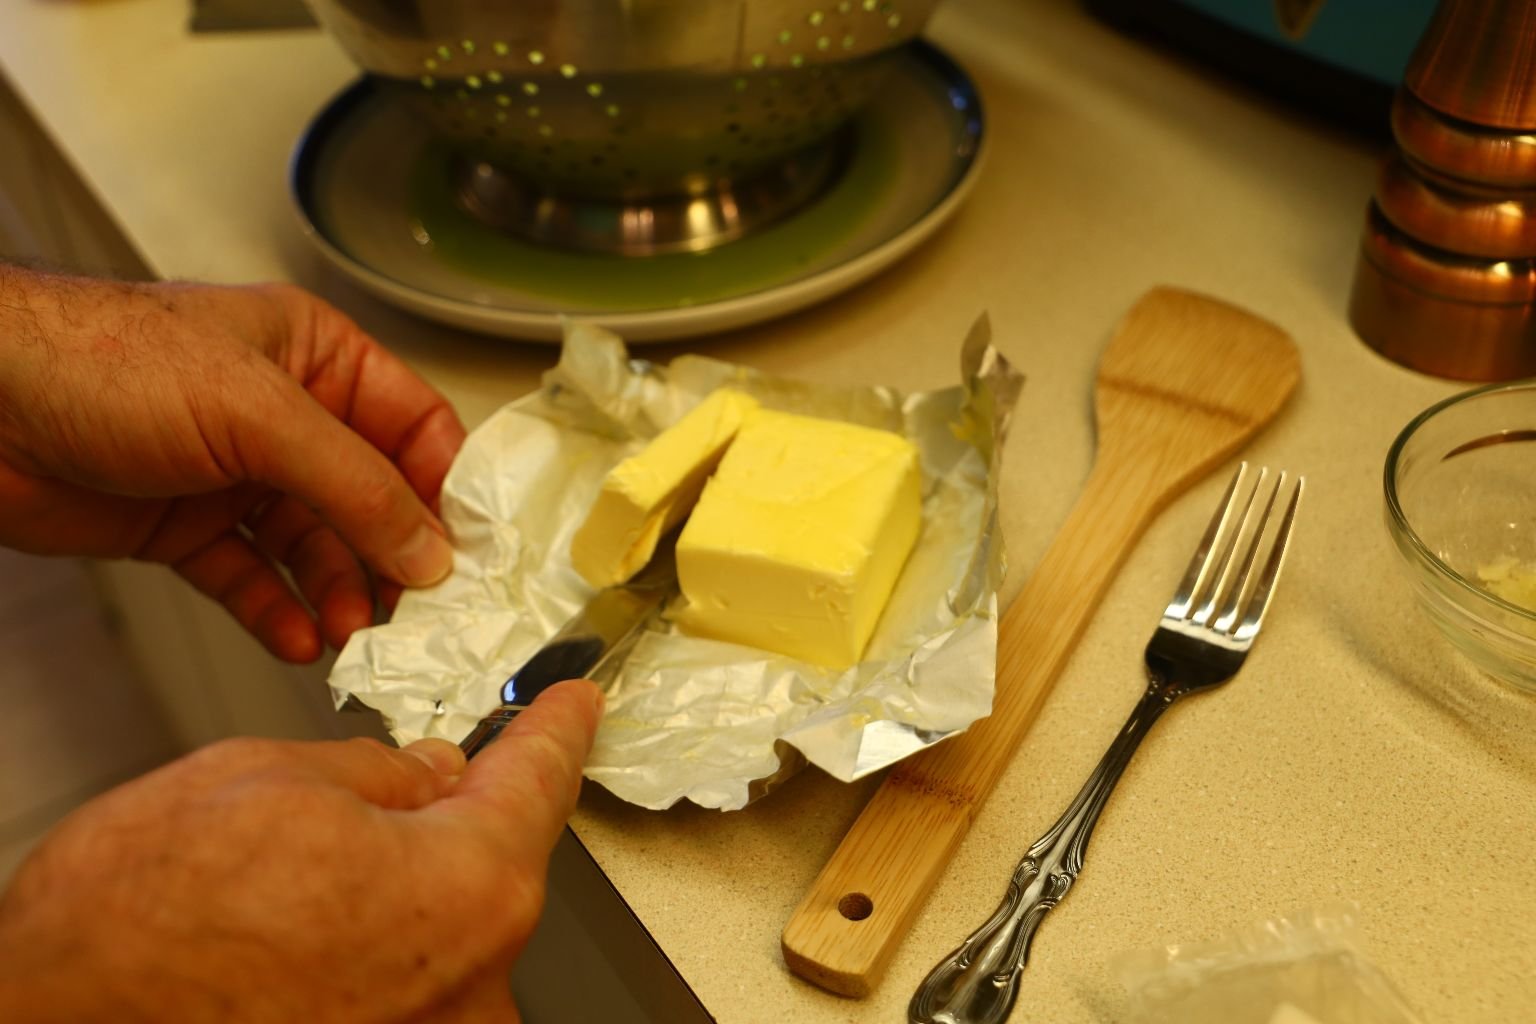
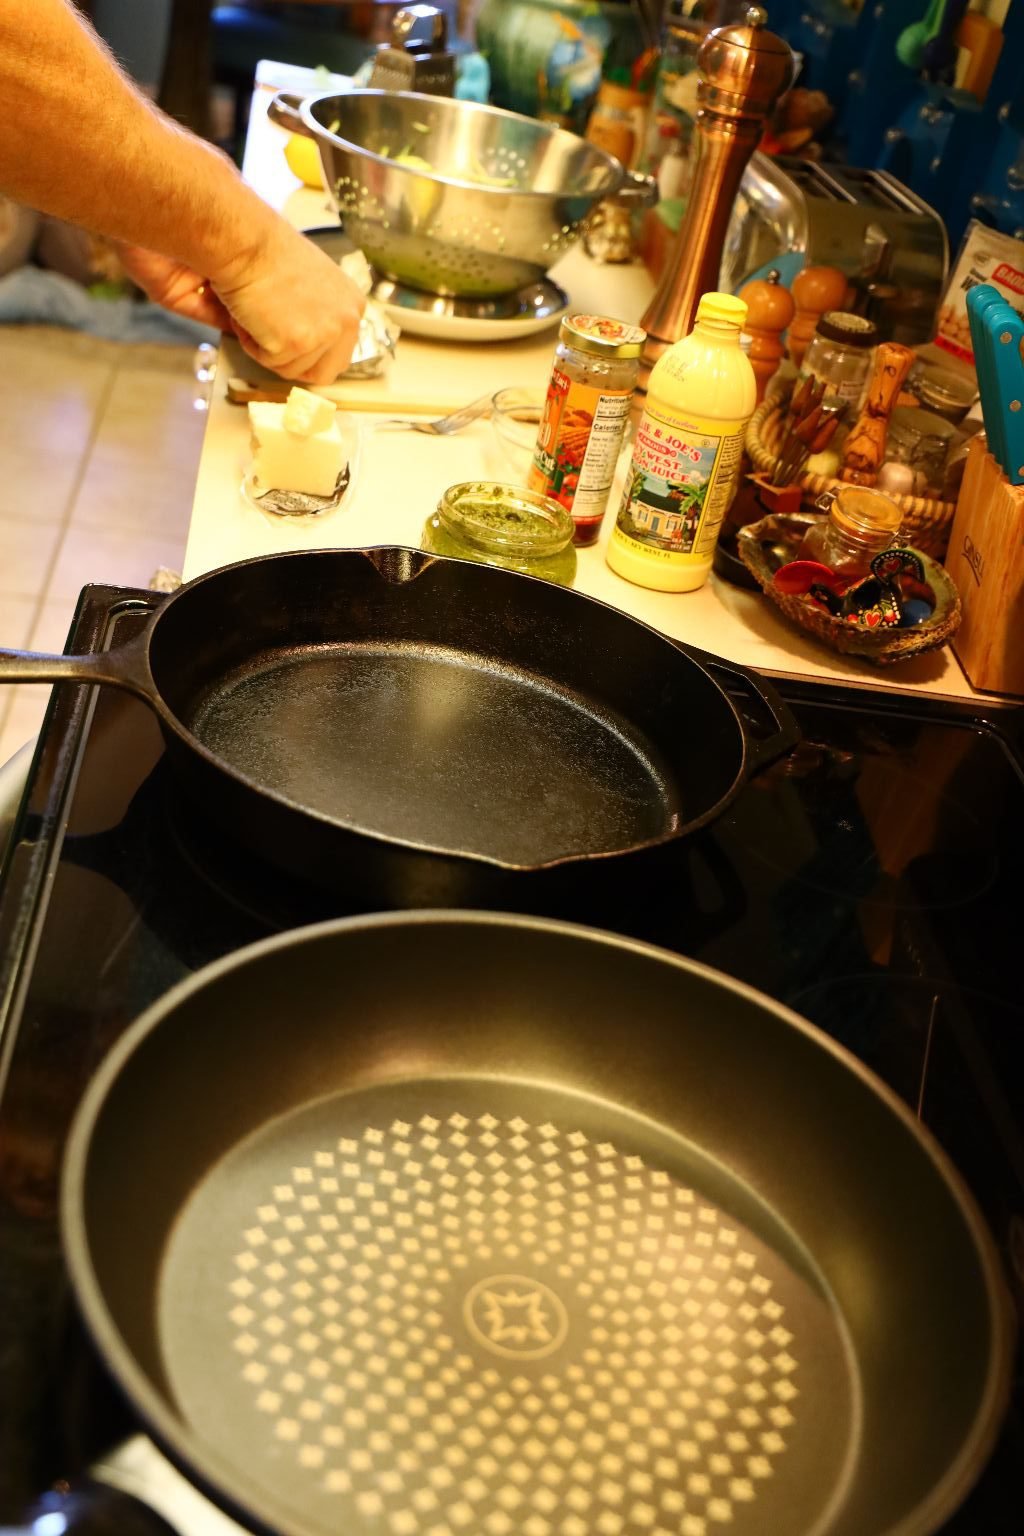
To cook the zucchini, start by adding about 4 Tbsp. of butter into a large saute pan heated to medium heat.
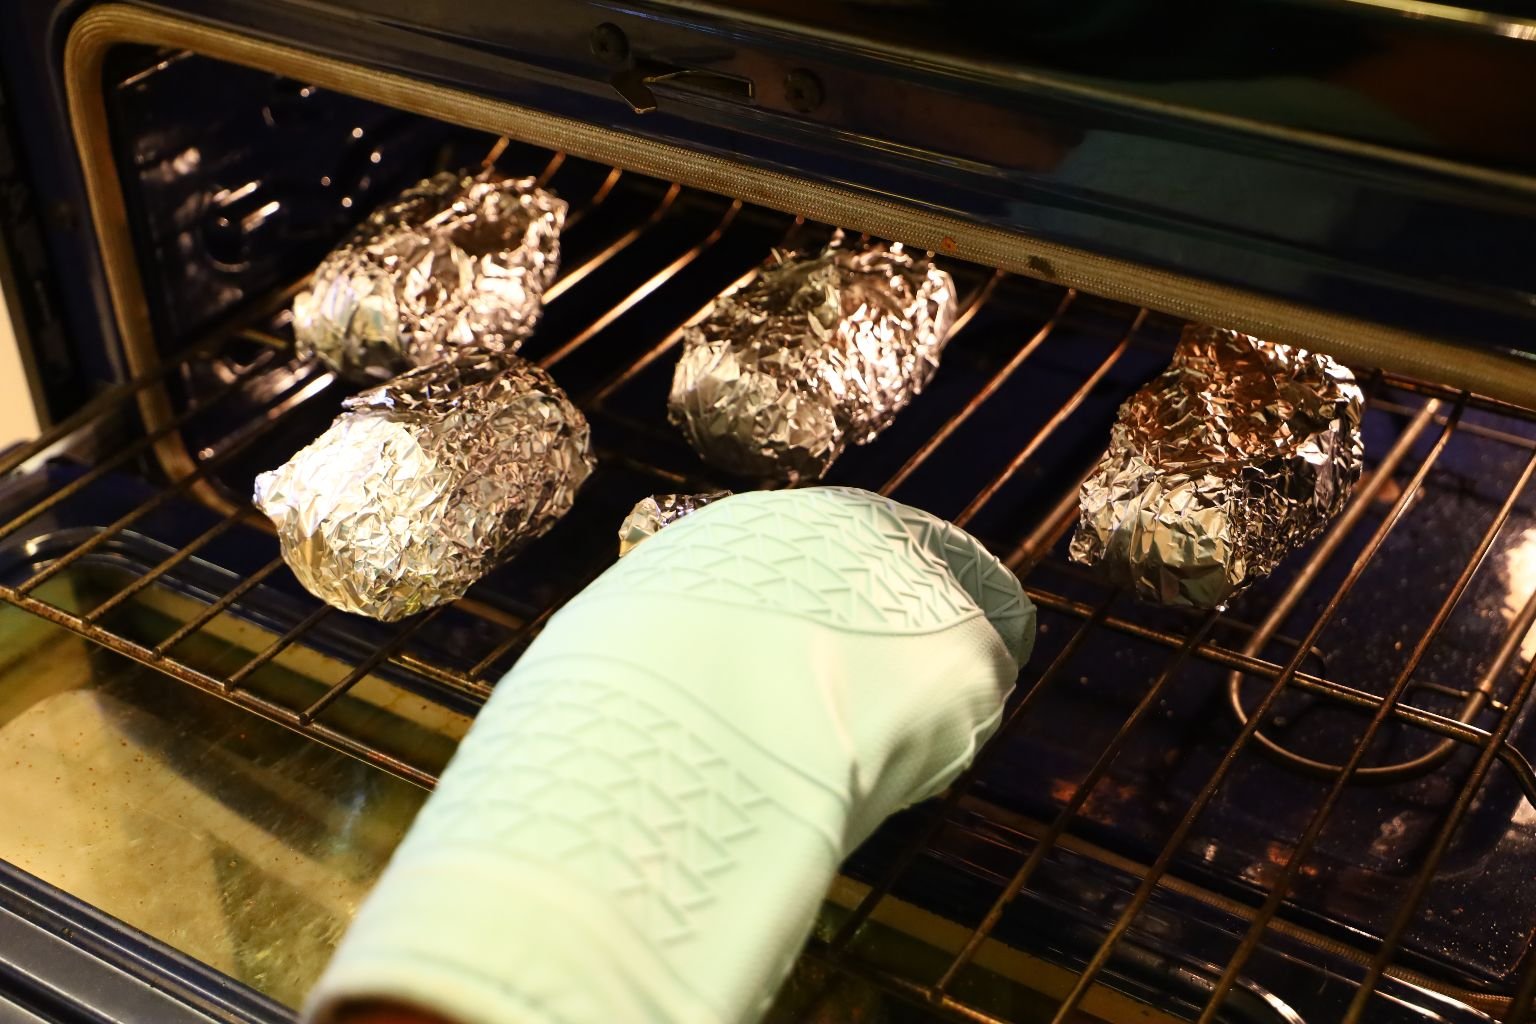
Here I am testing if the potato is done by squeezing it with my oven mitt. If you can crush the potato easily, it is done. These were not done, so back in the oven they go for a little longer.
Once the butter has melted…
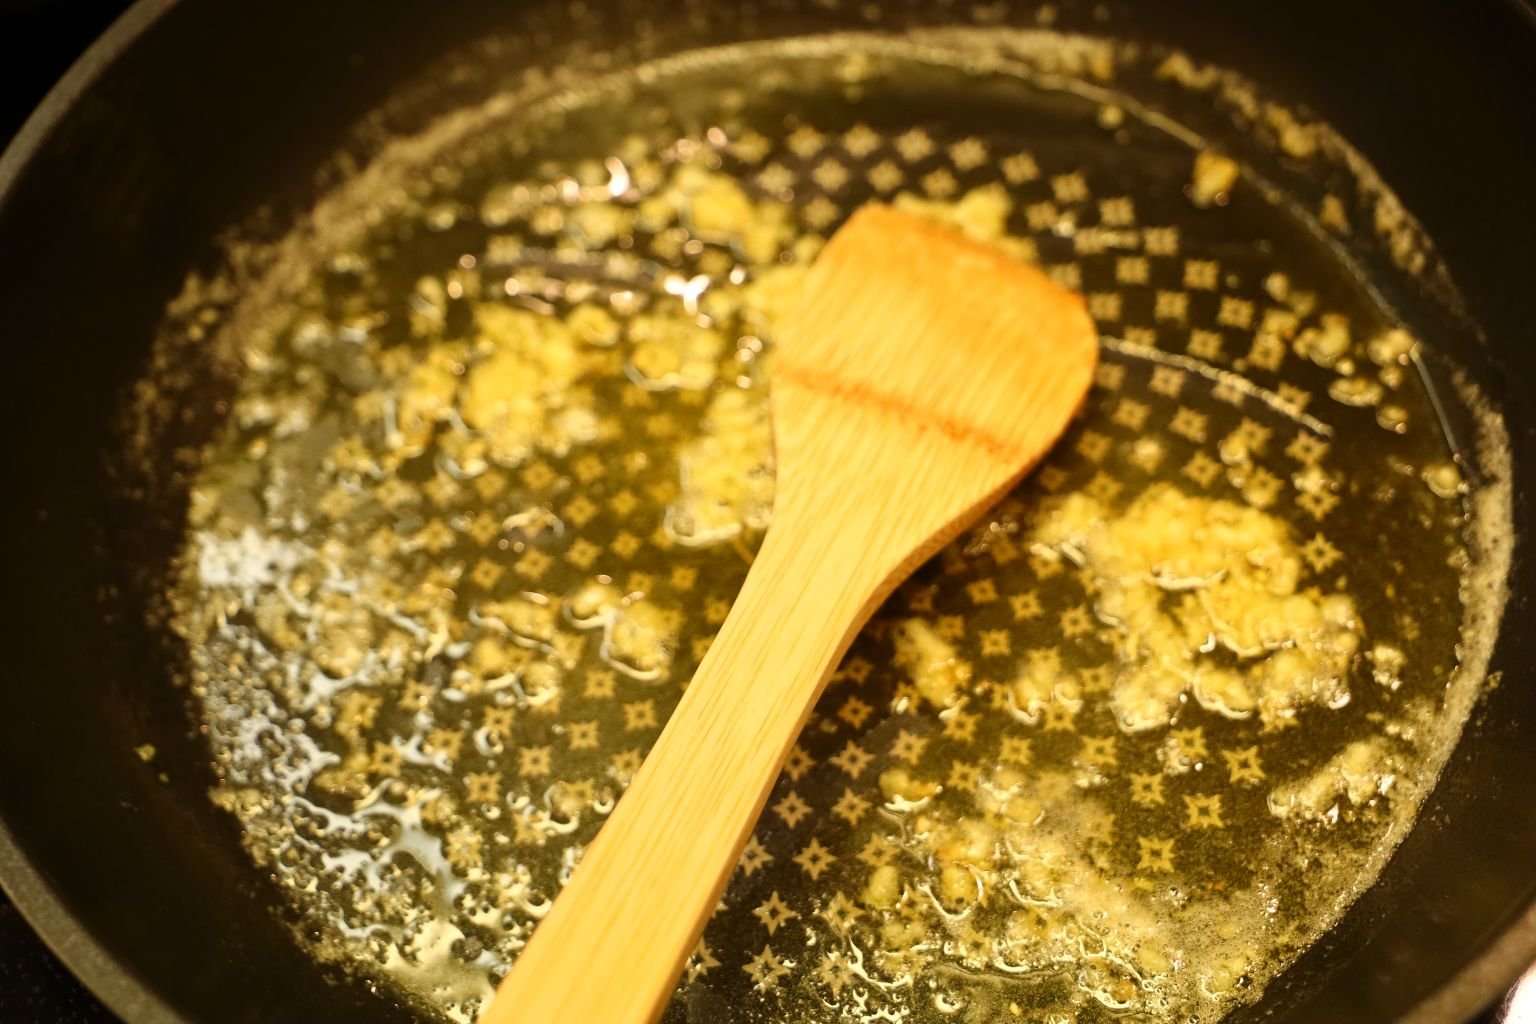
Add your garlic and begin to cook it.
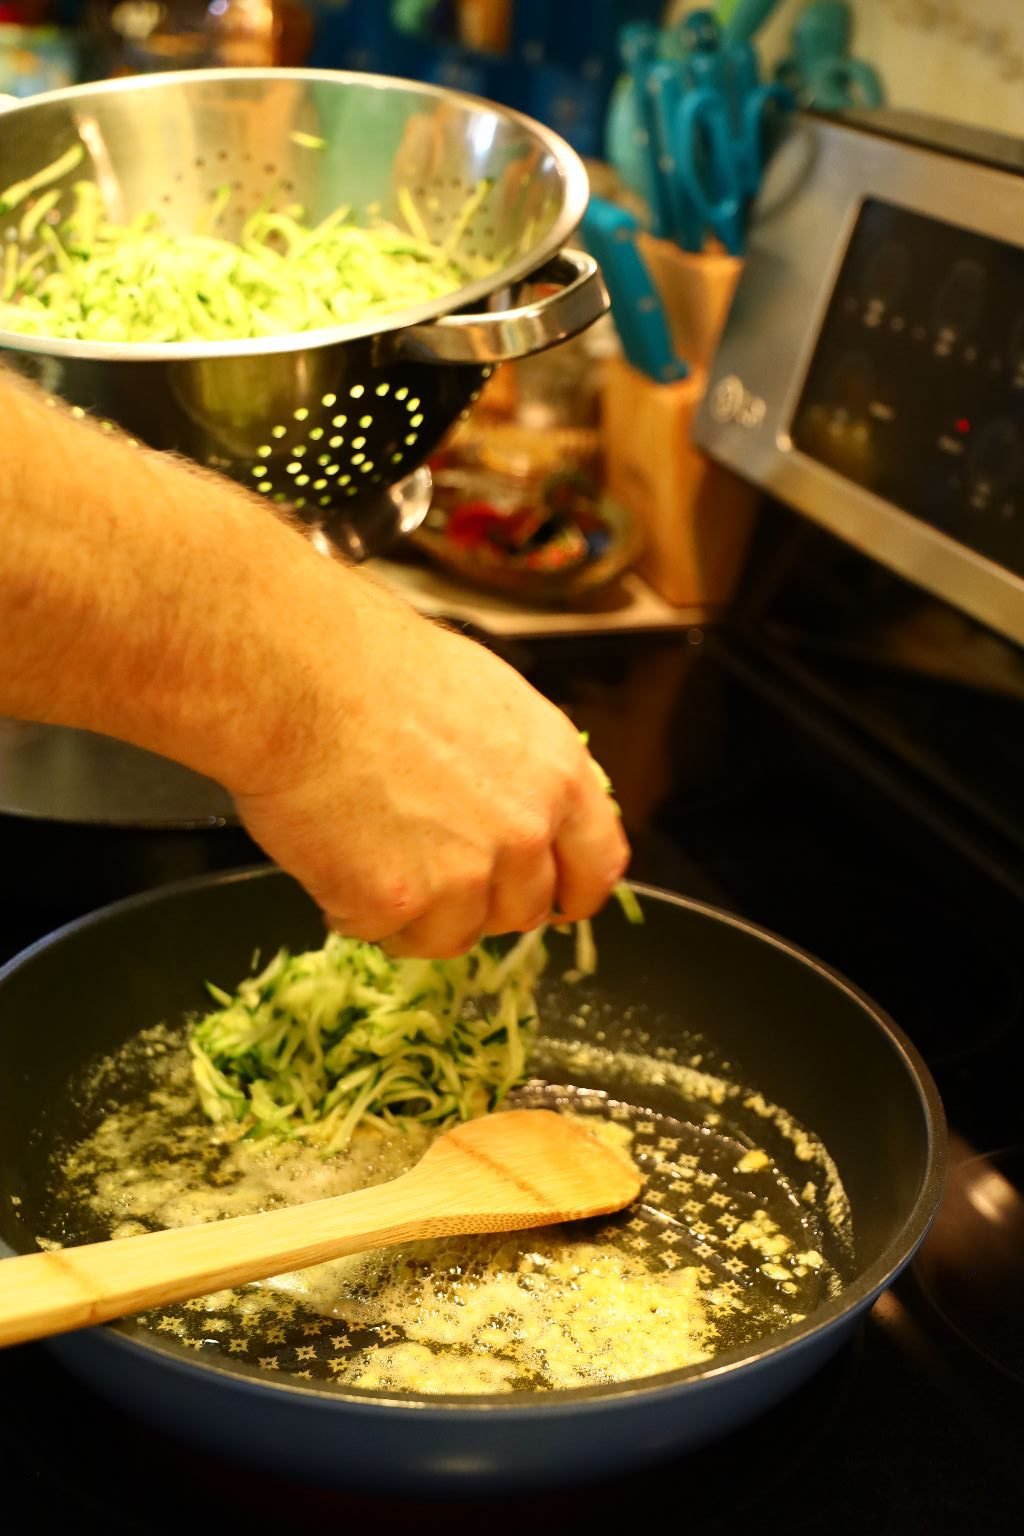
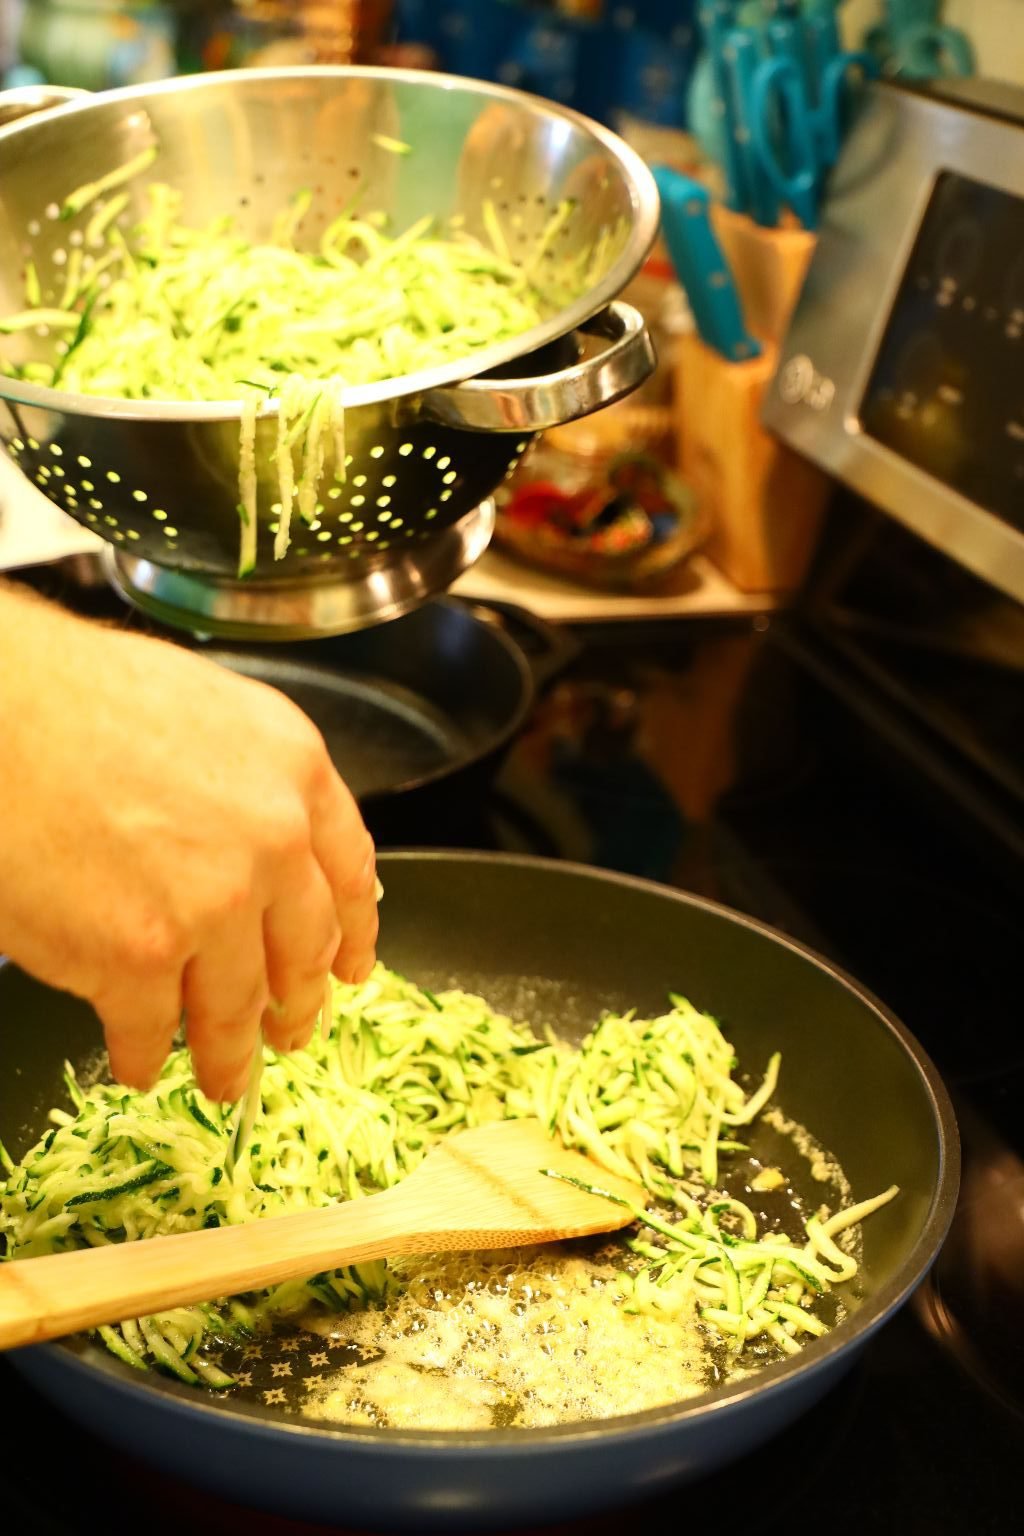
Once the garlic starts to brown, add your shredded zucchini.

Mix the ingredients together.
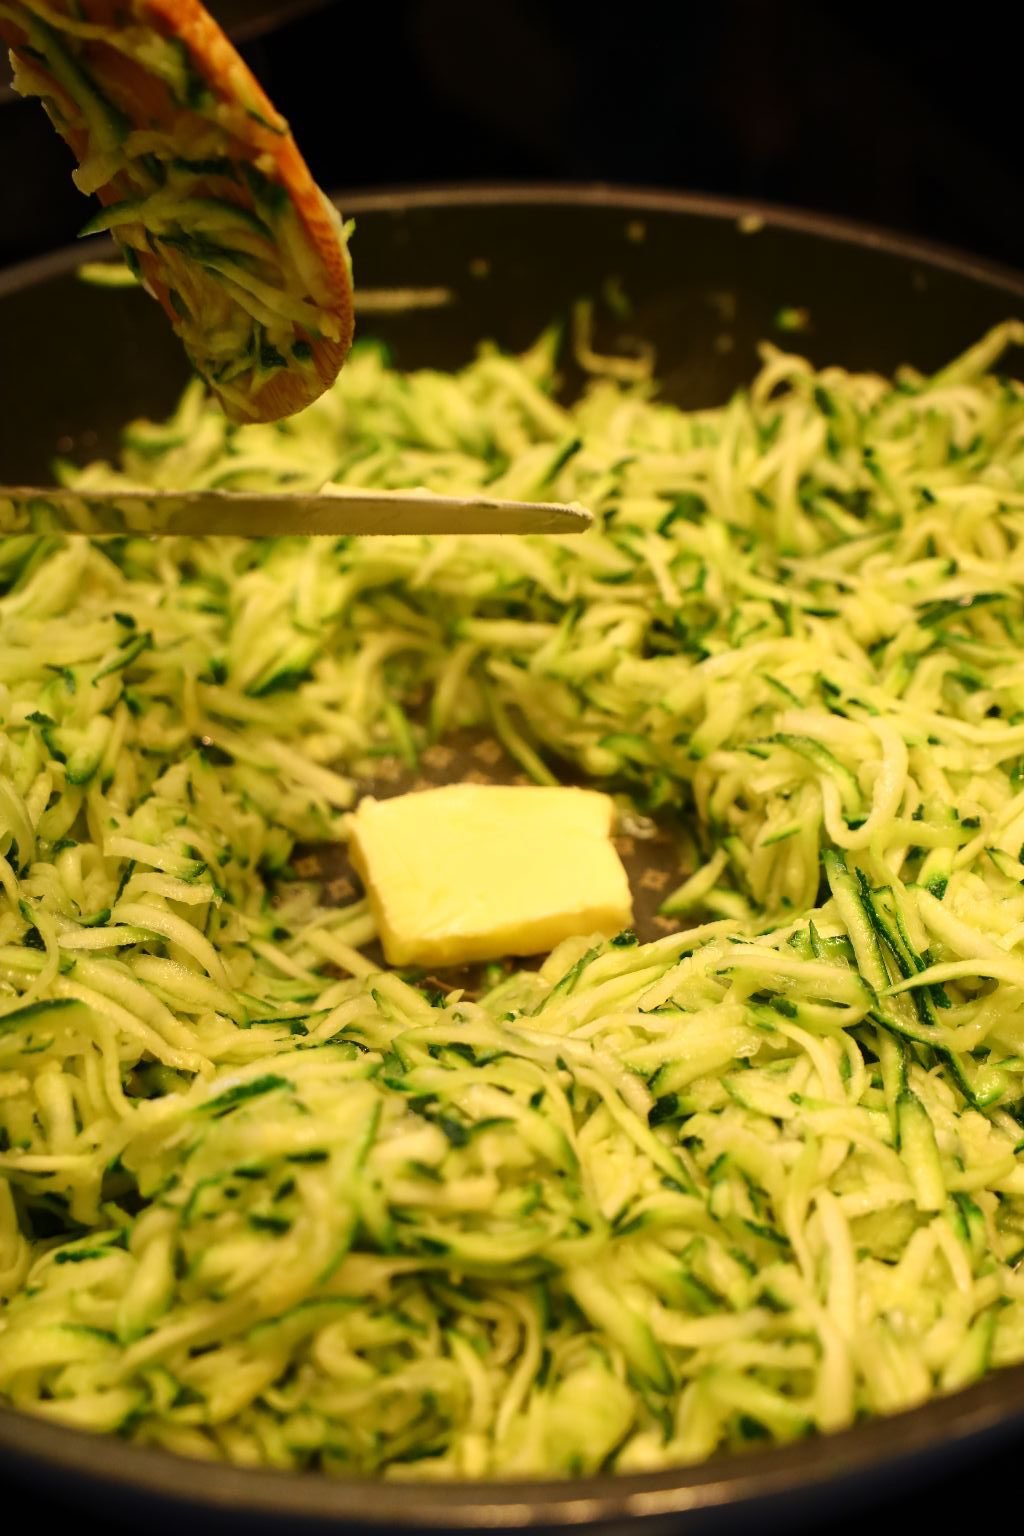
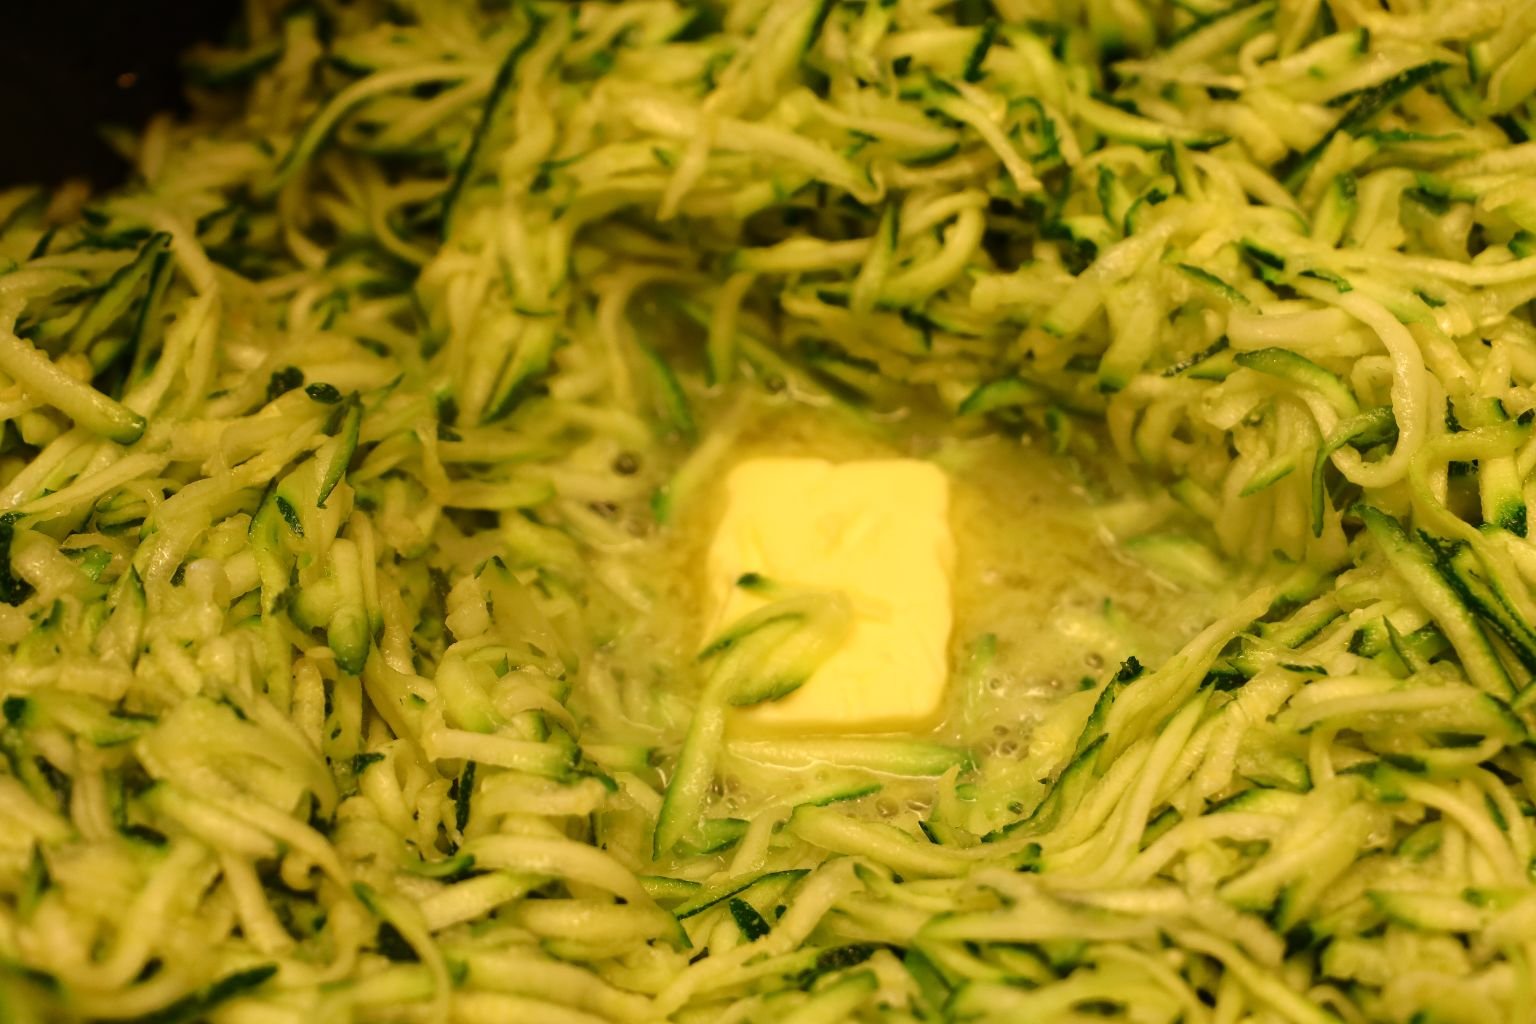
Add some more butter if you like… I like!
——————————————————————
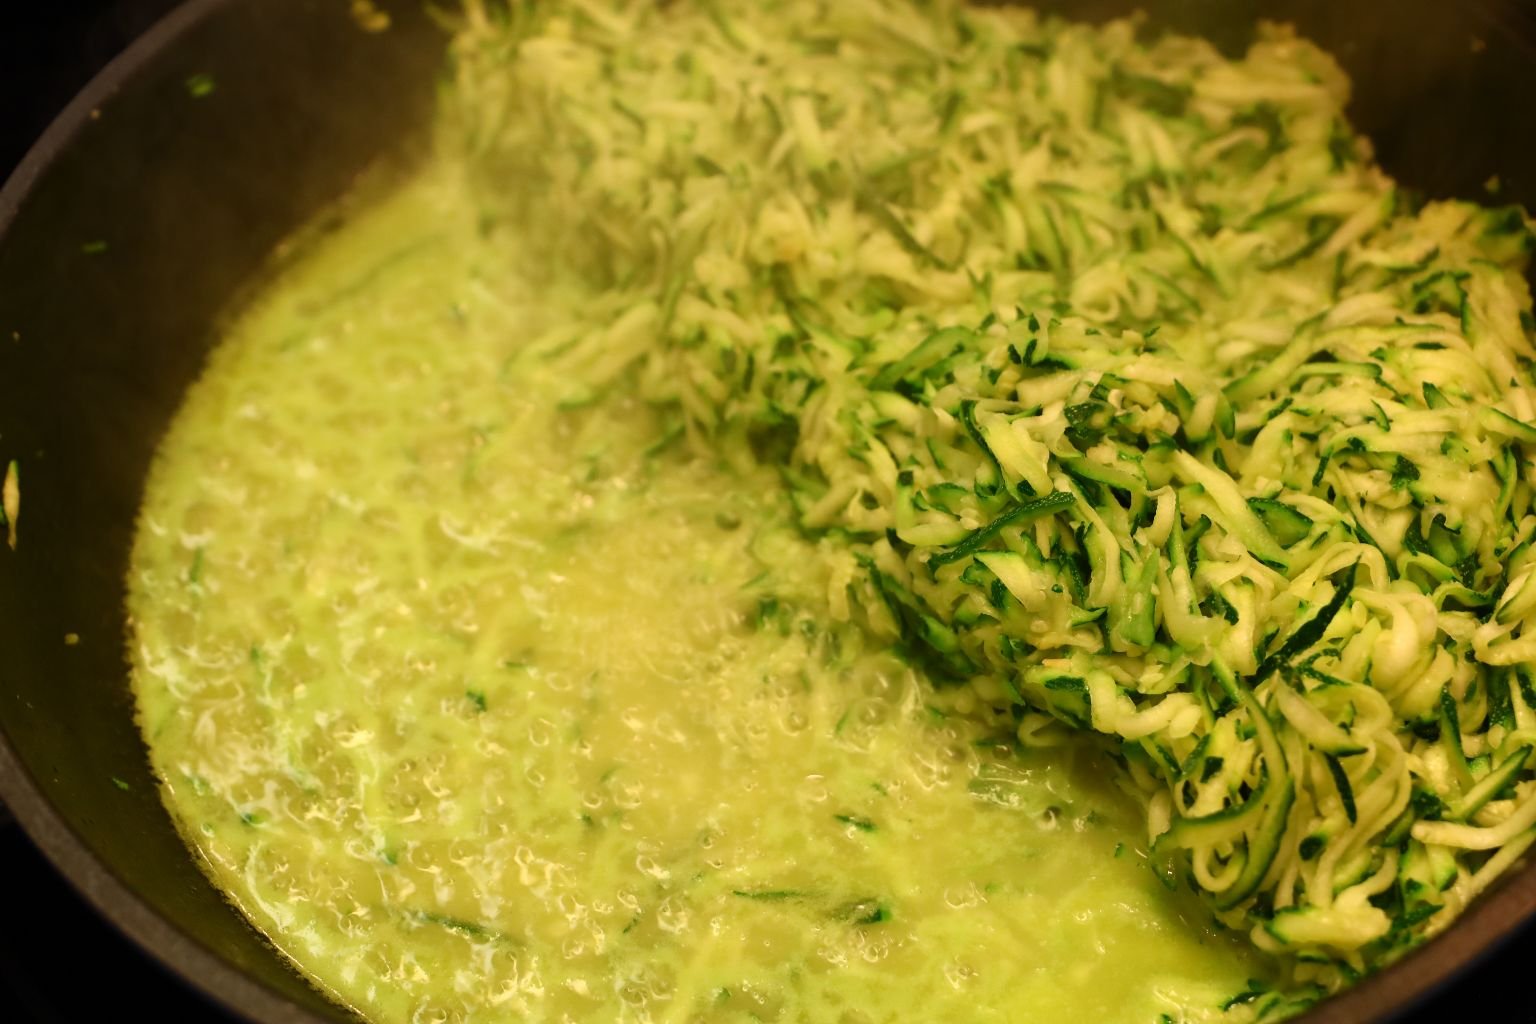
Here, I am about to drain the liquid from the pan as there is way too much to cook off. I use a splatter screen to do this as it doesn’t allow the garlic to pass through.
Turn the heat down to low and continue to saute the zucchini.
When the potato is crushed easily, it’s done! Let, them cool a bit, then unwrap them carefully and enjoy with butter, bacon, sour cream, chives, almost any cheese, etc.
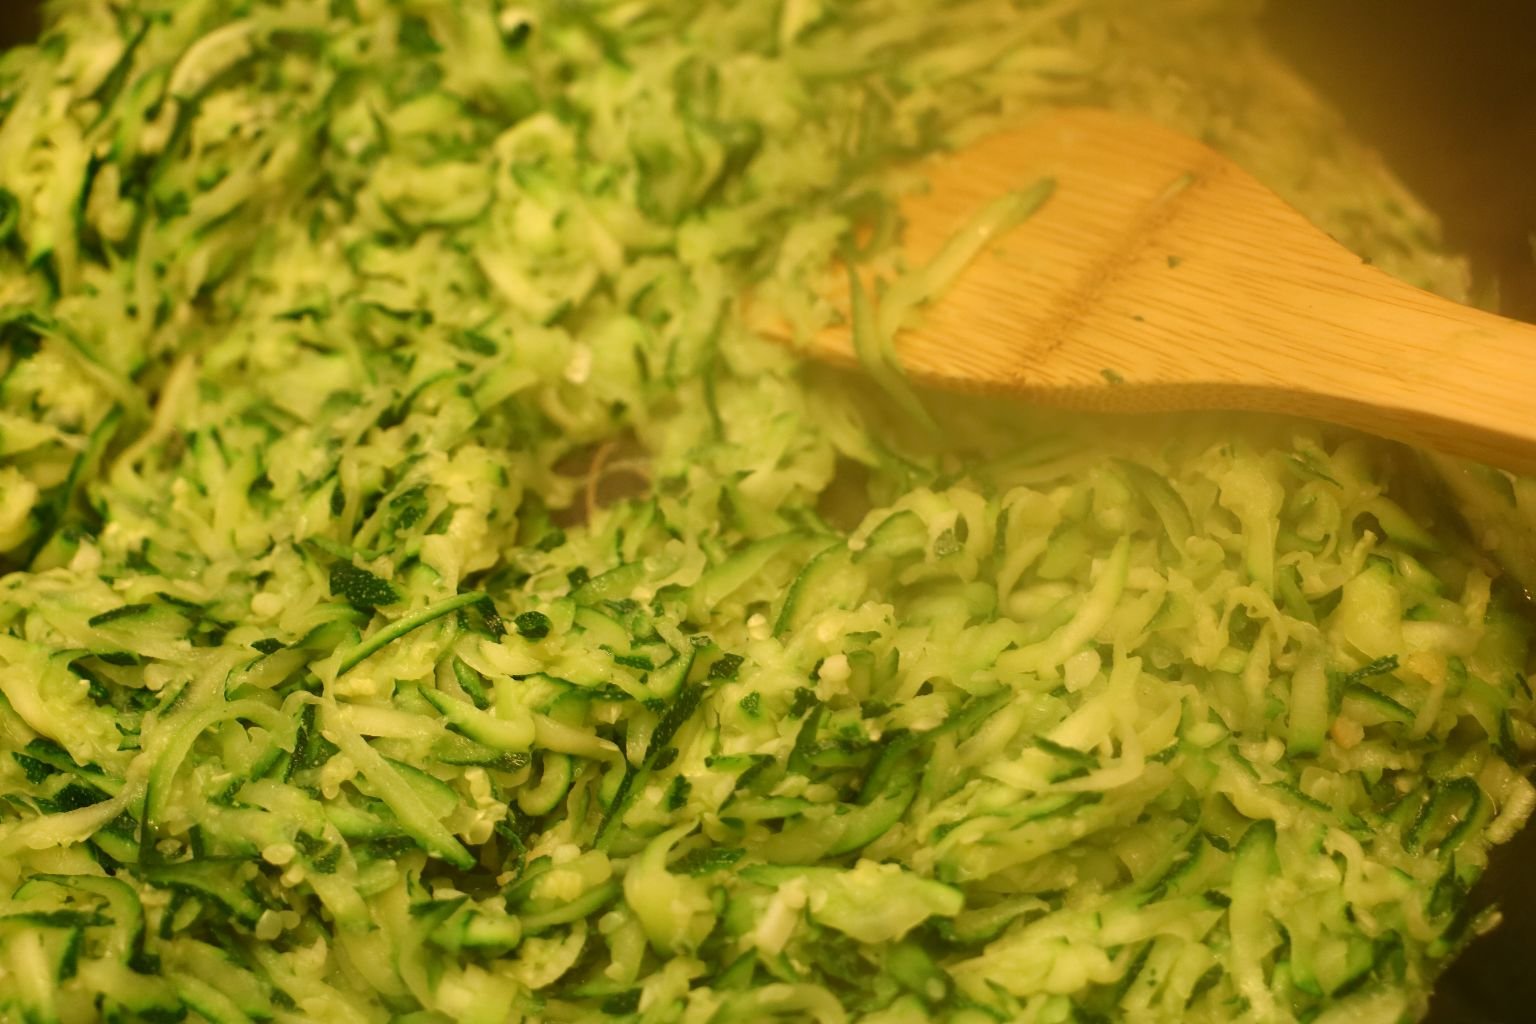
Meanwhile, continue to stir the zucchini removing more of the liquid.
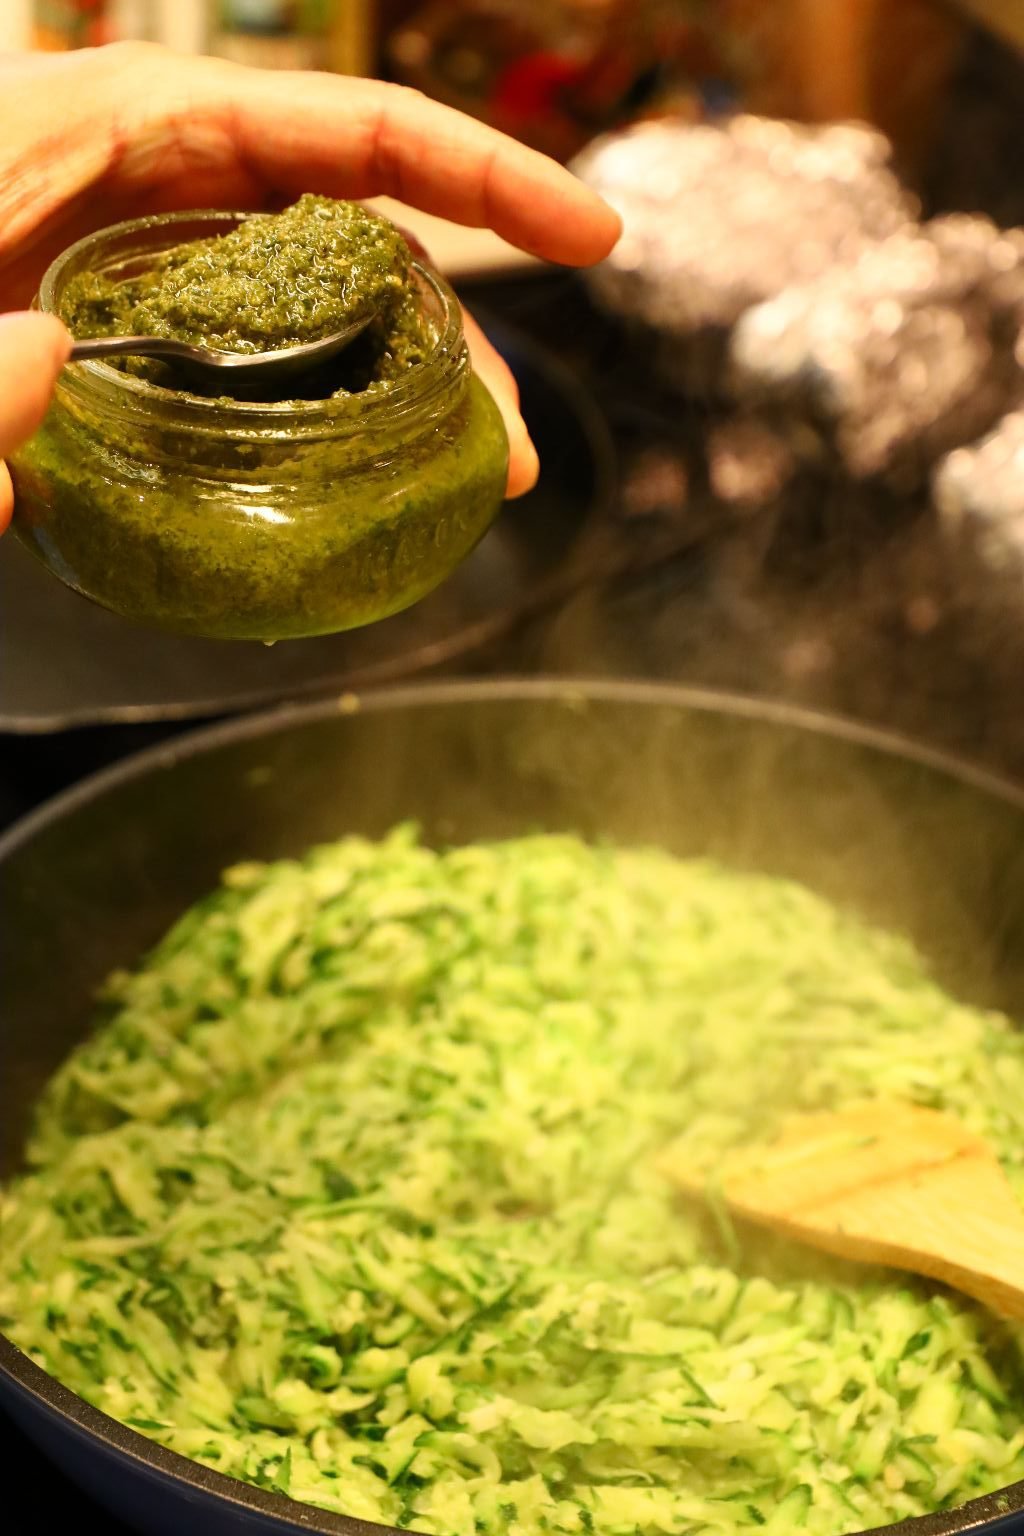
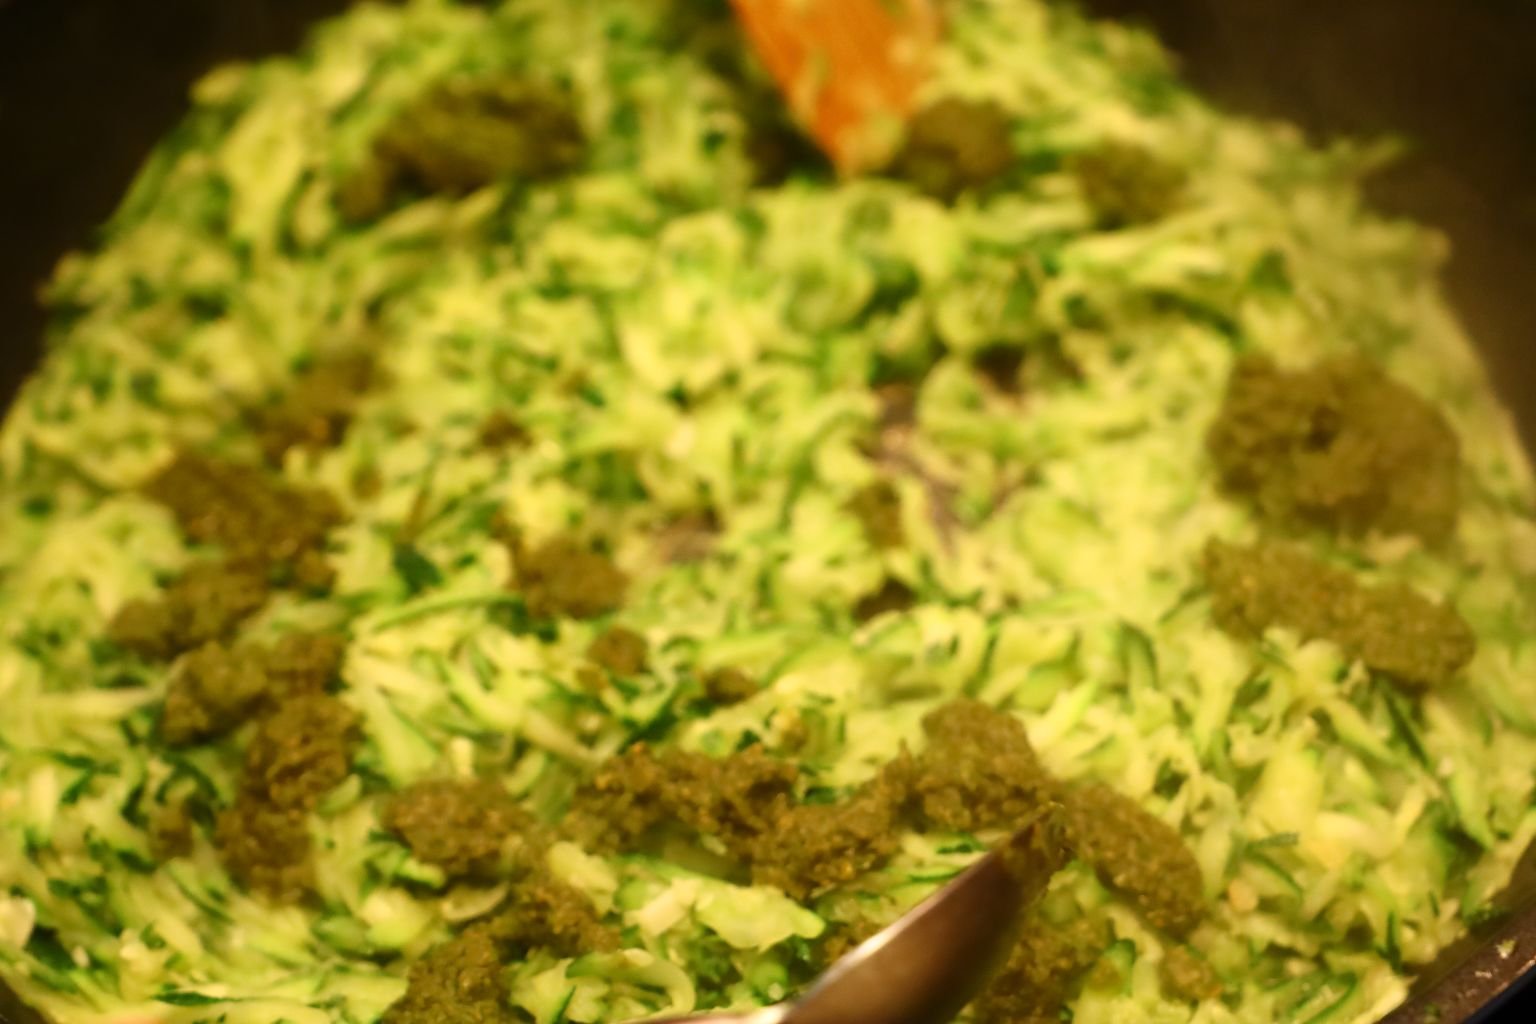
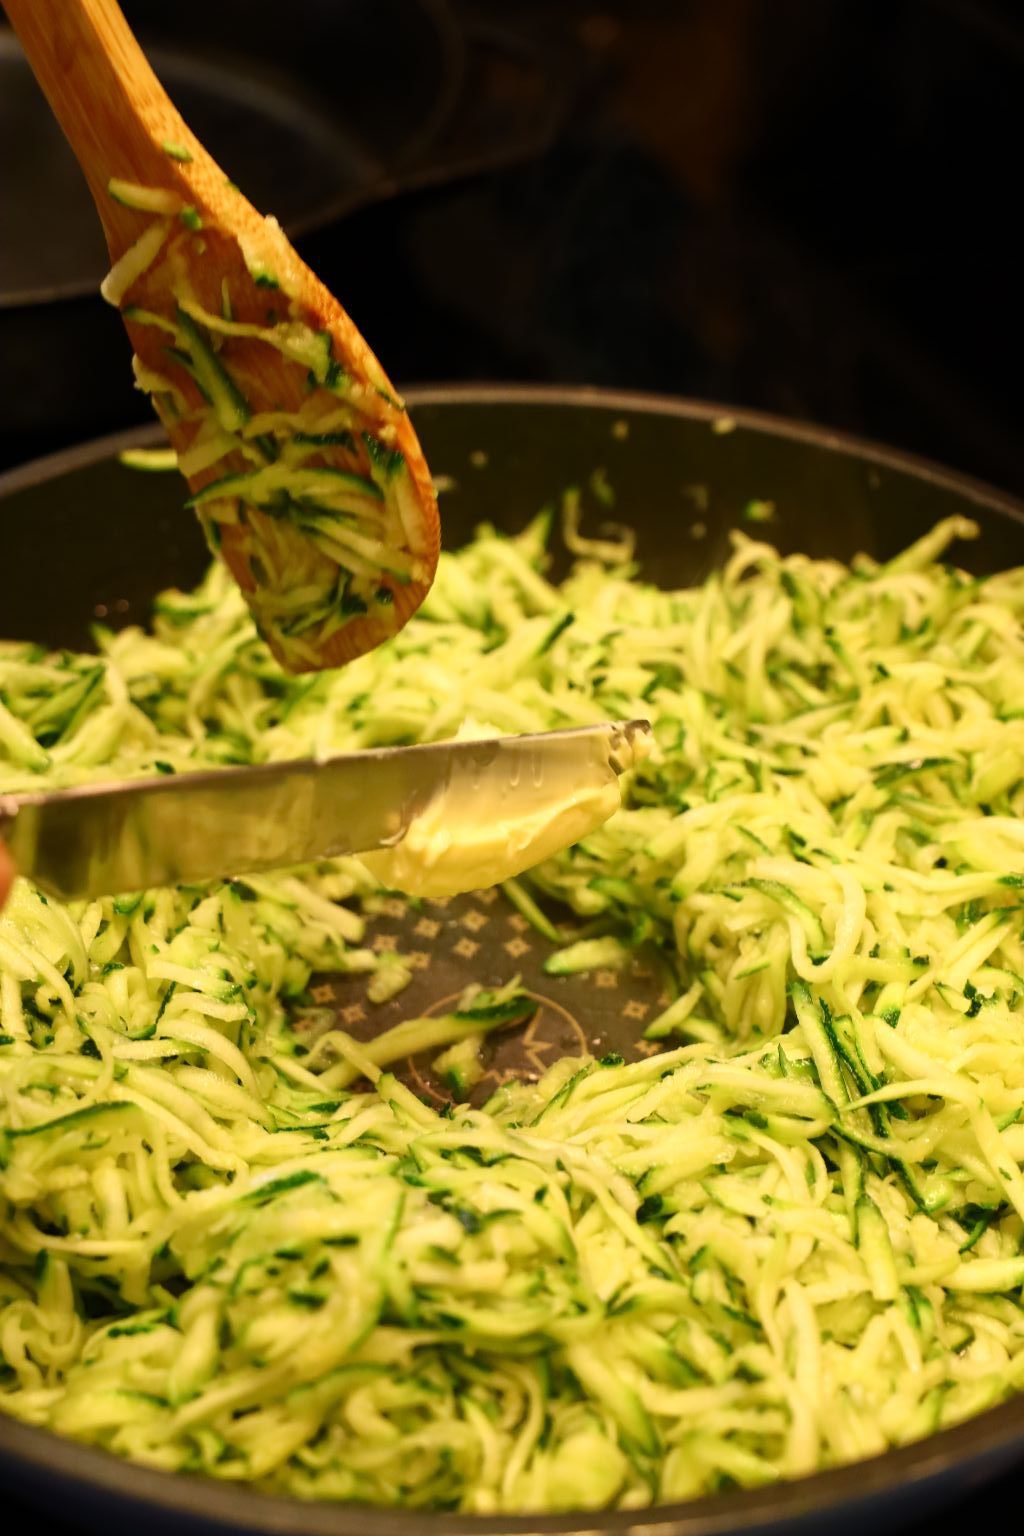
Now, spoon your pesto into the zucchini…
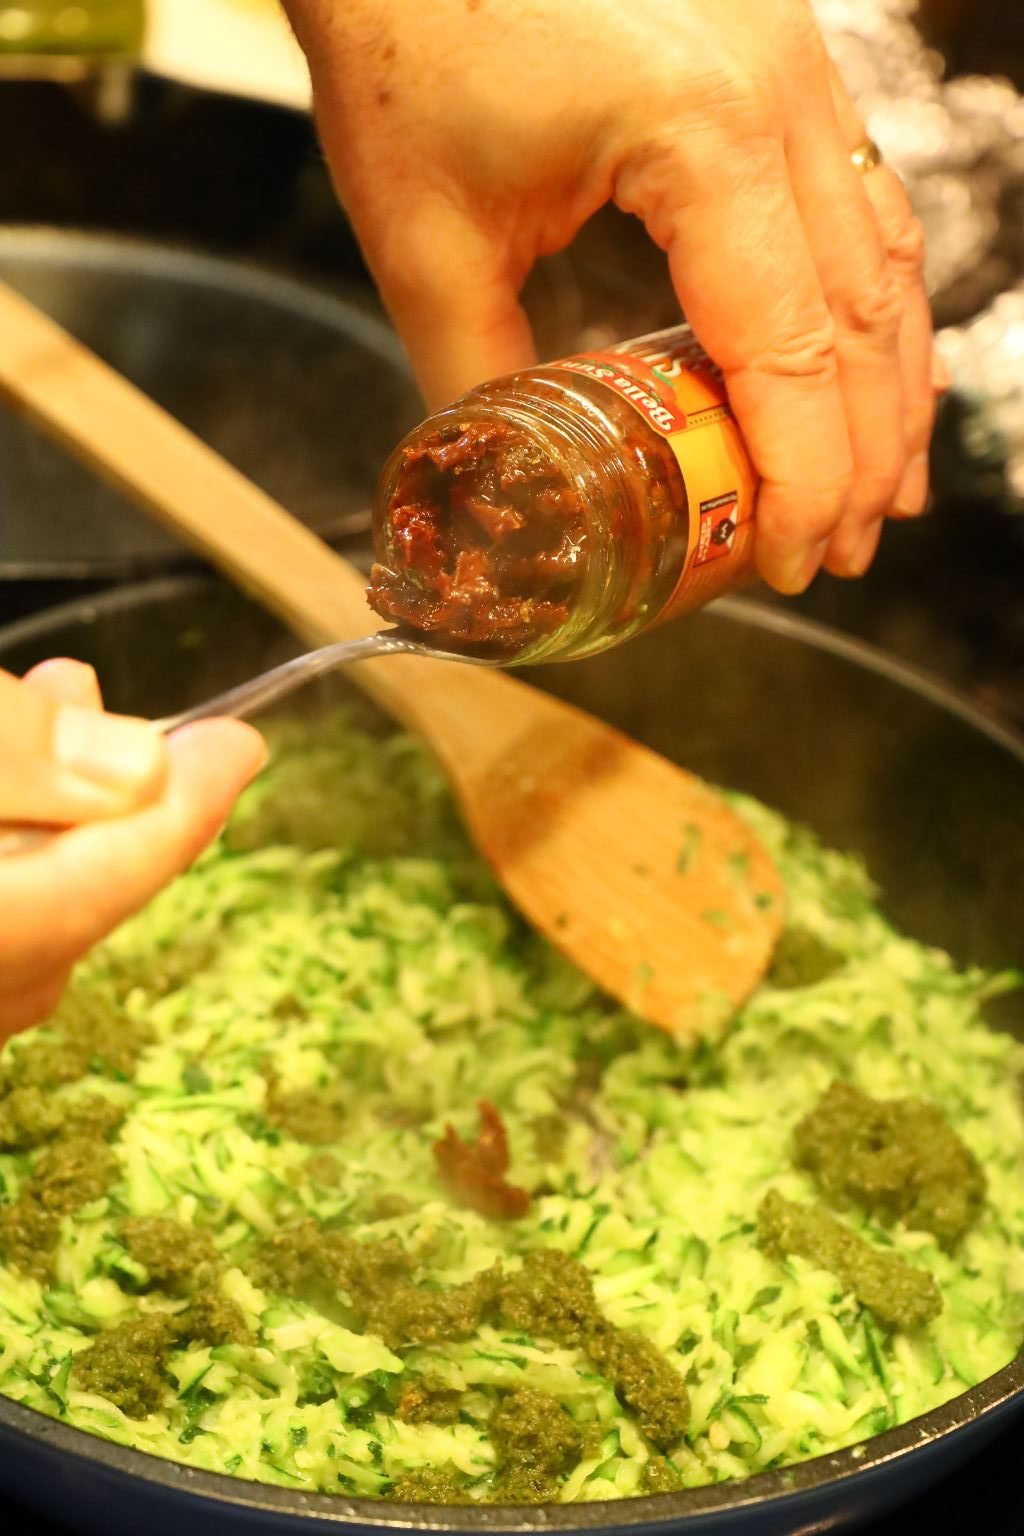

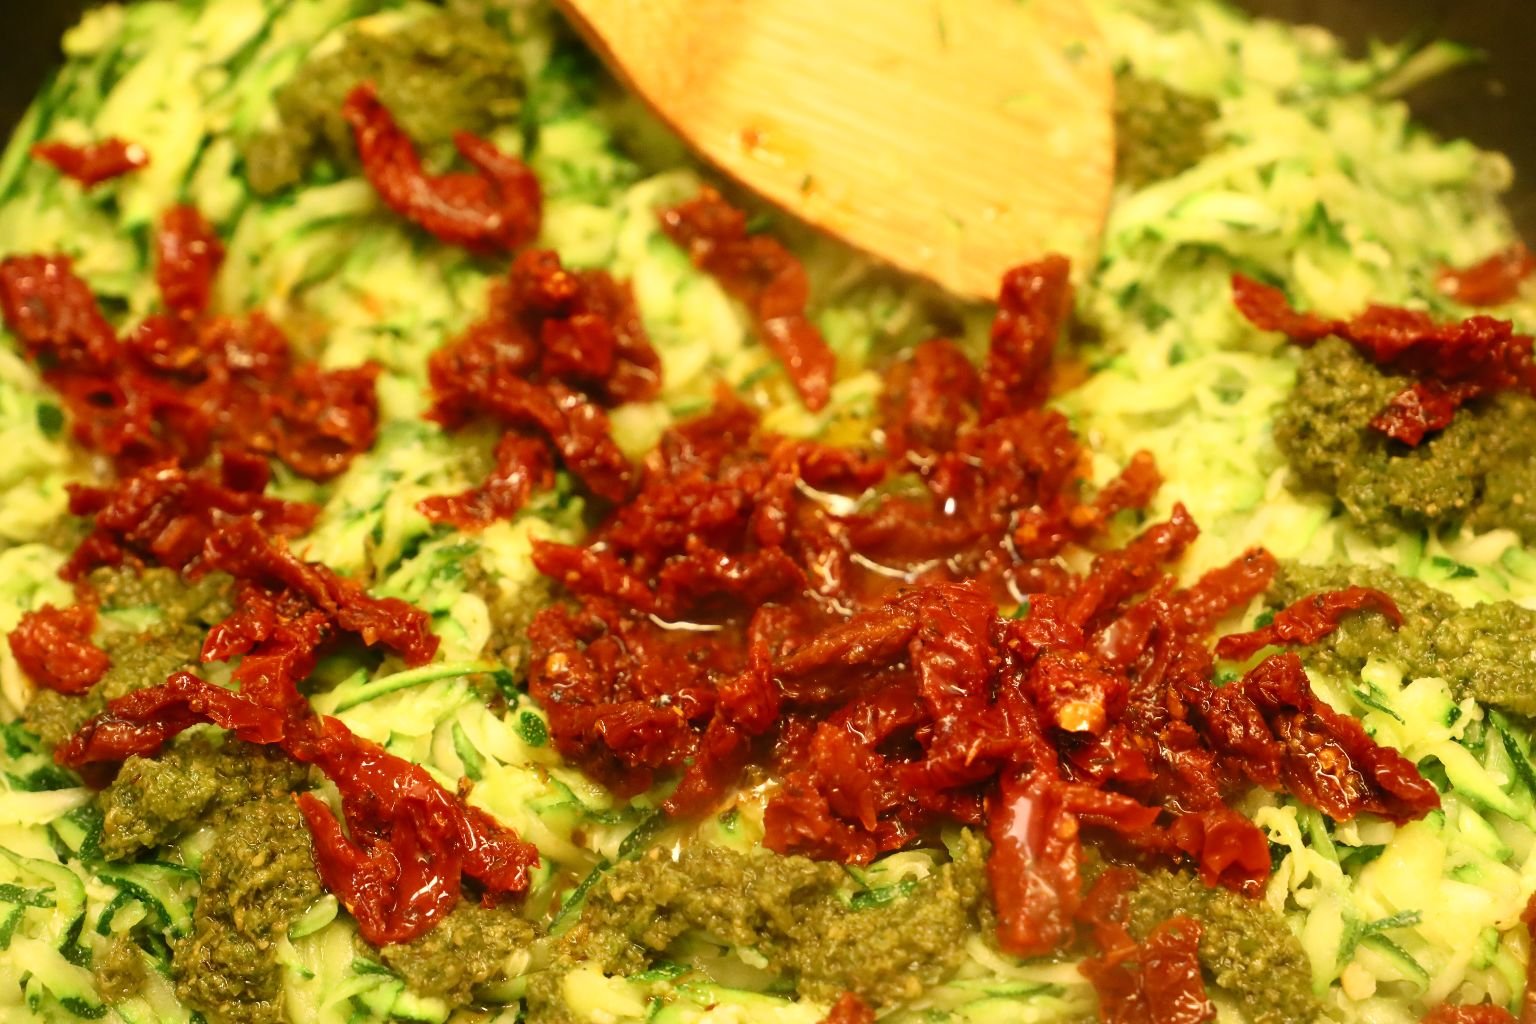
then place your Julienne sliced sun-dried tomatoes in the mixture.
—————————————————————
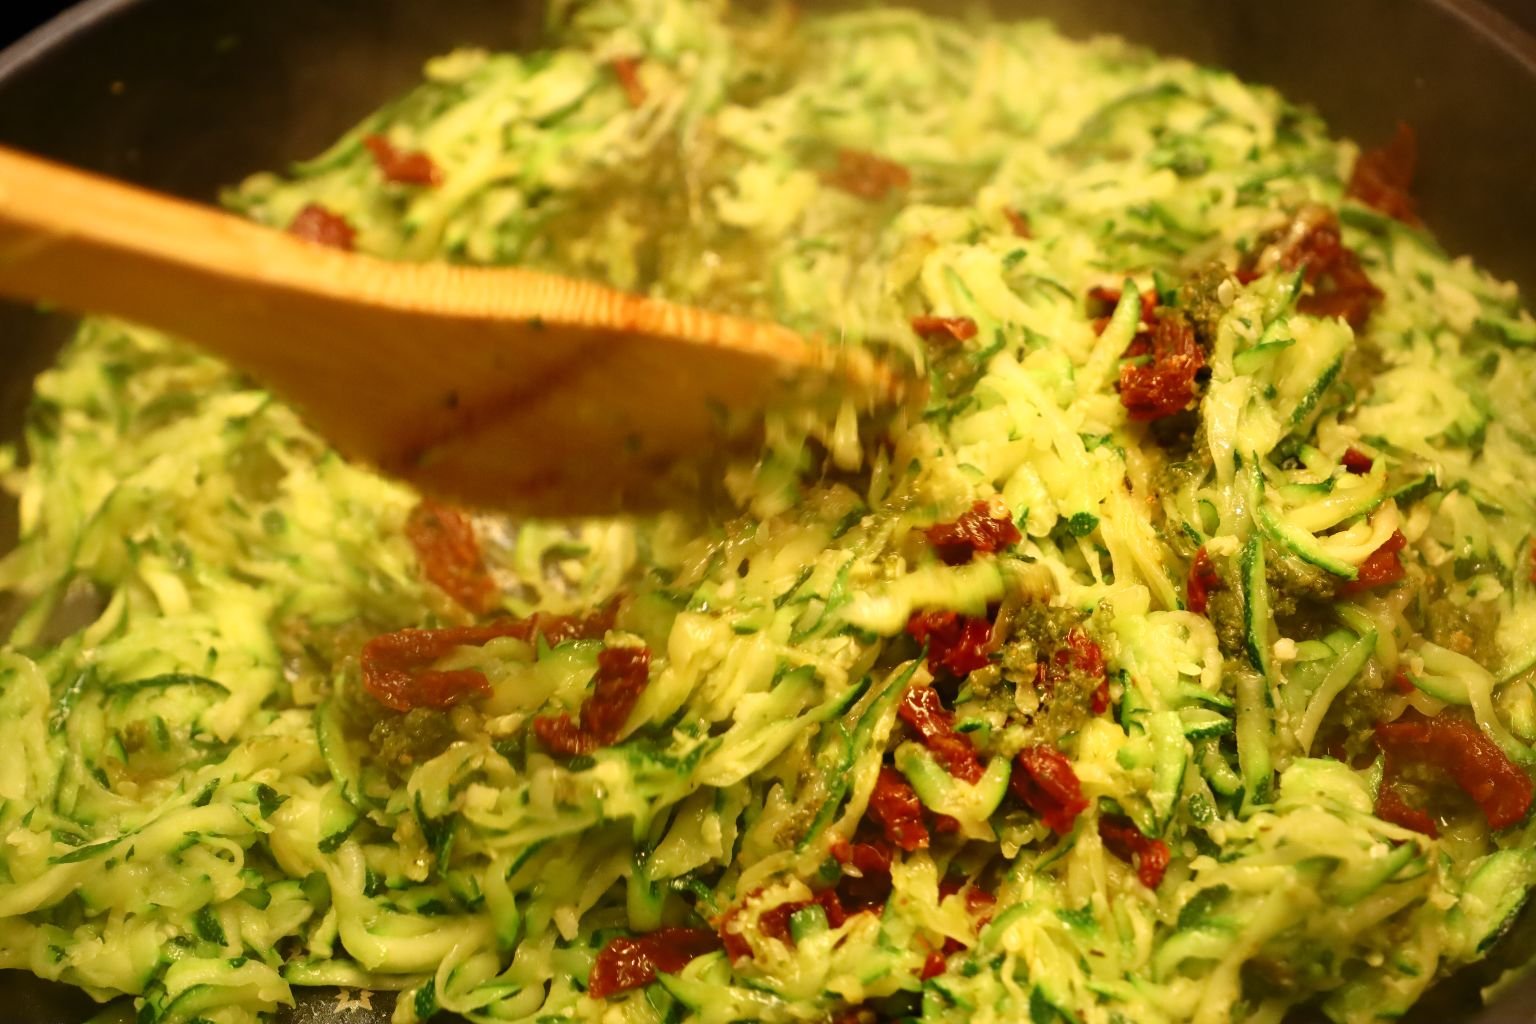
Mix all the ingredients together and turn the heat down to low.
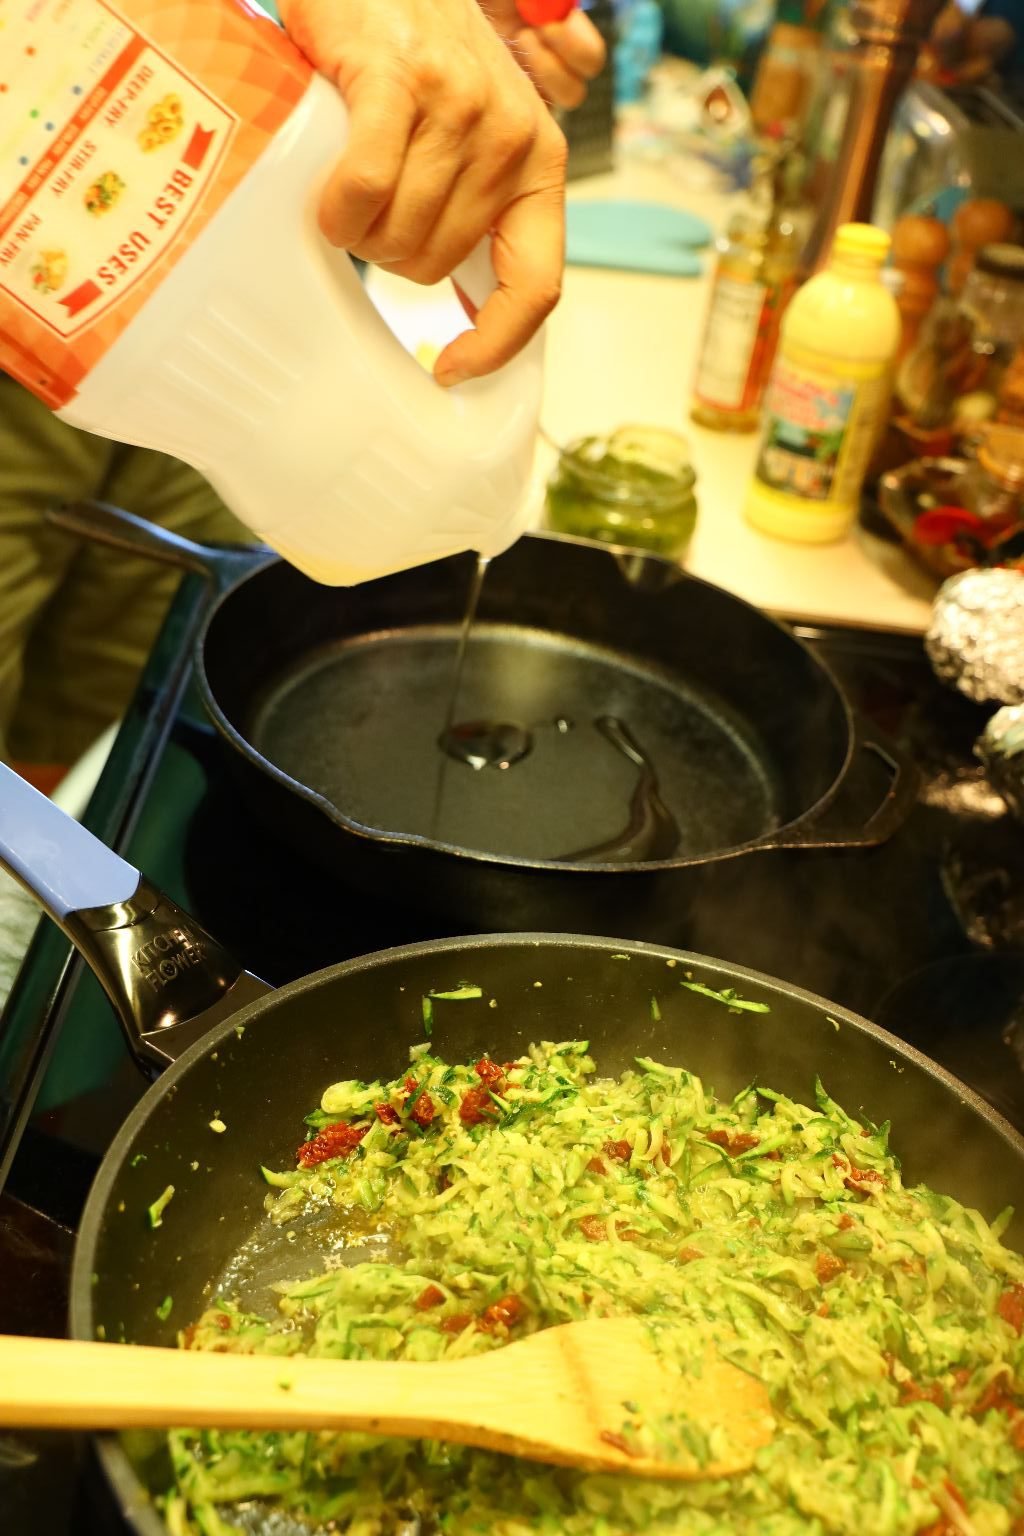
In a cast iron skillet, add a few Tbsp. of Peanut oil and heat to medium high.
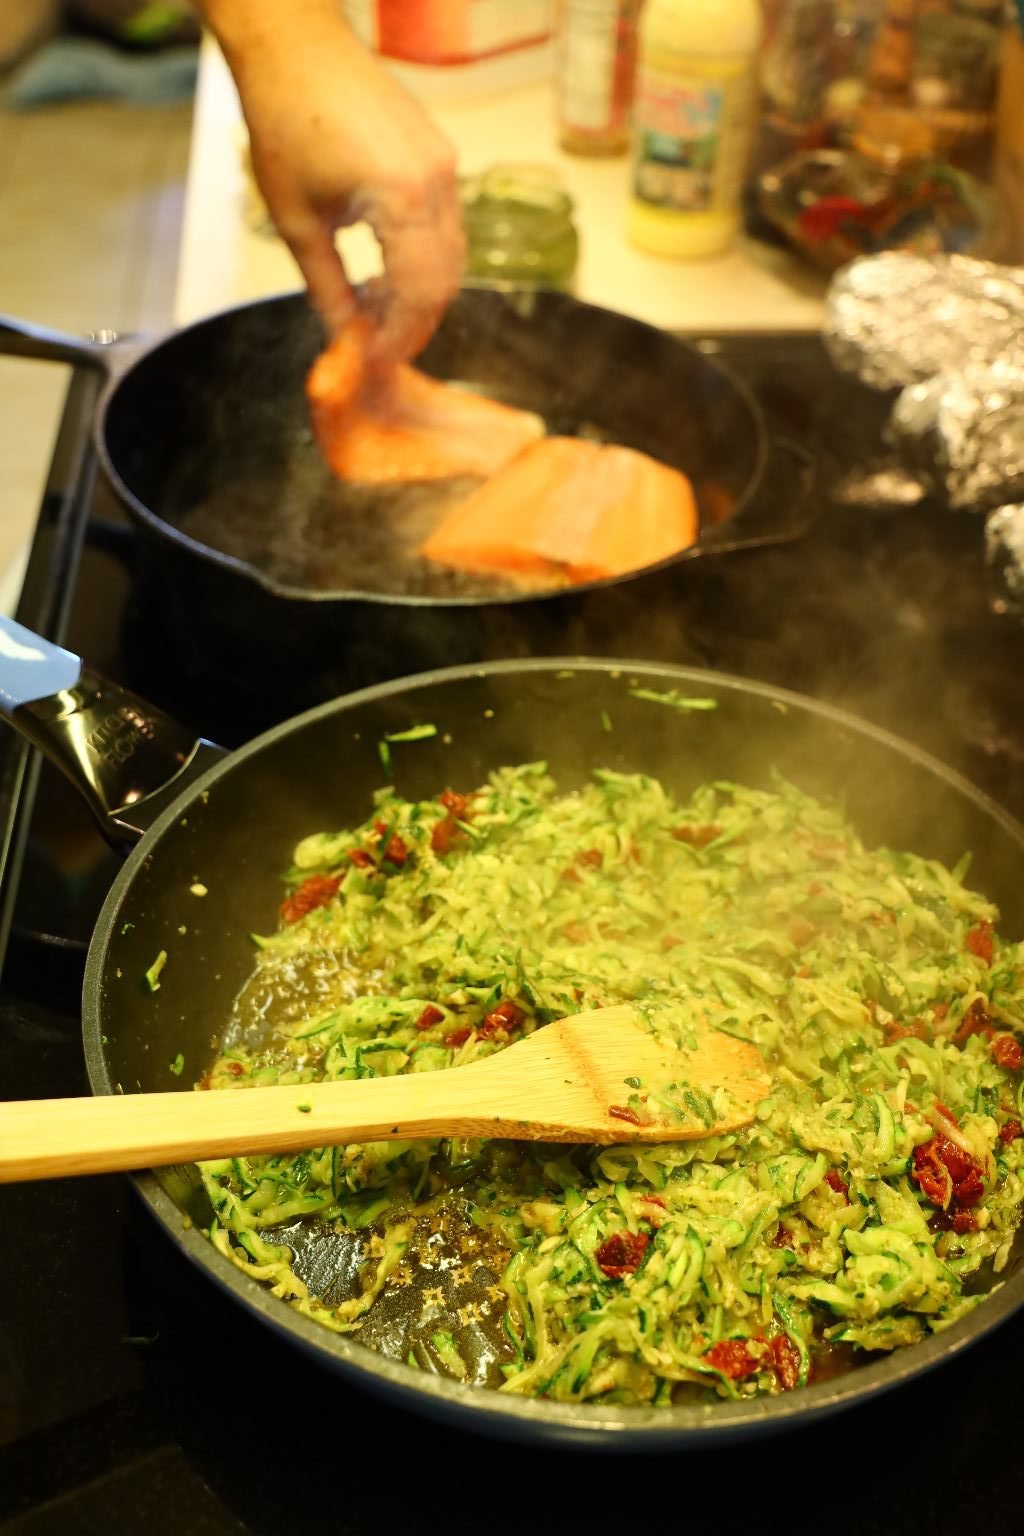
When the oil is at temperature, add your salmon fillets seasoned side down.

Continue to stir your zucchini…
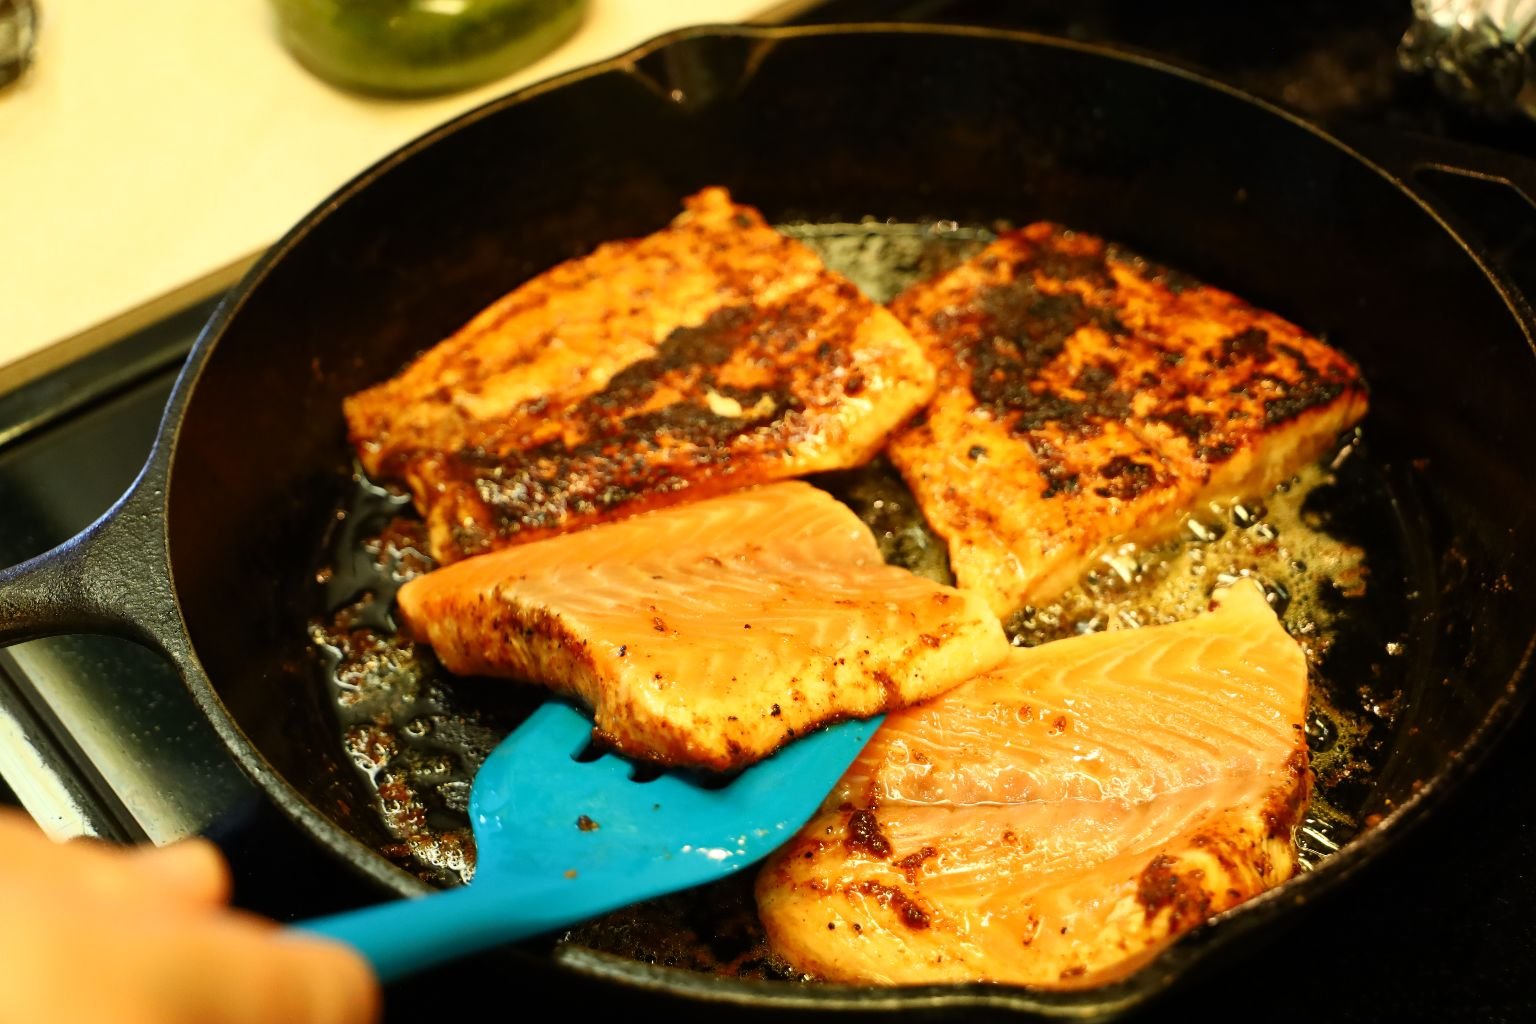
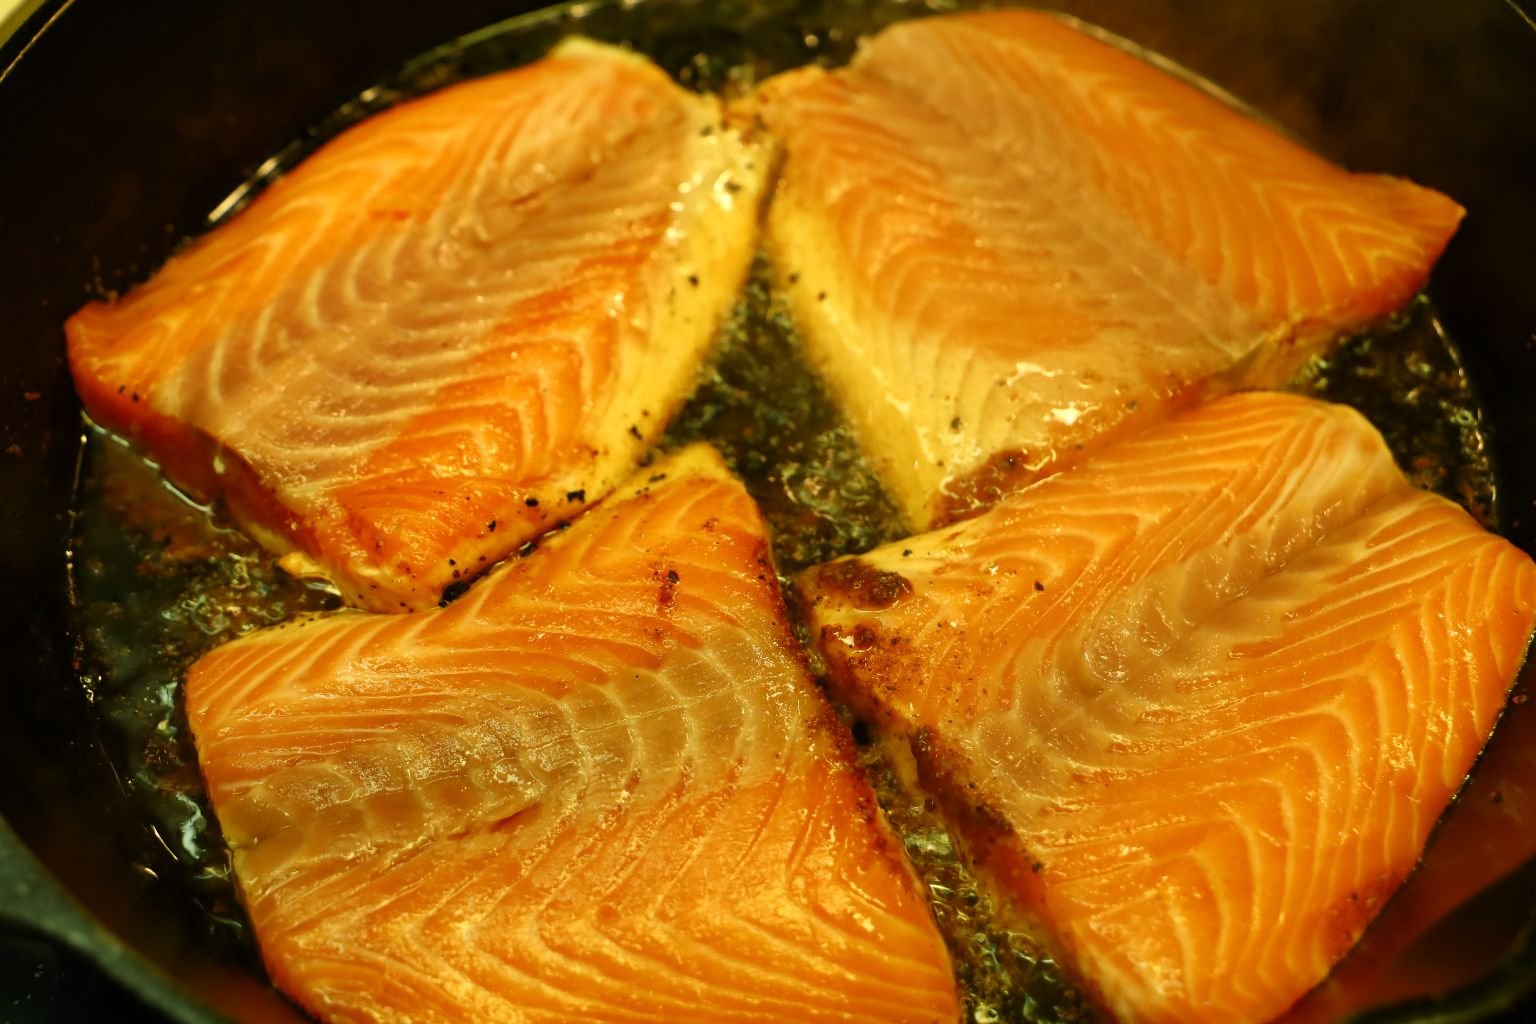
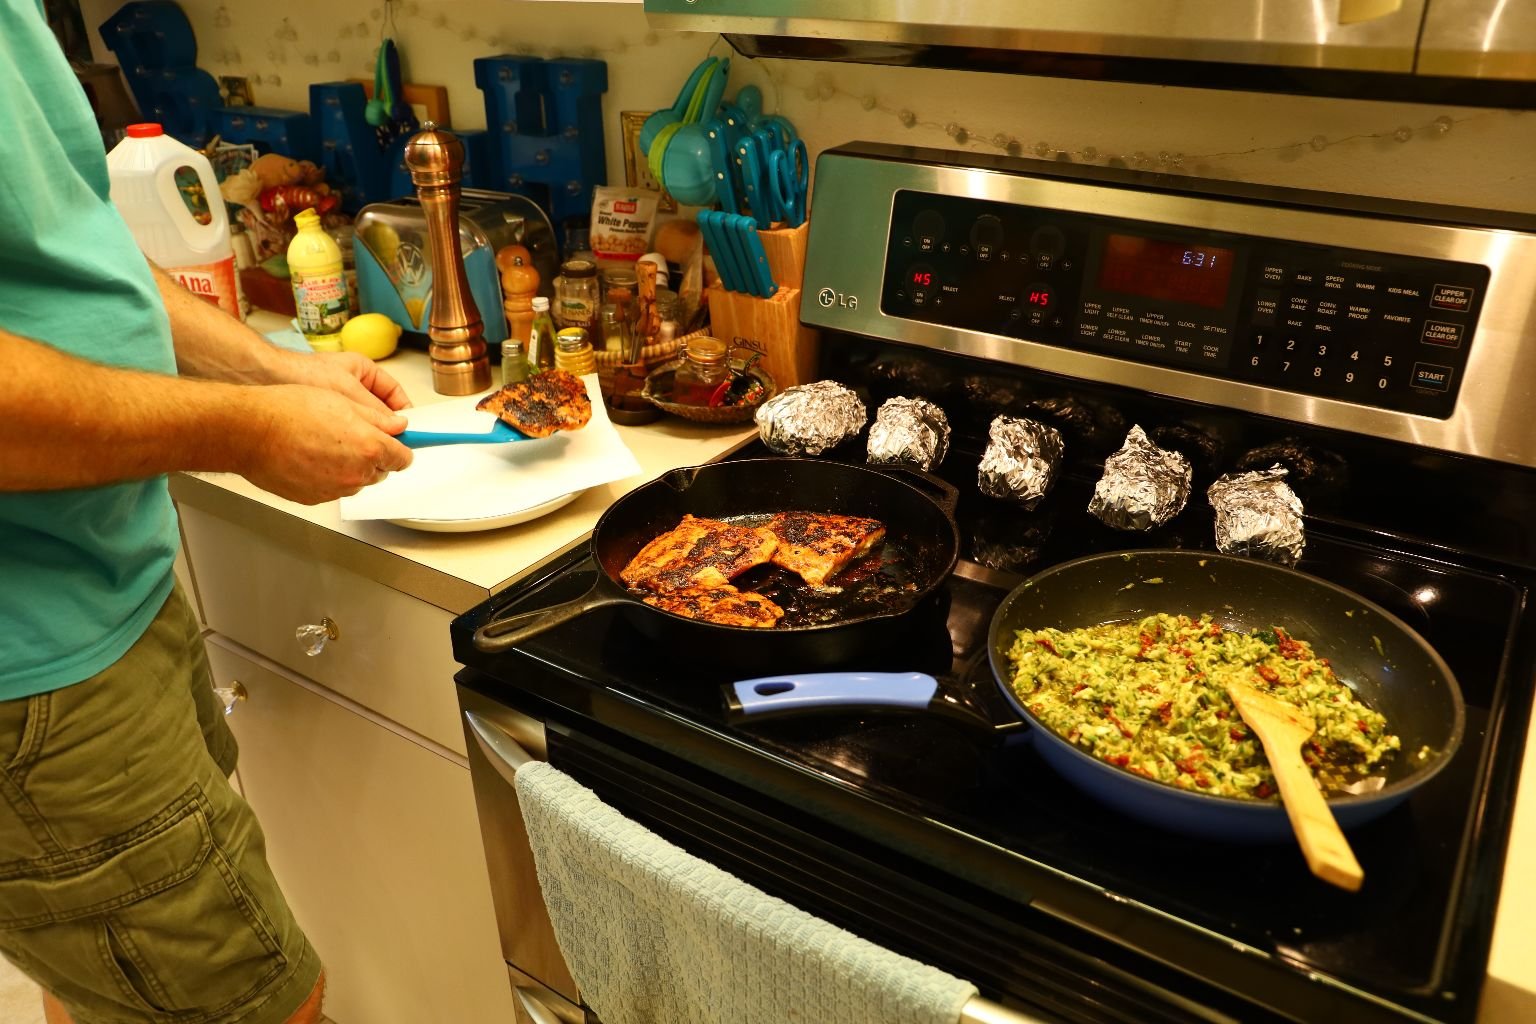
Watch the fillets as they only take a few minutes on each side to cook. You can tell when it is cooked by looking at the end of the fillet seeing the color change from dark pink to light pink half way up the thickness of the fish.
Turn your oven onto 350’F and when the fish is cooked half way, turn the fish fillets over…
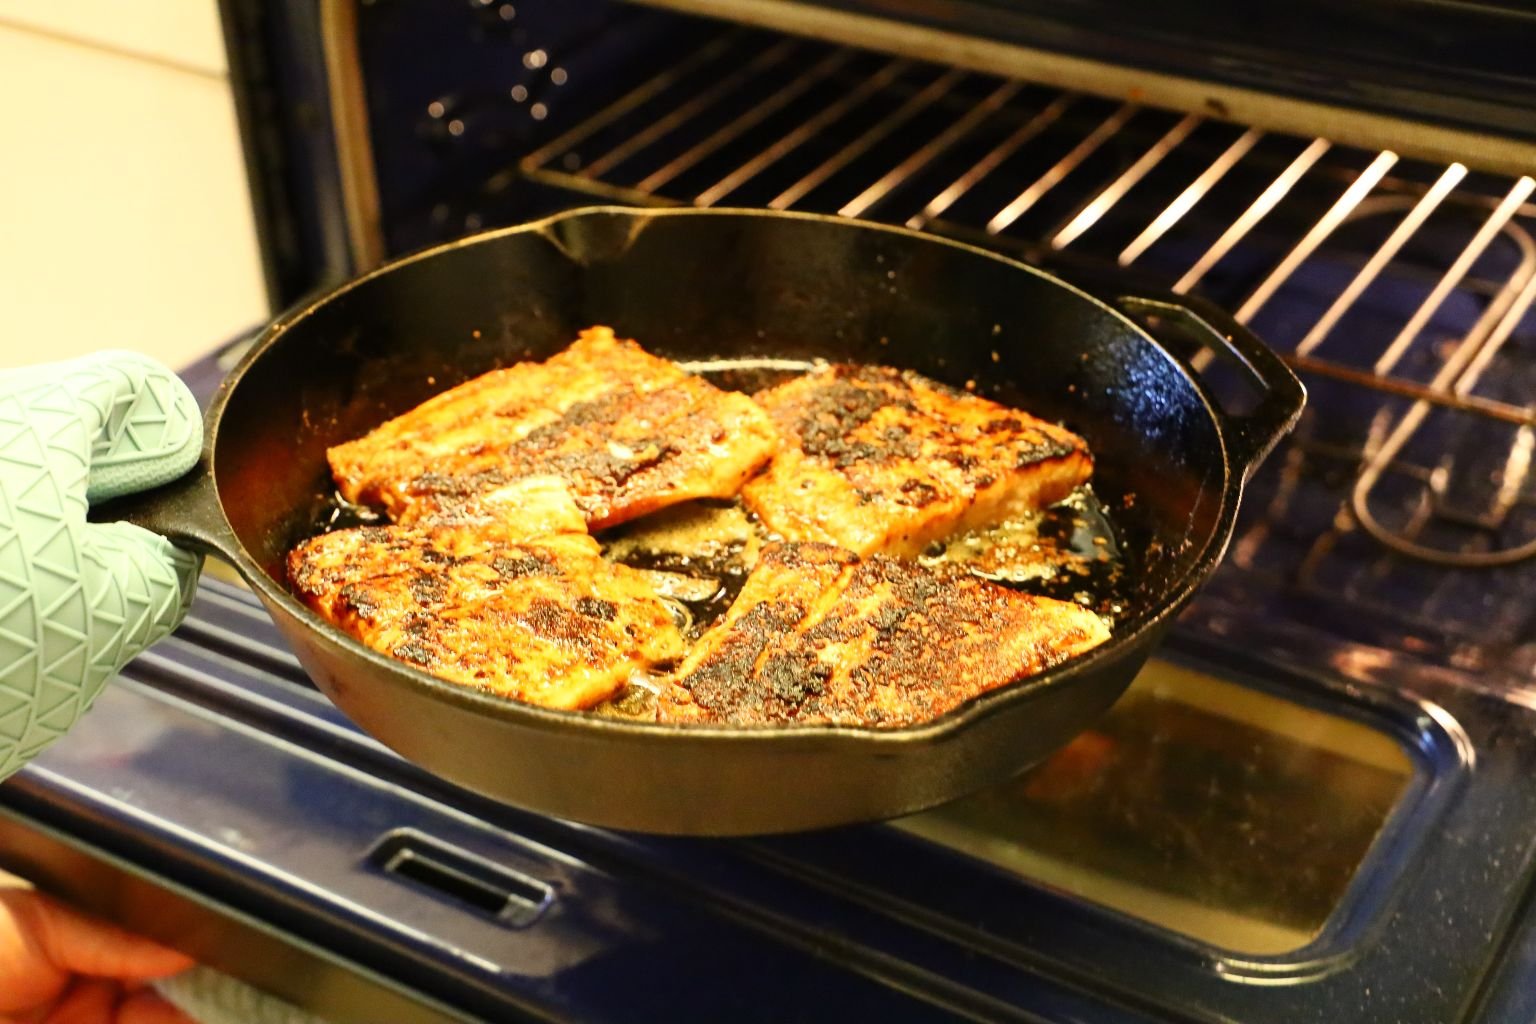
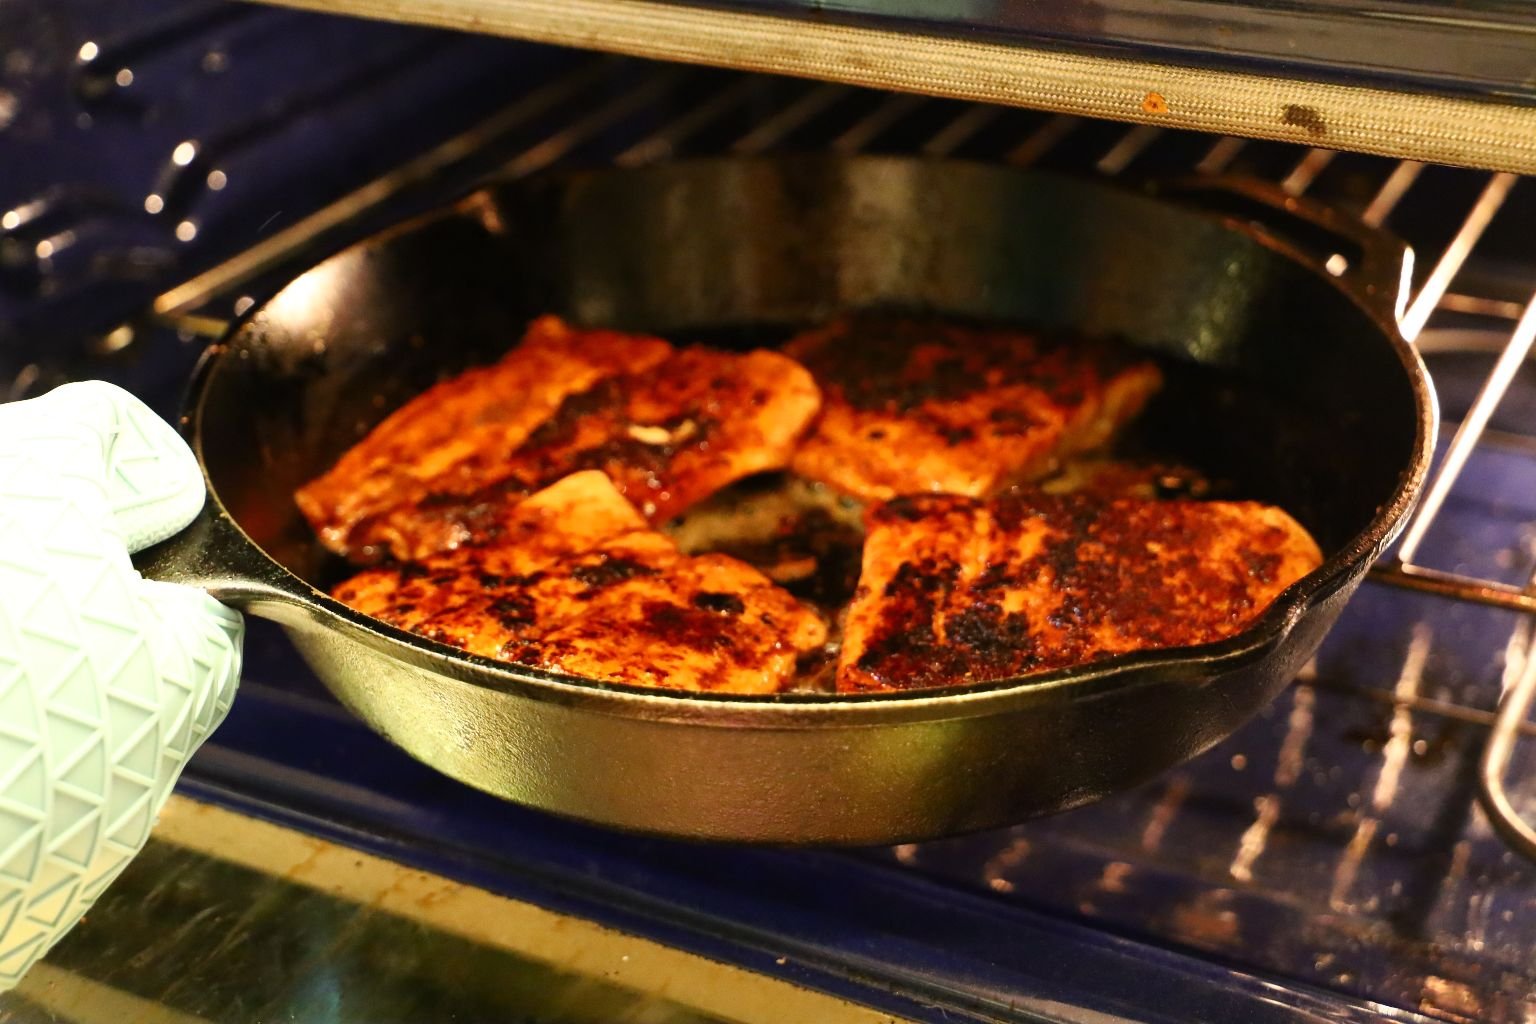
and place the pan in the oven to finish cooking. This will take just about 5 min. or more until it is done.
——————————————————————

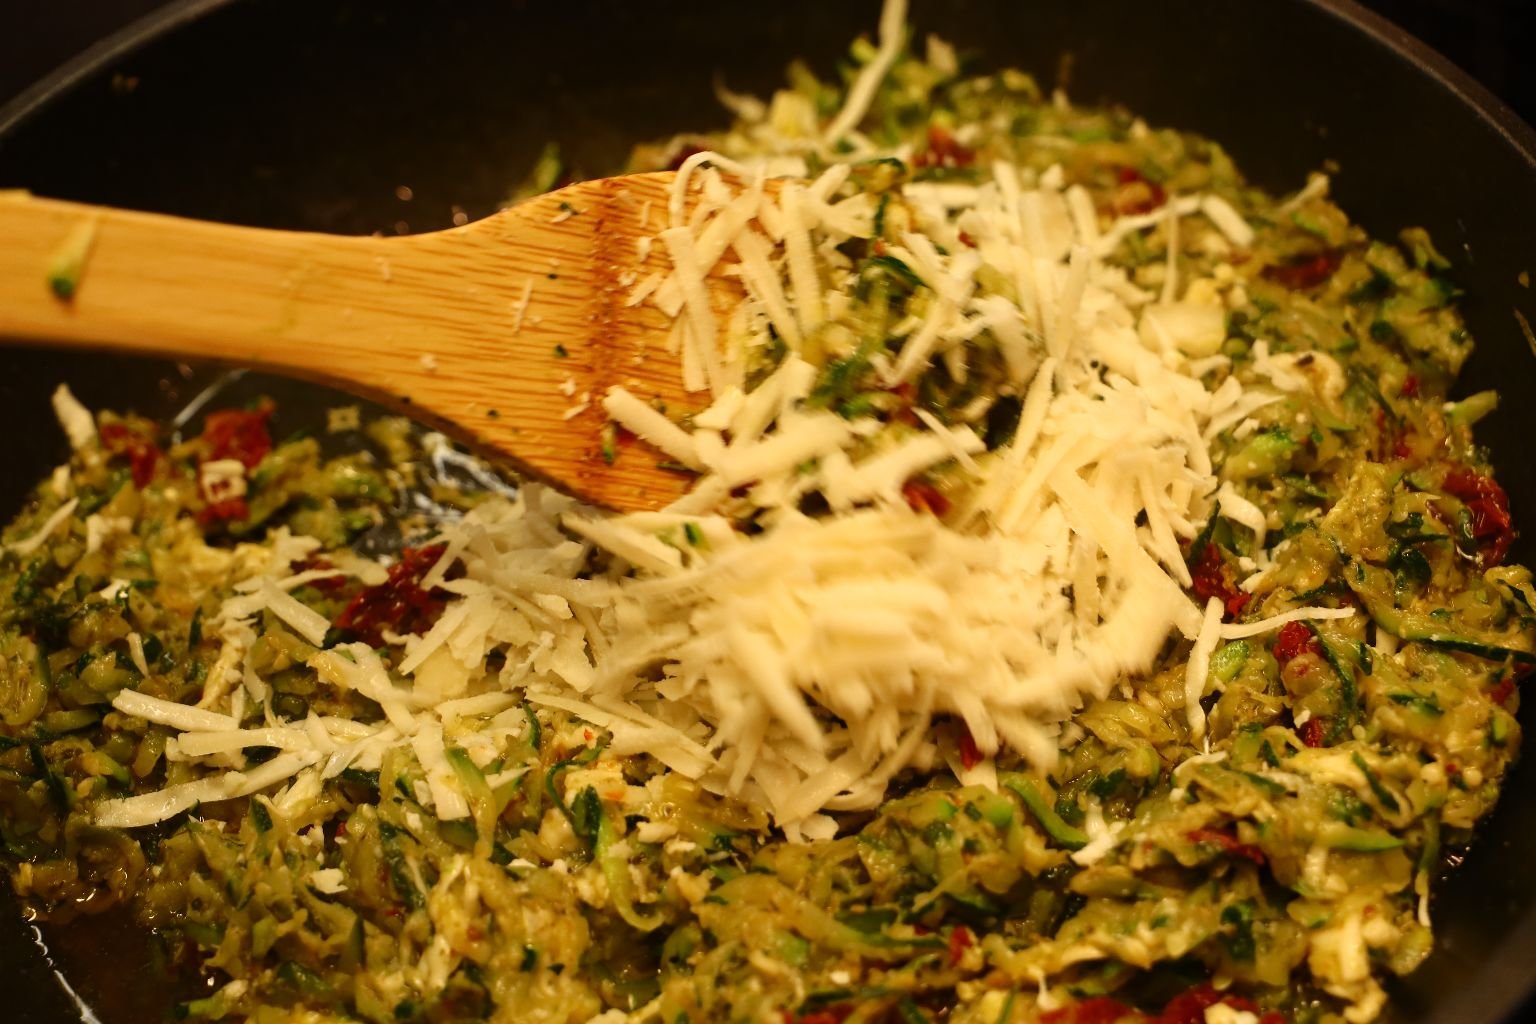
Meanwhile, using a shredder, shred your cheese into the zucchini and stir to combine.
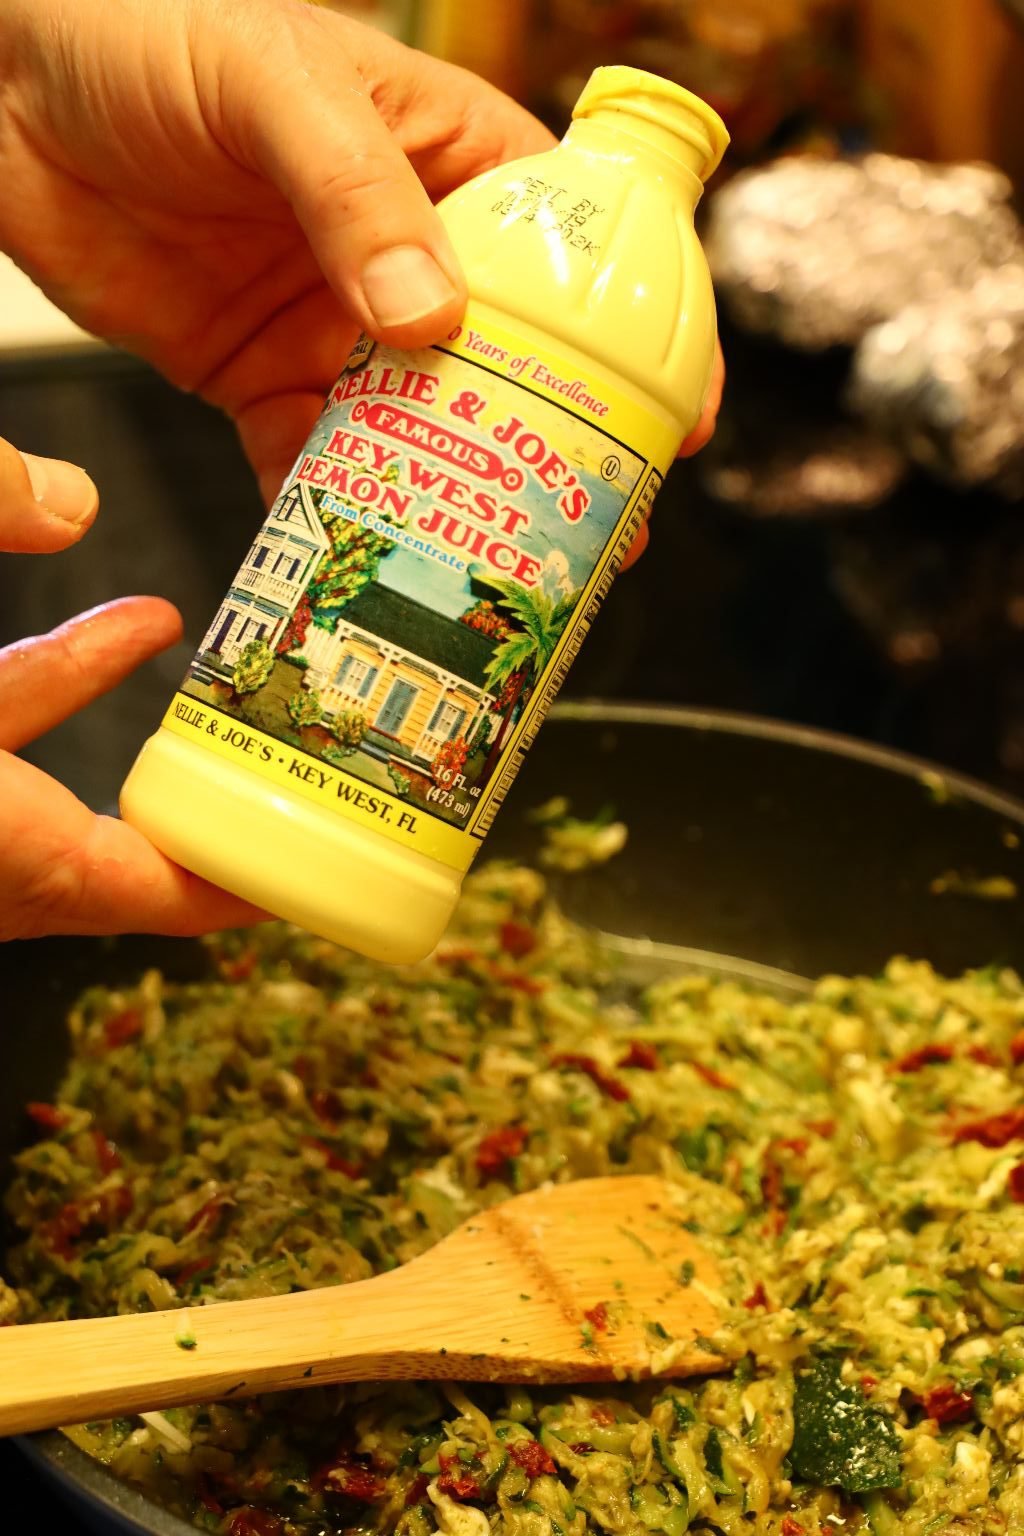
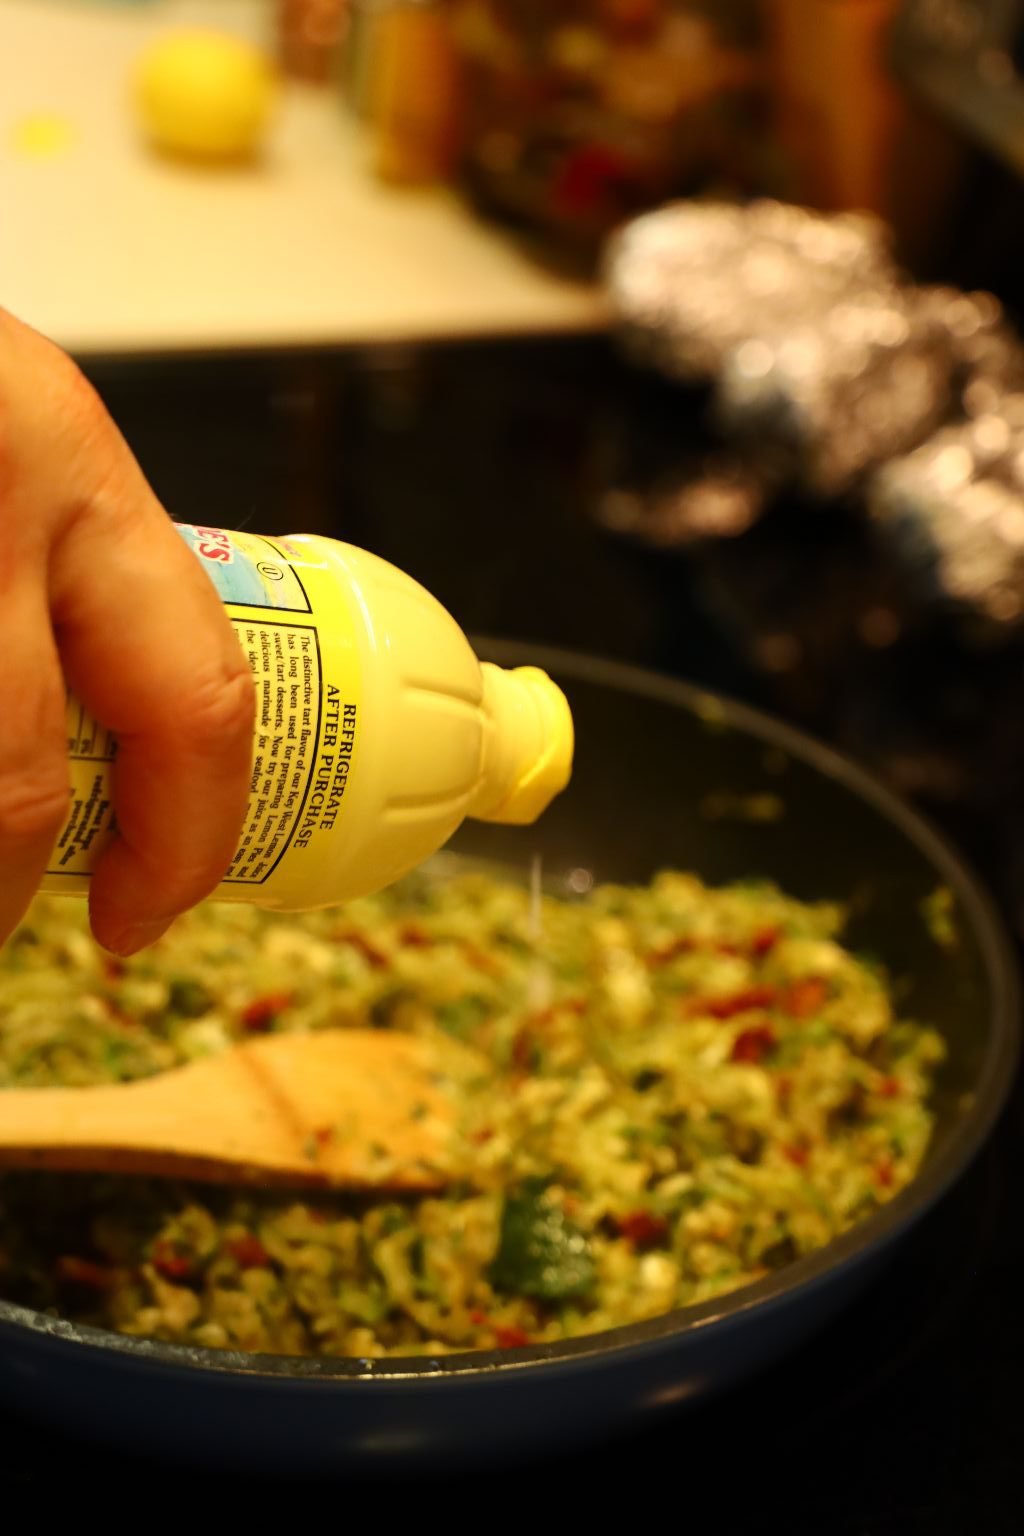
To brighten the dish while also adding a little acid, pour some lemon juice into the zucchini mixture.
Here you can see I removed the salmon from the oven and placing it on a dish lined with paper towels.
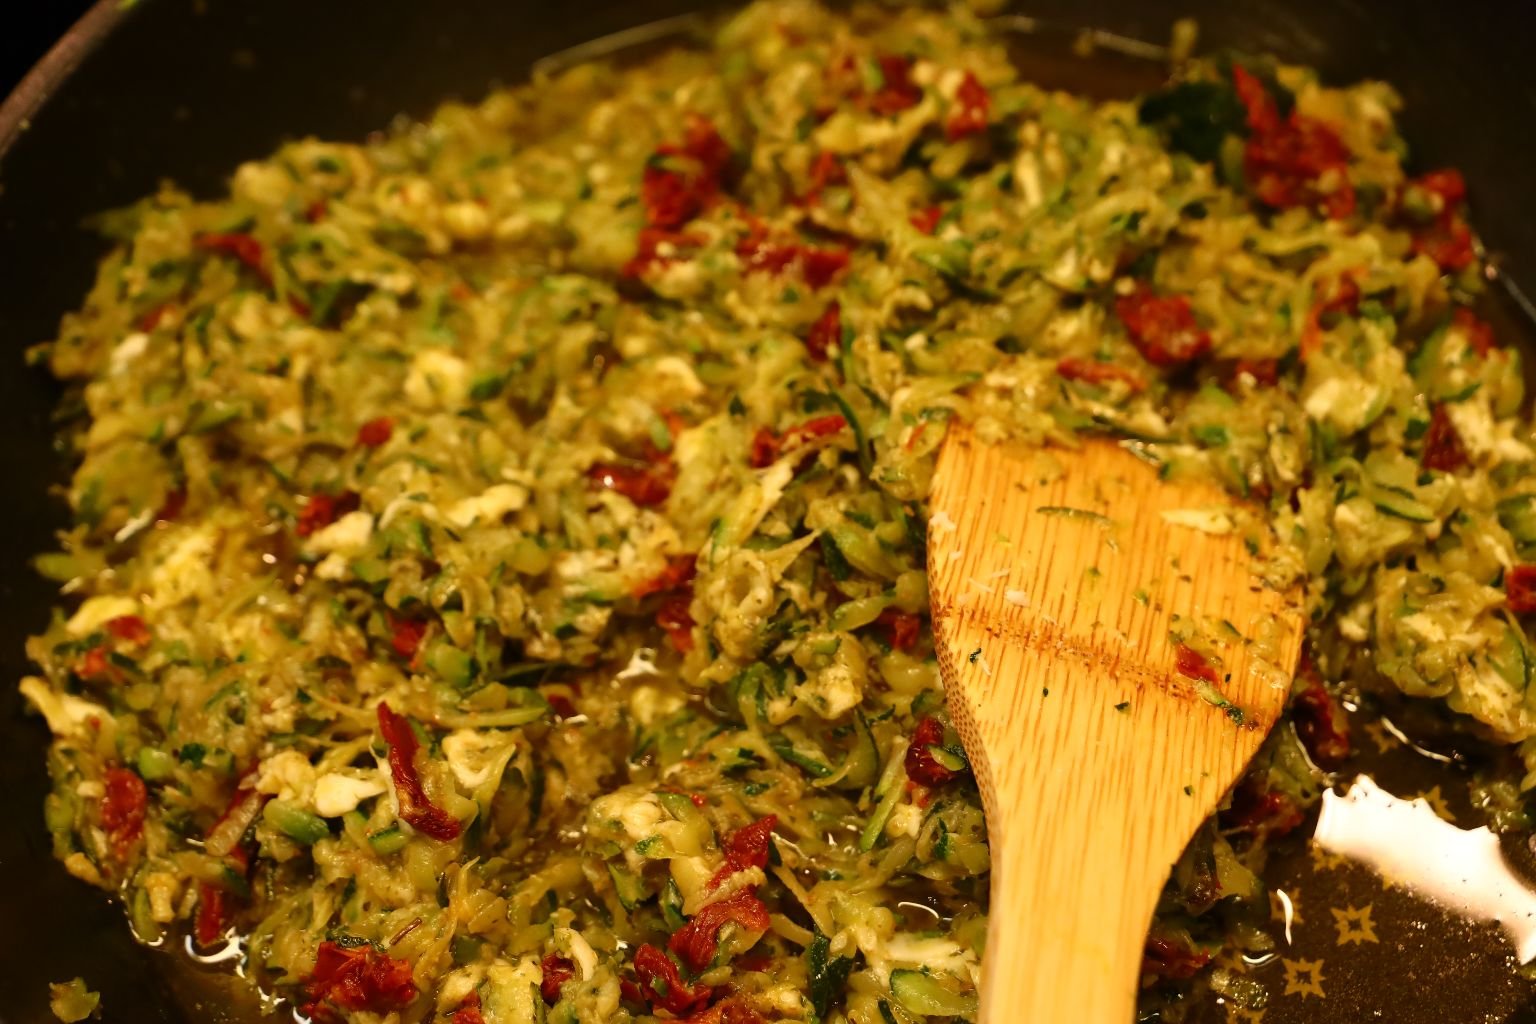
Give the zucchini a final stir
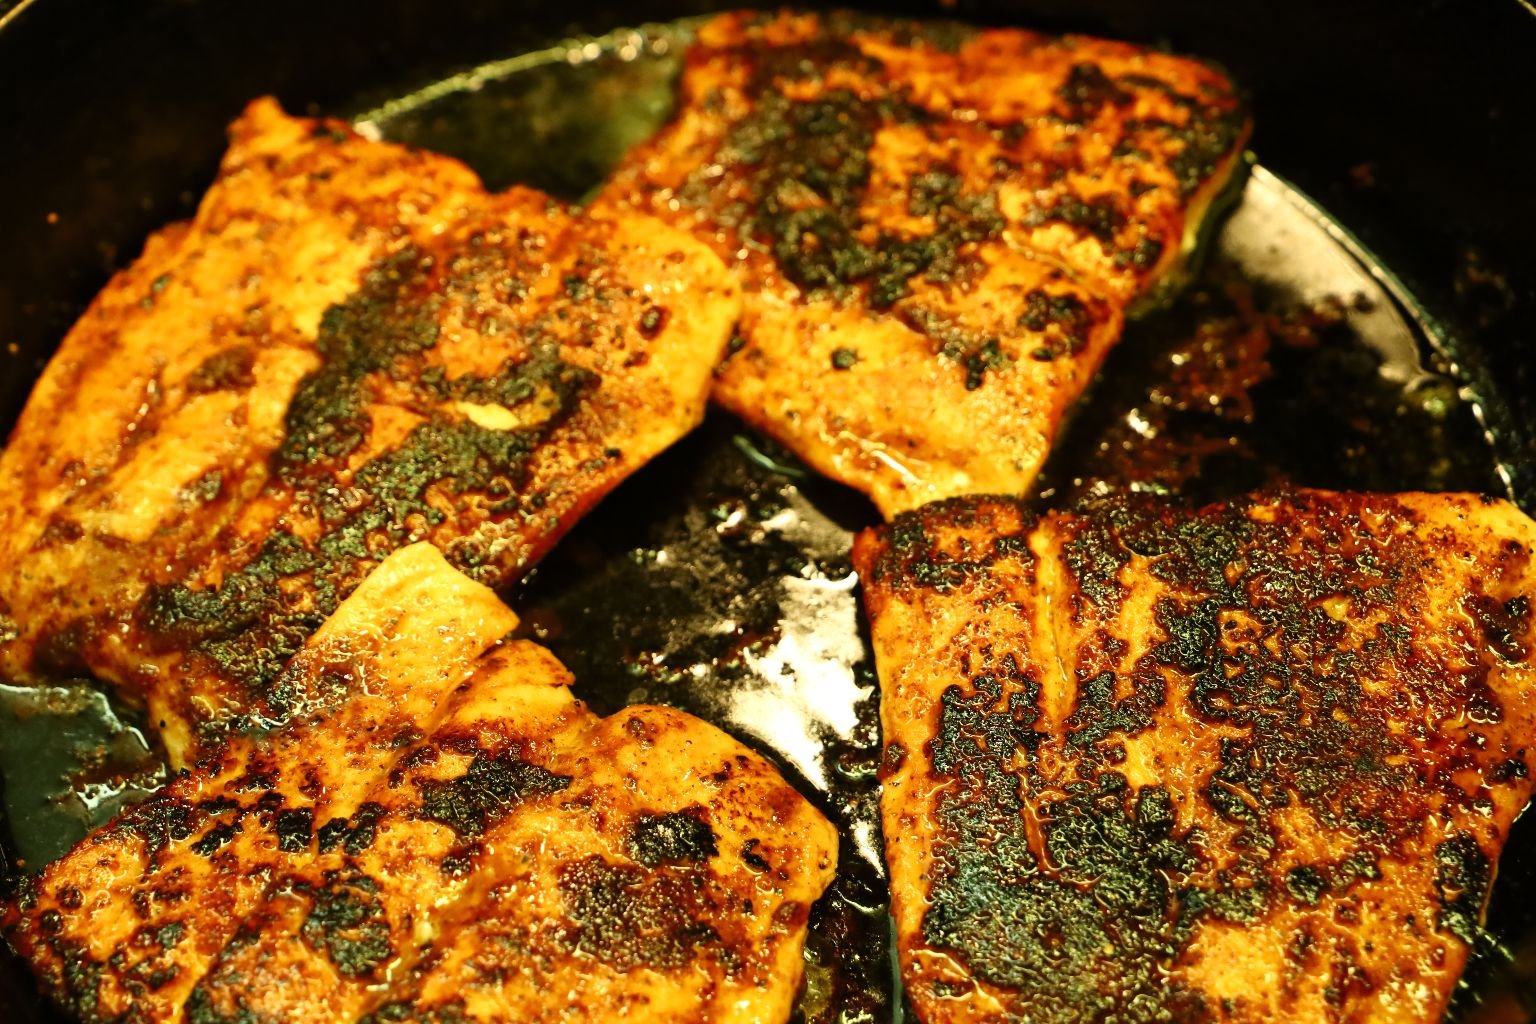
Here you can see the nicely cooked salmon fillets with the seasoned side slightly blackened. There is a difference between burnt and blackened. You can add some more seasoning to the fillets if you like.
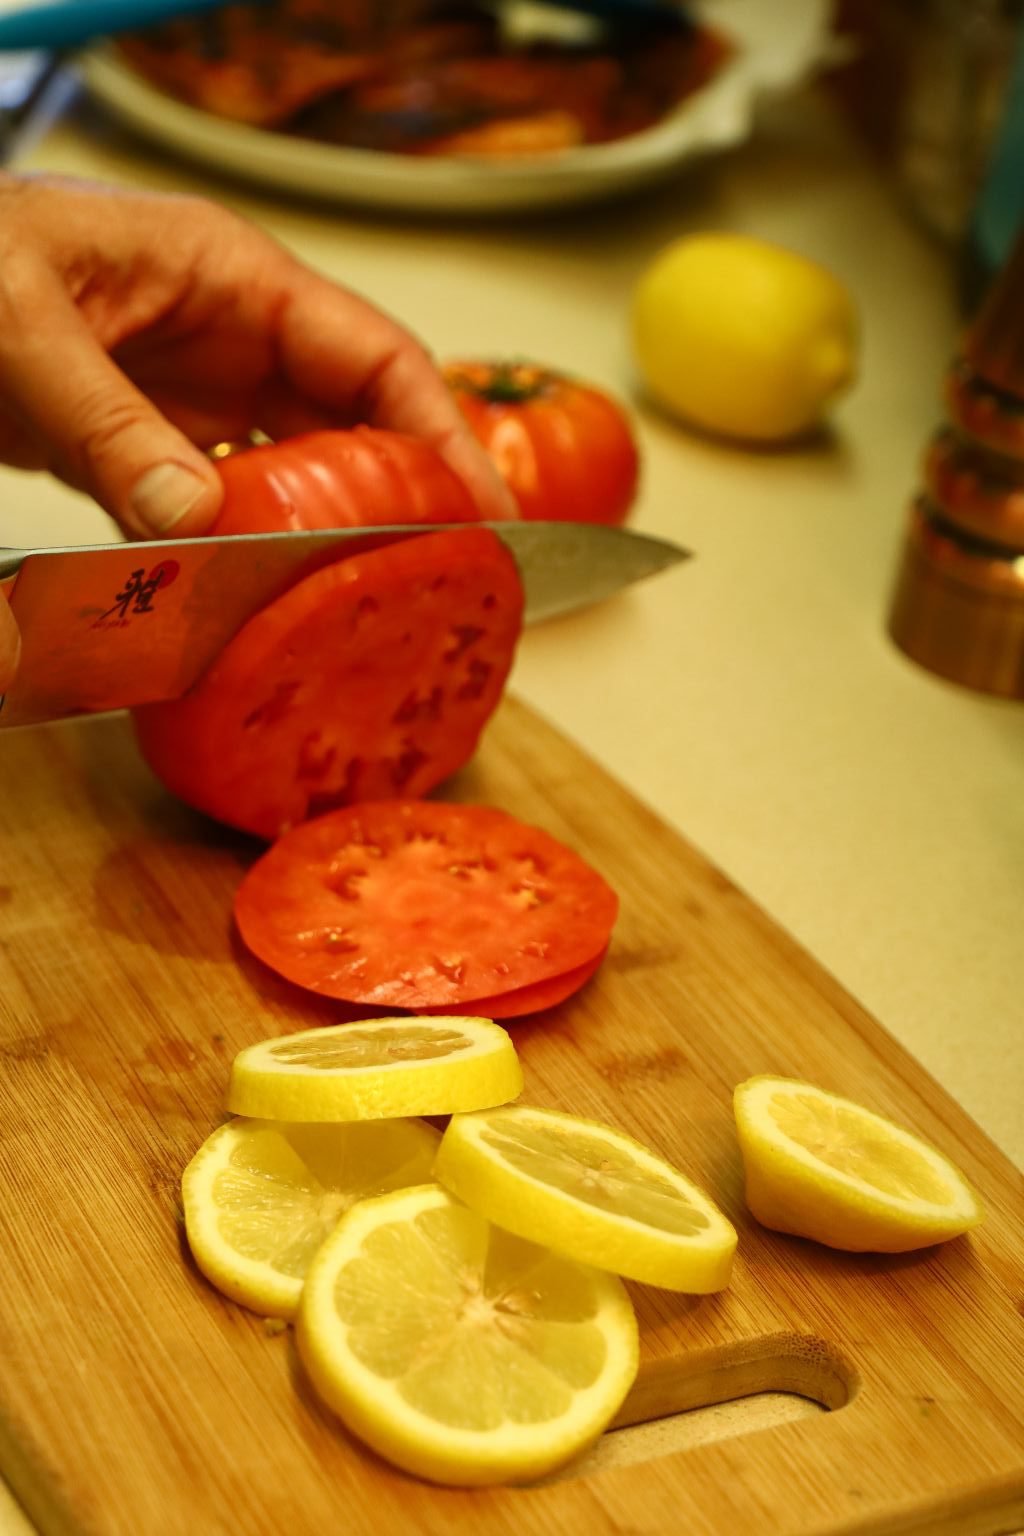
Here I am slicing some nice beefsteak tomatoes, and some fresh lemons to be grilled.
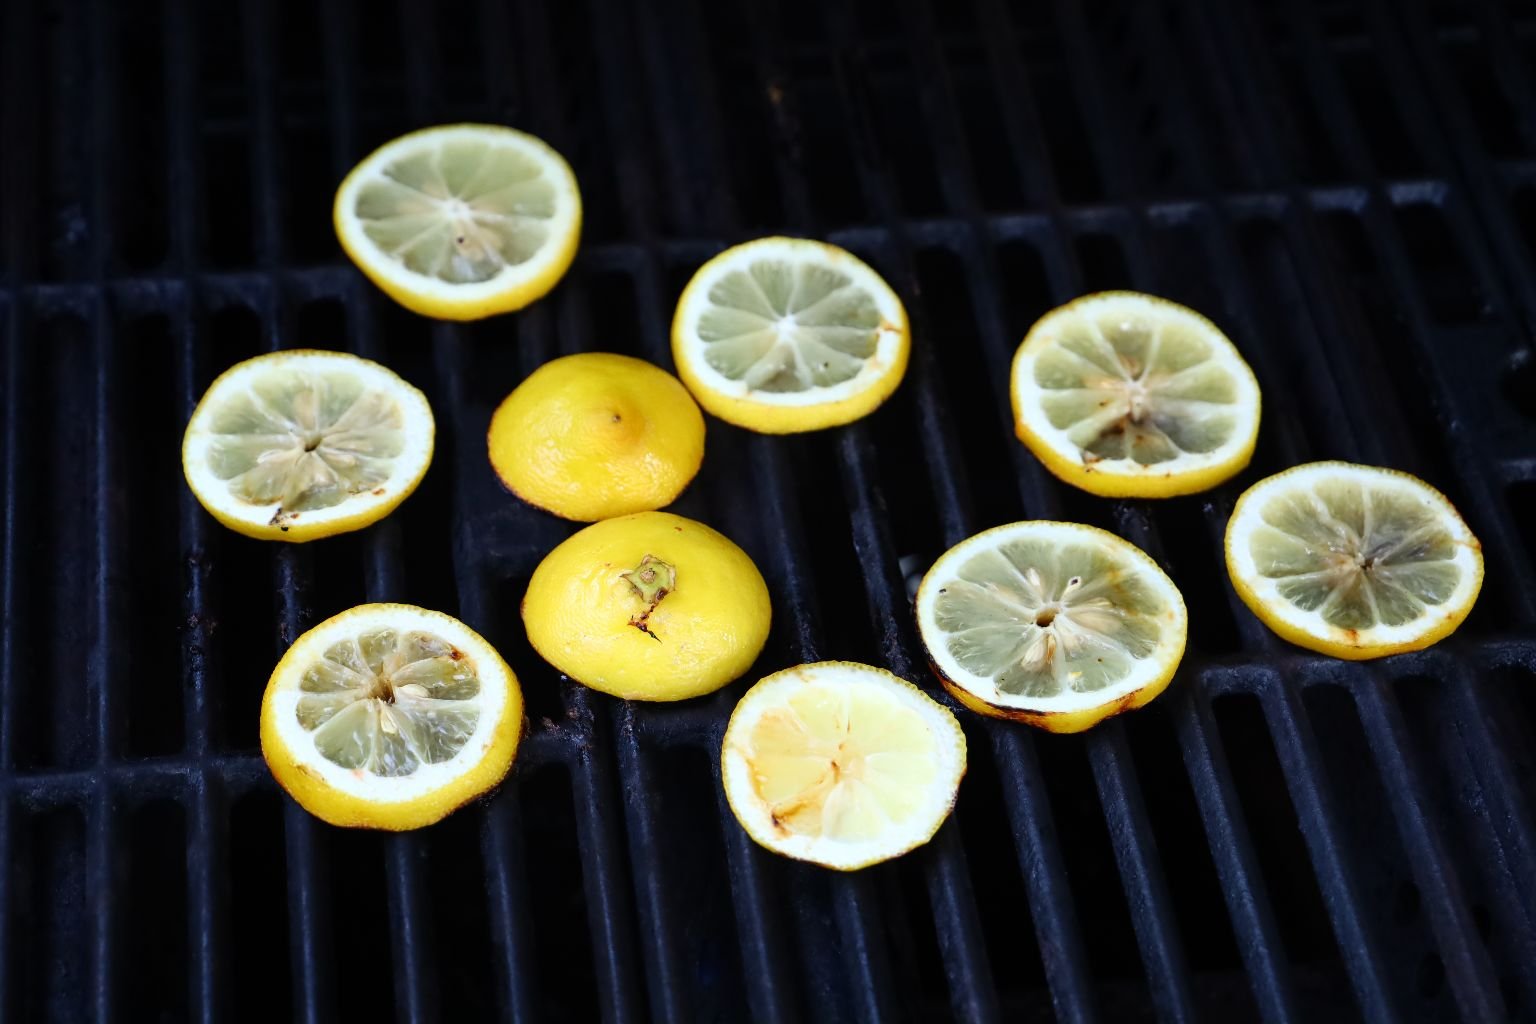
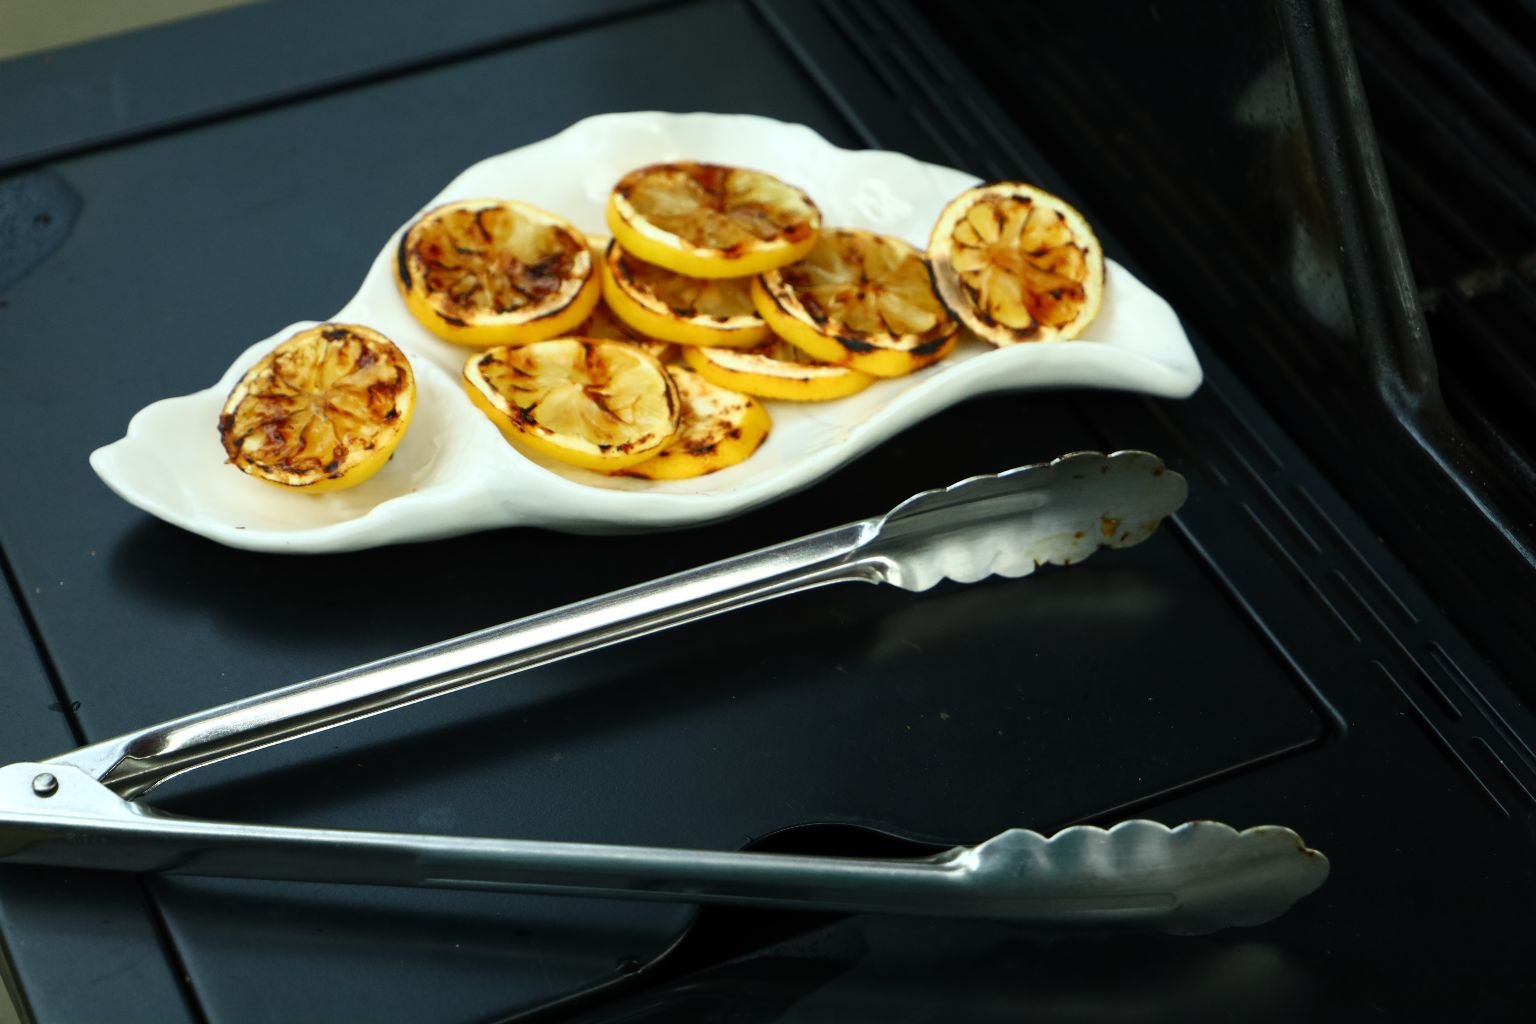
Place the lemon slices on a hot grill for a few minutes on just the one side. Grilling the lemons give their juice an amazing flavor.

Here are the finished dishes!
———————————————————
Homemade Pesto
If you have a lot of Basil in your garden as we often do, here is a great way to use it up in a slightly different version.
Ingredients:
1 1/2 Cups Fresh Basil Leaves
2-3 Green Onions
3 Roasted Garlic Cloves
1 Garlic Clove
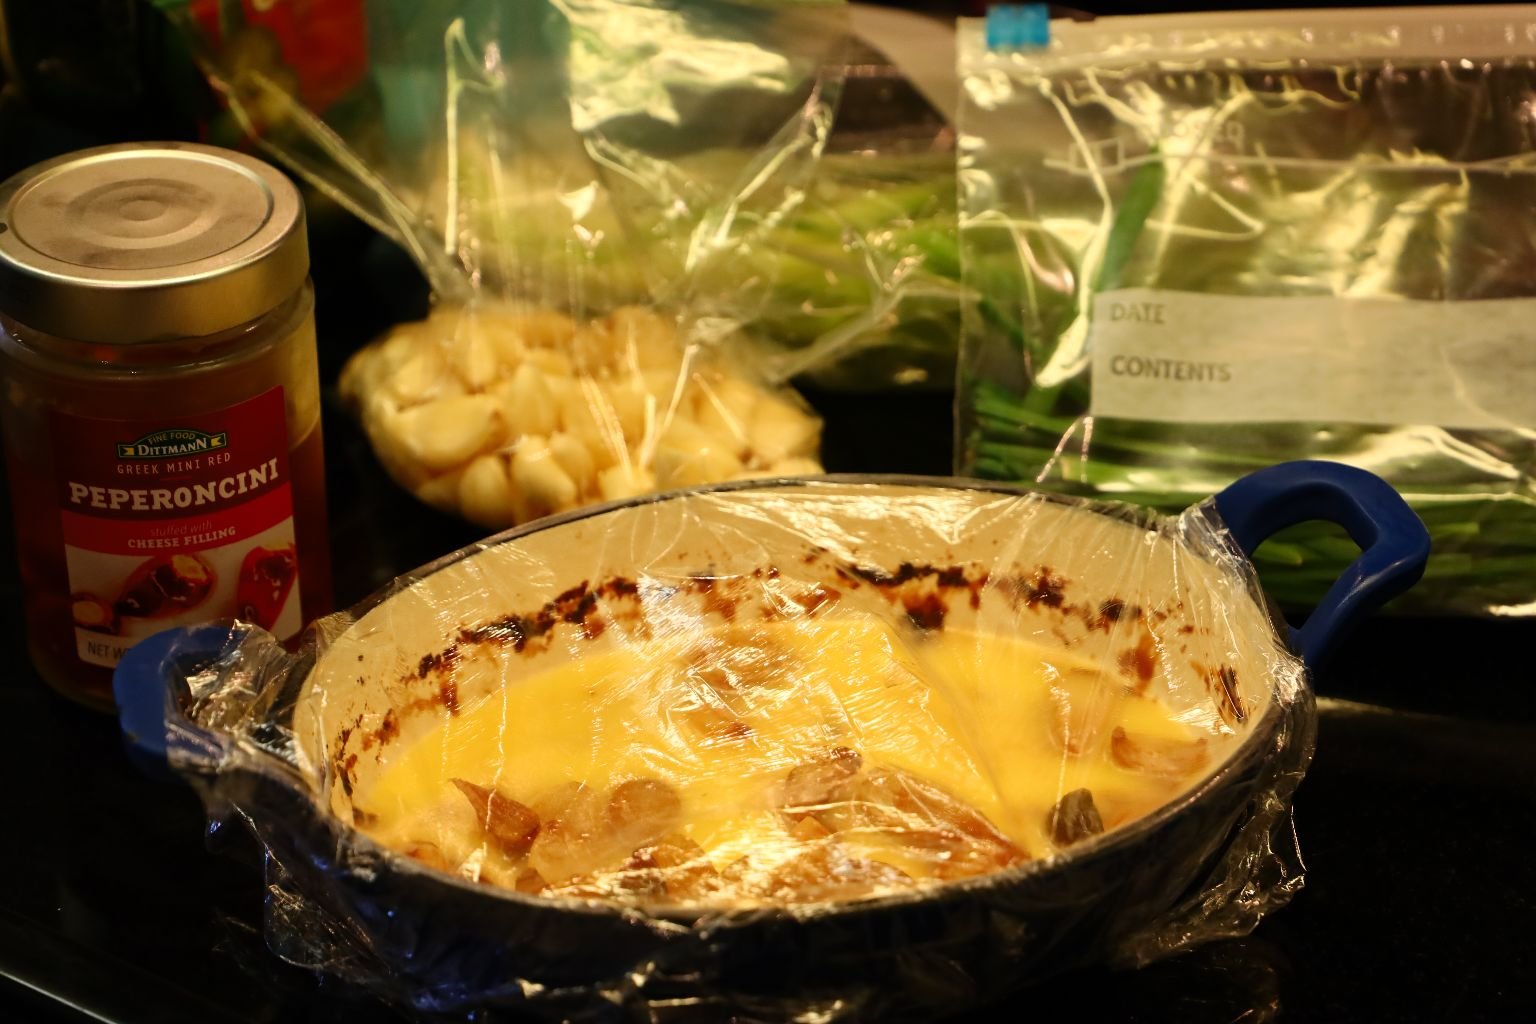
3-4 Tbsp. Cheese Filled Peperoncini Oil (or any oil that you prefer.)
1/2 Tbsp. Sea Salt
Fresh Ground Pepper to taste
TIP: To keep the pesto bright green, you can also add some parsley.
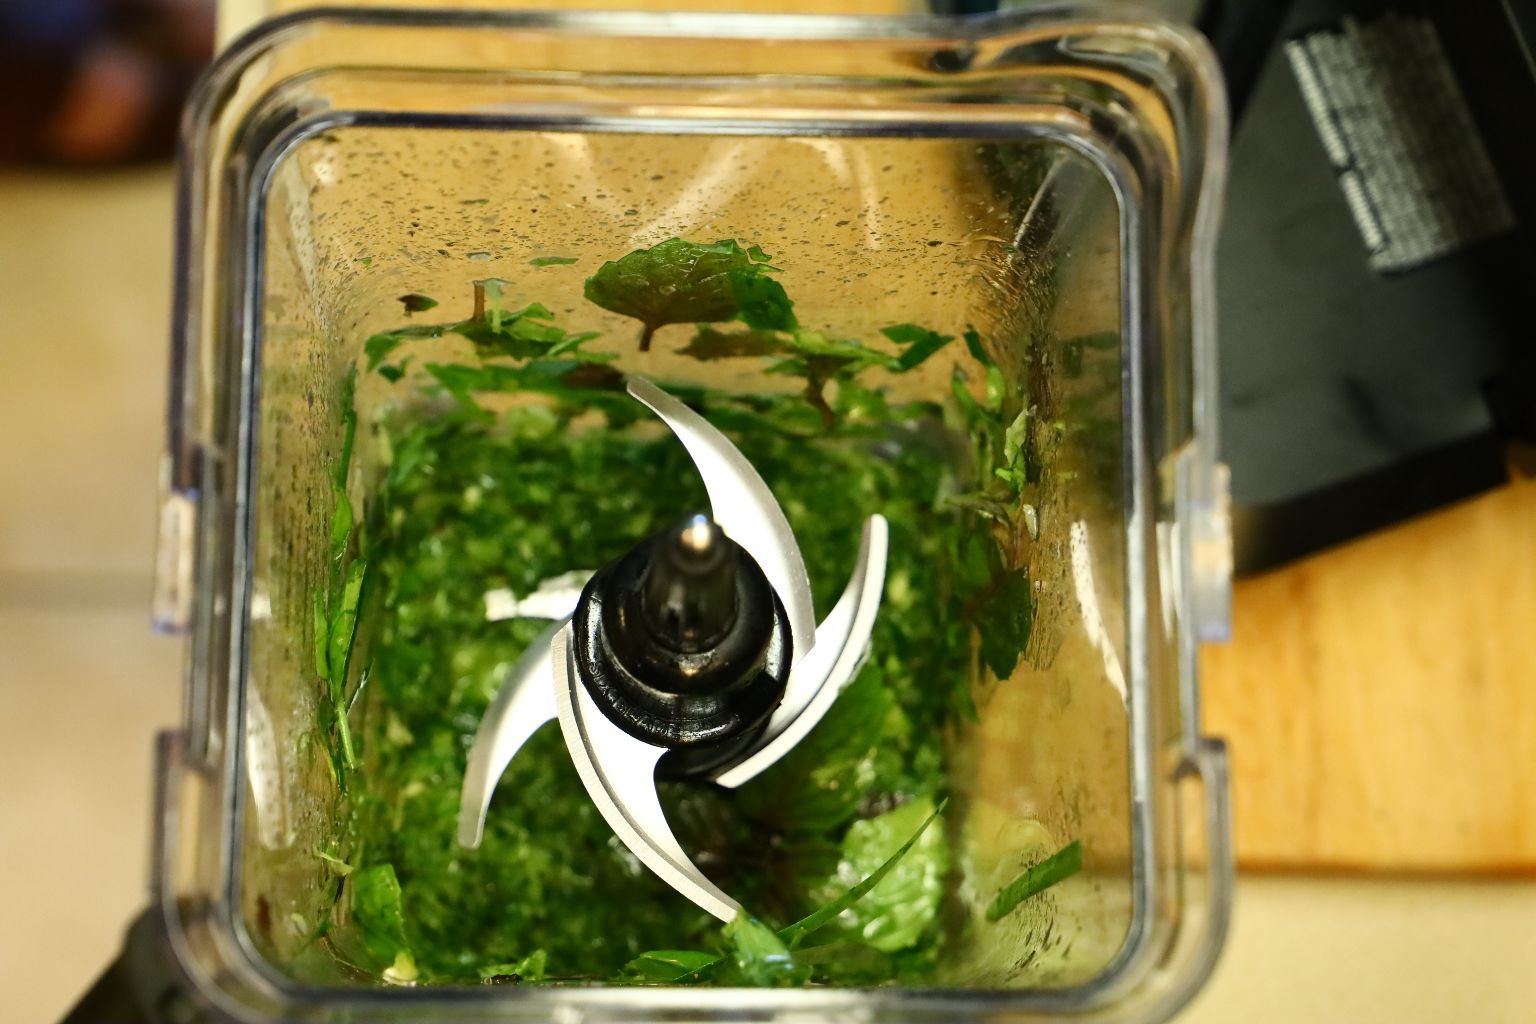
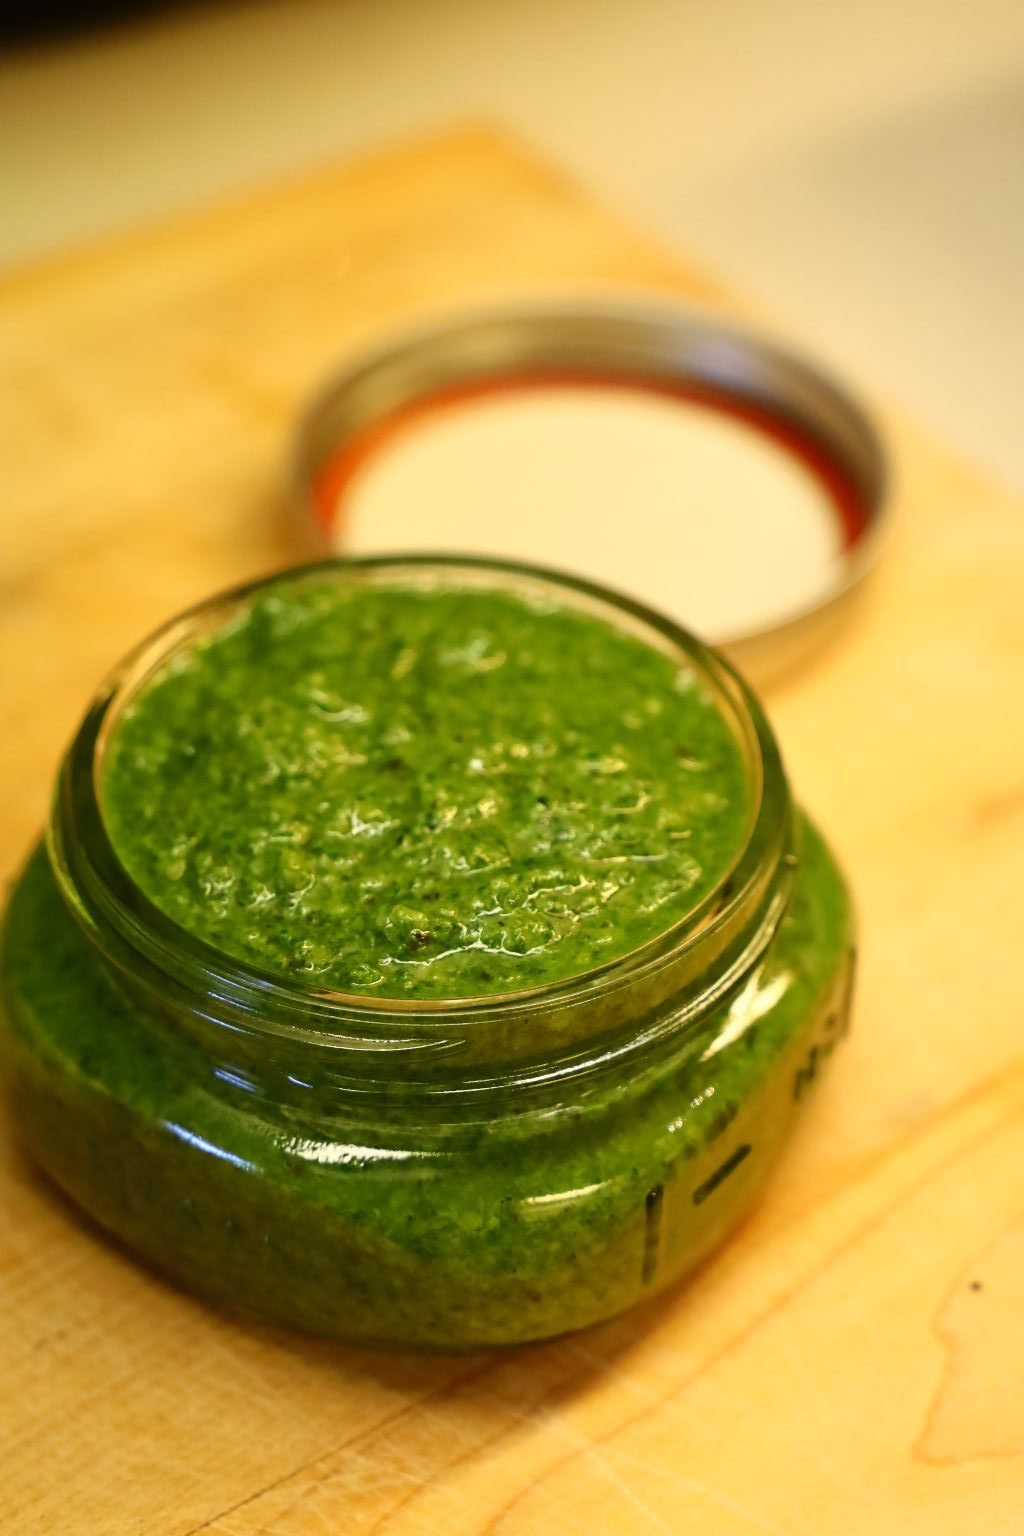
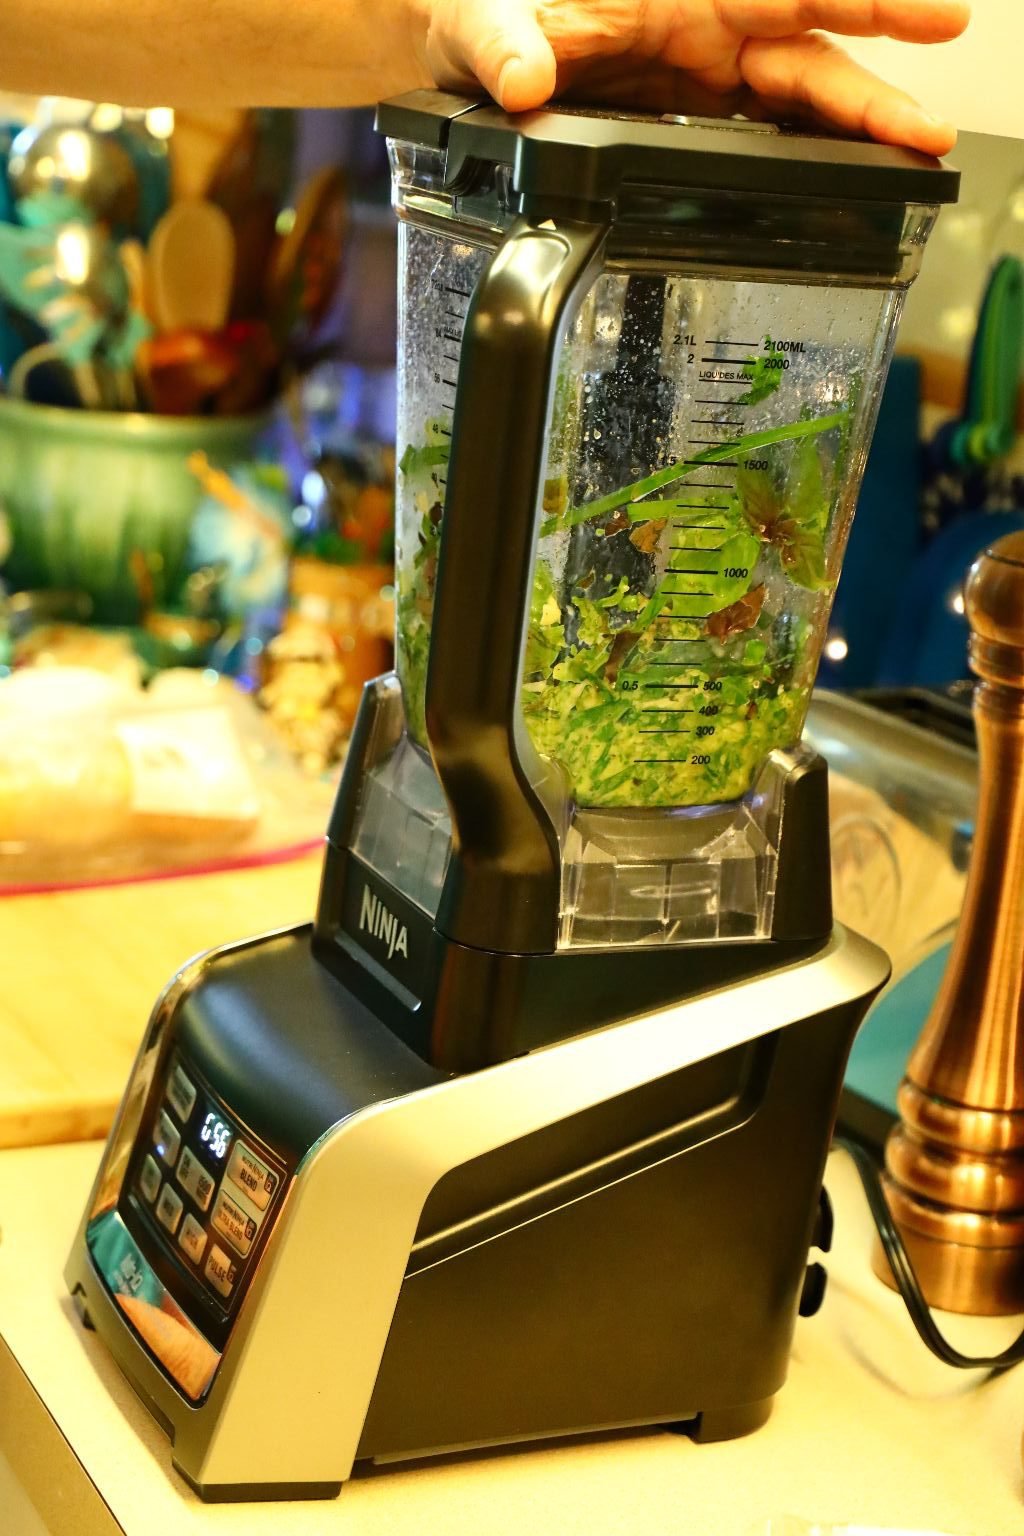
Add your fresh Basil to your blender and blend until chunky.
Front and Center are the roasted garlic.
I like using both the roasted and un-roasted as they both have unique flavors.
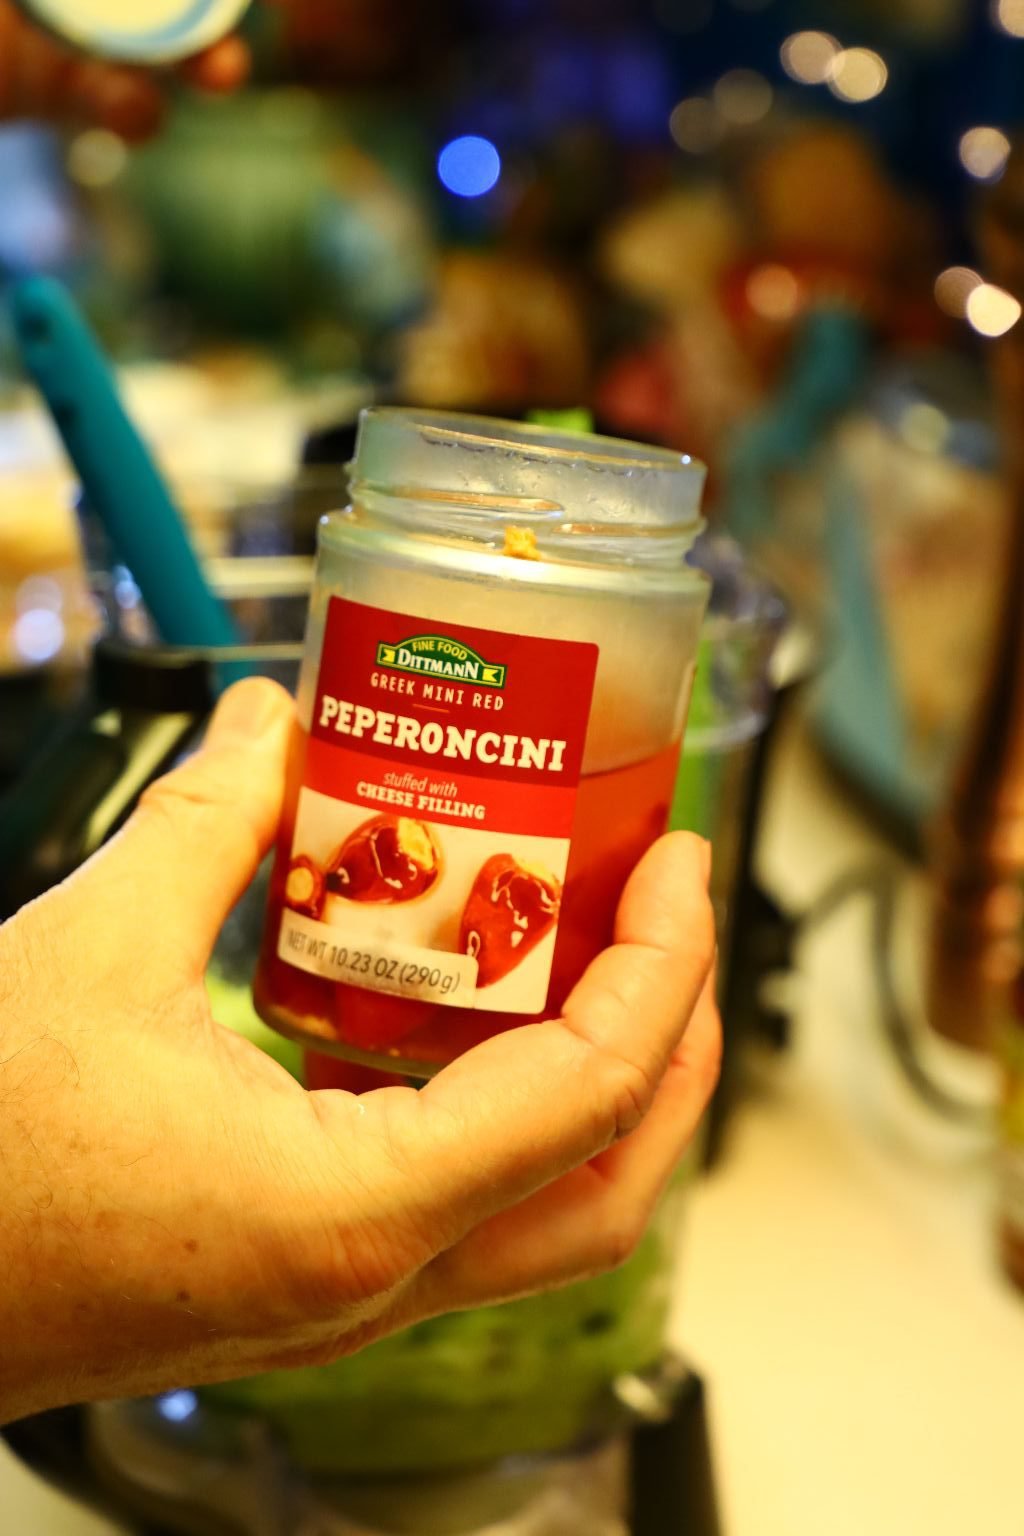
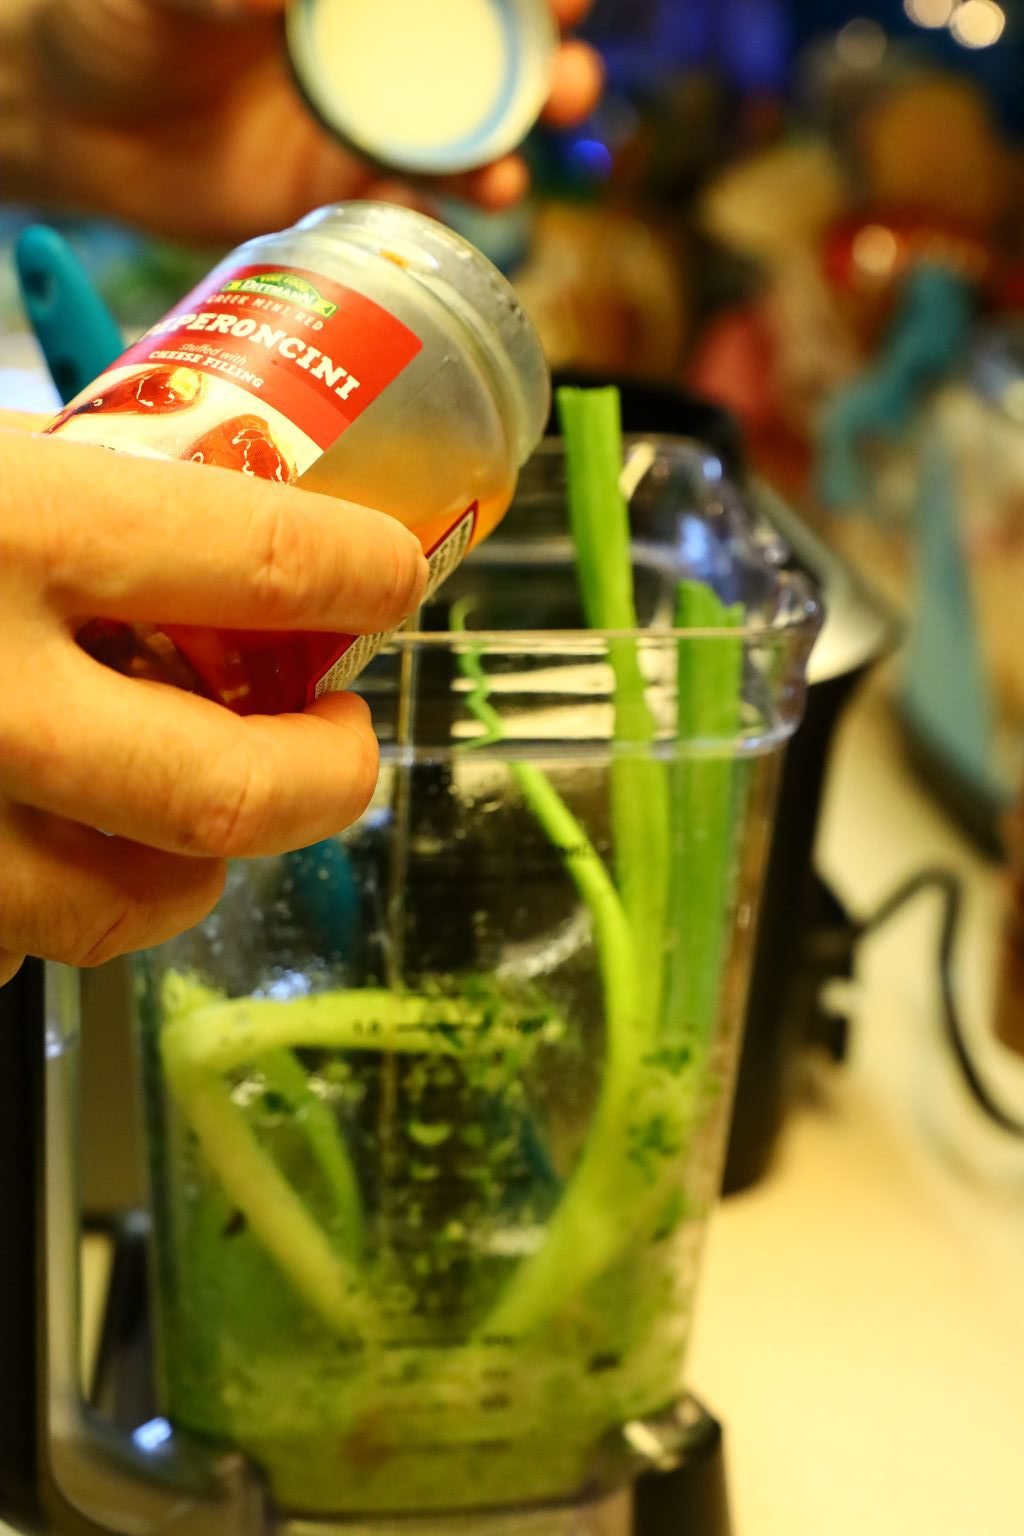
Here I am adding the peperoncini oil. These are some really great stuffed peppers and the oil is very nice as well. It has some nice heat to it.
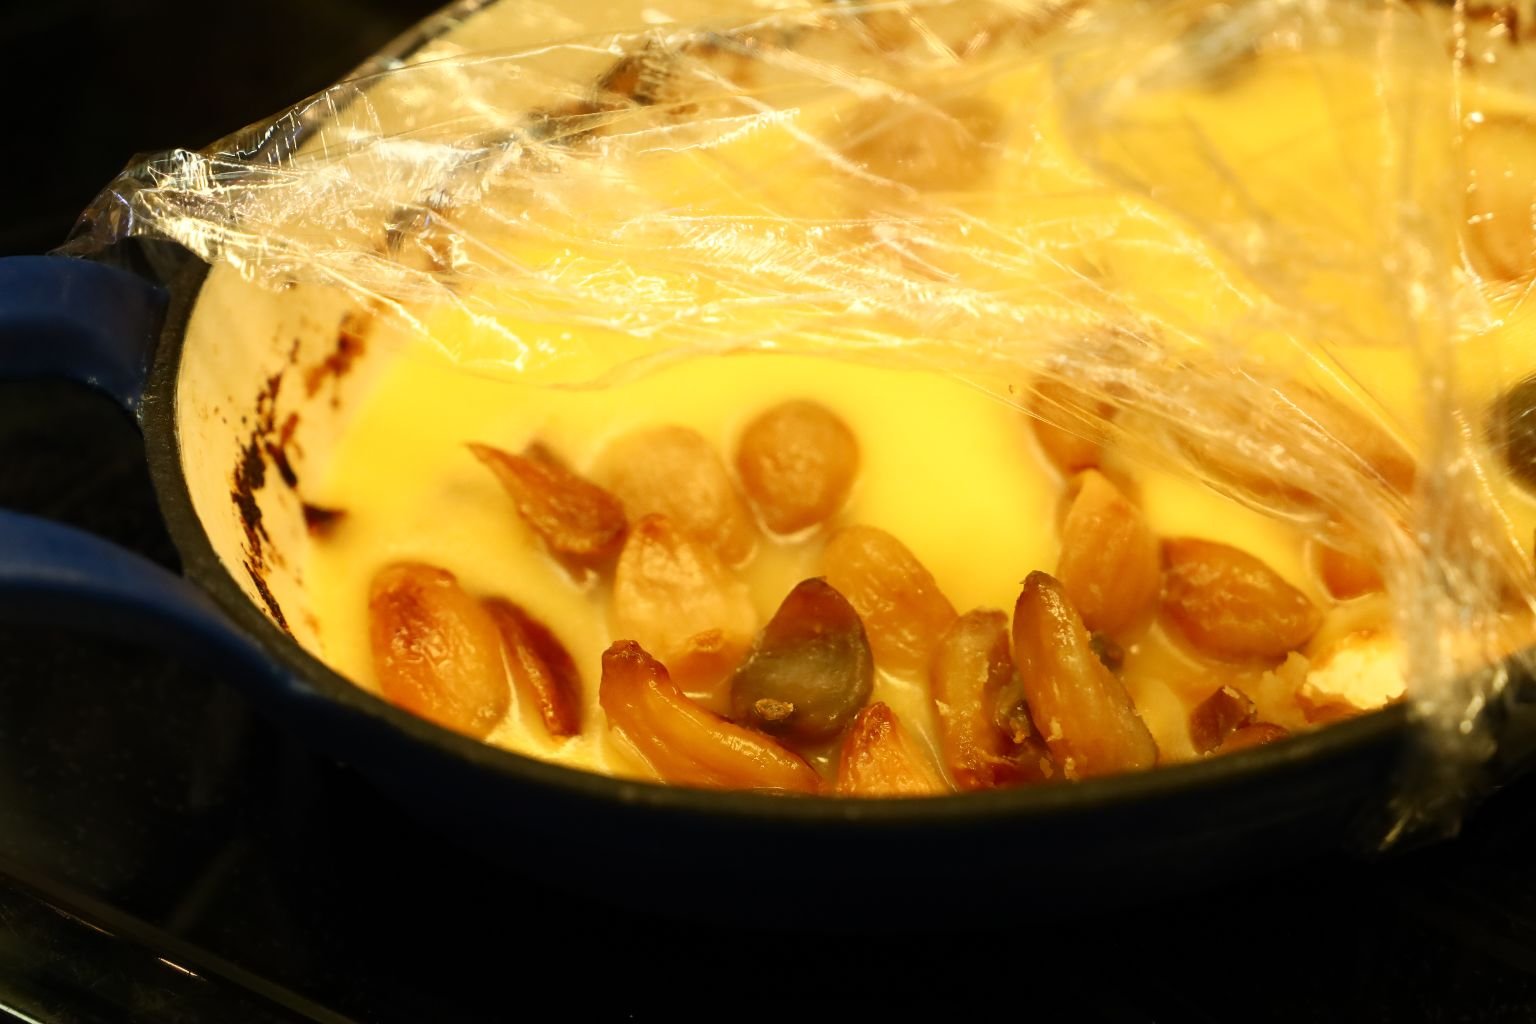
Here you can better see the nicely roasted garlic which was cooked in butter.
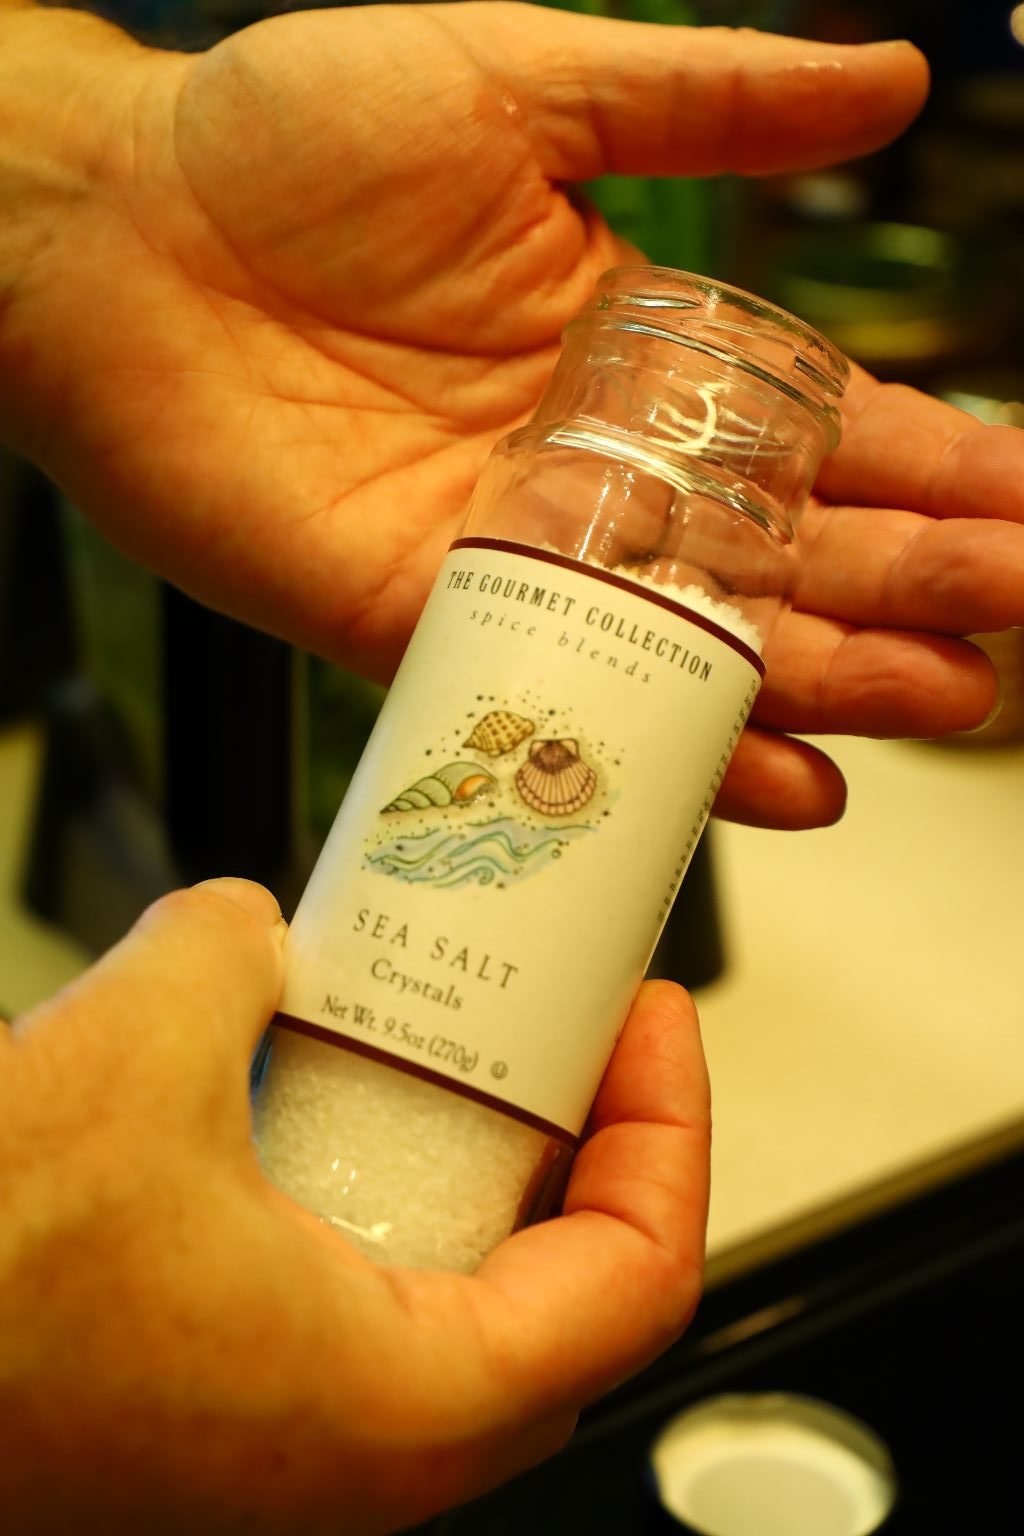
Use some nice sea salt.
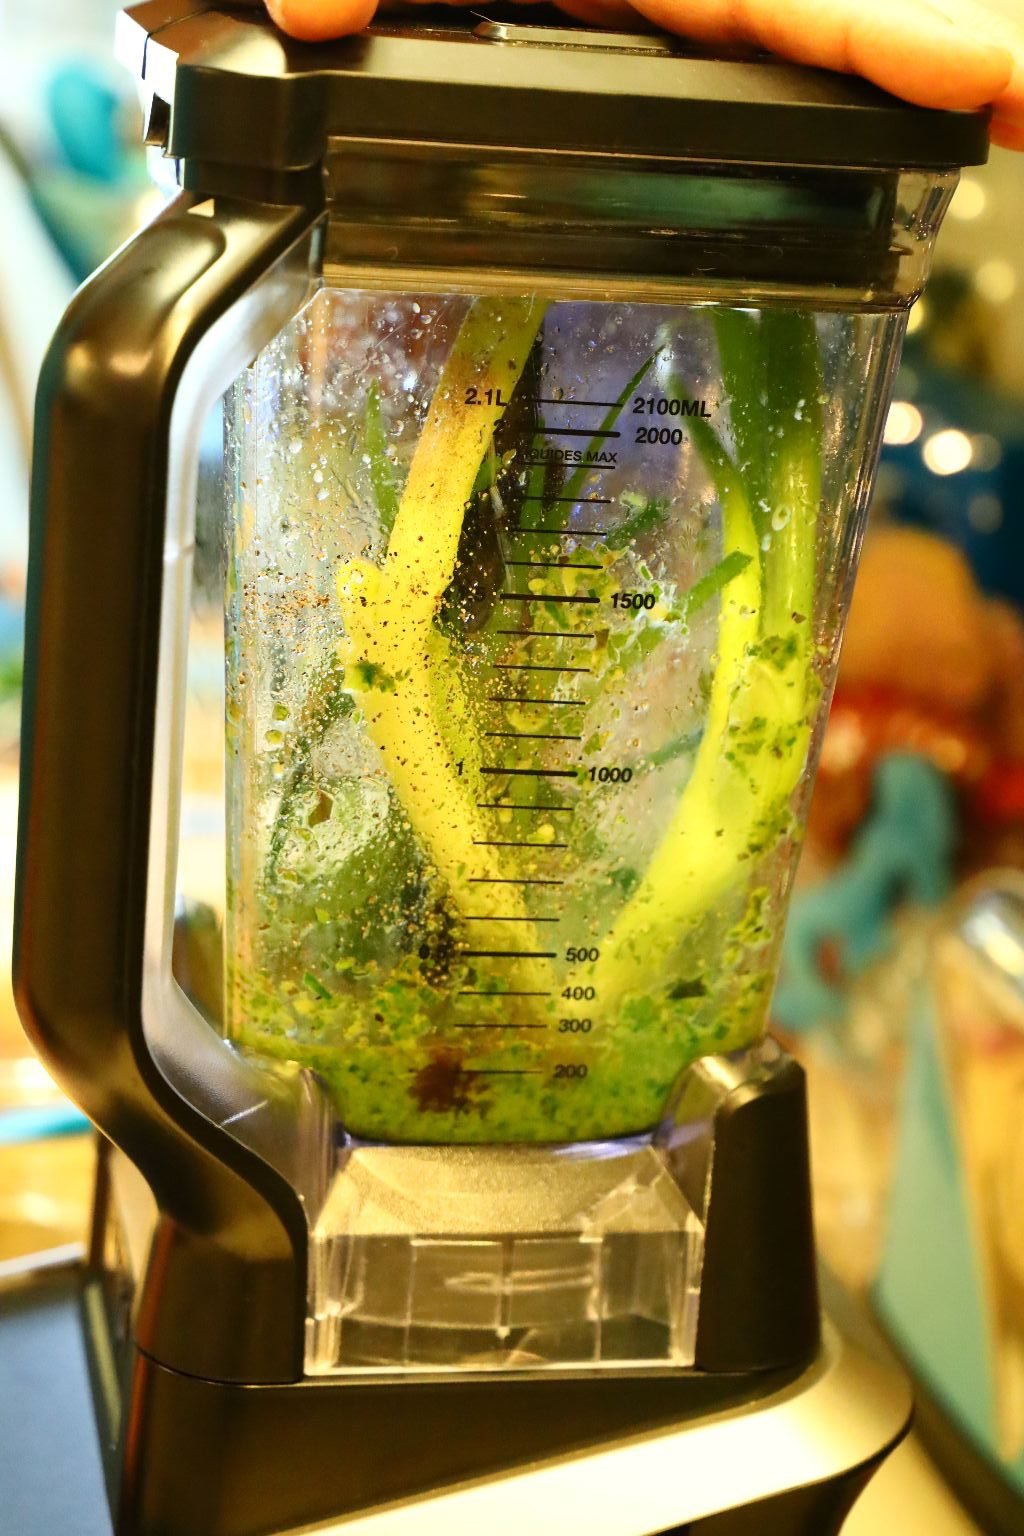
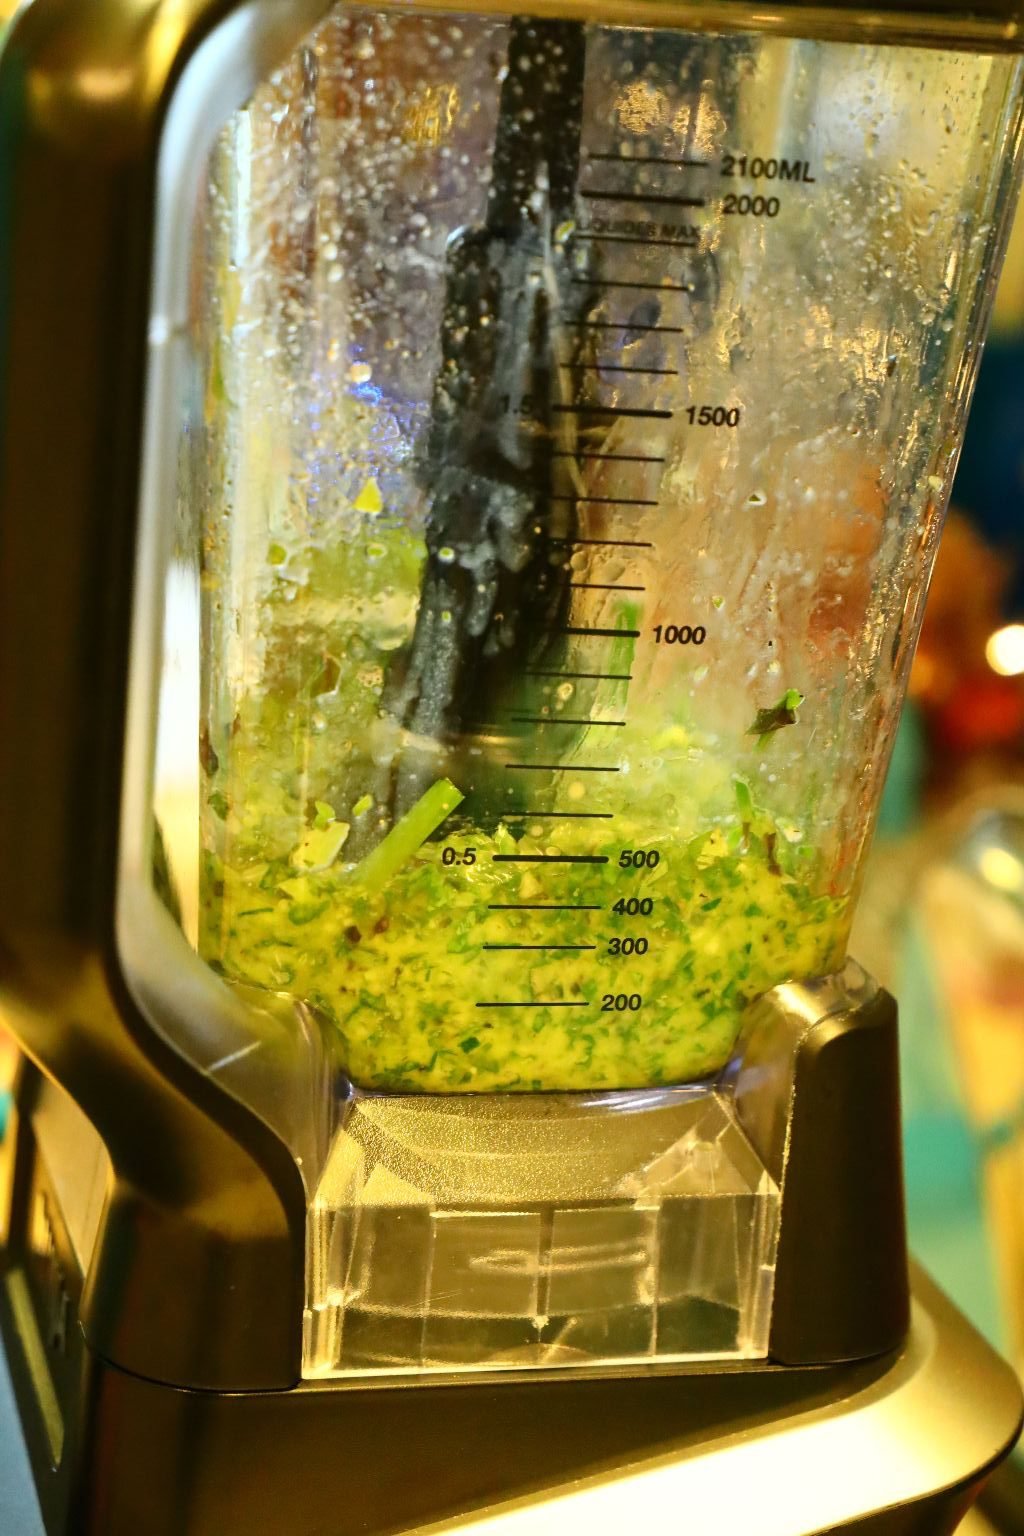
Here you can see I add all the rest of the ingredients to the blender.
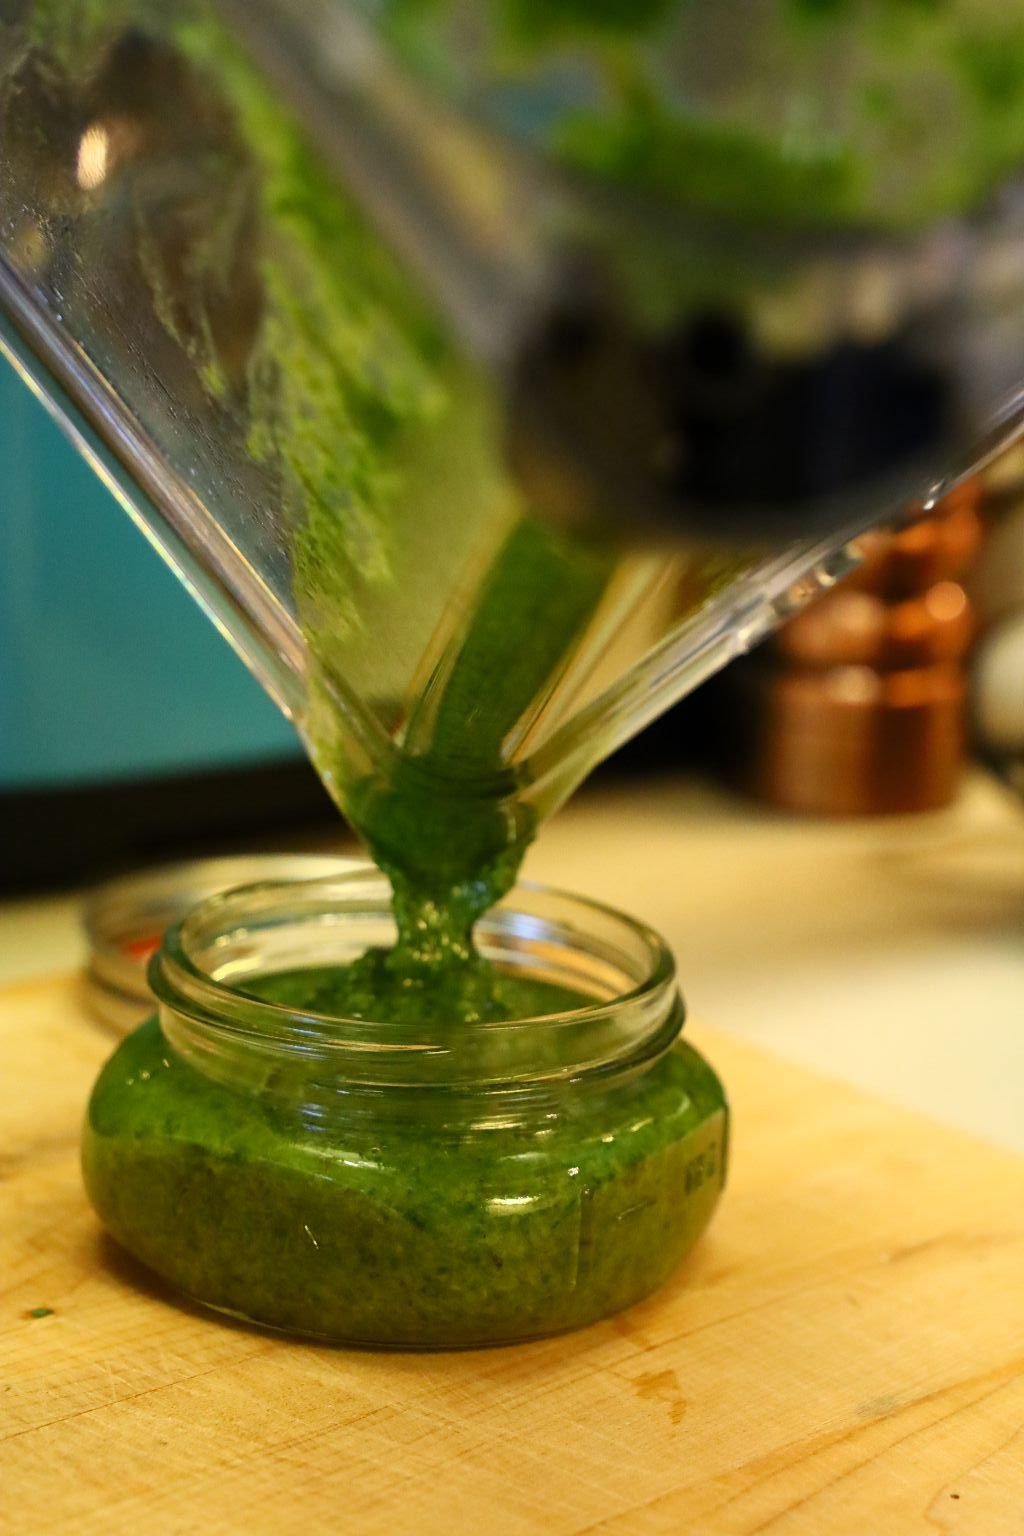
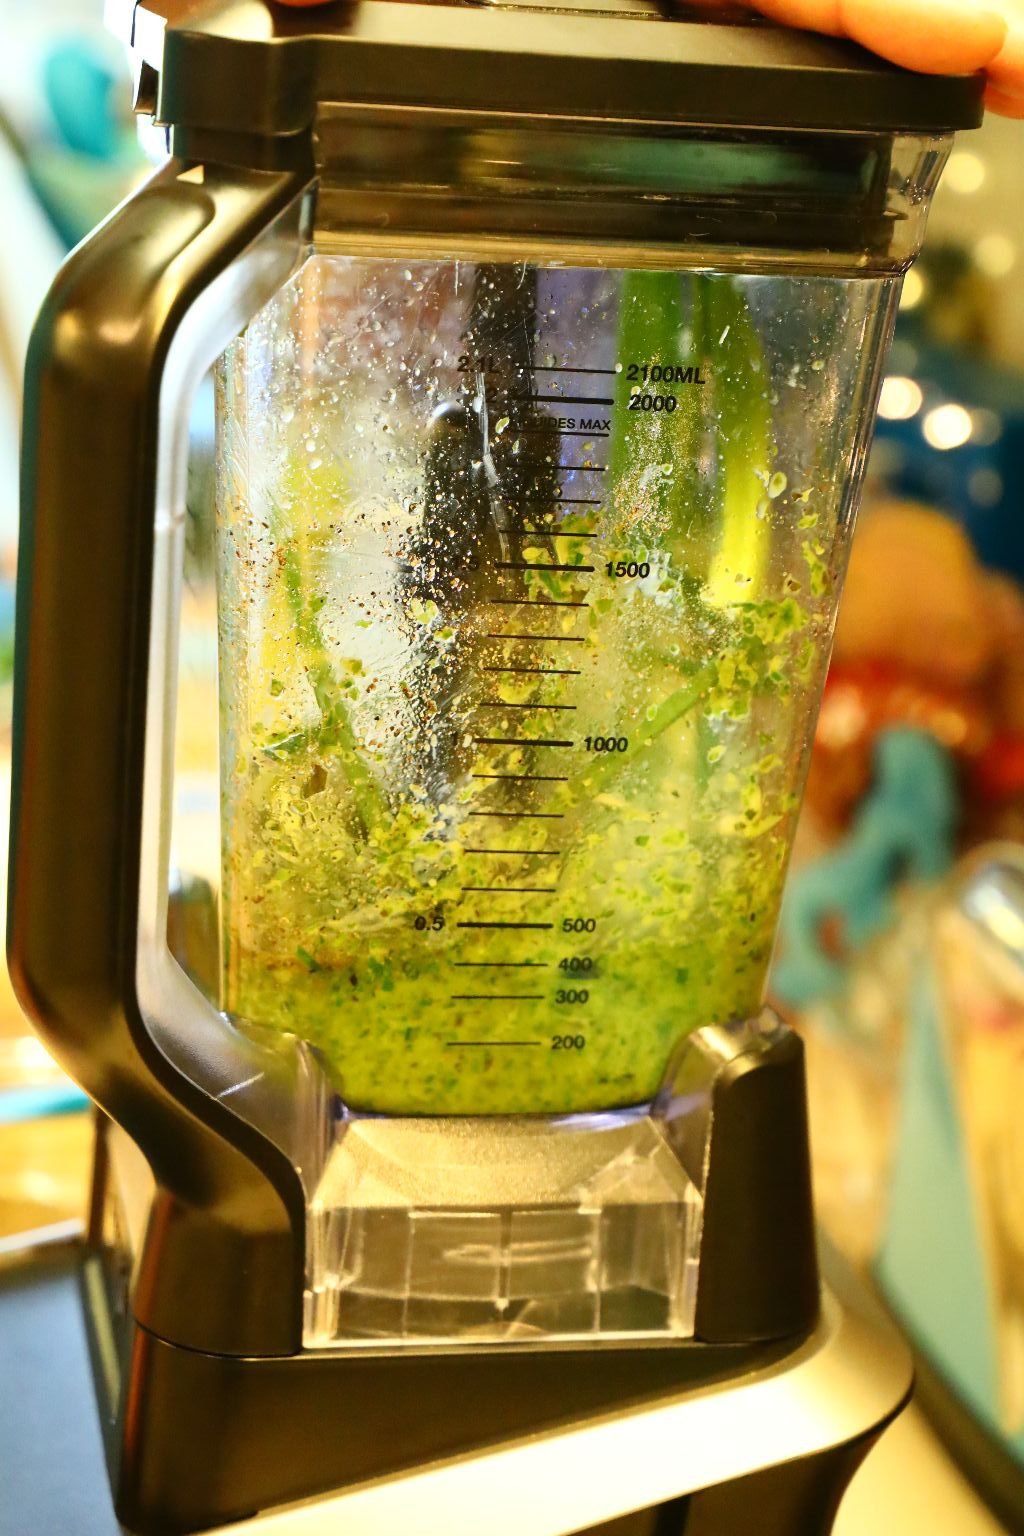
Once blended smooth, pour into a jar as shown. This will keep in your refrigerator for a few weeks if needed, but doesn’t in ours as we eat it well before that time ends.
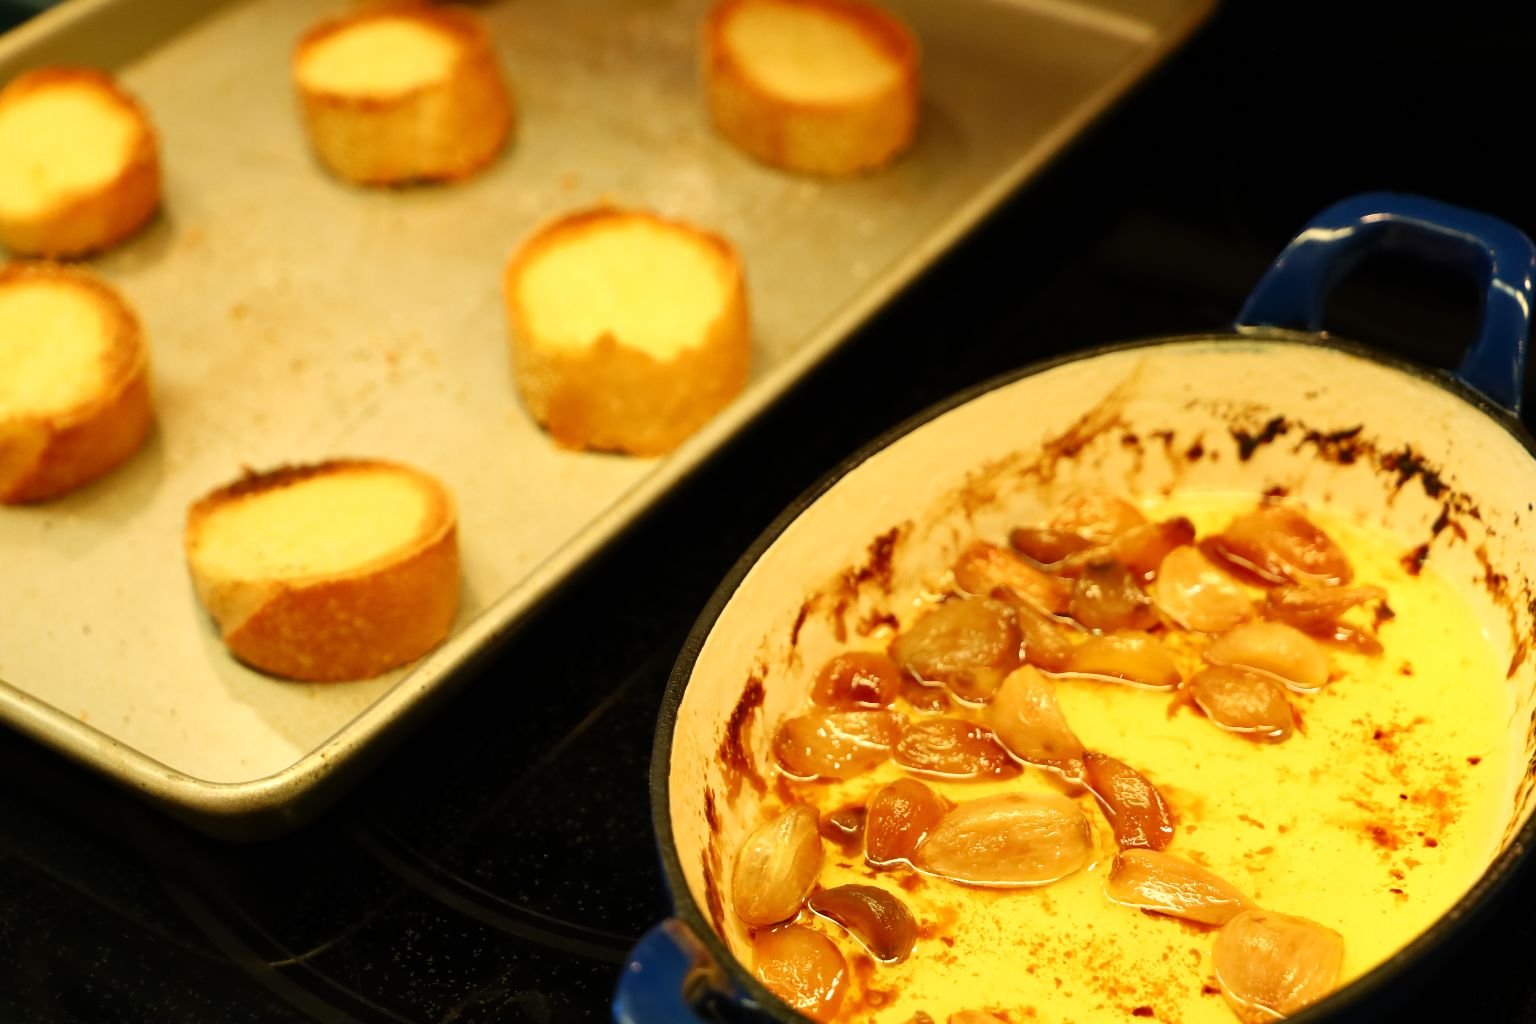
Serve it on some crusty bread with some roasted garlic and enjoy.
——————————————————————-
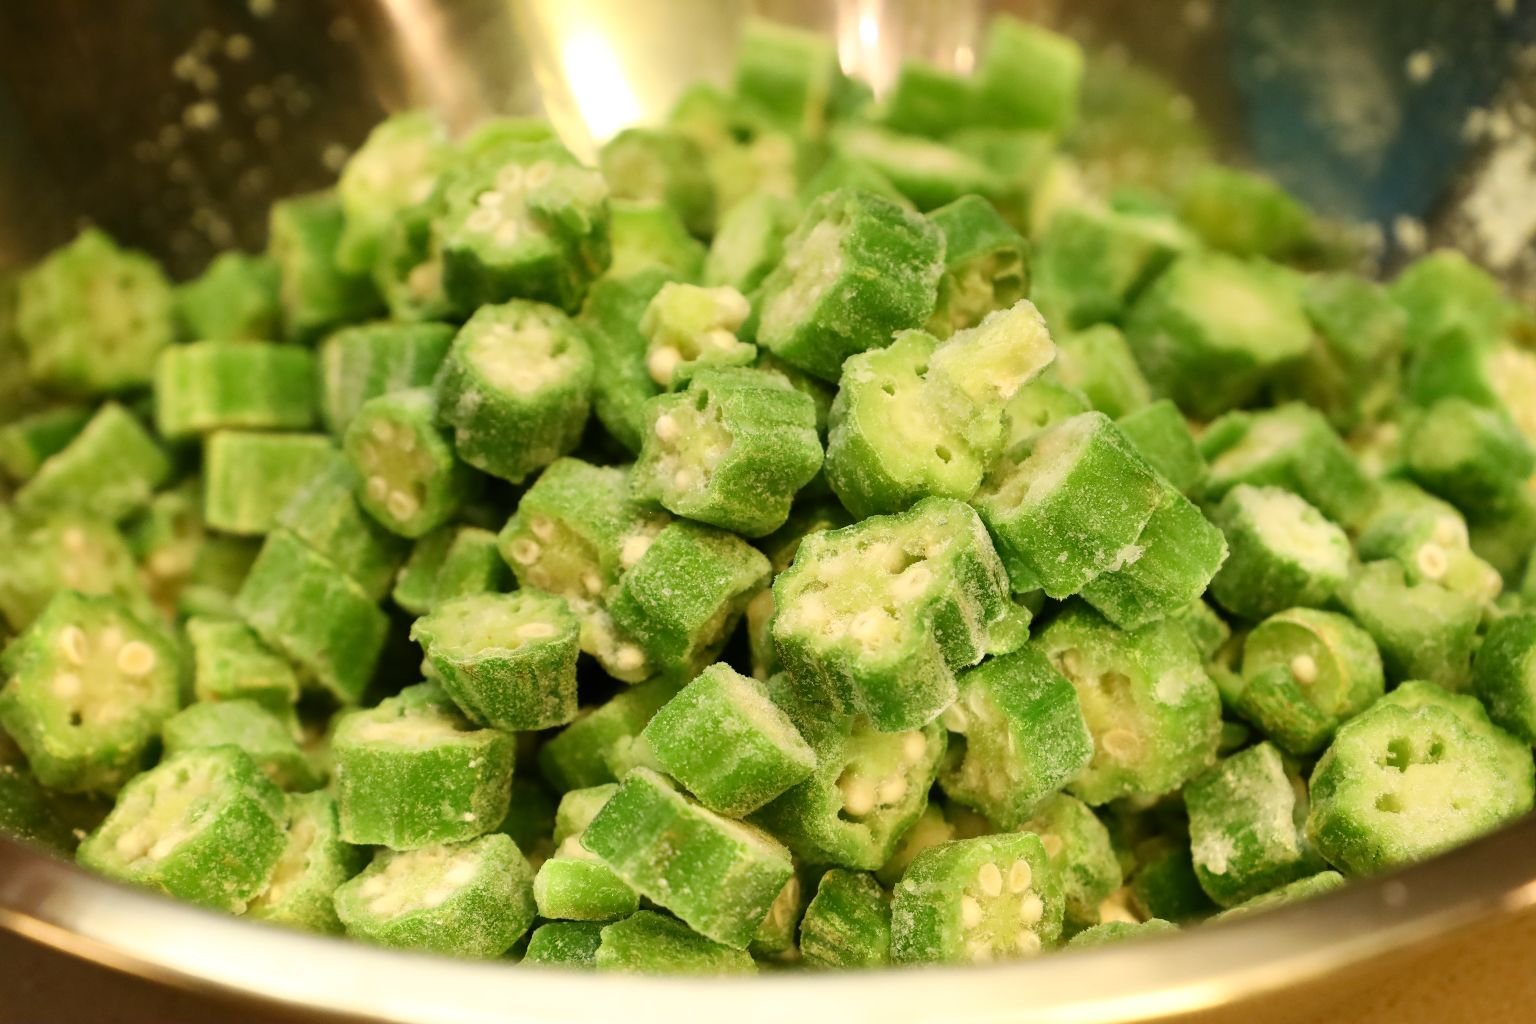
Fried Okra, a classic southern side dish for most any occasion.
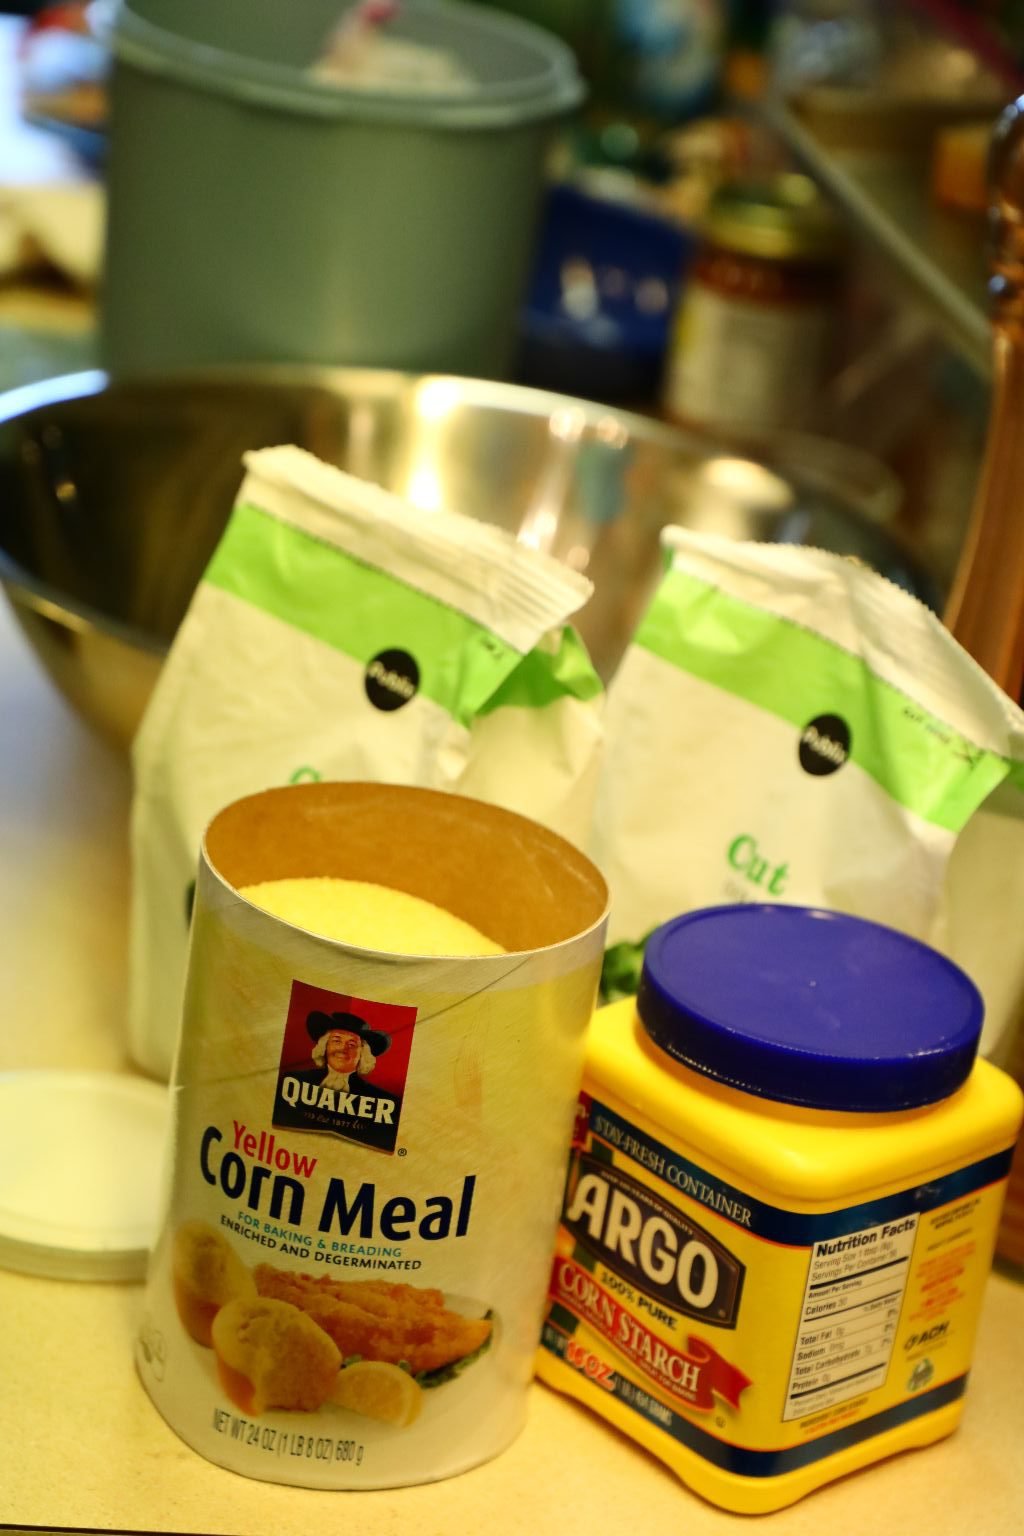
Ingredients:
2 Bags Frozen or Fresh Cut Okra
~3/4 Cup Corn Meal
~3 Tbsp. Corn Starch
~3 Tbsp. Flour
Salt and Pepper to taste
3/4 Cup Peanut Oil
TIP: Garlic powder is also nice in this recipe

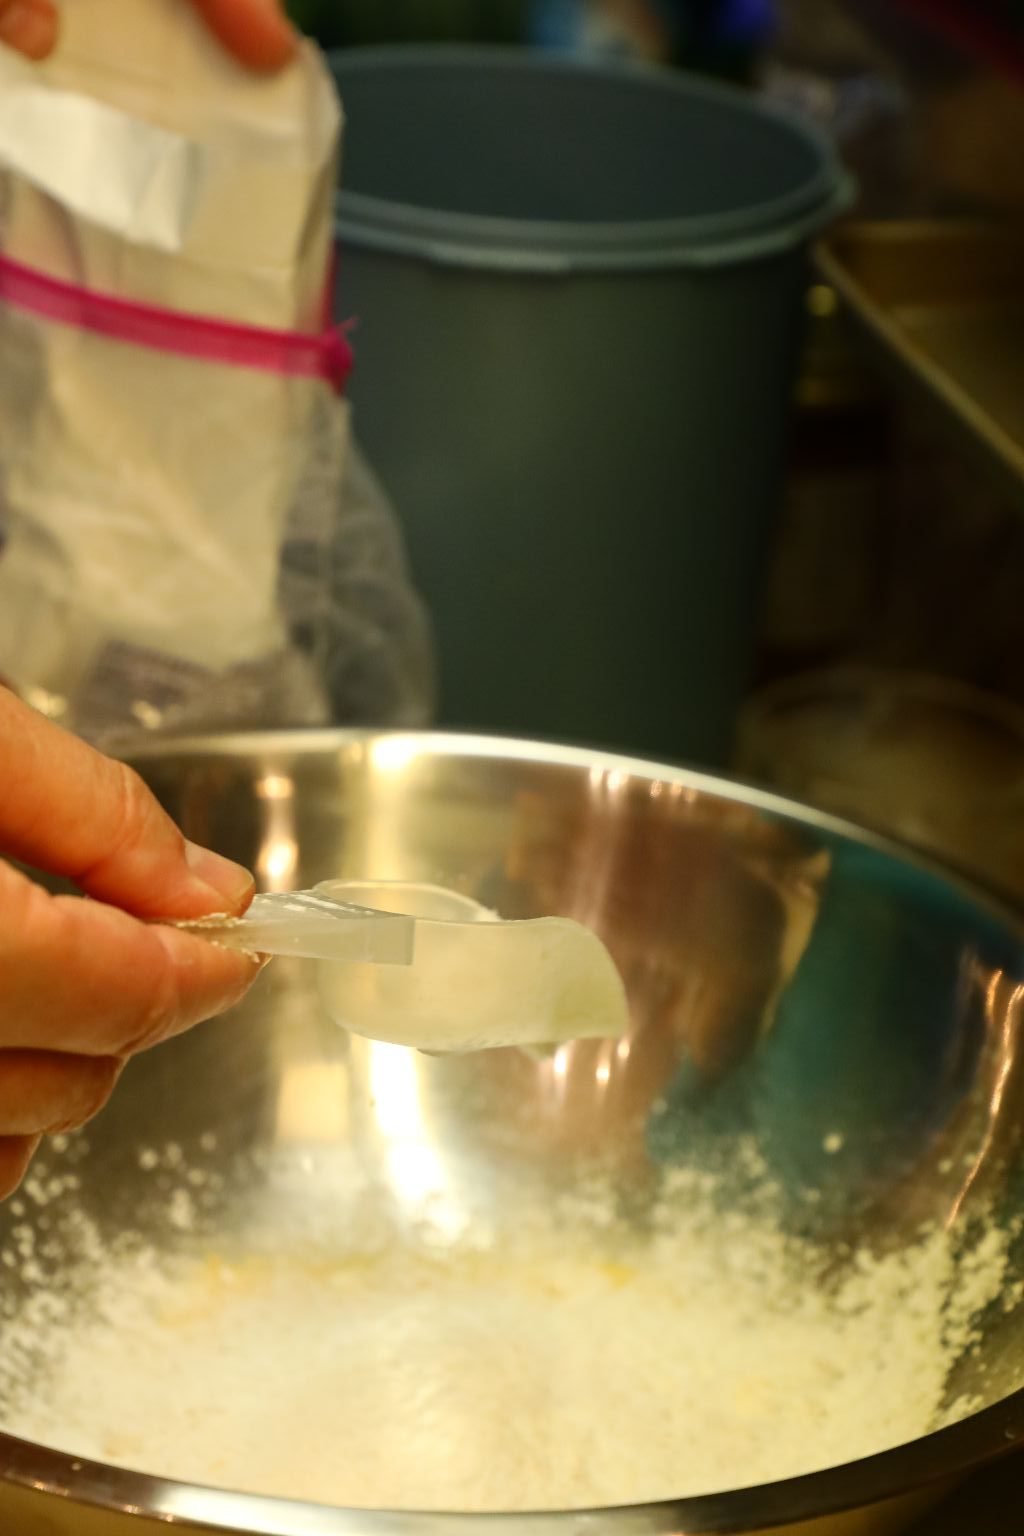
Add all your dry ingredients into a large bowl as shown.
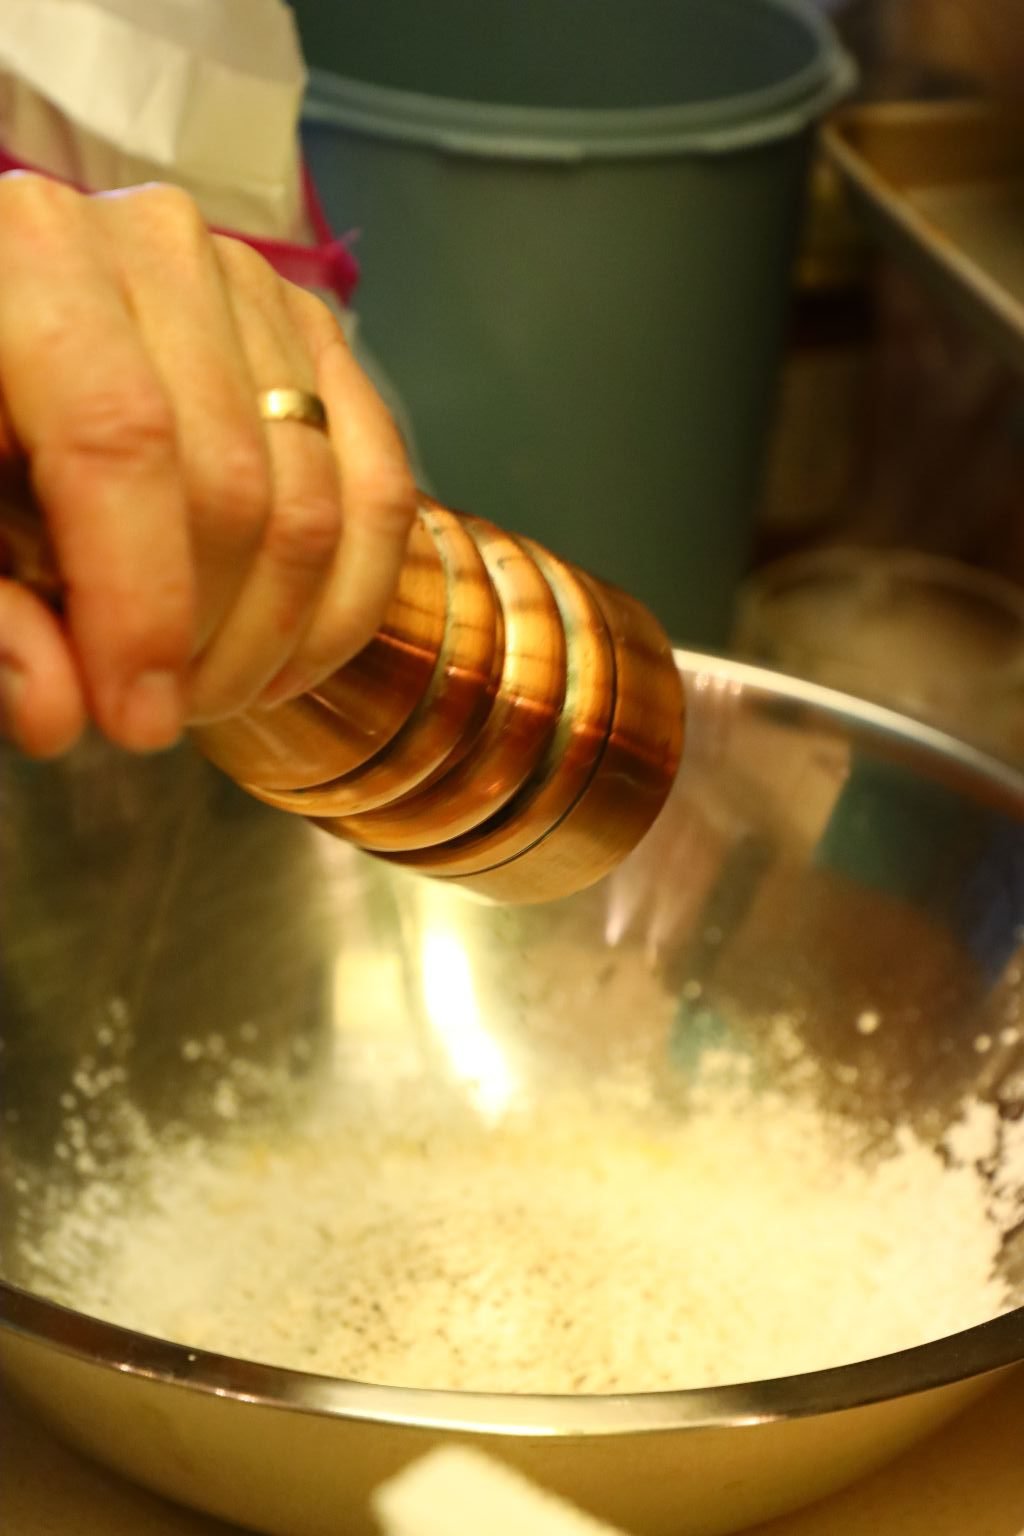
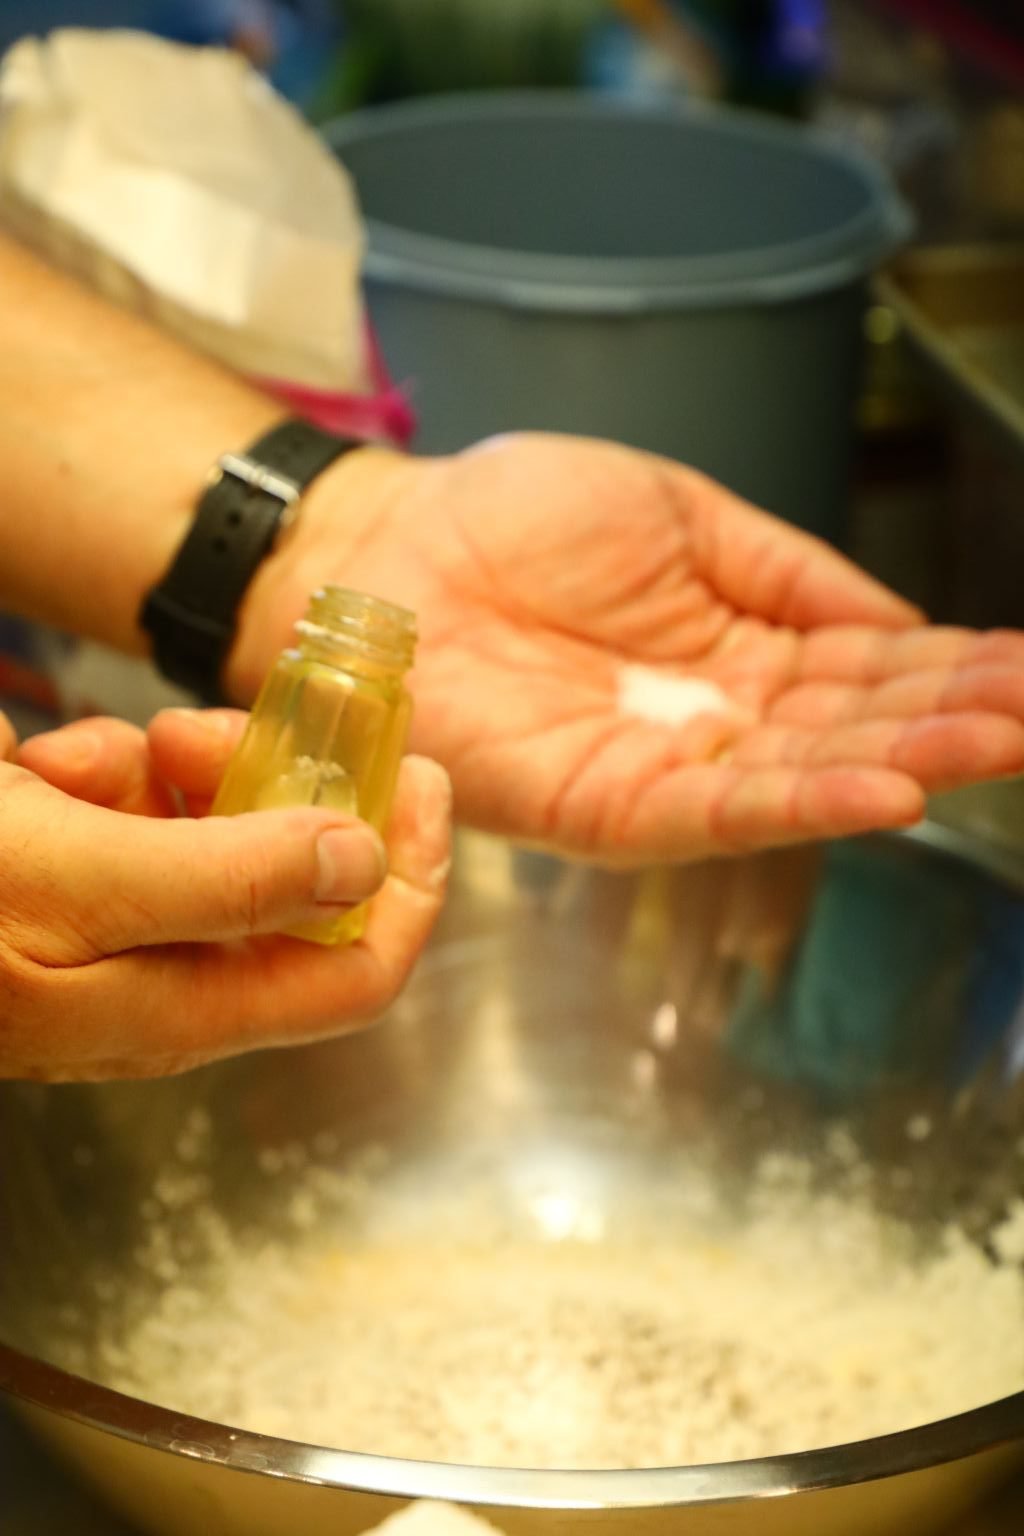
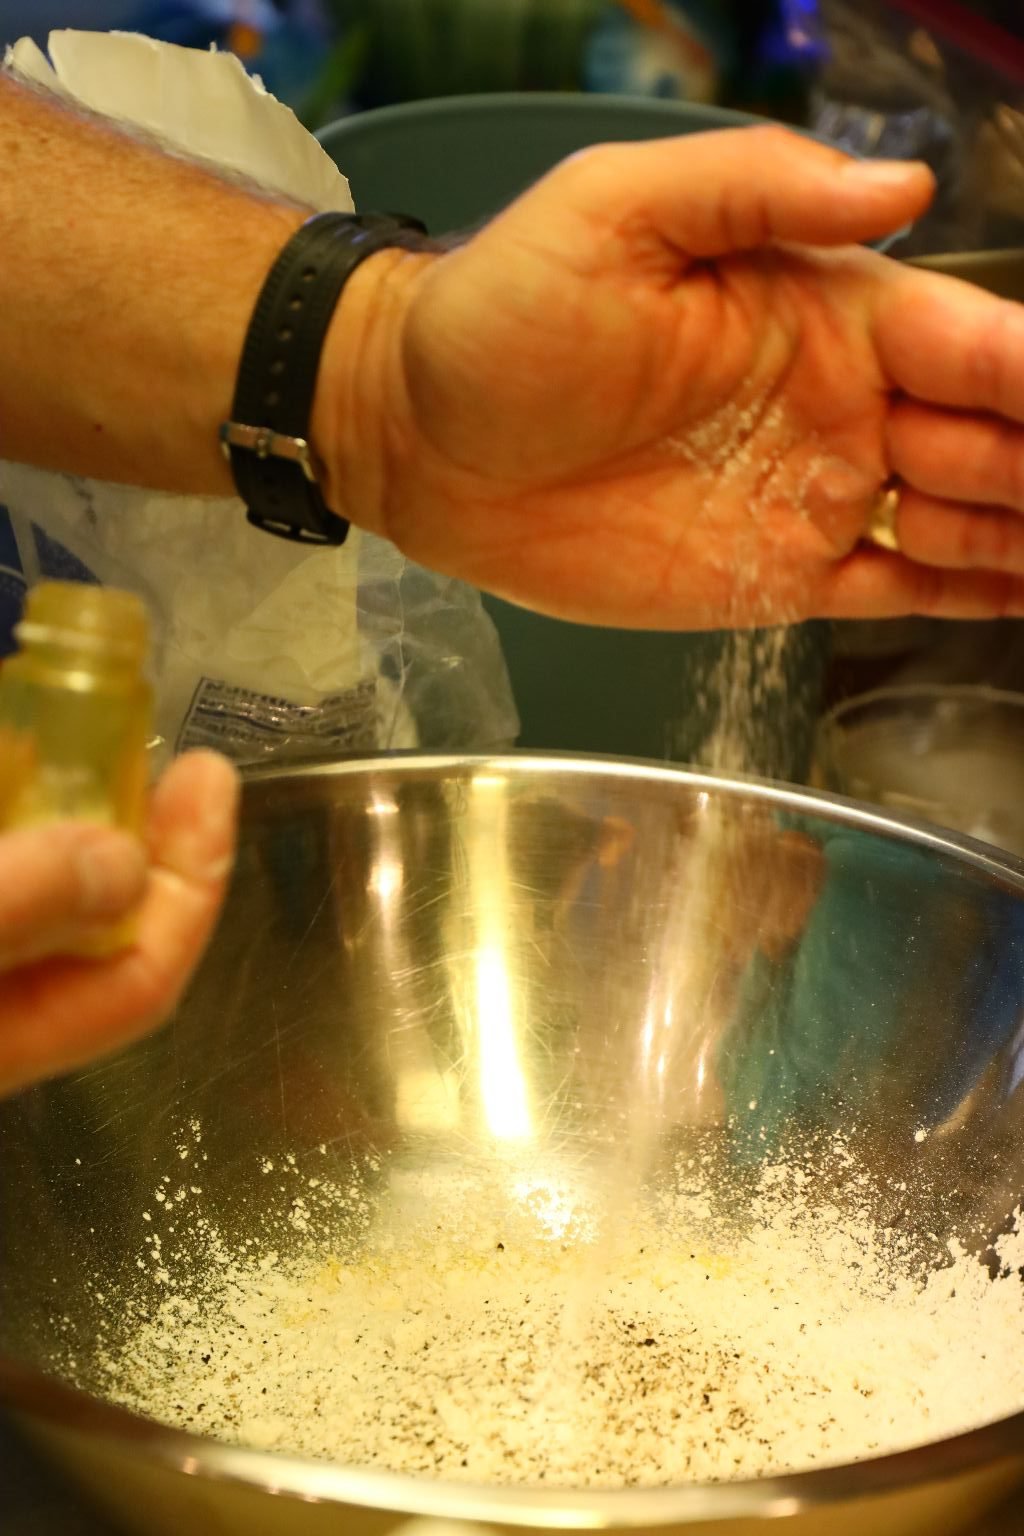
Here I am adding the fresh ground pepper and salt.
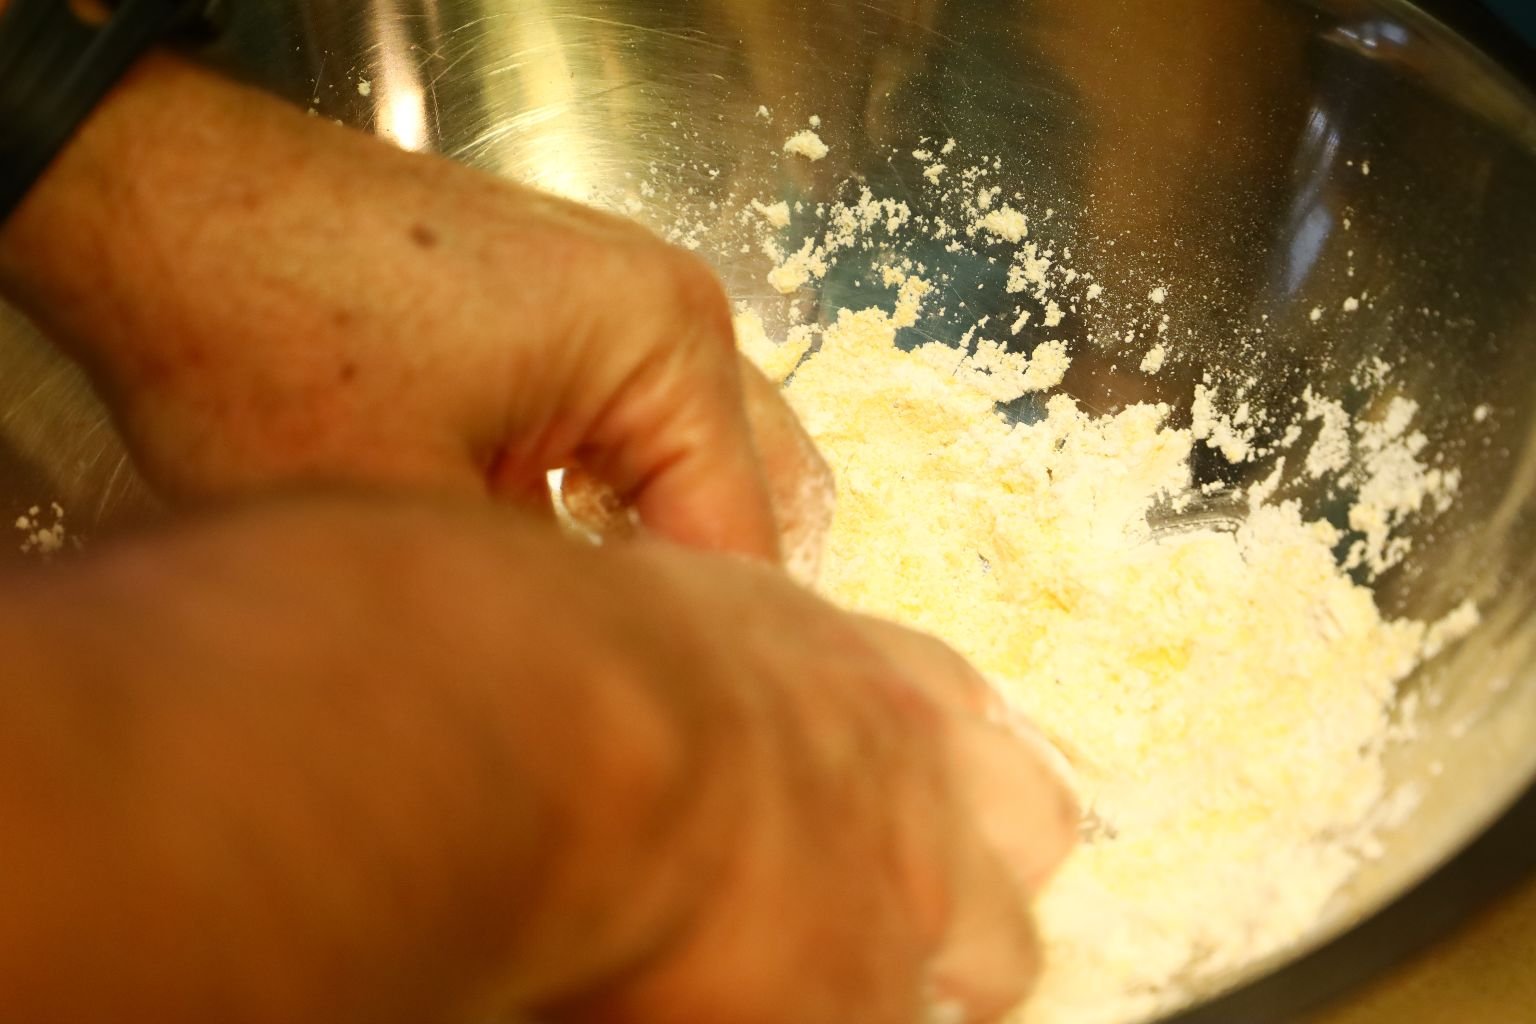
Mix all the ingredients with your favorite tool.
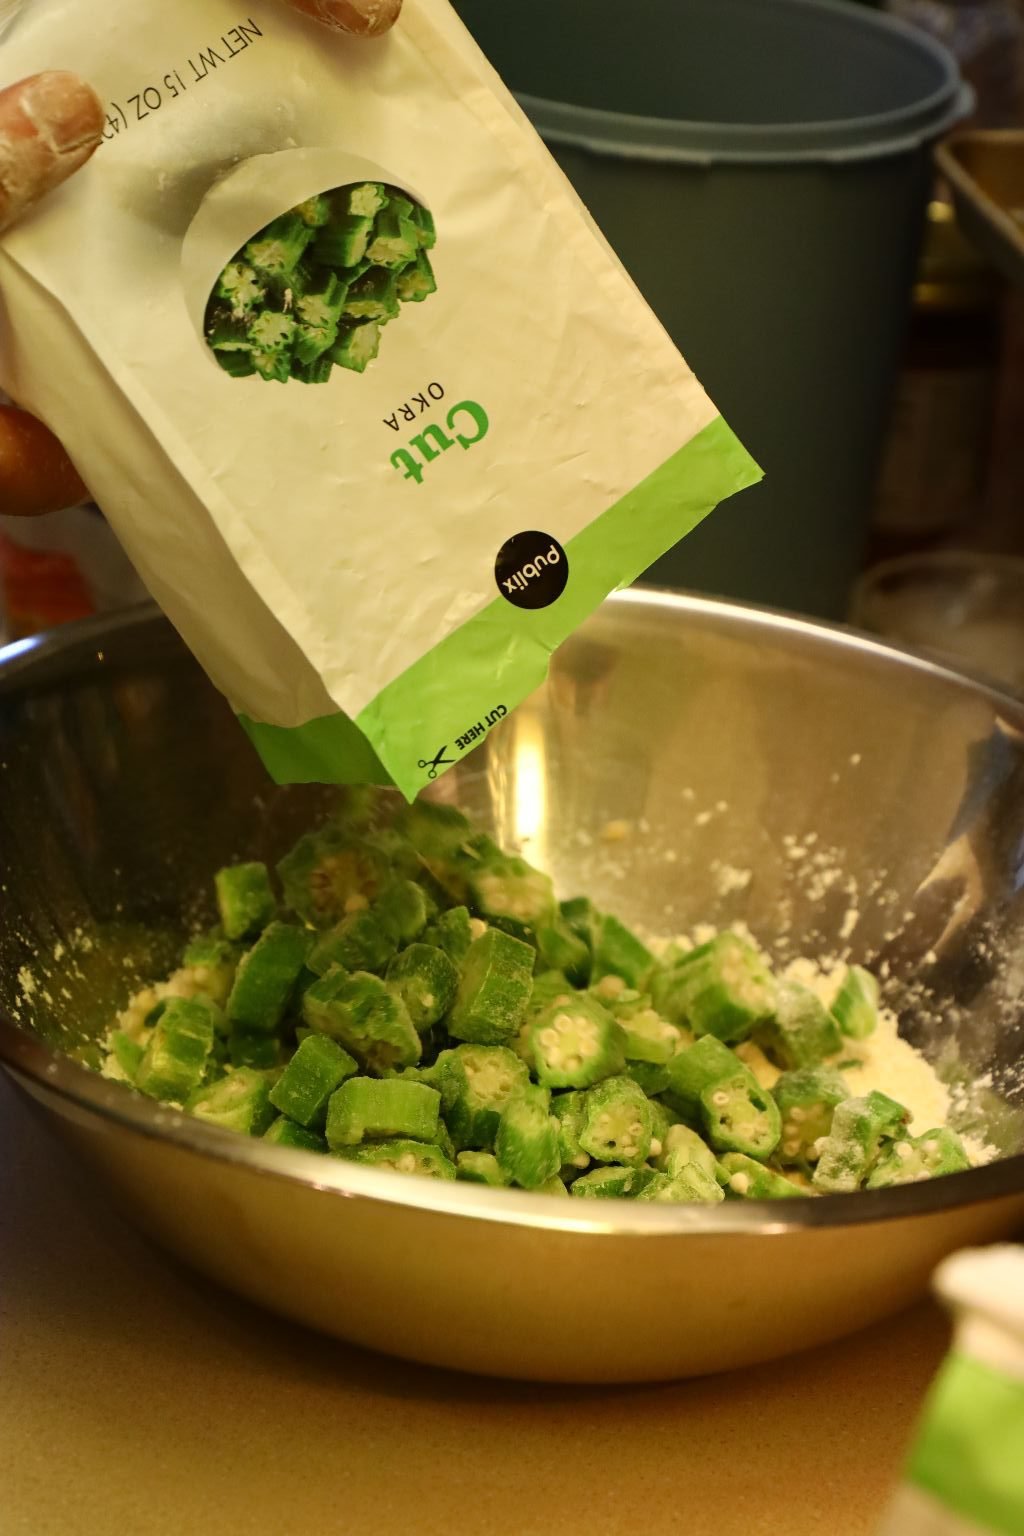
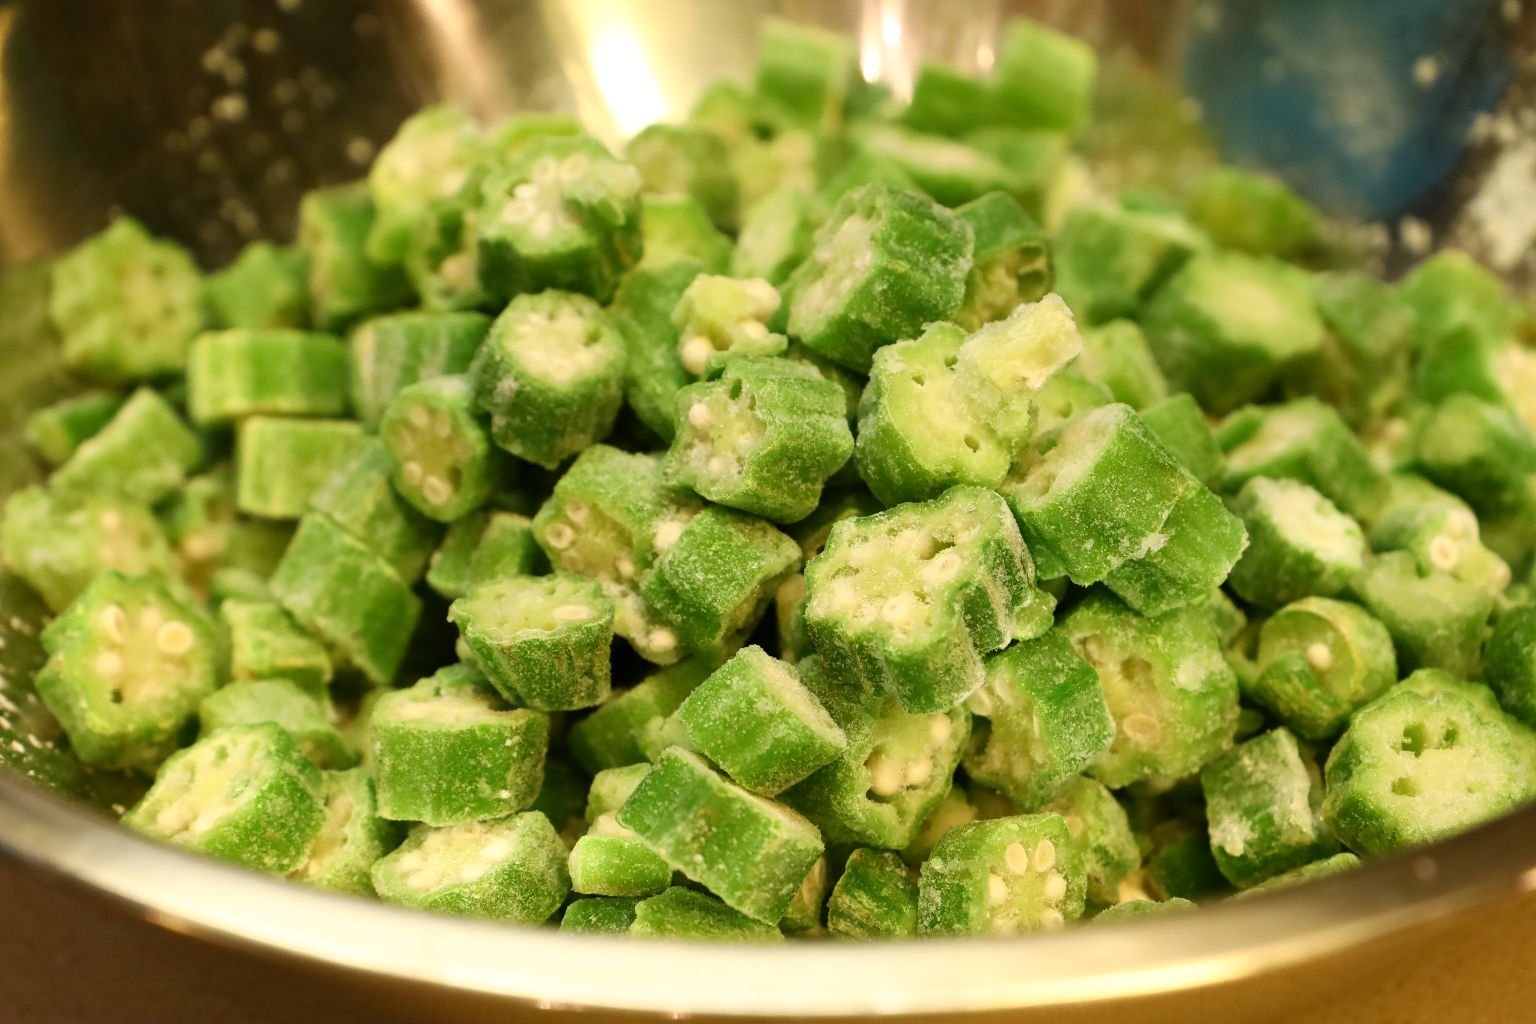
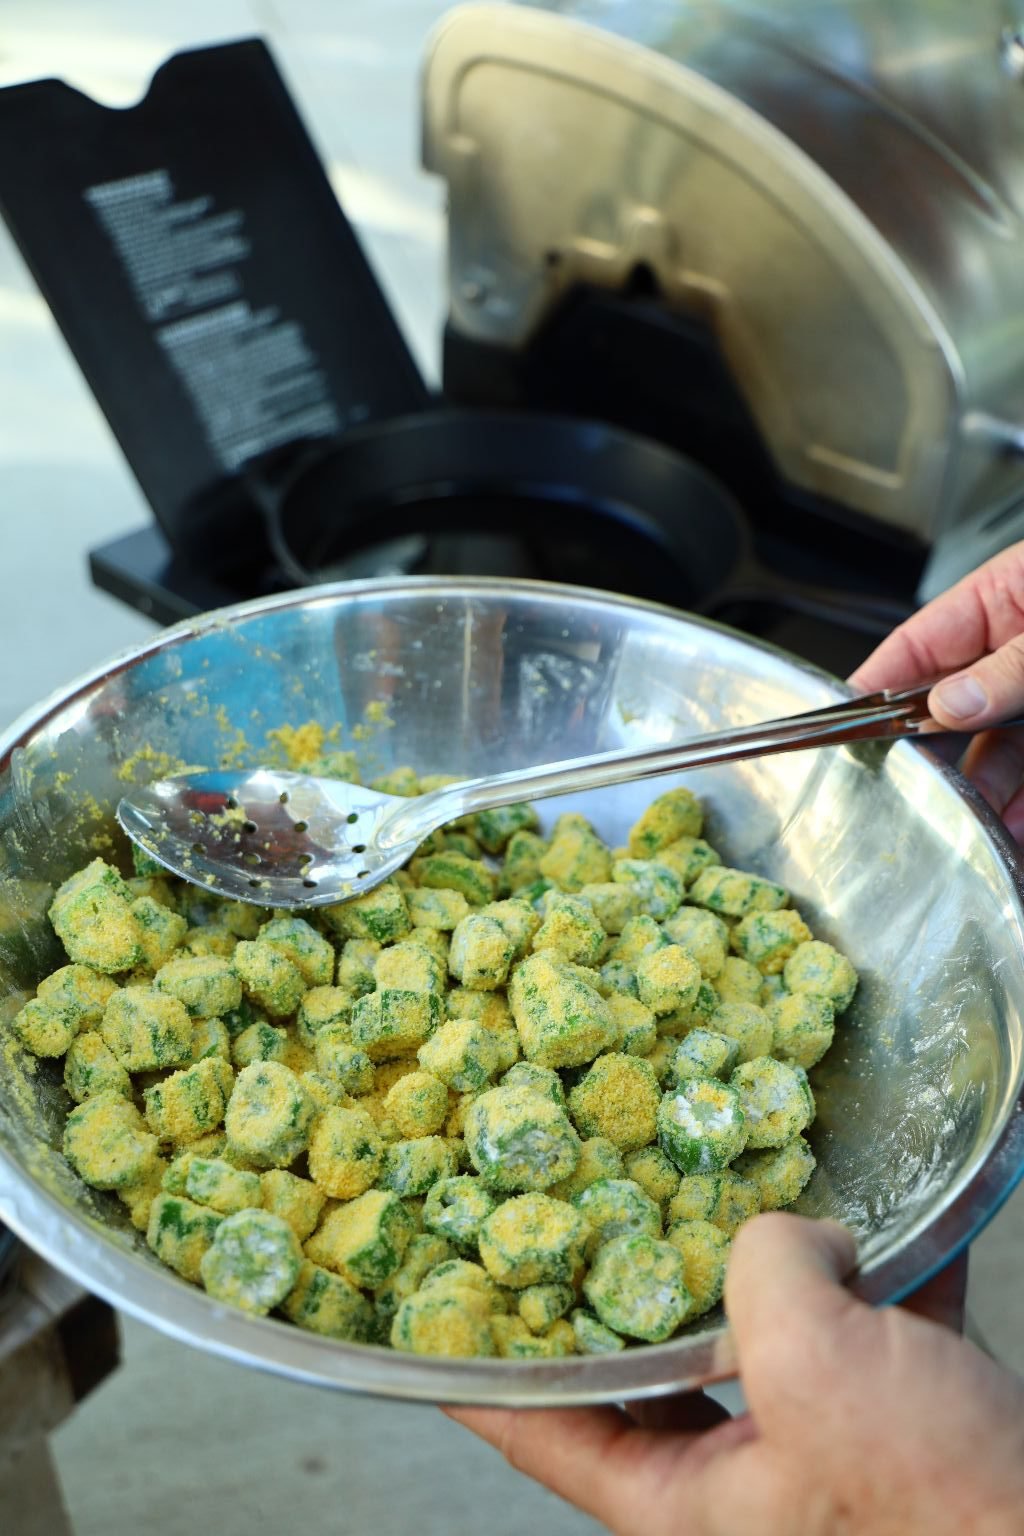
Now add your frozen cut okra.
——————————————————-
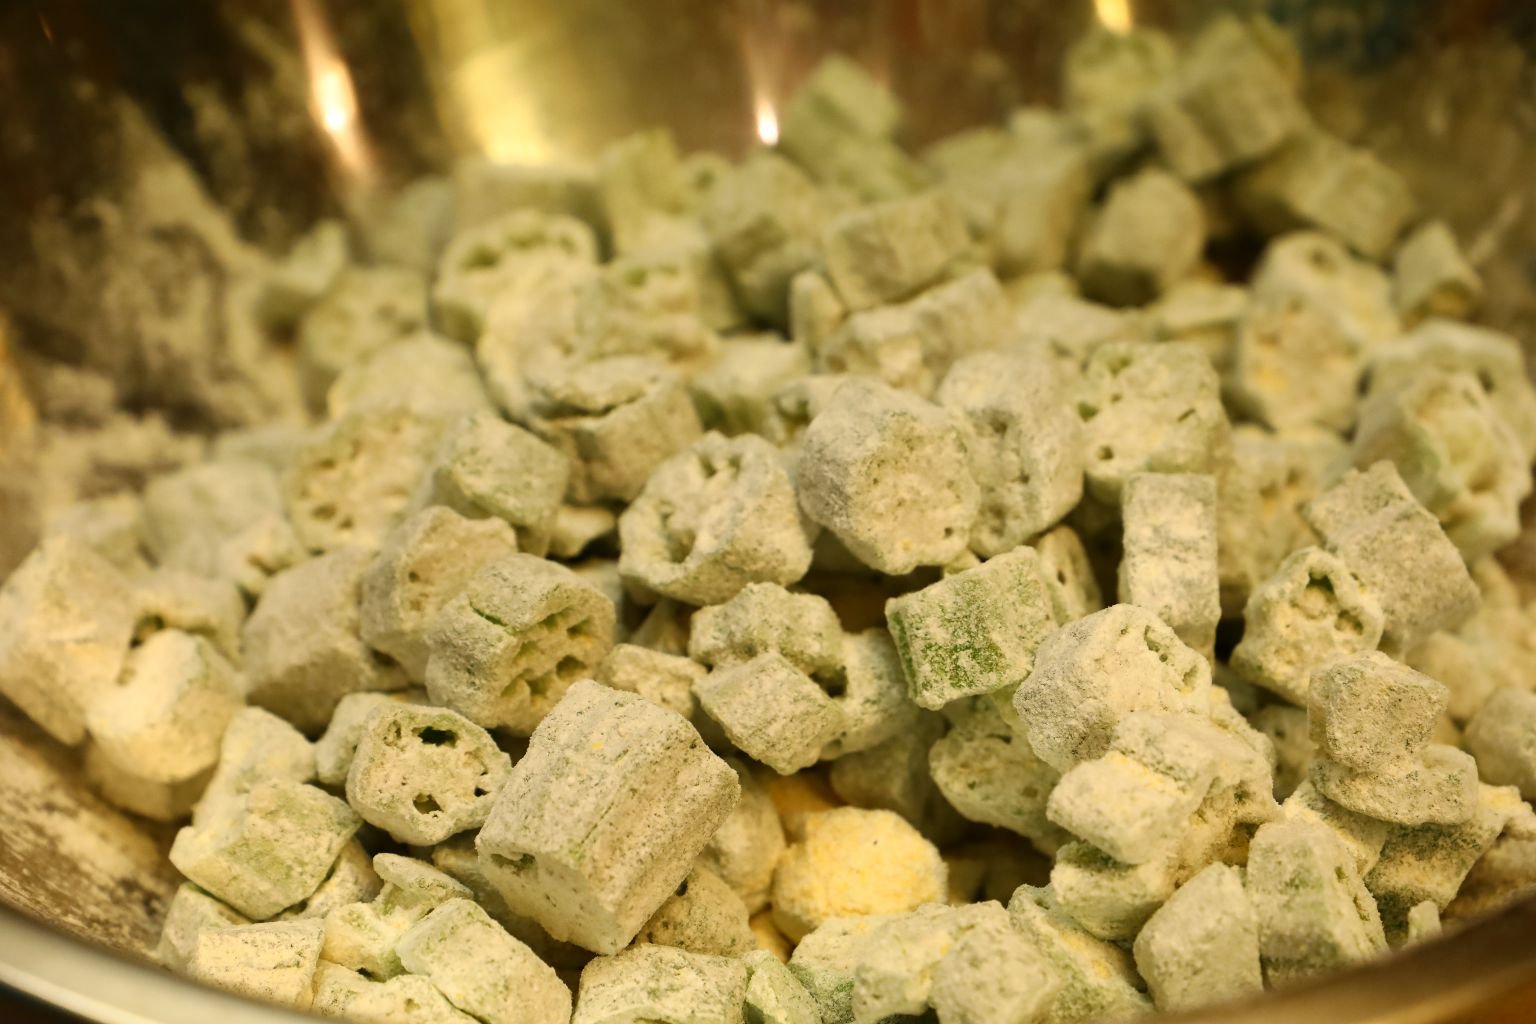
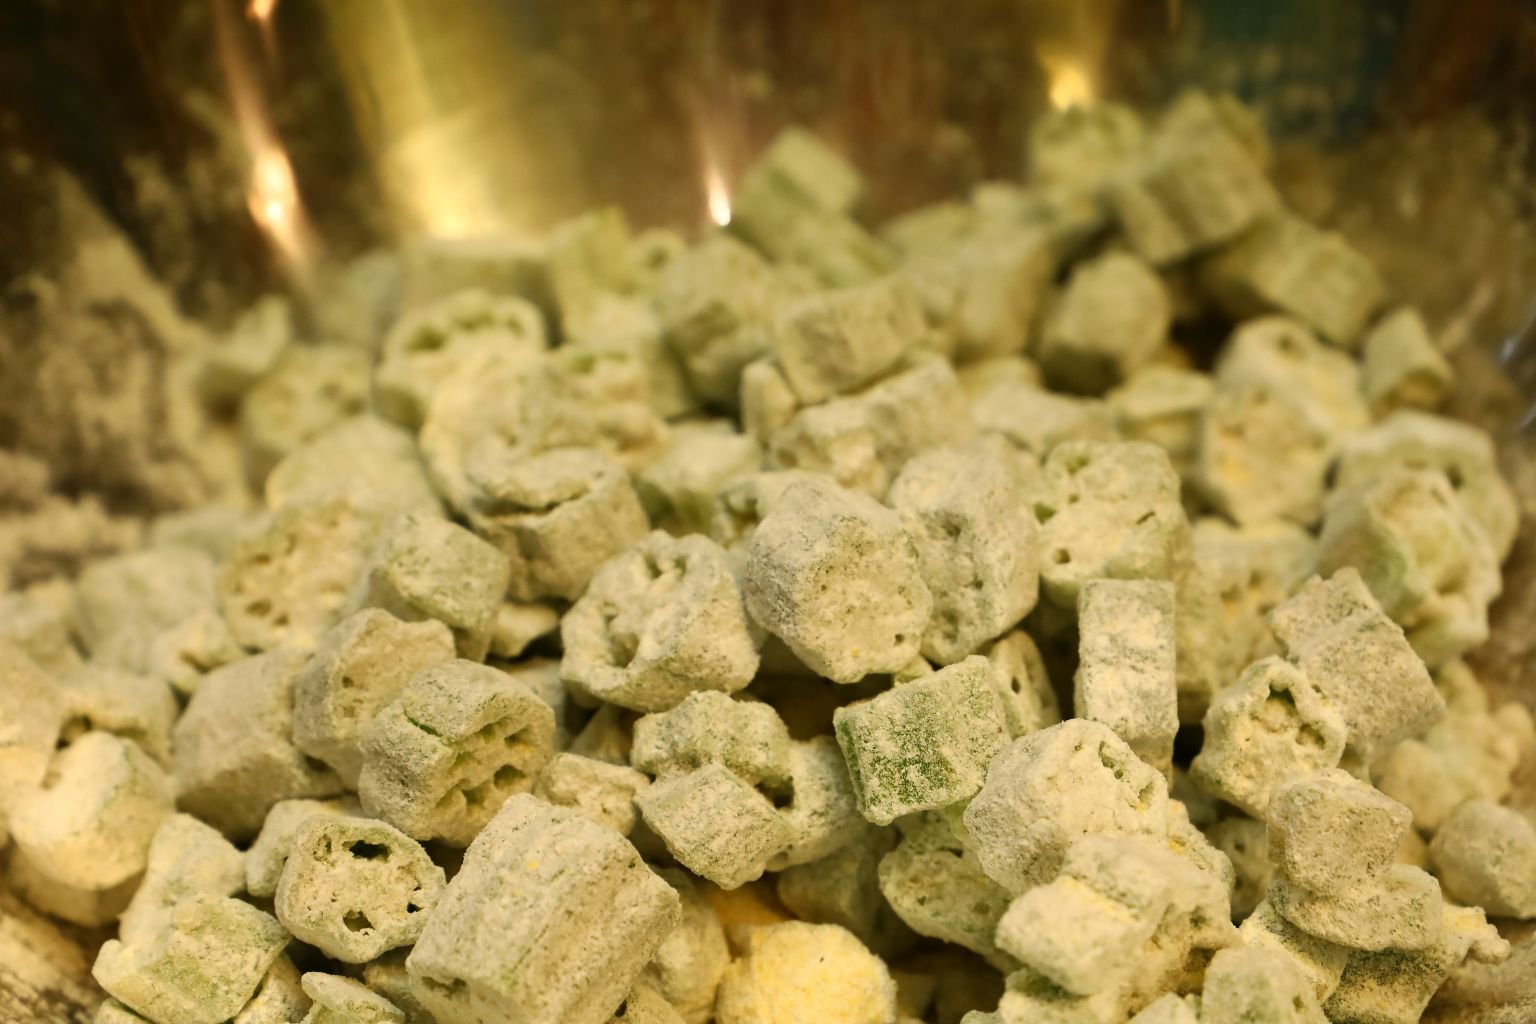
As it begins to thaw, the okra will pick up more of the coating.
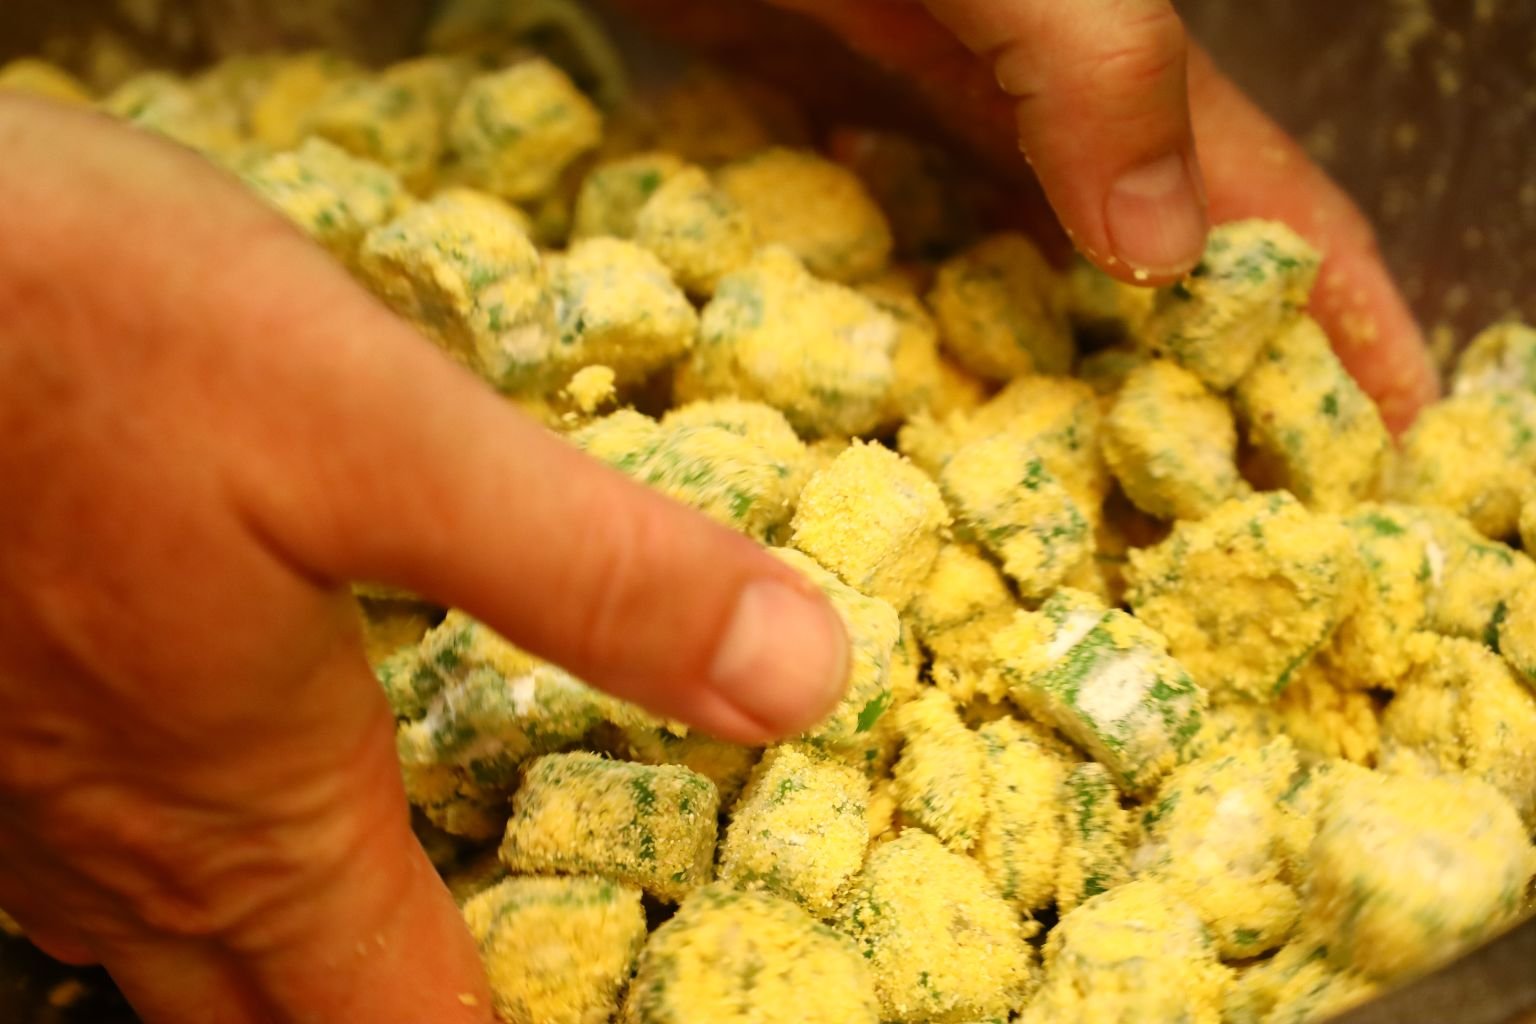
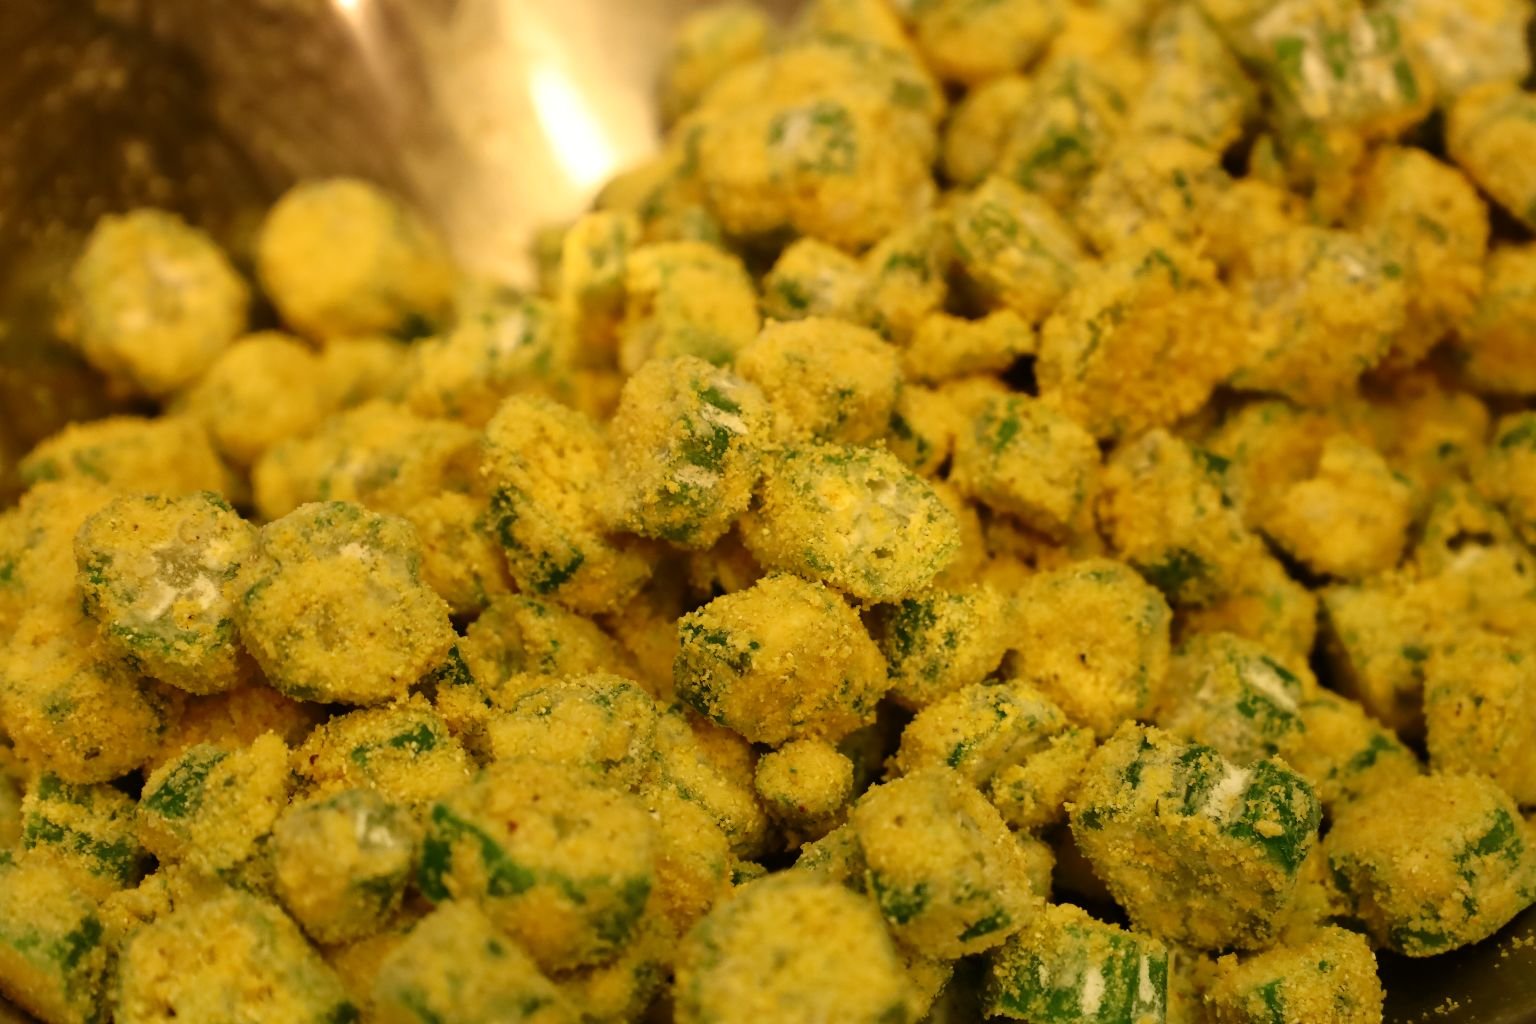
Here after a few minutes, you can see the corn meal start to stick to the okra.
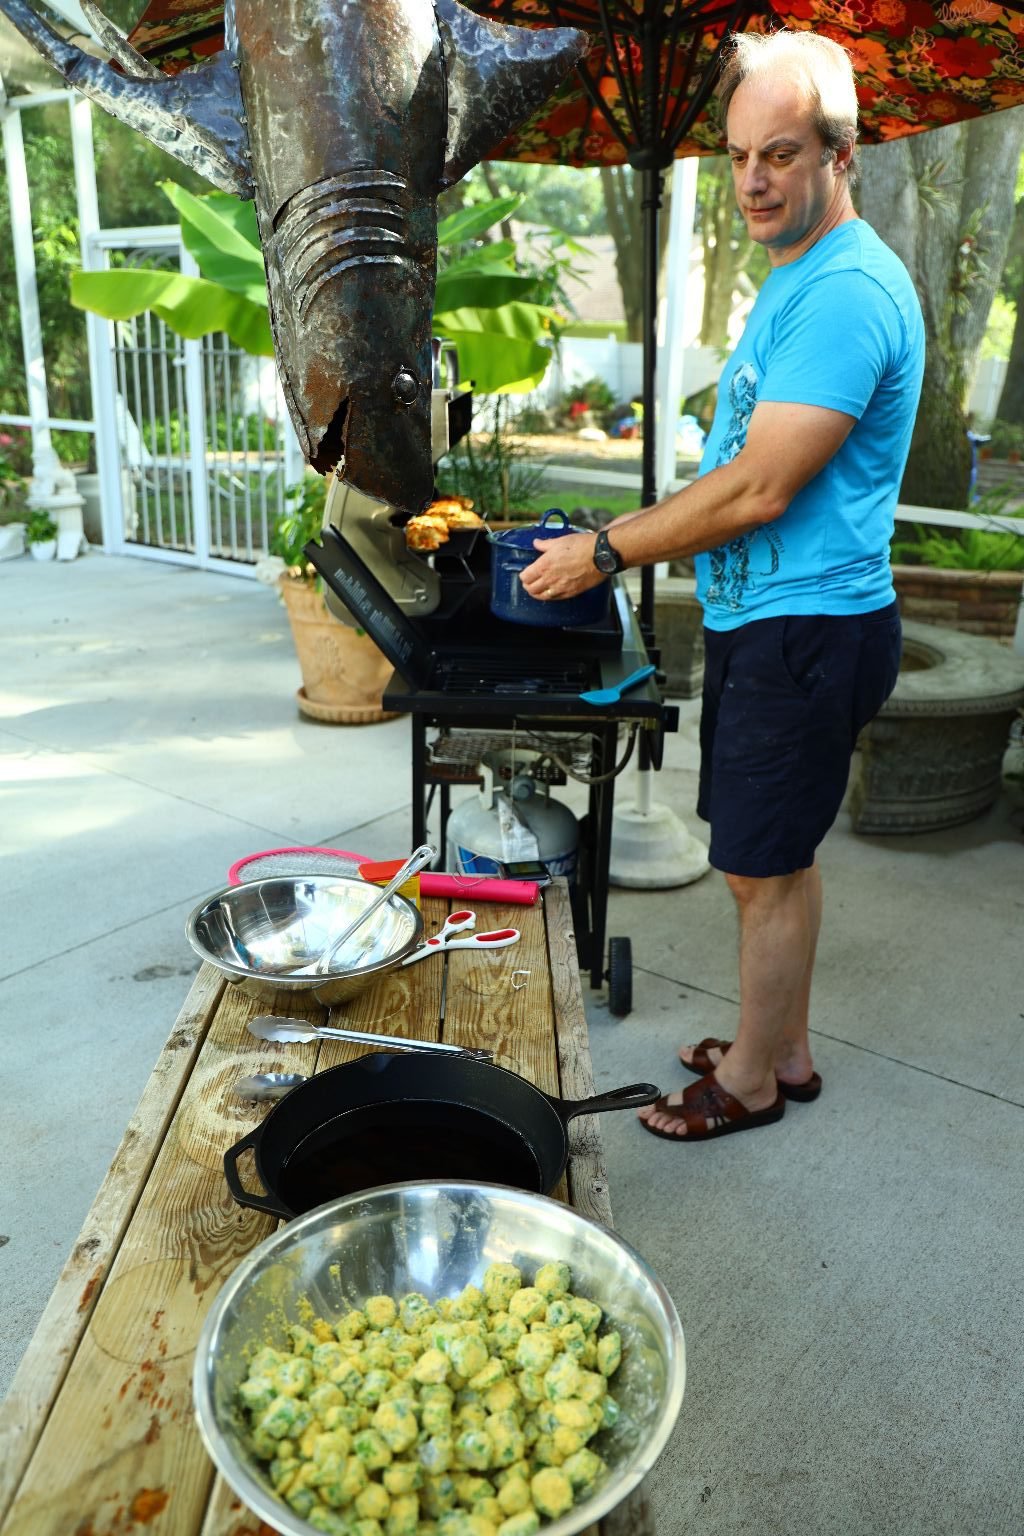
Here I am multitasking the use of my grill. I love that I have a side burner.
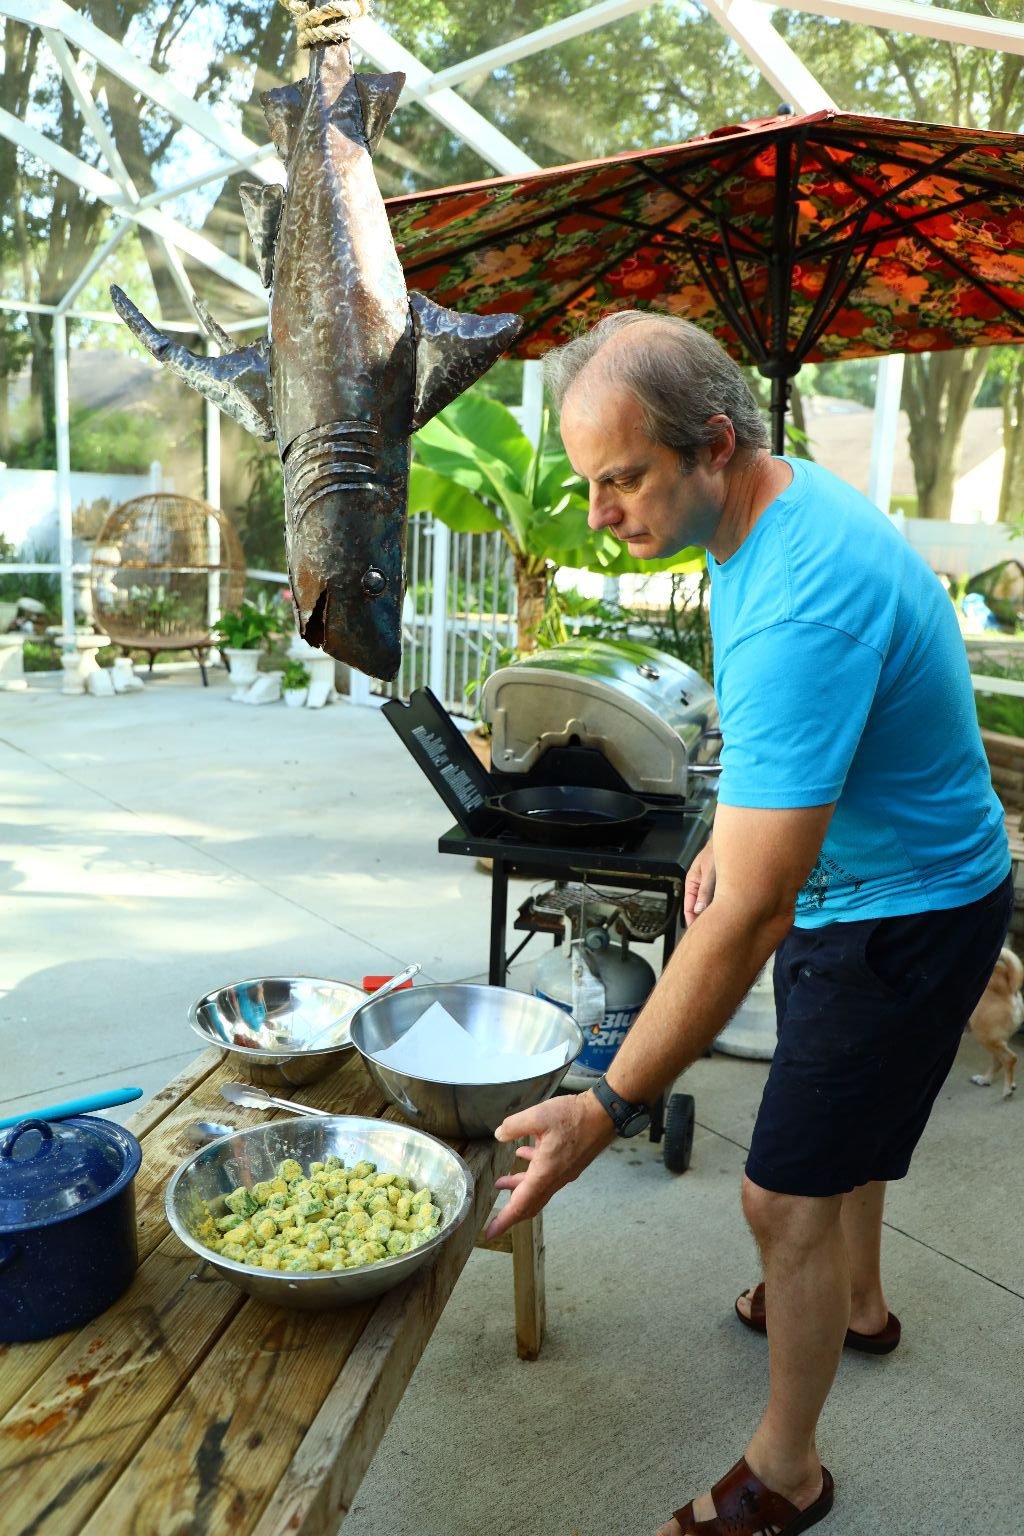
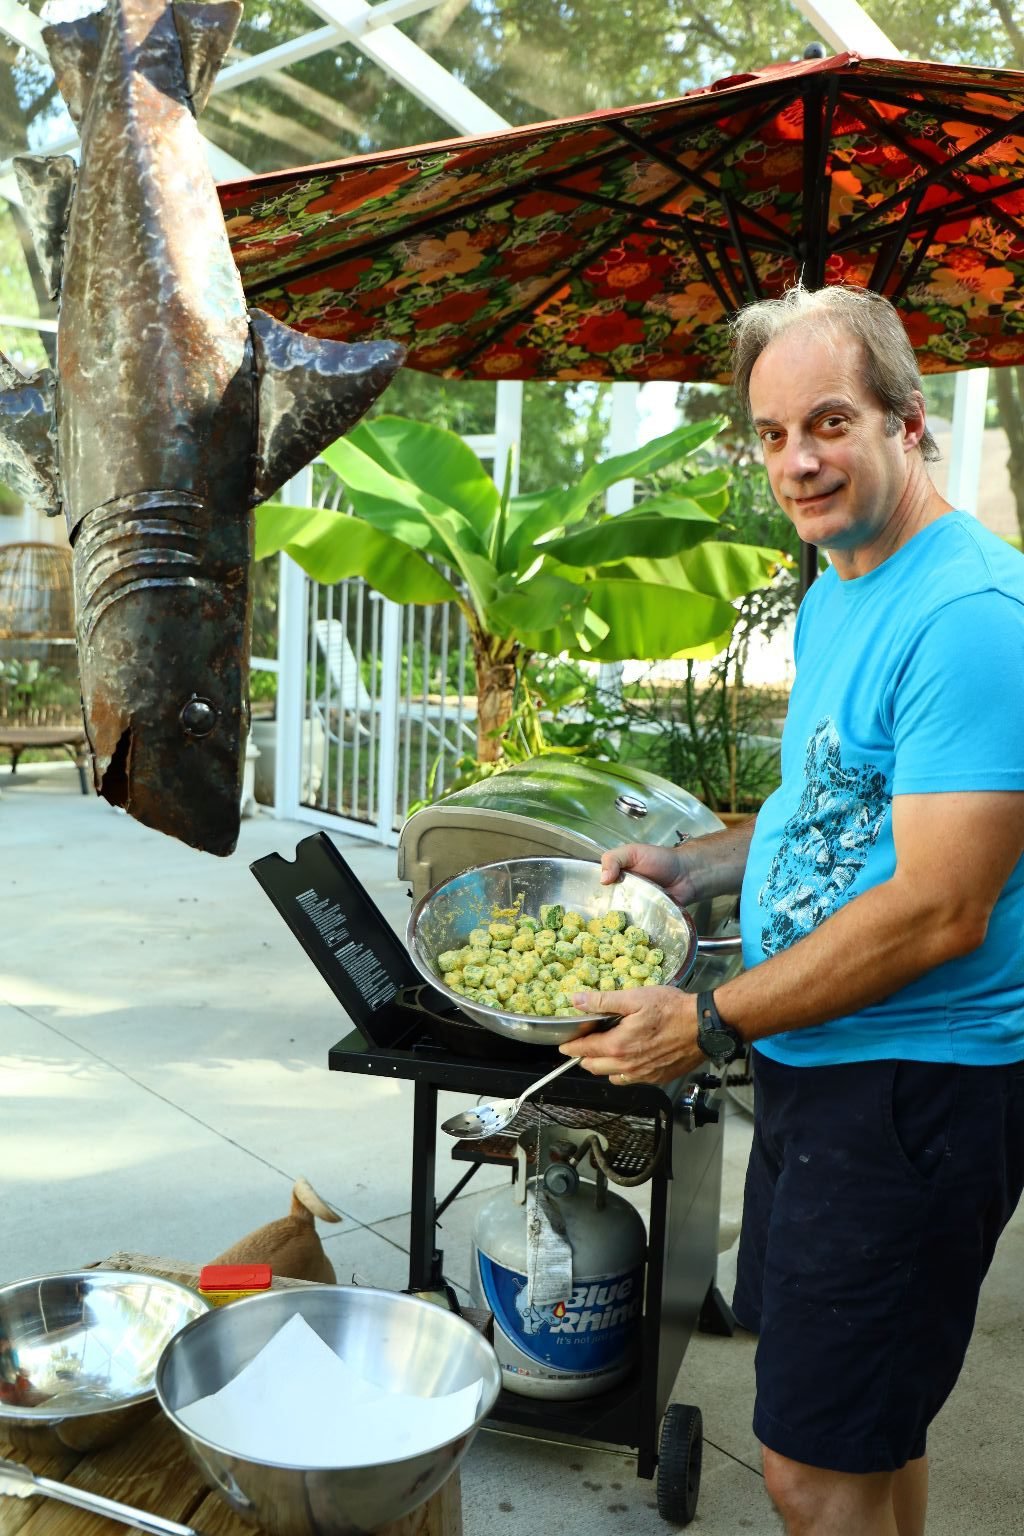
A cast iron skillet is best when frying these okra as it distributes the heat evenly, and the iron holds the temperature of what it is cooking. You can’t destroy these pans which is why they are so versatile.
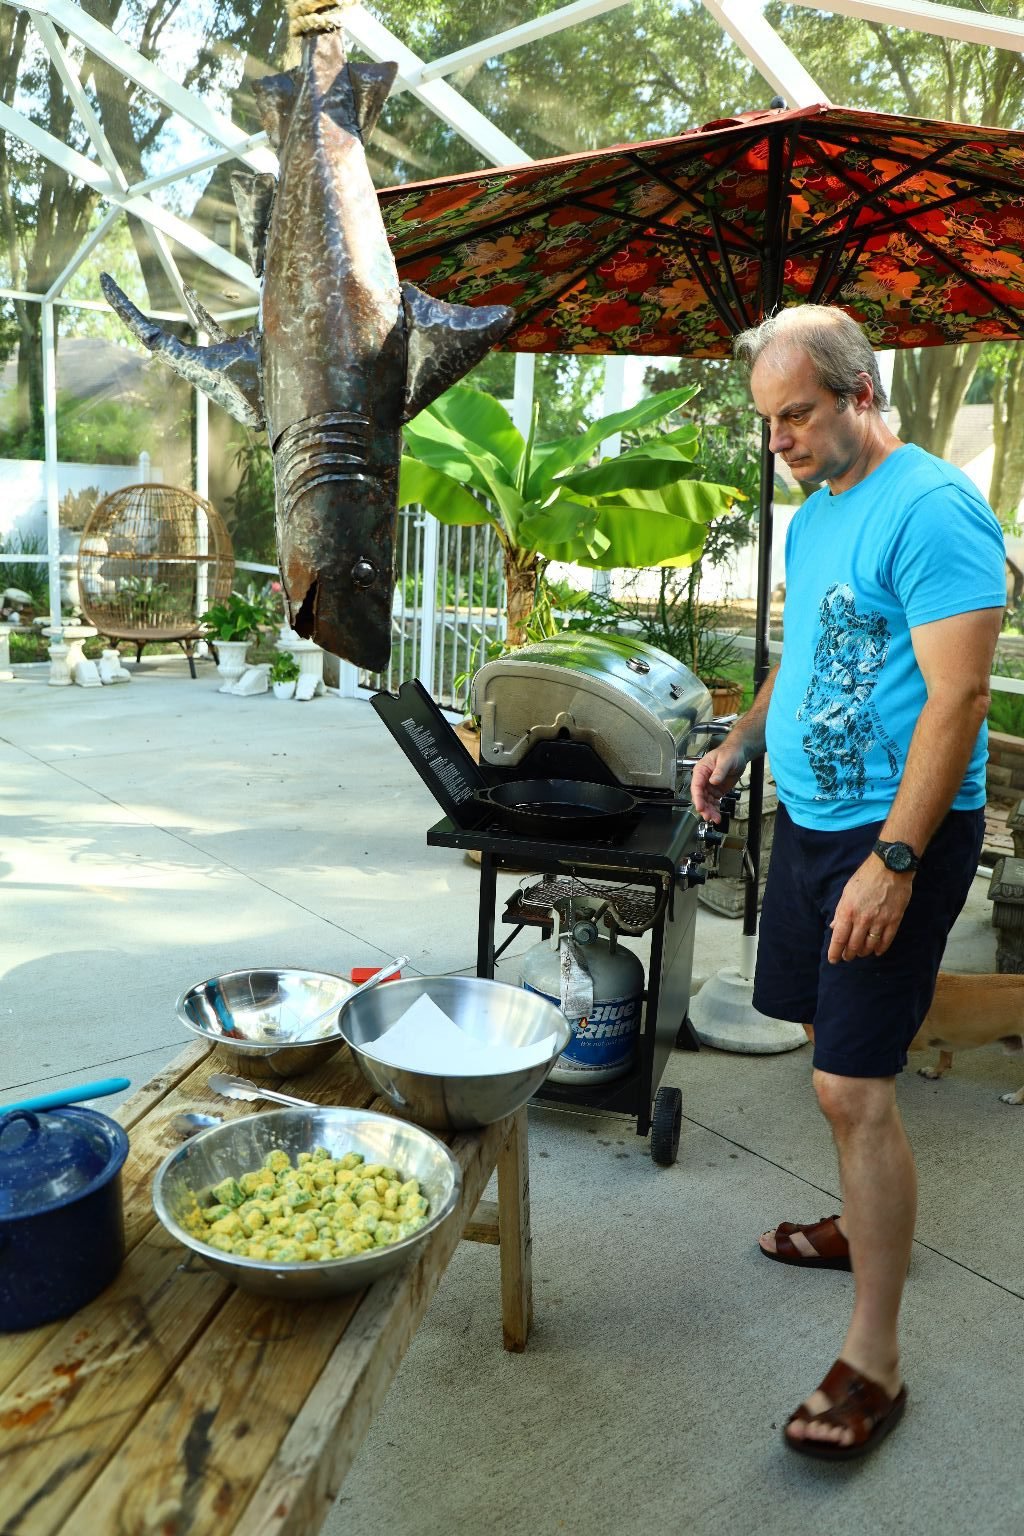
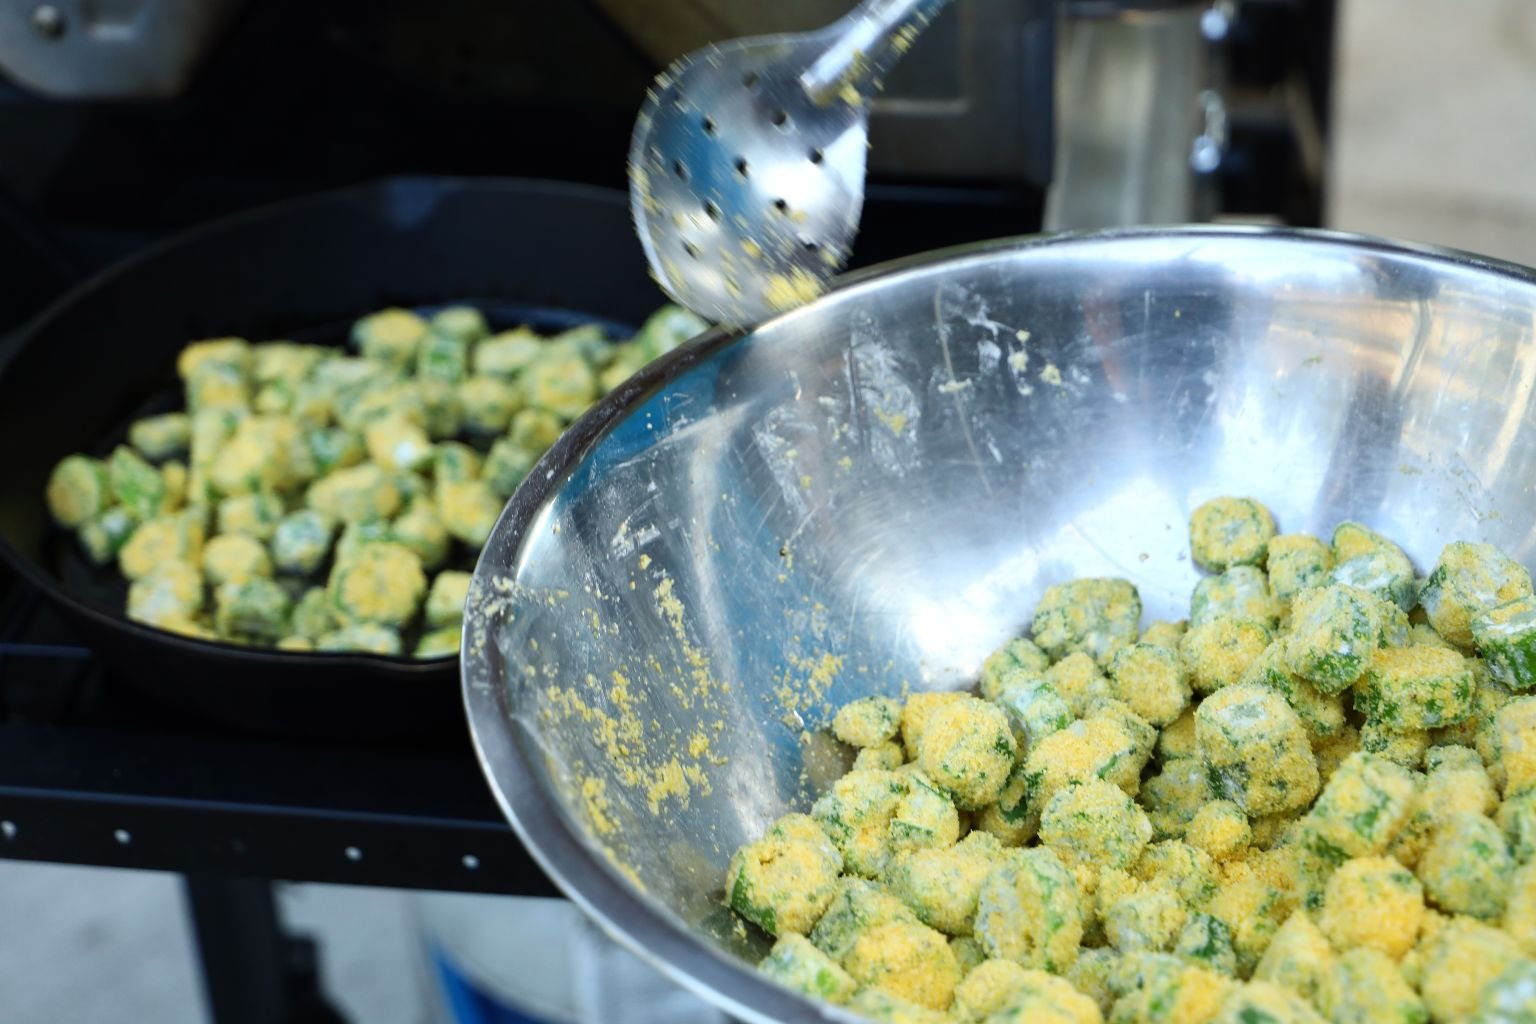
Heat your oil to medium high heat then place in your okra using a slotted spoon. The slotted spoon is used so you won’t splatter the oil when you place the okra in it. A slotted spoon also won’t pick up all the excess breading left in the bowl that didn’t stick to the okra.
——————————————————————-
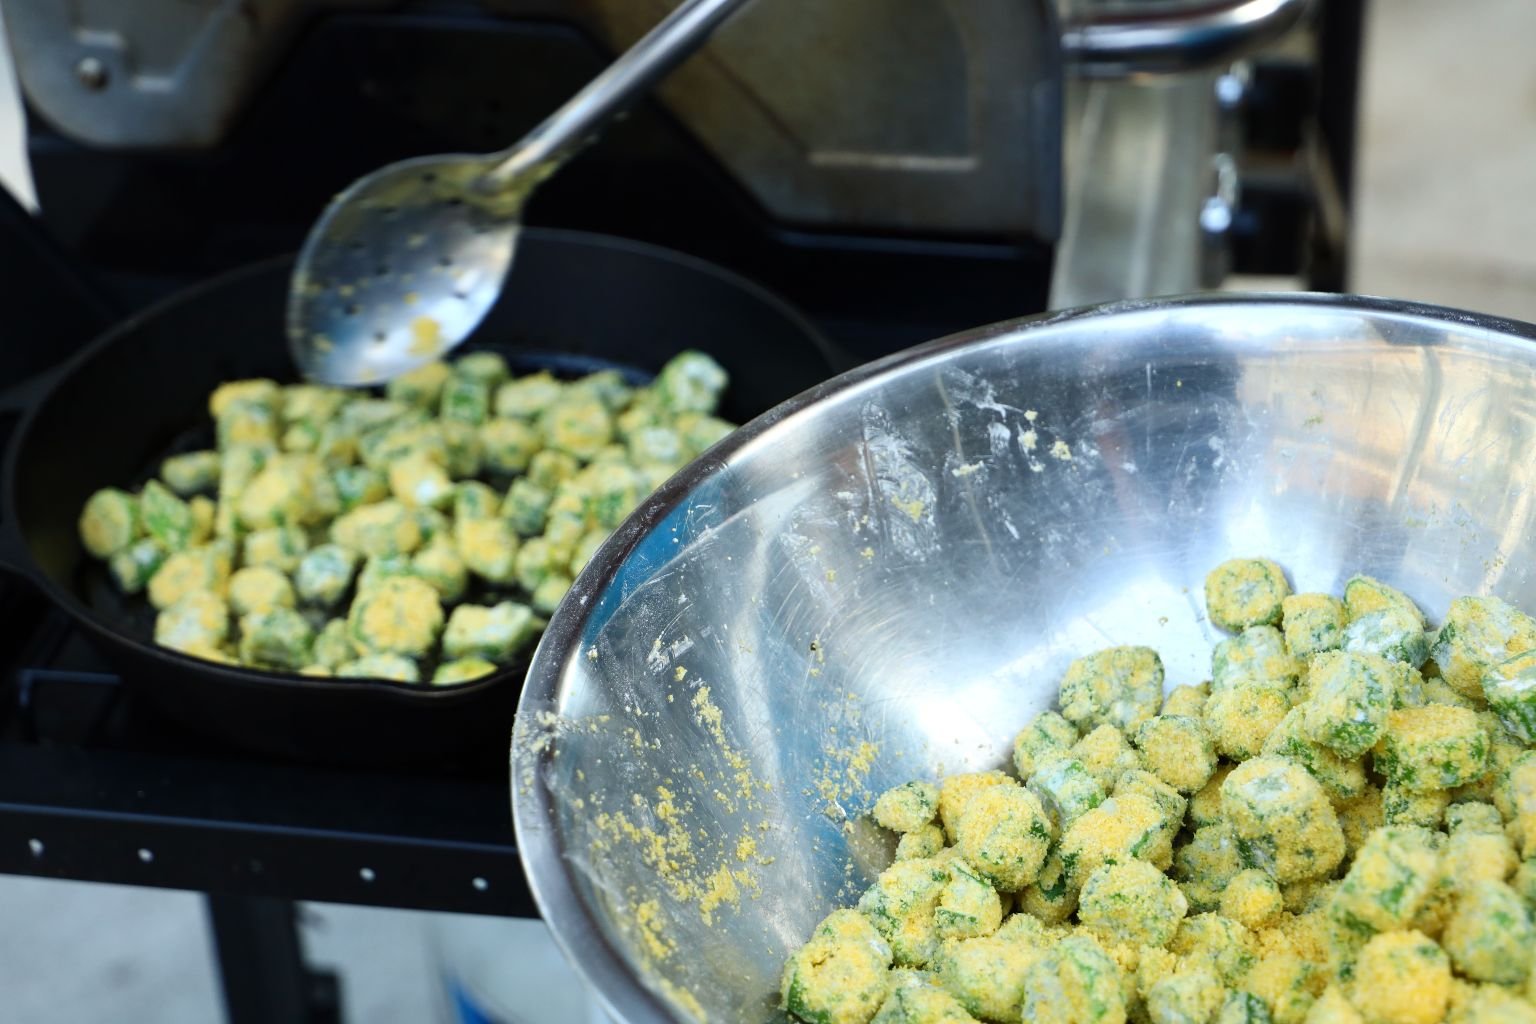
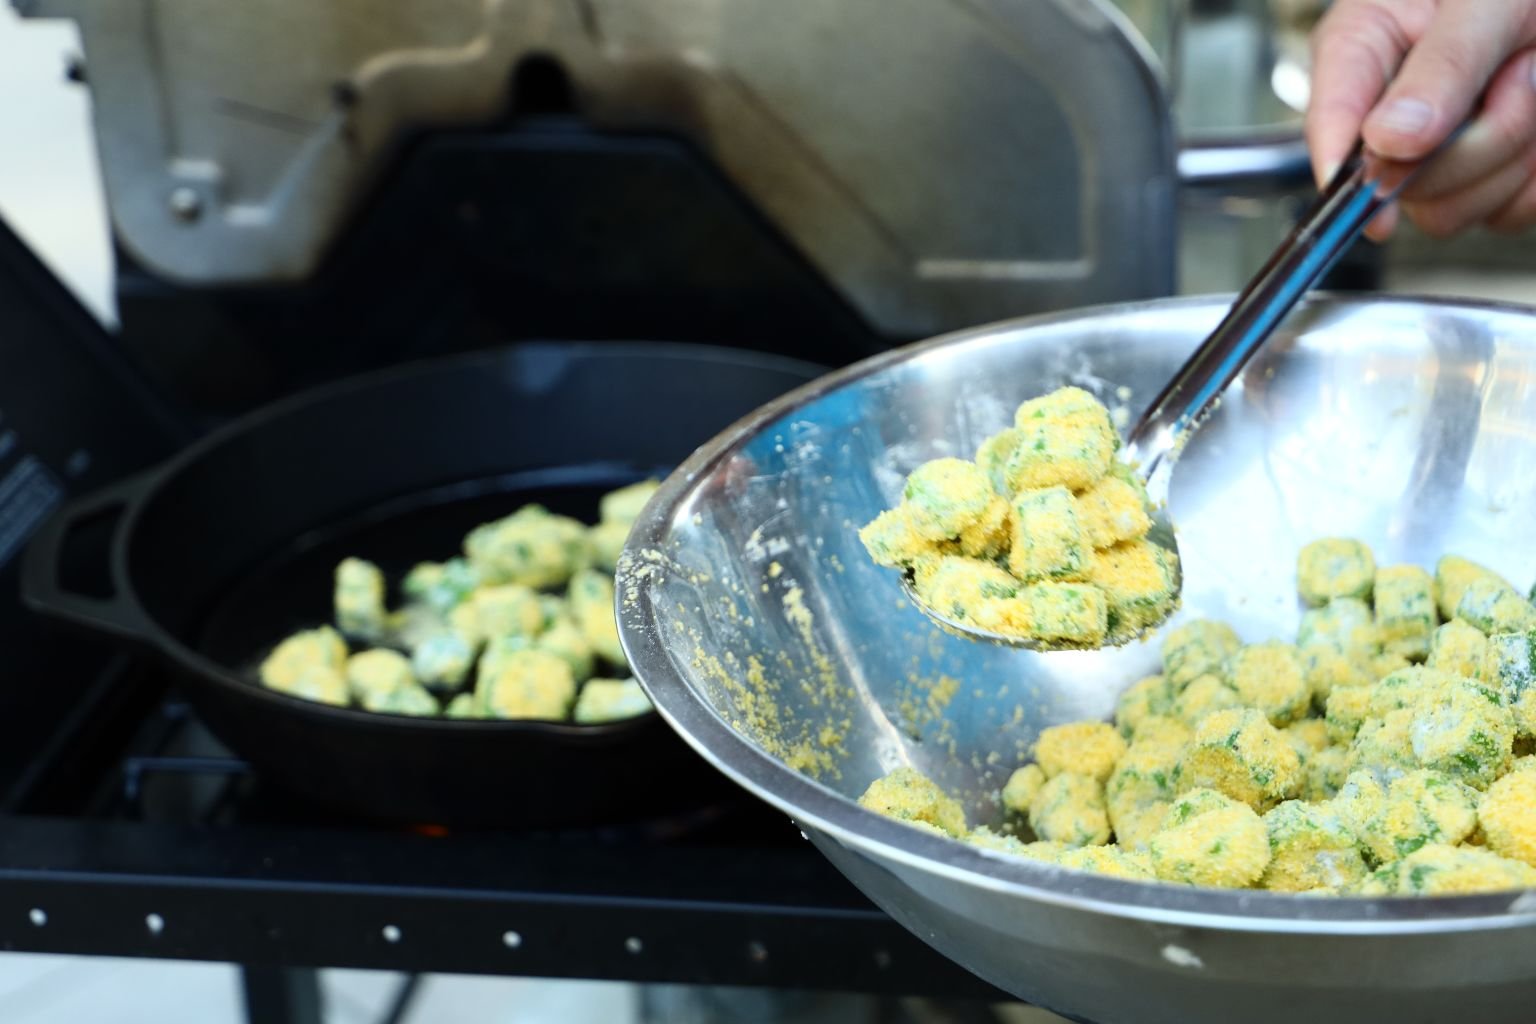
Only place as much okra into the pan that will make a single layer. Stir the okra using your slotted spoon as it browns. When all the okra is golden brown remove it from the oil and place it on a large plate lined with paper towels. Salt and pepper the hot okra to taste. Add more oil to the pan if needed as the oil should be at least 1/3 the way up the side of the skillet.
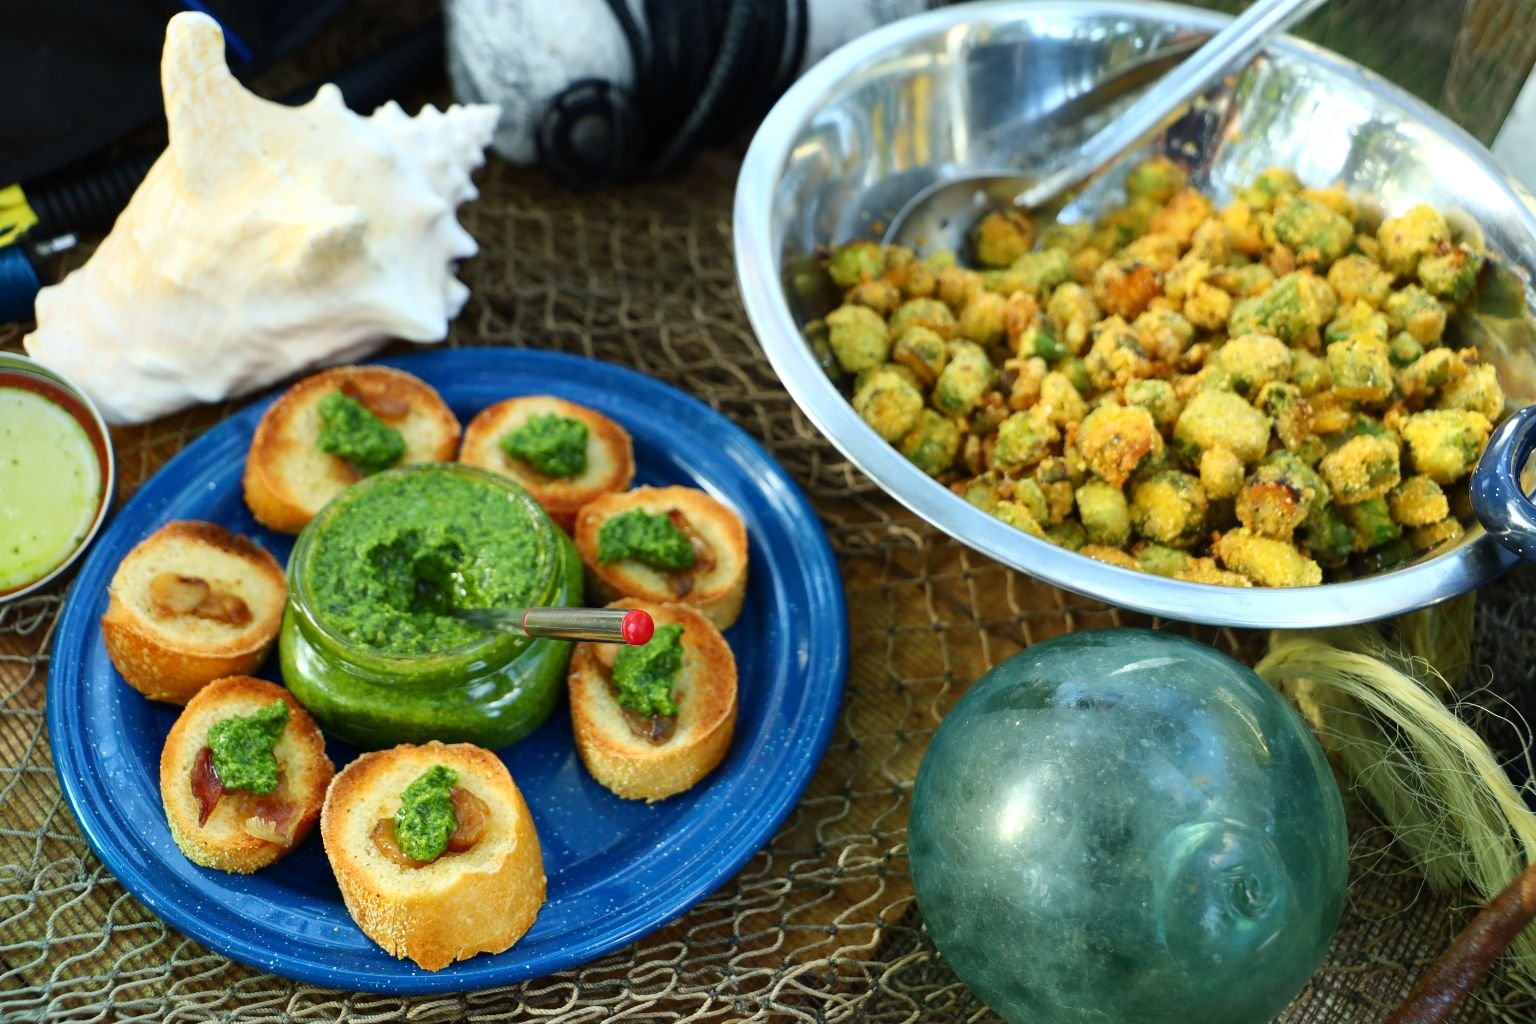
Here you can see the nicely fried okra.
———————————————————–
Time for More Mussels!
Add your frozen mussels to a medium pot that has a few Tbsp. of oil in it. Heat the pot to medium high heat.
Now, add some chopped garlic. Here you can see these mussels also come with butter.
Stir the ingredients together.
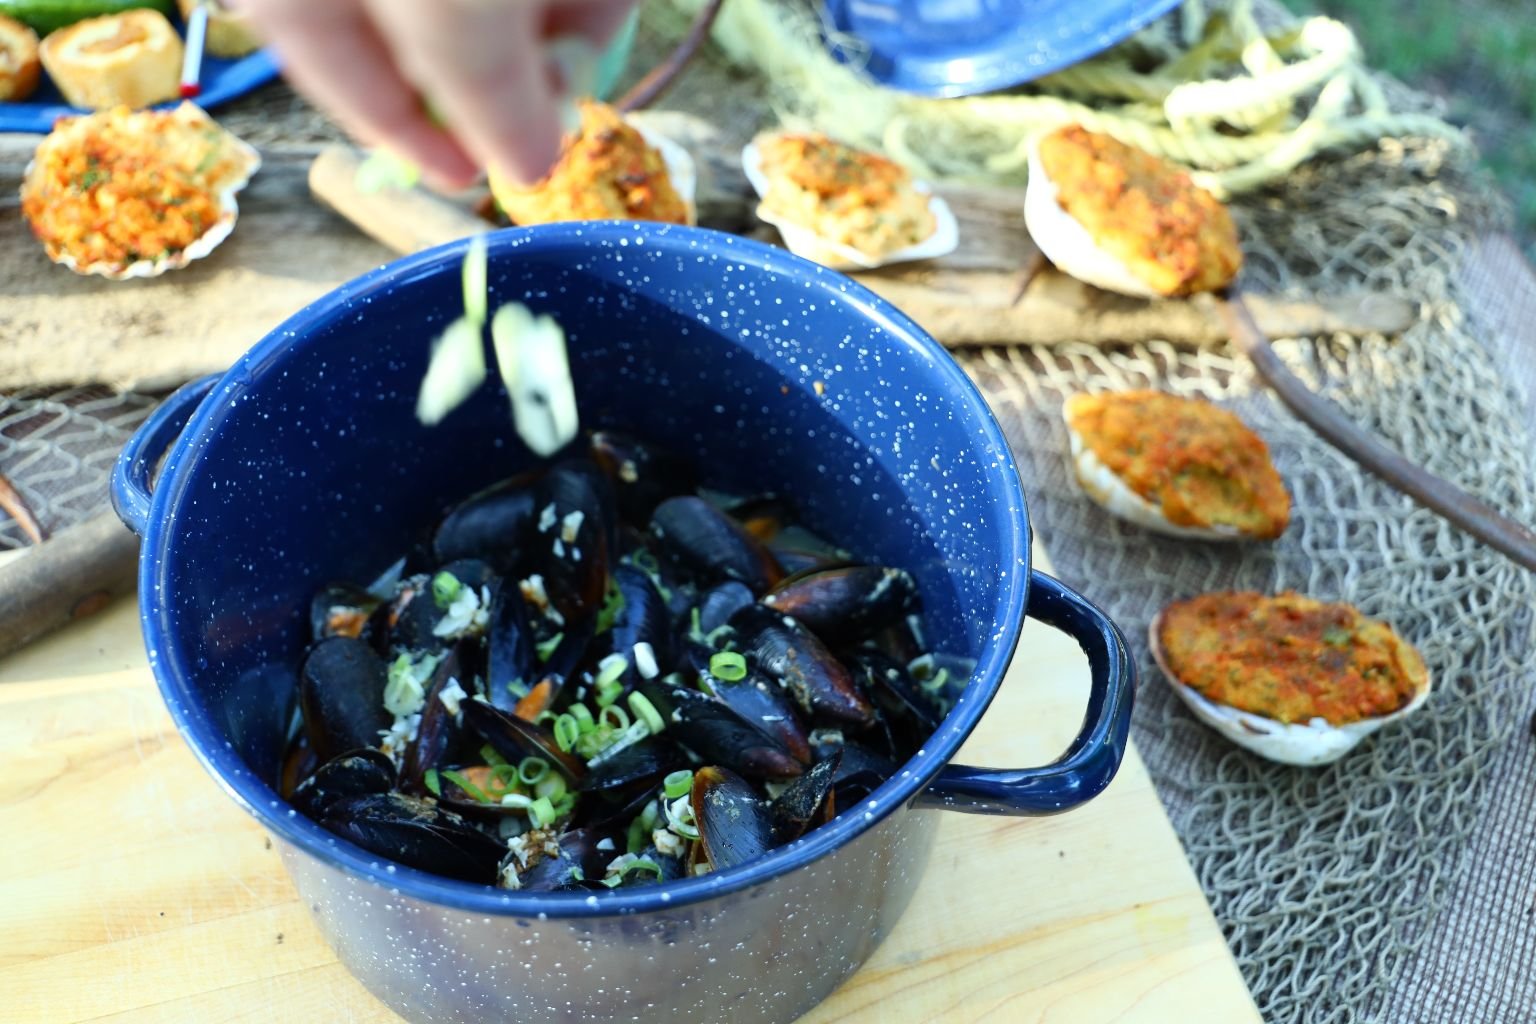
Cook the mussels for about 8-10 minutes, or until they open up.
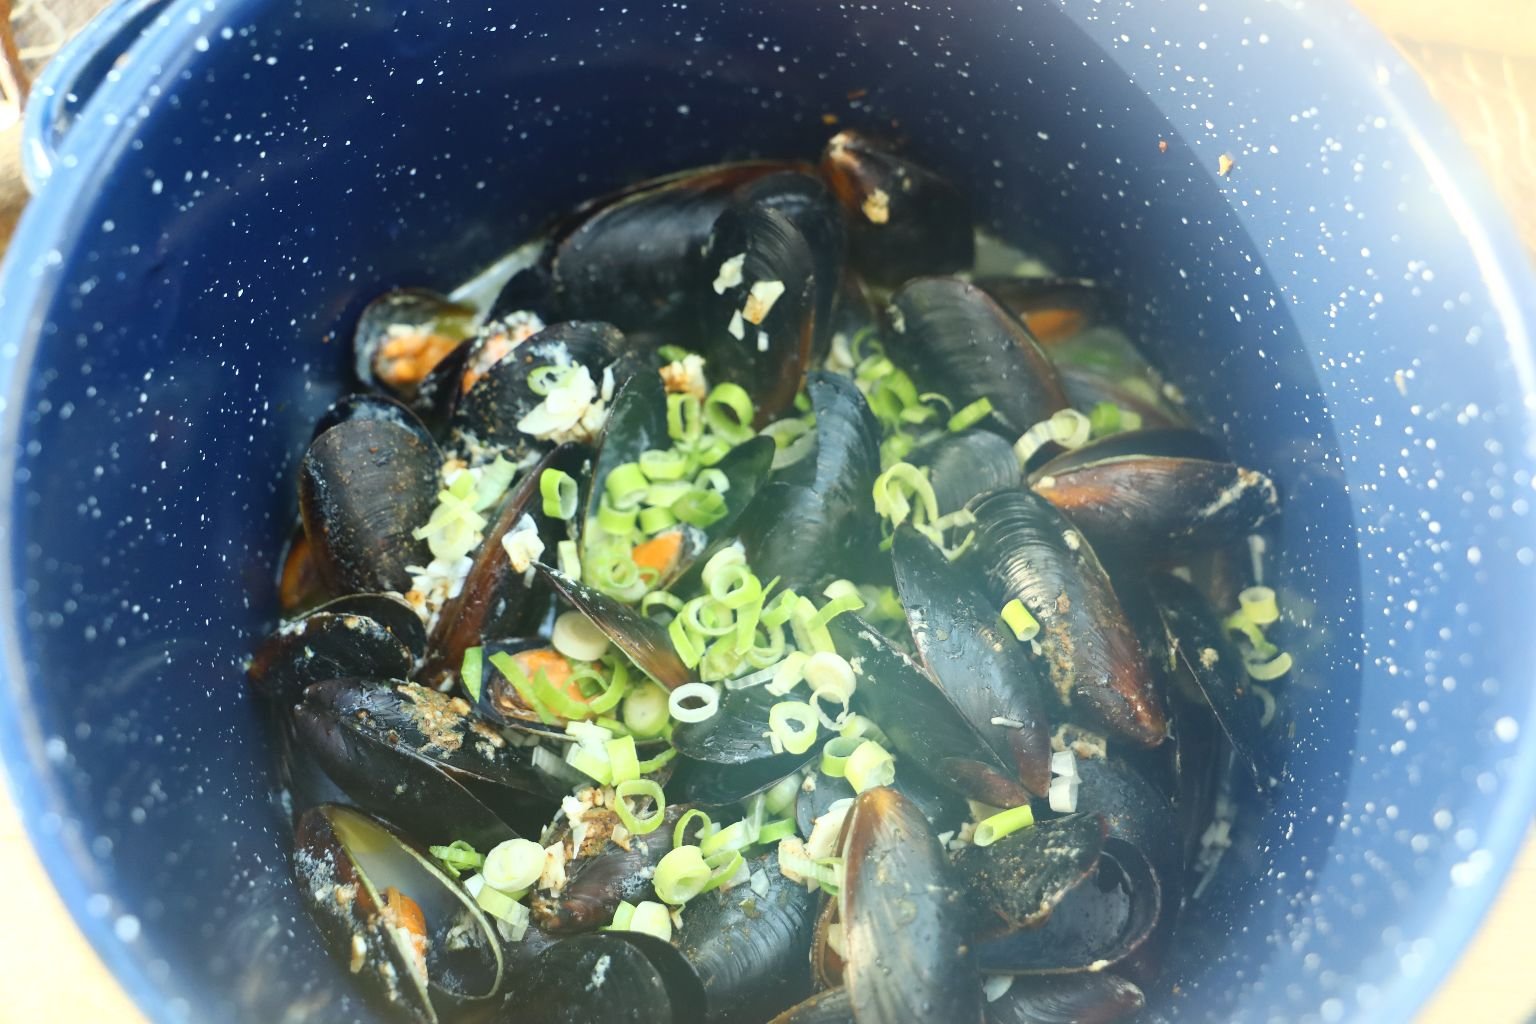
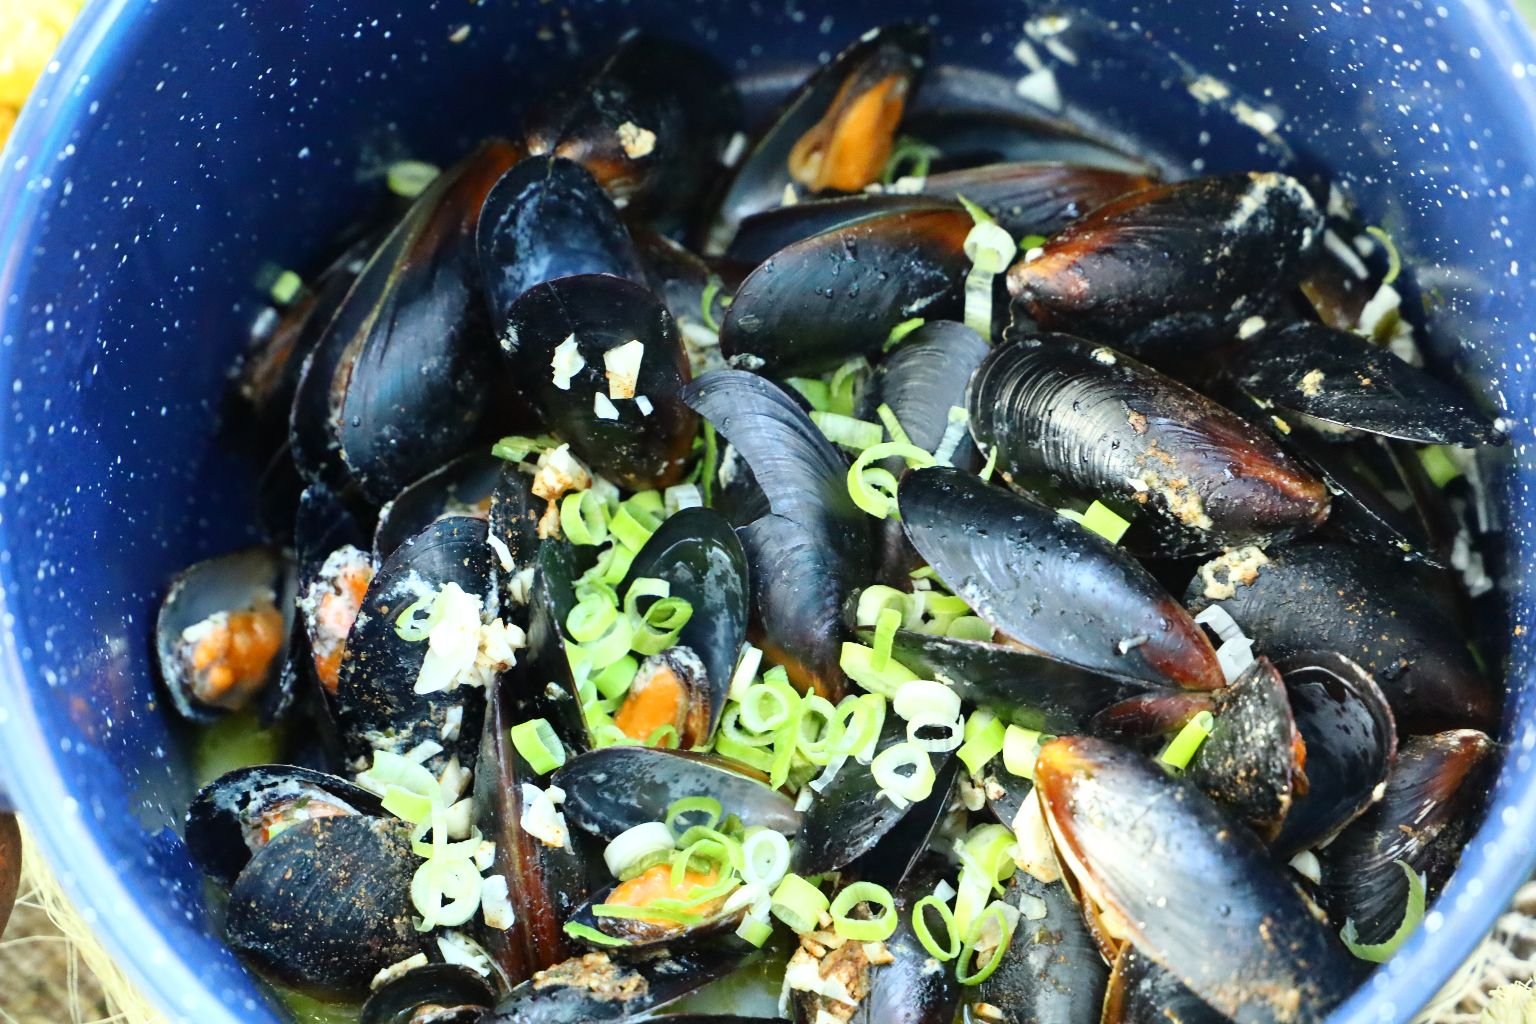
Stir the mussels then add some sliced green onions. Eat them right out of the pot. or pour them into a large serving bowl.
———————————————————–
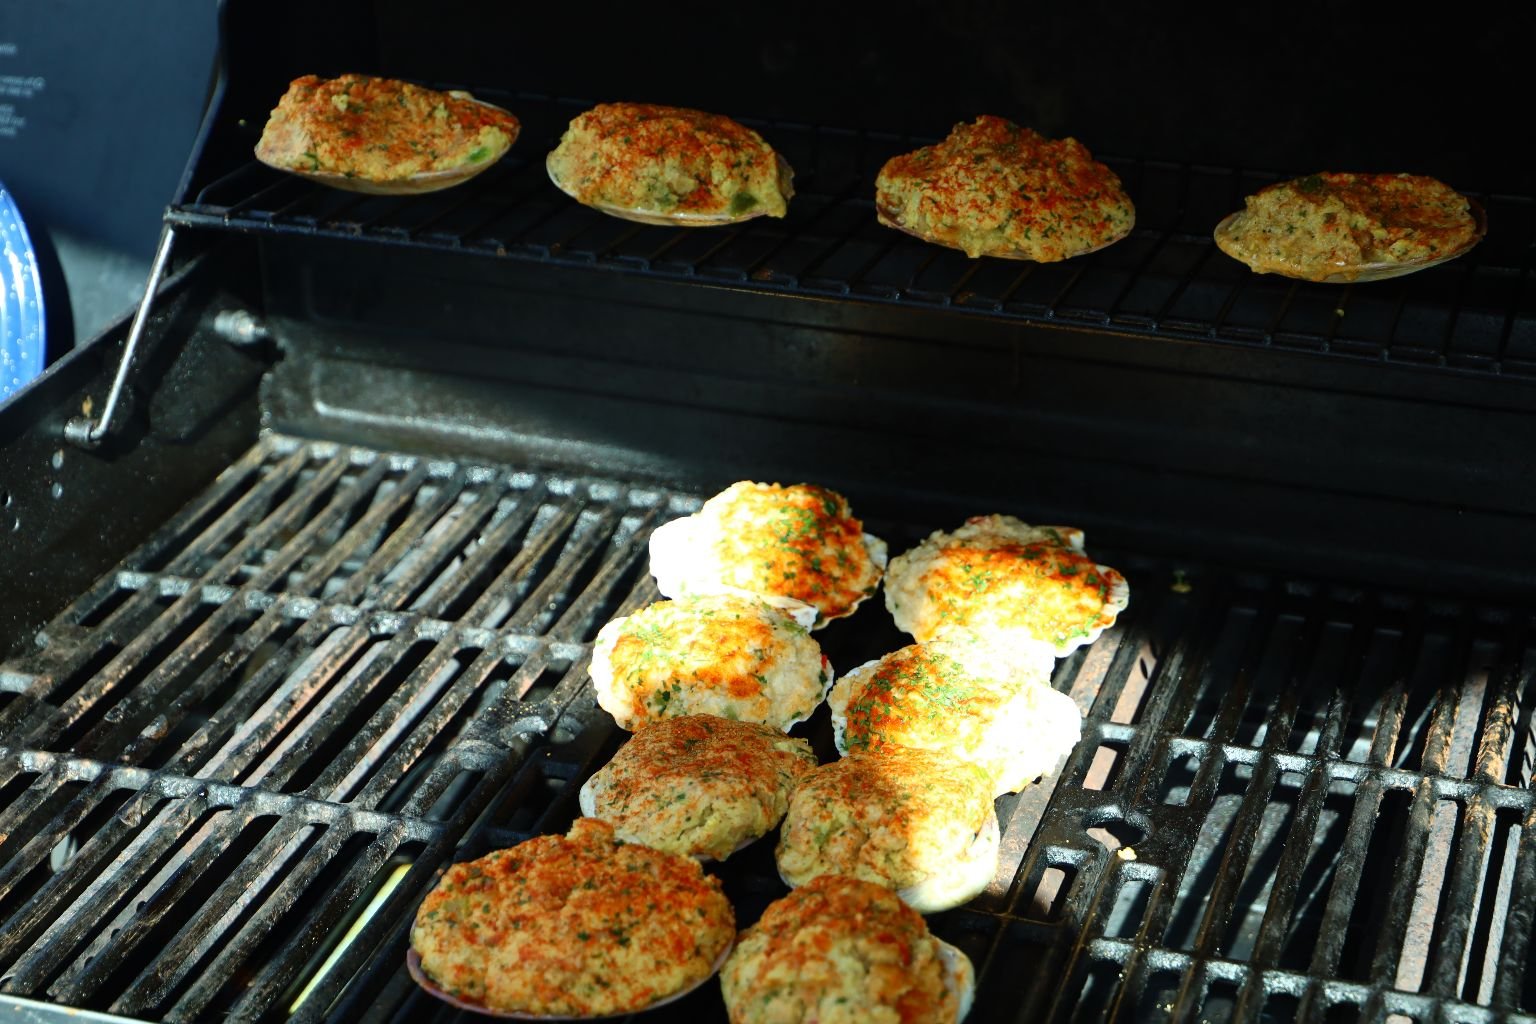
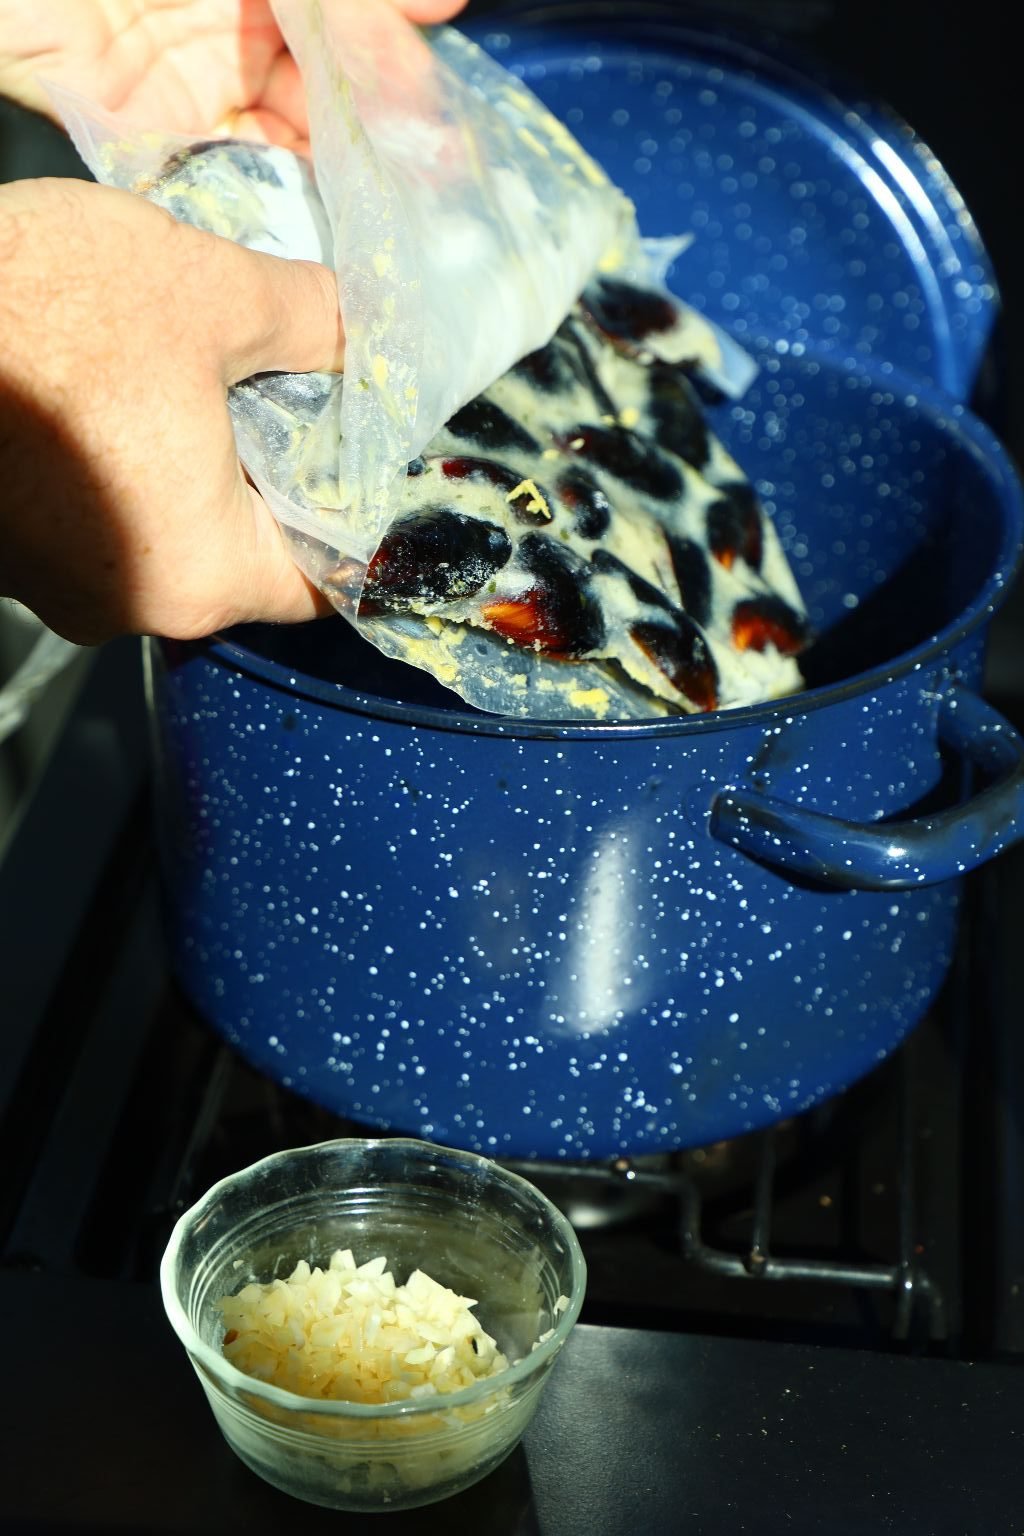
Grilling Stuffed Clams and Scallops
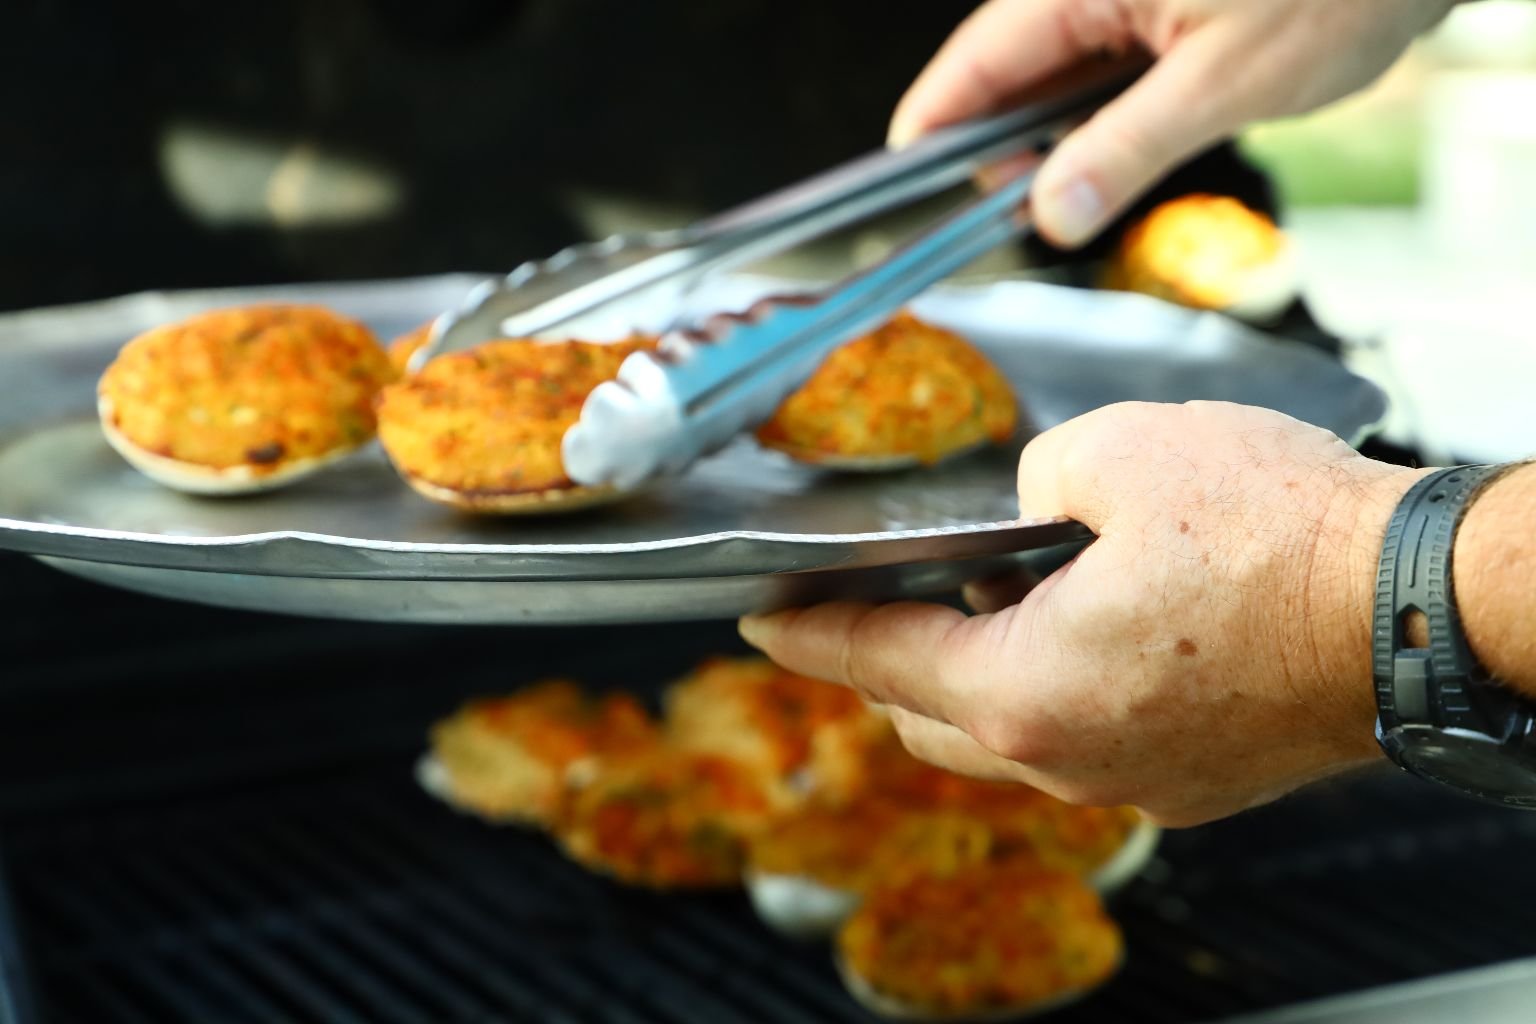
You can find these stuffed clams and scallops in most any supermarket. To cook them I like using the grill cooking them on medium heat. Keep the lid of your grill closed to help them bake. It will take about 12 min. or so to cook them correctly as you will begin to see where the ingredients inside the shell meet each other and start to boil. You can move the clams to the upper rack of your grill to help brown their tops.
—————————————————————-
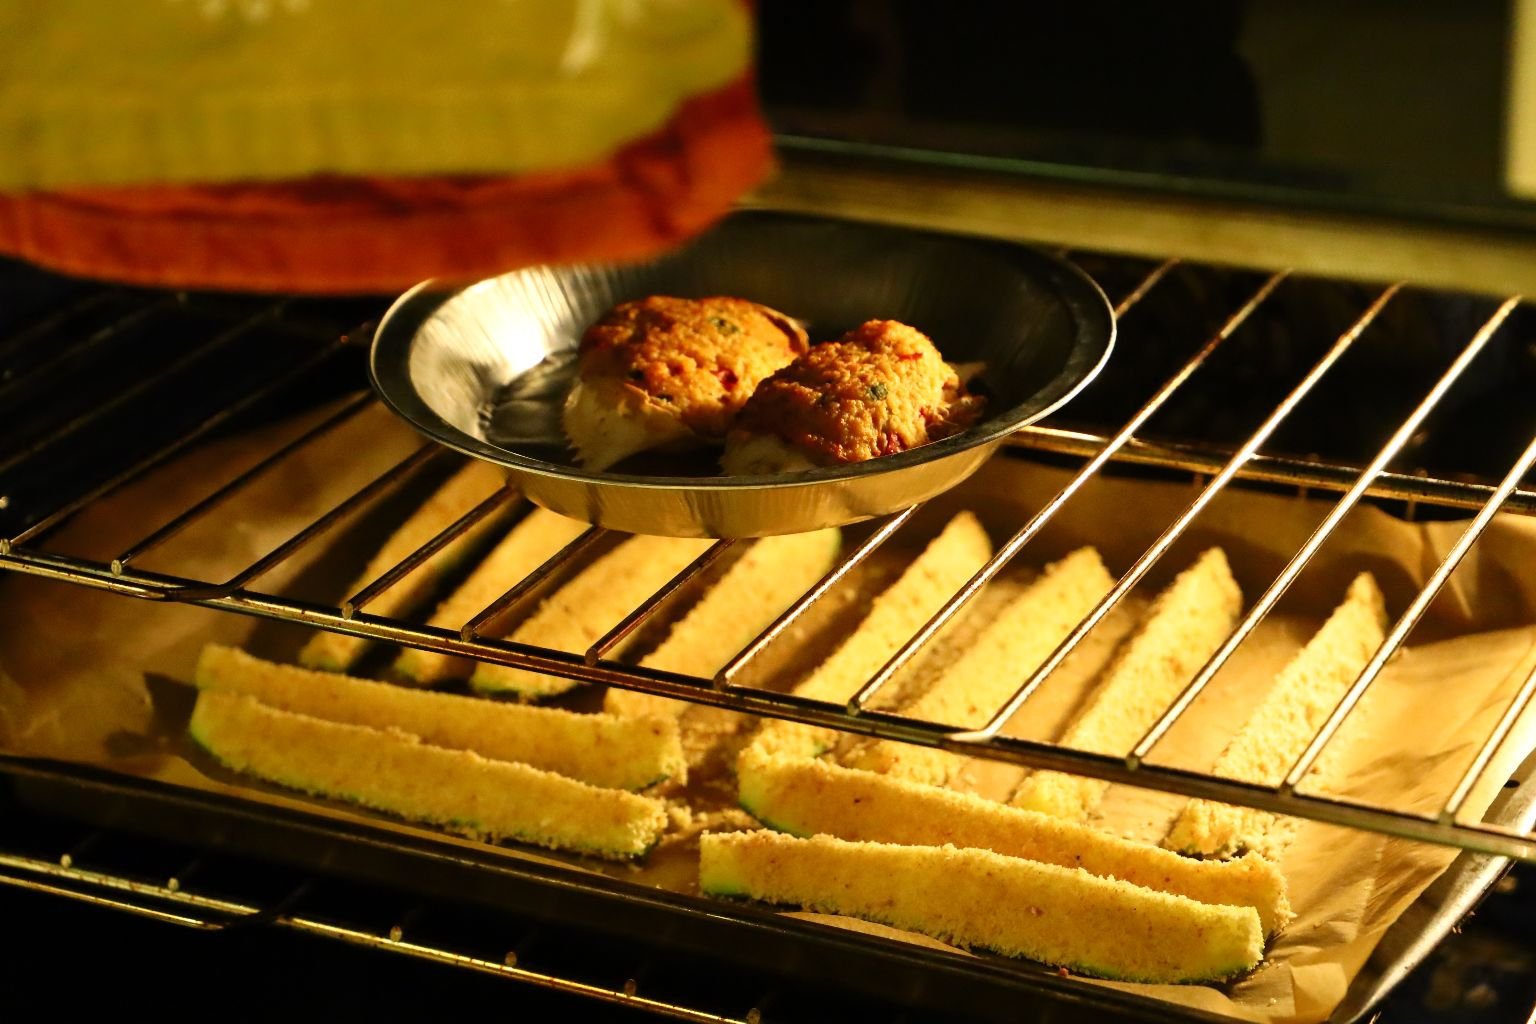
Crab Cakes, Cheddar Biscuits, and Fried Zucchini
Breaded and baked Zucchini…Another great southern side dish!
These are also very versatile in flavors as you are only limited to your imagination.
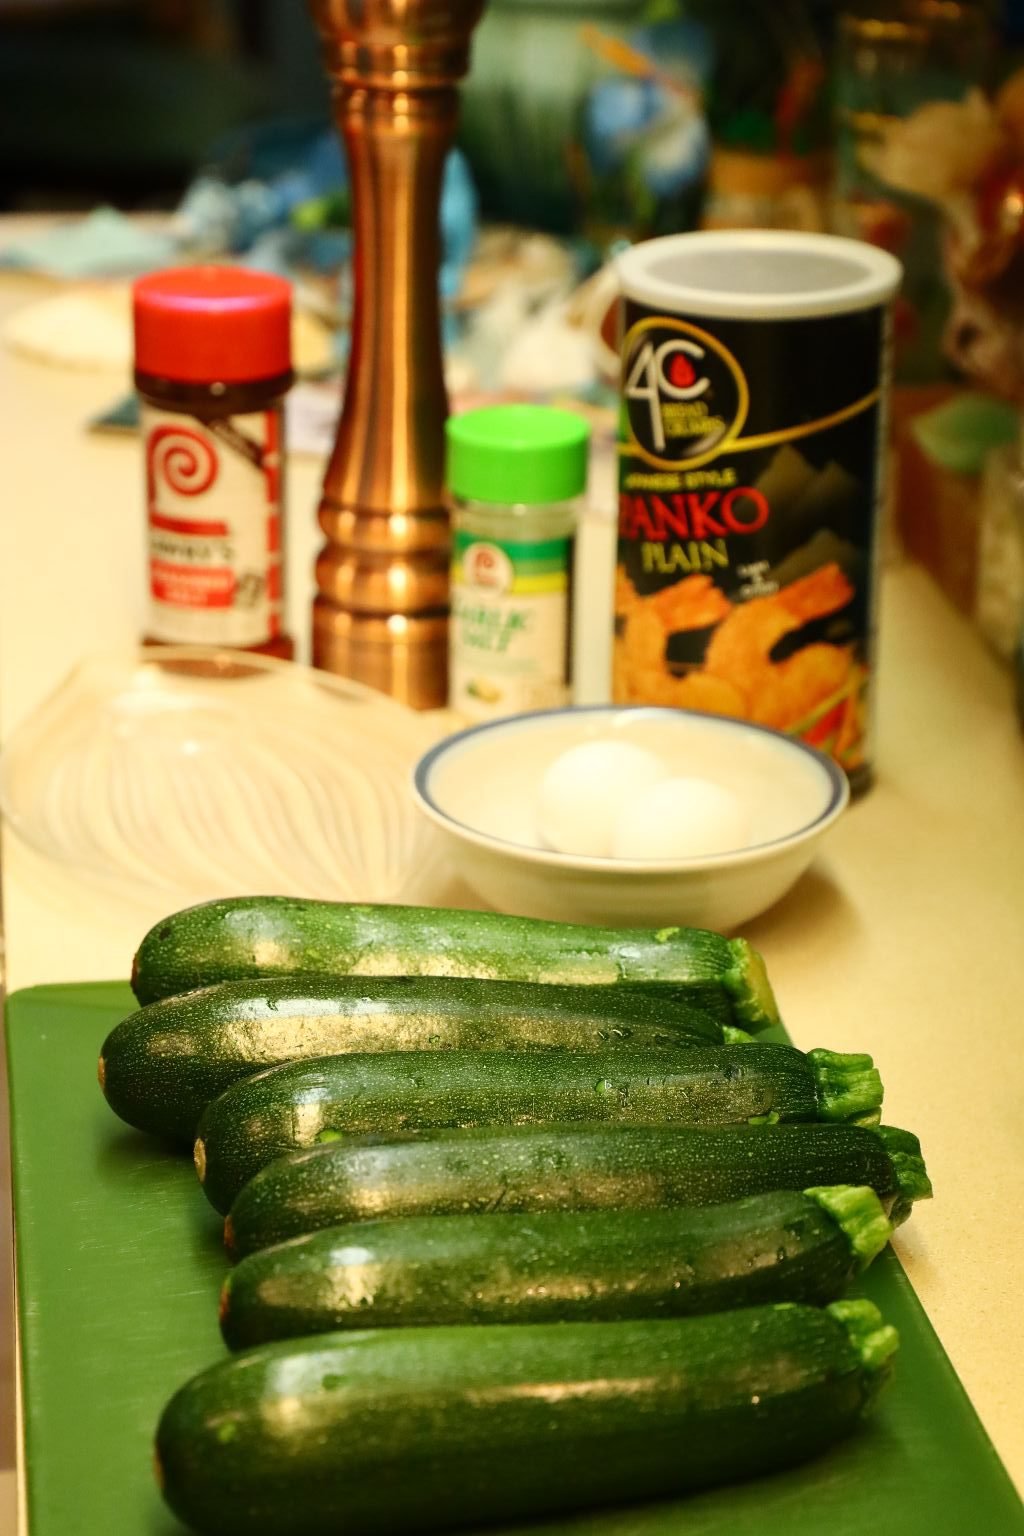
Ingredients:
6 Zucchini sliced lengthwise to 6 pieces
2 Eggs – Whisked
1 Tbsp. Water
Panko Bread Crumbs
Lawry’s Seasoned Salt
Roasted Garlic Powder
Salt and Pepper to taste
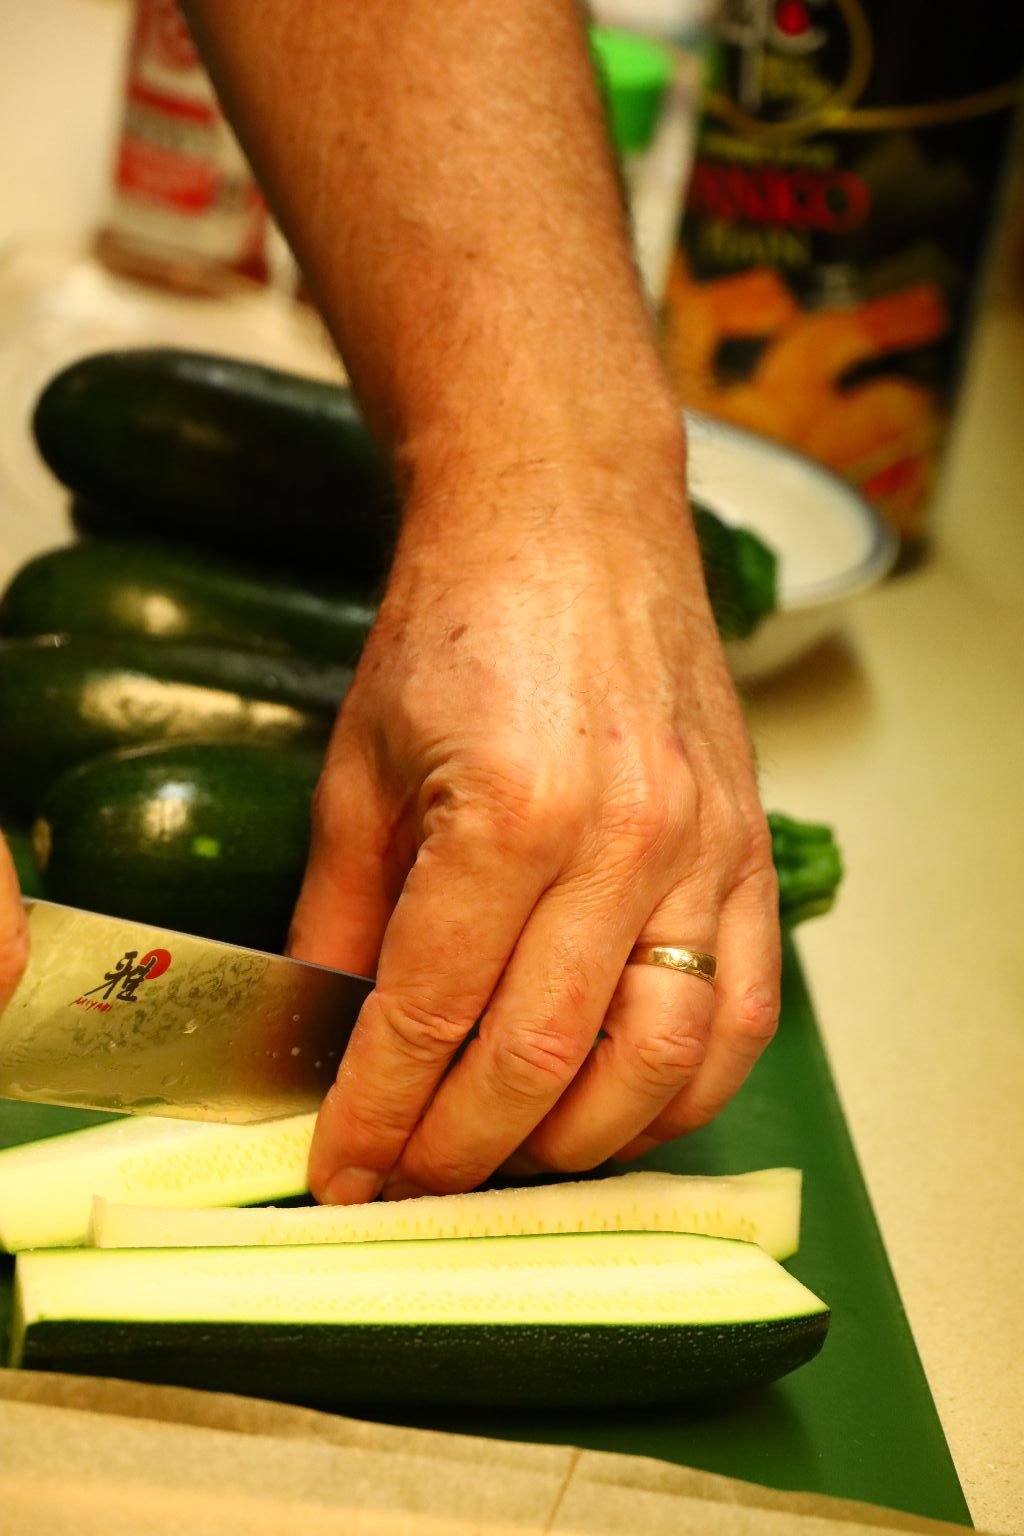
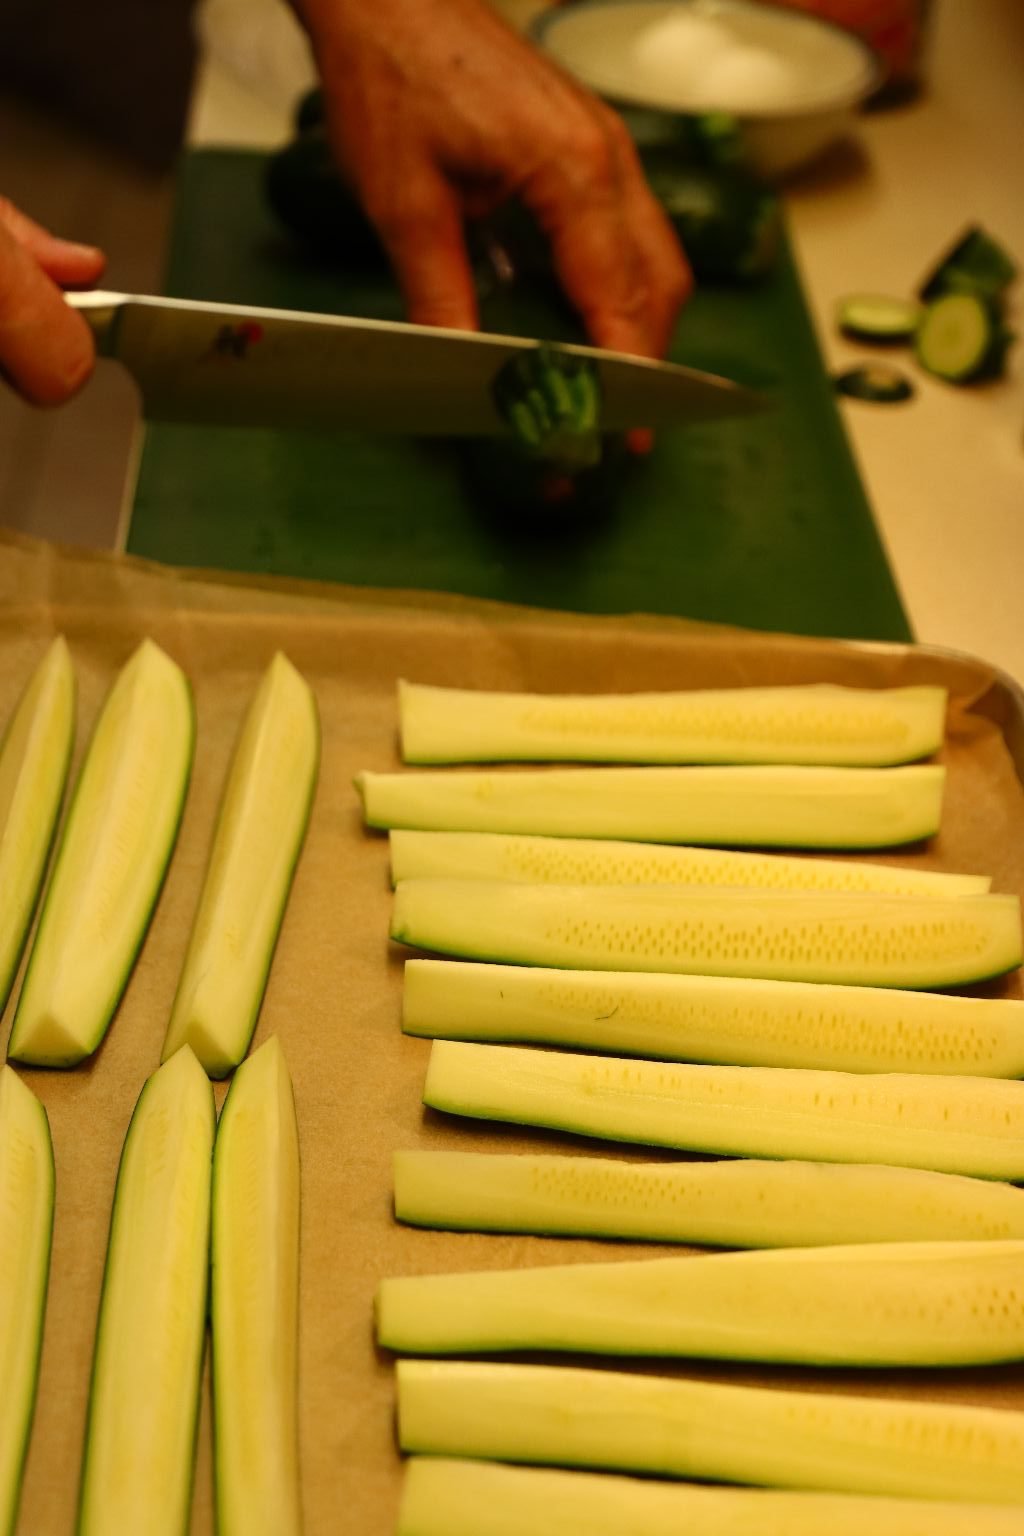
Slice off the ends of the zucchini then slice it into wedges as shown.
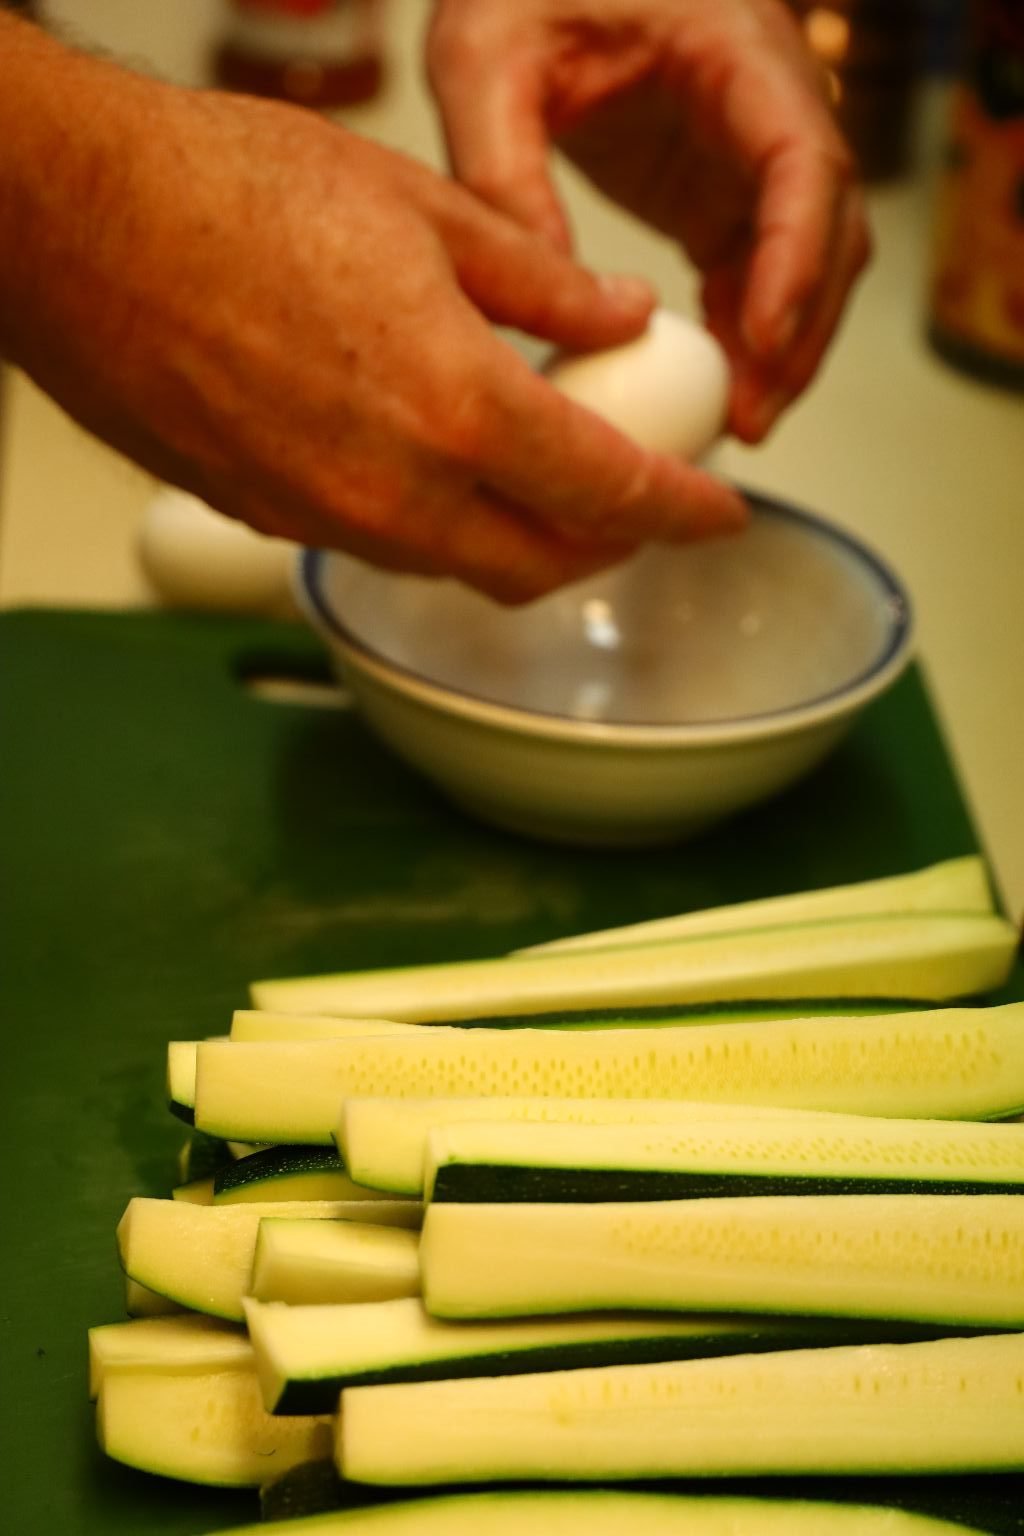
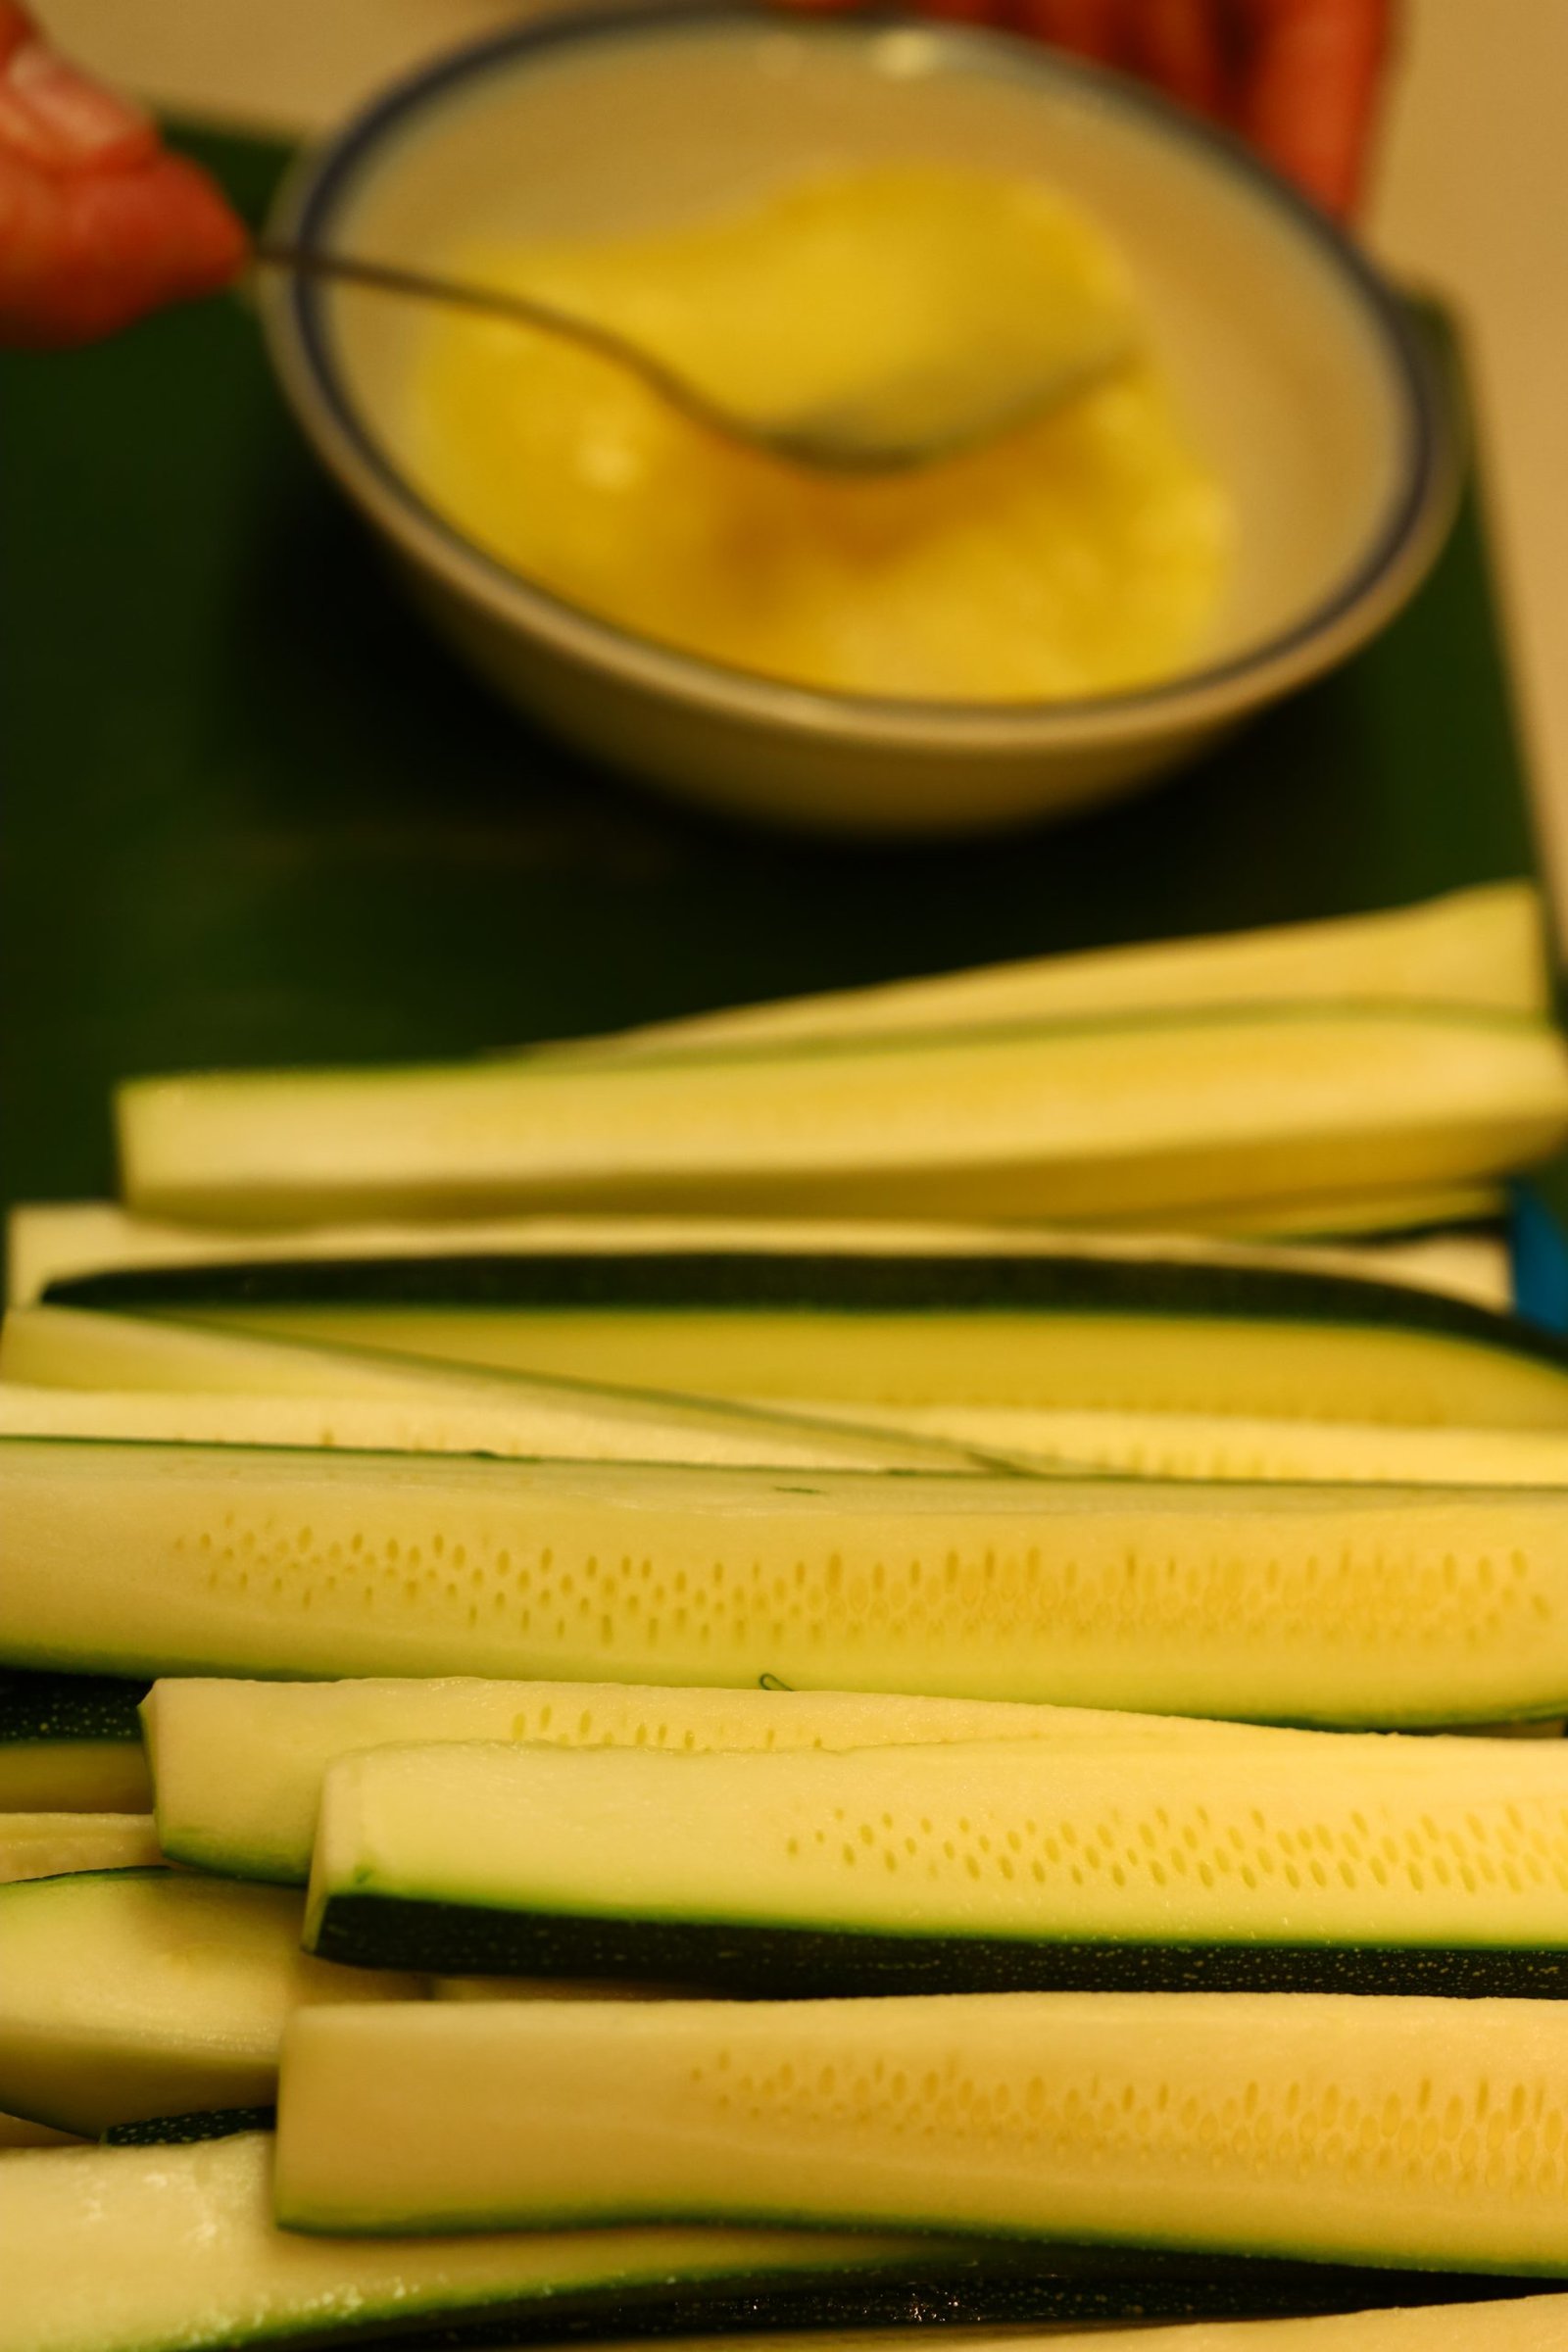
Break your eggs into a bowl then whisk them using a fork and add a Tbsp. of water and whisk until combined.
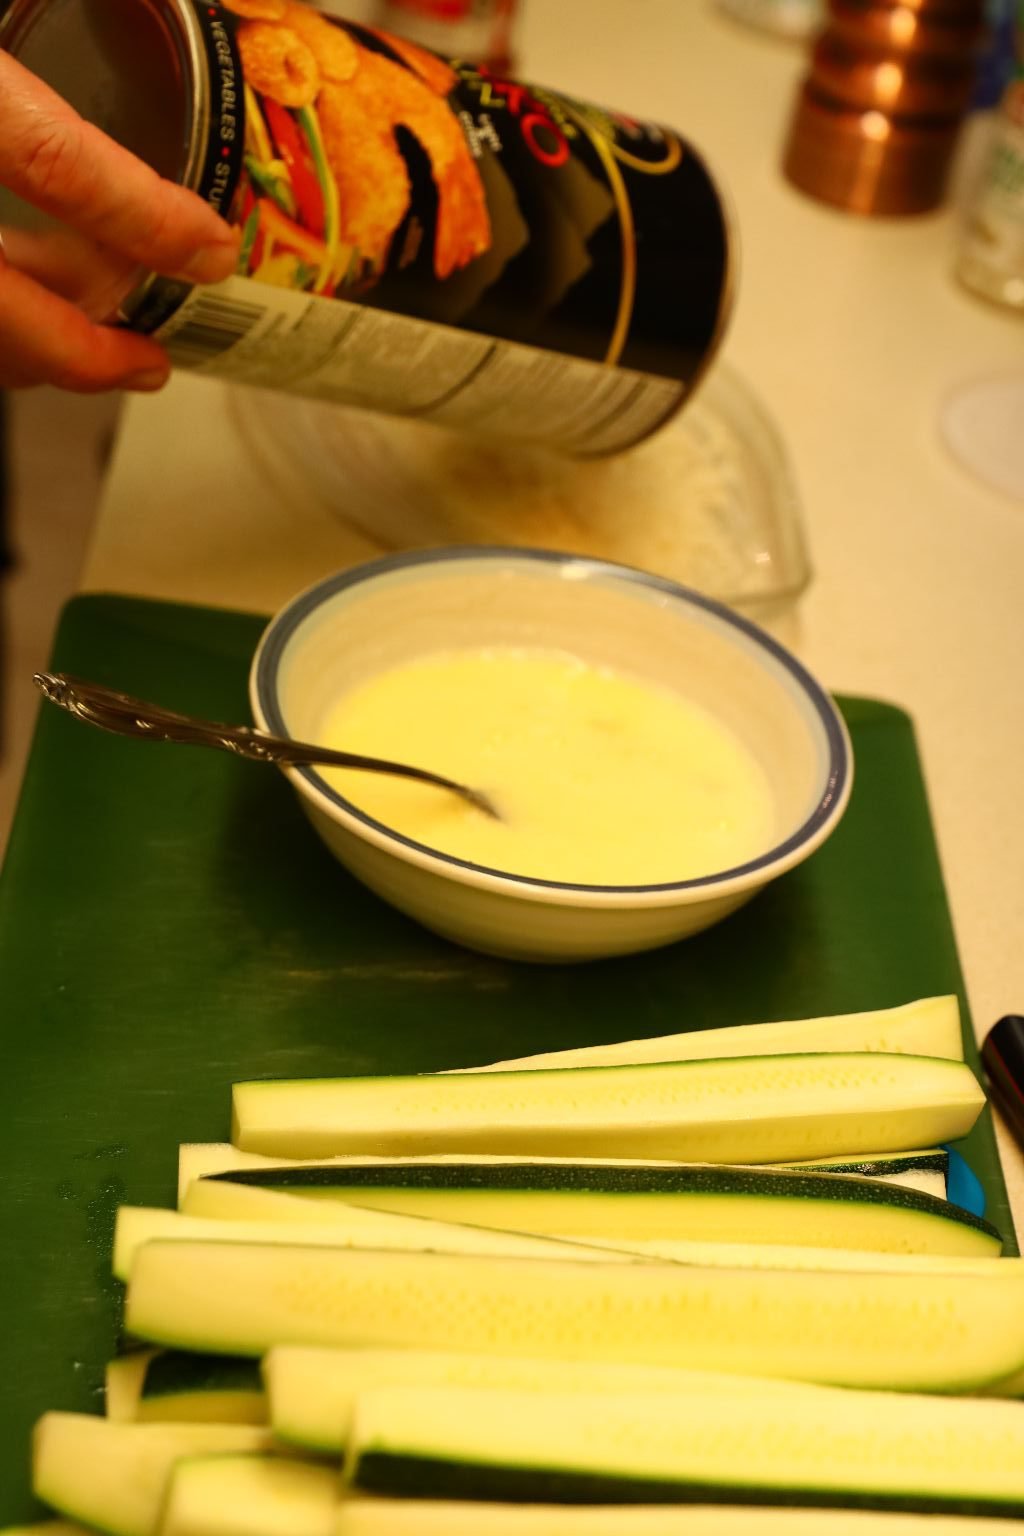
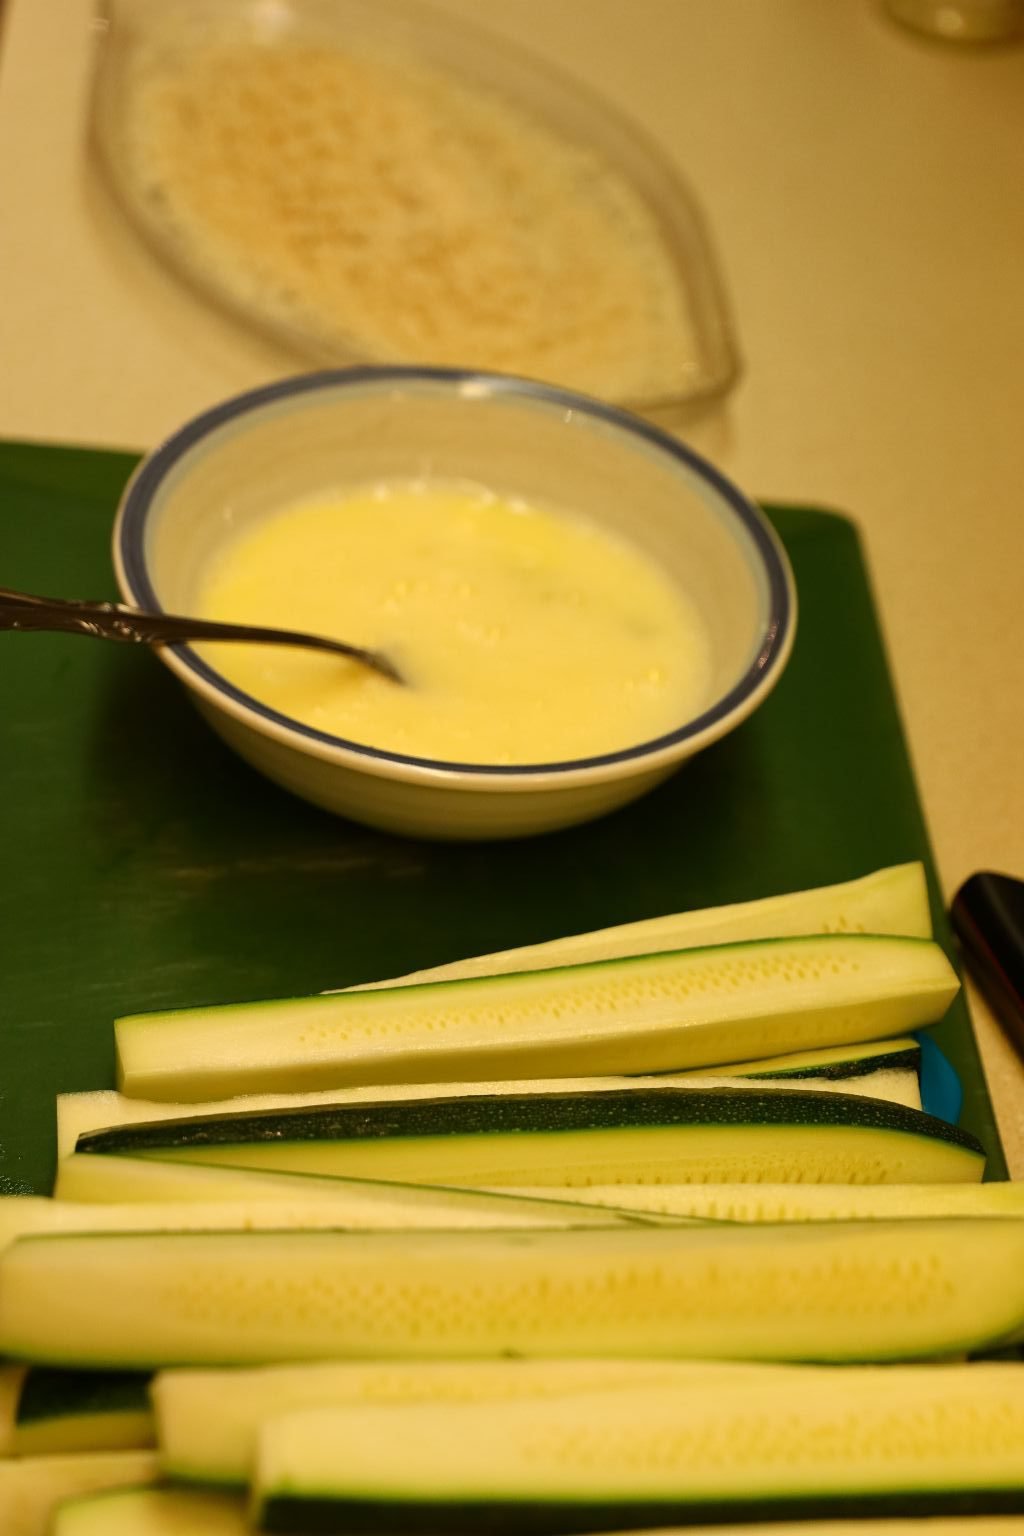
Place your Panko Bread Crumbs onto an elongated plate.
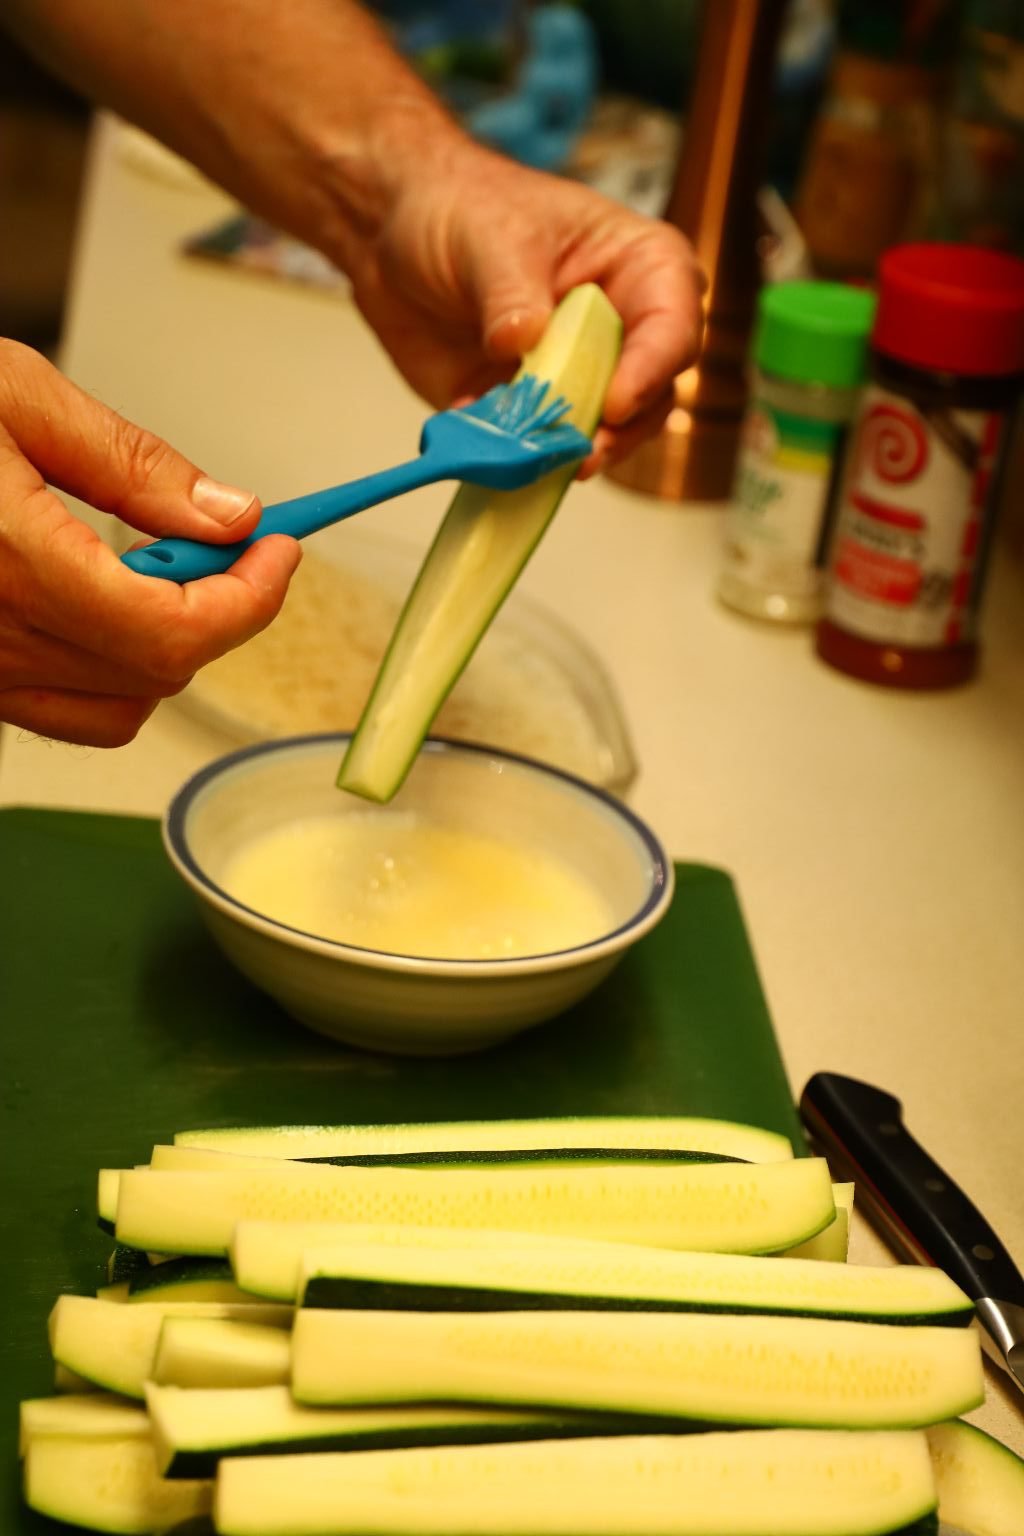

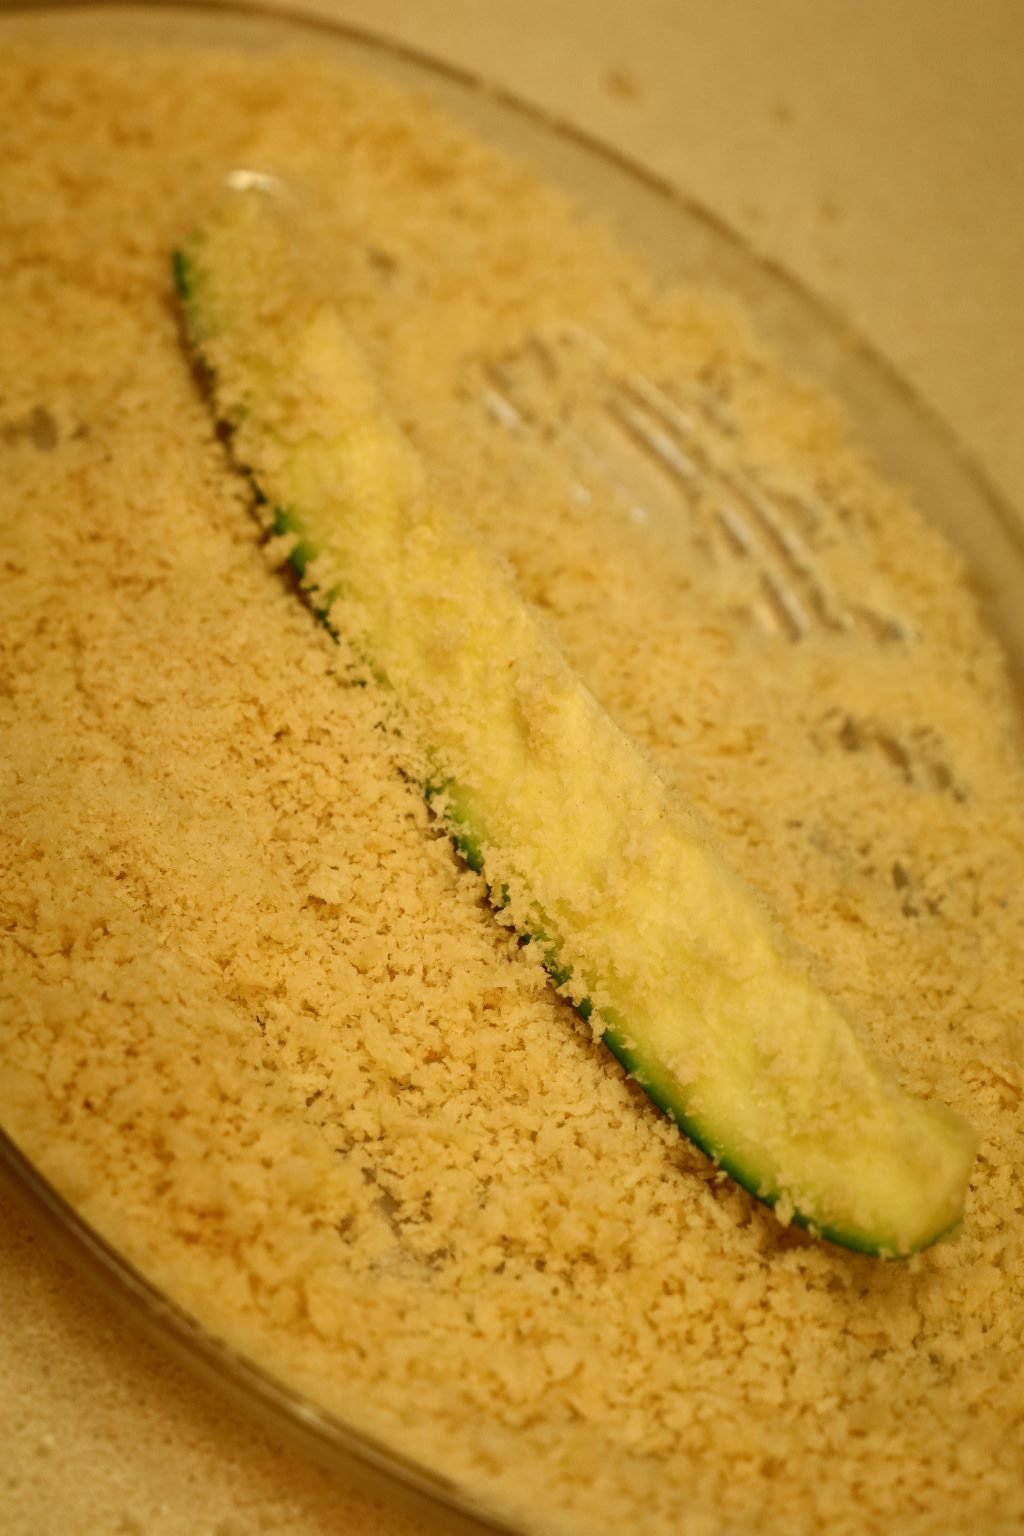
Brush the egg-wash onto the zucchini wedges cut sides, then place it into the Panko as shown coating each cut side.
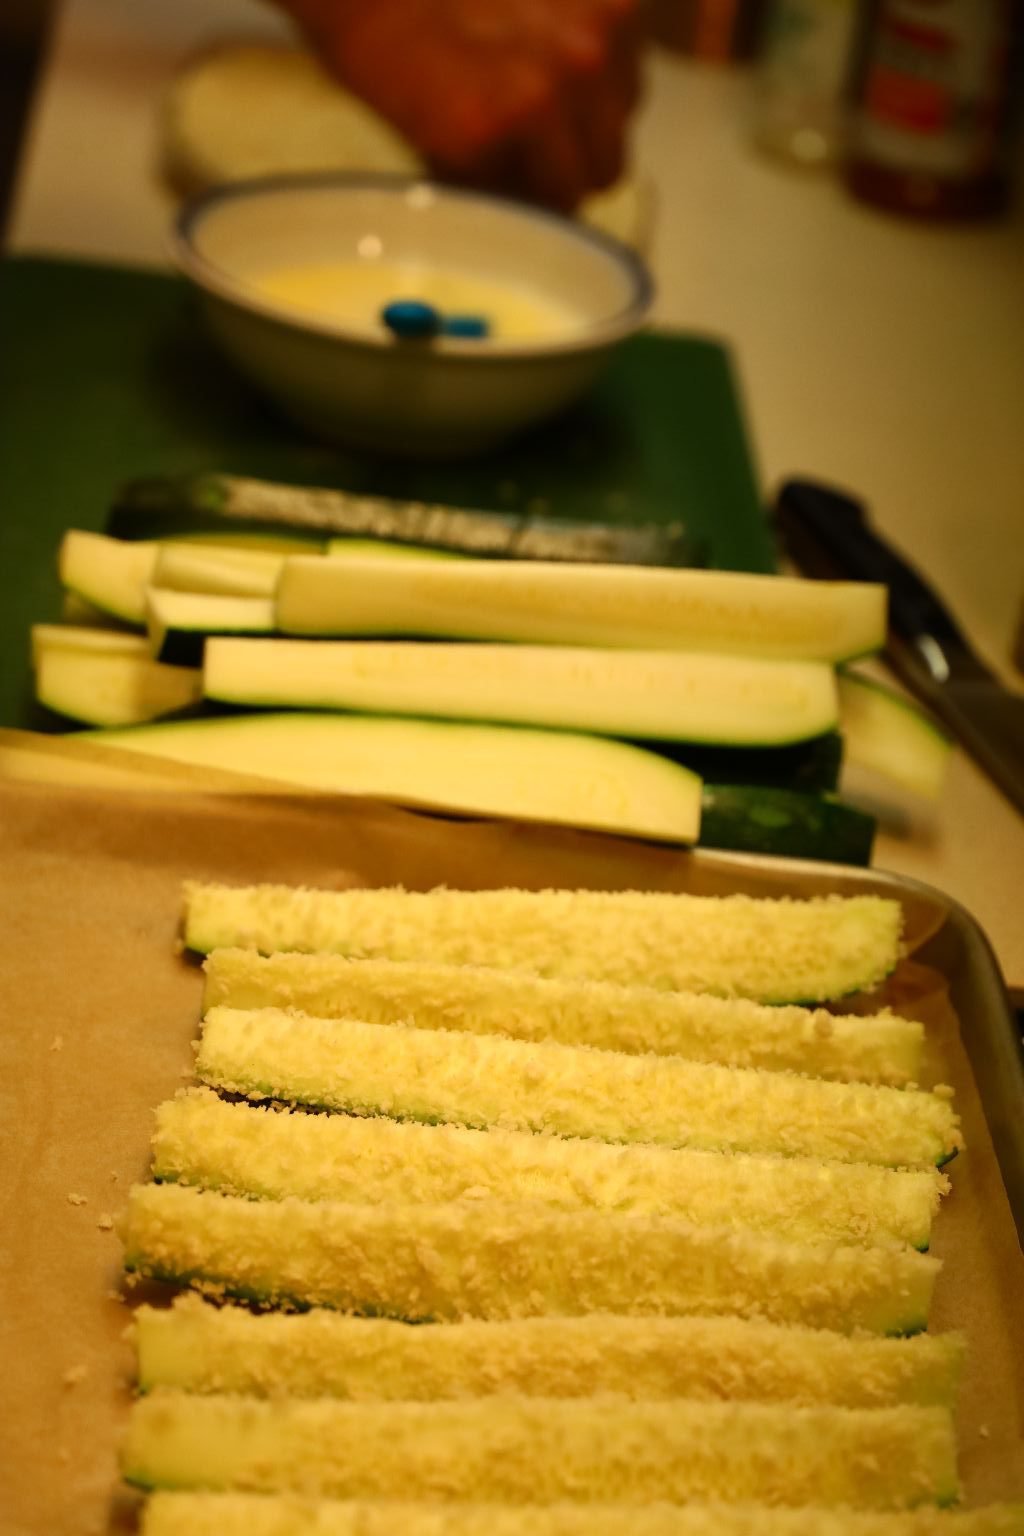
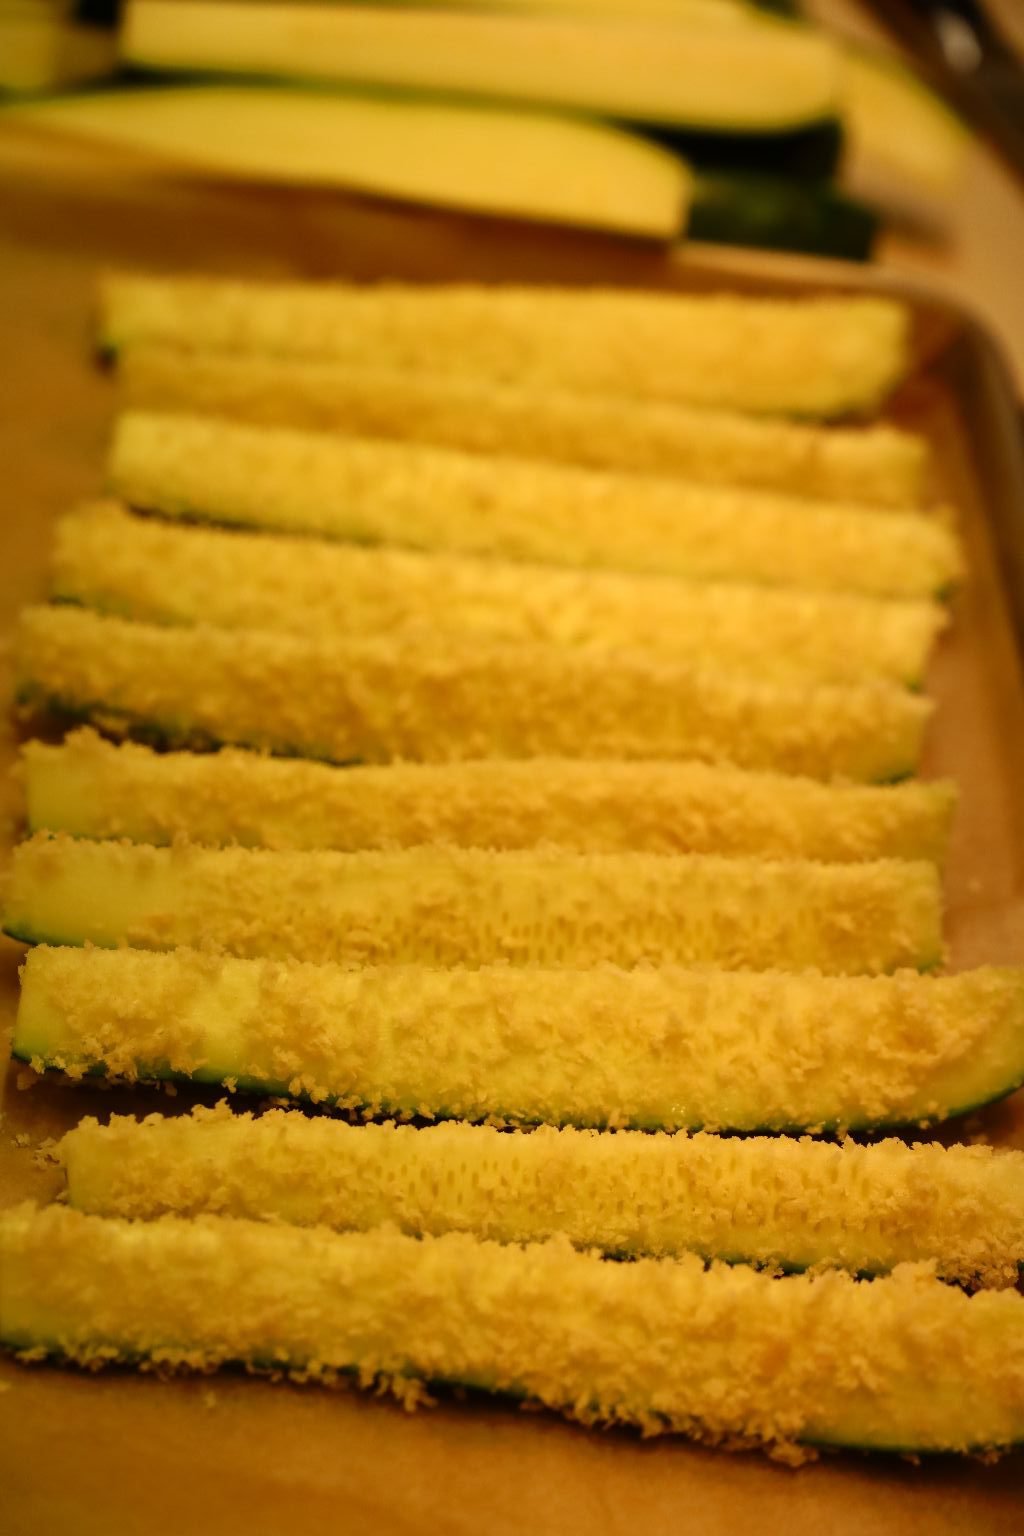
Repeat the process with all the cut zucchini slices.
—————————————————————–
——————————————————————
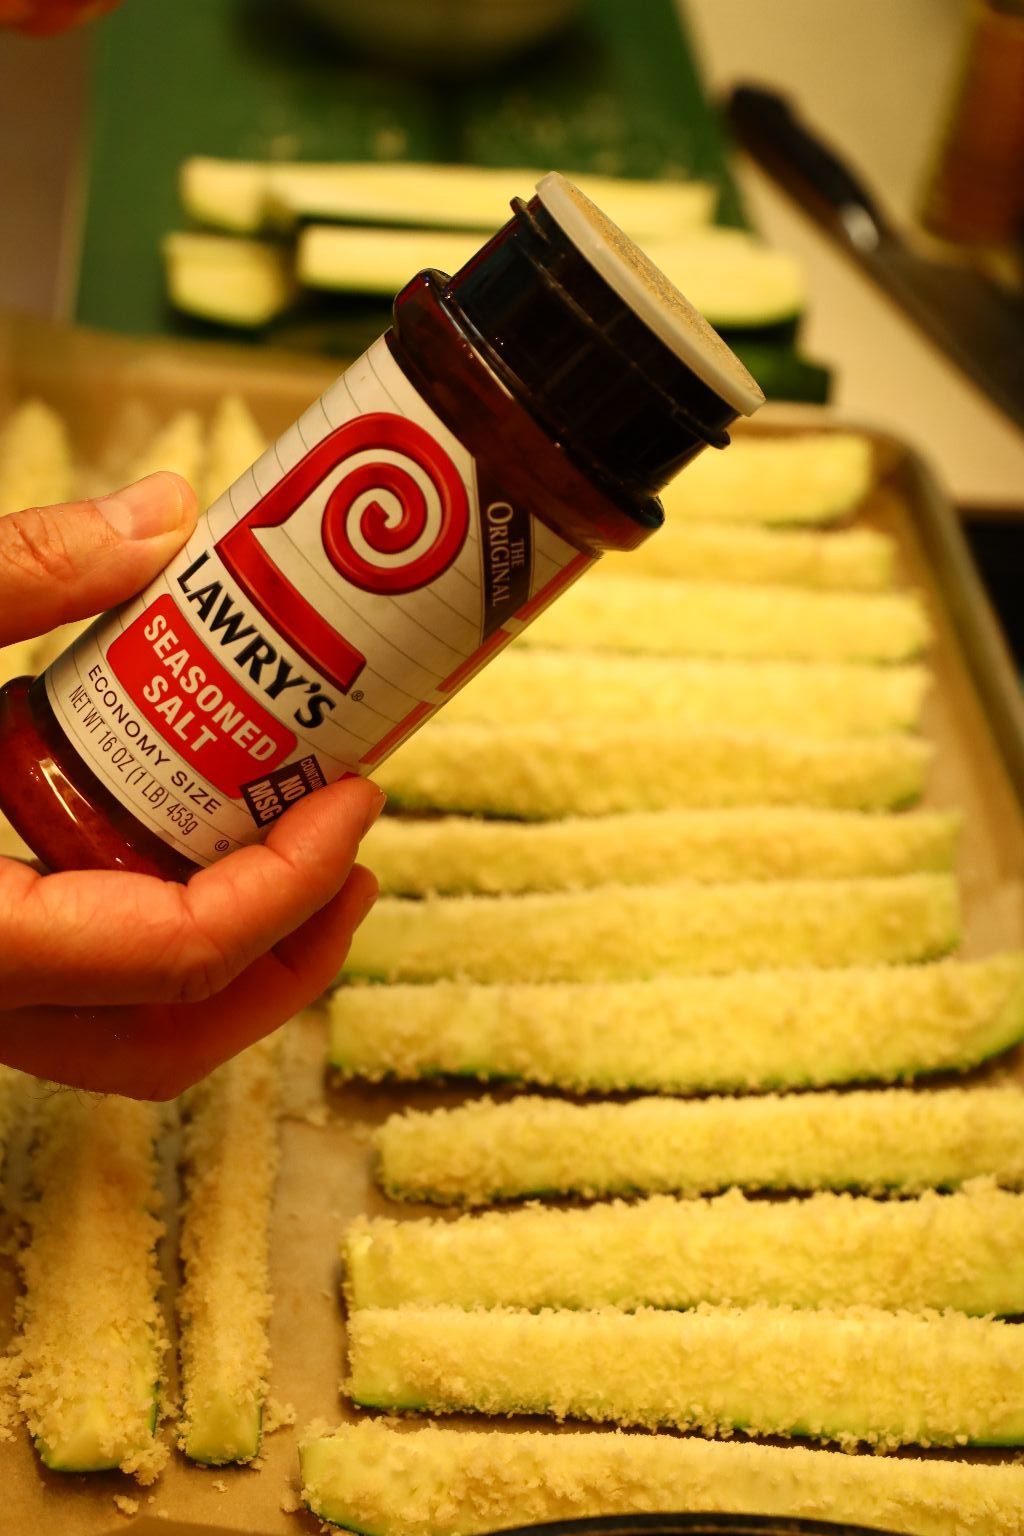
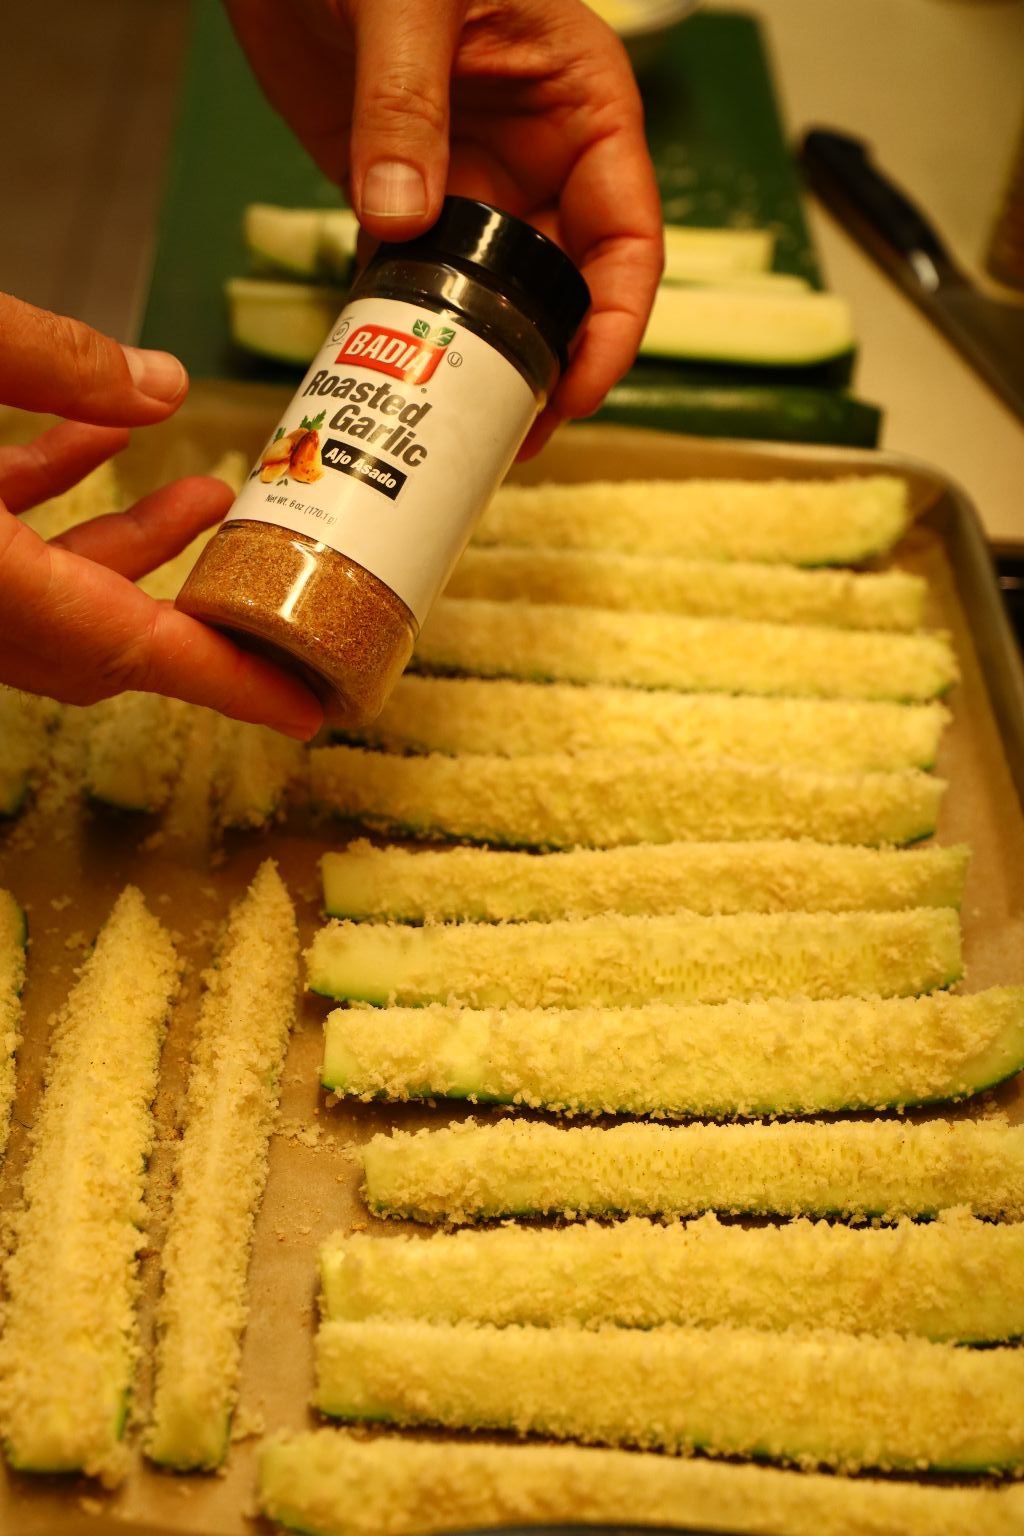
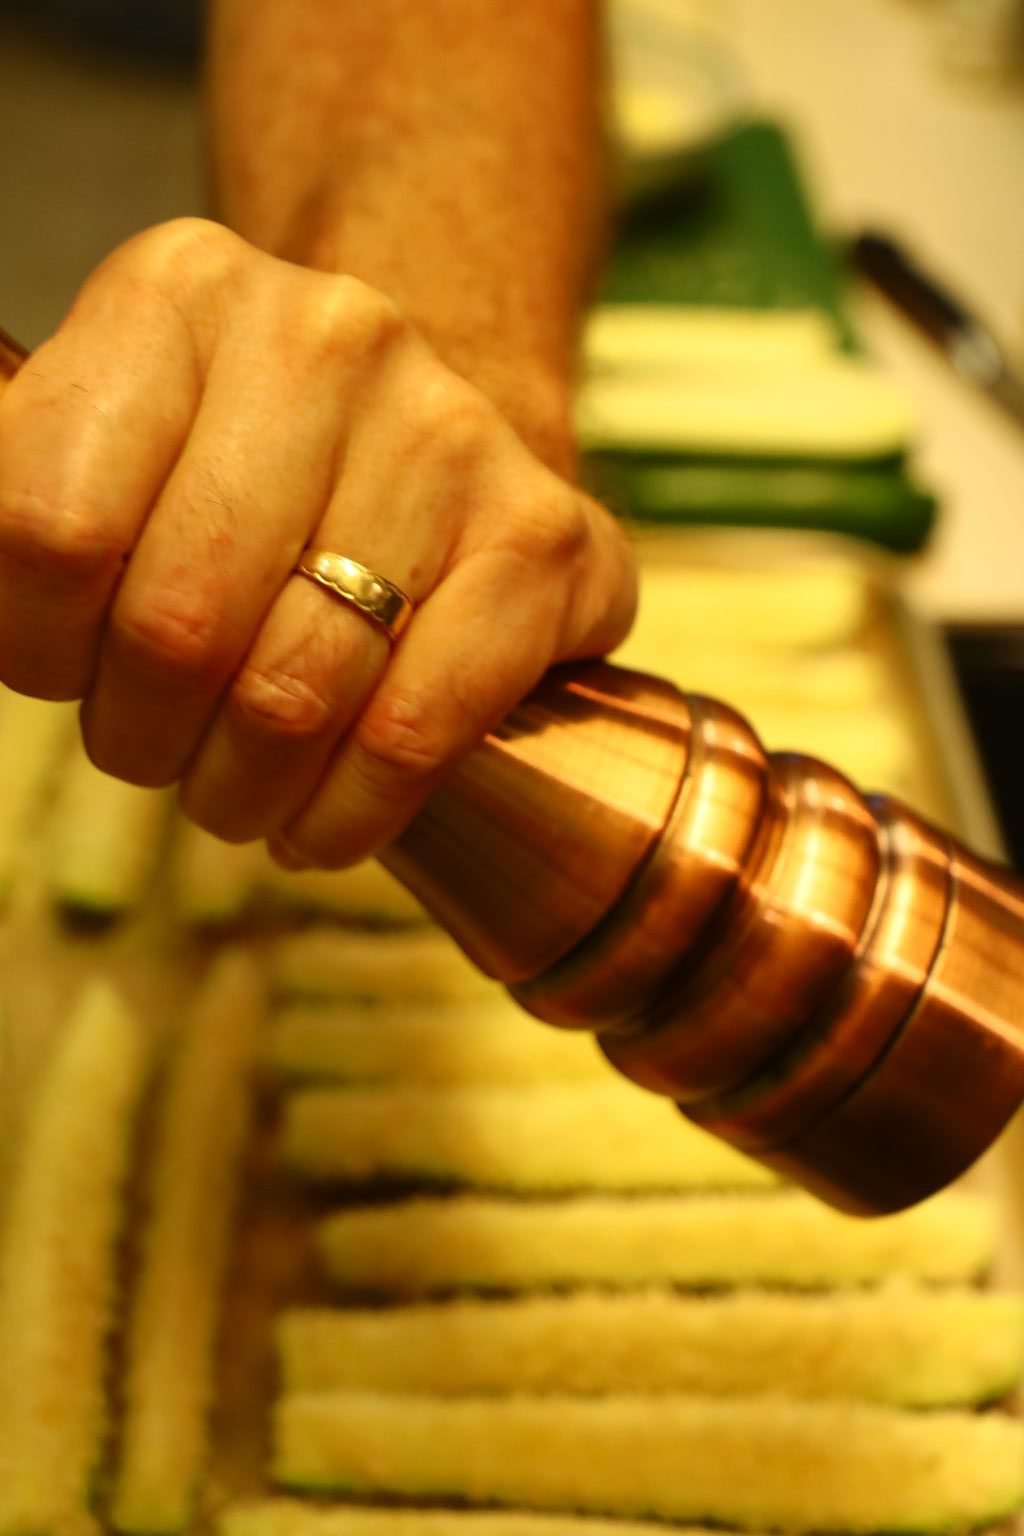
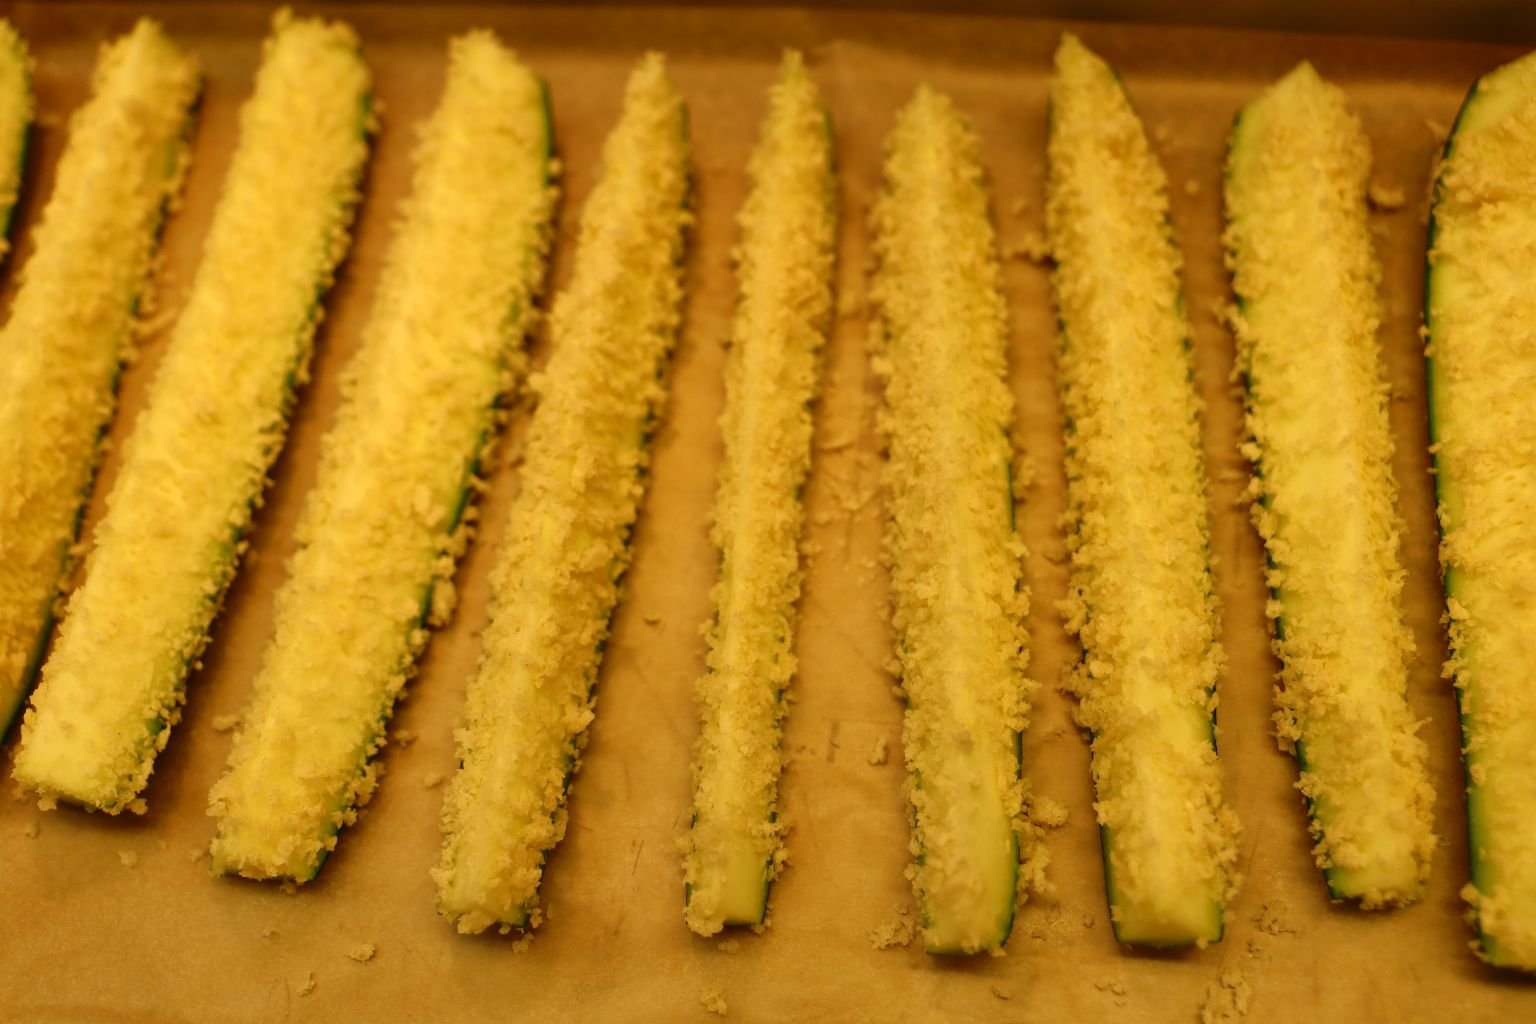
Place the breaded zucchini onto a large sheet pan and season all the zucchini at once with the spices. You could substitute the garlic powder with garlic salt, but I didn’t as I didn’t want too much salt on the zucchini, which is why I opted for the garlic powder.
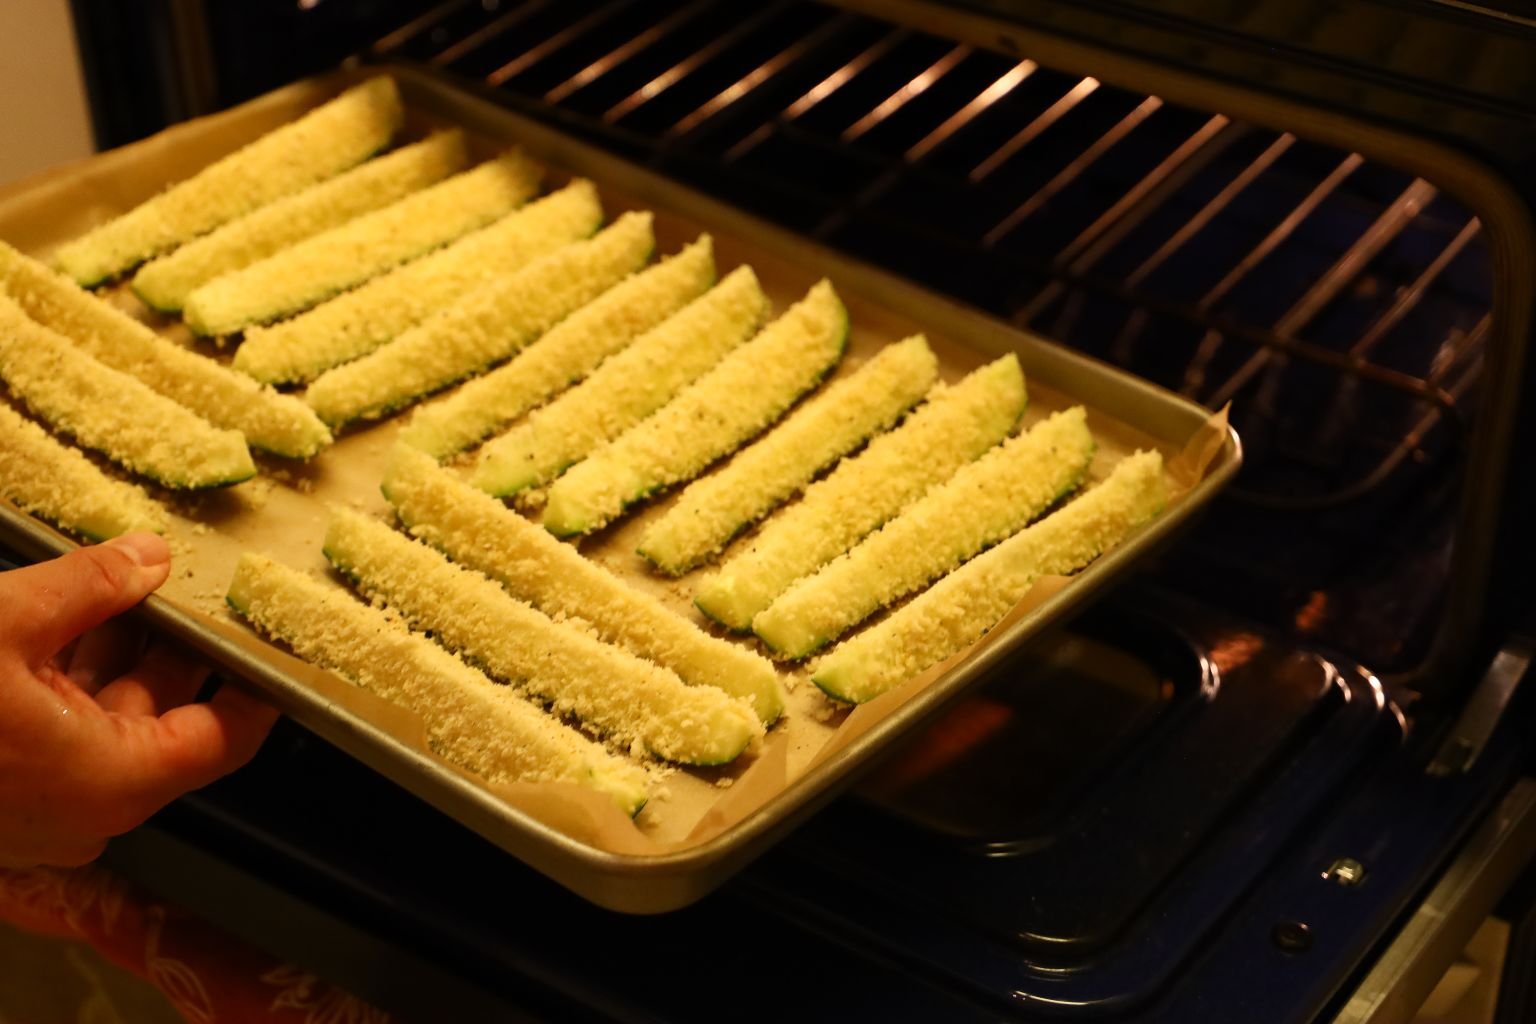
Place the breaded zucchini into a 400’F pre-heated oven for about 25 min..
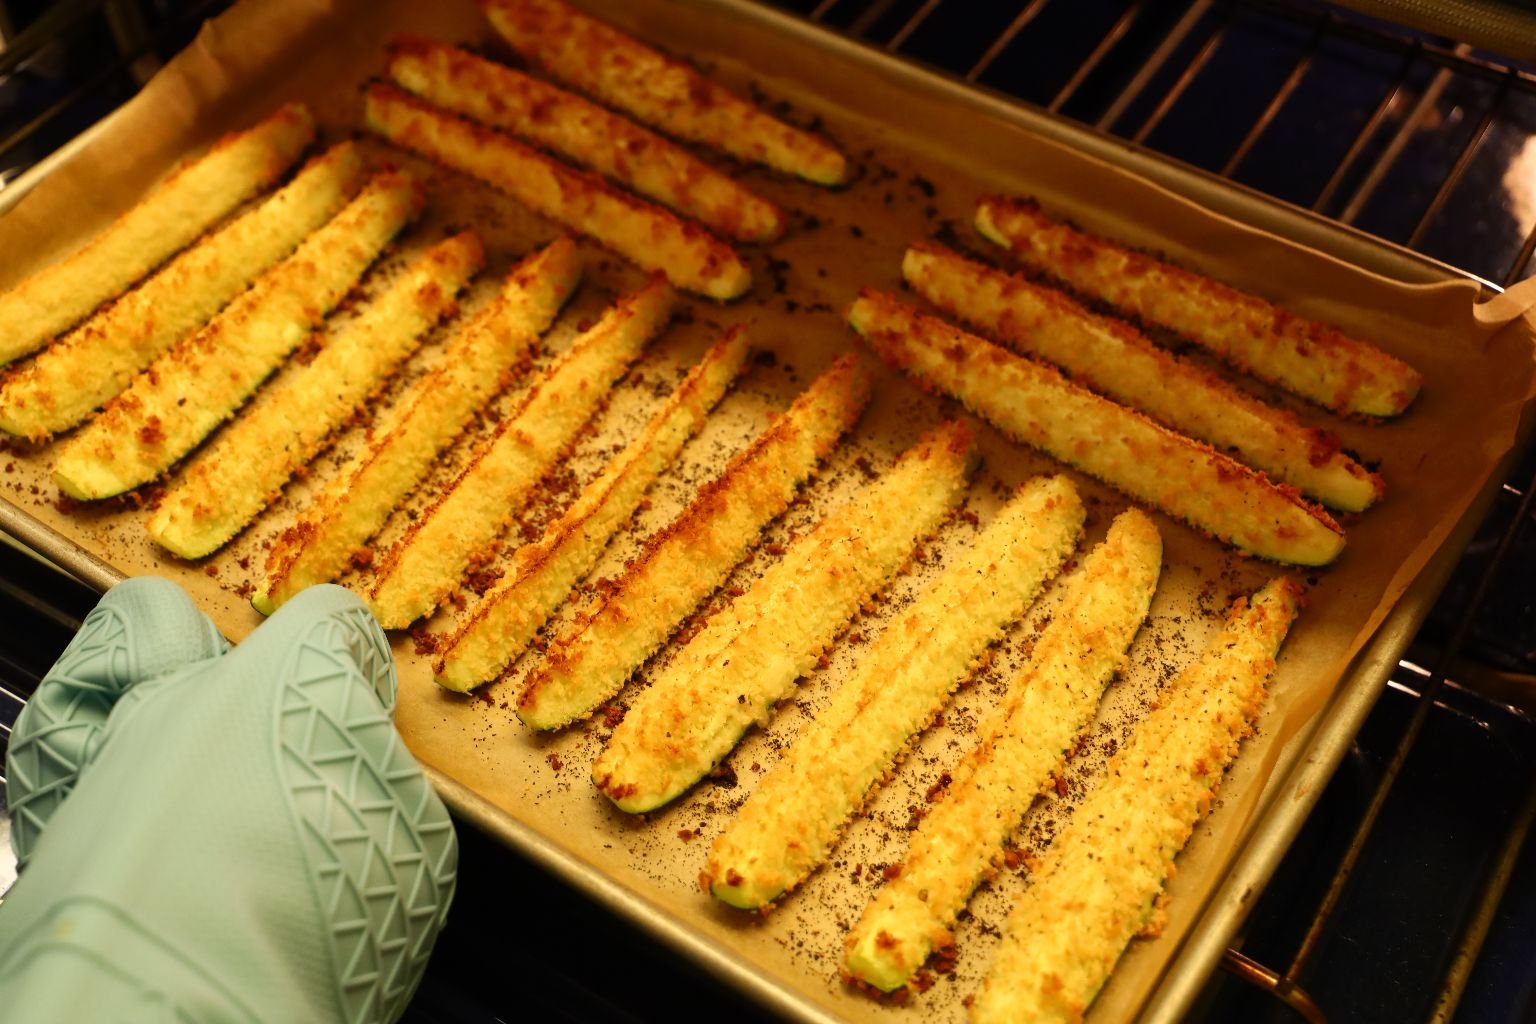
Bake the zucchini until golden brown as shown.

Here we topped the zucchini with a spicy tangy pepper sauce.
———————————————————————
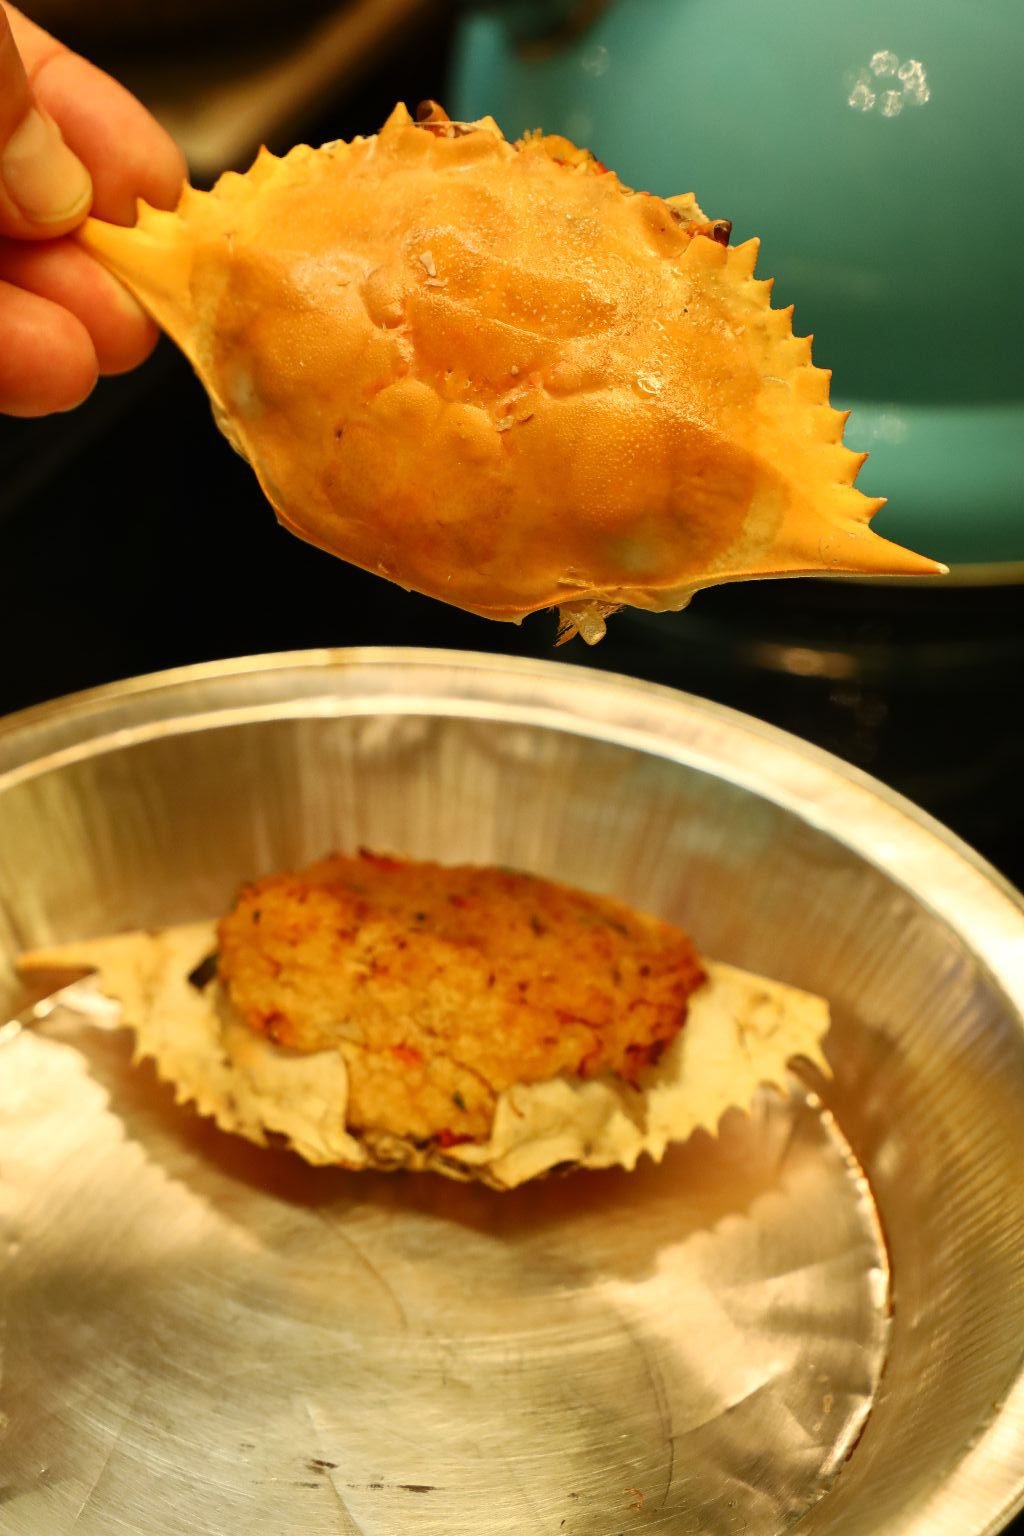
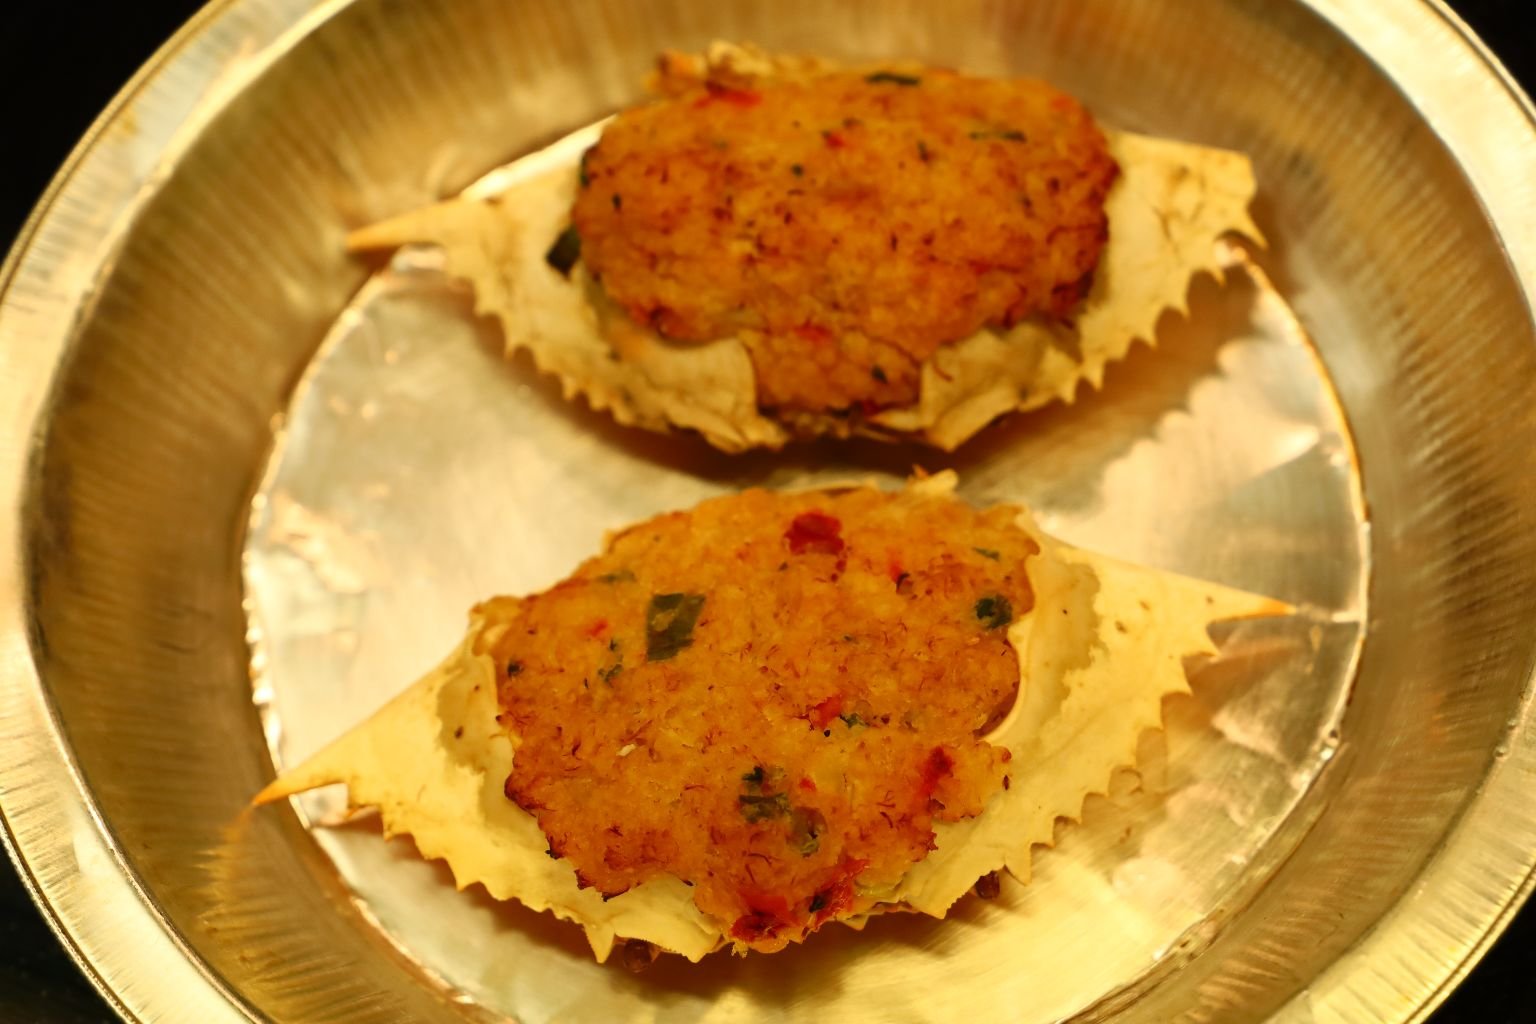
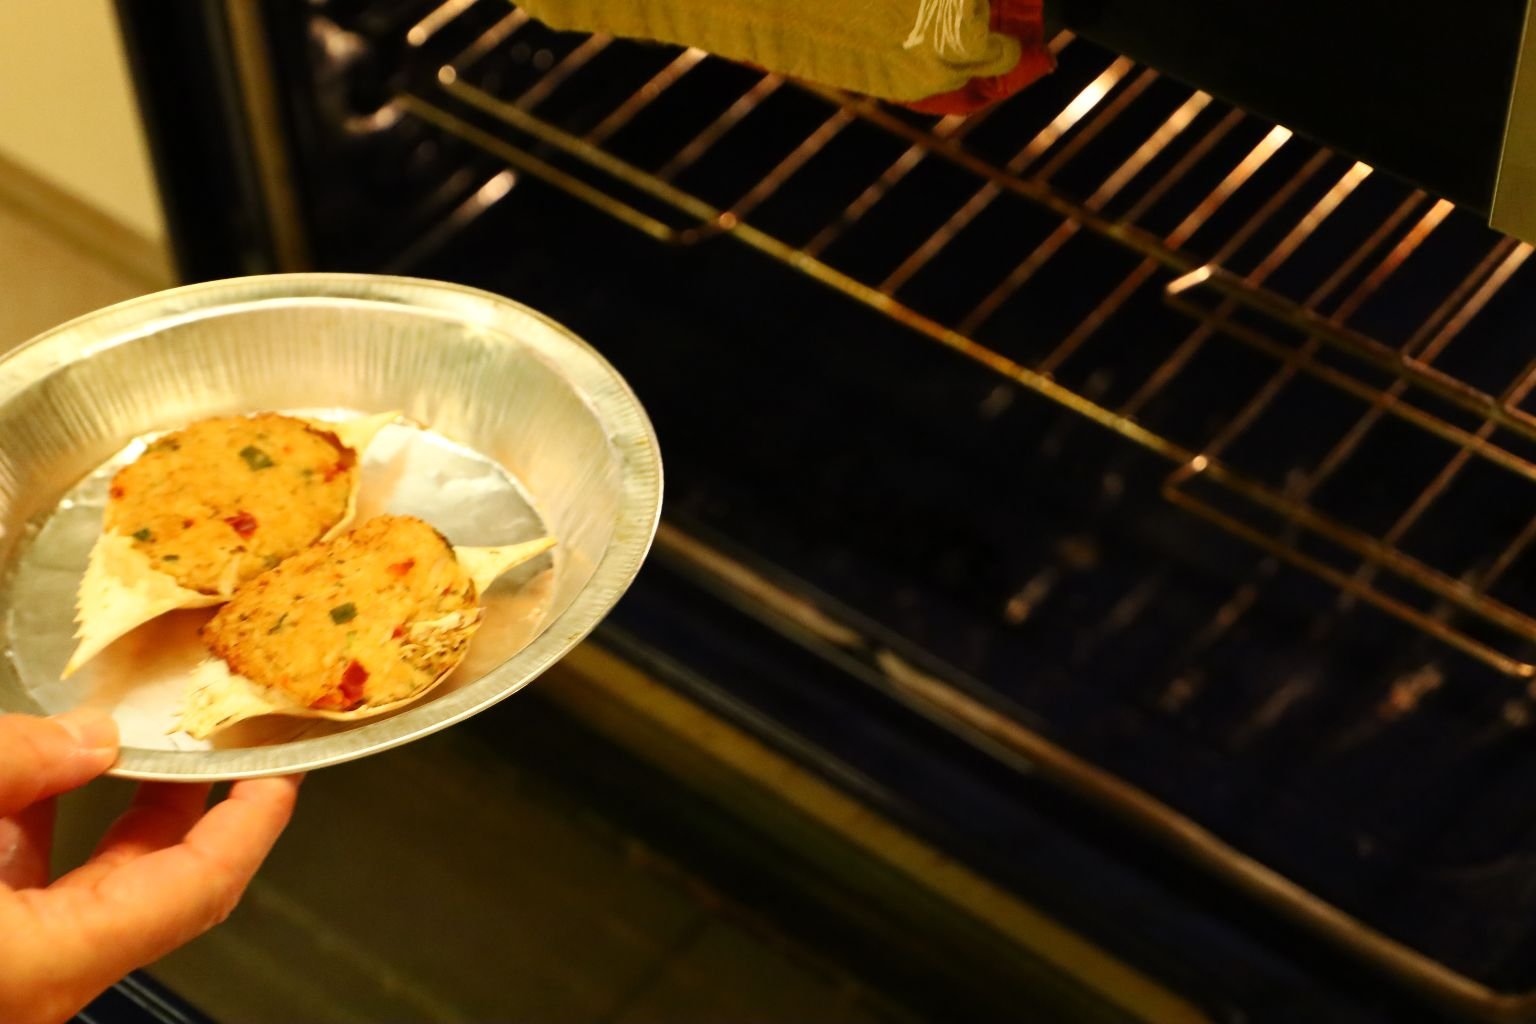
Stuffed crab shells.
These can be baked just like the stuffed clam shells using a 400’F preheated oven.
—————————————————————
Bake them until they too are golden brown which will take about 20 min. or so.
See the package for more details.
————————————————————————-
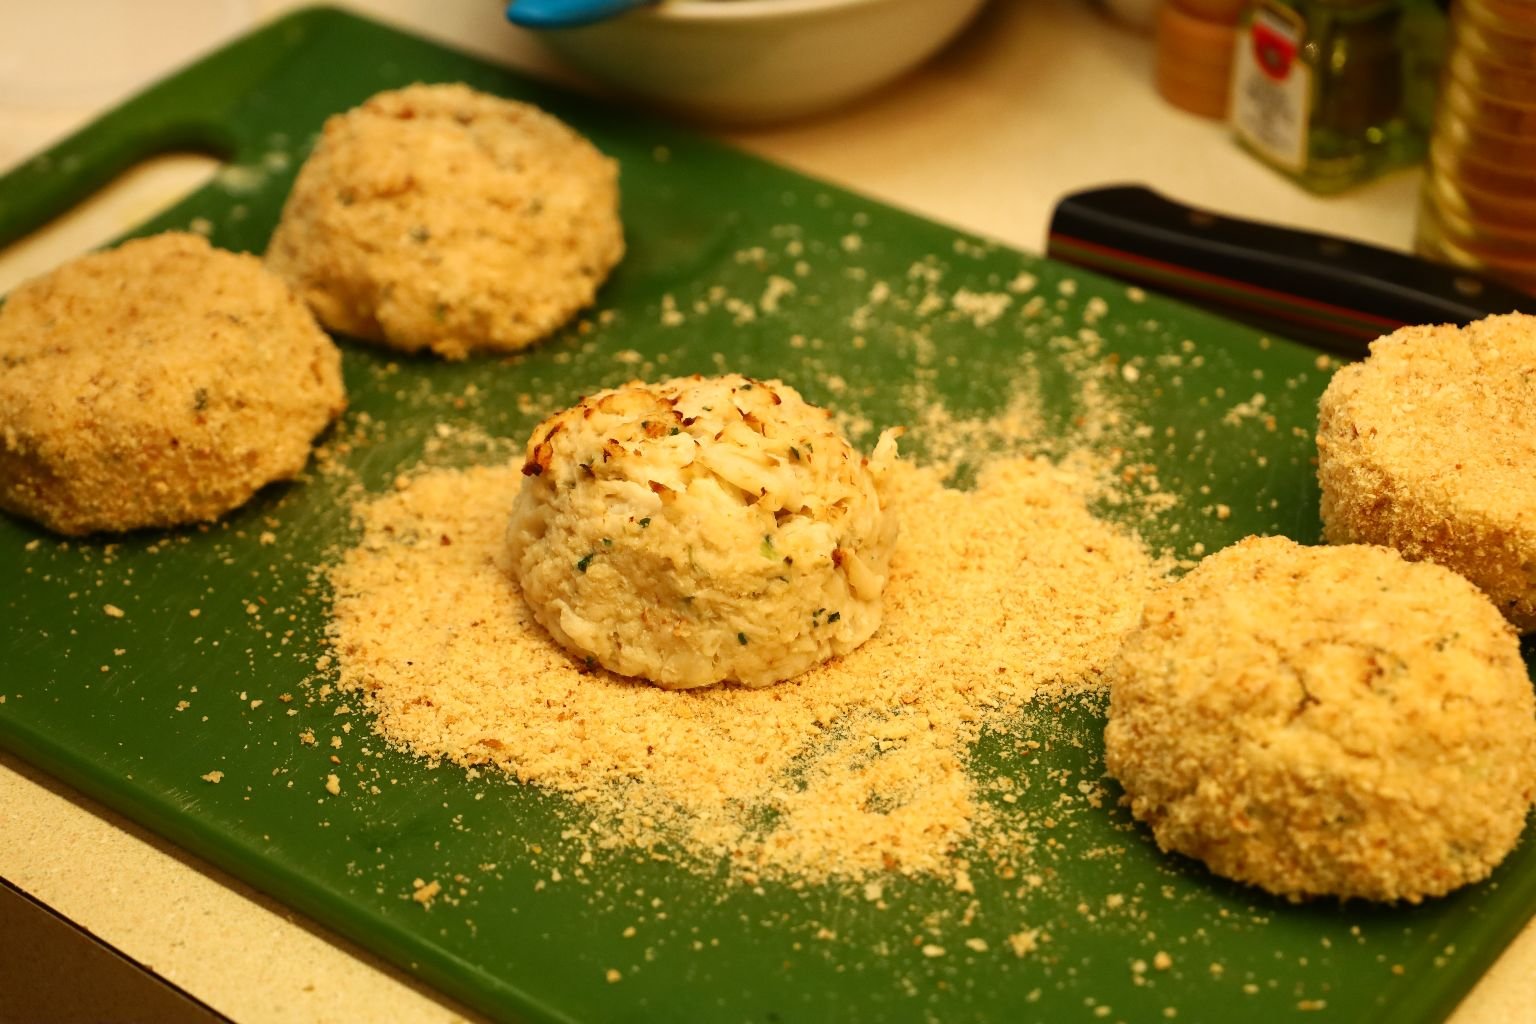
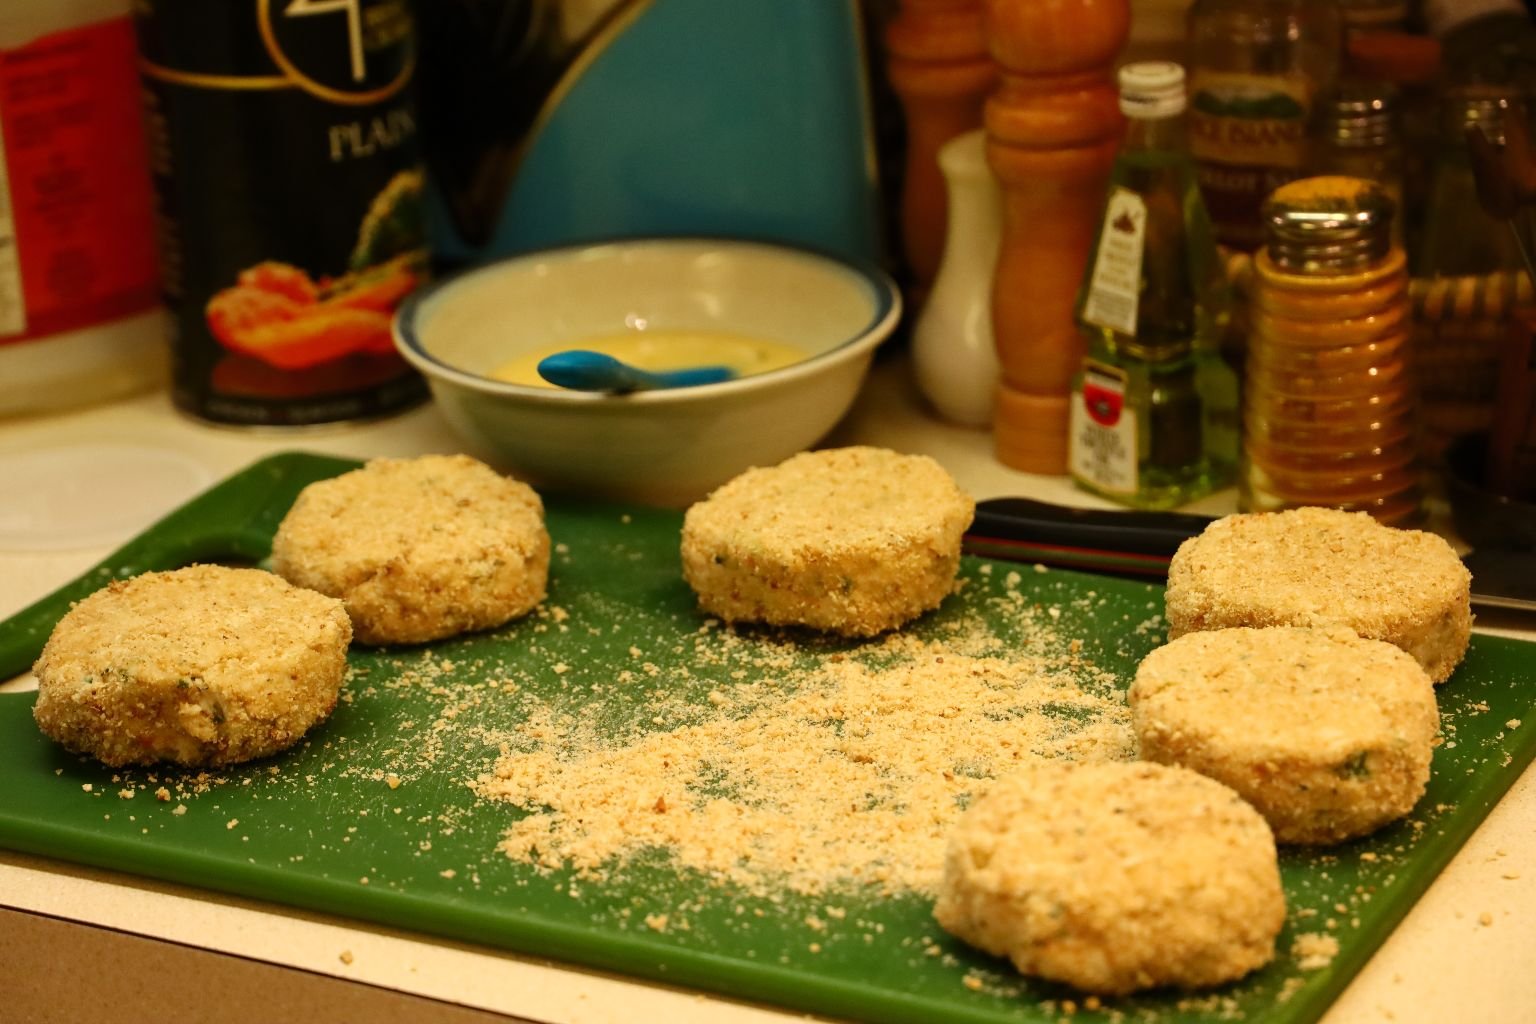
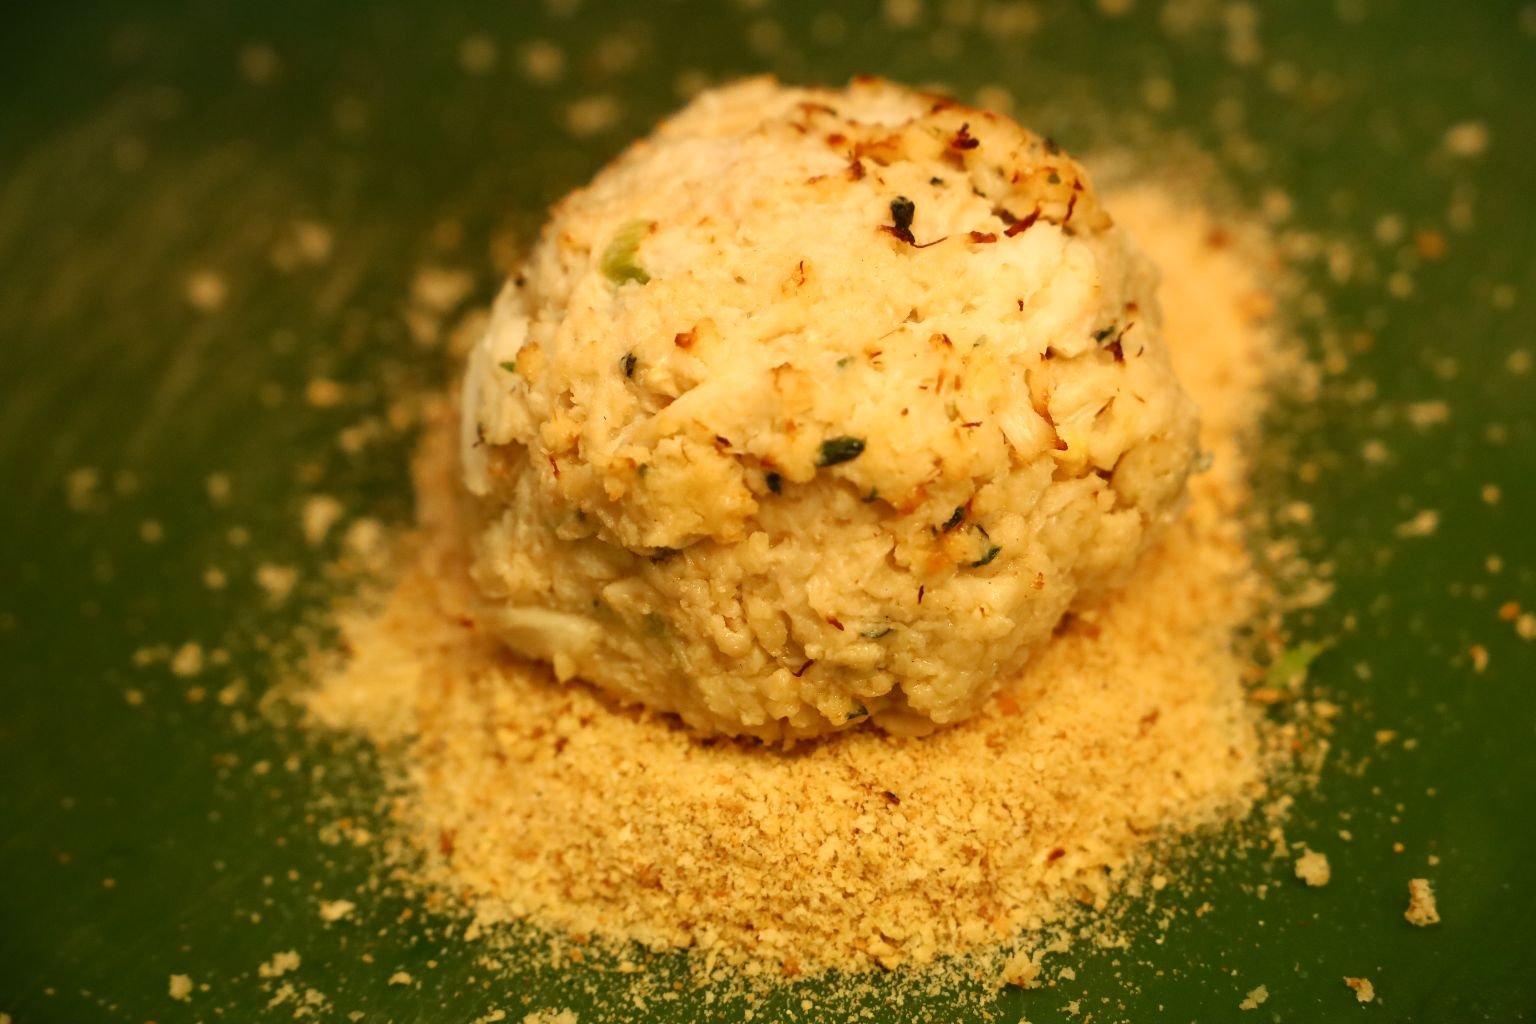
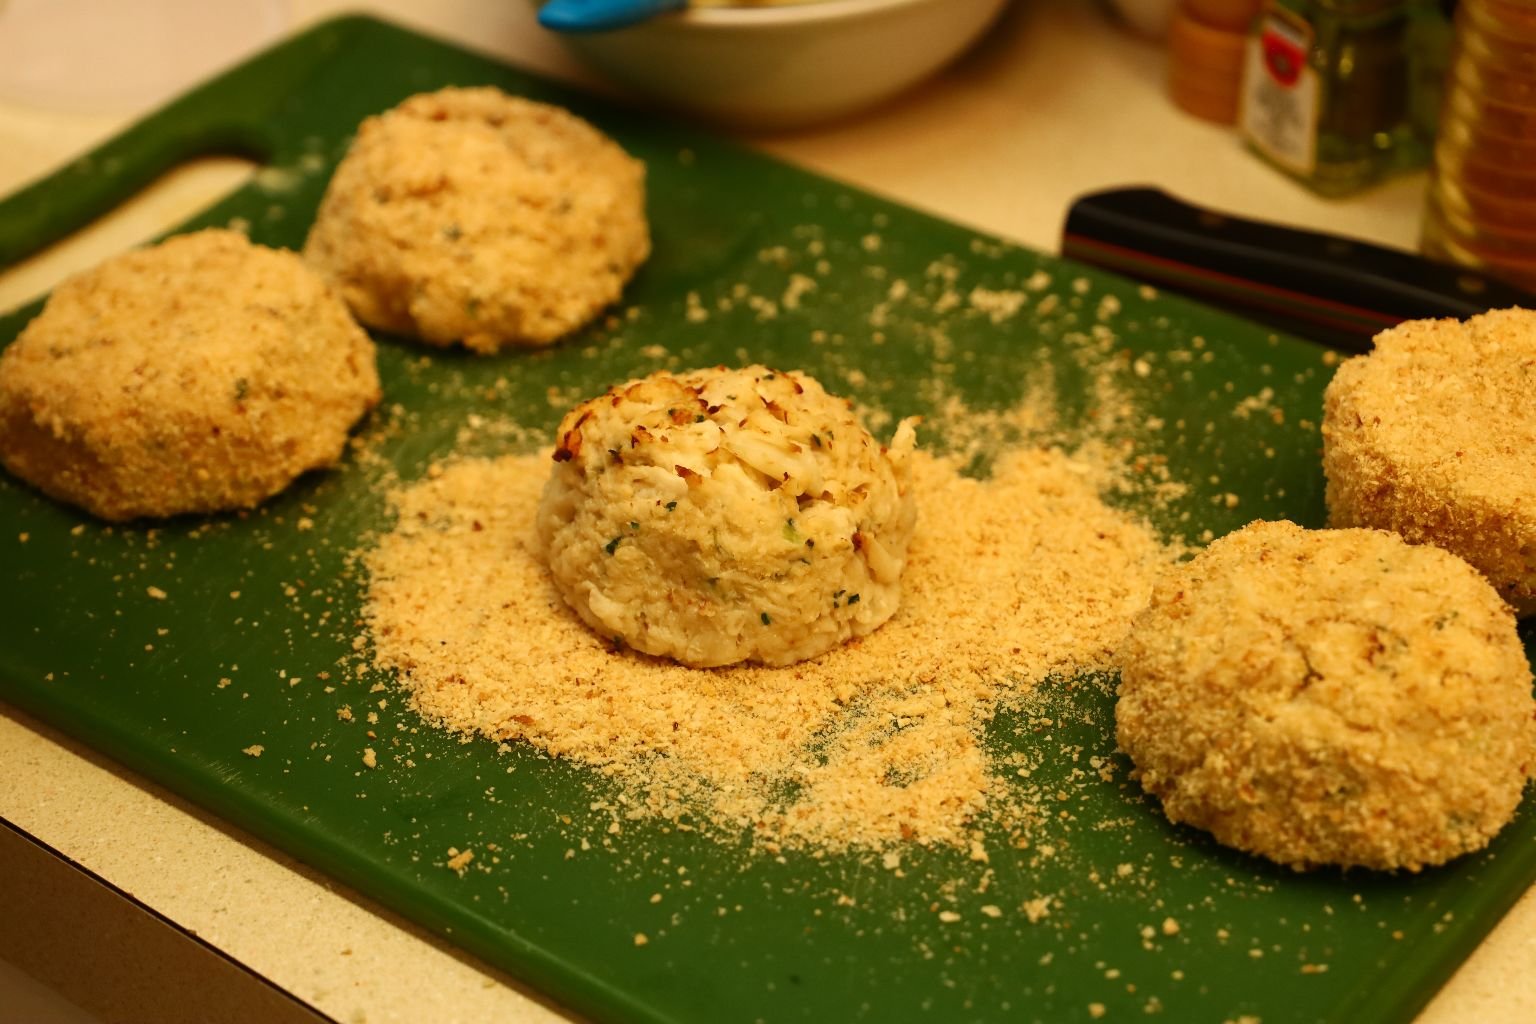
Traditional Crab Cakes
Here we bought some nice crab cakes where I made better by adding a little Panko and seasoning on the outside.
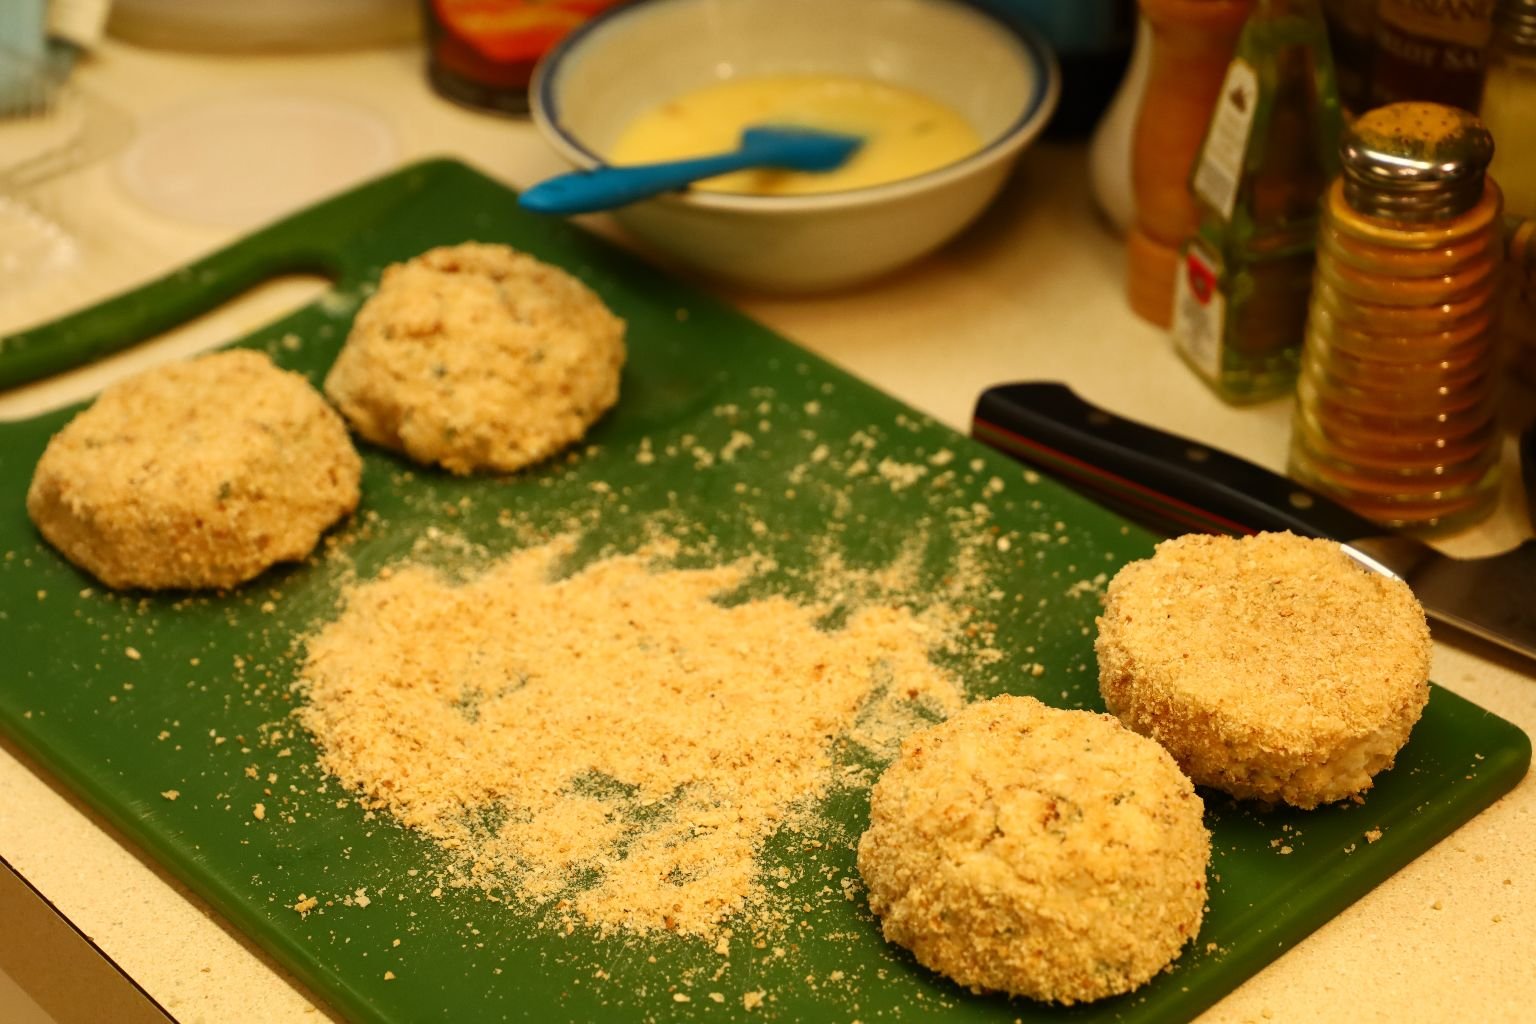
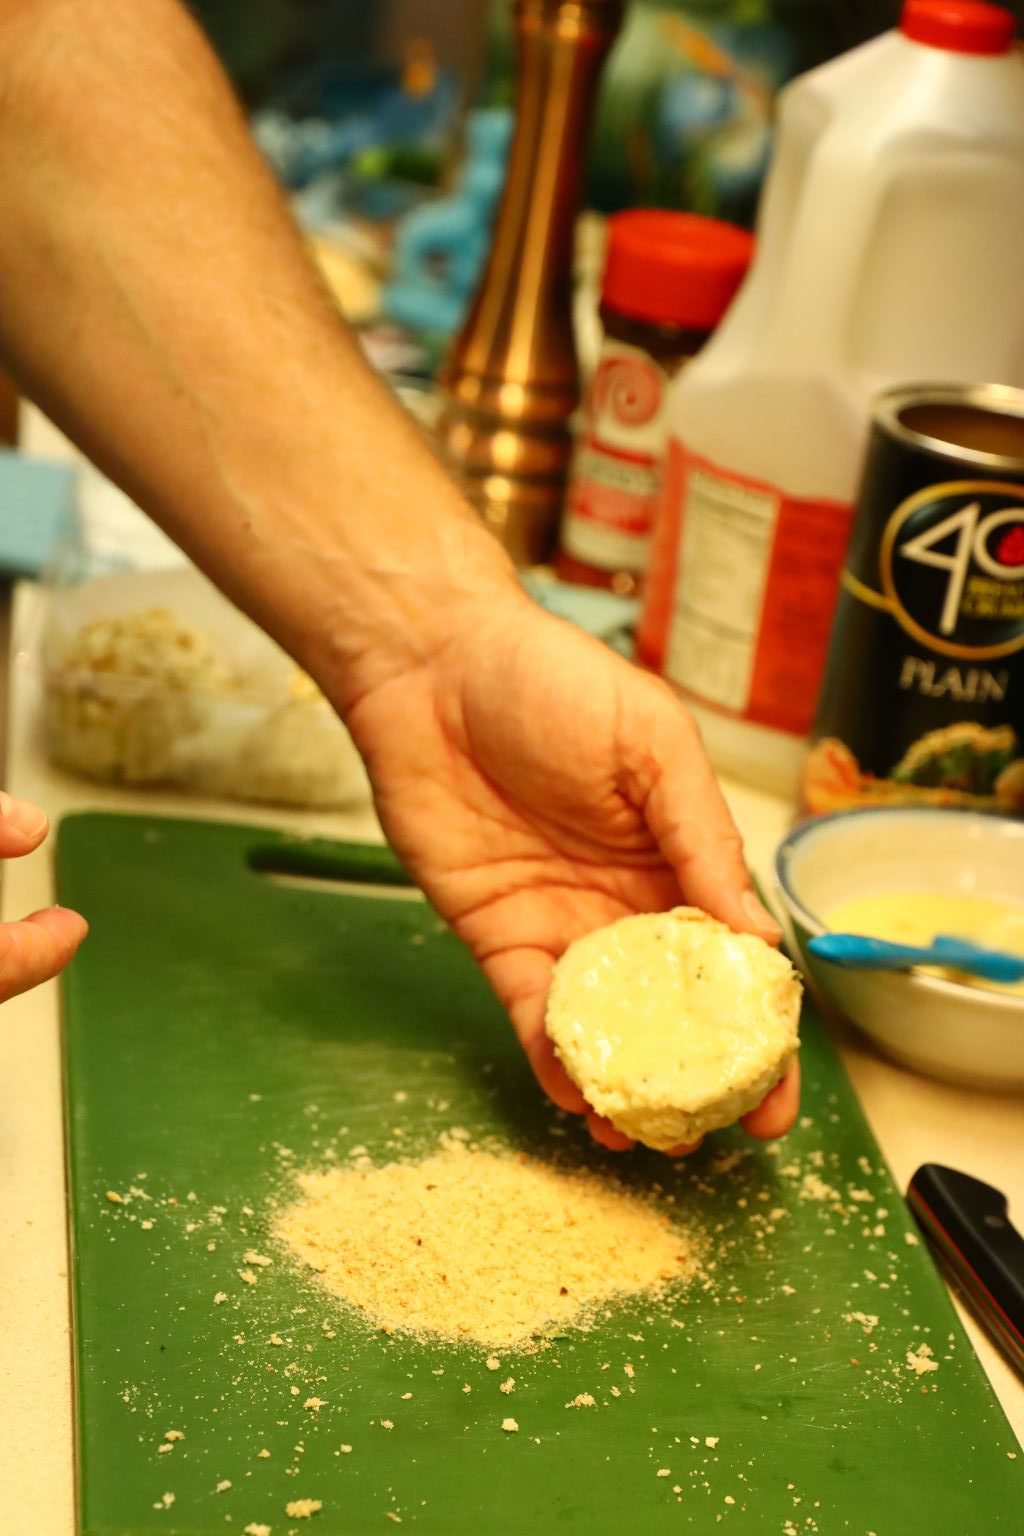
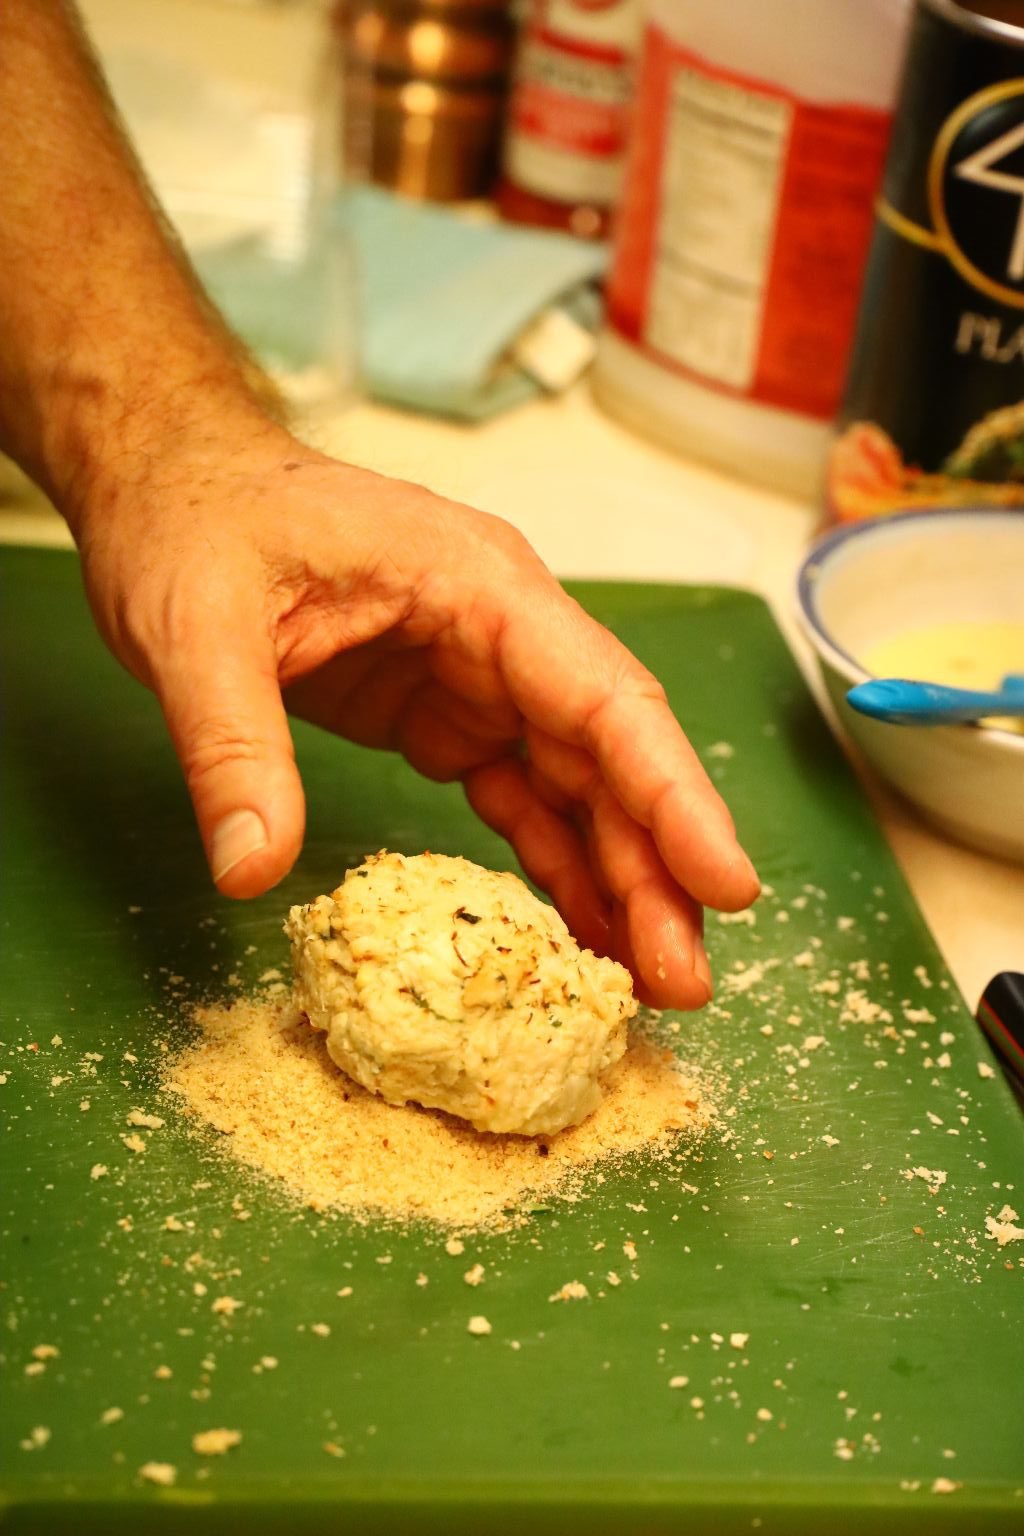
Here I brushed the crab cakes top and bottom with some egg-wash then placed them into some breadcrumbs.
——————————————————————-
—————————————————————————-
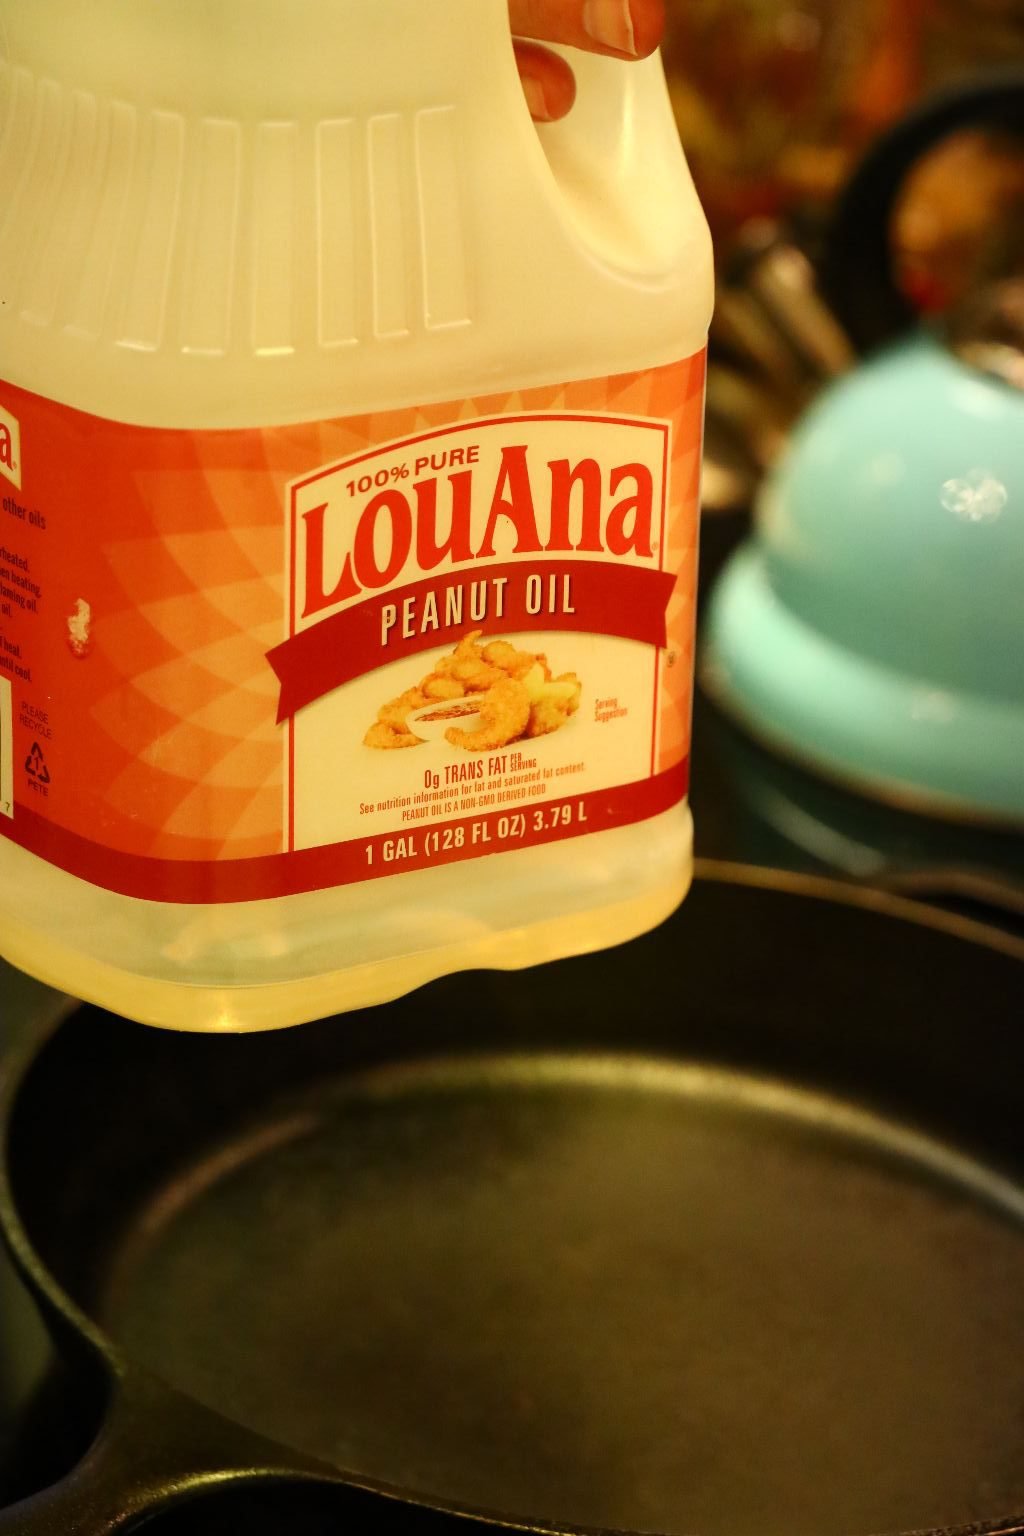
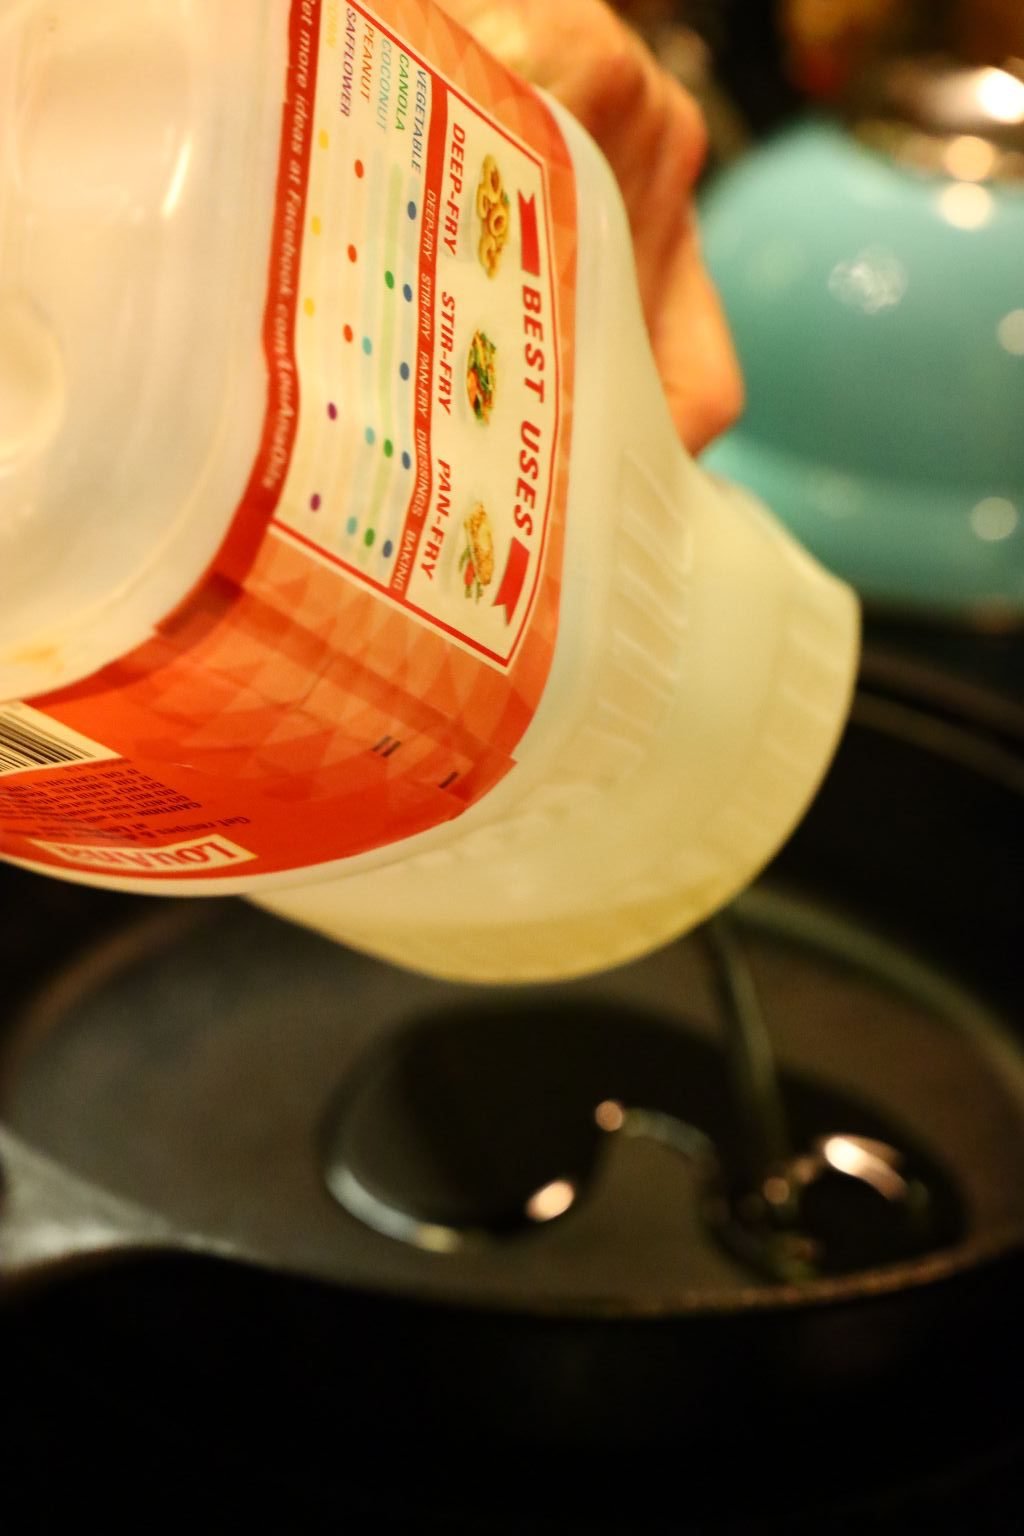
Add about 1/4 cup Peanut oil to a cast iron skillet and heat it to medium high heat.
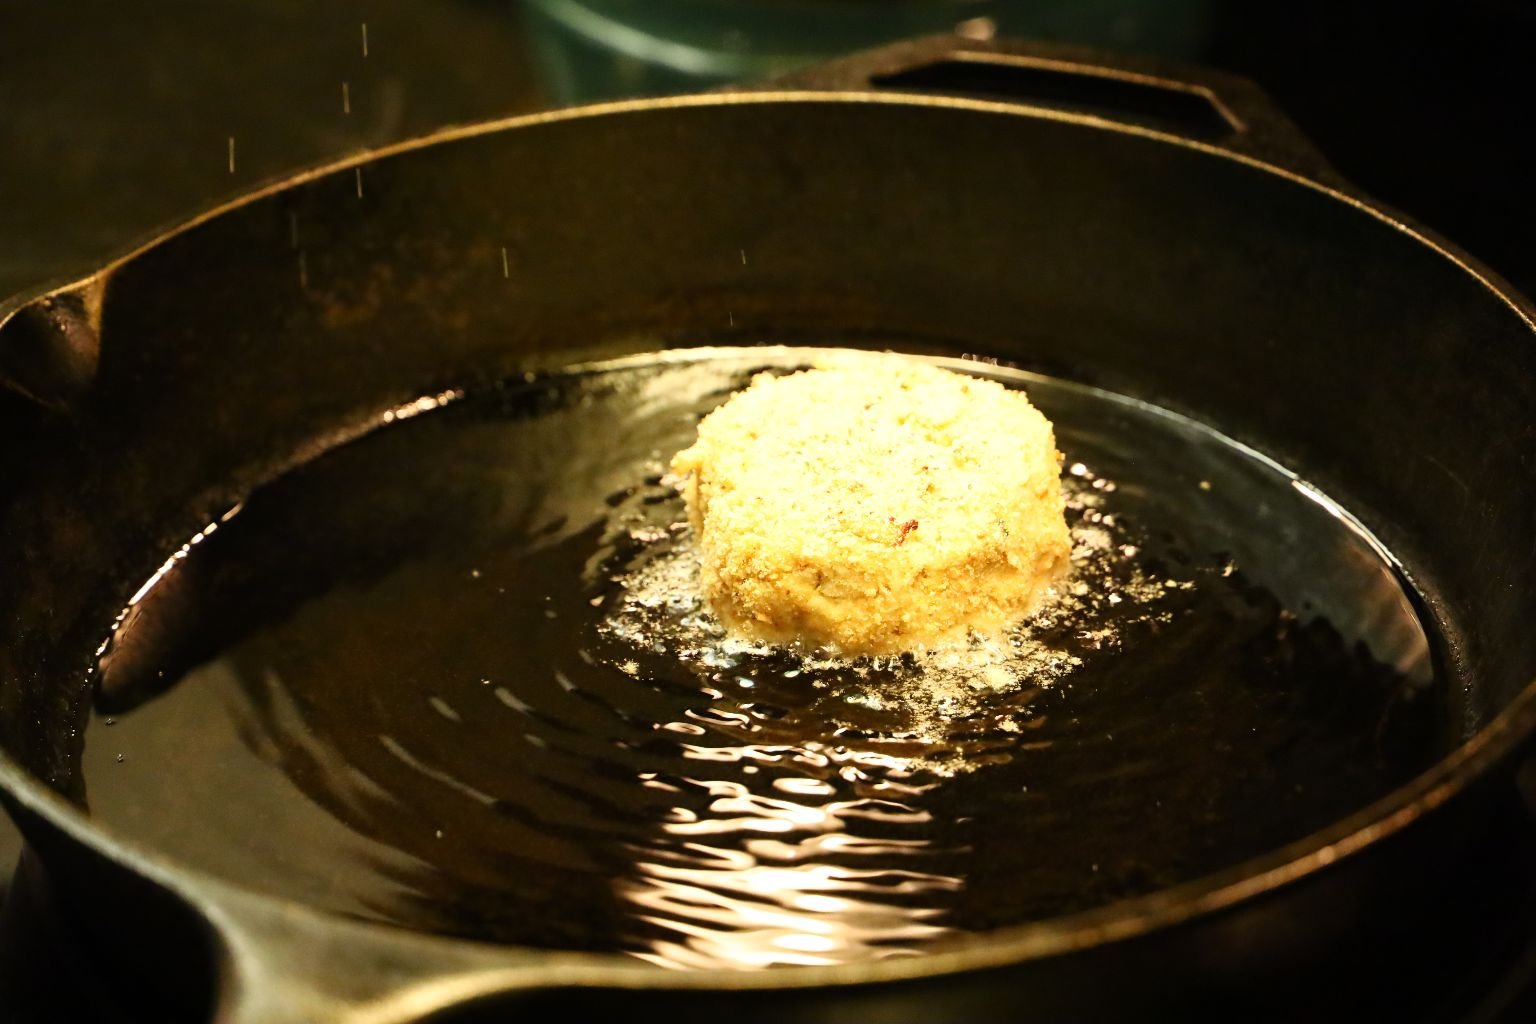
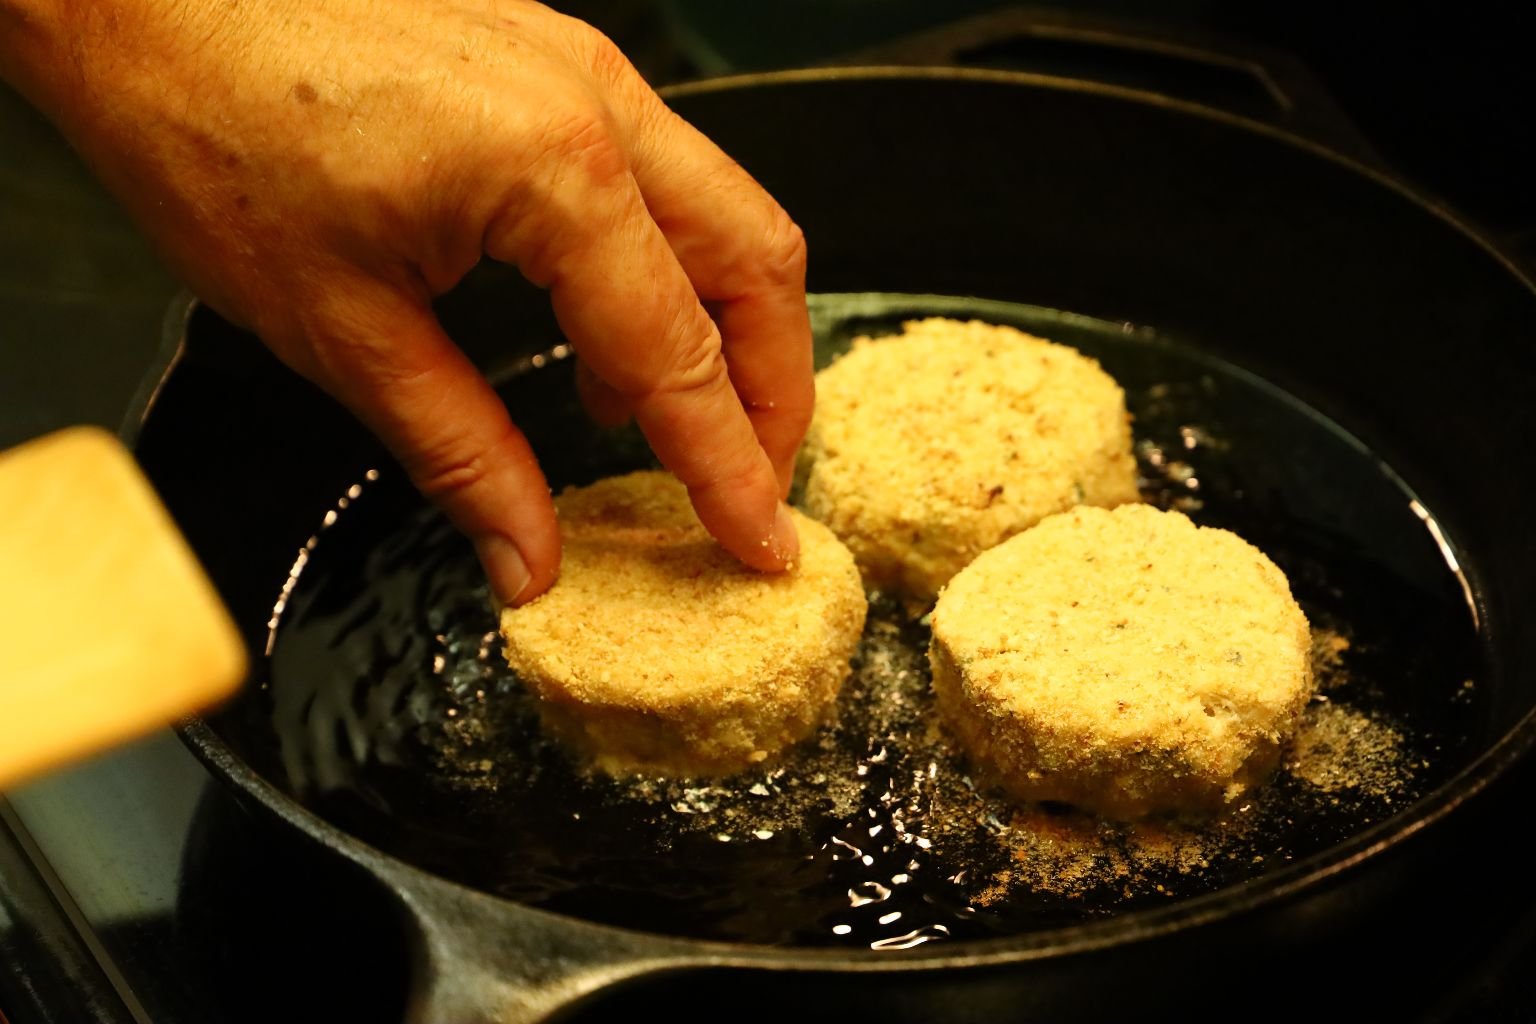
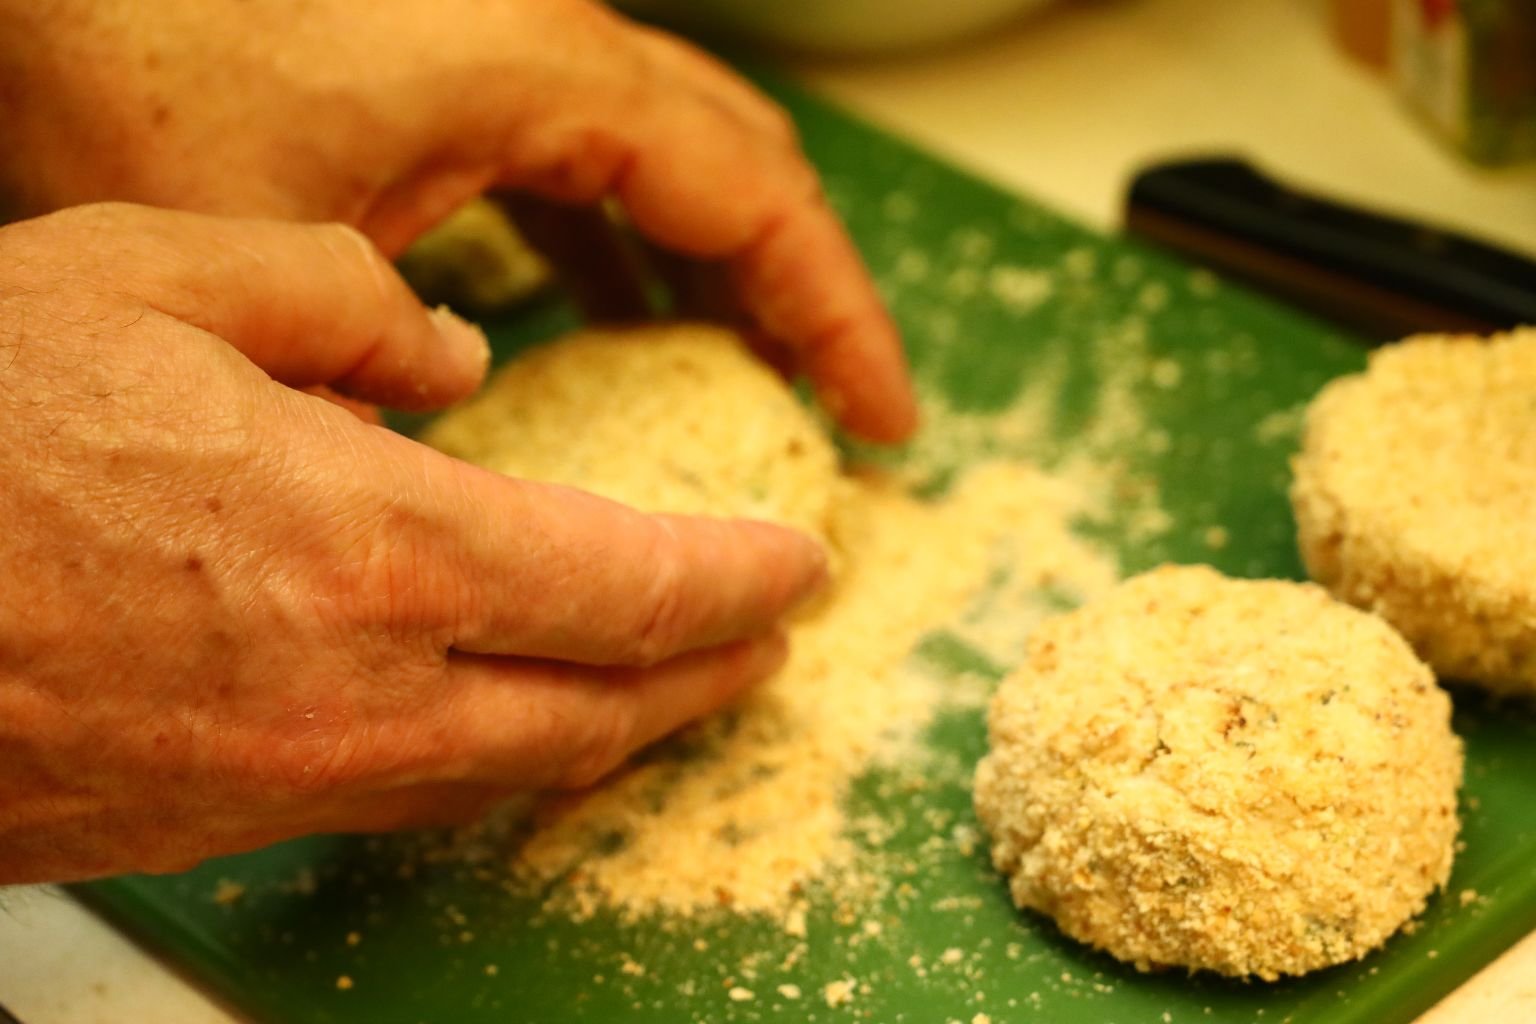
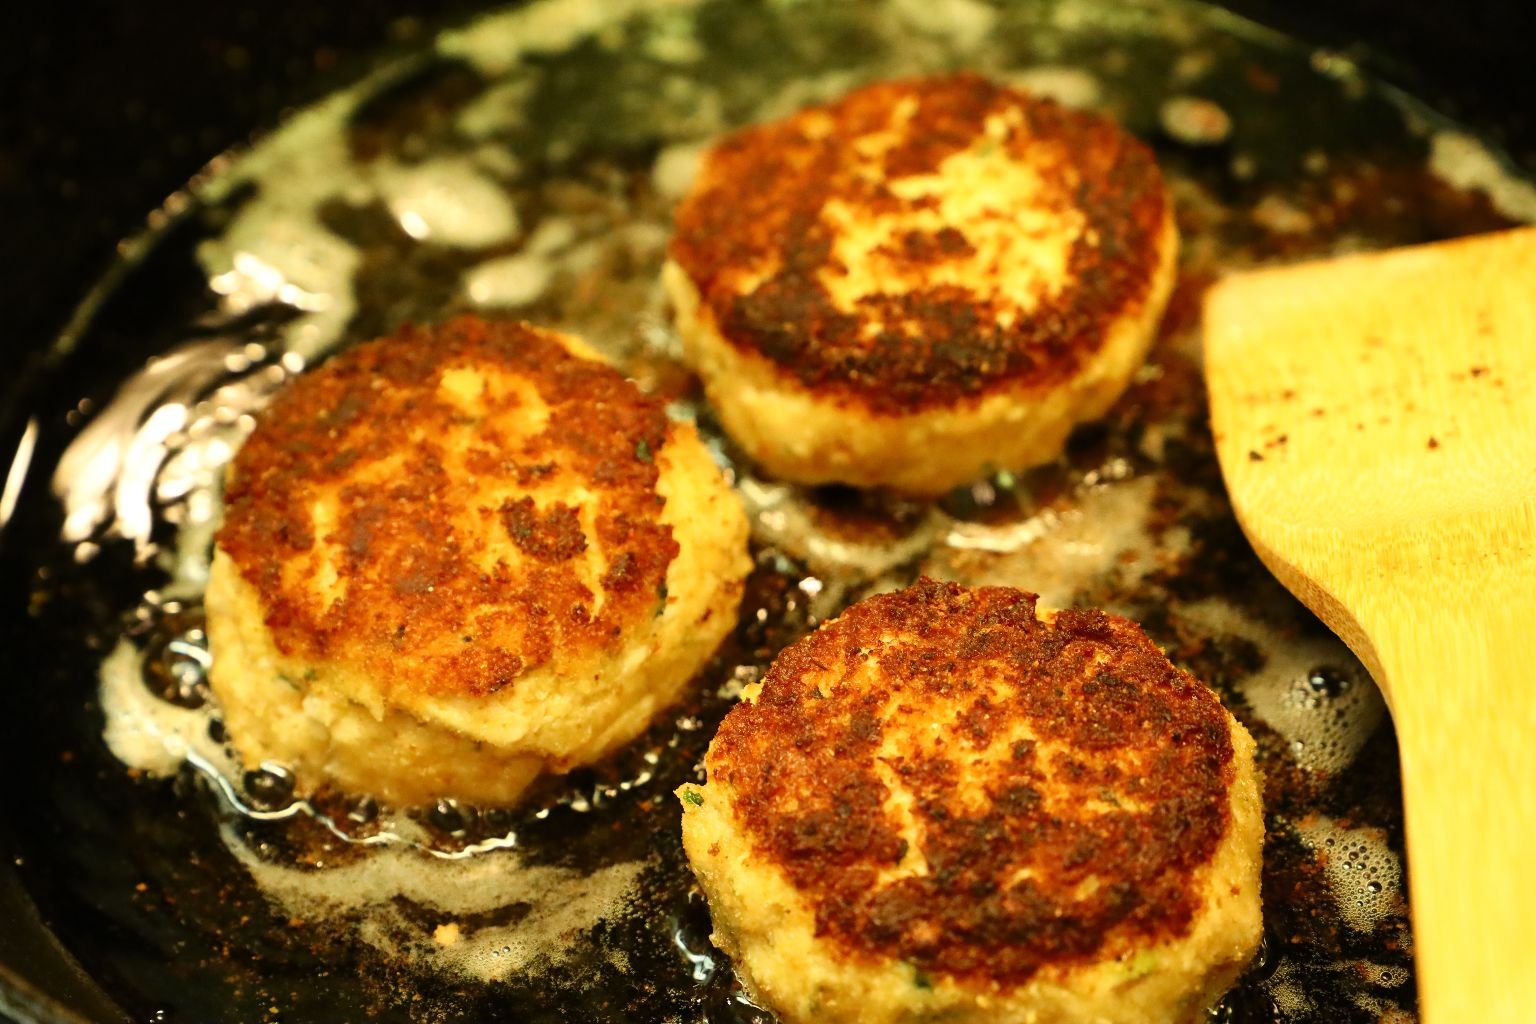
When the oil comes to temperature, add your crab cakes to the pan as shown.
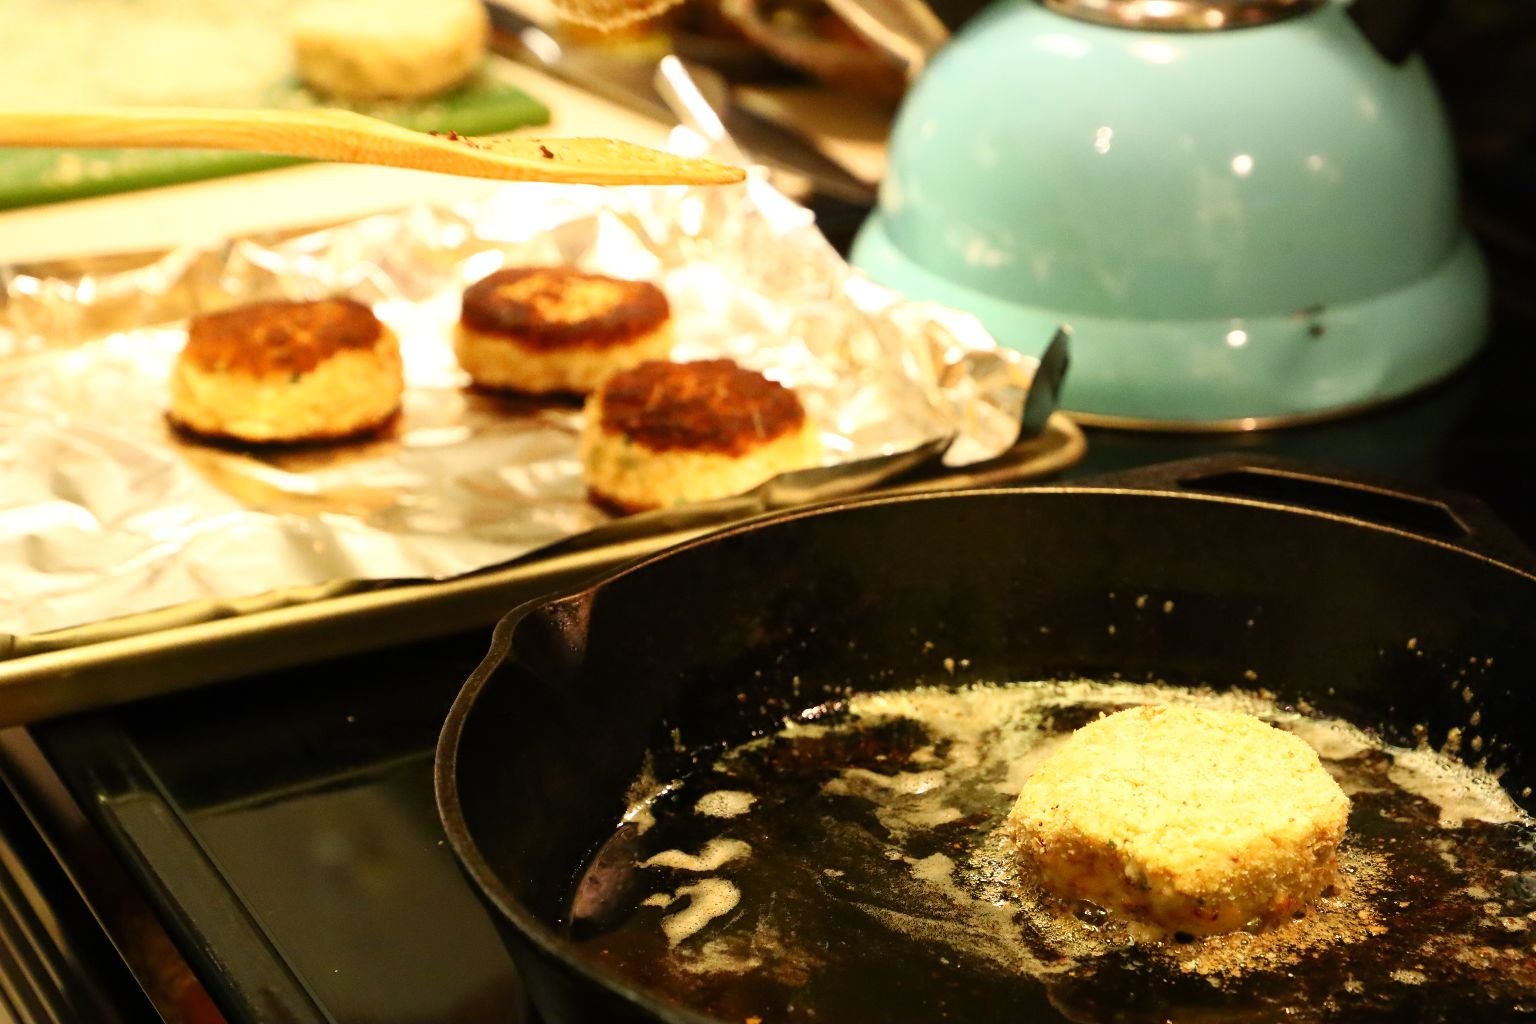
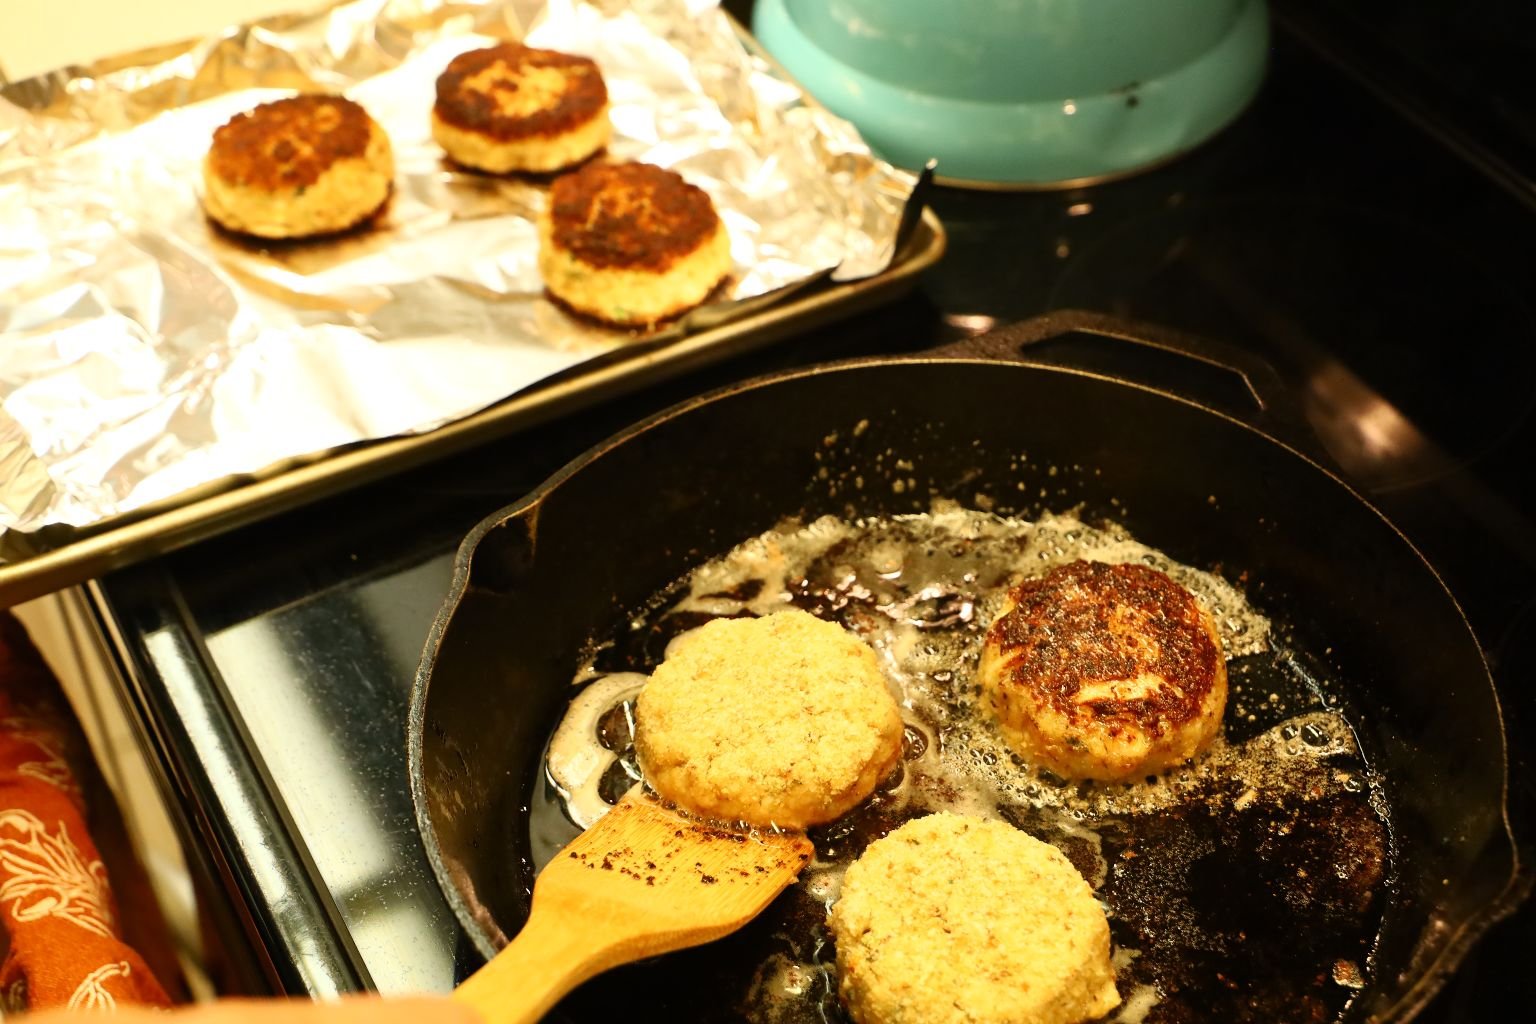
Cook the cakes until golden brown which will take about 5 min. on each side.
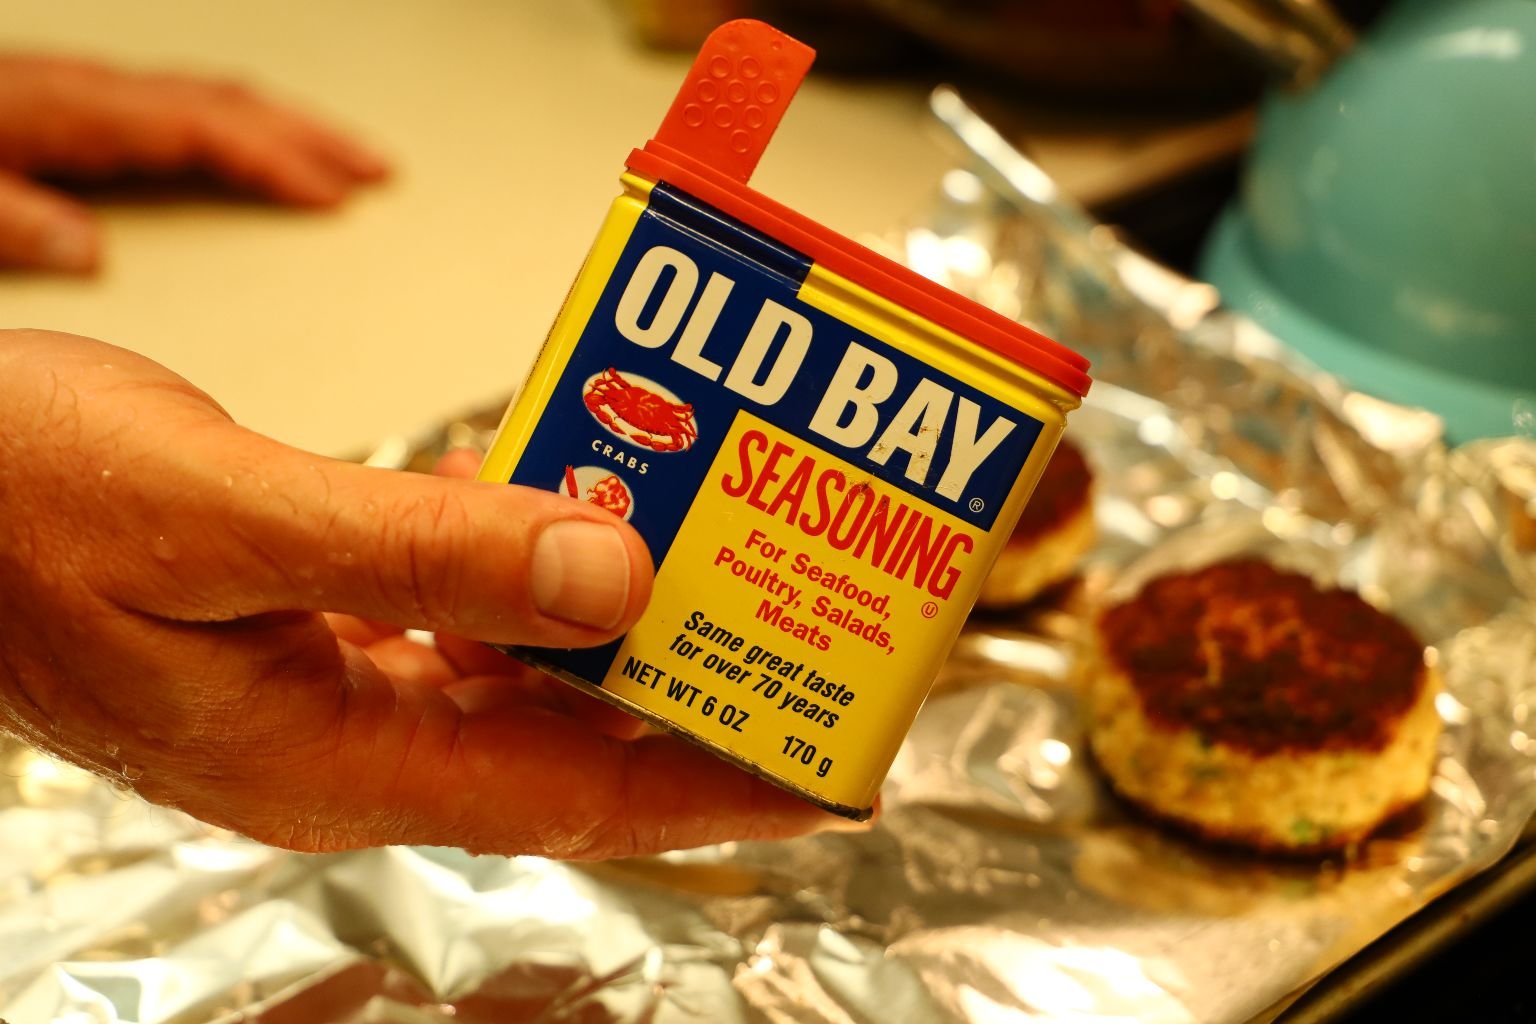
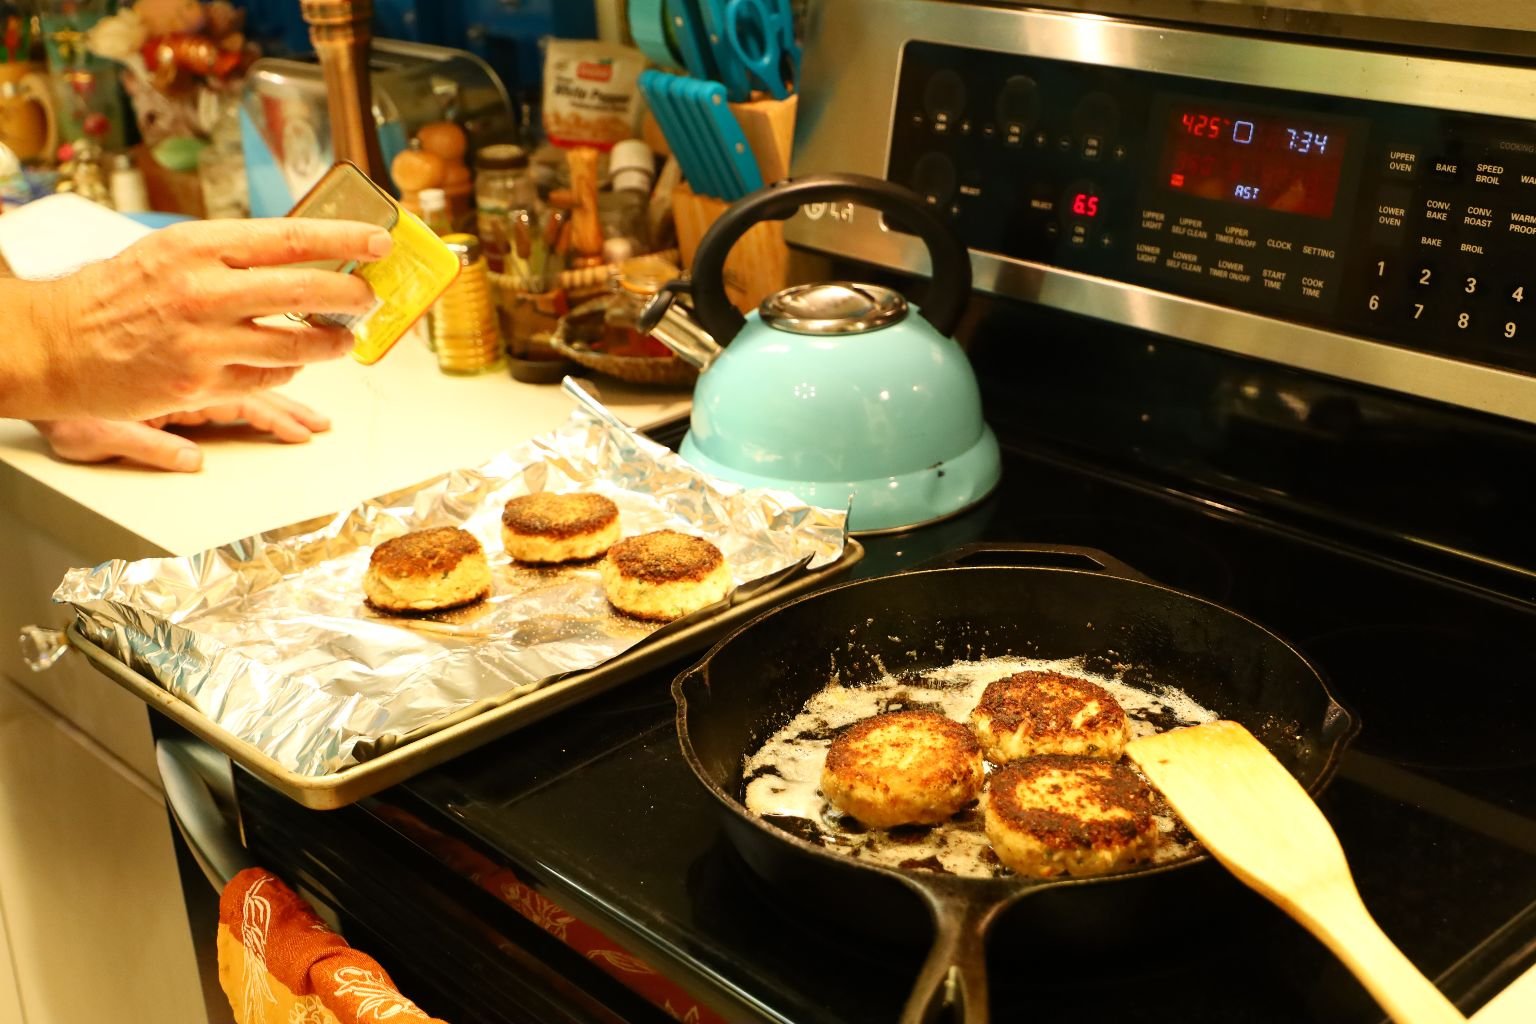
Add some Old Bay seasoning to the crab cakes, a very traditional seasoning.
—————————————————————————
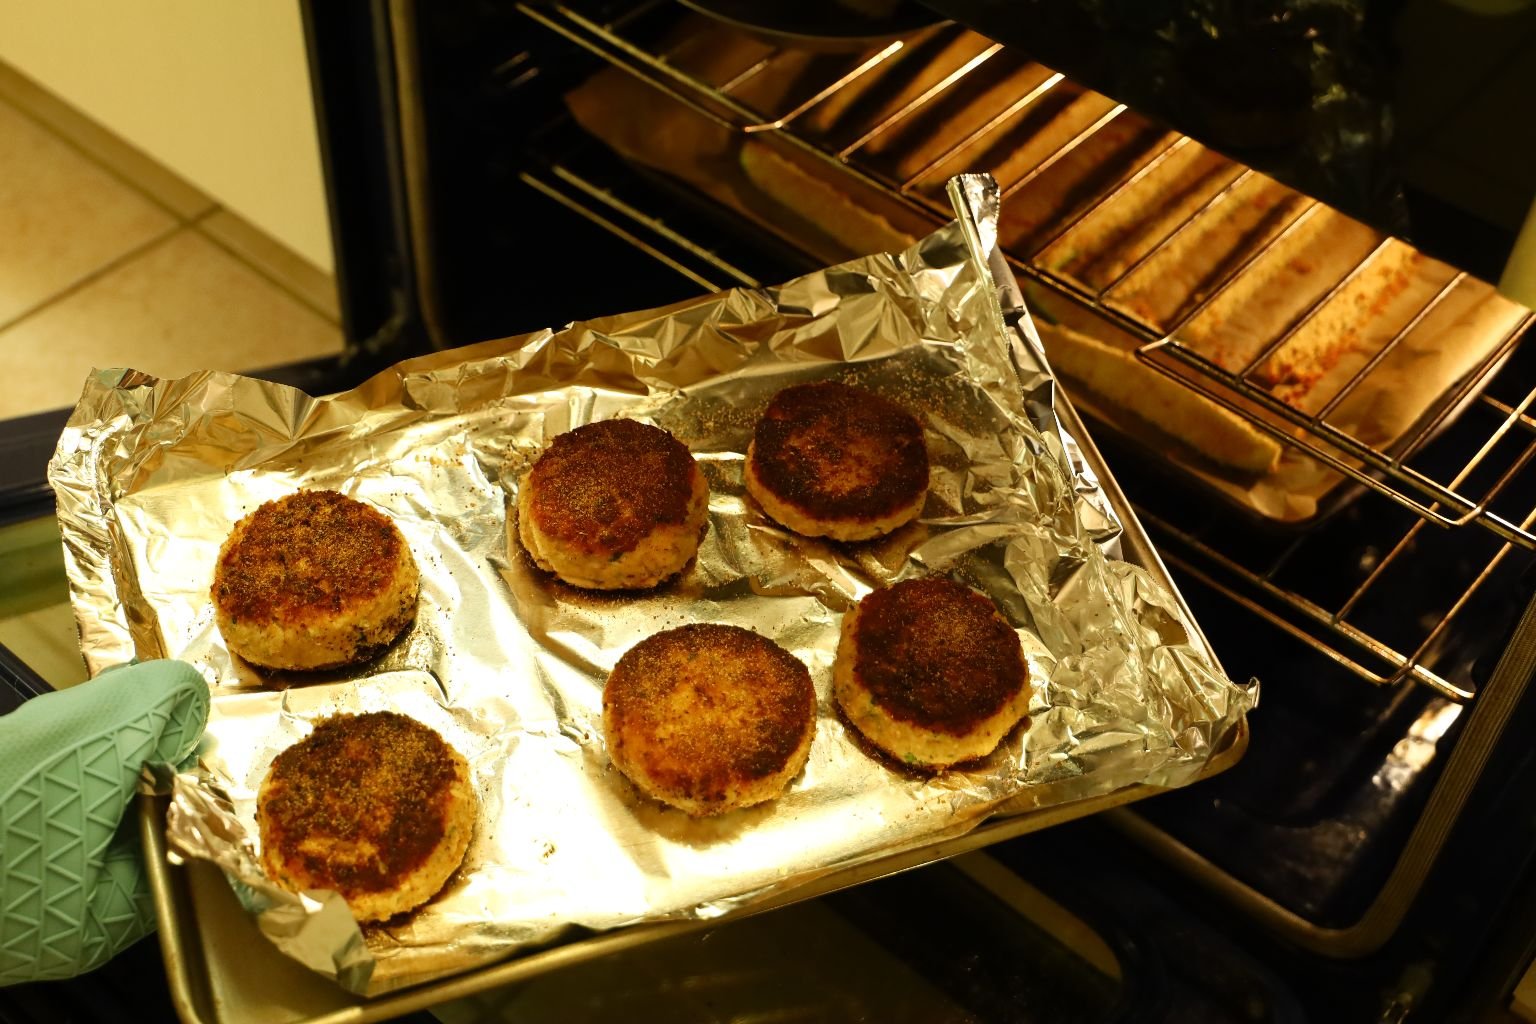
Because these are such thick crab cakes, to ensure the crab is cooked all the way through, place them into a 400’F oven for about 15 min.
———————————————————————-
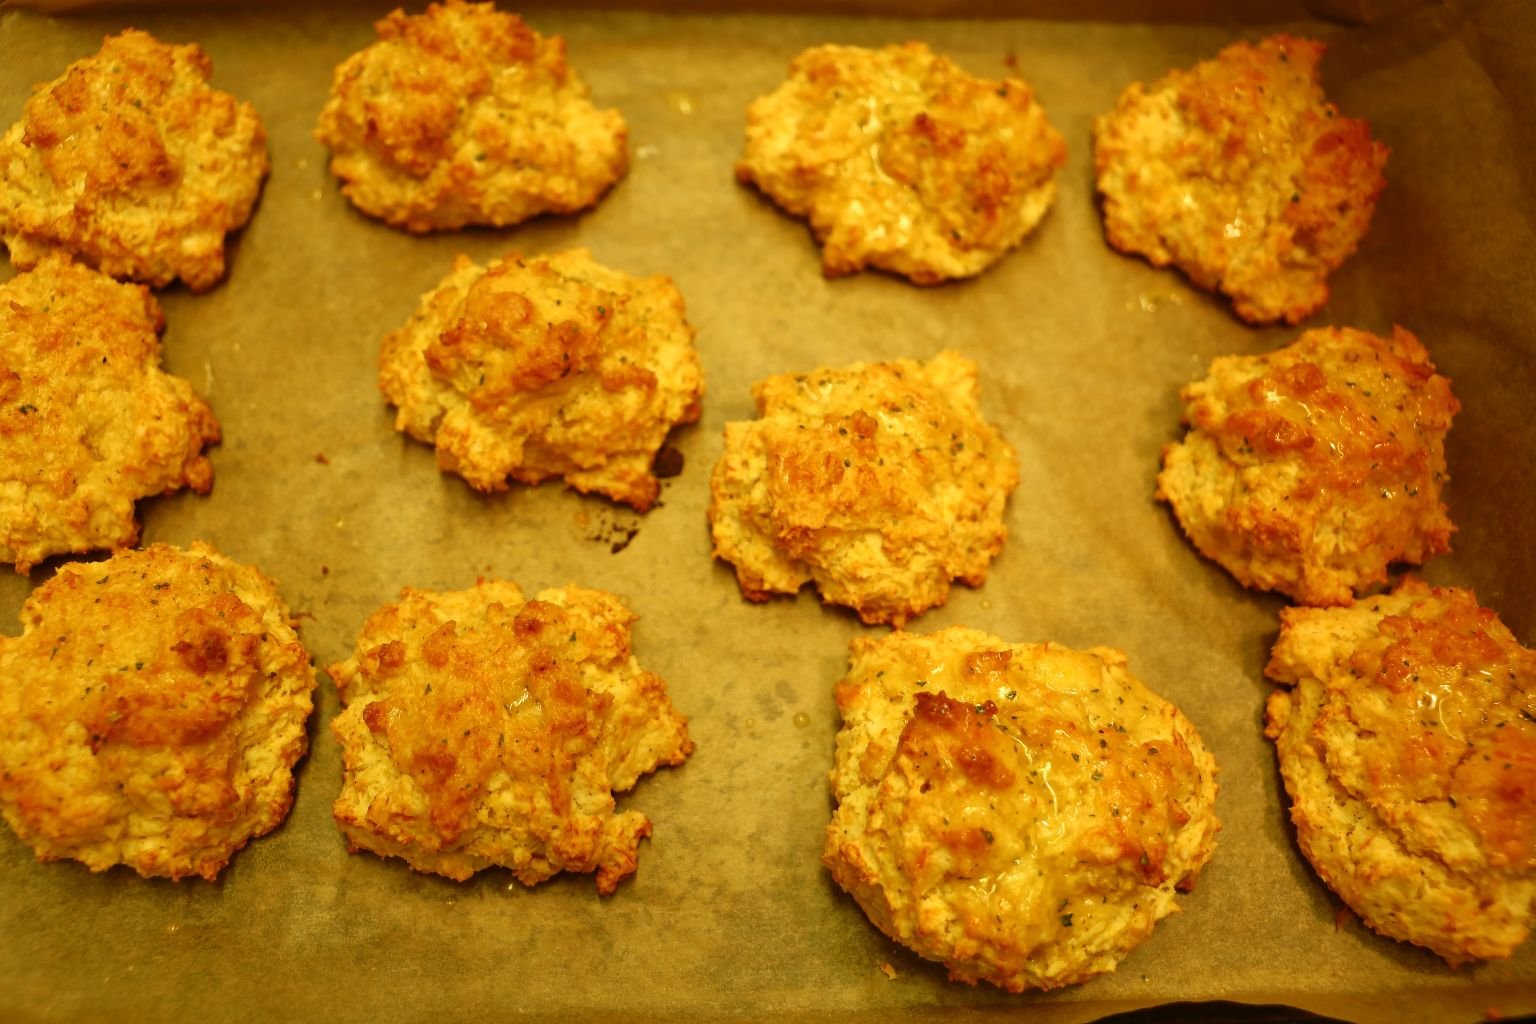
Here we also baked some Cheddar Bay Biscuits as directed by the box.
All you need is some cold water and shredded Cheddar cheese. They are a great addition to any seafood fare.
What a great meal!
—————————————————————
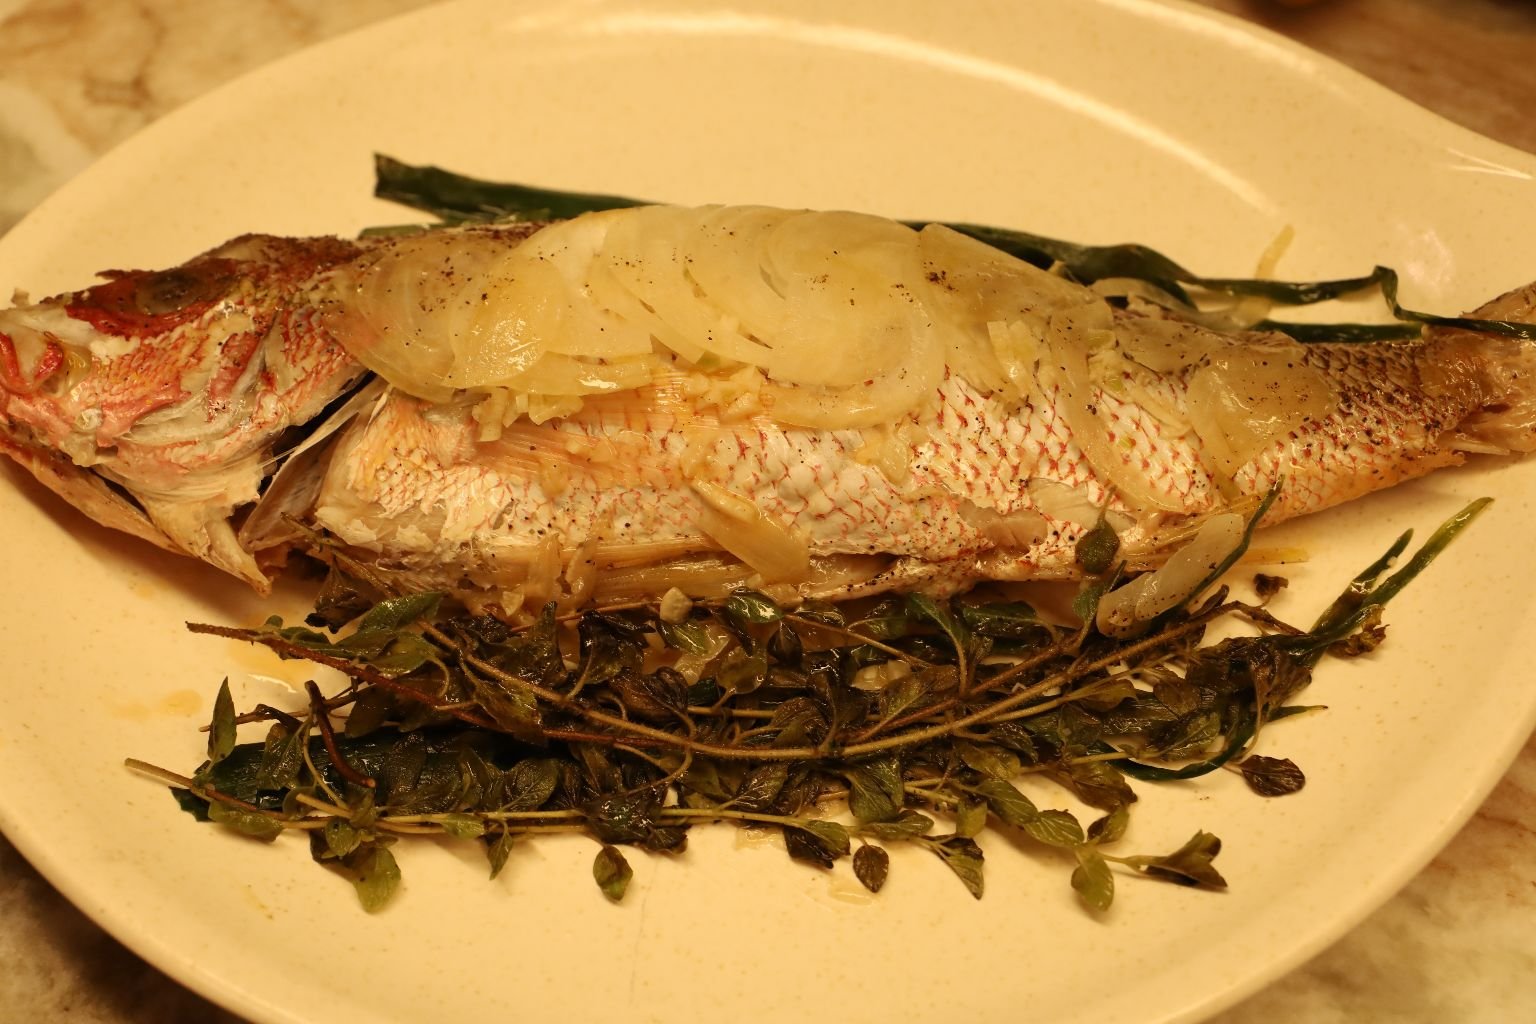
Quint’s Fish Dinner (Imagined)
—————————————————————-
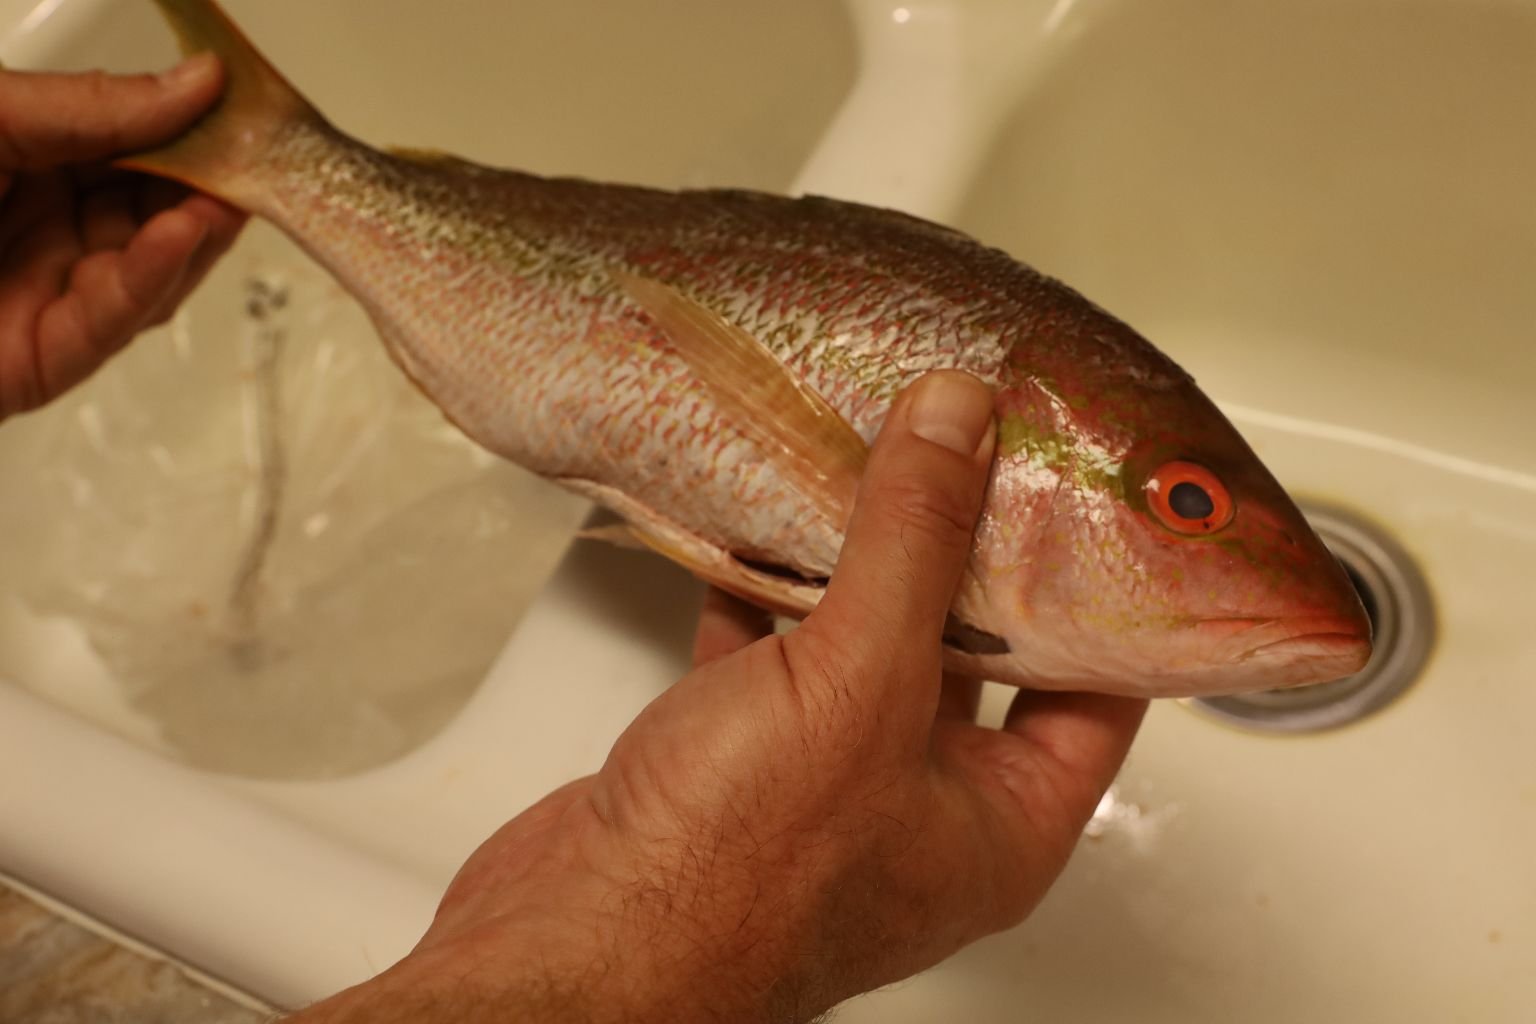
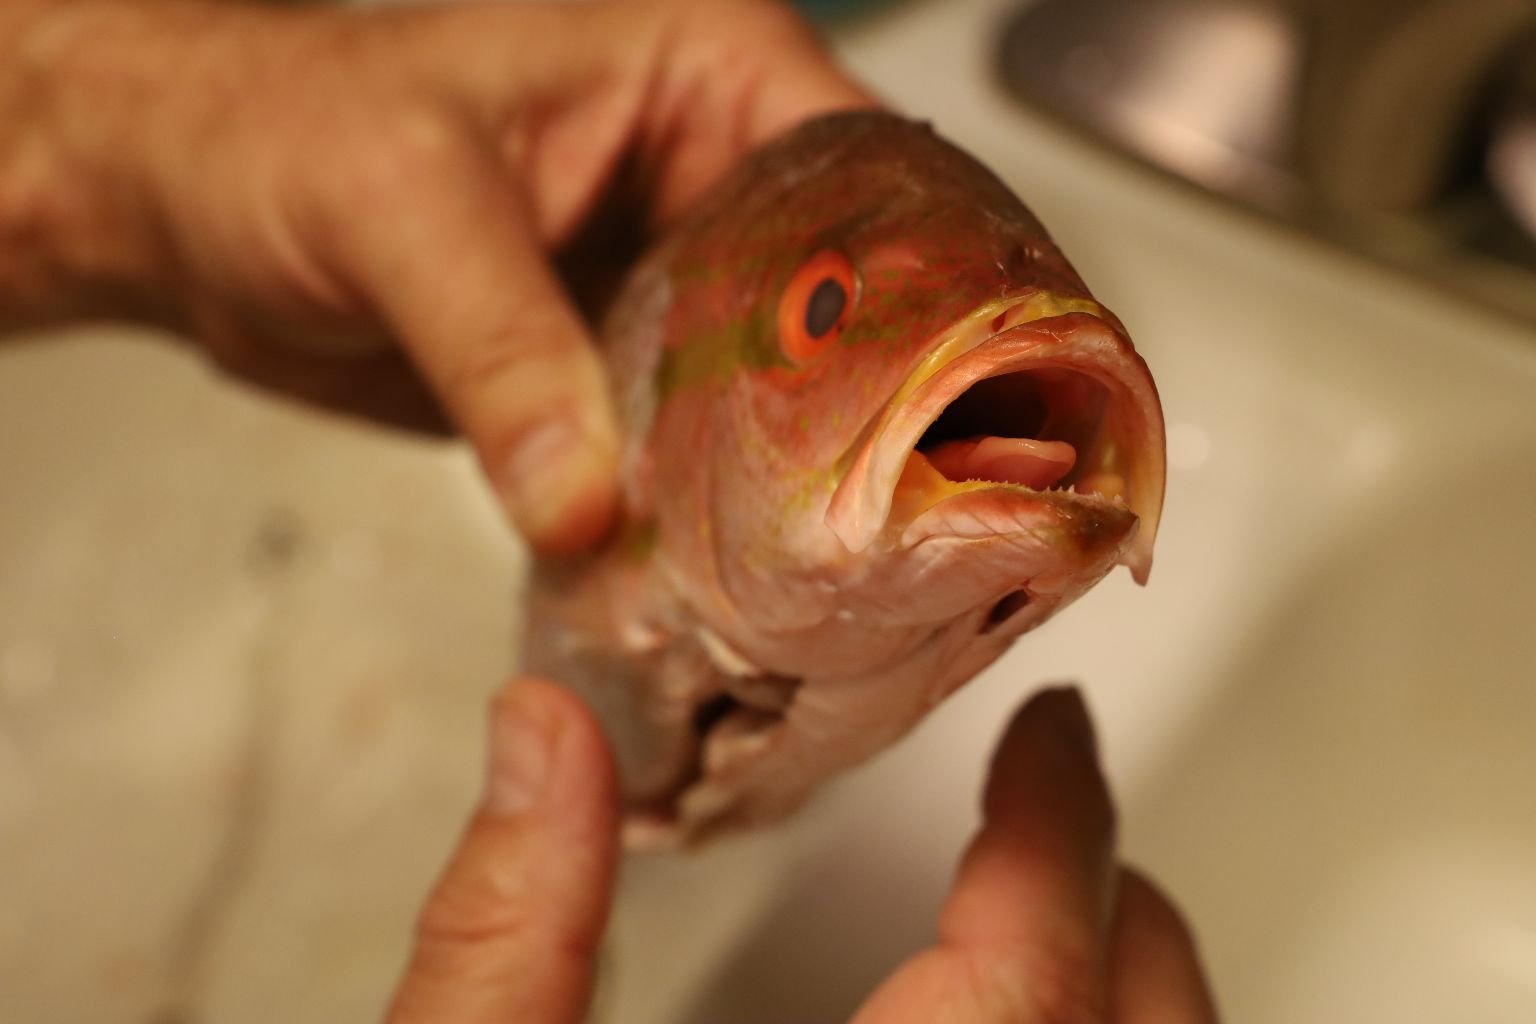
The Yellow Tail came from the fishmonger with the scales removed.
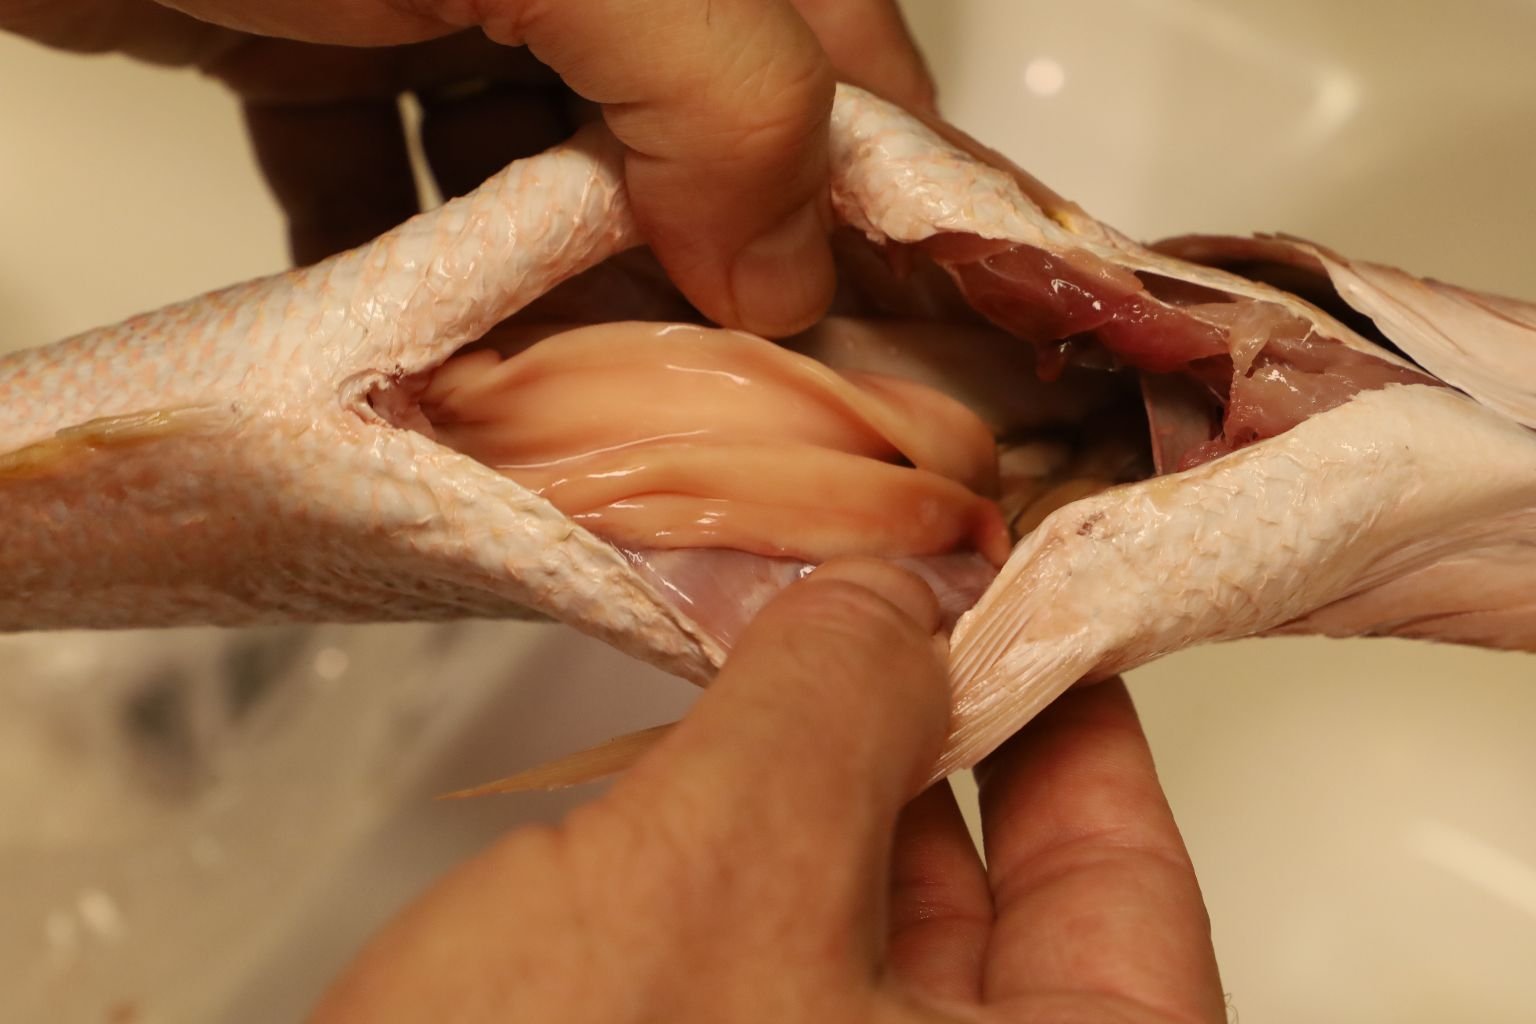
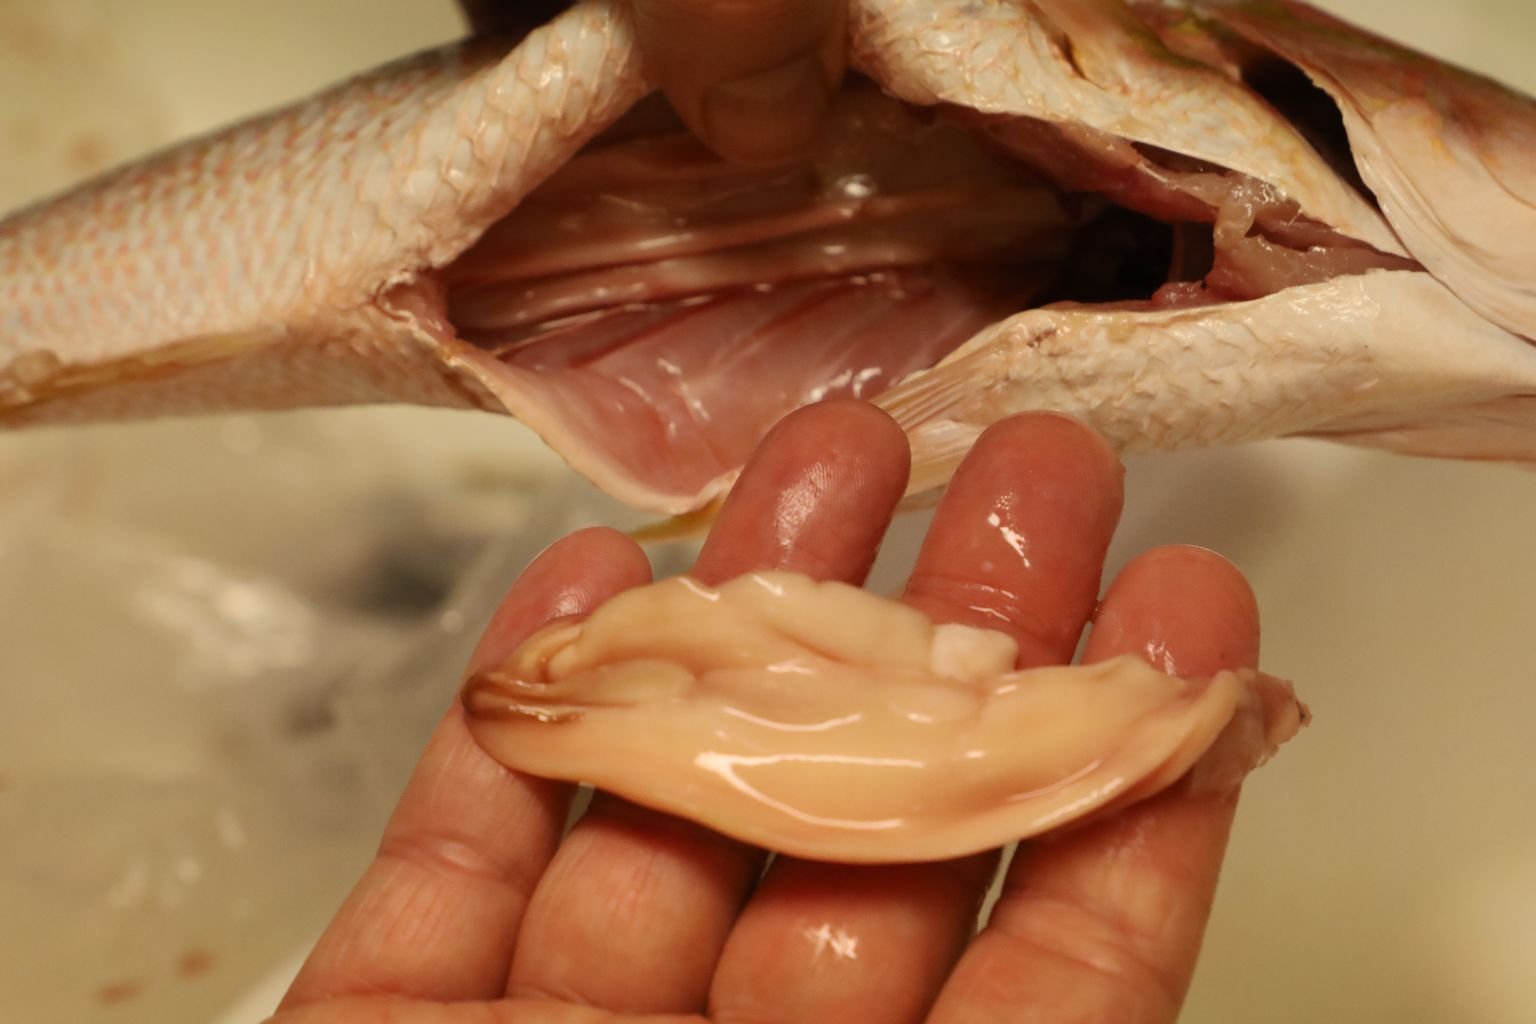
I did find some of the intestines still in the gut of the fish though, so I just removed them and rinsed the fish inside and out well.
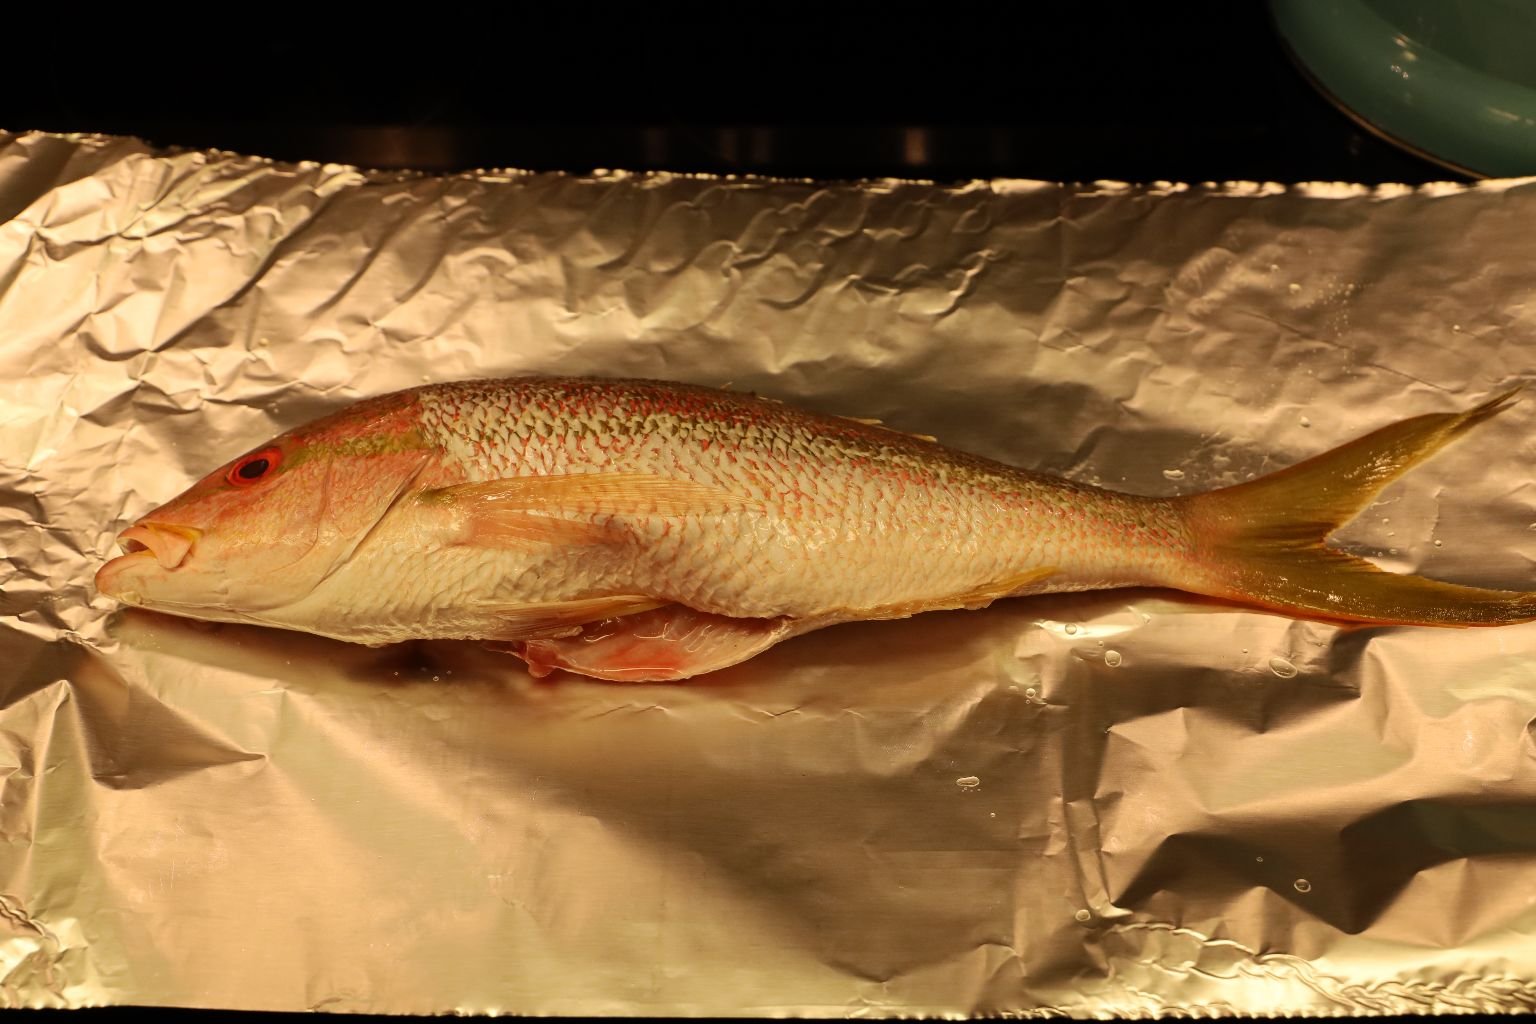
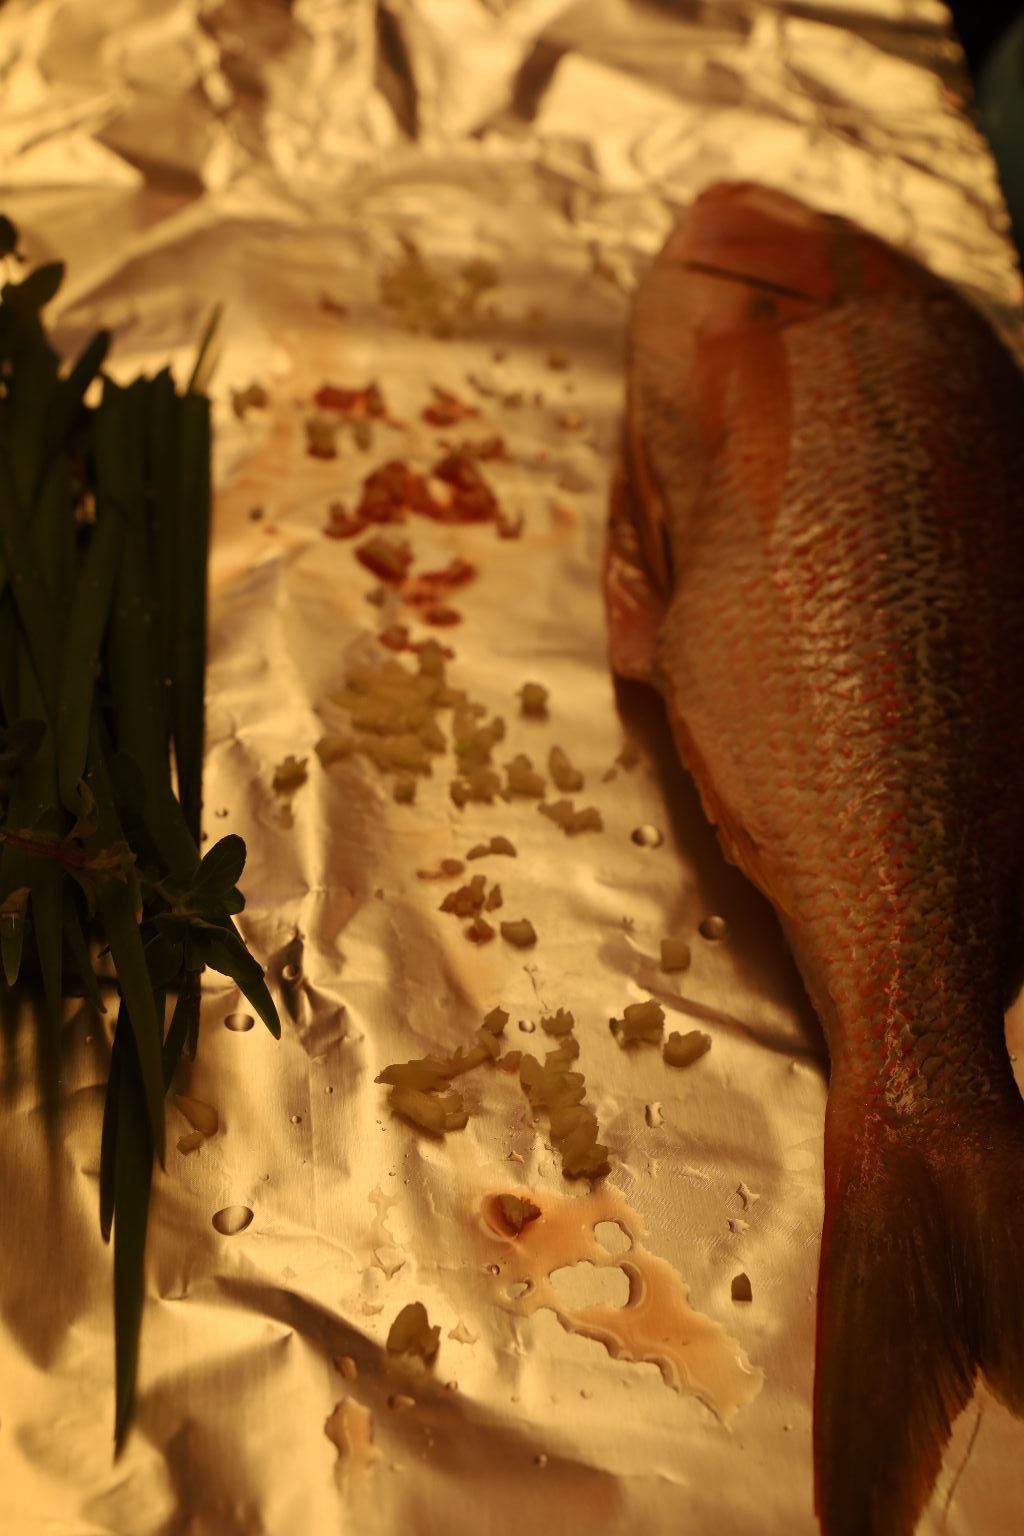
I placed the fish onto some non-stick aluminum foil. You can slice off the fins and tail at this point if you want, but I didn’t.
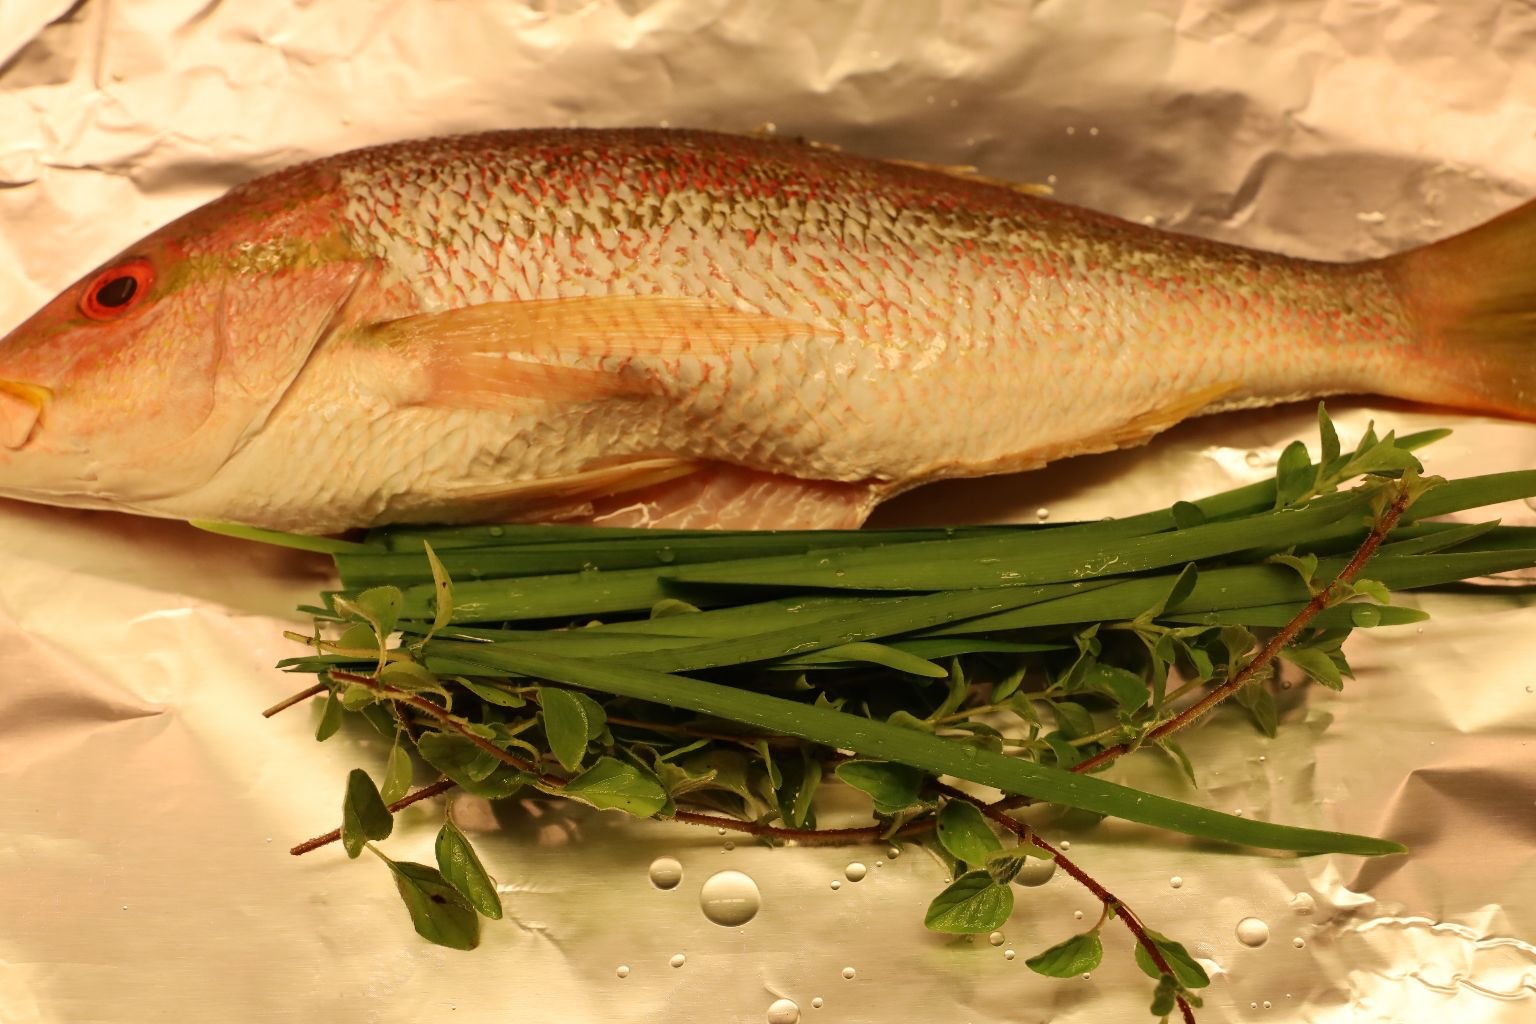
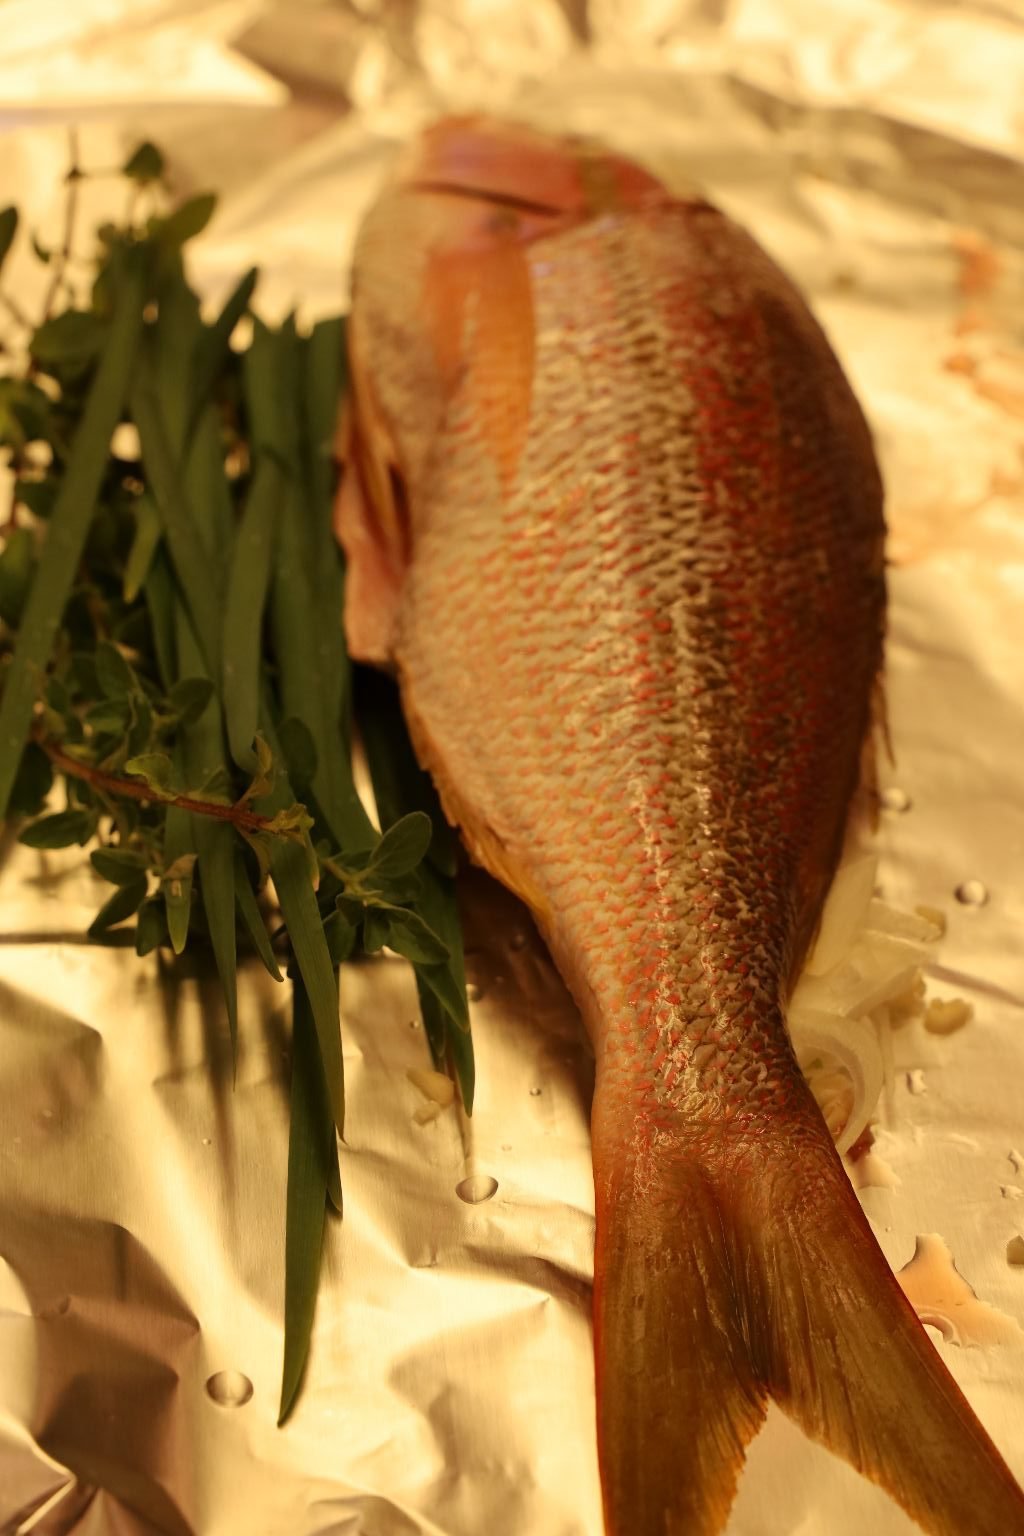
I then place in a generous portion of chives and oregano next to the fish.
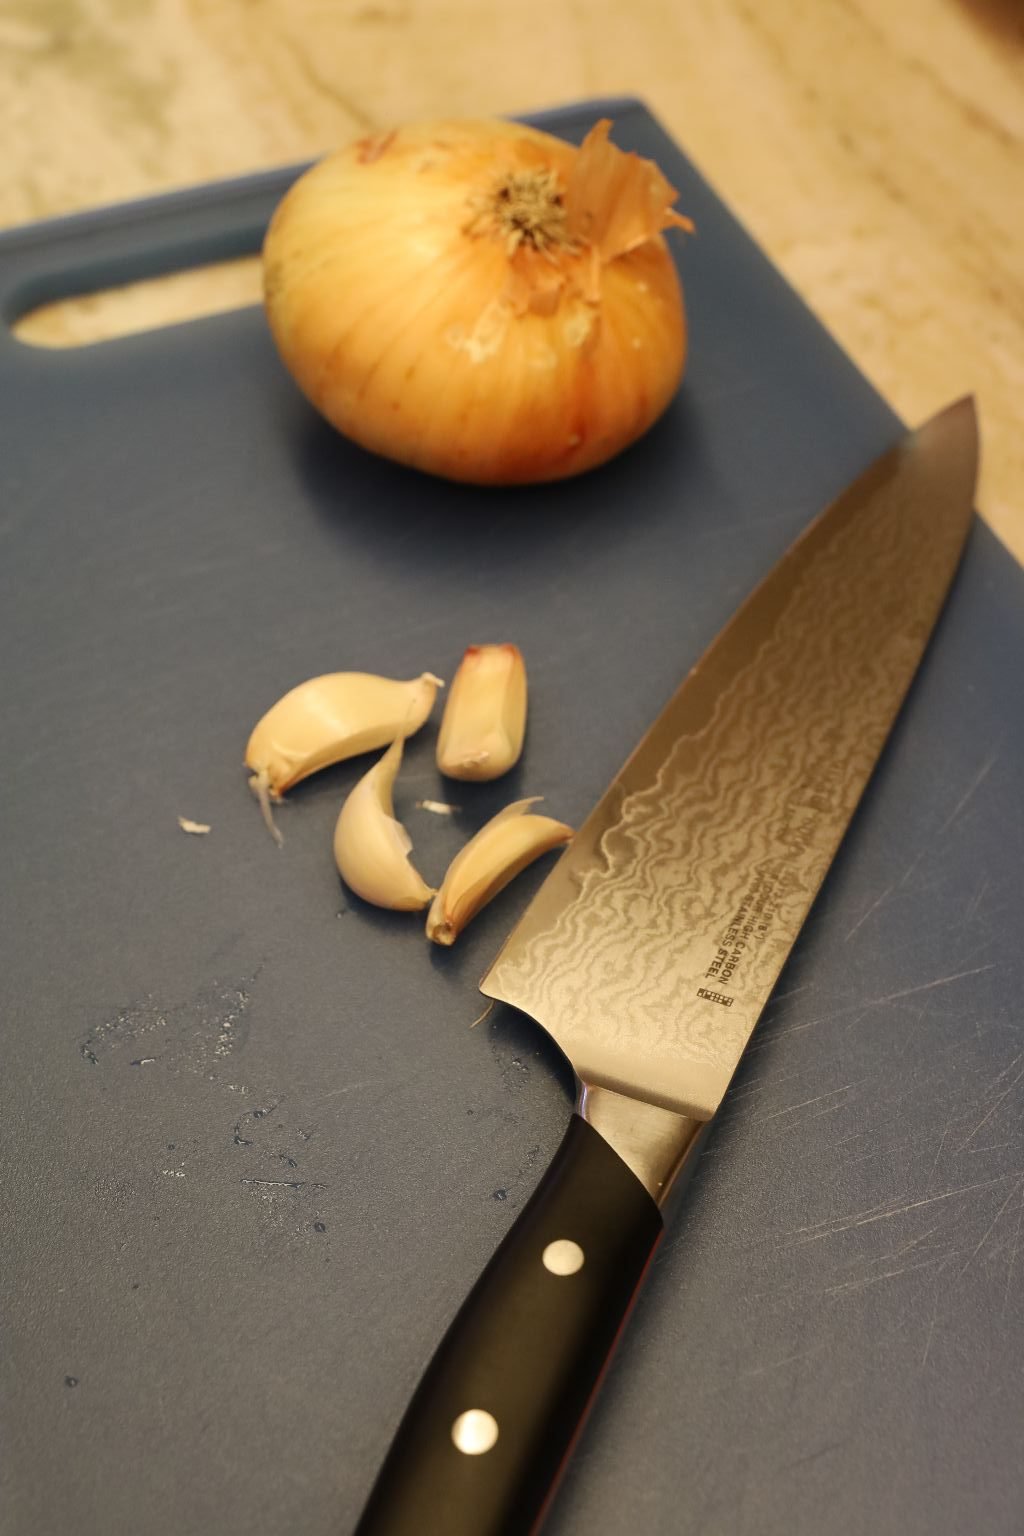
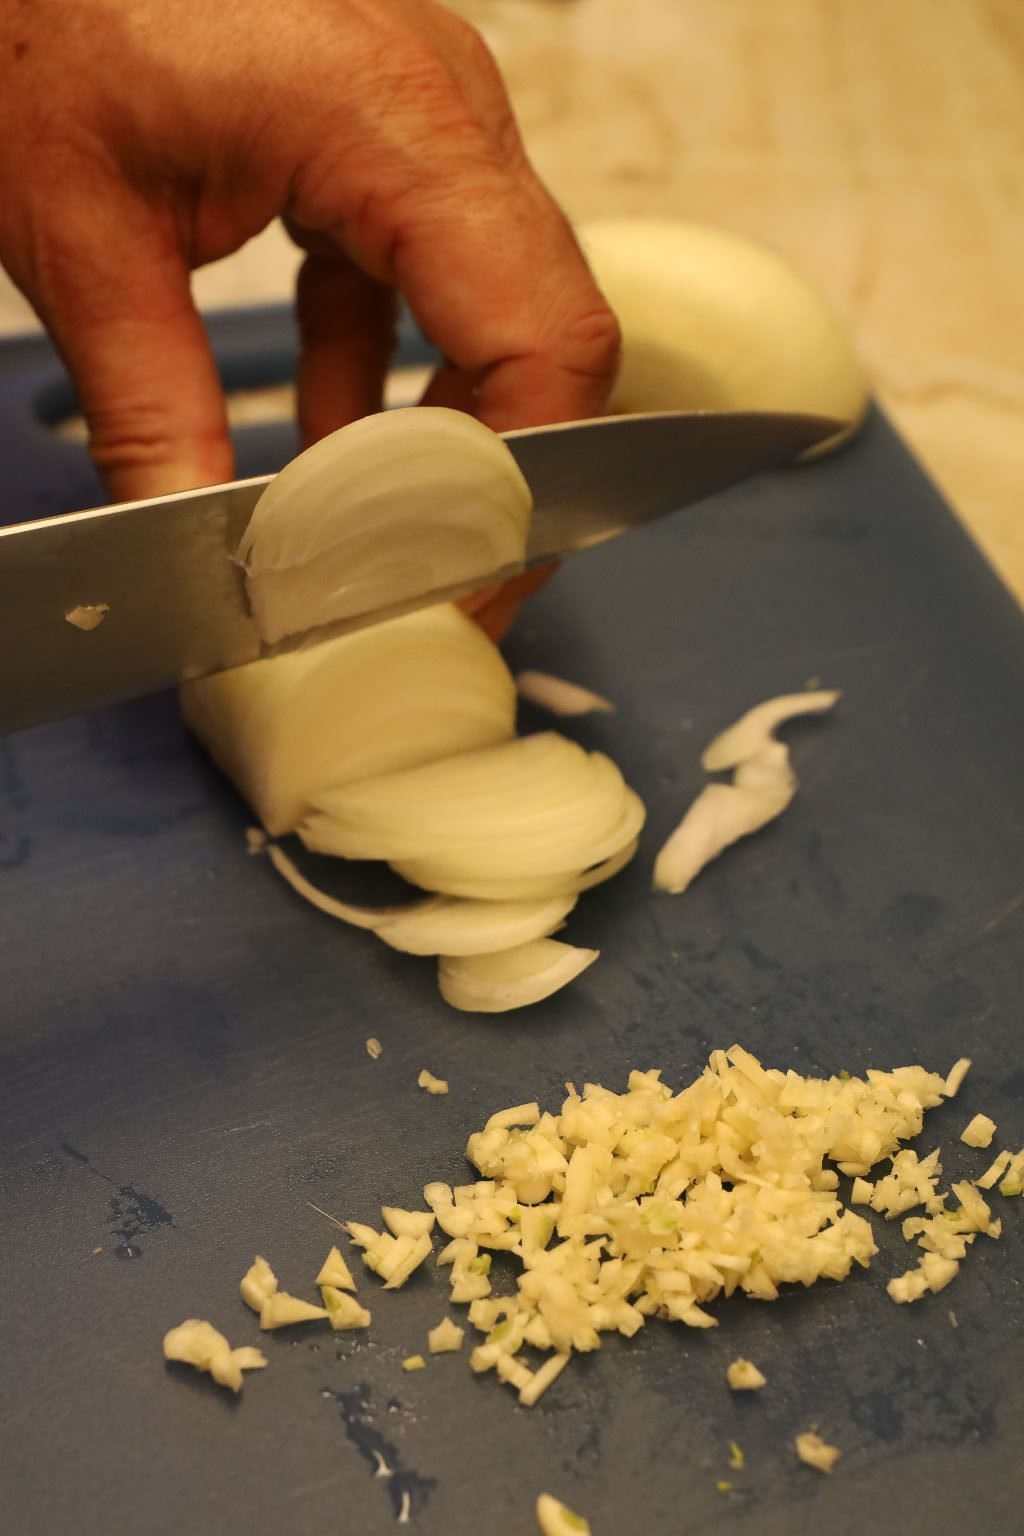
I sliced some onions thinly and chopped the four cloves of garlic. Wet your knife to keep the garlic from sticking to it.
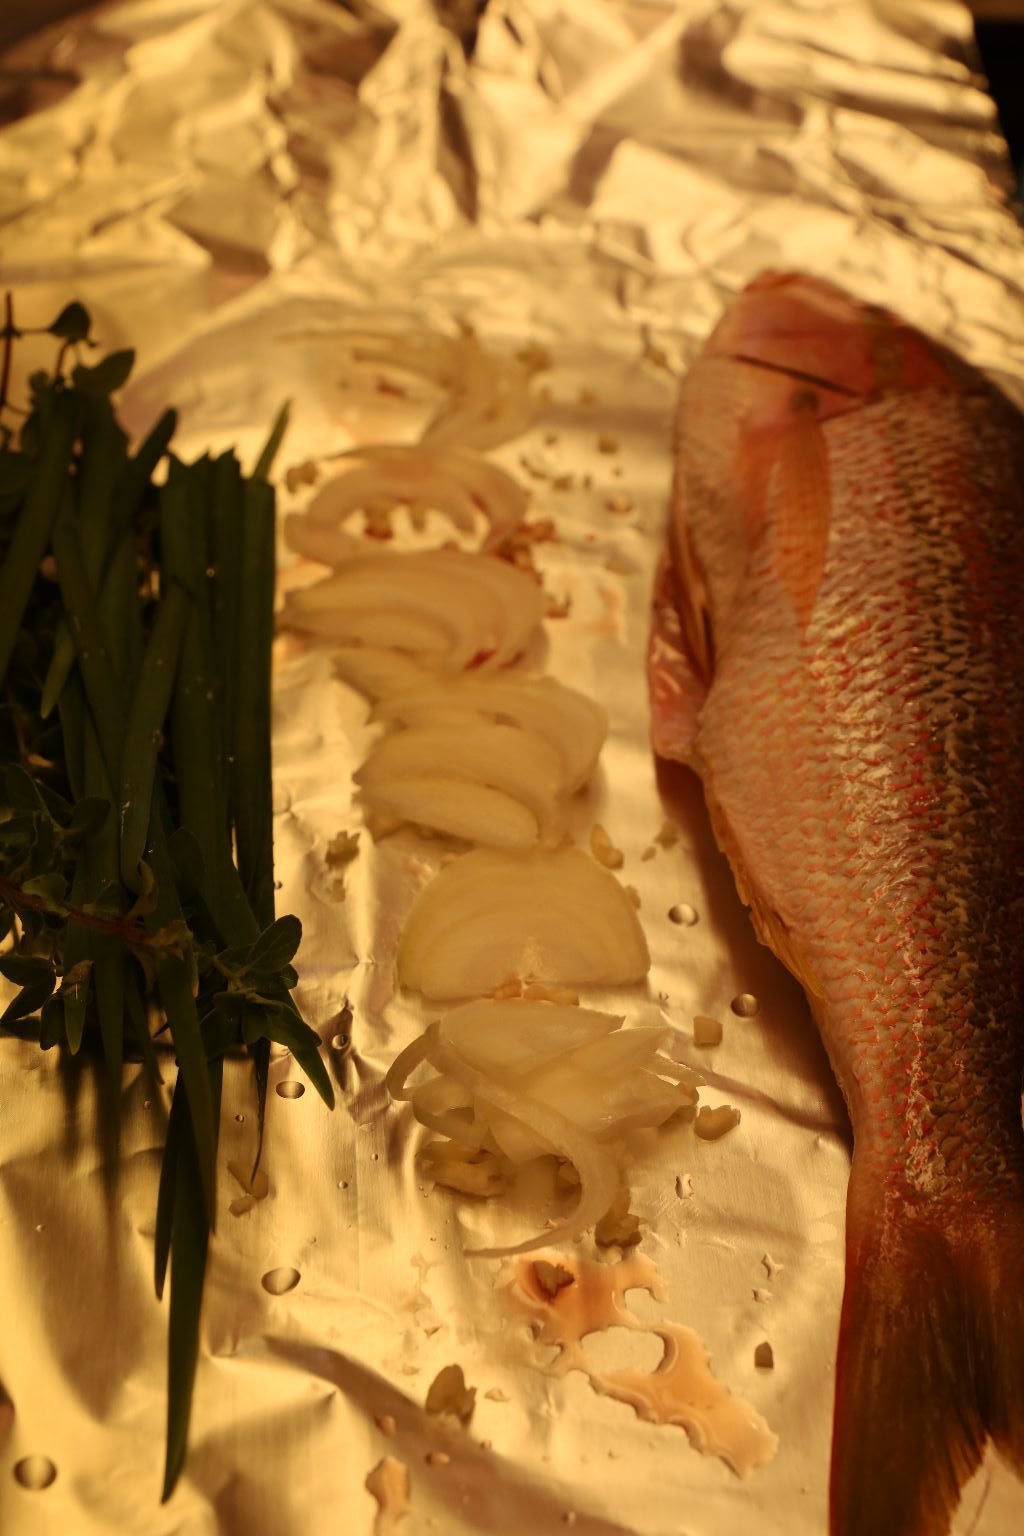
I made a bed of half the garlic and onion on the aluminum foil.
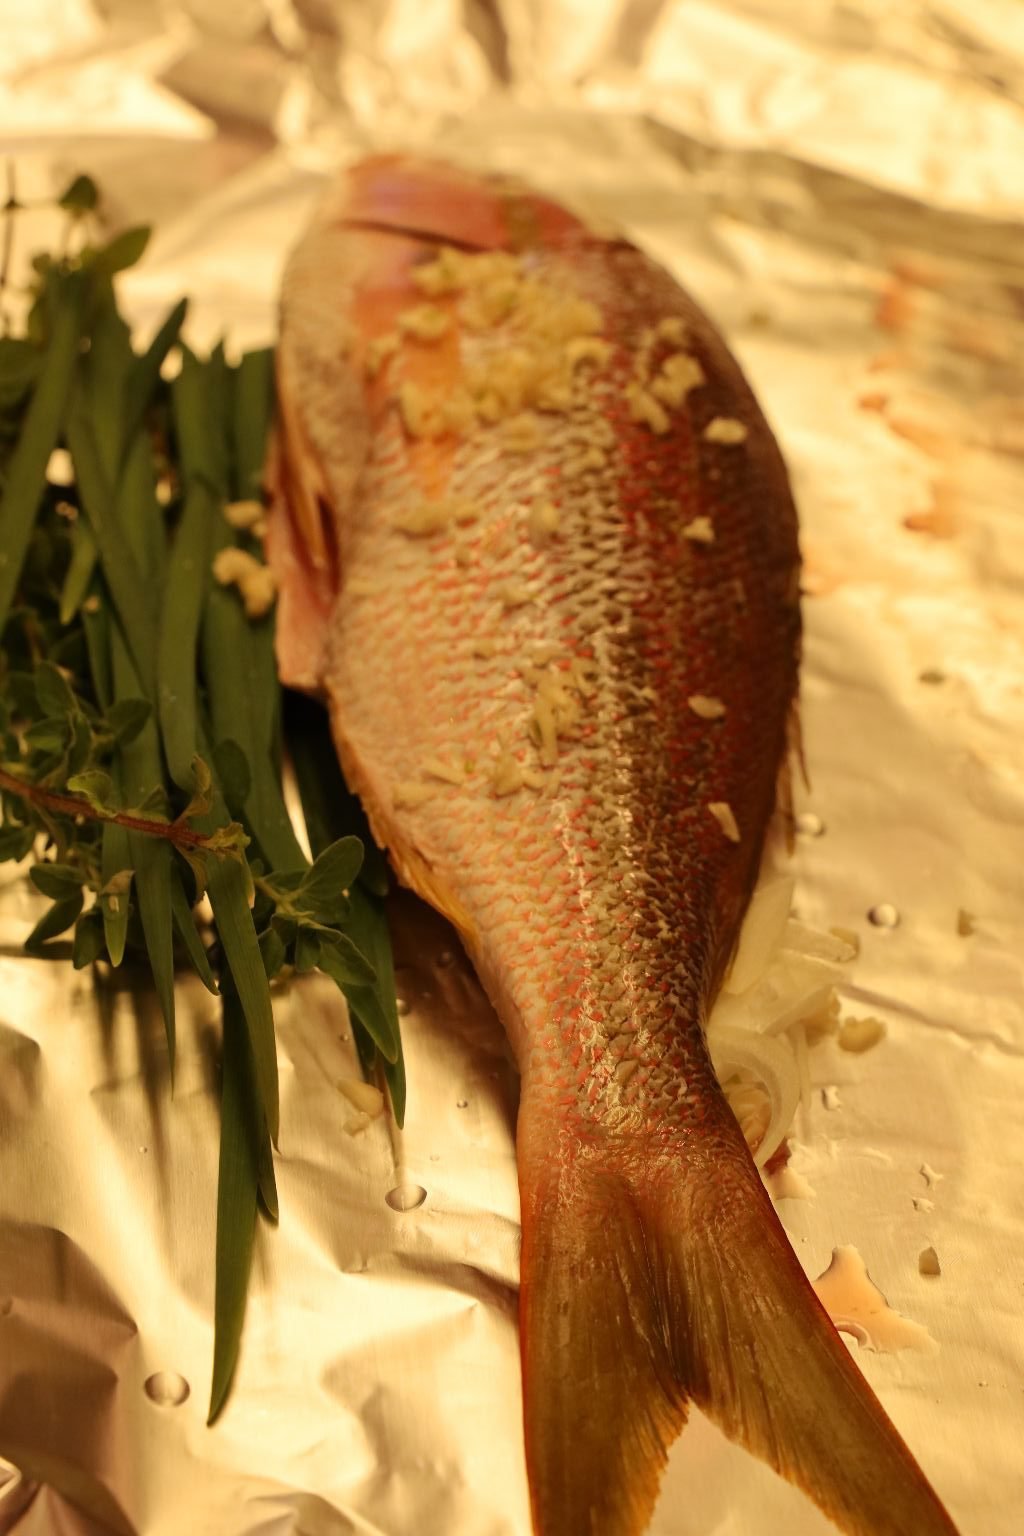
I then placed the fish on top of the garlic and onions, then sprinkled the remaining half of the garlic over the top of the fish as shown.
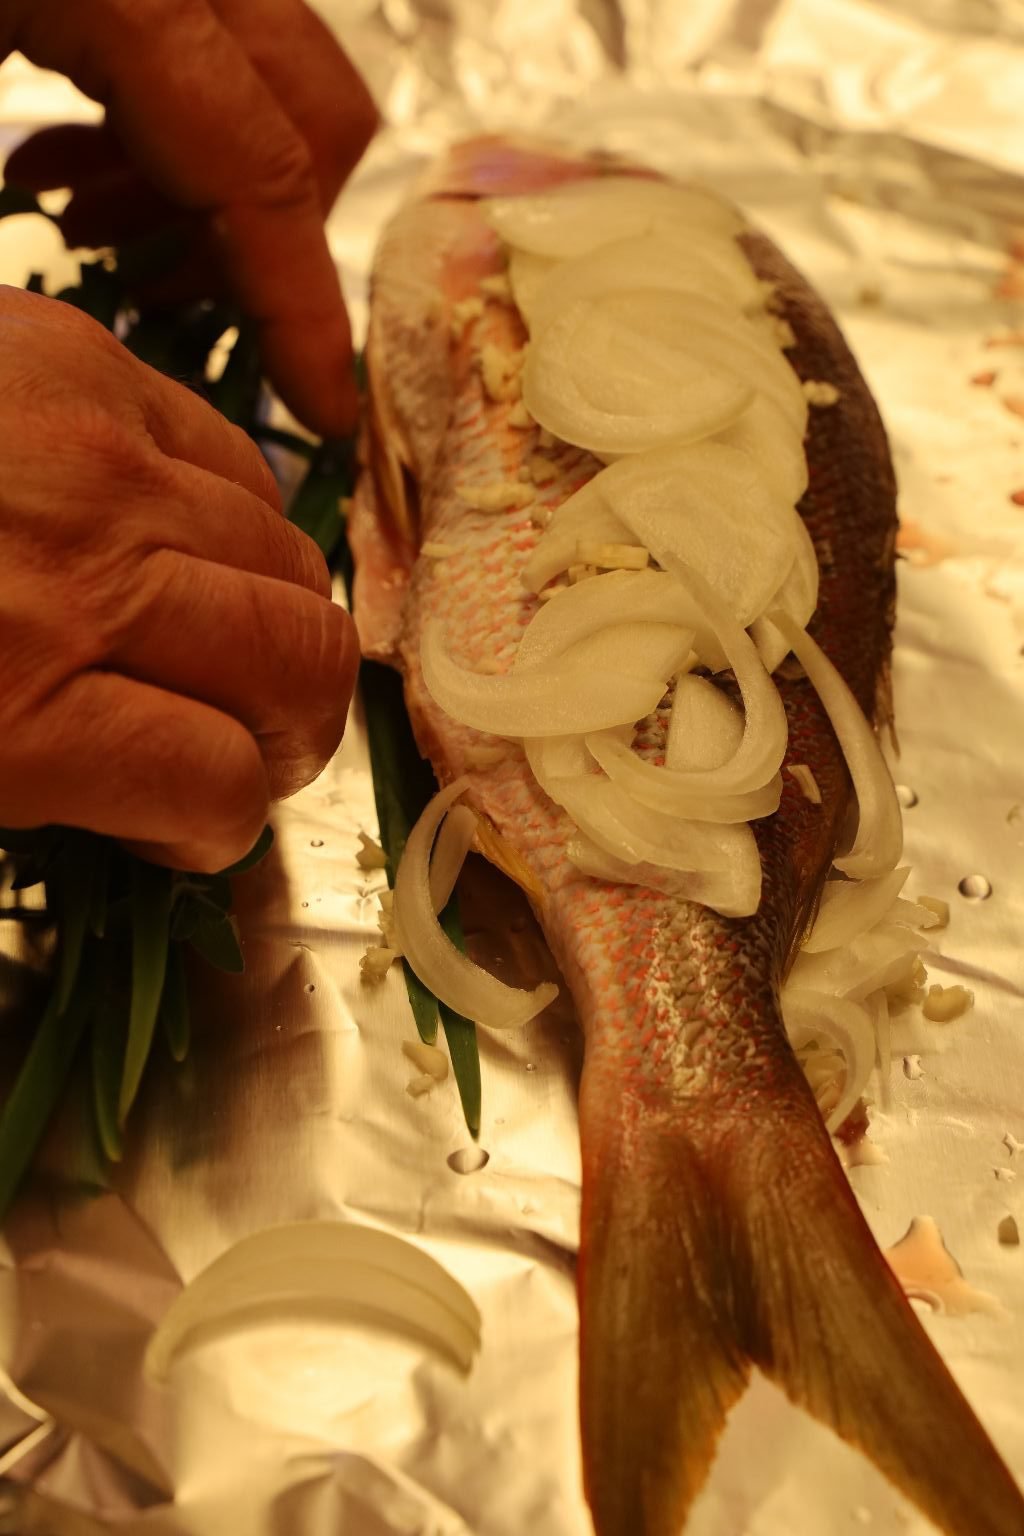
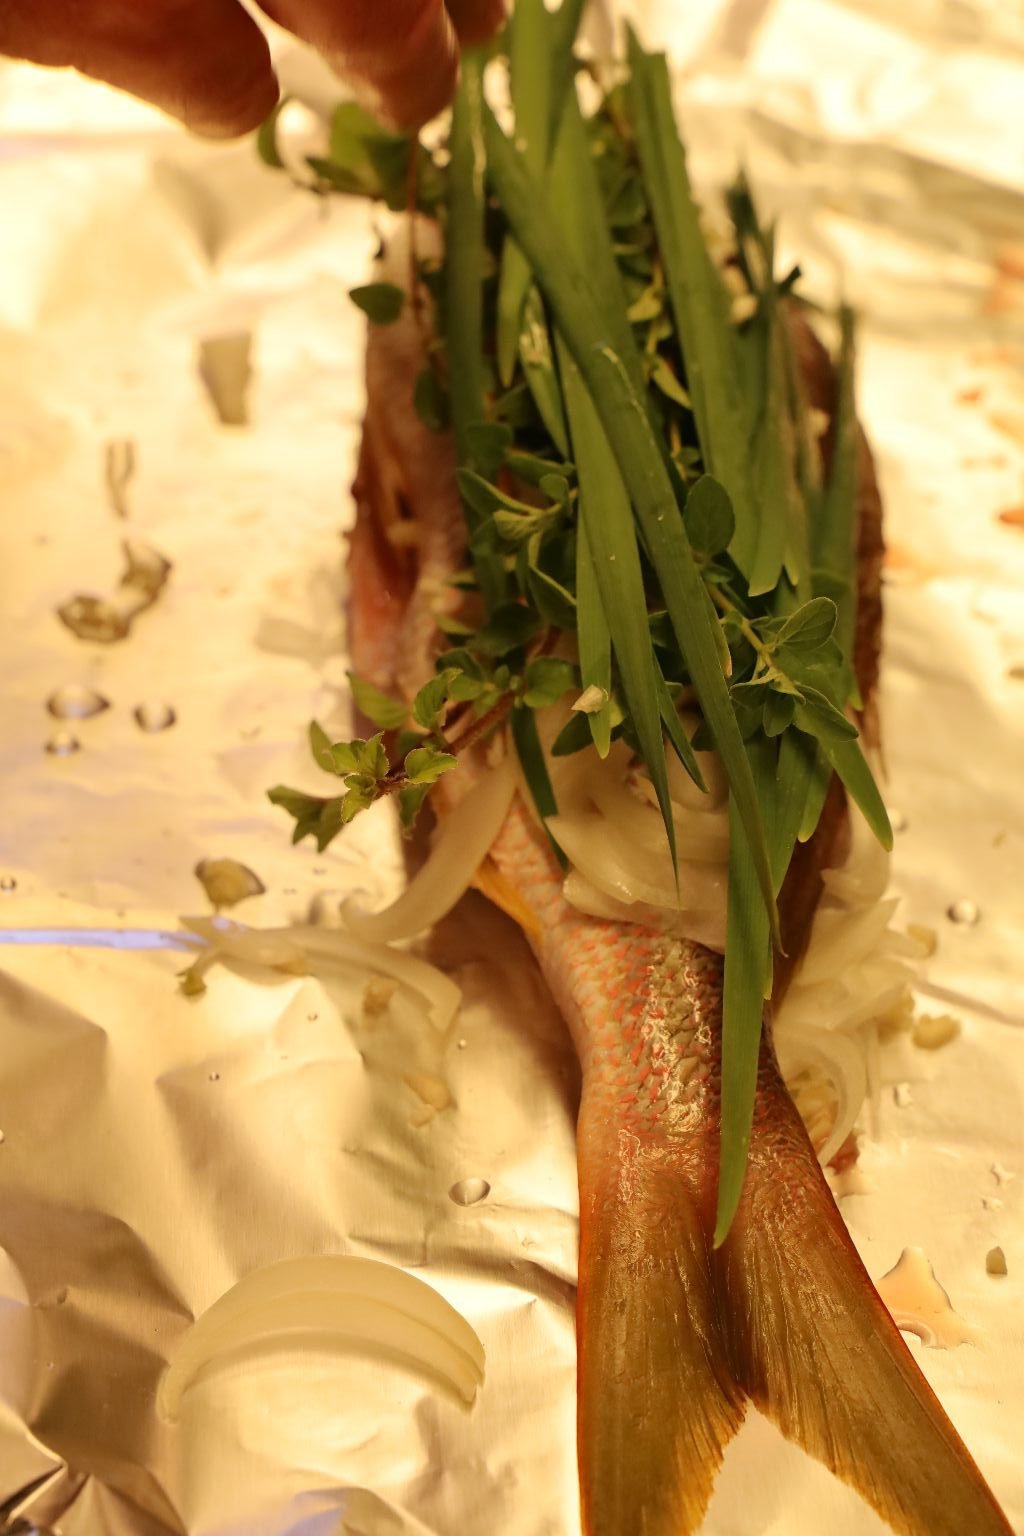
Now place the remaining onions on top of the fish then add the chives and oregano as shown.
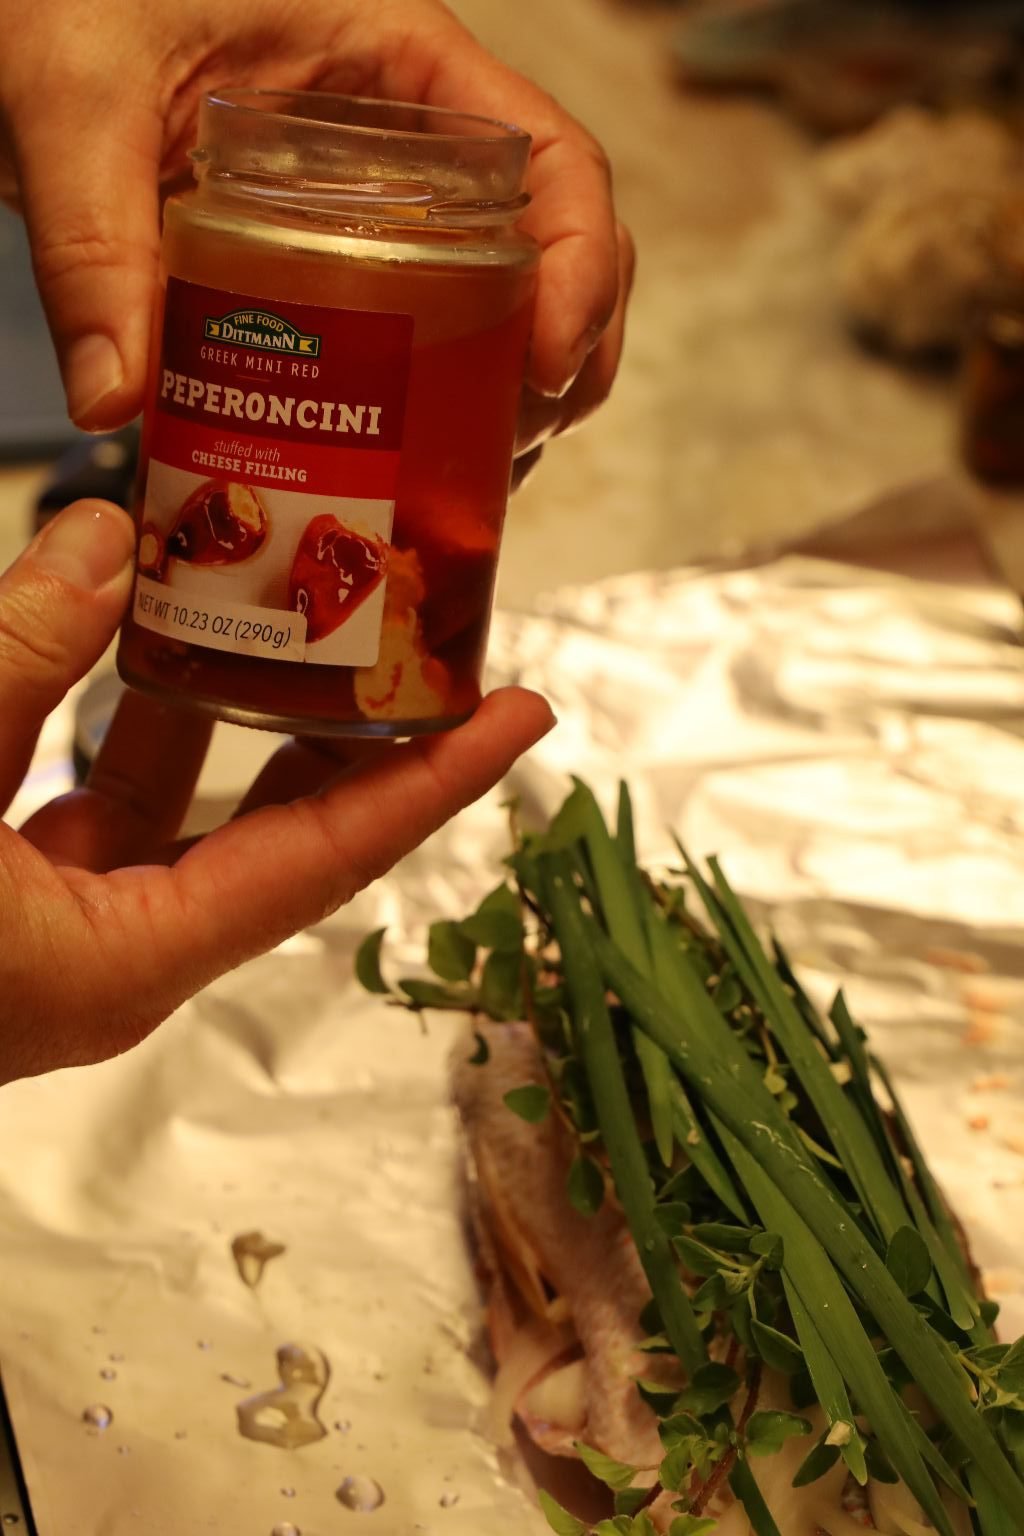
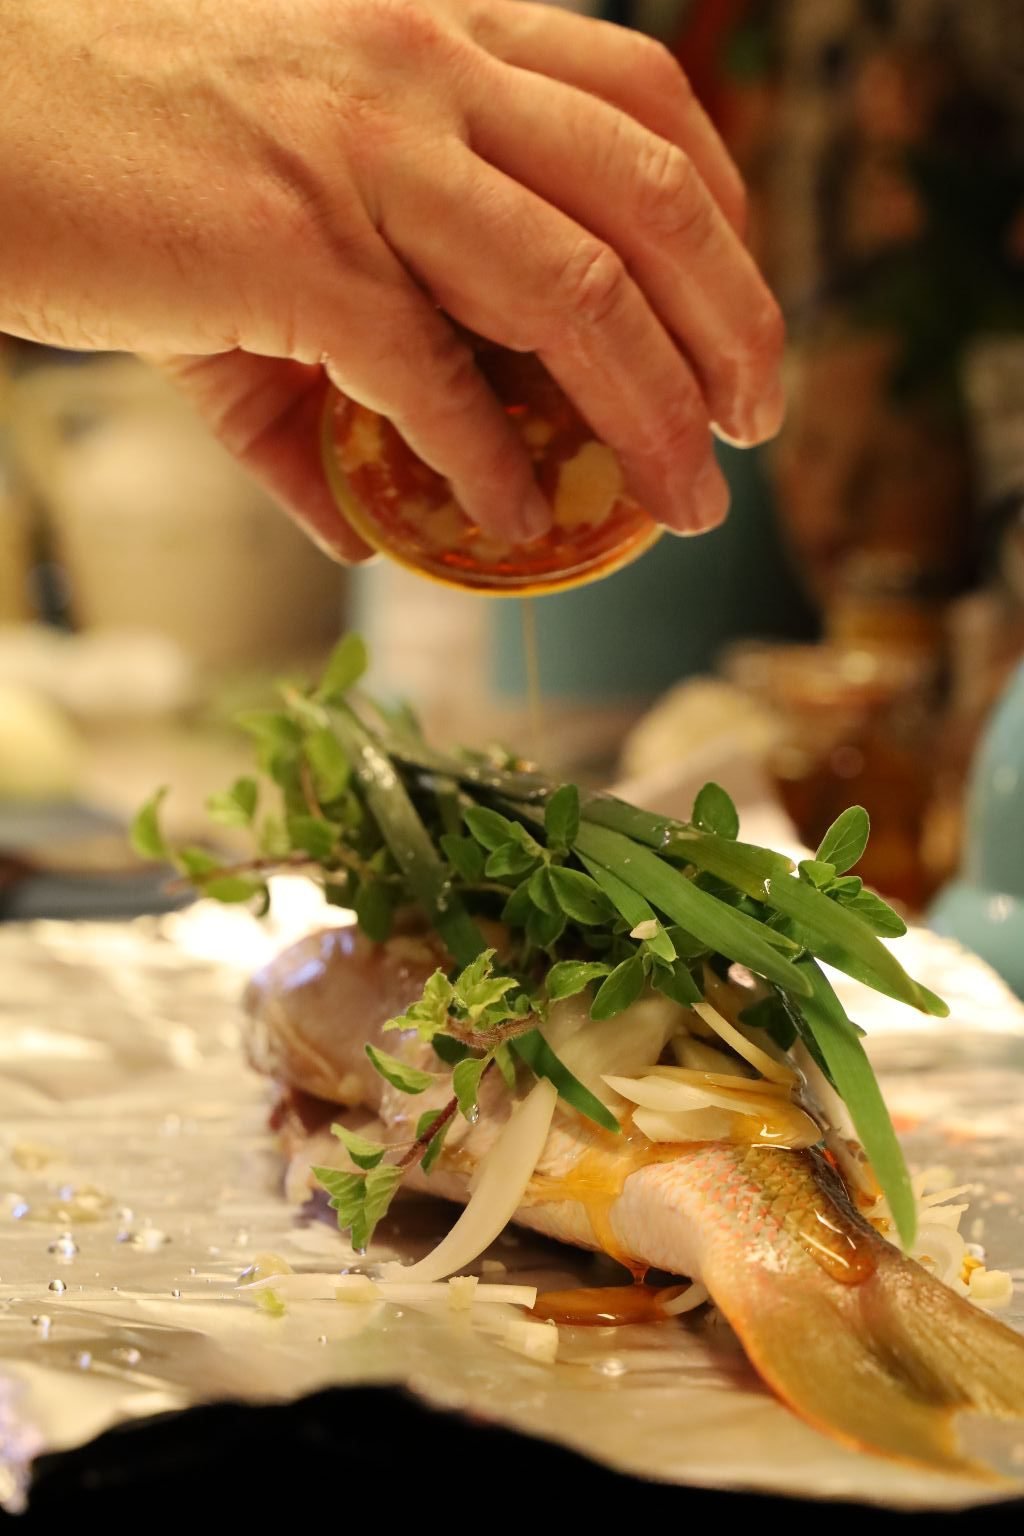
I drizzled the entire fish with some peperoncini oil to give the fish some great flavor and a touch of heat.
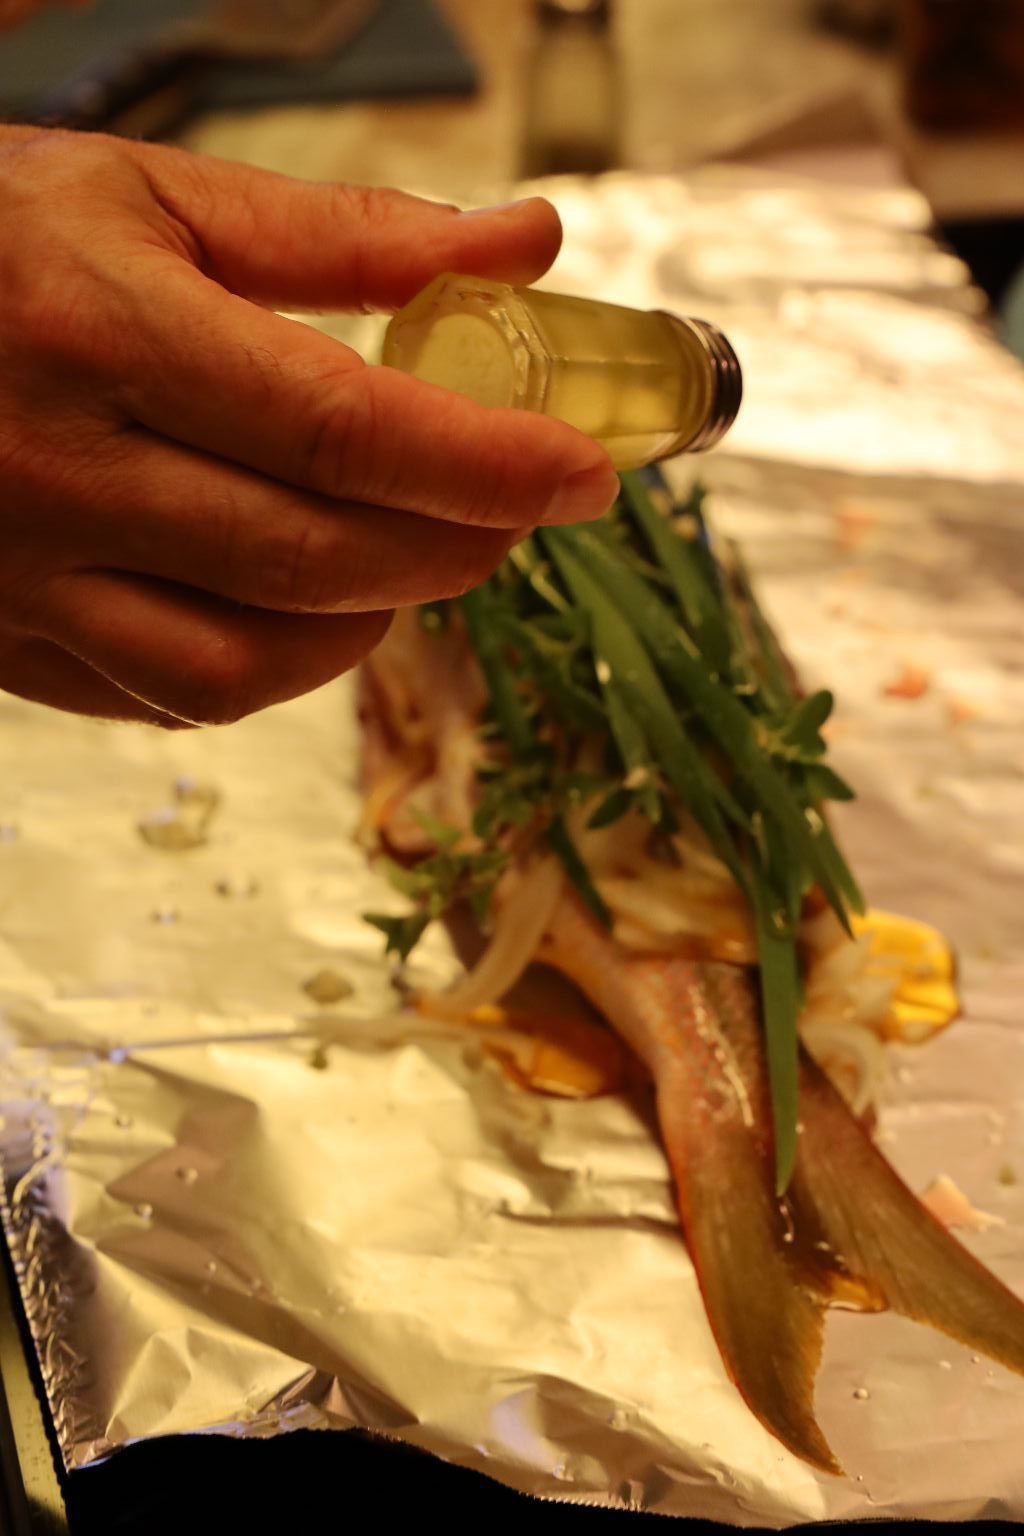
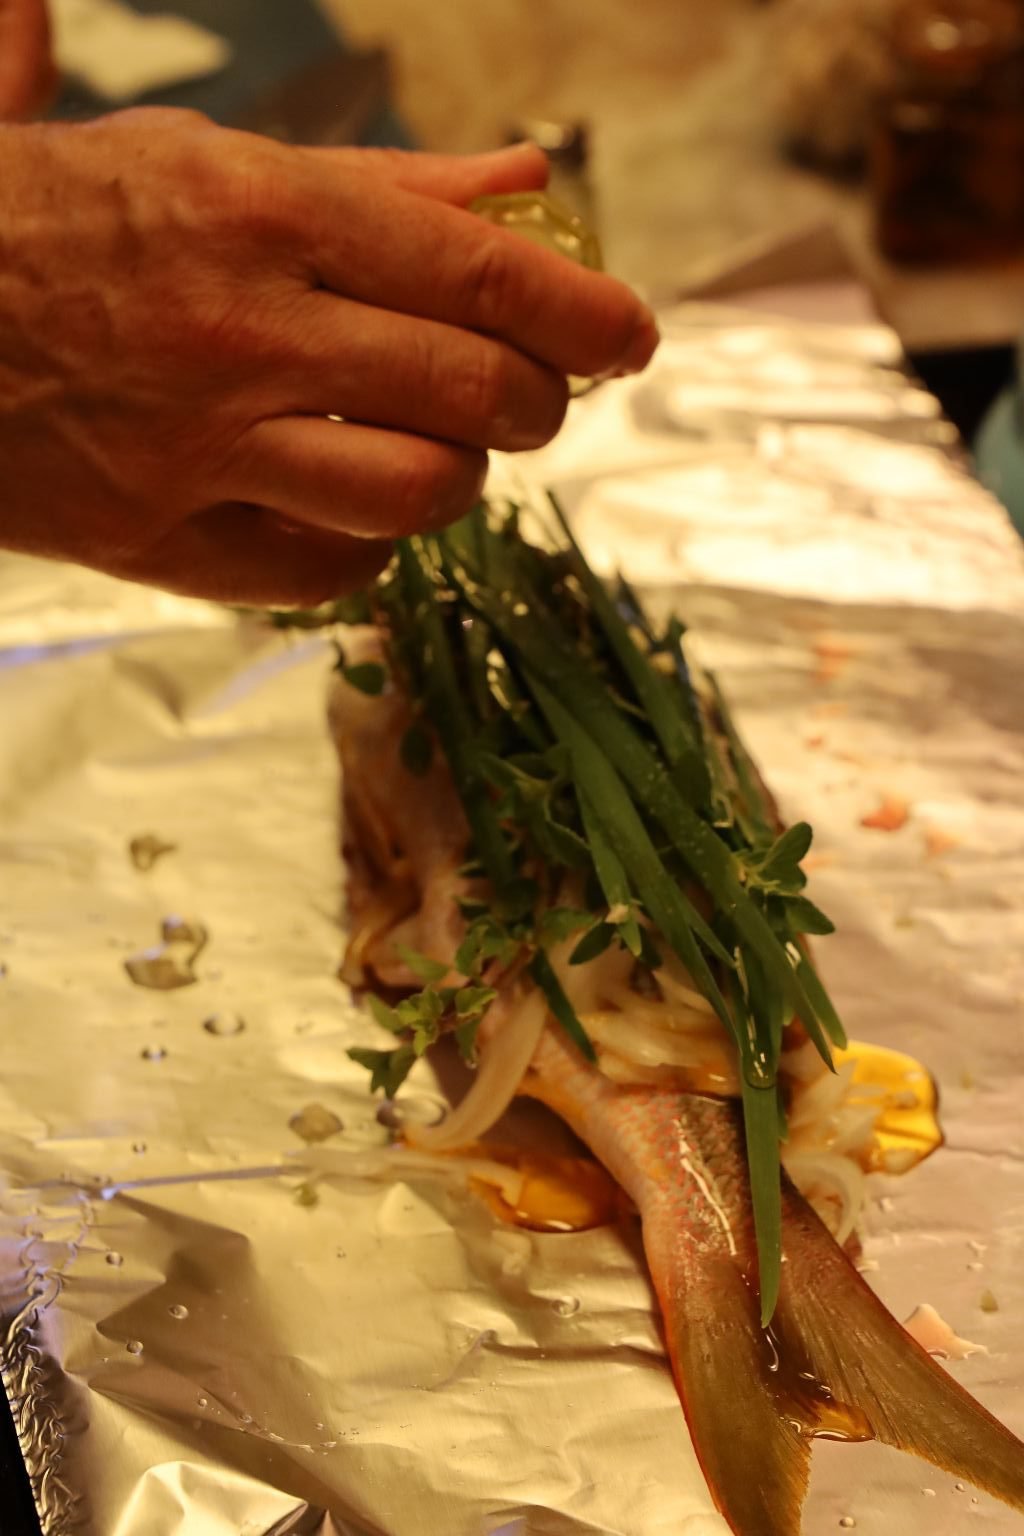
Add your salt and pepper to taste.
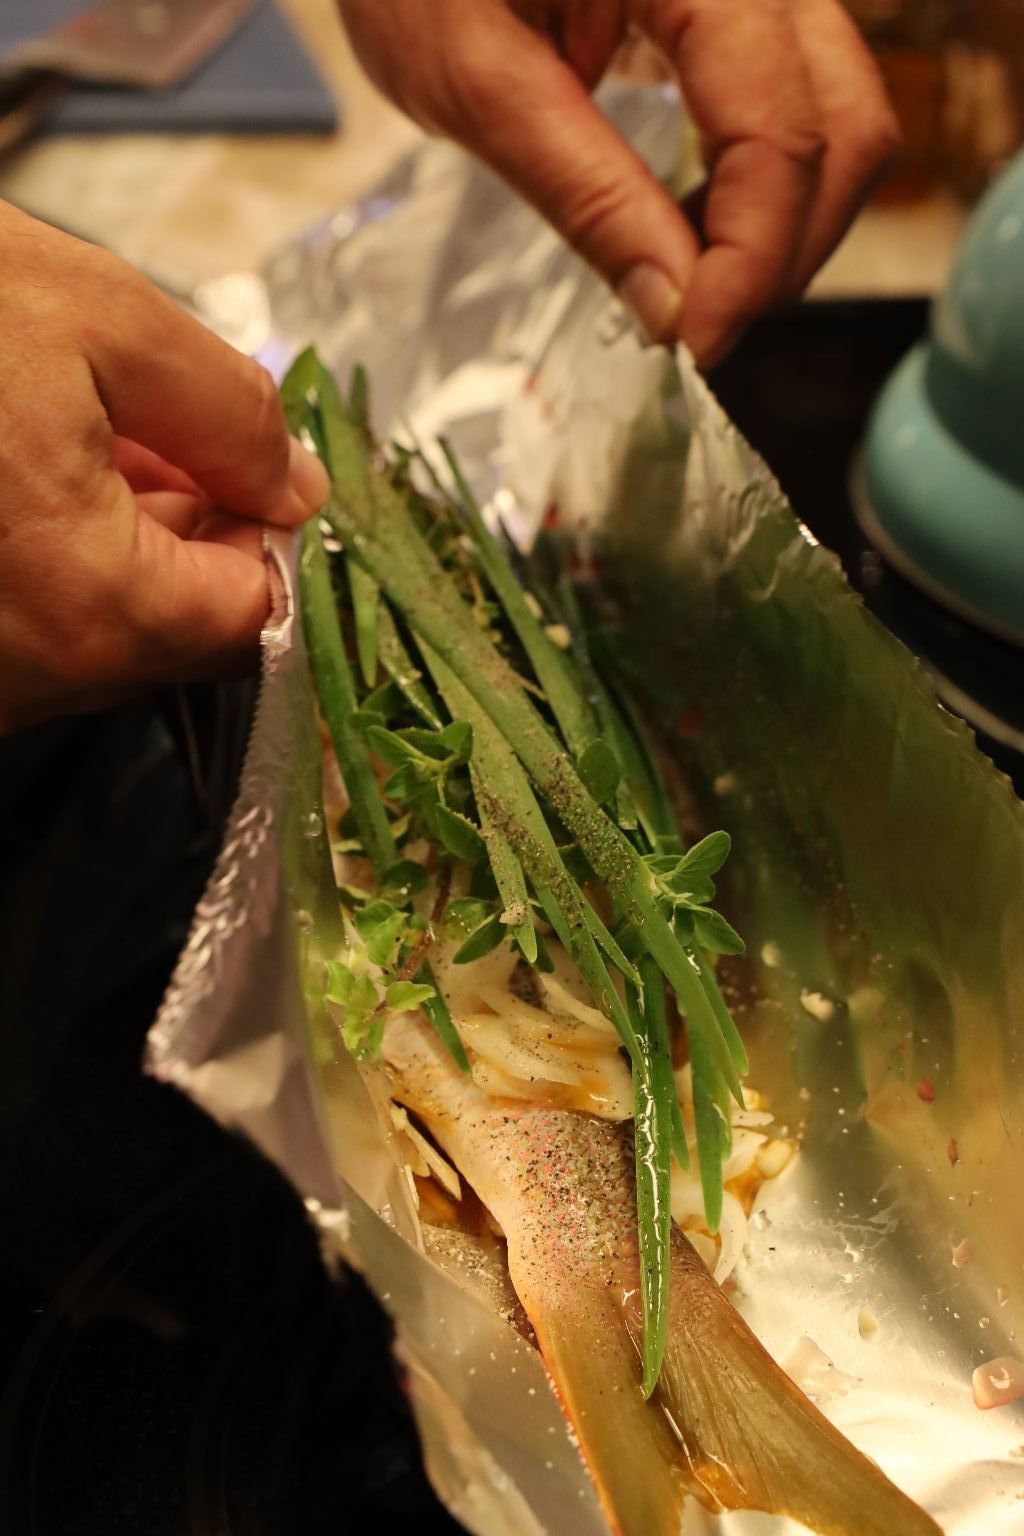
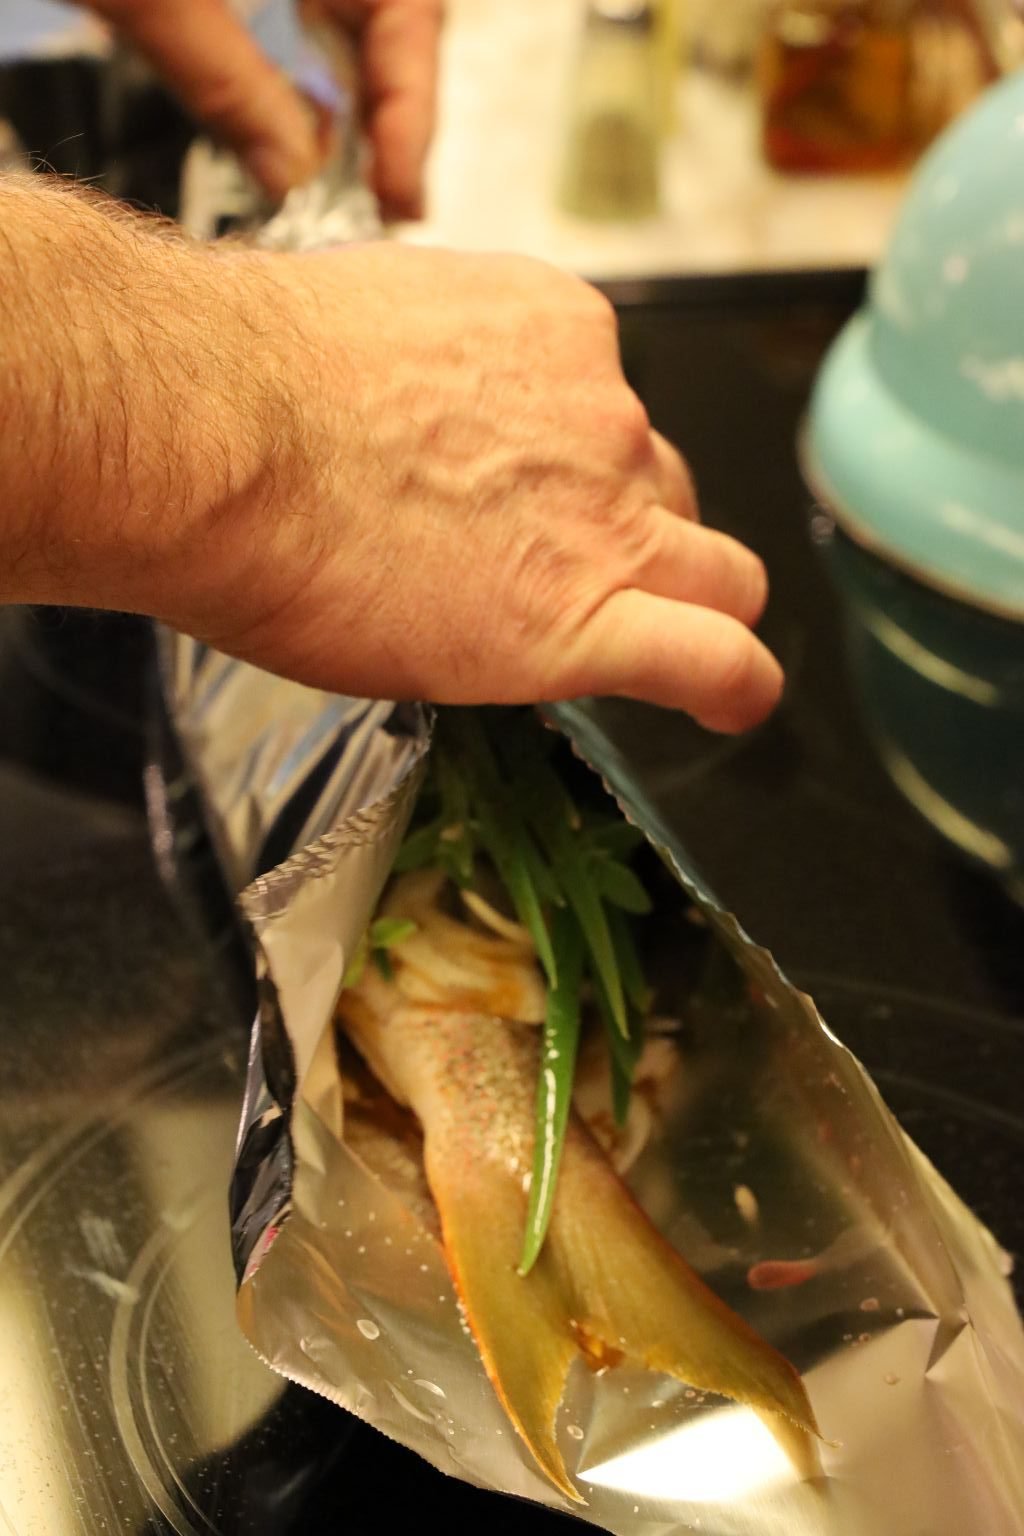
Seal the fish inside the foil by bringing up the sides and fold them together tightly around the fish. Then fold the sides up to the fish’s head and tail.

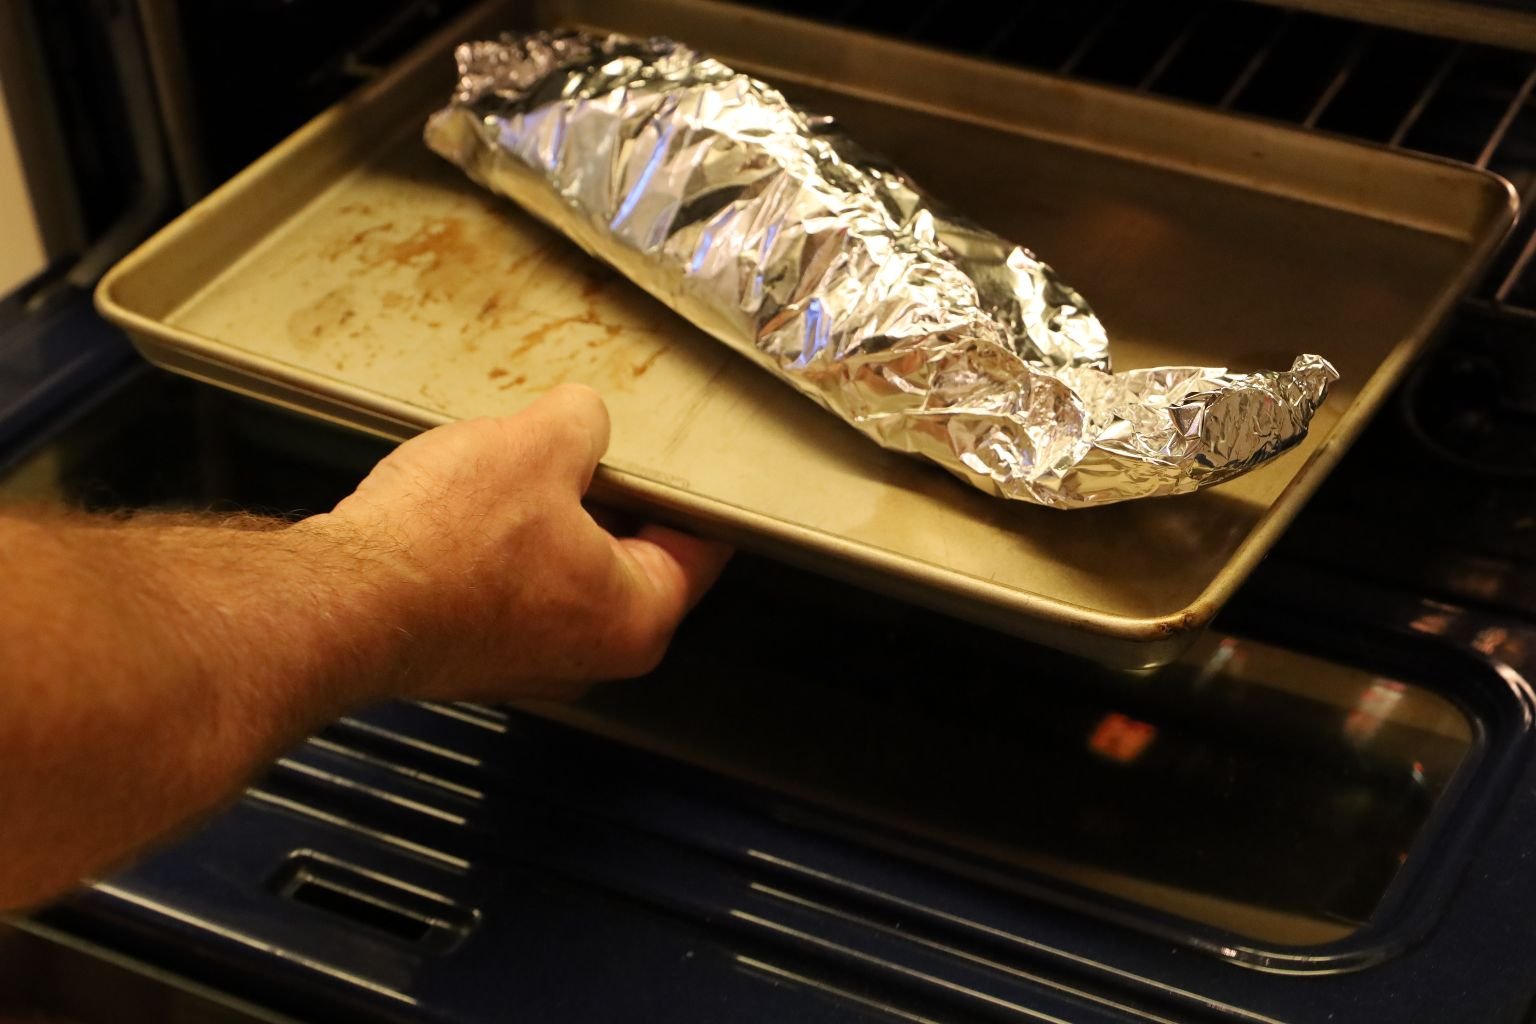
Here you see the fish sealed tightly within the aluminum foil. Place the fish onto a sheet pan then into a preheated 425’F oven. Bake the fish for 25 min..
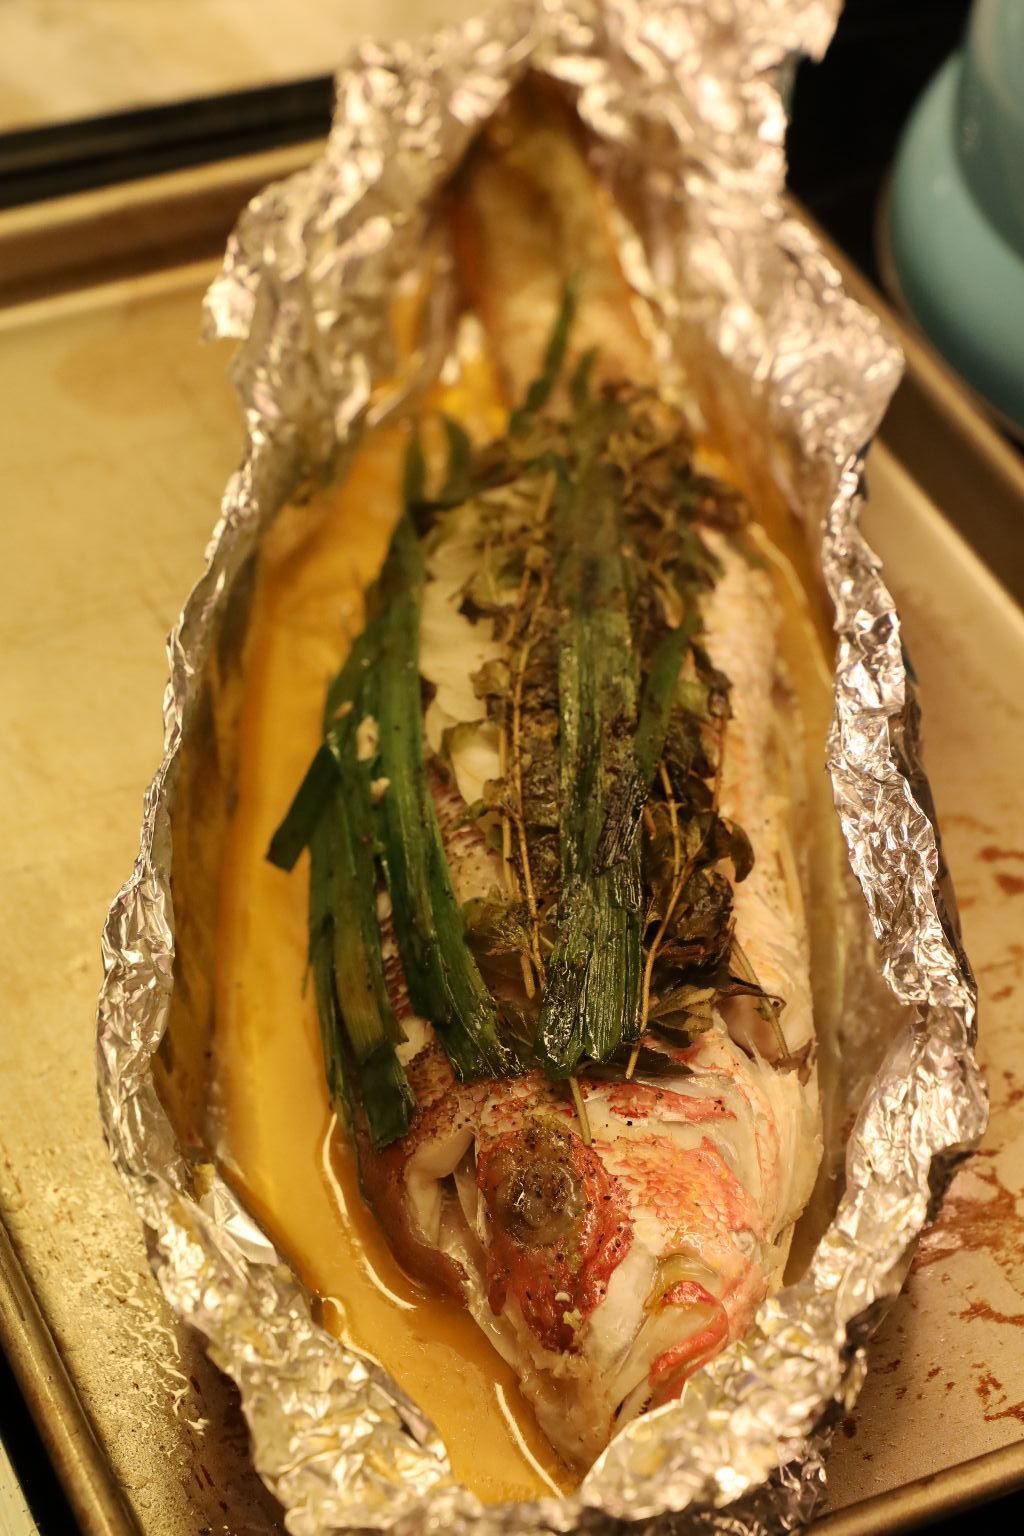
When done, let the fish rest for ~ 5 min. then open the foil carefully as it will still be extremely hot.

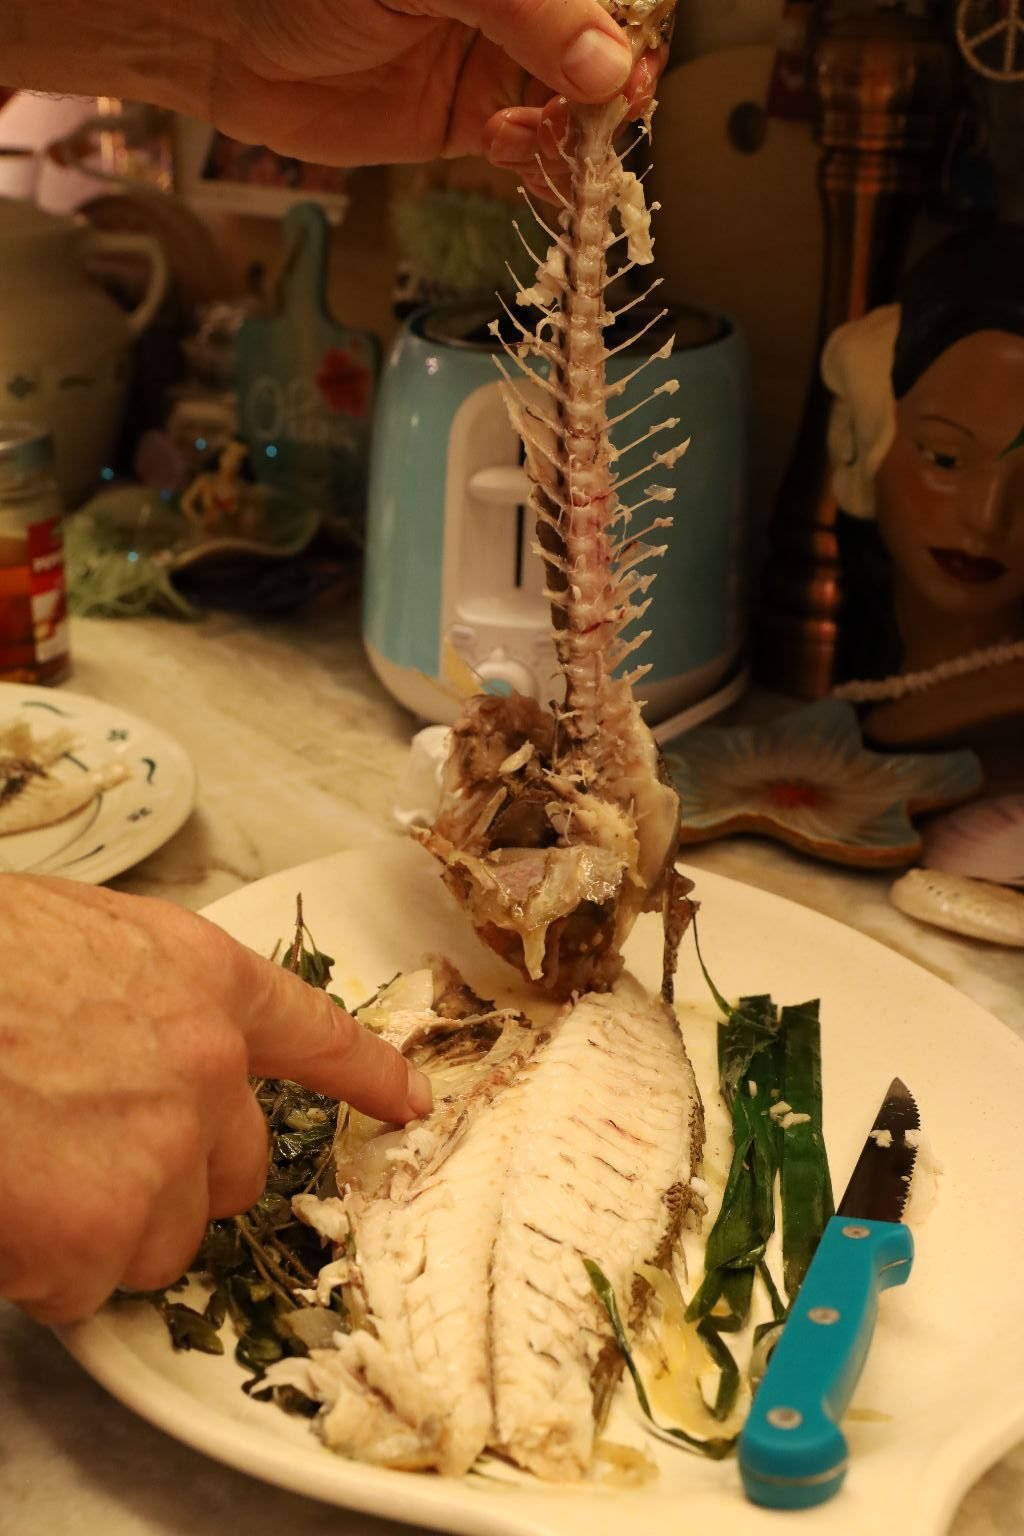
Use your knife to separate the top portion of the fish off the backbone. Then remove the backbone as shown. Go over the removed fish for any bones that were left behind.
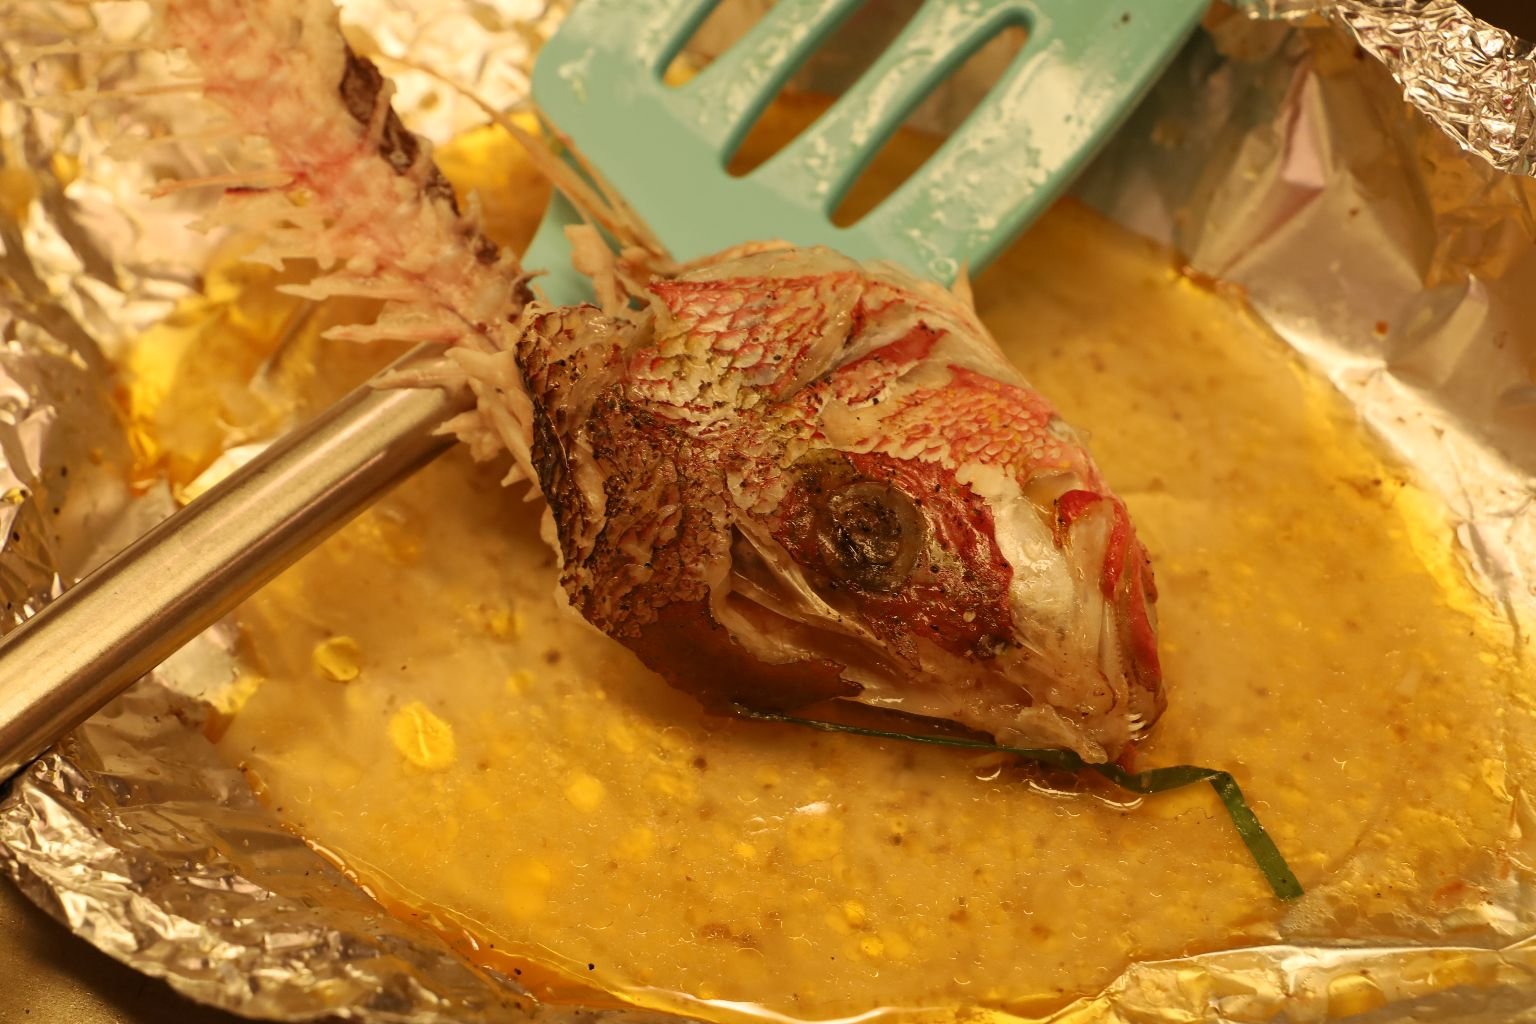
Feed the rest of the fish to the local shark!
——————————————————————
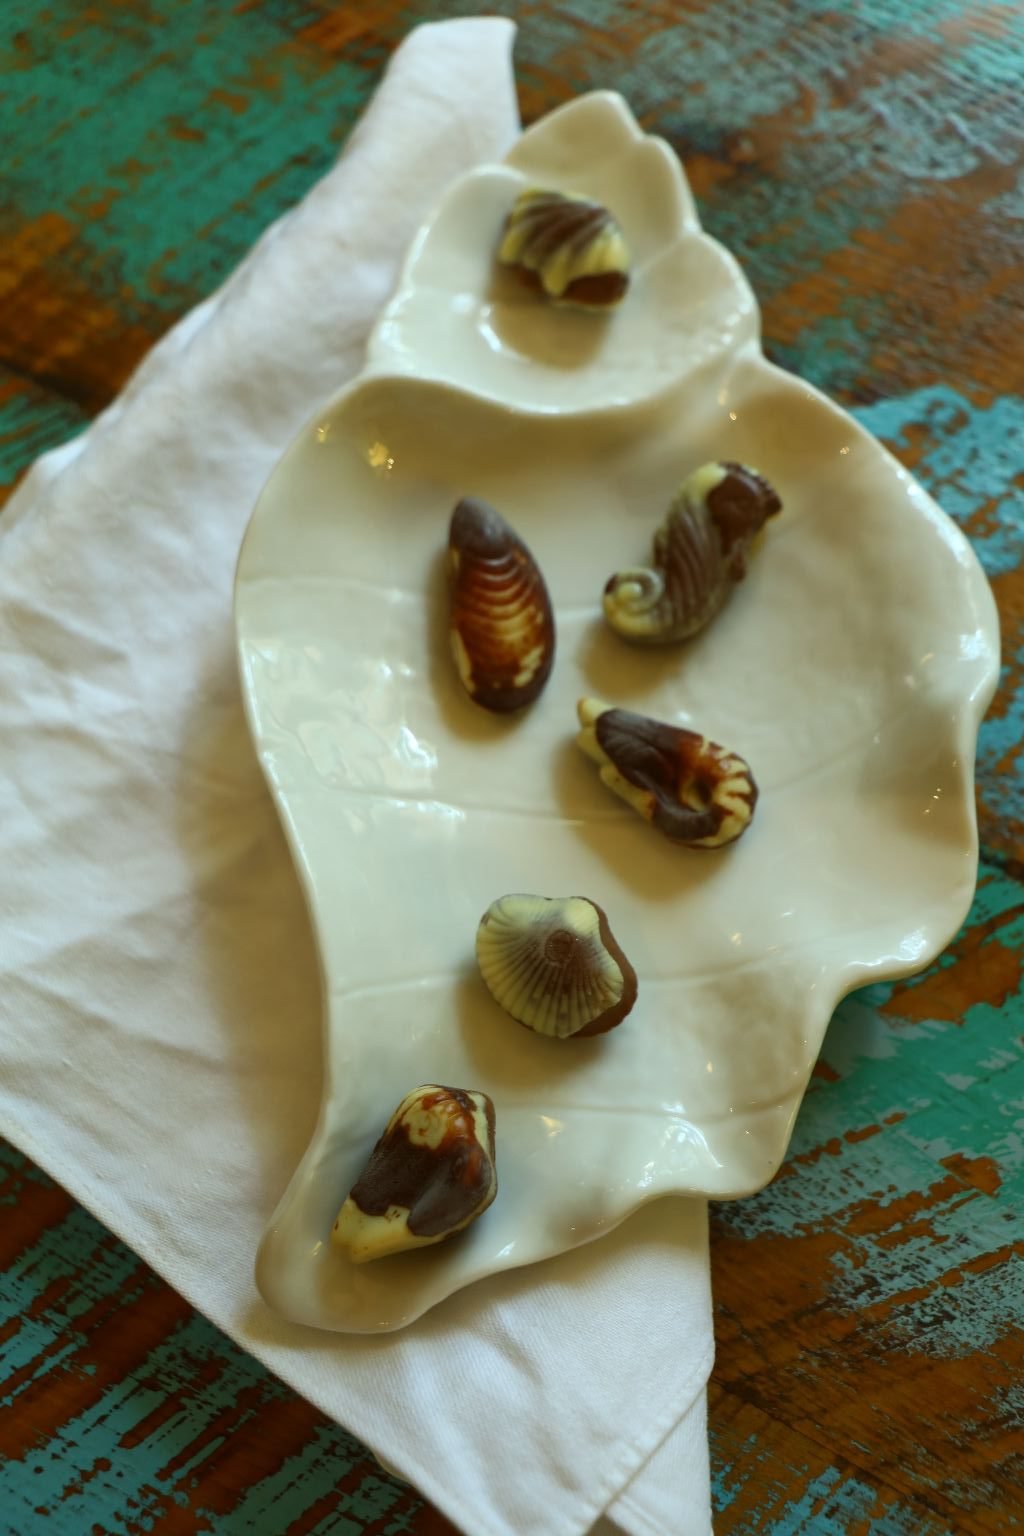
Have a Seashell Chocolate for Dessert
At ease, the Captain has left the Mess Deck.
Gordon and Julie
—————————————————————————-
Also Take a Look at our Other JAWS Themed Posts:
Our July 4th. Tribute to the Movie JAWS (1975)

AND,
Check Out Our: Summer Seafood, Sides, and Salads

And,
AND,
Stay Out Of The Water! JAWS Week
How to Make a Beachy Cheese Cake
———————————————————–
You can also view our Sh..sh..sh..sh..SHARK!!! Week here……..
————————————————————————————–
AND,
Click Here For: Our Southern Shark Week Table

Just a few great recipes that you can make for Shark Week as well.
Also Check Out:

AND,
