Gordon and Julie Seafood
For All Seafood Lovers
Welcome
This is Gordon and Julie Seafood
We will bring to you some very nice seafood recipes for you to try, or be inspired to do something similar in your own kitchen, or outdoor grill.
So whether it be Shrimp, Salmon, Lobster, Oysters, Crab, Fish……
And did I mention Shrimp????
Hope you will stay awhile and enjoy!
Eat Well,

Gordon and Julie
————————————-
Here are a few of our other seafood’s from other blog posts for you to try.
Just click on the seafood headline option that you desire:

——————————————–
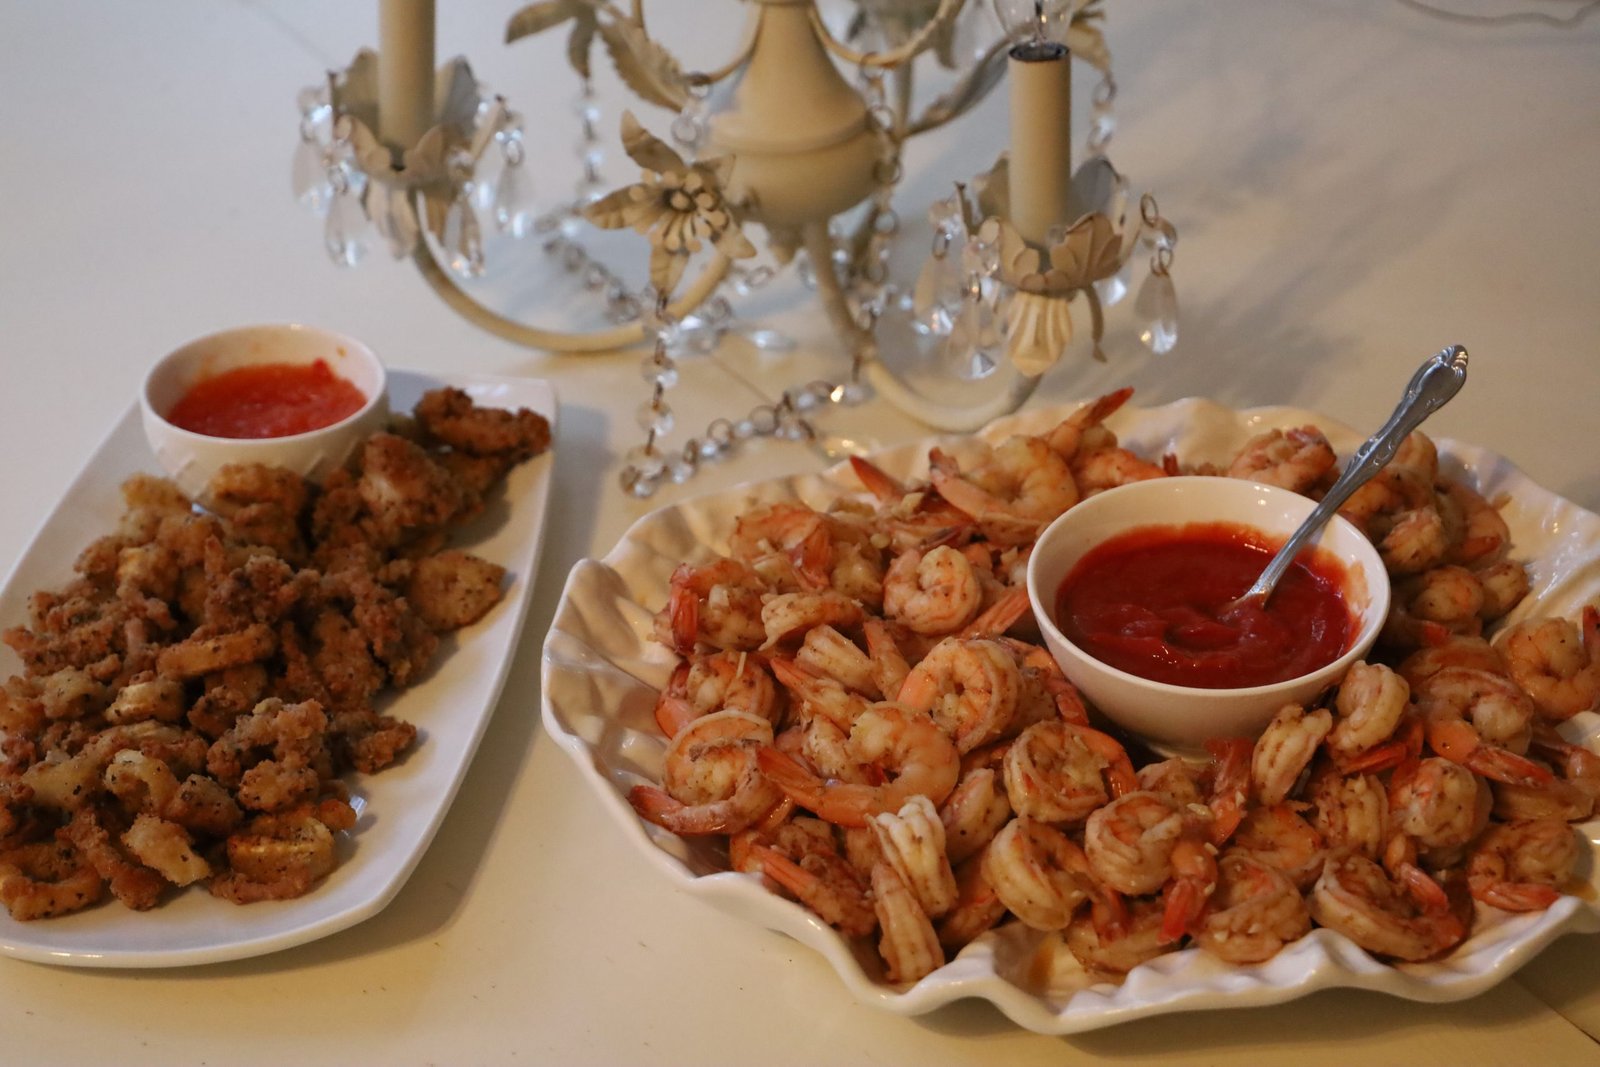
Featured on this Post:
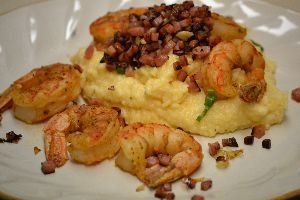
Shrimp Grits

Don’t Forget the Egg

Or Without, Works Just Fine Too
—————————————
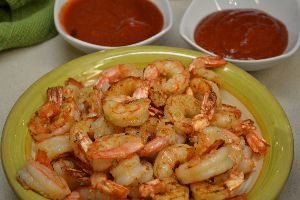
Grilled Shrimp

—————————————-
Tempura Shrimp and Veggies

—————————————–
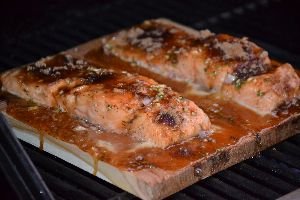
Baked Salmon

————————————–

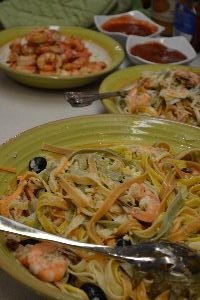
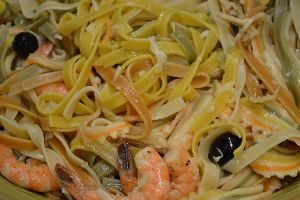
Garlic and Olive Oil Pasta with Shrimp
And Delicious, as always, Shrimp Cocktail
———————————-
Shrimp Cocktail
————————————–

Grilled Salmon
Lemon Dill Topped Fish
—————————–
All of these recipes can be found below.
Enjoy!
Gordon and Julie
———————————————–
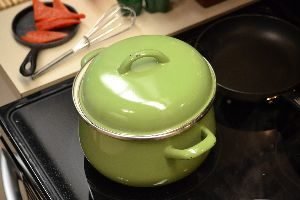
Gordon and Joseph’s
Garlic and Olive Oil Pasta w/ Shrimp
Our nephew Joseph was coming for a visit and asked if he could cook with Gordon and learn a few things. We just happened to have a few bags of nice pasta that we needed to use, and a bag of Argentinian shrimp in the freezer, so….. Garlic and Olive Oil Pasta w/ Shrimp was born.
Ingredients:
1 1/2 lbs. Large Shrimp peeled – we used Sweet Argentine shrimp
4 Garlic Cloves – minced
4 Tbsp Olive Oil
1 Cup Black Olives
1/2 Cup Shredded Parmesan Cheese
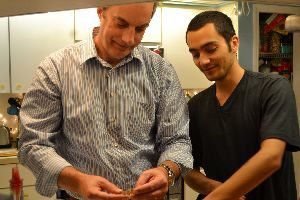
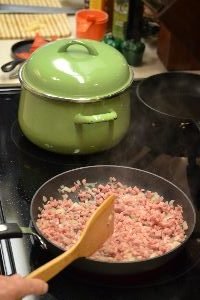
With a Nephew’s help, peel and rinse the shrimp.
Slice and chop to a mince the garlic.
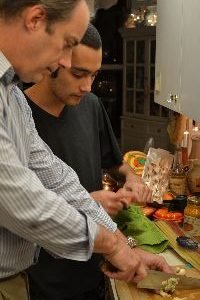
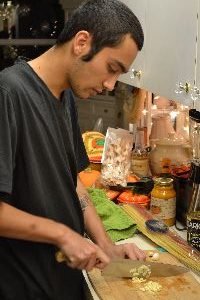
Place the chopped garlic in a cast iron skillet …

Then add your olive oil.

Starting out in the kitchen, I got the olive oil and garlic together then I took the pan out to the grill to cook.
Using your grill’s side burner as the heat source, begin to cook your shrimp on medium heat.
————————————–
Decorations on the Grill

Personalizing the Grill
Needing a bottle top opener near the grill, I fastened this Coco Cola one to the front right panel. It came with a bin/catcher underneath, so to make it work, I had to extend the side panel. To accomplish this, I purchased a piece of stainless steel and cut a wooden backing to size to give it stability. I then drilled all the needed holes through all the pieces and bolted them all together.
In the picture you see an ornament being hung between the opener and the bin.

And with an Ornament….
————————————–
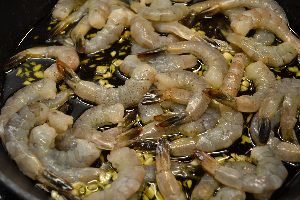
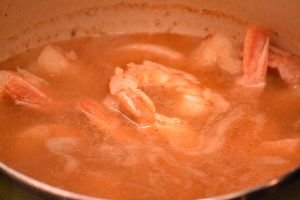
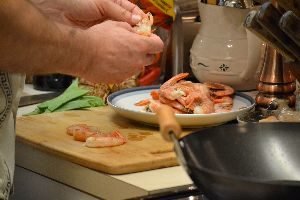
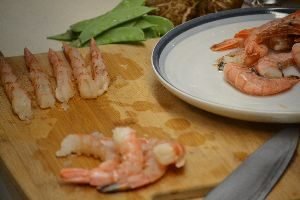
Here I was grilling some pork tenderloins and about to do some shrimp as well for shrimp cocktails.
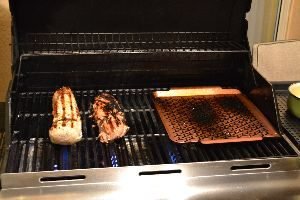
Brodie Over for Dinner

Here are the shrimp we used for the shrimp cocktail ready for the grill.
You can see I am grilling and using the side burner… nice action shot Julie!

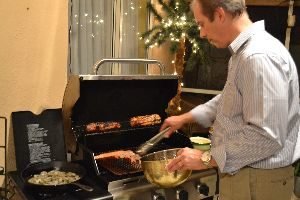
Here I am using a grill grate for the shrimp so that they don’t fall through as I cook them.
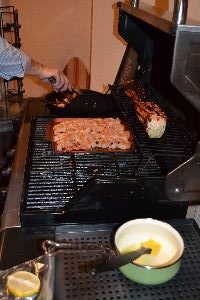
Melted butter with garlic in the green pot, used for the grilling shrimp. Just simply brush on while the shrimp are cooking.
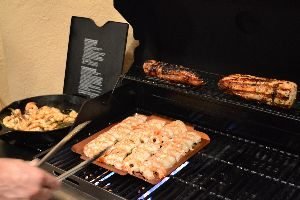
Shrimp take no time at all to cook, so be ready to turn them all once they start to turn white.

Shrimp in the Cast Iron Skillet
———————————-
I usually place all the shrimp facing to one side, that way I know which ones to turn when on the grill.
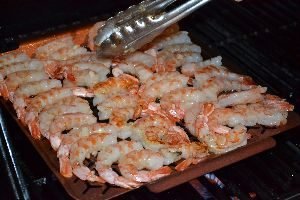
Shrimp are Done!
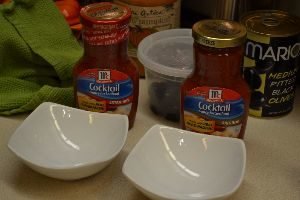
Dipping Sauces from Jars
These Argentine shrimp have a thicker shell and have a sweet almost Lobster taste to them.
The hungry guys!


Cooking all the real Italian pasta which are all died using natural colors.
Read the directions on how long the pasta will take to cook.
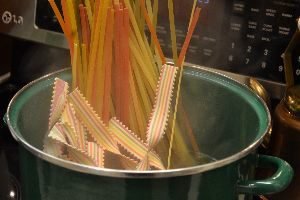

We Combined Two Different Pastas, Why Not?
The shrimp for the pasta are now ready

to be poured into the cooked and drained pasta.

Add your Black Olives
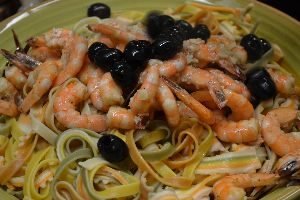
Toss the mixture
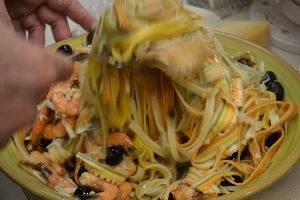
and lastly, top with Parmesan Cheese.

Enjoy!
—————————————
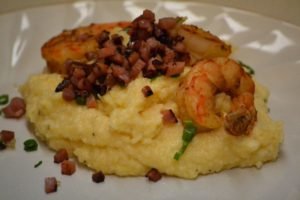
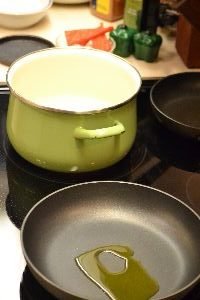
Shrimp Grits

The Ingredients
2 Tbsp Olive Oil
1/2 Cup Onions
1 Cup Chopped Ham
3 Garlic Cloves, chopped
1 1/2 Cups Slow Cook Grits
2 Tbsp Butter
3/4 Cup Shredded Cheddar Cheese
1 Lb Shelled and De-veined Shrimp
2 more Tbsp Olive Oil
2 Tbsp Old Bay Seasoning
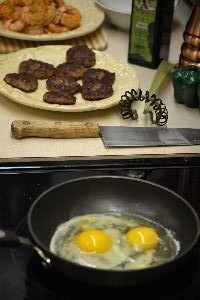
1 Egg cooked sunny side up if you like (Optional)
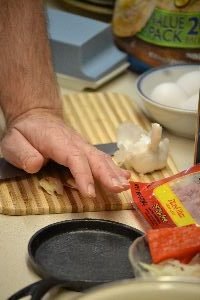
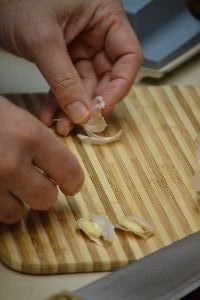
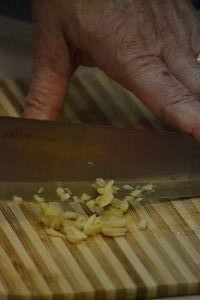
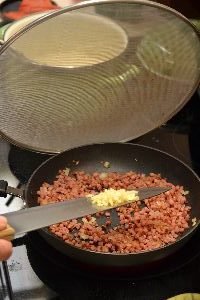
Crushing, Peeling, and Chopping the Garlic Cloves
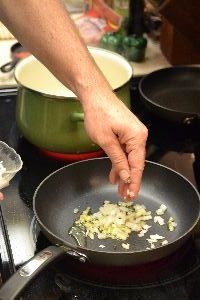
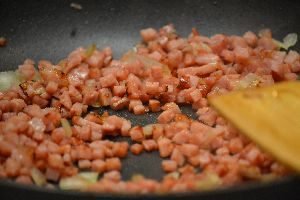
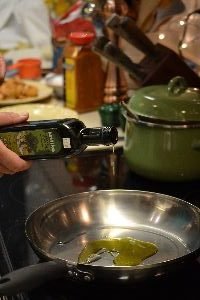
With the heat on Med. add your Olive Oil to the frying pan. Then add the onions and saute.

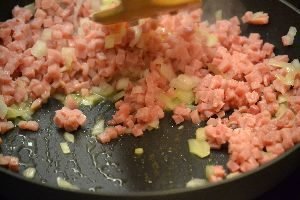
Adding some chopped ham to the onions and cook for about 6 min.

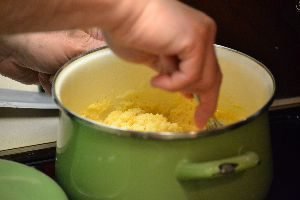
Time to add the grits to the boiling water. Cook them as per directions.
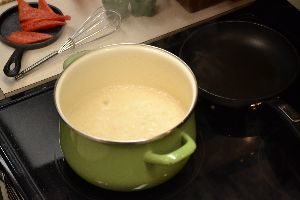

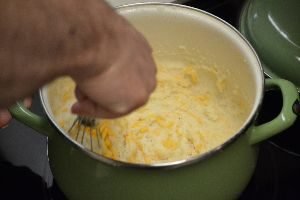
Whisk your grits to make them smooth.
Add your garlic to the ham and cook for another 3 min.


Adding the Butter/Margarine to the Grits once they are cooked with some fresh ground pepper.
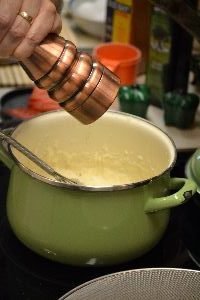

Time to Add the Cheese and whisk it in.
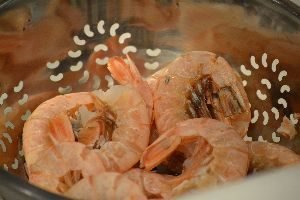

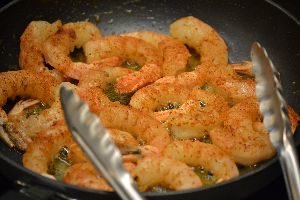
Add your olive oil to the pan and coat your shrimp with Old Bay Seasoning before adding them to the pan.

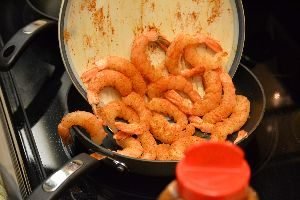
Saute the shrimp on Med. heat until just cooked, about 2 Min. on each side.
Add a touch more water to your grits if they get stiff and whisk in.
The Grits Cooking, Above, The Shrimp Cooking, Below
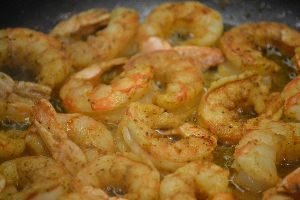

These shrimp are Perfect on their Own!
Place all the ingredients on your plate like so and dig in!
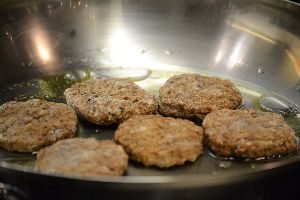
Frying up Julie’s favorite turkey sausages in olive oil.
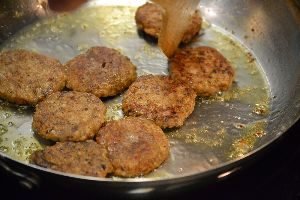
They are going to taste soooo good!


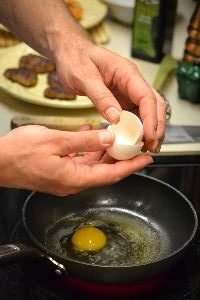
Gordon cracking an Egg in the mini cast iron skillet for his Shrimp Grits

Southern Biscuits
We buy these frozen and ready made but boy are they good!
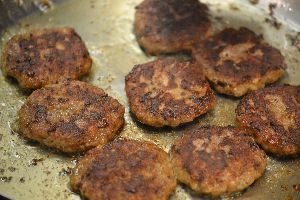
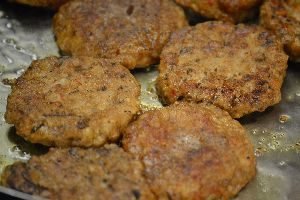
The Turkey Sausages are Ready

Now Gordon is Making my Scrambled Eggs
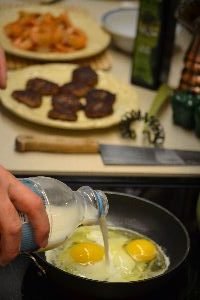
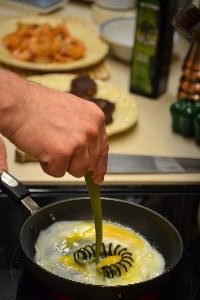

Simple. Just some milk, salt and pepper.
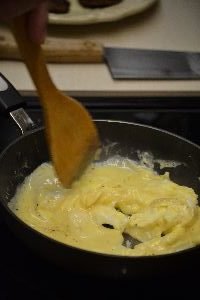

Light and Fluffy
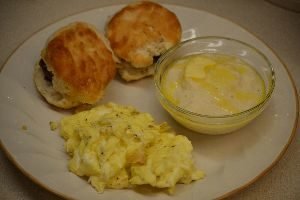
Julie’s Plate
All that I wanted was my beloved home style grits, scrambled eggs, and my southern sausage and biscuits. I am from Georgia, btw…..
Now Gordon, on the other hand, got the Shrimp Grits!
———————————
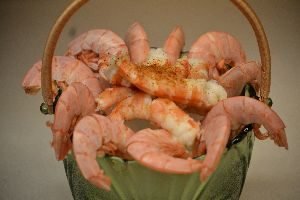
Shrimp Cocktail
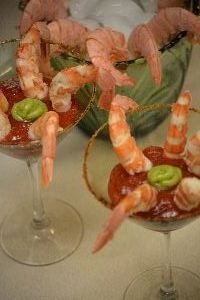
Martini Glasses Filled with Shrimp
Gordon Rimmed the Gasses with Old Bay Seasoning

Reminds me of something out of a Tim Burton movie.
Japanese Wasabi Paste added to the Cocktail Sauce

Argentinian Shrimp


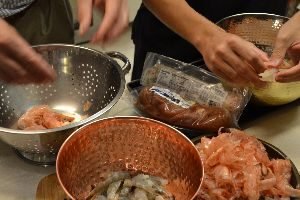
Men in the Kitchen Cooking
While Veronica and I just stand around drinking wine.
Brodie is a great apprentice, he loves cooking as much as Gordon does.
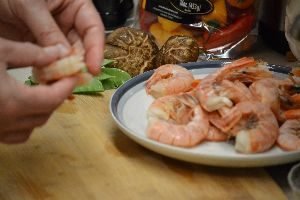
Brodie Prepping the Shrimp
Washing them and peeling them, all but the tail.
Also deveining them, as in removing the black vein down the back of the shrimp.
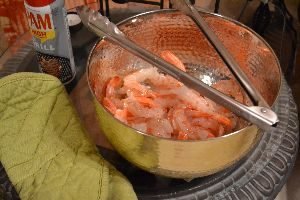
Some Shrimp we Boiled, and Some Shrimp we Sauteed
Try boiling your shrimp in some water with Old Bay Seasoning added. Penetrates into the shrimp.


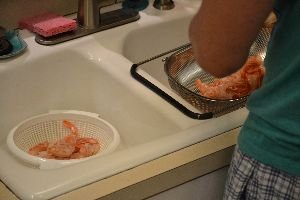
Gordon cooked the shrimp two different ways. He did a shrimp cocktail and added some Old Bay Seasoning to the water that he boiled the shrimp in. That way it gets seasoning in the cooking. He then placed them onto a strainer over the sink, packed them in ice to stop the cooking and cool them down.

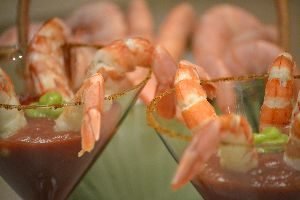
Gordon With our Shrimp Cocktails
Shrimp Cocktail, IS My Favorite!
Next Up:


The second way he cooked the shrimp was to sautee the shrimp in butter and garlic on the stove top, with some Old Bay Seasoning.
They were perfect!
—————————————
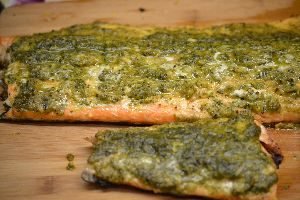
SALMON
The Dinner
Grilled Salmon, Fried Asparagus, Rice with Squash and Zucchini
Love All The Green


Grilled Salmon with a Pesto Sauce
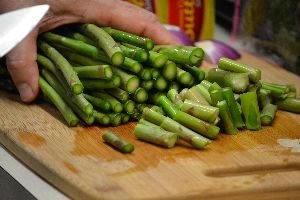
Asparagus on the Grill as Well
Just chop the ends off of the asparagus, brush them with some olive oil, then toss on the grill.
Great Accompaniment

Fresh Pesto… great topped on fish!
Ingredients:
30 Leaves of Fresh Basil
1 Large bunch of Parsley
2 Garlic Cloves
1/4 Cup Pine Nuts
1/2 Cup Olive Oil
Salt and Pepper to taste


Place the first four ingredients into the blender and turn onto low, then add the olive oil and turn up the blender to medium until the mixture just starts to churn and stop adding the olive oil.
You want the mixture to still be slightly chunky and firm.
Below you will see a jarred brand that I have used when fresh ingredients aren’t available.

The Salmon


Salmon is one of our favorite fish as it takes on seasoning well. Here I just sprinkled it with lemon pepper on both sides.
To cook the fish I am using a fish basket to hold the fish which makes grilling very easy.
Simply place your fish in the basket, season, then place on your grill. The basket holds the fish in place making it easy to turn if needed as it is locked in between the two sides of the mesh basket. Grill your salmon skin side down first to make the skin crispy as it releases the fat, for about 8 min. on ~400’F. The direct heat of the grill cooks the fish faster.
So Delicious!
————————————
Lemon Dill Topped Fish
A perfect pairing with fish!
Ingredients:
2 packages of Fresh Dill or about 2 good handfuls
3 Tbsp’s Lemon Juice
1/4 Cup Olive Oil
Salt and Pepper to taste

Rinse your dill first in water then blend with lemon juice and then add your Olive Oil the same way as with the salmon above… until the mixture starts to churn and the mixture is still firm.
Top the mixture on any fish and bake, or grill as directed!


Baking your Fish!


Using a layer of red onions like a grate to lay your fish upon, and a drizzle of olive oil, bake your fish at 400’F for about 12-15 min. per inch of your fish thickness. Depending on your fish, you need to watch for the white fat to be released which is a good sign it is nearly done cooking.


Quite Delicious and Healthy!
——————————

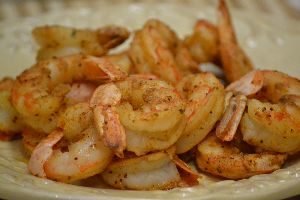
Julie’s Favorite, Shrimp
Thaw out your shrimp and peel and rinse them well ensuring the tail shell is left on them.


These Shrimp are from Argentina and have a thicker shell than Gulf shrimp.
While rinsing them ensure you get out the digestive track which looks like a piece of black string which is located along the back where they were cut open. Remove that.


Making the Garlic Butter

First you want to melt some butter on the stove top in a small saucepan. Next, add some chopped garlic, along with some turmeric. The turmeric is a light Earthy tasting healthy spice. It is known to kill cancer cells and it gives the shrimp a lovely golden yellow color.


You just want the butter mixture to simmer on top of the stove.

Although I don’t have a photo, I chopped some chives from our garden into the butter before I brushed it onto the shrimp while on the grill.
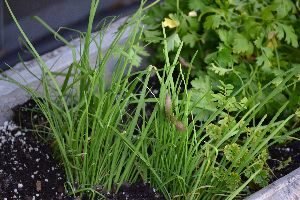
Chives from our Garden
If you add the herbs too soon, they turn brown.

Cook the shrimp for about 2-3 minutes per side until they go from opaque to just white in color, quickly remove and serve them to your guests.
Be sure not to overcook the shrimp! Or they will turn rubbery in texture.

Beautiful and Delicious!
————————————
Now for the Dipping Sauces

RECIPE:
Roasted Red Pepper Spread
This is an excellent dip for pita chips, or a spread for crackers, or as a dipping sauce for shrimp.
This recipe makes a little over 2 cups.
Ingredients:
15 oz. jar of Roasted Red Bell Peppers, drained
¾ Tbsp Cumin
½ Tbsp Turmeric (To help fight off Cancer)
½ Tbsp Smoked or Regular Paprika
½ Med. Onion chopped, (Red Onion would also add to the color)
2 Garlic Cloves, chopped
3 to 4 Tbsp Lemon Juice
3 Tbsp Plain Greek Yogurt
Salt and Pepper to taste
2 packages 8 oz. light or reg. Cream Cheese (softened)
In a blender first mix all the ingredients except the cream cheese until just combined. Then add the cream cheese and blend until smooth.
When done top with a sprinkling of paprika or chopped scallions!

This is actually a recipe that a former neighbor gave us. We of course, revamped it for our tastes.
You just want to mix everything in a blender or food processor.


It’s very easy and quick to make.
An Excellent Appetizer


Just Ask Julie
————————————–
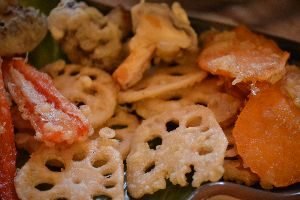
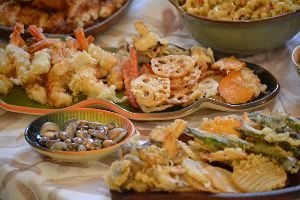
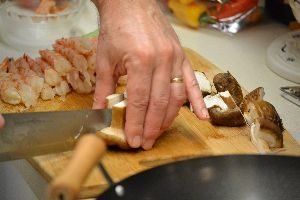
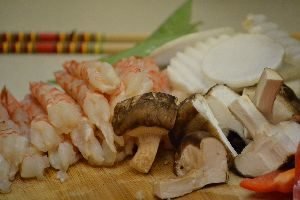
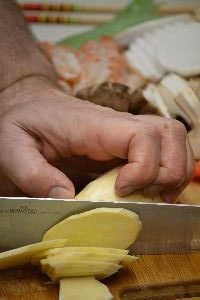
Tempura Shrimp and Vegetables
Med. Sized Shrimp
Lotus Root
Sweet Potato
Yams
Red Bell Pepper
Onions
Mushrooms (Cremini, Shitaki, or White)
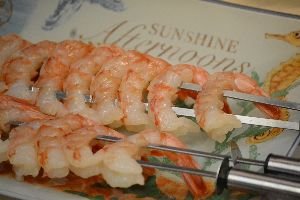
Below are some stretched shrimp!
This is done to cook them evenly and make a great presentation.
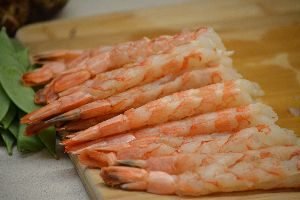
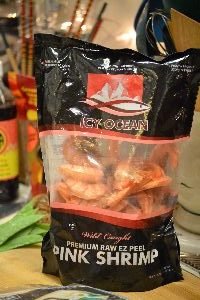
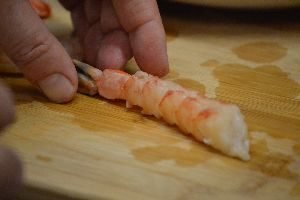
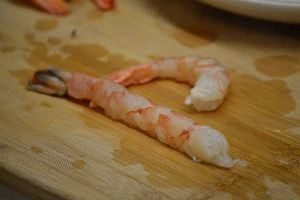
I used some shrimp from Argentina. Their shells are thicker and the meat is slightly sweet.


Peel and devein the shrimp. Peel all the shell away with the exception of the tail piece.
To devein, cut the shrimp on its top and remove the black vein by rinsing the shrimp under running water.
Here you have the shrimp ready to stretch.
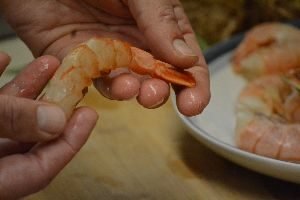
Place the shrimp on its back.
Where the legs use to be down by the tail, place a small cut across the shrimp about 1/4 inch in depth in increments of about 1/2 inch down the shrimp.
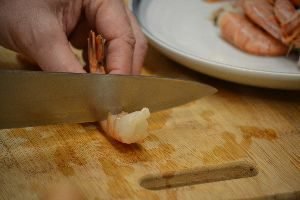
Turn the shrimp over onto its belly or legs side down.
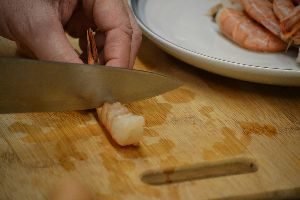
Now with your index fingers and thumbs from both hands starting at the head, slightly pinch and push down on the shrimp. Continue this motion down to the tail using less pressure as you go.
You should hear some slight cracks which is the meat separating becoming elongated.
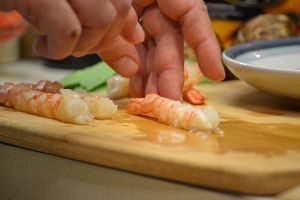
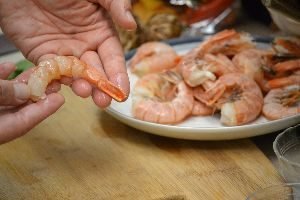
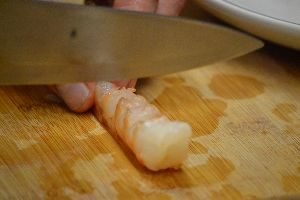
Above you can see how much longer the stretched shrimp is compared to the un-stretched ones.
As you stretch more of these, you will become faster with the process.
The Stretched Shrimp

Next up, Gordon Preparing the Vegetables for the Tempura
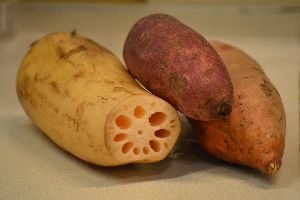
Here are some of the classic vegetables we used to Tempura… Lotus Root, Sweet Potato, and a Yam.
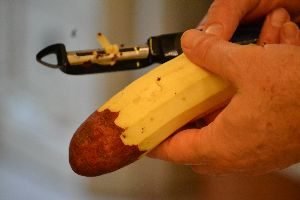
Here is simply peeled one end of the sweet potato.
From Julie…(Yes it does look like that, doesn’t it?)

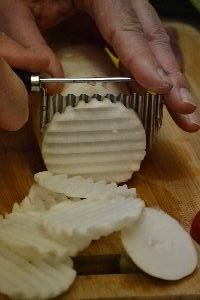
Above is some Chinese Daikon Radish
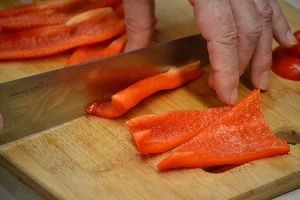
Red bell pepper which has been sliced into triangles.
Below, I used a special slicer to make wavy cuts of the Daikon.
You can also slice them flat if you don’t have one.
Mushrooms should be halved then quartered.
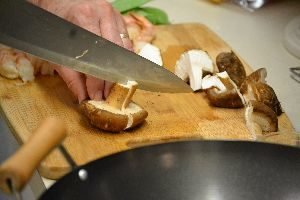

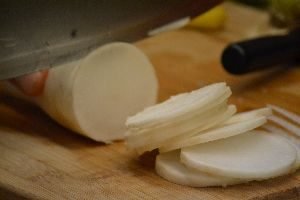
Here you can see the thickness of the vegetables… about 1/8 inch.

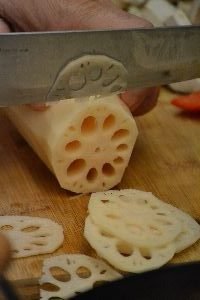
The Lotus Root will turn brown after cutting, so place them in some water until ready to cook them.
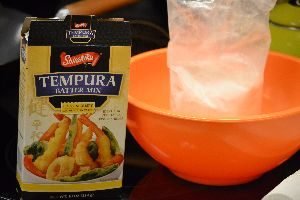
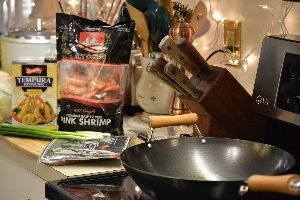
Above is the Tempura mix we used.
You can make your own batter but we had already had this in the pantry and wanted to use it up first.


Use ice water to keep the Tempura batter cold, so when it hits the hot oil, it will become crispy.
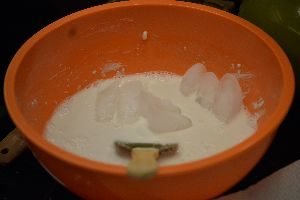
To accomplish this, I use very cold water and I keep some ice cubes in the mix.
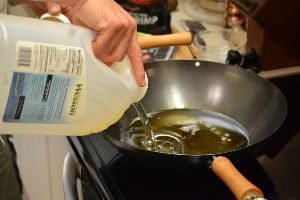
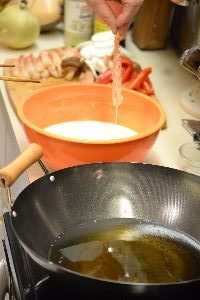
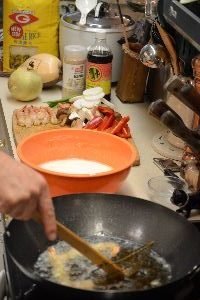
Using your wok, place in a few cups of vegetable oil and turn the heat to Medium High.
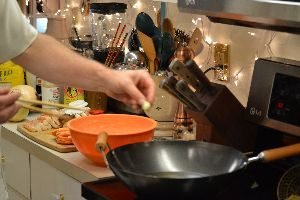
To test the oil’s temperature, I place a piece of vegetable into the oil and see if it sizzles.
The locals will throw in a garlic clove and when it floats to the surface the oil is ready.
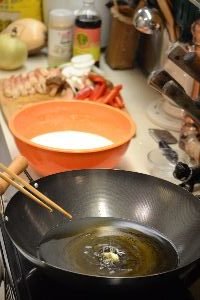
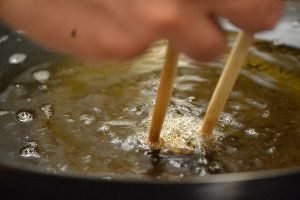
Using cooking chopsticks is a good way to retrieve the vegetables.
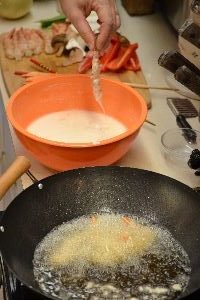
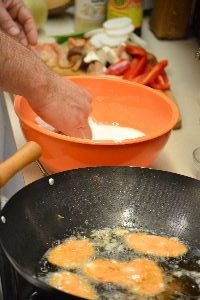
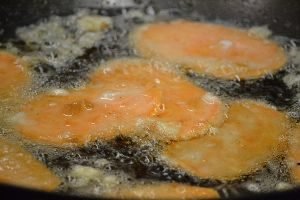
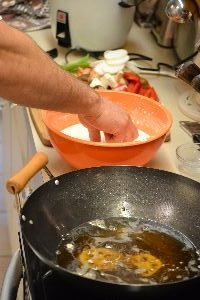
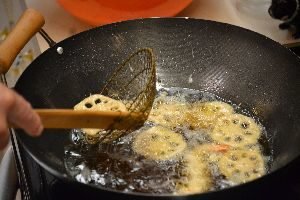
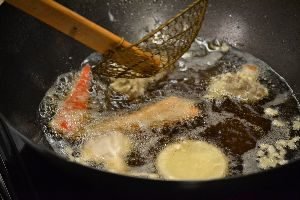
Dredge your shrimp into the Tempura batter and place into the wok. Only cook a few at time, so the oil’s temperature doesn’t lower.
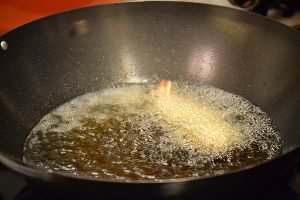
Cook the shrimp until slightly browned and crispy. This should only take about 1 min.


Use cooking chopsticks to turn the shrimp.
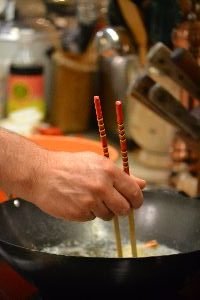
You can use any utensil you like to turn the shrimp but we prefer to go native and do as the locals of Hawaii do.
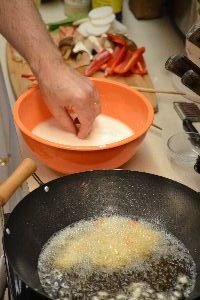
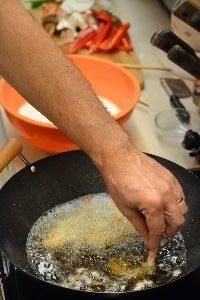
You can also use your hand and drip in some tempura batter into the wok, then when you place the shrimp into the oil, the crunchy bits will adhere to the fresh batter and make the shrimp more crispy and more coated.

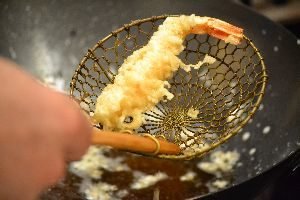
Now Gordon has switched over to a cooking strainer to remove the shrimp from the oil.
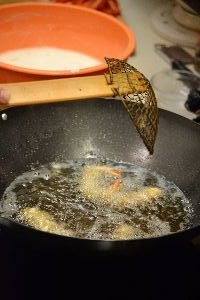
This strainer will work well with the vegetables too.
We purchased this one from the Asian store but you can find similar versions at other stores that sell cooking utensils.

Put the shrimp and other vegetables on paper towels when you remove them from the wok.
Here, I am getting ready to batter the vegetables.
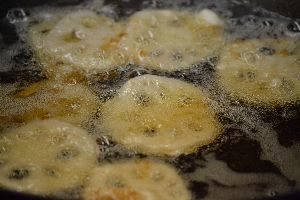
Frying the Vegetables

The lotus root is beautiful to tempura. Love all the holes that show through.
Again, don’t fry too many or the oil’s temp will lower and not let the batter get crispy.
Cook the Sliced Vegetables for about a minute and a half in the oil.
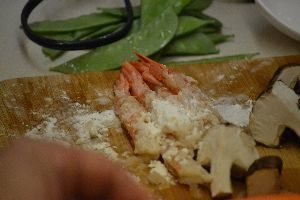
Here Gordon sprinkled some corn starch onto the shrimp to tempura. With many Asian fried dishes, corn starch is used because it becomes more crispy than plain flour when fried. The dry corn starch will also help the wet tempura batter adhere to the shrimp.
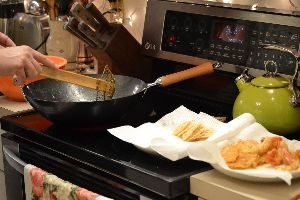
Always place on paper towels to drain the excess oil.

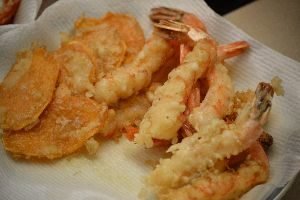
Enjoy this great way to cook shrimp and vegetables!
—————————————-
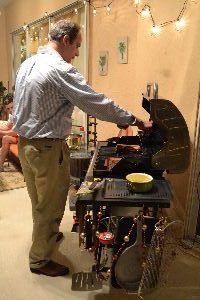
Ready to Grill Some Shrimp

Gordon and his Grill


Gordon in the Kitchen

On our Lanai


Two Pork Loins and Shrimp on the Bar-be
Sometimes all you need to do is to brush the shrimp with butter or olive oil, no need for the extras. Sometimes it’s nice to just taste the flavor of the meat without all the extras.

I Smell Something Good!
————————————-
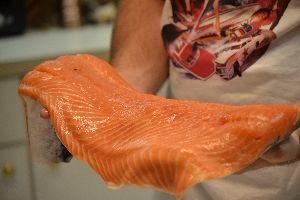
SALMON
I was shopping and I came across this while at the commissary. Father’s Day was coming up and I thought of Gordon and the great meal that he could cook with this, so I bought it.

Over 4 Pounds of Salmon
I picked out the large one on top! I knew he will love it but it will hardly be a surprise seeing as how he has to cook it.
So Happy Father’s Day Gordon………..
Now go cook this. 🙂
—————————————————-
Father’s Day Salmon Dinner

Father’s Day Dinner with a Middle Eastern Flair
Gordon has traveled throughout the world during his 20 year Naval career and through his subsequent profession. (Cooking is just his hobby). During his travels he would always bring back so many goodies for myself and our children. It is with that in mind that I chose the atmosphere to be a bit Middle Eastern.

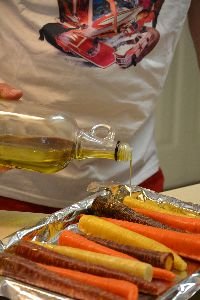
In the photo at right Gordon is adding some olive oil and spices to our colorful carrots.
Middle Eastern food tends to be very spicy so it was just a matter of adding the exotic spices to the dishes. Gordon has brought home some wonderful spices from over there that we use to cook with, even now. We found a great ethnic food Indian grocery store out in Seminole that we visit that carry what we like. There is also one out near our home.

Doesn’t that look beautiful? The salmon barely fit in the pan.
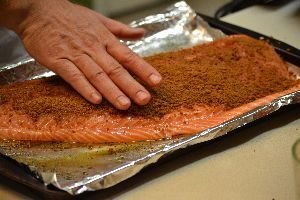
For the Rub…
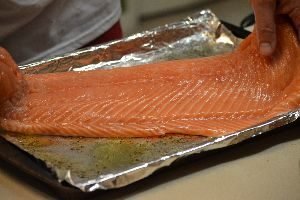
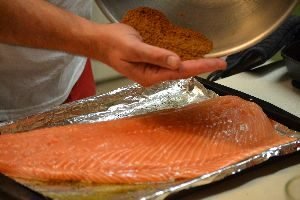
1 1/2 Tbsp Onion Powder
1/2 Tbsp Garlic Powder
1 1/2 Tbsp Turmeric
1 1/2 Tbsp Ground Cardamom
1 Tbsp Ground Ginger
1 1/2 Tbsp Coriander
1 1/2 Tbsp Cumin
1 1/2 Tbsp Chili Powder
1 1/2 Tbsp Ground Cinnamon
1/2 Tbsp Nutmeg
1/2 Tbsp Cayenne Pepper
1 1/2 Tbsp Light Brown Sugar
Salt and Pepper to Taste
In a small bowl, mix all ingredients well and set aside.
1/2 Cup Olive Oil
– 4 lb Salmon Fillet , with or without skin
—————————————–
Seasoned Cherry Tomatoes:

~20-25 Cherry Tomatoes
1/4 Cup Olive Oil
1 Tbsp Fresh Ground Pepper
1 Tbsp Dried Basil
1 tsp Dried Thyme
1 tsp Garlic Salt
Mix all the cherry tomato ingredients in a bowl and set aside.
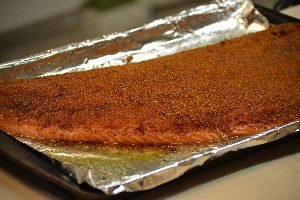
When ready to cook the salmon, preheat the oven to 400’F. On sheet pan lined with foil, pour on your olive oil and place your salmon skin side down on it. Move your salmon around on the pan to coat the skin with the oil. Turn the filet over and sprinkle a small amount of the spice rub mixture on the skin side. Move your salmon around on the sheet pan with oil again to coat the top of the filet. Now, turn the salmon over (skin side down) and rub the entire salmon filet with the spice rub mixture (you can marinate the salmon in the spice mixture a day ahead of time). Roast the salmon for ~17-20 min. depending on when the salmon becomes slightly opaque and feels firm to the touch.
Now, add your seasoned cherry tomatoes to the pan and broil the fish for 3 to 5 min. more being sure to carefully watch the fish as it cooks as the spices and sugar could burn. Once cooked, let the salmon rest for ~5 min. before slicing.


Salmon with roasted cherry tomatoes, roasted colorful carrots, baked sweet potatoes, and squash casserole made with Panko instead of breadcrumbs.
Beautiful table setting, the fabric Gordon brought me back from one of his trips.
Delicious food. Nice atmosphere.
That’s what you want. Also, there is no way to gain weight off this food as it is low in calories and good for you too!
Salmon is pretty much the healthiest fish that is left that we can eat without too much worry. The worst is tuna. It is only safe to consume about one ounce per month because of the high levels of mercury, any more than that is too dangerous.
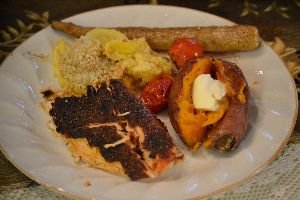
My Plate
Not the most attractive presentation of the food on my plate but it was superb!
That’s all that matters.


Gordon and Veronica

So guess what OOWhann wanted for this Father’s Day?
Happy Father’s Day Gordon!
Love,
Julie
BTW, Sean Connery was the best Bond out of all of them!!!!!
—————————————
Mother’s Day Grillin’ at the Beach

Grilled lobster with an herb butter, grilled crab halves, grilled corn on the cob, grilled veggie kabobs, and grilled Japanese eggplant. It’s longer and thinner than regular eggplant.

Corn on the Cob and Veggie Kabobs


Grilled crab and grilled lobster. Can you believe that little portion of lobster above was $50.00? The commissary was out of lobster, so we visited the Asian supermarket. Normally they are very reasonable, but this was pretty expensive. It is from Canada. If we don’t know where seafood comes from then we don’t buy it.
Preparing your lobster and crab for the grill.
Simply remove the head of the lobster from the tail using a twisting motion. Rinse the tail with water and slice in half with a sharp knife. Now, remove the lobster claws from the body and crack them open using the back of a large knife. Do note use the sharp side as you will cut the meat. You are only looking to open up the shell, so later it will be easier to eat. Cook the lobster on the gill sliced side up over med. heat. After the first few minutes on the grill, add the herb butter to the tail meat. Then cook for about another 4 min. until the meat turns white and the butter slightly bubbles.
To grill the crab, simply remove the top shell and clean the yellow out of the cavity using fast running water. Remove the lungs of the crab which sit on top of the sections containing the meat and rinse the crab again. Now, break the two sections containing the meat part. Remove the legs using a twisting motion. Keep the claws as they contain good meat. Place the claws and halved sections of crab on the grill on med. temp for about 4 min. each side.
FYI: Did you know that the former Bush Administration (from 2001 – 2008) made it perfectly legal for a corporation to buy up cheap seafood from somewhere else and then put it in the Chesapeake Bay for about 15 minutes, then remove it and they can legally say that the seafood came from the Chesapeake Bay? I don’t know if it is still legal, some of the old contracts may not have expired yet but we still ere on the side of caution until we learn differently. Since the big Gulf oil spill several years ago we steer clear of seafood from the Gulf. The carcinogen used on the oil to “dissolve” it, didn’t. It just made it sink to the bottom creating dead zones in the Gulf. That carcinogen also is cancerous. So who is to say that a fish up near Louisiana didn’t come in contact with that carcinogen and then make it’s way down toward us where it was caught and then sold to a supermarket for us to purchase?
Now a days you have to do your homework before you go shopping to make sure your food is safe.
—————————————
Making Herb Butter


Chopping your favorite herbs and adding them to softened butter/margarine.
You can also use chopped garlic in the mixture if you like!

Adding the Herb Butter

Generously Add the Herb Butter to the Lobster

Also to Your Grilled Corn

Grilled Japanese Eggplant
Just slice thinly and add olive oil and then grill. Great taste!

Gordon grilling the Japanese eggplant.

Veggie Kabobs
A perfect accompaniment to anything that you grill. Not to mention, healthy!
Just skewer sliced veggies and brush on olive oil. Then place on the grill to brown a little with grill marks until done.
——————————————

Looking for Driftwood
So while Gordon is grilling up a storm above I am in the back mangroves looking for driftwood.
I found some nice pieces too.
—————————————-
Crab Salad

Gordon makes the best crab salad ever. The secret is using rice wine. Also we don’t use real crab, this is imitation crab, white fish from Alaska. I love real crab but unless we know where it comes from then we don’t eat it. Next time we are in Virginia and Maryland we will definitely chow down on some crab.
The pretty bowls I bought at the Asian Supermarket. Here I glued two bowls together, one upside down. I have a friend who’s birthday sign is Cancer, the crab, I’m planning on giving her a nice set as a gift. I do love mine though!
——————————————————————-
Crab Salad Recipe
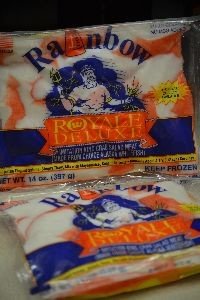
This is a quick and easy cracker topping, that is always a hit. Simply use one package of imitation crab meat of which I prefer the chunk type made by the company shown. I found this brand breaks up nicely like real crab meat.
Break up the the crab meat into a medium sized bowl and add 1/2 cup Miracle Whip, 1 Tbsp Old Bay Seasoning, 1/2 cup diced celery, and 2 Tbsp Rice Wine. Mix all ingredients well and place in the refrigerator for about 1 hour to chill. The Rice Wine adds to the sweetness of the crab and keeps the ingredients moist.


Place a dollop of the crab salad on your favorite cracker and enjoy!
———————————————–
Happy Eating!
Gordon and Julie