Our New Orleans Style 4th. of July Foods (Tasso Seasons)

July 4th.
America’s Independence Day

Joyeux Jour De I’Independance
Bienvenue to Our New Orleans Style 4th. of July Foods for our American Independence Day
(Tasso Seasons)
This is probably our most tasty 4th. of July that we have ever celebrated.
The food was Magnifique!
It was my idea to change our menu up and do something different. Seeing as how America is a big melting pot of cultures from around the world contributing their spices and recipes to all of our celebrations, I wanted to do a New Orleans Style Menu with an Italian, and a French Twist to it.
———————–

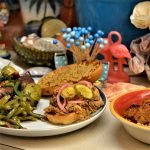
Our Florida Kitchen
Here I had turned our kitchen into an old vintage Florida Souvenir Stand.
————————————————-

Our 4th. Menu
Muffaletta Dip w/ Provolone Toasts
Tasso Pulled Pork (Onion, and Pretzel Buns)
Pickled Red Onions
Tasso Gumbo
Brown Rice
Grandmaw Nell’s Green Beans (an attempted recreation)
Fingerling Potato Salad
Corn on the Cob
Condiments of Grainy Mustard, Bread and Butter Pickles, Italian Dill Pickles, etc.
Red, White and Blueberry Breads
Along with decorations of Lightening Bugs! 🙂
—————————————–
Tasso Gumbo with Tasso Shrimp
(and Lightening Bugs!)
AND,
Click Here For: Our Southern Shark Week Table

———————————————

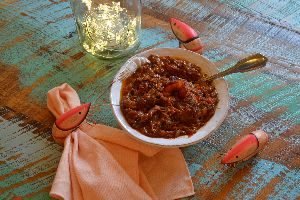
Tasso Gumbo

———————————————

Dessert Table
——————————————–
This day we experienced a lot of rain which is why we didn’t photograph all the food outside. During the dry spells we were outside taking photos, but most of the day we were either inside, or on our enclosed lanai where the rain couldn’t touch us. The ceiling fans helped to cool things down for us when we were out there.

——————————————-

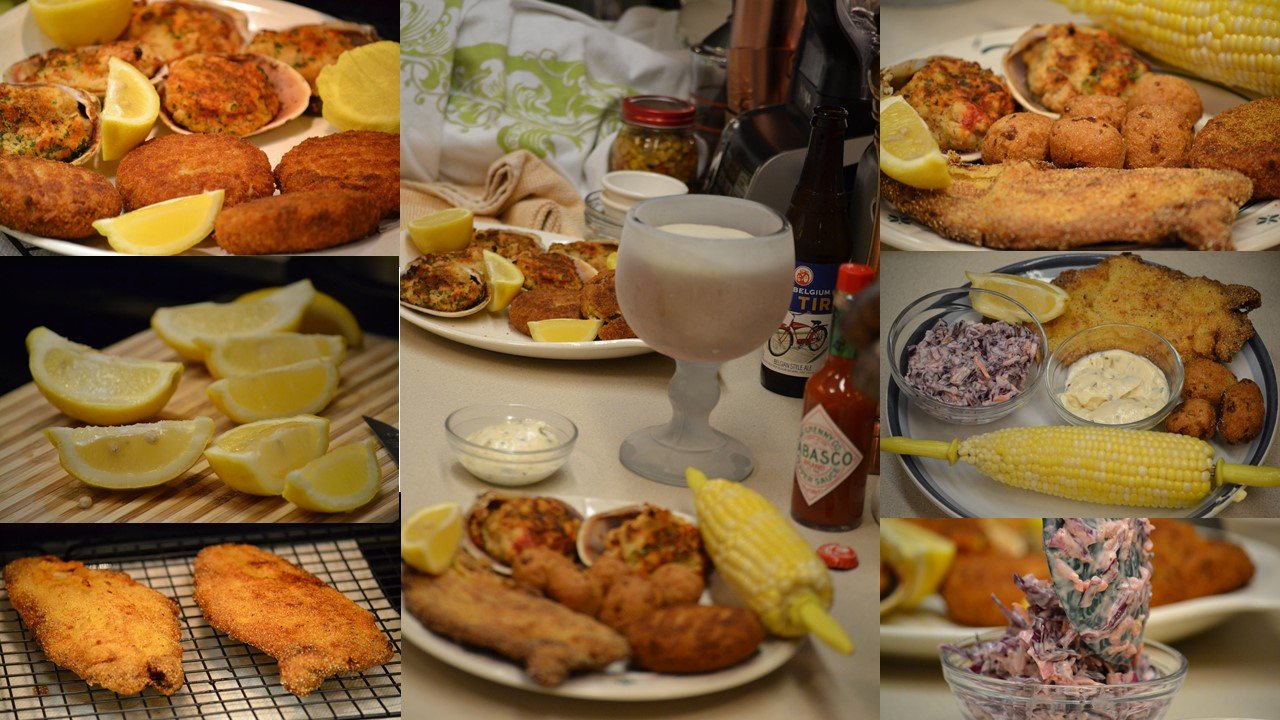
The Hor Dourves for our New Orleans style 4th.

Muffaletta Olive Tapenade Dip with Provolone Toasts,
…..and a lovely French Wine.
(And my souvenir spoon from New Orleans that I purchased when I was pregnant with Brodie, 1992.)

Add some Shaved Parmesan…
Although the Muffaletta Sandwich was created in New Orleans by Italian immigrants.
Click Here For: My Mardi Gras Birthday and New Orleans Soul Food Recipes

AND,
Click Here For: Our Southern Soul Food
AND,
Click Here For: Julie’s Southern Birthday Low Country Favorites

Welcome Y’all!
We are Gordon and Julie
——————————–
Making the Muffaletta Olive Tapenade Dip with Provolone Toasts
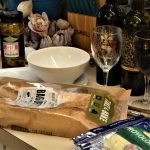

Easy Instructions……

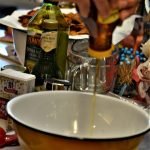
Baguettes, Muffaletta Olive Tapenade, Drained…..
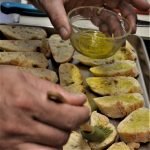
Just slice a baguette, or two and lay on a baking sheet. Add some Extra Virgin Olive Oil then top with some slices of Provolone Cheese. Before you add the cheese you could place some herbs or spices onto the bread first if you like, after you drizzle some EVOO….
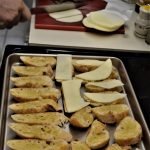
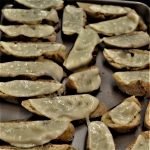
Just place into a hot oven, about 350F just for a few minutes for the cheese to melt and the bread to warm.

DELICIEUX!
—————————————

Julie’s Red, White, and Blueberry Breads


Fresh Berries, and Cupcakes Too!

Let’s not forget the Cotton, and the Magnolia’s.
——————————————

Florida Souvenir Stand
(Beach bucket full of utensils.)
———————————————
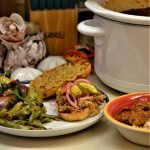
Indoor Eating
The rain drove us indoors. Here we are fixing our dinner plates.
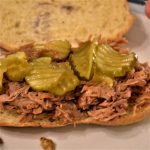
Bread and Butter Pickles topped the Tasso Pulled Pork


The Tasso Gumbo Poured over Brown Rice

——————————————-

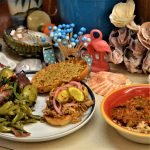
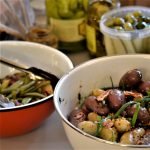
Pressure Cooker Green Beans with Pork Fat, Fingerling Potato Salad, Tasso Pulled Pork with Pickled Red Onions, and Pickles.
Gordon Pickling the Red Onions

Gordon’s Dinner Plate

Pressure Cooker Green Beans with Various Pork Fat
(We always called it Fat Back.)
The Fingerling Potato Salad

HAZE BEER ( Voo-Doo)


The most delicious Onion Sandwich Buns, and a few Pretzel Buns as well.

And Gordon’s Pickled Red Onions
My recreation of Lightening Bugs by placing mini battery operated lights into Mason Jars.
This is a childhood memory of mine. I grew up in Rome, Georgia and in the summer we would catch lightening bugs and place them in mason jars, poking holes in the lids so they could breath, and bringing them into our bedrooms at night to be our night lights.
——————————————–

Gordon’s Corn, and Tasso Pulled Pork Sandwich

Monk and Chewie


Chewie with his human, Veronica.


Our Handsome Grand-Dog Chewie
——————————————
Red, White, and Blue


Cherry……(Red)

Cupcakes
————————————–
Lychee, and Palm Seed………….(White)
—————————————
And Blueberry……….(Blue)


My, Julie’s, contribution to this grand meal, other than the idea’s for it, is my Red, White, and Blueberry Breads, and Cupcakes.
As our son Brodie said when he tasted the Tasso Pulled Pork, and the Tasso Gumbo, “This is the best food I’ve ever eaten! I want this every year from now on!” Brodie Whann
This is honestly the best tasting 4th. that we have ever had!
May every 4th. taste as good as this!
Happy Independence Day,

Julie and Gordon
———————————————
TASSO SEASONINGS
(Here is a rough guide for throwing together the spices for Tasso. This should season any 5 LB. Pork Butt for Pulled Pork, or any 5 LB. Pork Butt for Gumbo.)
3 T Kosher Salt
3 t. Cayenne Pepper
9 T Paprika
2 T Garlic Salt
2 T Freshly Ground Black Pepper
1,1/2 t. Cinnamon
1 T White Pepper
1 T Splenda Brown Sugar
2 T Garlic Powder
1 1/2 T Onion Powder
———————————————-
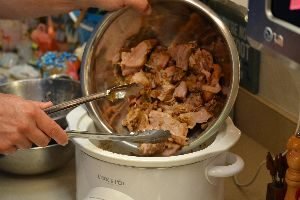
Tasso Gumbo
Cooked in the Crock Pot
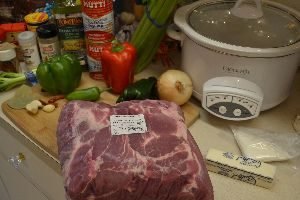
The Pork Butt/Shoulder

5 Lbs. of a 10 Lb. Pork Butt
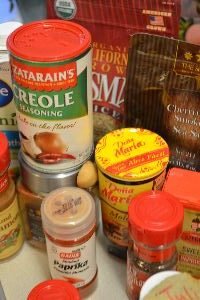
(Here are Gordon’s Tasso Seasonings that he used for the Tasso Gumbo)
Tasso Seasonings Ingredients:
3 tsp Smoked Salt
1 t. Cayenne Pepper
2 T Paprika
2 T Smoked Paprika
3 T Sweet Paprika
1 T Roasted Garlic Seasoning
1 T Ground Black Pepper
1,1/2 t. Cinnamon
1 T Onion Powder
1 tsp Worchestershire Black Pepper
1 tsp Zatarain’s Creole Seasoning
1 T Splenda Brown Sugar
—————————————————————————————-
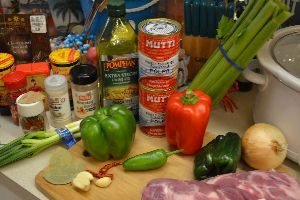
Other Ingredients:
5 Lbs. of a 10 Lb. Pork Butt
½ of a Large Yellow Onion – Sliced to a small dice
3 qts. Vegetable Broth
5-6 Garlic Cloves – Sliced thinly
2-3 Celery Stalks – Diced
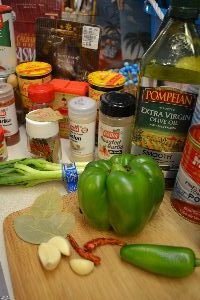
~ 3 Tbsp. Olive Oil
1 Green Bell Pepper – Diced
—————————————————————
1 Yellow Onion – Diced
1 Red Bell Pepper – Diced
½ Poblano Pepper – Diced
½ to 1 whole Jalapeno Pepper
4 Green Onions – Sliced thinly
————————————————————————–
2 Cans Finely Chopped Tomatoes
3 Heaping Tbsp Mole
2 – 3 Cups Okra – Thawed, if frozen
¼ Red Onion – Sliced
2 Dried Hot Red Peppers
3-4 Bay Leaves

1 ½ Cups Capicola Deli Meat – Diced
Basmati Brown Rice – Cooked
——————————————————
Roux Ingredients:
1 Stick of Butter
~1 Cup All Purpose Flour
Pinch of Salt and Pepper
—————————————————————–

Sweet Boy Monkee 🙂

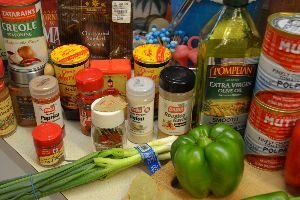
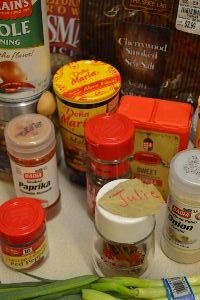
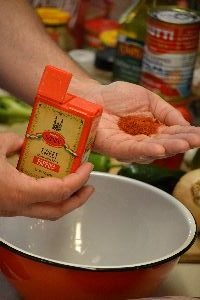
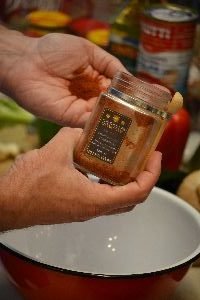
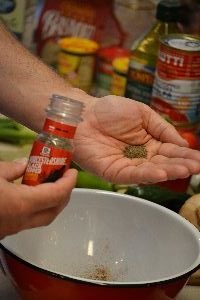
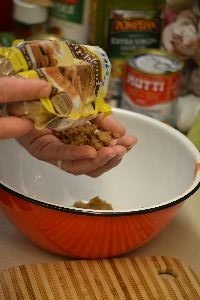
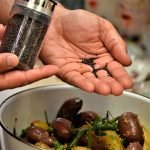
Start by measuring out your spices and placing them into a bowl as shown.
This is the smoked salt.
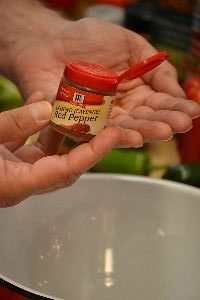
Red Pepper, and Paprika
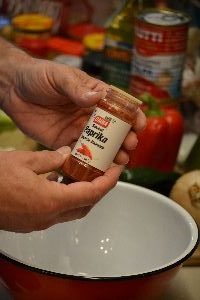
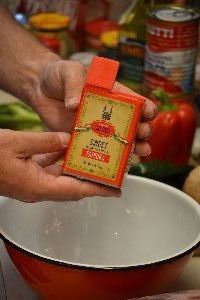
Sweet Paprika
More Sweet Paprika as I like to use a variety of spices and brands… and roasted garlic.
—————————————————————

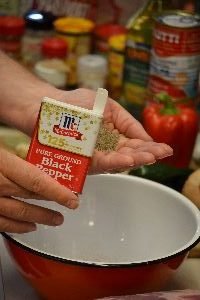
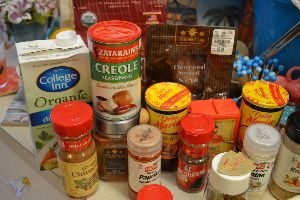
Hungarian Paprika, Roasted Garlic, Black Pepper
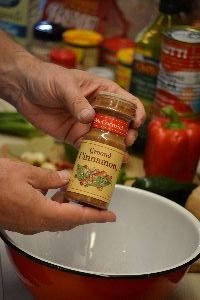
Ground Cinnamon, and Onion Powder

——————————————————————
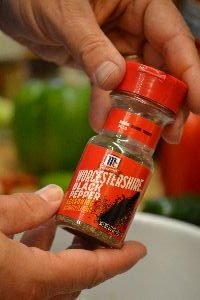
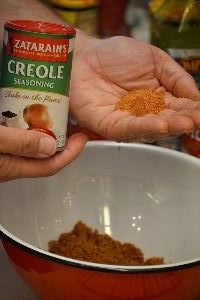
This ingredient is interesting as it has dried Worcestershire mixed in with the pepper.
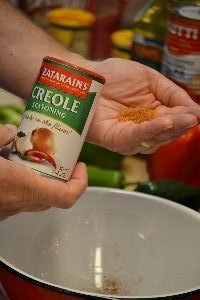
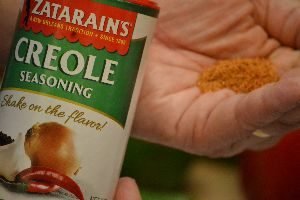
Zatarain’s Creole Seasoning
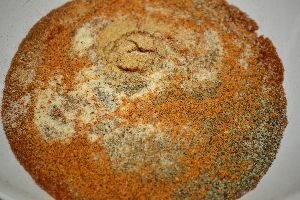
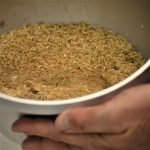
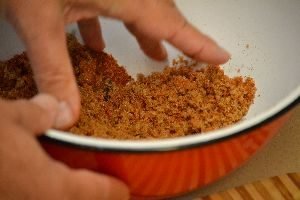
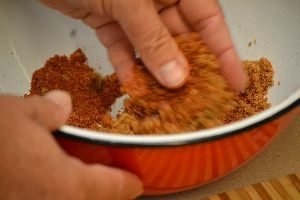
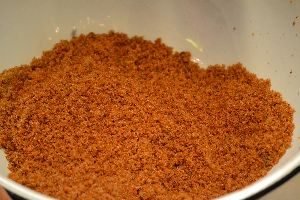
Tasso Seasonings
And there you have it… now simply mix them together
Tasso Seasonings!
——————————————————–
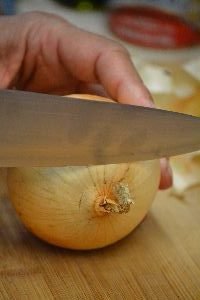
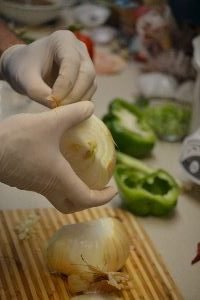
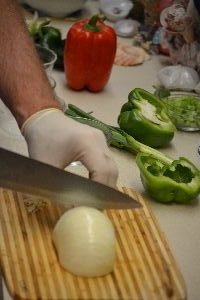
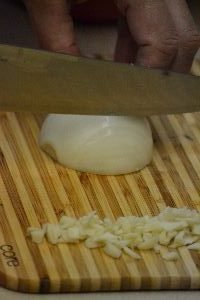
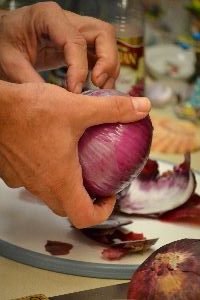
Slice your onion starting with the top or non-rooted end. Slice starting about ½ an inch back.
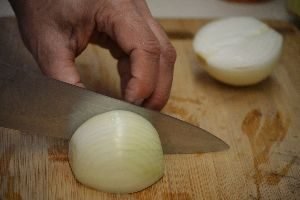
Then slice it in half and peel the outer skin off leaving the white flesh. With the root end to you, slice
Length wise down the onion at ¼ inch or less leaving the root intact. Doing this will keep the onion
together. Save the other half of the onion for later with this recipe.
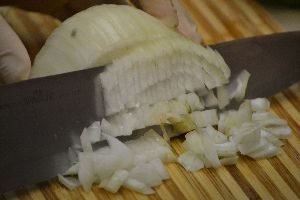
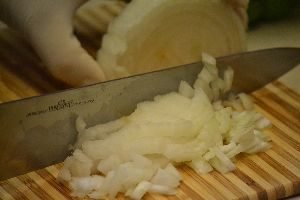
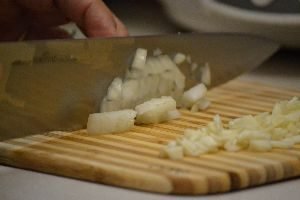
Slice your onion diagonally with your cutting board in 1/2 inch slices.
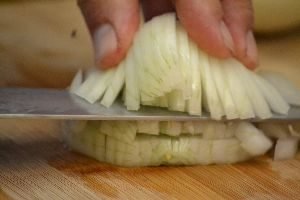

Finally, slice down creating a small dice of onion pieces as shown.
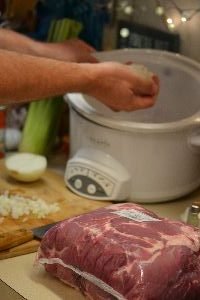

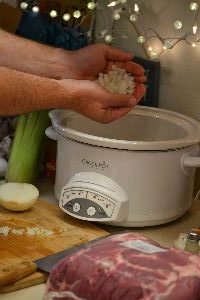
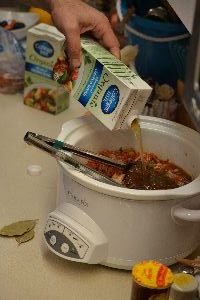
Place your diced onion into your slow cooker.
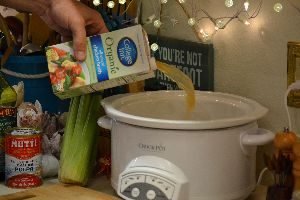

Now, add your vegetable broth, or stock to the slow cooker pot.

Turn on your slow cooker to medium.
——————————————————————
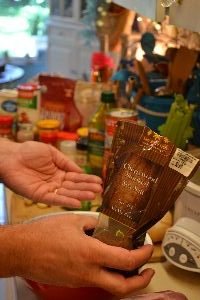
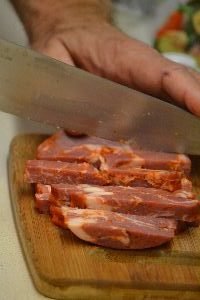
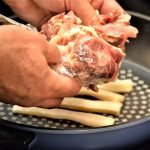
Time to prepare the pork!

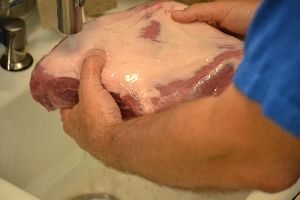
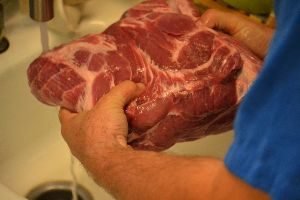

Rinse off any blood still on or around the meat.
Using a paper towel, pat the meat dry and place on your cutting board.
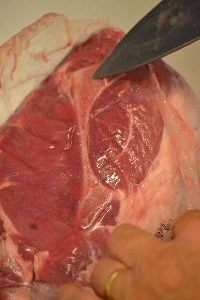
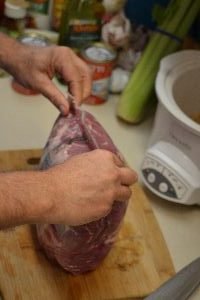
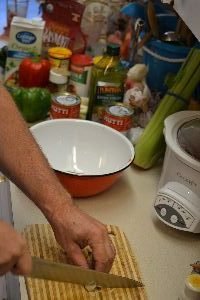
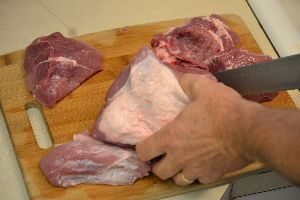
Here is the shoulder bone within this cut of meat.

Find the shoulder bone and using your Chef Knife, cut to the side of it.

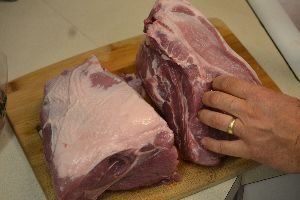
Basically, cutting the shoulder in half as shown…nice picture Julie!
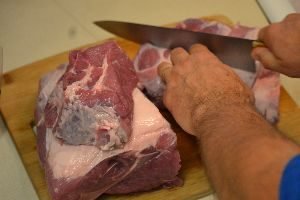
Now, slice the half into smaller portions about a cup in size.
You can also cut away some of the fat if you like.


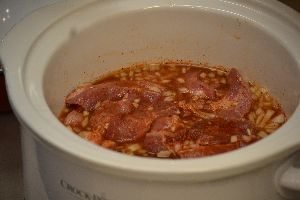
Place the chunks of pork into the slow cooker.
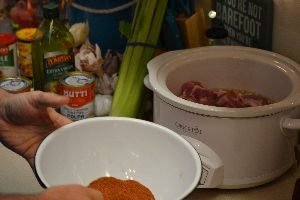

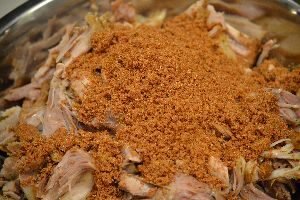
Add about 3 to 4 Tbsp of your Tasso Seasonings into the slow cooker and stir well to combine.
————————————————————————————————
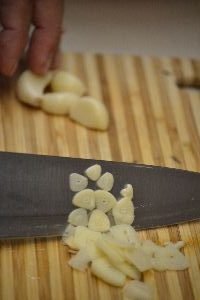
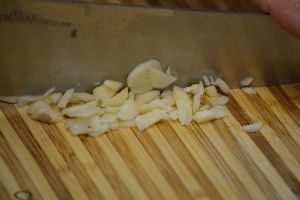
Slice a few cloves of garlic thinly as shown and place them into the cooker.

————————————————————-

Place your lid on the slow cooker and cook for about 2 hrs.
————————————————————————————-
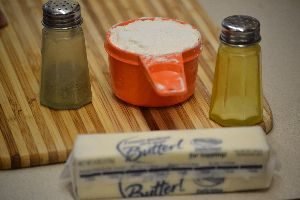
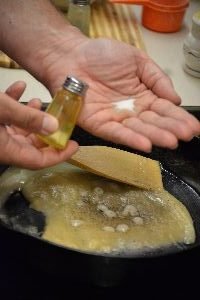
Now for the Roux!
Here you need equal part butter, to flour as shown, with a little salt and pepper.
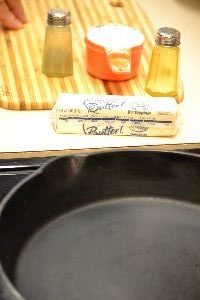
I find a cast iron skillet works best to make the roux as it has even heat and stays hot longer than most
pans. This is a slow process, so take your time.

Over low heat melt your butter.


When melted, add your flour.


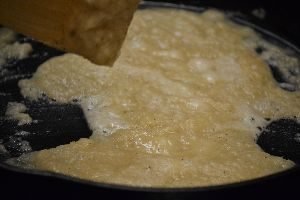
Using a flat wooden spatula, combine the flour and butter… you should now have what looks like wet
sand.
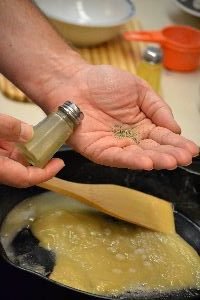
Add some pepper, and salt to the roux.

Continue to stir the roux evenly.


Here is another great shot by Julie which shows the wet sand look of the roux.

Again, continue to stir.

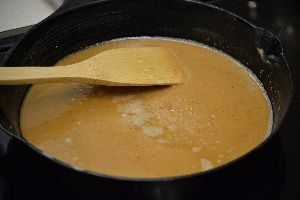
Now, you see the roux start to change color!

Continue to stir the mixture evenly.

The darker the roux the less thickening power it has, but the better tasting it becomes. I like taking it to
a dark tan to almost red color as shown.

Remove from the heat and place your liquid gold into a bowl to use later.
————————————————————————————-
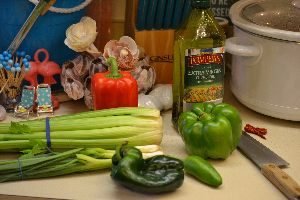
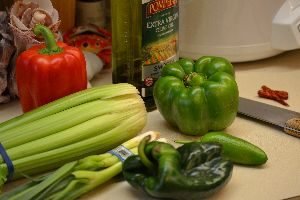
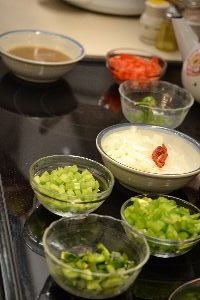
Here are the vegetables you will be slicing next.
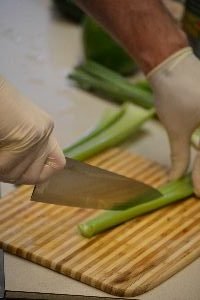
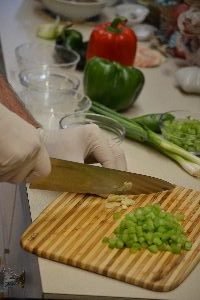
Wash your celery stalks well and slice off the white ends as shown. Then slice them length wise in order
to make a nice dice.
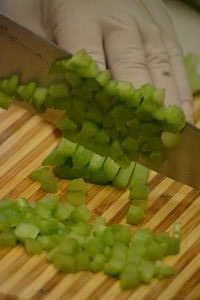
Now, bundle them together and slice them into dice sized pieces as shown.

Add some olive oil to your cast iron skillet as shown, and turn up the heat to medium.
Slice up the rest of your garlic cloves, thinly.
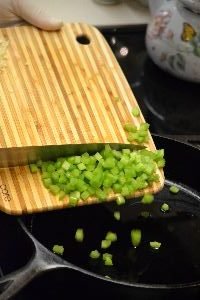
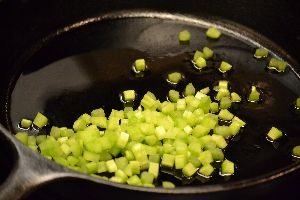
Add your diced celery to your skillet.
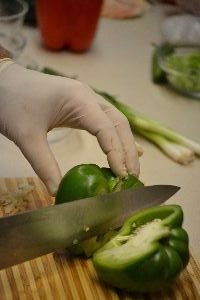
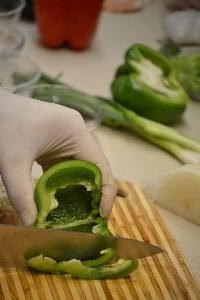
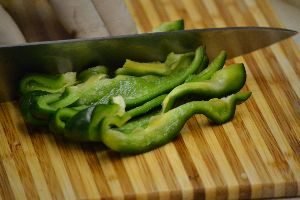
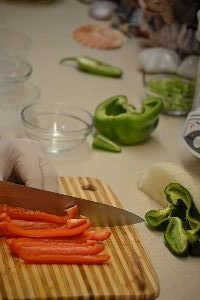
Slice your green bell pepper in half, and remove the seeds.
Slice only half the pepper into slices as shown.
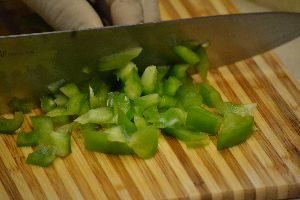
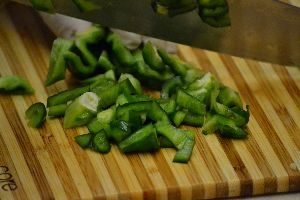
Now slice into diced sized pieces.
Remember to stir your celery!
Slice your onion as you did before with the root end toward you.
Now, slice down to make the dice.
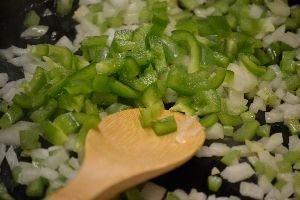
Add your bell pepper, and onion to the skillet and stir.


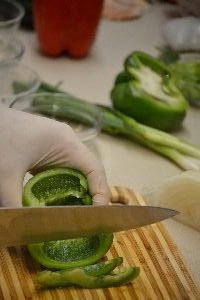
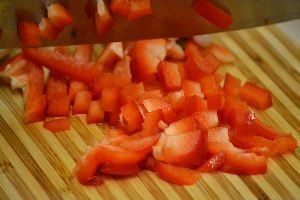
Slice half of your red bell pepper the same way you did the green. This is the most efficient way to slice
a bell pepper as it leaves very little waste. The rest of your peppers will be placed in later to give the
dish some crunch.
————————————————————–


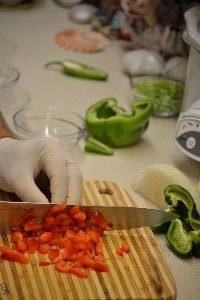
Add your diced, red bell pepper to the skillet.

Cut the Poblano pepper in half and slice it the same way you did the other peppers.
Slice into strips, then dice.


Now, add them to the skillet, and stir well to combine.
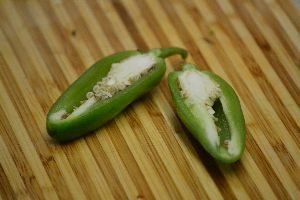
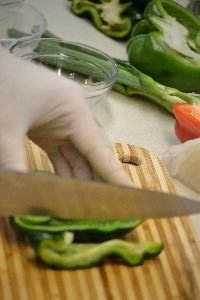
Slice your Jalapeno pepper in half as well and use as little or as much as you want.
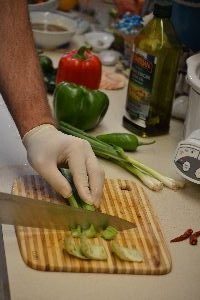
This is why I am wearing the gloves.. as the pepper’s oil can get under your nails and onto your skin and
create a nice burn if you get it into your eyes.
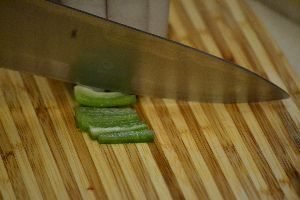
Again, slice the pepper lengthwise thinly and then in the opposite direction to make small diced pieces
and place them into the pan.
Stir everything well to combine.

Add some of the tasso seasoning to the mixture to give it some nice flavor as well.
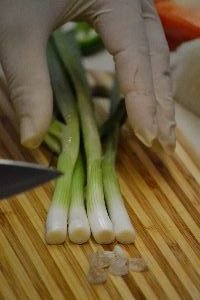
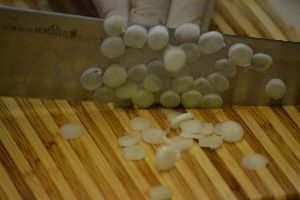
Slice the root end off your green onions, then slice them thinly as shown.

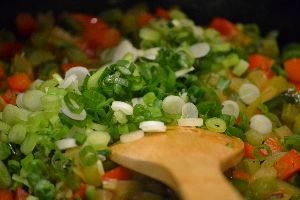
When done, place as much or as little into the pan with the other vegetables and stir.
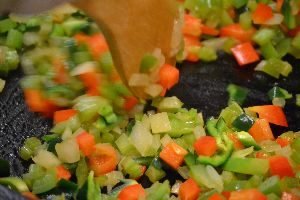
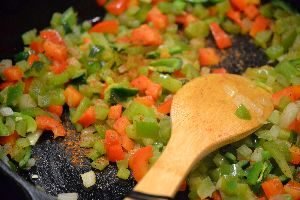
Sautee the vegetables until they are cooked through and slightly browned.

Slice the rest of your peppers and onion the same way as you did before, and place them in small
containers. These will be used later in the gumbo to give it some crunch.
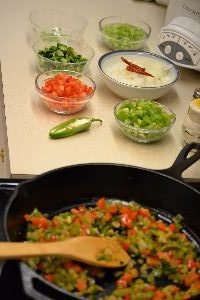
I think my vegetables are done now.


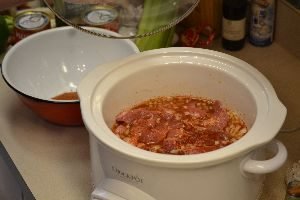
Checking the meat in the slow cooker, looking for its doneness.

Giving it a quick stir.
Nice closeup Julie!
———————————————————
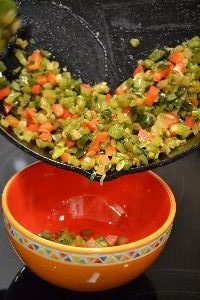

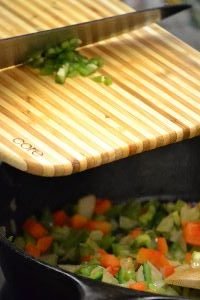
Remove the vegetables from your skillet and place in a bowl for later.
———————————————————————————————-
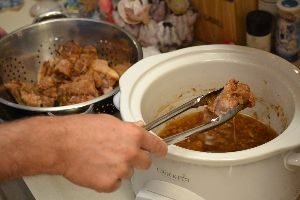
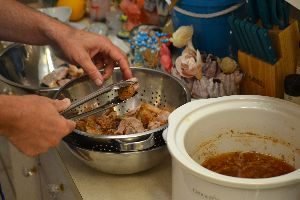
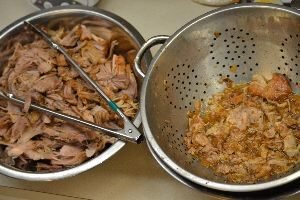
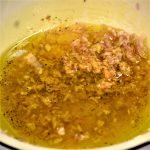
Place your colander into another large bowl to catch the drippings. Remove the meat from the slow
cooker and place into the colander to drain.

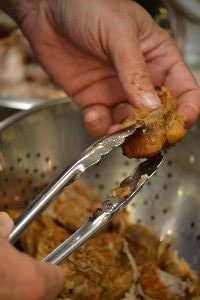
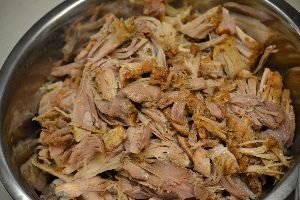
Here is a nice closeup of the meat and how it is so tender and Juicy!
Pull the larger chunks of meat apart making them bite size. Be sure to also remove any fat chunks as
well.
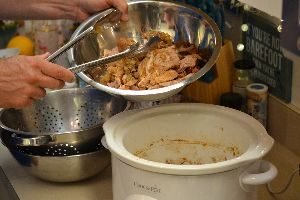
Skim off the fat from the liquid left in the Crock Pot using a spoon.
When done, place your meat back into the sauce. Don’t forget the drippings the meat left behind. Add
these good juices back into the Crock Pot as well.
——————————————————-
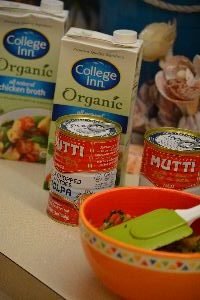
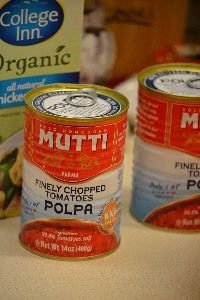
Open your two cans of finely chopped tomatoes.
Here, I am ready for the next phase of cooking the gumbo.

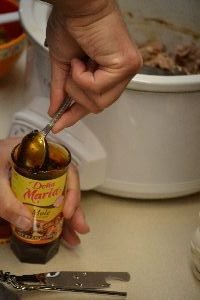
Open the Mole and place a few Tbsp’s into a bowl with the vegetable broth and some directly into the
Crock Pot with the meat. I was worried the Mole might not get evenly dispersed, so I tried it both ways.

Pour some Vegetable Stock into a small bowl shown here with the Mole.
——————————————————————————————

———————————————————
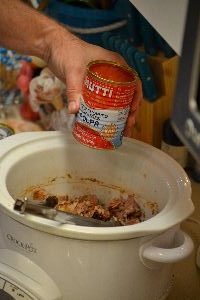

Pour your canned tomatoes into the Crock Pot.


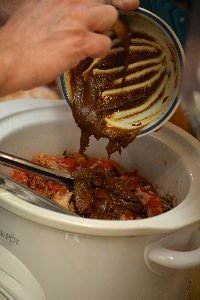
Now, add your sautéed vegetables and mix your Mole in with the vegetable broth.
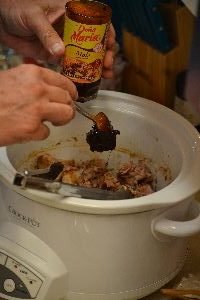
Spoon in your Mole from your bowl into the Crock Pot.
Add more of the Vegetable Broth to the Crock Pot as Gumbo is supposed to be a little thicker than soup.


Give it a good stir with your tongs.
Looking pretty good!

—————————————————————-

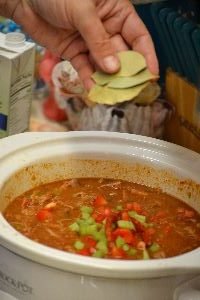
Add your Red Hot Peppers if you like it a little more spicy hot. Add your Bay Leaves for a little more
flavor to the Gumbo. Also, begin to add your fresh red and green bell peppers.


Then add your onions, and Poblano to the pot.
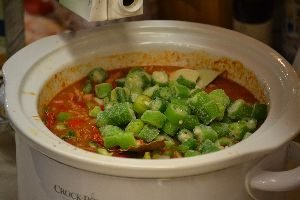

Now, add your okra.
And more vegetable broth if needed.
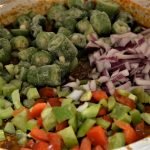
Add your red onions to the pot and stir well to combine.


Looking pretty good right now!
—————————————————————————————-

Here is a nice picture of the Capicola Ham.
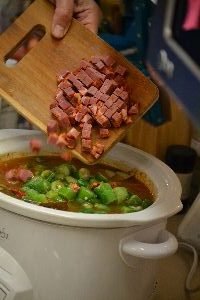
Slice it all into medium diced sized pieces, and add them to the pot.
This is an Italian ham.


Give it all a good stir and cook for another 45 min.

While it is cooking, now is a good time to cook the rice.
Once the rice is done cooking, you are ready to eat!
——————————————————————————————-

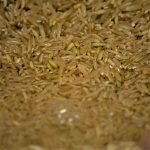
Basmati Brown Rice
Cooking Rice
Using a rice cooker is a great way to cook your rice. The cooker is on a timer and you just have to get
the correct amount of water and rice to make perfect rice for your next meal. This method requires no
measuring utensils.
Pour a good amount of rice into the rice cooker bowl. Now, rinse your rice by pouring enough water
into the bowl to cover it. Run your clean fingers through the rice and pour out the water…and repeat
until the water runs clear. You are rinsing off the coating.

Now, fill water into the bowl until it is one knuckle above the rice as shown. This trick will work in any
size bowl with any amount of rice… which is why you don’t need any measuring utensils.

Place the rice cooking bowl into the rice cooker and top with the lid. Turn on the rice cooker and wait
for the click or the power goes off and then you are done. No peaking during this time or you will mess
up the rice. It will generally take about 15 to 20 min. to cook!
Enjoy!
——————————————–

The Rice Maker and the Crock Pot
——————————————-

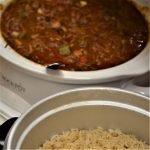
Tasso Gumbo, and Brown Rice
——————————————–
Tasso Pulled Pork
Seasonings:
3 Tbsp Kosher Salt
2 Tbsp Cayenne Pepper
1 Tbsp Creole Seasoning
2 Tbsp Black Pepper
1 Tbsp Cinnamon
1 Tbsp White Pepper
¾ Cup Splenda Brown Sugar (or any brand you prefer)
5 Tbsp Paprika
1 Tbsp Garlic Powder
1 ½ Tbsp Onion Powder
————————————–

Ingredients:
1 Pork Butt
1 Medium Onion – Chopped
4 Tbsp Garlic – Minced
4 Tbsp Olive Oil
Vegetable Stock
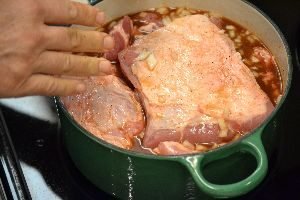
Slice your Pork Butt into chunk sized pieces as shown
You can slice off some of the fat if you like and be sure to leave in the bone as is gives extra flavor to the dish.

—————————————-
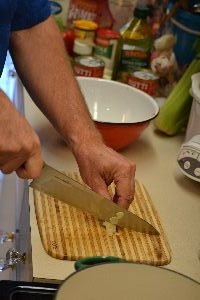
Chop your onion and garlic into small pieces. The thinner you make your initial slices, the thinner your end product will be. You want them somewhat small as you want them to disappear into the meat.

Chopping the Garlic
Chopping the Onion
———————————————

In a small bowl mix all your seasonings together.
When done, taste them to ensure they are to your liking.
——————————————-


In a large stewing pot, add your olive oil and turn the heat onto medium.
When the pot is up to temperature, add your onions.
Stir the onions periodically for even cooking. After they have become translucent in about 7 min. time add your garlic and stir.
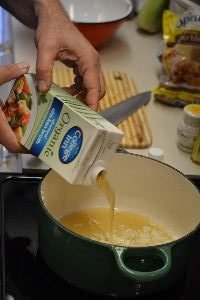
Adding the Vegetable Stock
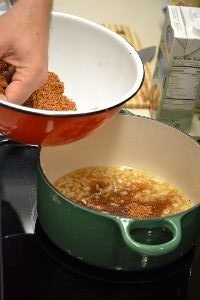
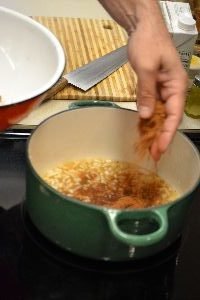
Now, add ½ of your seasonings to the garlic, and onions and stir to combine. After just about 1 Min. add just enough stock to the pot to make a light soup.
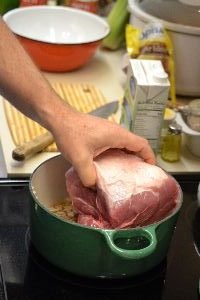
Then it is time to add your meat, and more stock if needed so that the meat is just about floating.

—————————————-

Place your covered stew pot onto a cookie sheet just in case it boils over and bake it at 400’F for about 1 1/2 hrs.

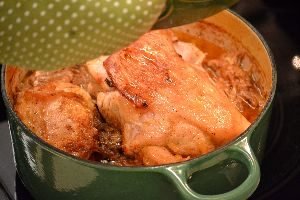
After the time is up, check to see if the pot needs any liquid and see how the meat is coming along.
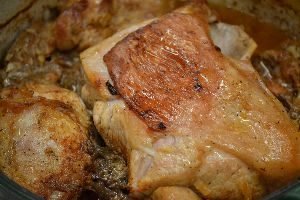

Adjust as needed and place back in the oven for about another hour or so, or until the meat reaches a temperature of 155’F.

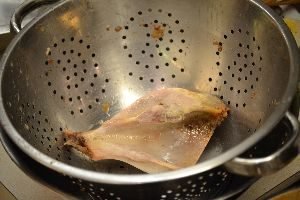
Remove the pot again from the oven, check the temperature and basically check to see if the bone falls away from the meat. This is a great indication that the cooking process is complete.
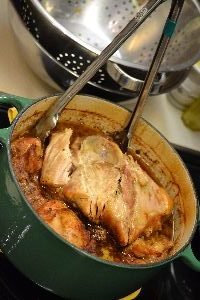
Using a colander, remove the meat from the pot using tongs.
Once the meat has been removed, place the pot on the stove top and begin to slowly reduce the liquid to a sauce consistency.
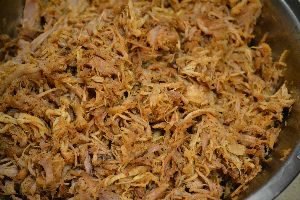
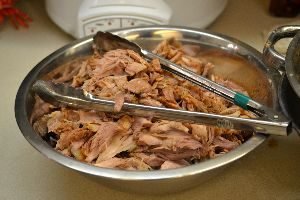
While this is happening, in another large bowl begin to remove the fat from the meat placing the good meat into the bowl. This is also a good time to shred the meat as shown.
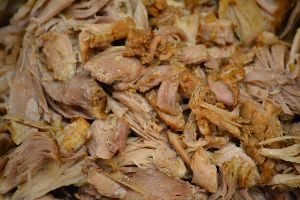
When your meat is completely shredded, add the rest of your seasonings to the meat and mix well. Taste the meat to see if it needs any other seasonings. You may also want to add more brown sugar or other seasonings as needed, as I did.

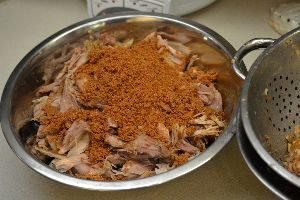

A little stock may also be needed to keep the meat moist and to also help distribute the seasonings.

You can place the pork back into the pot to keep warm in the oven while everything else cooks.

Grab some nice buns and load them up!
Enjoy!
————————————–

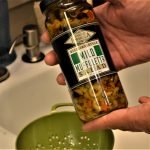
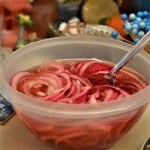
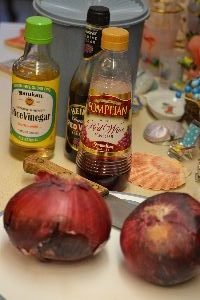
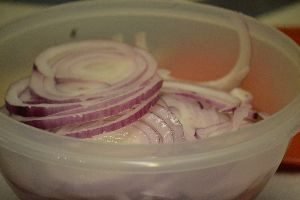
Pickling Red Onion
Pickled Onions
Pickled Onions are a great accruement to the Tasso Pulled Pork.
They are easy to make and last a long time in the refrig just like pickles.
Here I am using Red Onions, but any type will do.
—————————————-
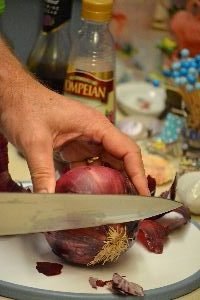
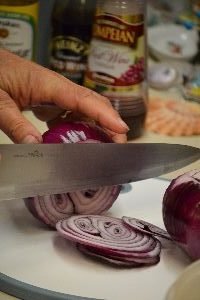
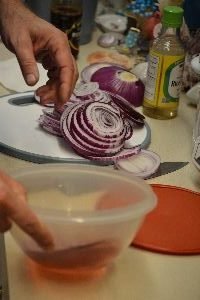
Peel and slice your onion thinly into rounds.


—————————————————
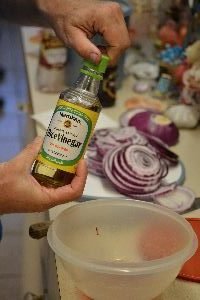

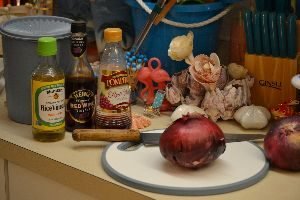
Next, use enough vinegar to just cover the onions. Here, I am using a rice wine, and Red Wine vinegar, but any vinegar will due.

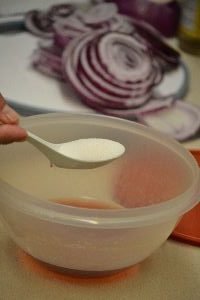
Place them into a Tupperware bowl that has a lid.
Add about 2 Tbsps of sugar to the mixture and stir well.
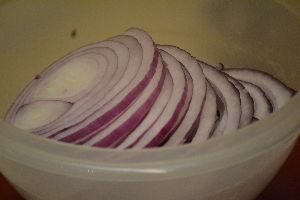
Seal the lid on the pickled onions and place them into the refrigerator to let the pickling process begin. After at least 4 hours, your onions will be pickled. The thinner you slice your onions, the faster they will pickle.
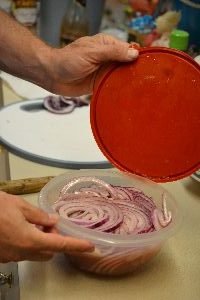
Into the Fridge they go!

——————————————
Pressure Cooker Green Beans, and Fingerling Potatoes

Potato Salad first, then Pressure Cooker Green Beans… we did them together so some of the pics are not
in order….
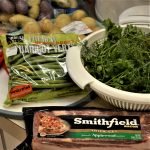
Ingredients:
Fresh Green Beans – we used Haricot Verts – rinsed well
Fingerling Potatoes – Red and Yellow – rinsed well
Thick Cut Apple Wood Smoked Bacon – cooked until brown
Dressing Mixture:
One Large Whole Shallot Thinly Diced, as shown
Honey
Roasted Garlic Horseradish Mustard
Florida Salt Blend with spices… regular salt would work as well
Freshly Ground Black Pepper
Extra Virgin Olive Oil
White Wine Vinegar
————————————-
Garnish with Yellow, and Black Mustard Seeds
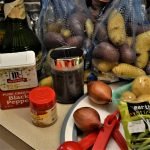
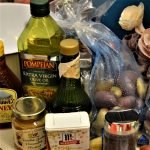
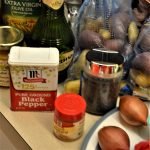
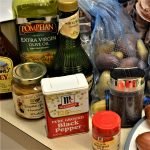
All of the Ingredients
—————————————————–
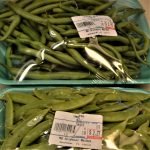
All the Green Beans

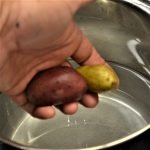
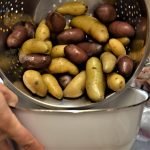
For the Potato Salad, start with the rinsing of the Fingerlings.
Rinse your potatoes well under running water, then scrub them with your hands or a vegetable scrubber.


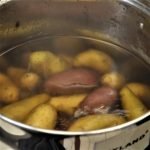
Put enough water in your large pot to cover the potatoes…and add about a Tbsp of salt.

Add more water if necessary.

Turn the pot on to boil, cover and boil until tender… about 20 min.
———————————————-

Using a cast iron skillet if you have one…


Cook your bacon until well browned…

As shown, and place on paper towels to catch the grease.


Repeat until all the bacon is cooked.
When your potatoes are ready, they should be able to be poked with a fork and it should easily go in.


Carefully place your potatoes into a colander and rinse with cold water until cool…. Doing this will stop
the cooking process.


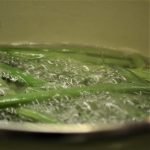
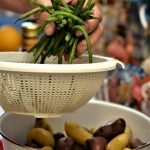
Now, boil your French Haricot Verts Green Beans in water with a small amount of salt. They will take
about 10 to 15 min. to cook.

———————————————-


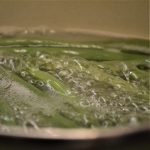
When the green beans are tender, but still have a slight crunch to them, remove them and place them
into a colander and rinse with cold water to stop the cooking process.


Here we cooked the other batch of French Haricot Verts Green Beans.


Potatoes cooling, and still cooking the bacon. 🙂
————————————————

————————————————–


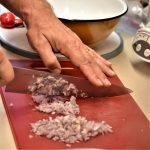
Slice your Shallot’s top off, then slice in half. Now, peel off the outer skin of the shallot.
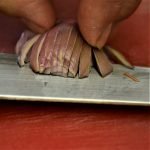
Using your knife, slice straight down length wise, then turn your knife and slice down the opposite
direction making thin diced pieces.
—————————————————
Still boiling more Haricot Verts…

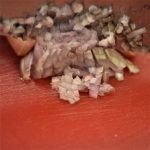
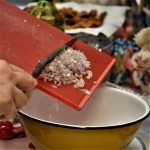
Slice the other half of your shallot the same way and add them all to a large bowl as shown.
———————————————
Making the dressing is easy so get creative… if you like it sweet… add more honey. Here I started out
with about 2 Tbsp. adding it to the shallots.

————————————————-

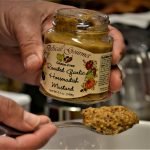
Now, add some mustard to help with the emulsification… I will explain later. A little goes a long way, so
I added about 1 Tbsp. (You can use any tangy mustard you like.)
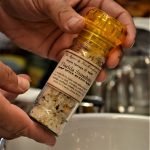

Add some salt… about a half tsp or so… here we are using a nice Florida blend……


…as well as Table Salt, and Freshly Ground Black Pepper
——————————————
Spend the money and get a nice Extra Virgin Olive Oil… I added about a cup and a half to the bowl
Remember, you can always add more later if needed.


————————————————


I then added some White Wine Vinegar… you need the acid to make the dressing taste good. Here you
could use most any type of vinegar… I just like White Wine. I added about 1/2 half of a cup.
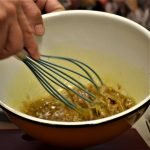
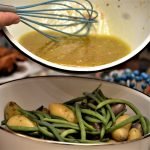
Mix well with a whisk. The mustard in the mixture will help emulsify or keep the mixture mixed
because the oil like’s to separate from other liquids. The mustard keeps everything mixed together… at least for a
little bit. Taste what you created! If you like more sweetness, add some more honey. If you think it
needs more acid, add more vinegar. Let your creativity guide you until you like how it tastes.
Add your Potatoes, and Green Beans to the bowl.
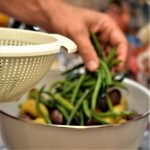

And toss them all together well!
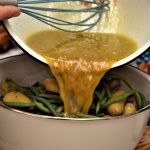
Then pour the dressing over the green beans, and potatoes.
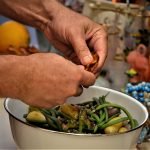
Crumble in the Bacon…..

Then add the Herbs…..
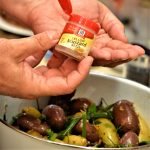
Sprinkle your….
Yellow, and Black Mustard Seeds
Perfect!
————————————–
Pressure Cooker Green Beans, and Fat Back

Ingredients:
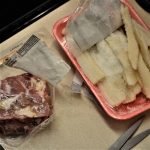
Pork Sliced Fatback – Rinse to remove some of the salt
Salted Pork – sliced into chunks if needed
Green Beans – Cleaned, and rinsed
See all the salt in the Fatback?

Place some of the Fatback slices, and most of the Salted Pork into a large skillet.
Cook using medium heat until the Fatback slices render some of their fat, and the Salted Pork get a little
brown as shown.


———————————————-

Here are the different beans we used… string and snap!

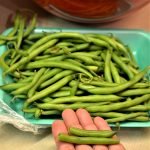
Peel off the long string as shown, from the stem of the string bean. This is done as it can be a little
tough to chew.

Nice close up Julie! 🙂 Thanks, Gordon!
Snap off or cut off the stem from the snap beans, and snap them in half if needed due to their length.

Rinse all the beans well … then drain as shown.


Place them into a large bowl for holding.
——————————————


Fatback, and Salted Pork ready, along with the Pressure Cooker.
—————————————–


Add about three quarters cup of water to the pressure cooker pot… or as per directed.

Add your Green Beans, then Fatback, and Salted Pork to the pot.

Lots of Flavor!


No need to mix anything here… then place the lid on as directed, and the steam valve.

The valve on top is to let a little, or as much steam out as needed. Turn on the heat to high and cook for
about 10 min. This method takes less time than conventional cooking. After the time is up, remove
from the heat. After the steam has stopped from coming out, using gloves lift off the valve from the
steamer. When all the steam has come out and the pressure has gone, you can finally undo the lid.
Mix the ingredients and enjoy!
——————————————

Left: Our Pressure Cooker Green Beans.
Right: Our Fingerling Potato Salad
—————————————

Julie’s Red, White, and Blue Breads
……..and Muffins.
I wanted to make the desserts for our July 4th. and I knew that I wanted to make something using the colors, Red, White and Blue. It’s easy to come up with something RED, and something BLUE, but something WHITE? I really couldn’t think of anything WHITE. Not at first anyway. I had decided on 3 different kinds of breads. I wanted them to be colorful and delicious. The RED was easy, I decided on Cherry. The BLUE was easy, I decided on Blueberry. Now for the WHITE……

Julie at the Asian Supermarket
I always get inspiration at the ethnic food markets. Here we are shopping and looking for inspiration.

Hot Chicken Flavored Squid? 🙁

Gordon found something he wanted to eat and take into work for lunch.
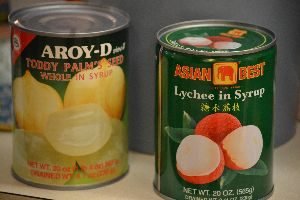
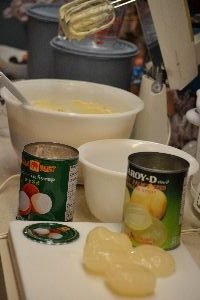
And then I found what I was looking for…….
Toddy’s Palm’s Seeds Whole in Syrup, and I do love the Lychee’s!
Done! I found my WHITE!
——————————————–
But first the RED
Cherry……(Red)

Start out by buying fresh Cherries

You want to de-pit them and remove their stems.
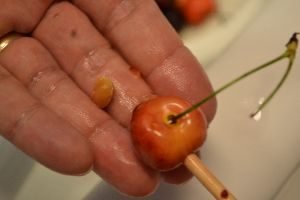
A Chopstick is a great tool to use.
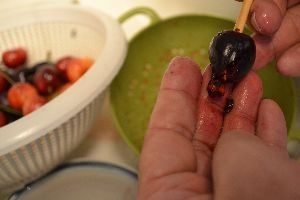
Just insert the chopstick down into the Cherry and push the pit out.
———————————————-

The Ingredients:
(I did triple this recipe. I always make extra to give as gifts. Or, so the guests can take some home with them. And we do so love leftovers. 🙂
I made one version with Maraschino Cherries, I then made a second version with fresh Cherries, as well as a third version with fresh cherries for cupcakes as well. But, here is a single recipe of ingredients.)
—————————————-
1, 10 oz. Jar Maraschino Cherries, Drained (or about 20 – 25 Fresh Cherries Pitted.)
3 Cups All Purpose Flour
1/2 t. Baking Powder
1/4 t. Baking Soda
1/4 t. Salt
1 Cup Butter or Margarine
1 Cup Sugar
5 eggs
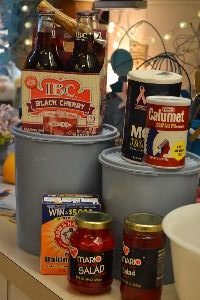
1 1/2 -2 Cups Cherry Flavored Soda ( recommended IBC Black Cherry Soda as it will turn the batter a beautiful pink. But I also used a Cherry Flavored Coca Cola, which was delicious but did not turn the batter a pretty color.)
———————————————

Use a Mixer to cream the butter/margarine, and sugar, once the butter has softened. You also want your eggs to be more at room temperature when you do this.
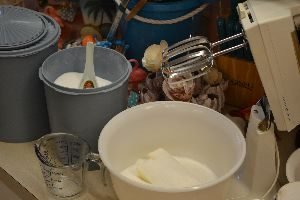
Ready to cream the butter and sugar in the electric mixer. Beat at med/high speed until light and fluffy, usually about 2 minutes or so. Then you want to add the eggs, one at a time, beating until they are well blended into the mix. Beat after each egg until they all have been added.
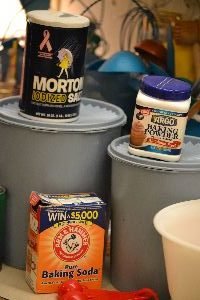
In a separate bowl add the dry ingredients. Flour, Baking Soda, Baking Powder, and Salt.

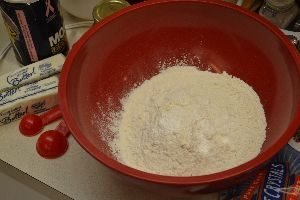
I like to use a whisk to mix all the dry ingredients together. (Right)
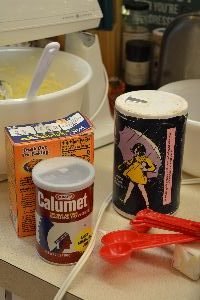
Baking Soda, Baking Powder, Salt, and Measuring Spoons
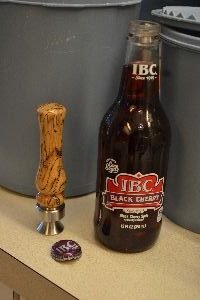
IBC Black Cherry Soda
( I do so recommend this!)

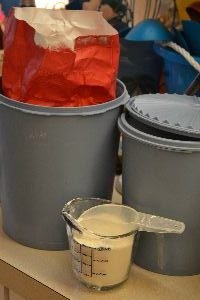
At this point in the mixing process, you want to add the dry mix to the creamed butter and sugar, and eggs. All the while mixing until everything is combined. Add about 1/3 dry ingredients first, then when blended, add another 1/3 , etc. Until all the dry mix has been added and blended. The mixing setting for this should be at a low/med on whatever mixing appliance you are using.

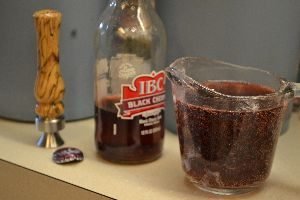
Once all the dry ingredients have been blended into the butter, and sugar, and eggs, now you add the IBC Black Cherry Soda.

Continually mixing on med/high all the while.


Once the batter is ready it is time to add the cherries. Whether they be fresh, or Maraschino.
Here I added the entire jar of Maraschino Cherries, drained.

The Batter is Beautiful!
———————————————
Make sure your oven is preheated to 300F.
Bake Loaf Pans for 1 Hour, to 1 Hour 15 minutes. (Or less, depending on your oven.)
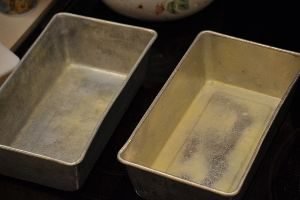
You also want to use a cooking spray to coat your loaf, and muffin pans. I did not flour them though, although that is recommended with a lot of baking. There are baking sprays that have flour in them that are perfect here!
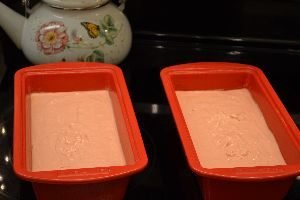

Just spray the pans you intend to use.
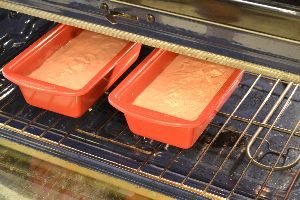

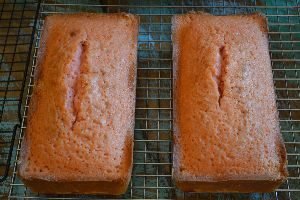
Here I am baking 2 Loaf Pans with the Maraschino Cherry Batter.
—————————————————
The other red loaf pan, and the muffin pan, (top right) will house the fresh cherry batter which I am about to make next.


Same Recipe as Above……
Except this time I used a Cherry Coke instead of the ICB Black Cherry Soda.


The taste may have been nice, but the color of the batter was still a yellow color and not a beautiful pink.

Fresh Cherries are already placed into the muffin pan.


Then pour the batter over top, filling not quite to the top of each muffin cup.
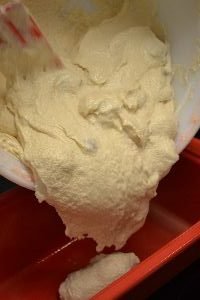

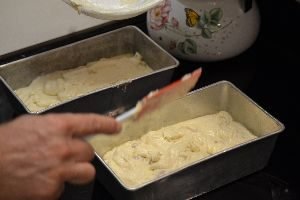
Now fill the greased Loaf Pan with the batter, about 3/4 high.

Now bake in a 300F oven for about 20 – 25 minutes for the muffins, and an additional 20 minutes for the Loaf Pan.
NOTE: Every oven is different! Whenever I bake anything, especially something NEW, I make myself available to be around the kitchen to keep an eye on this stuff. Just use baking times as a suggestion, and NOT a RULE!

Right out of the oven and turned upside down because they are so beautiful!

Cooling on the Rack
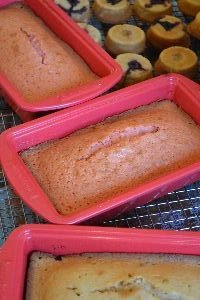

Do Not Remove Until Thoroughly Cooled
Let Loaf Pan sit on rack a good 10 – 15 minutes before removing from pan. Then have bread sit on rack a good 40 minutes until thoroughly cooled.
——————————————–
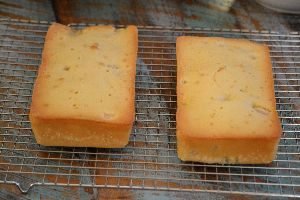
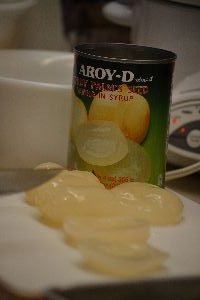
Lychee and Palm Seed………….(White)
Now we are to the WHITE of my RED, WHITE, and BLUE Breads.
Palm’s Seed, and Lychee’s

The recipe is exactly the same as above.


Luckily I have plenty of Loaf Pans.

Creaming the Butter/Margarine and Sugar Together.


Here are good shots of adding each egg and blending before adding the next egg.


Ready for the Dry Ingredients

THE Dry Ingredients
Using a Cooking Oil Spray with Flour in it.
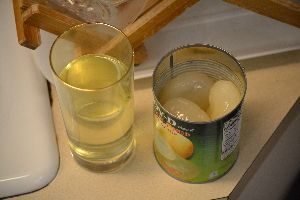
-1 1/2 – 2 Cups of the Liquid
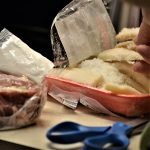
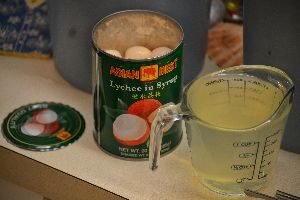
The cans of Palms Seed and Lychee come with lots of syrup. That syrup is very sweet and delicious and can be used in other recipes that call for it. But here we do add it to our mixture for our white loaf bread.
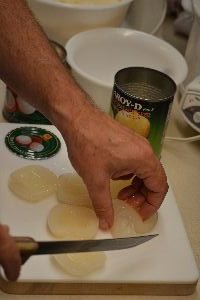
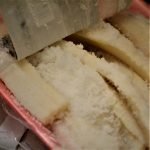
Here Gordon is chopping up the Palms Seed into chunks for me.
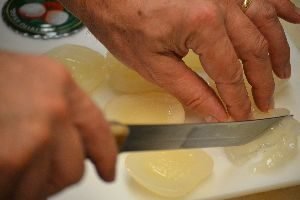
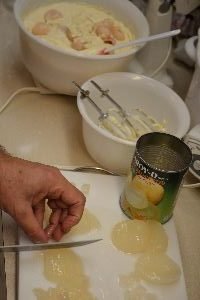
He also chopped up the Lychee’s as well and added them to the batter.


Now, pour the batter into the loaf pans.
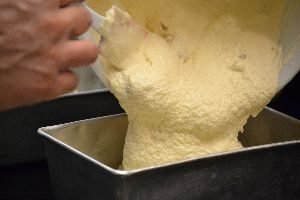
It is a beautiful WHITE batter.
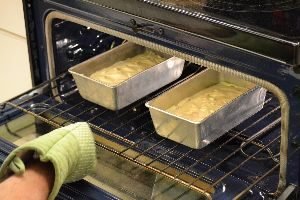
Now, into the oven they go in two loaf pans into a 300F oven for at least 1 hour.

Ah, out they come! Set onto a cooling rack for about 15 minutes while in the loaf pan. Then remove from loaf pan and let sit on the cooling racks a good 40 minutes longer.
——————————————
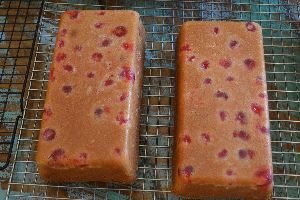
And Blueberry……….(Blue)
The Blueberry Breads are Absolutely Beautiful!

Again, the ingredients are the same as above.


Creaming the Butter/Margarine, and Sugar, and adding the Eggs.

——————————————-

Fresh Blueberry’s

IBC Black Cherry Soda


The Beautiful Batter


Adding the Rinsed Blueberry’s to the Mixture


Stir Together By Hand


Add to already greased and floured Loaf Pans.

Now place into a 300F oven for about an hour.
And I think you know the rest……. 🙂
——————————————
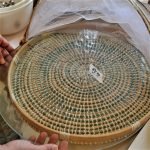
What you see here is a piece of glass that Gordon bought at a yard sale for who-know’s why years ago? Well, it fit perfectly over this basket thingy that I bought on sale. I wanted to place my breads inside it. Gordon producing the glass liner, was perfect!! 🙂
Now my breads can sit inside without getting crumbs everywhere inside the basket.
—————————————–

Gordon and Julie

Brodie and Julie
Why there are so many Mason jars all around us is a mystery to me? 🙂
It started raining so badly that we ended up here.

And Chewie Needs a Drink
———————————–

My Ability to Stack Dishes…. all from the 4th.! 🙂
———————————————-
Happy 4th. of July!,
Gordon and Julie