Julie’s Beach House
YEARS IN THE MAKING……
August/September, 2018
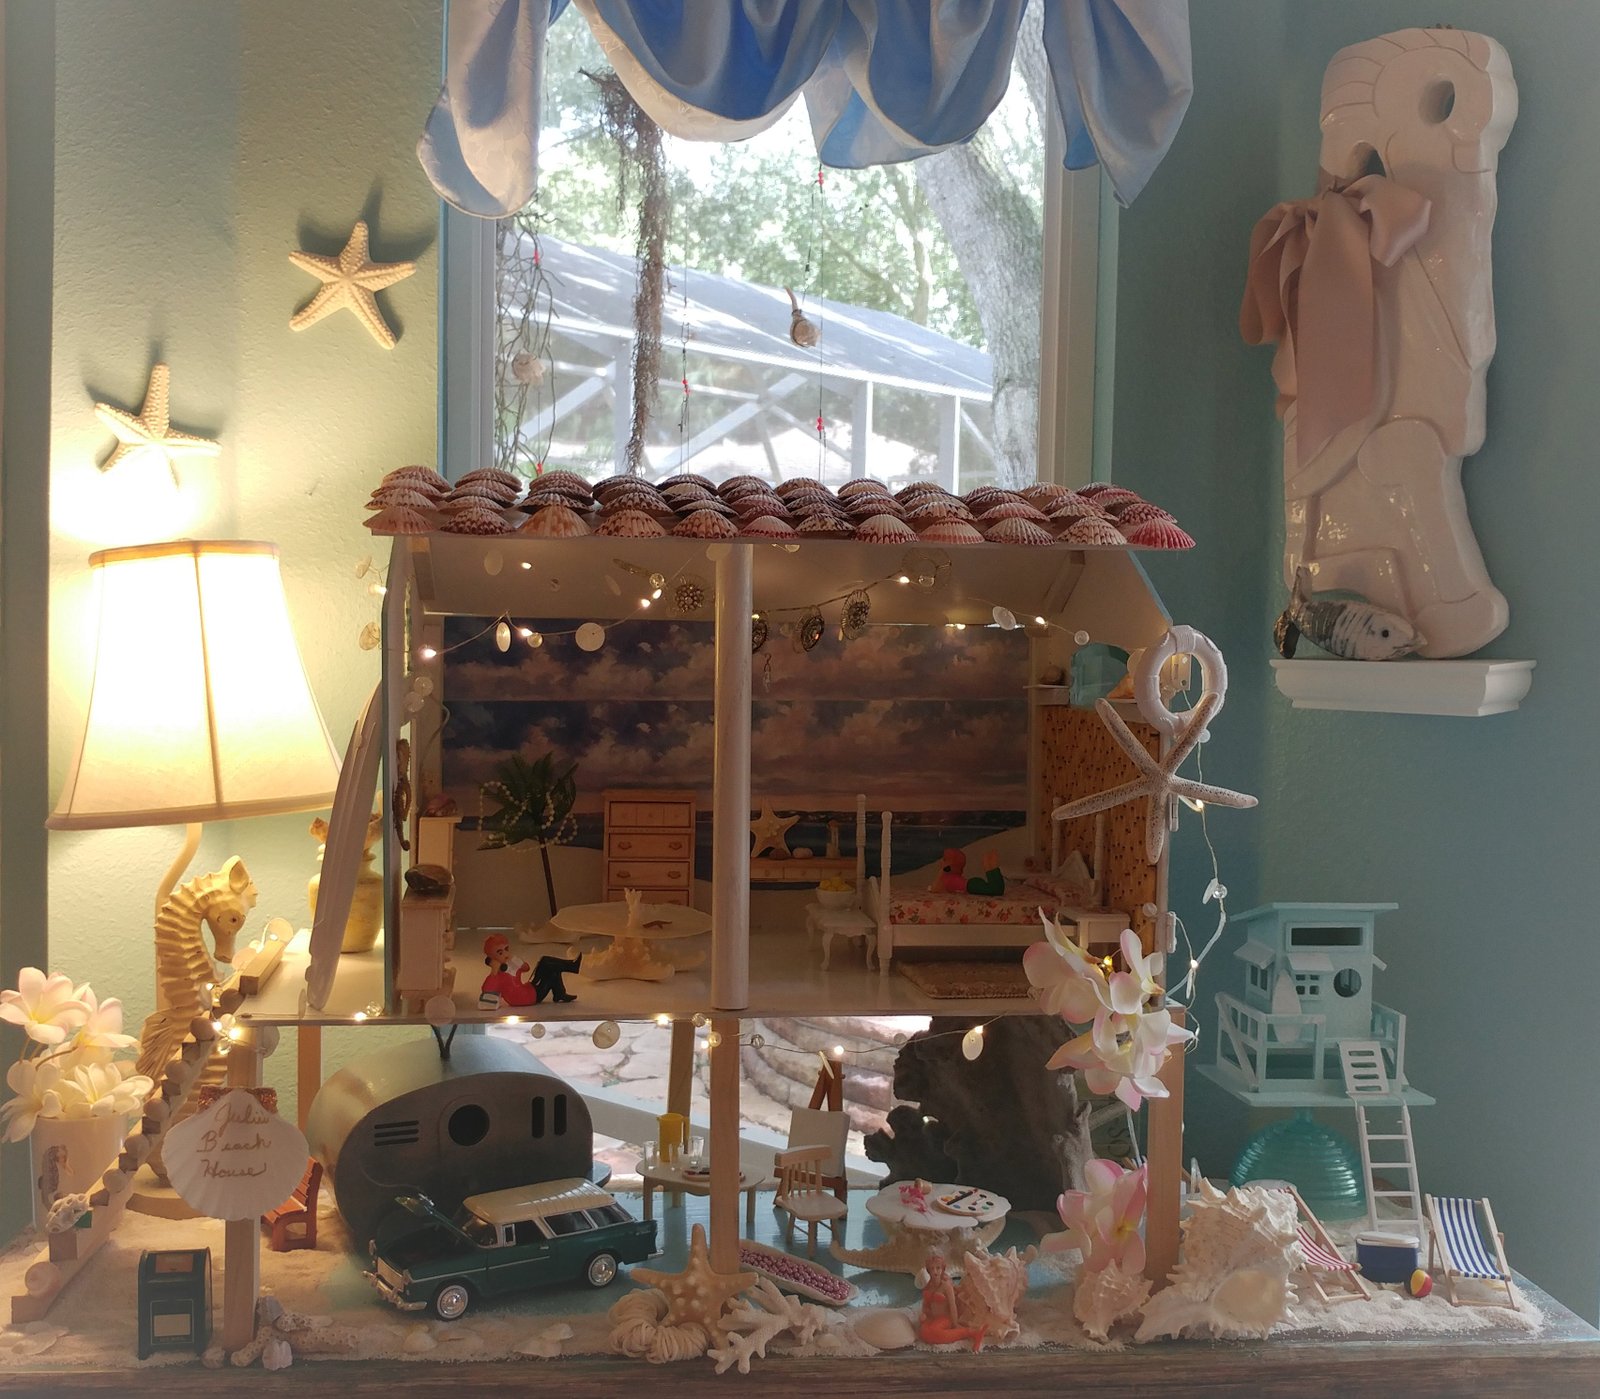
Welcome to Julie’s Beach House

————————————————————————————-

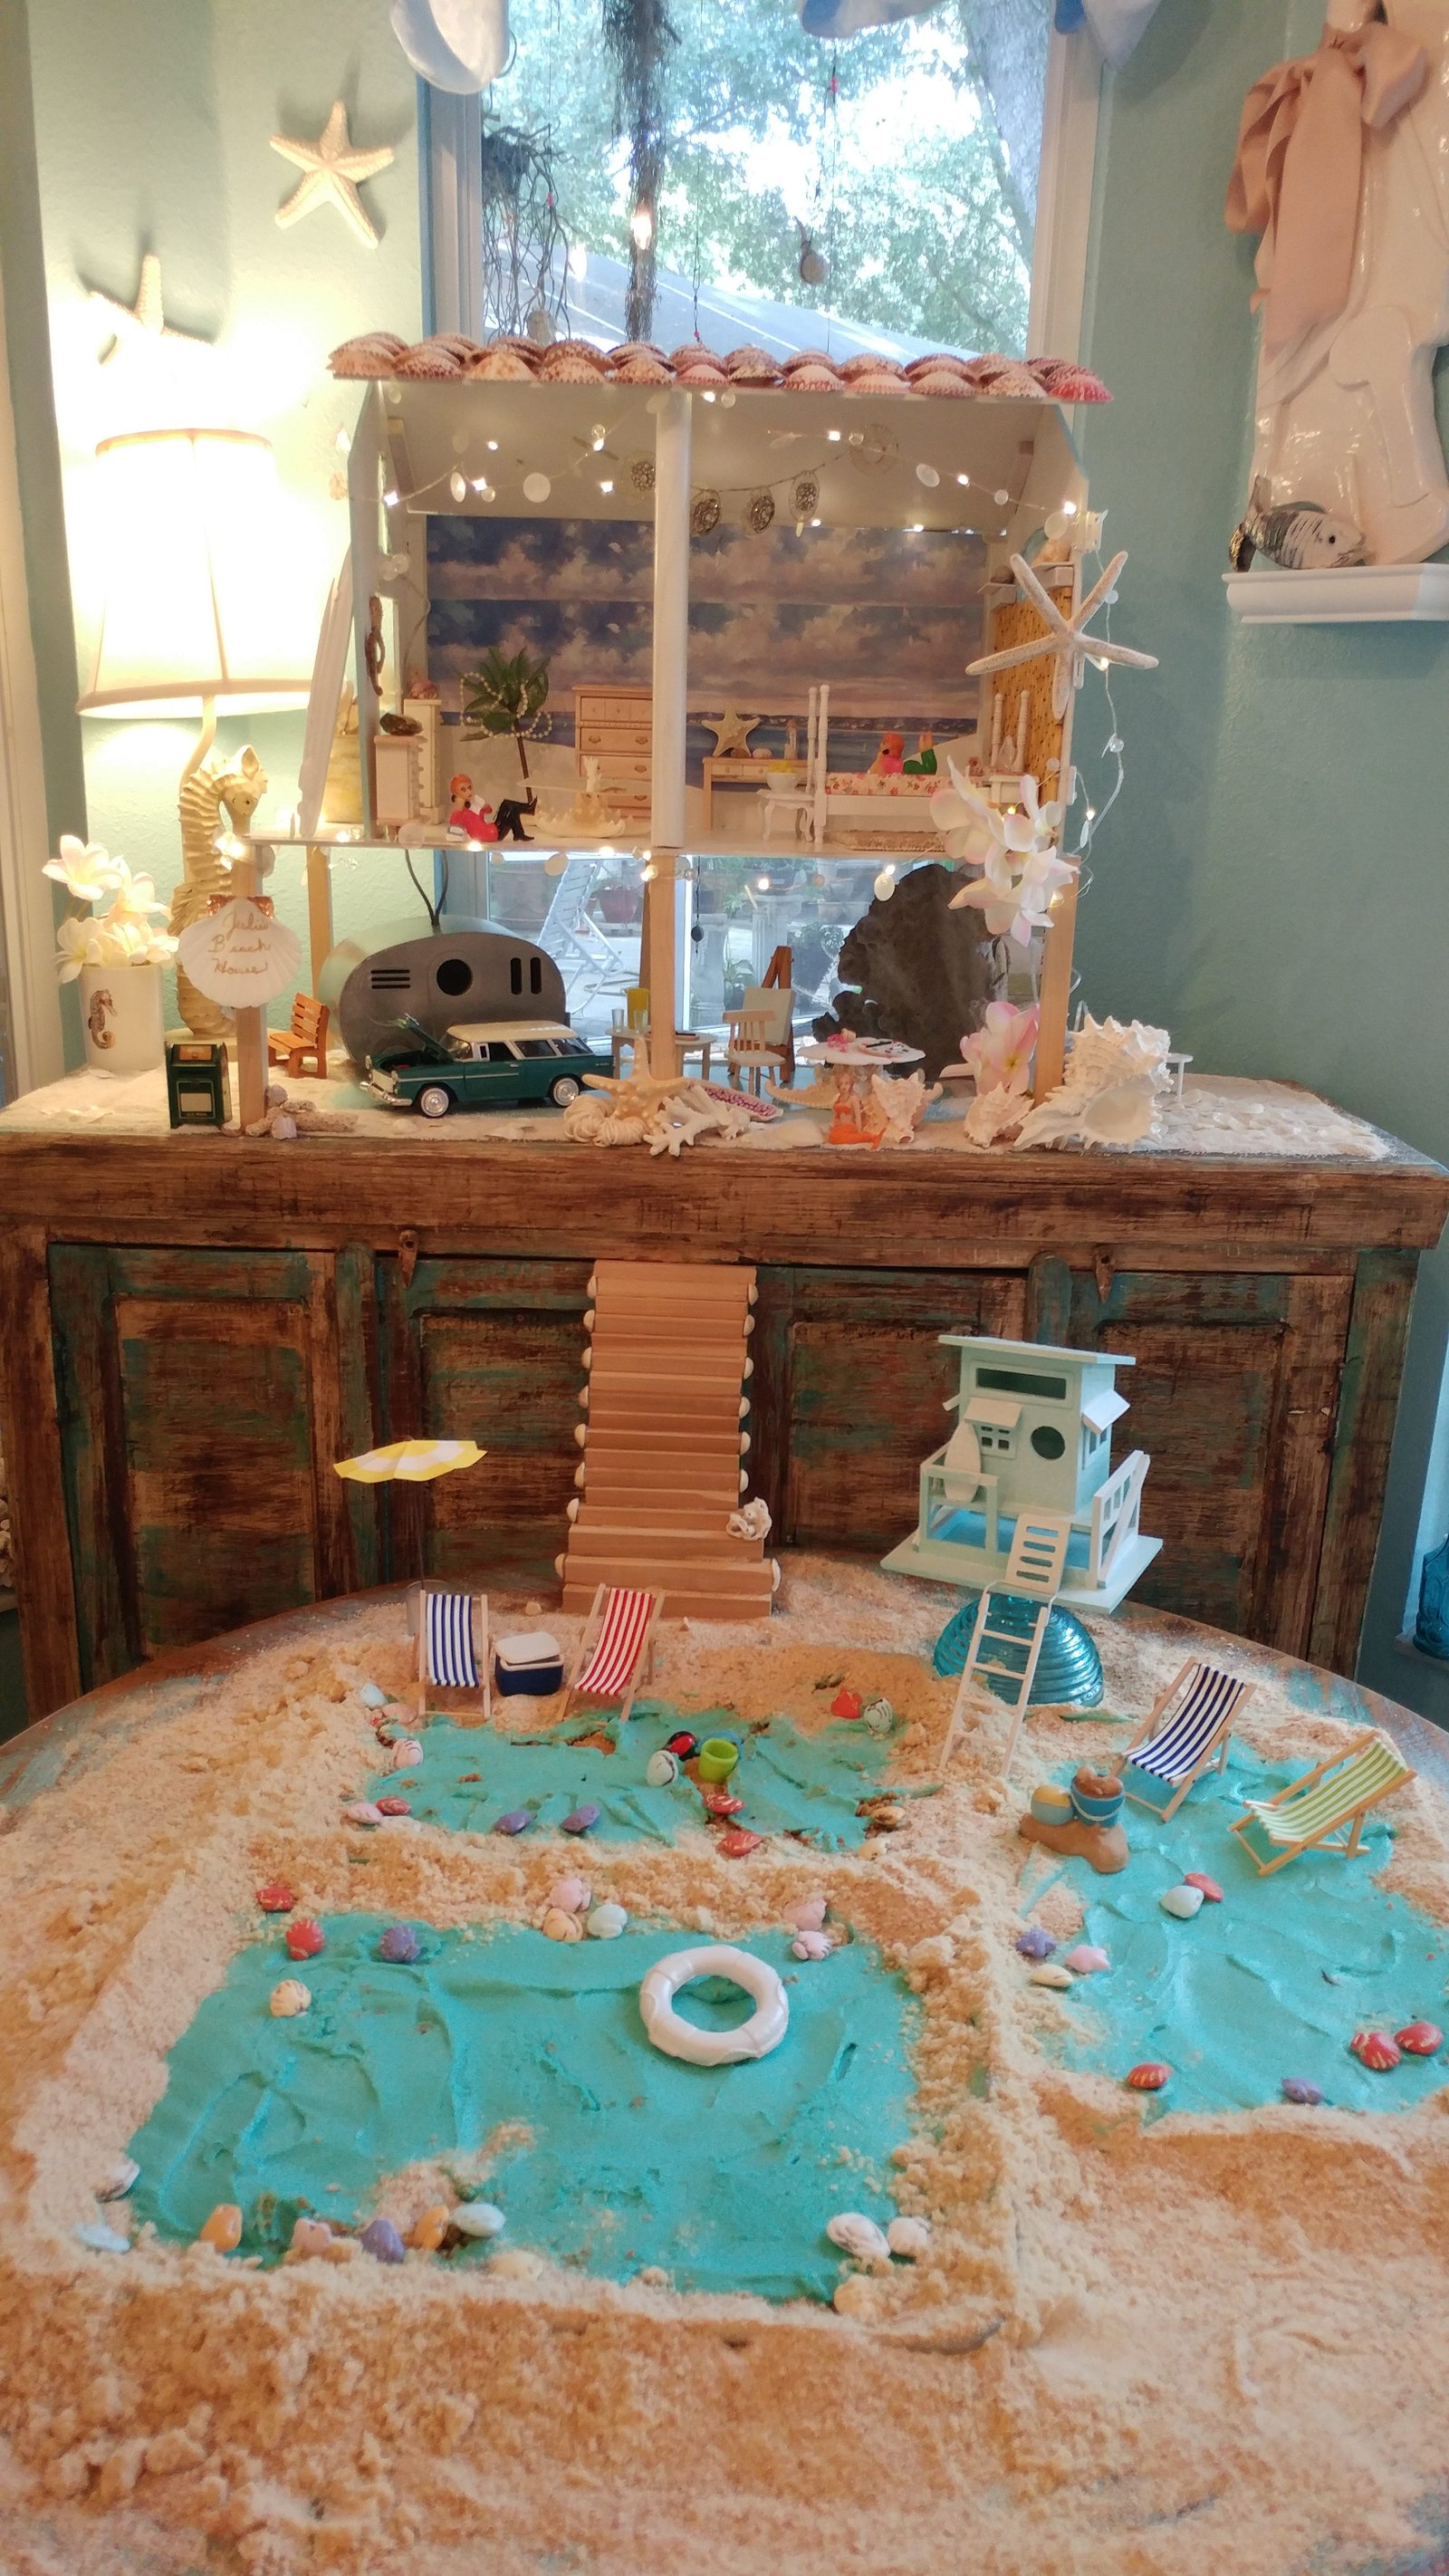
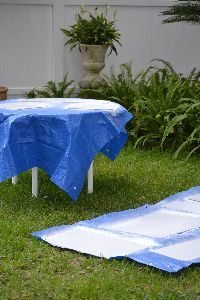
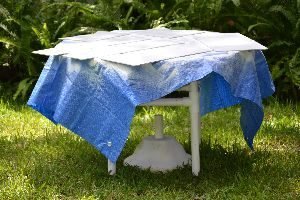
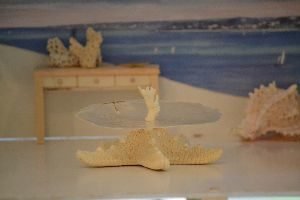
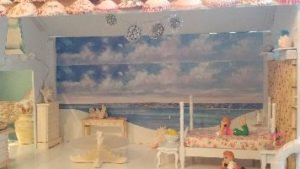
In the Kitchen Nook for me to Enjoy
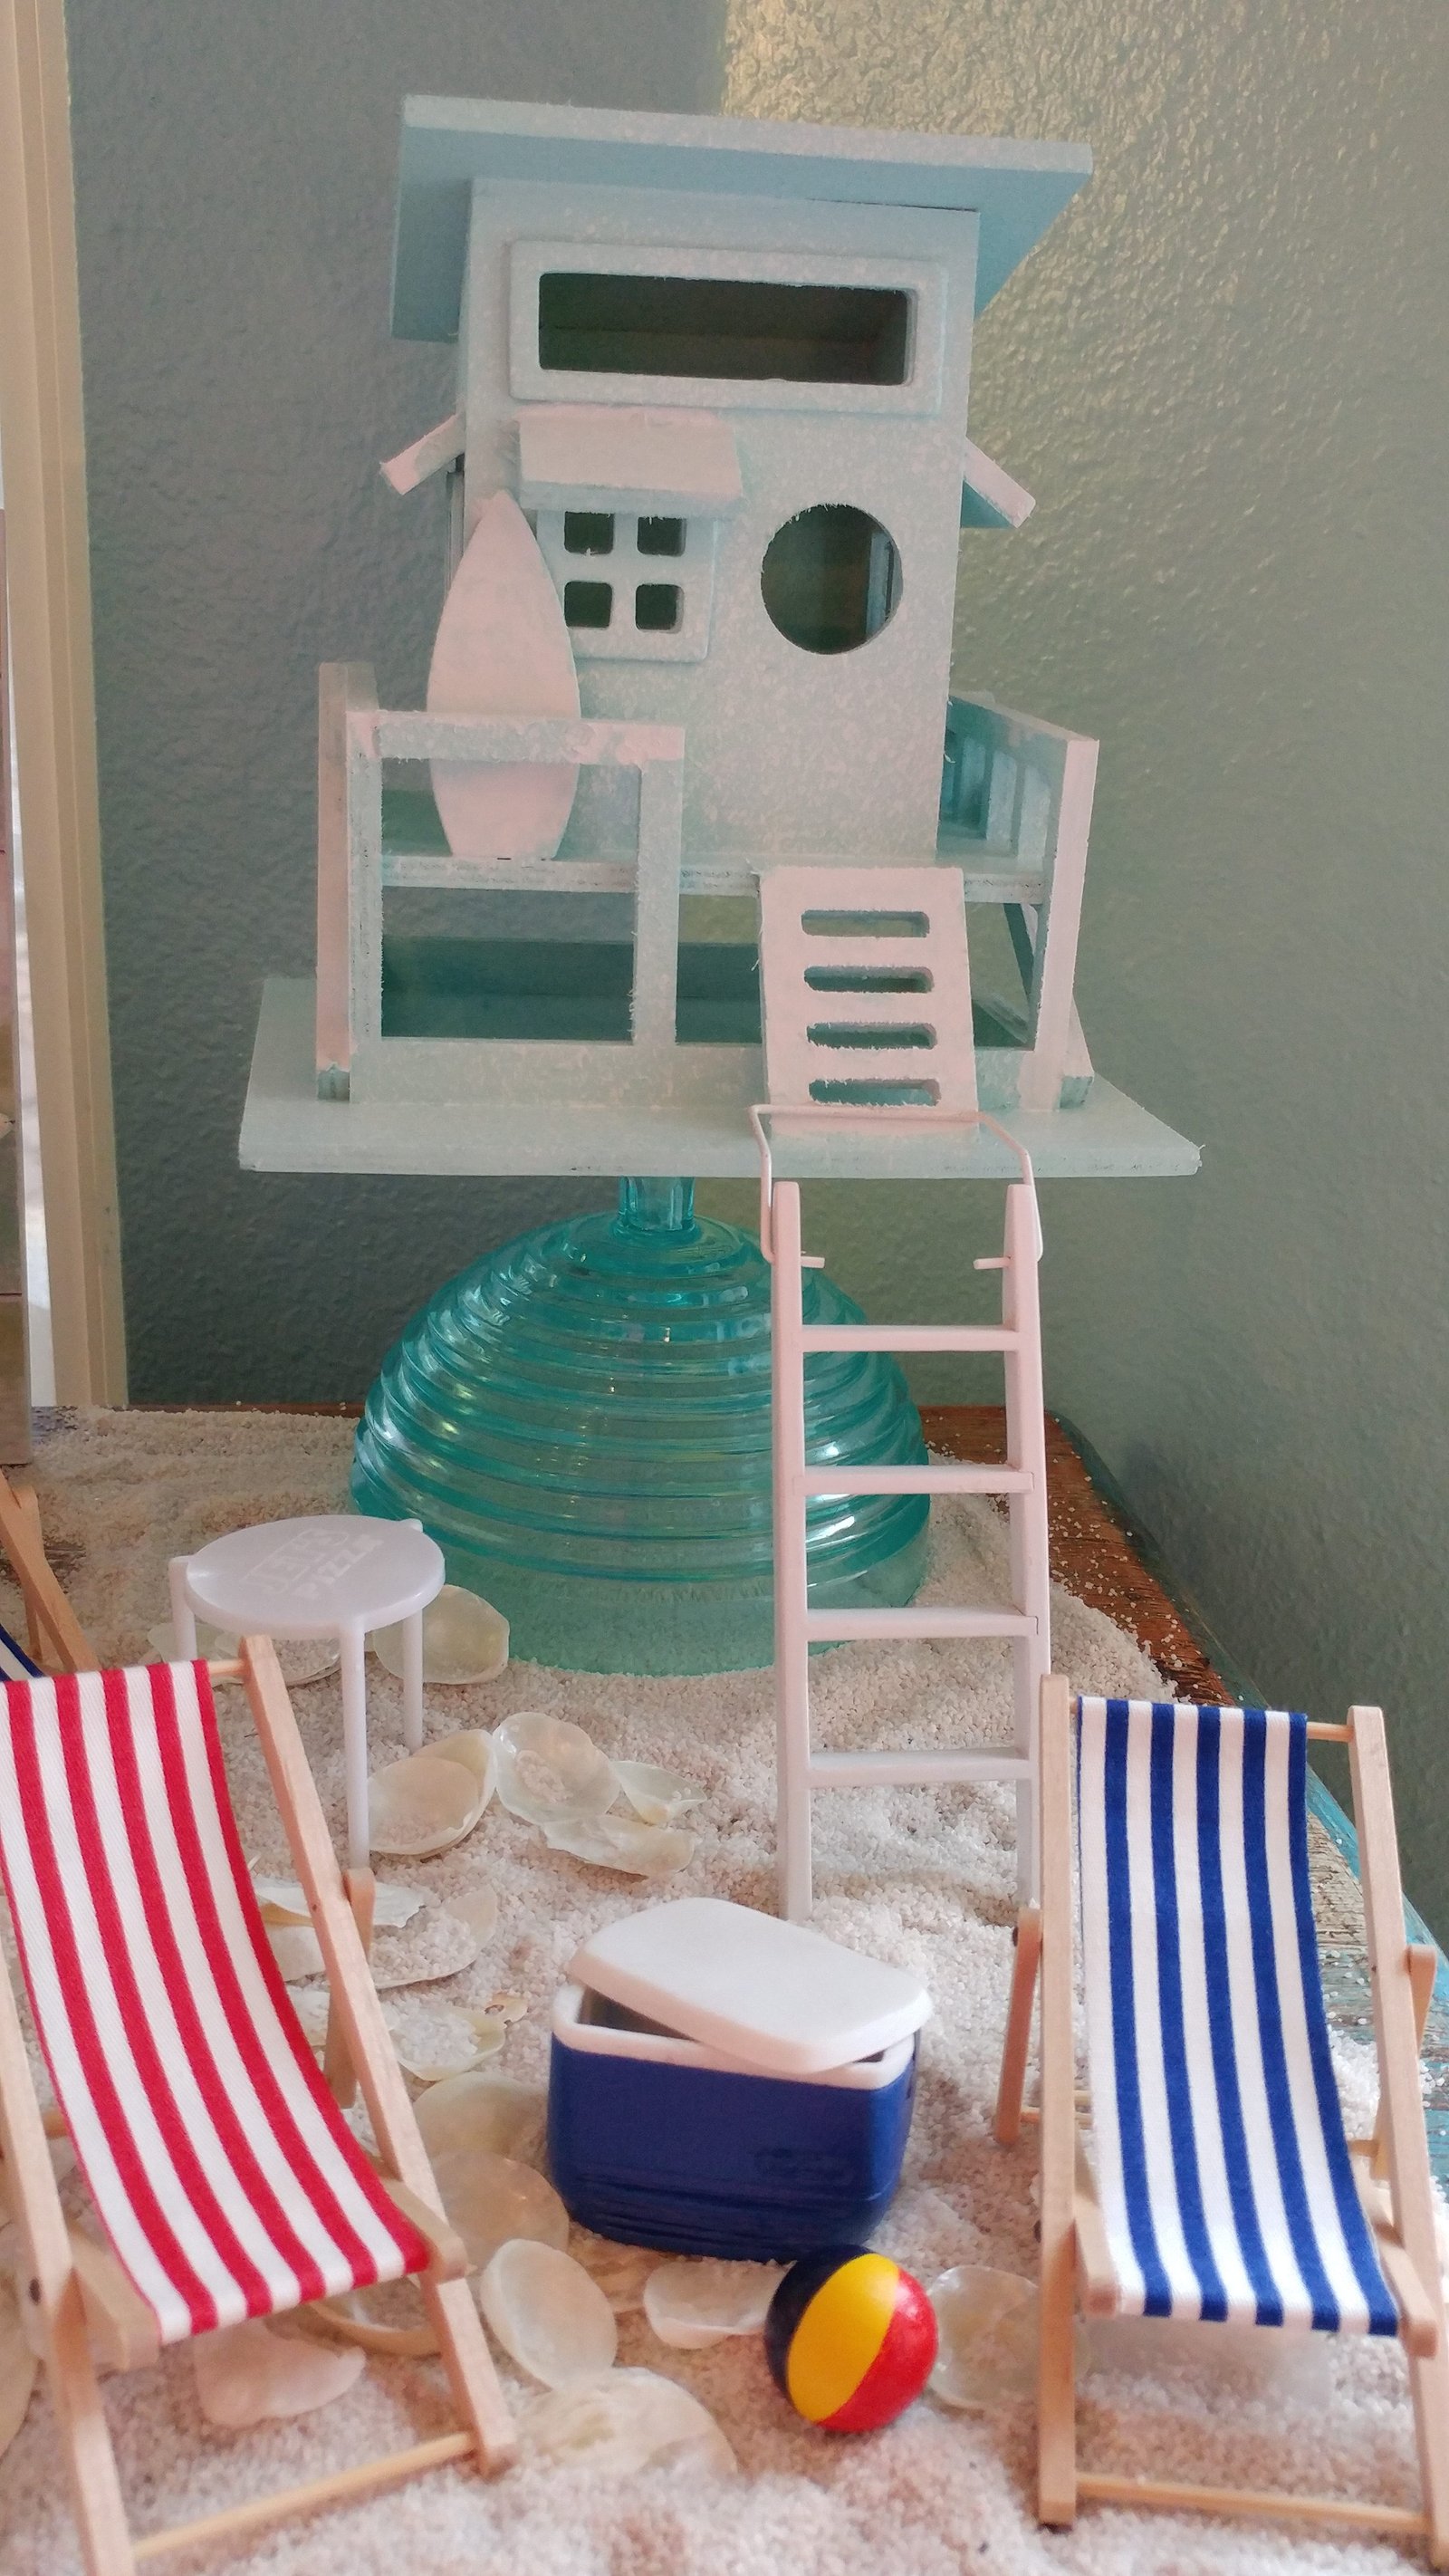
I did add a Lifeguard Tower and some beach chairs.
Not to mention lots of SAND.
————————
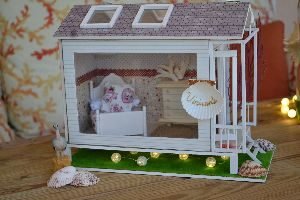
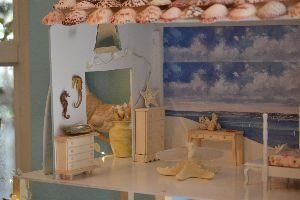
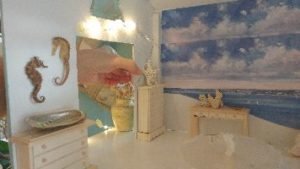
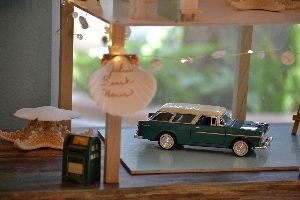
Vivien’s Beach House
(Note the shell with her name on it in glitter. I did that.) 🙂
The Beachy Doll Houses that Gordon and I made for our nieces in Ireland.

One for Vivien, and One for Lola
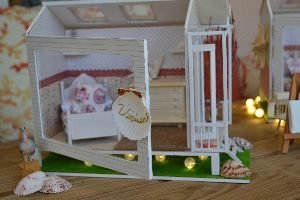
Some of the doll furniture came with the doll house kits, and some we bought at Dollar Stores. Sea shells and coral we found on the beach, and the fabrics for the bedding we placed over little pieces of foam and cushions stuffed with polyester fiber fill.

The wall paper came with the kits, and the rugs are just carpet samples from Home Depot.
The pretty fanned coral like plants I found on the beach along with the pretty pink and white scallop shells.
The pretty artist’s palette, canvas and stand I purchased from an art supply store going out of business. And once again, the unfinished doll furniture I bought at Dollar Stores.
————————————–
This story actually starts here: (as taken from my blog)
June 23, 2014
New Project
Earlier this year I paid $300.00 for these two mini doll house kits that you assemble. I found them on Ebay from China. I got them for me and my niece Lola who lives in Ireland. They were so cute, (in the photos), and when they arrived I was so excited to put them together. I set them aside because I had to work on other things and this week when I pulled every thing out, set up my craft table to do the work, I noticed something very strange……..
The instructions looked a bit funny.
I don’t understand? What are these strange symbols?
Oh My God! The instructions are in……….
CHINESE!!!!!
Bright side, I’ll figure it out.
When life gives you Chinese, grab some
chopsticks. 🙂
Julie Whann
—————————————–
O.K. I never figured any of it out. Chopsticks be damned!!!
BUT, as time went on I decided to use these doll houses as a template and make them a bit bigger and design them ourselves.
So, let’s continue…………….
—————————————
July 10, 2014
Projects! Projects! Projects!
(As taken from my blog.)

The Doll House Projects
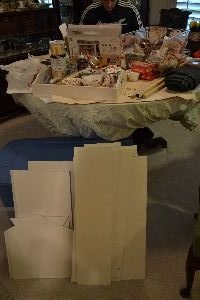
We are big on projects around here. To me a messy, cluttered, room filled with junk is perfection! Here are the remnants of our latest projects.
I cannot tell you how fulfilled I am in a room full of junk with potential.
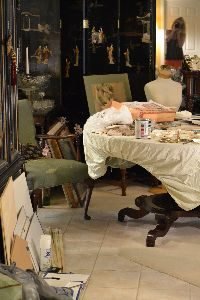
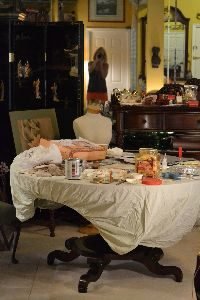
I wish I had an entire studio for this and not just my dining room.
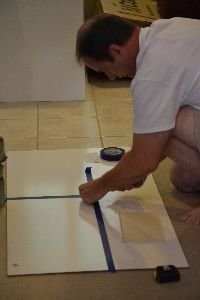
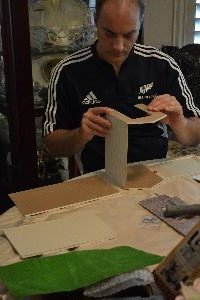
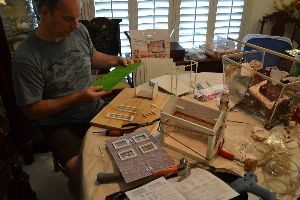
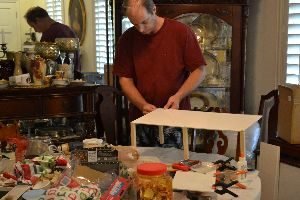
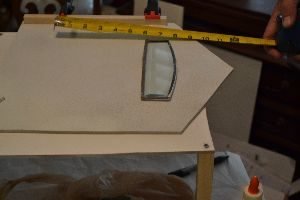
In this photo Gordon is taking measurements for our doll houses that we are making.
(When I say “we” I mean Gordon.) 🙂

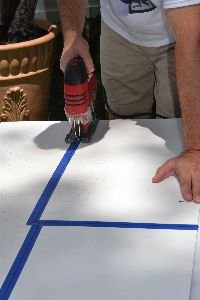
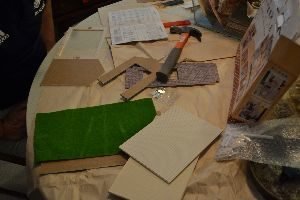
Taking the measurements and using the jig saw to cut the wood for the dollhouse sides, roof and flooring.
We are making doll houses for me and my nieces.

Do the math prior to.
(p.s. We LOST the card with the math on it and had to rely on our memories (HAH!) when it came time to really finishing up these big doll houses.)
Here Gordon is cutting the wood into pieces that we will then put together.
We decided to make our own using our own design. We originally had a template but we have expanded on that and we will show you how we did it once we have made them. (And when we find that card with the math on it.)
————————————–
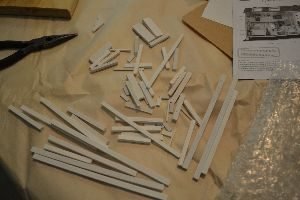
P.S. I Found the Card with the Math!!!!
The Template for the New Beach Houses we are working on.
————————————–

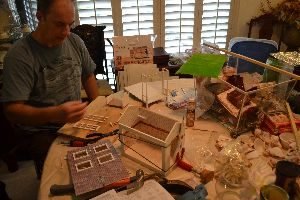
Everything is cut out and ready for assembly. We’ll bring that to you soon. But until then, we constantly have projects going at once. That is how creative people live and think. I have about 6 going on at the same time. Gordon too. I have no clue how to do one thing at a time. That is foreign to me. To be fulfilled creatively is something that I cannot even explain.
A huge mess is heaven to us.
Happy Creativity,
Julie
—————————————-
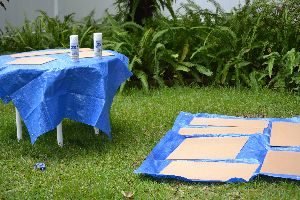
Spray Painting all Sides of the Doll Houses
Sadly, it was at this point that we packed it all away in order to get ready for the upcoming holidays with the intent on working on them soon. (My “soon” is anywhere between one week and 10 years. Just so ya know.)
———————————————
O.K., Now Fast Forward 3 Years…..
At this point we just found out that my brother Johnny, his partner Sabina, and our niece Vivien are coming for the Christmas holidays so we are under pressure to get these 2 small doll houses completed for Vivien and Lola.
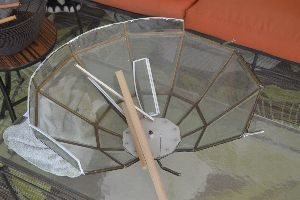
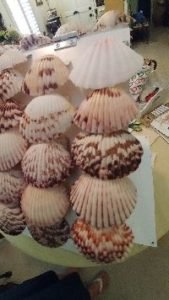
Some of my many Sea Shells
At this point the intention is to work on 4 Doll Houses but we are lucky to get the 2 small ones done.
Gordon Working on the Doll Houses
I would give you the instructions BUT THEIR ALL IN CHINESE!!!!
Luckily, Gordon has an eye for figuring things out so he got to work to assemble the doll houses the best way he knew how.
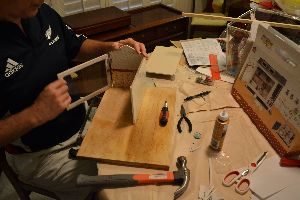
Thank Goodness for Gordon’s Mechanical Mind!
He also has a very intricate hand at putting together small pieces and having the patience to do so.
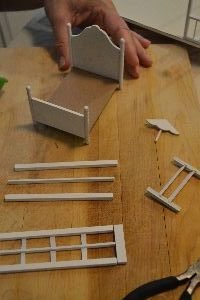
He was literally gluing a bunch of toothpicks together to make furniture and accessories!

Vivien and Lola need to be very pleased that their uncle spent so much time on trying to figure all of this out. That is how much they mean to him!
There was a lot of gluing, screwing, assembling…….
—————————————-
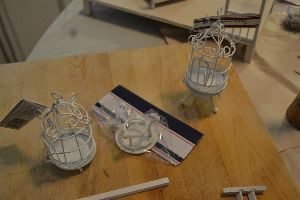
My job was more in the decorating department. I found these two nice tables and 2 birdcages and put them together.
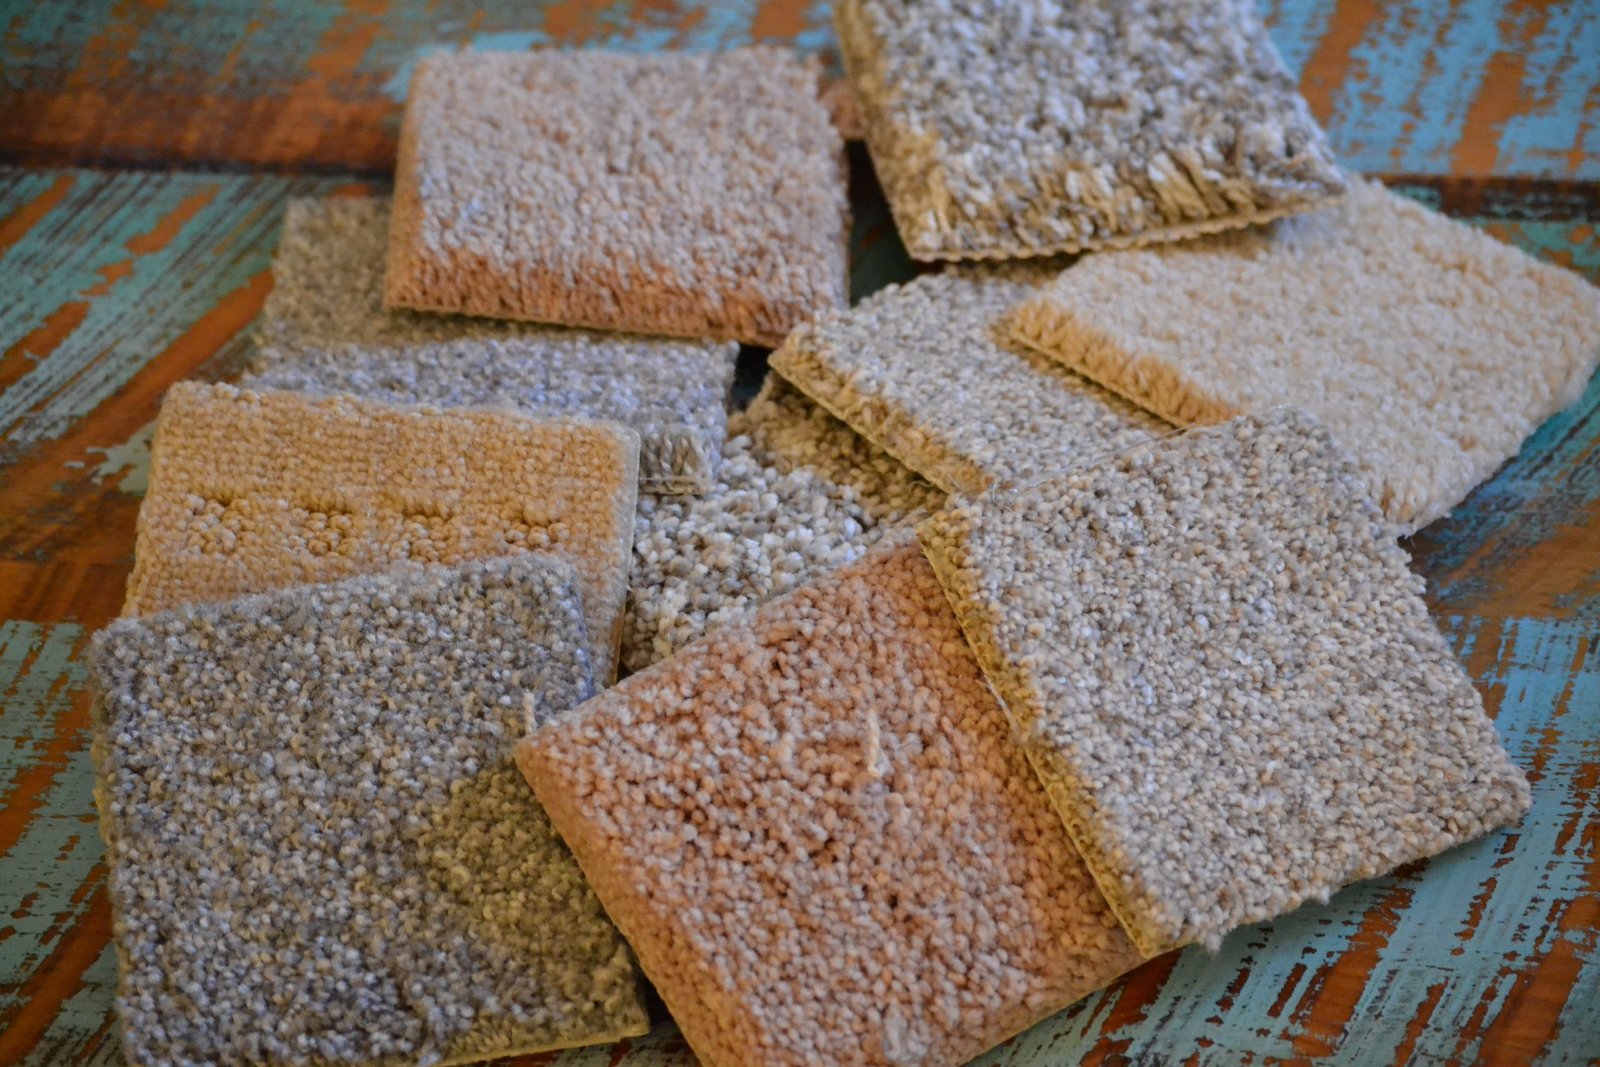
Carpet Samples from Home Depot make great Area Rugs for the Doll Houses. 🙂
(But don’t tell Home Depot that I did this.) Shhhhh.
——————————————
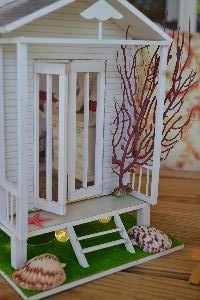
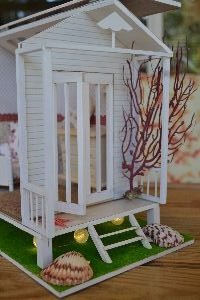
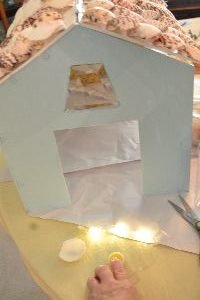
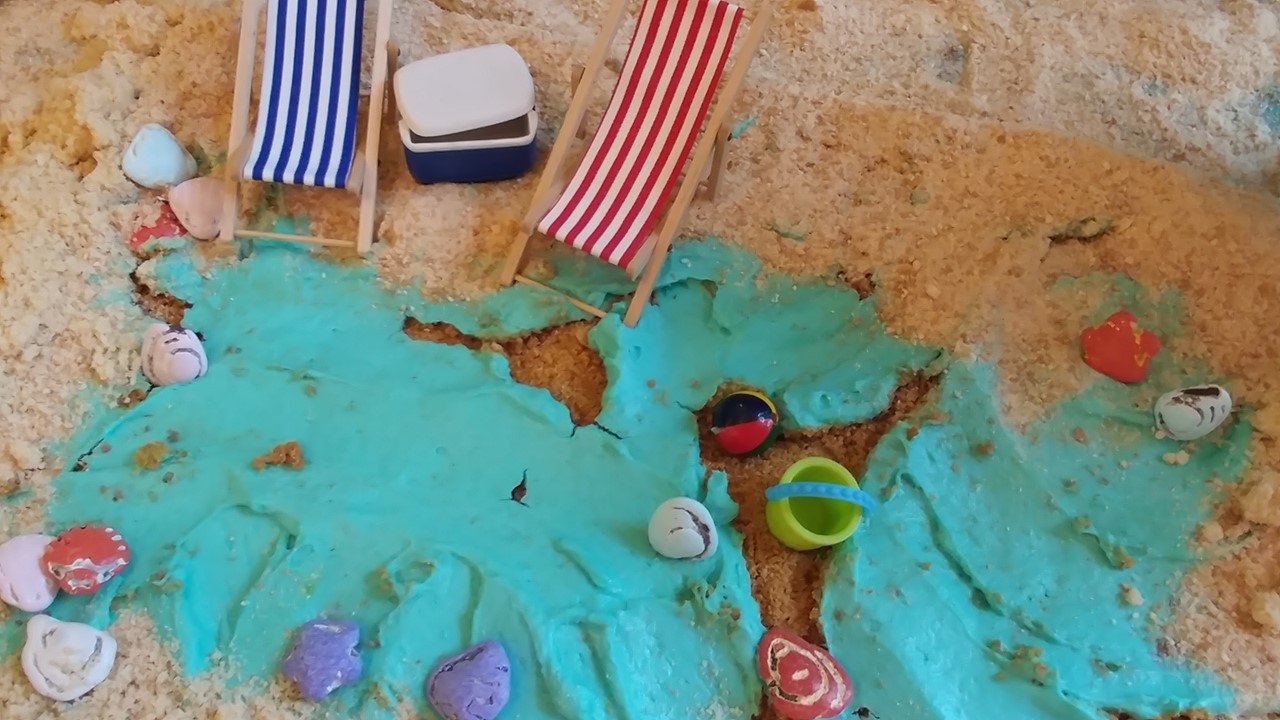
I also added some nice battery operated lights for underneath the beach houses to sort of illuminate them.
Also the knobby star fish made a nice decoration for the side of the house.
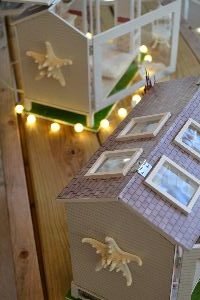
Gordon did a great job on the sky light windows.
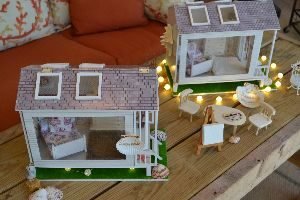
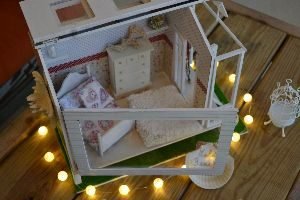
Vivien’s and Lola’s Beach Houses
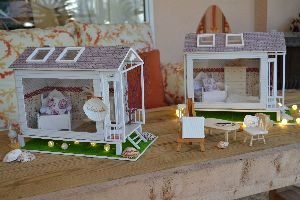
Their Christmas Gifts
—————————————–
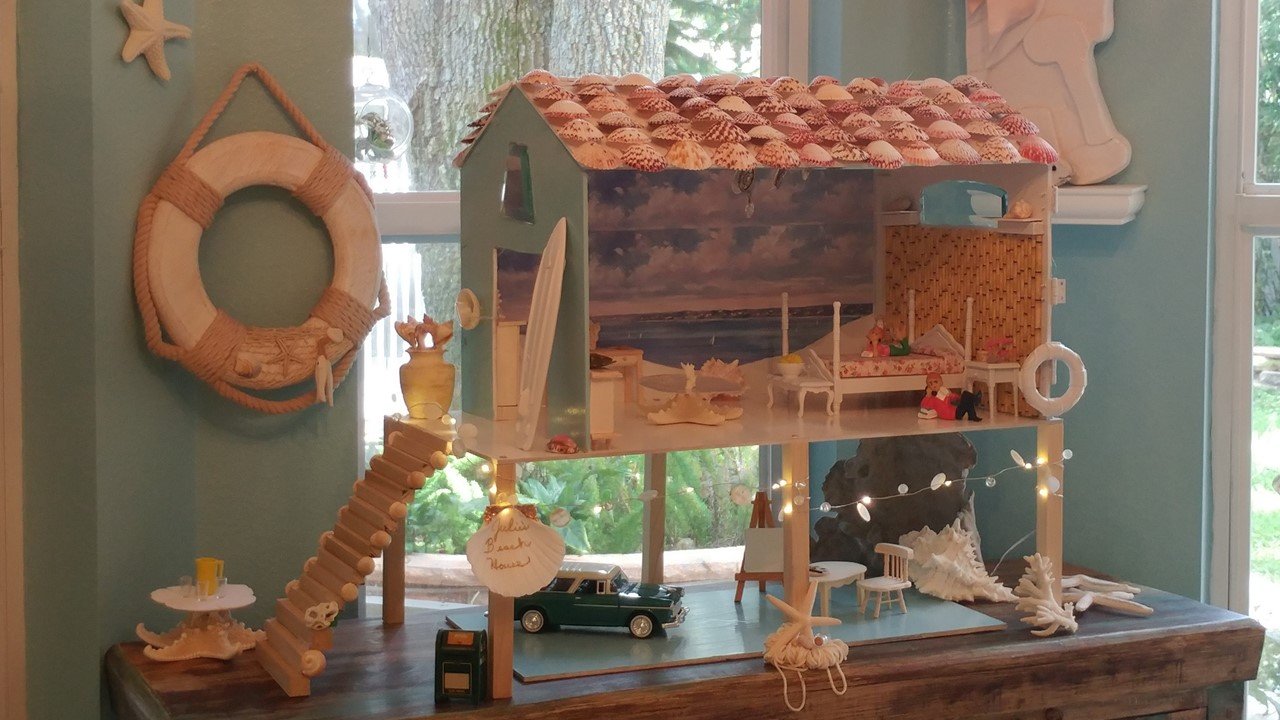
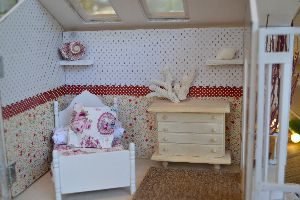
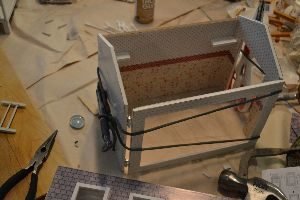
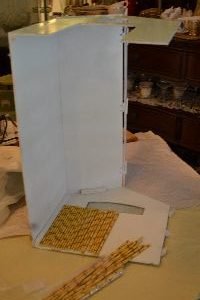
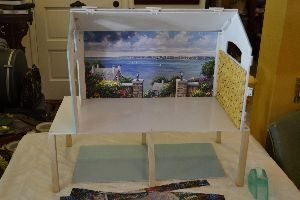
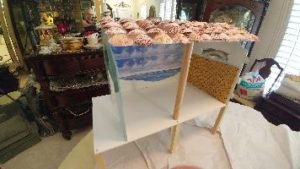
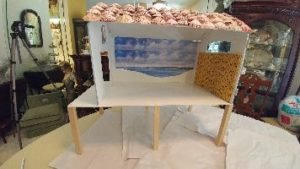
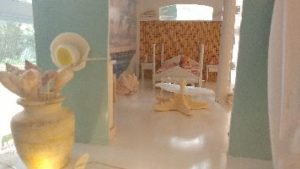
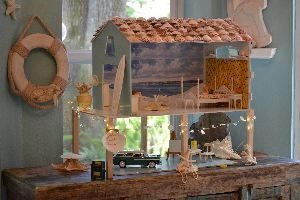
Now for Julie’s Beach House……
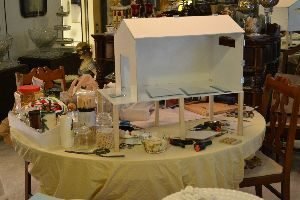
This is still in progress and I will be bringing the finished results to you.
Gordon started this for me before he left for overseas. As you see it above is how he left it for me. Now it’s up to me to finish. I am greatly looking forward to it. But, here is the work he did on it before he left……
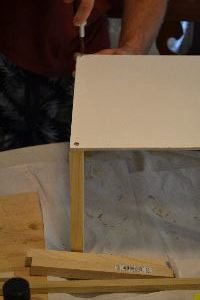
Here it is really just a matter of taking a piece of the wood that is designated for the flooring and adding 6 stilts underneath.
Drilling 6 Holes for 6 Stilts
Now adding screws into the holes that then go into the stilts.
The white screws blend in well.
—————————————-
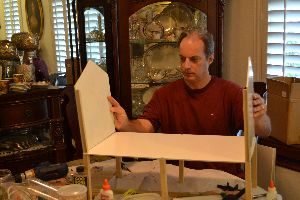
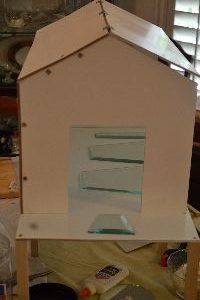
Here you can see how the sides will fit onto the house.
————————————–

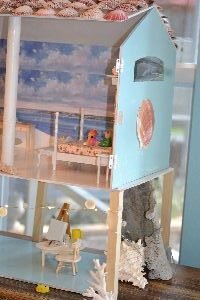
This light fixture used to hang in our kitchen, see below. Now we are taking the glass panels out of it to make windows for my beach house.
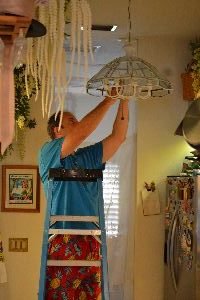
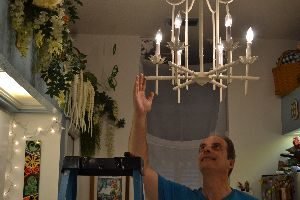
Here Gordon is removing it and replacing it with another light fixture of ours.
————————————-
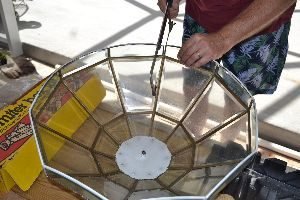
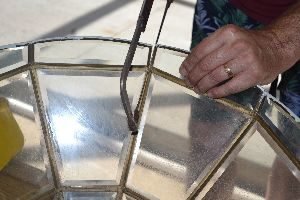
I’m planning on using many of these windows for my beach house. And eventually we will build one for our daughter Veronica, we have all the supplies, but hers will have to wait. The idea that I have for my daughter’s is for hers to be more of an Archie theme, as in The Archie’s. I did name her after the character, Veronica.
You can see in photo above the places that I/we are placing the windows.
There are lots of glass that we can use for many windows in many projects.
——————————–
So, here is where Gordon left off and I will take over. 🙂
——————————————-
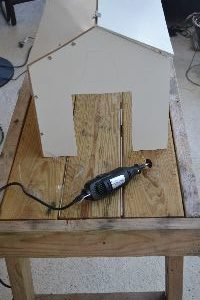
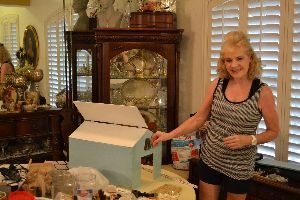
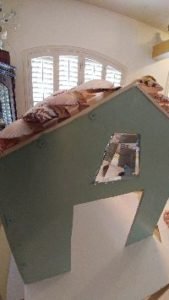
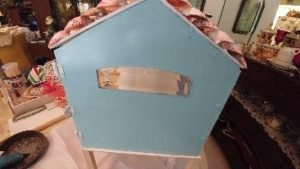
Now it’s JULIE’S Turn!

My Dremel 200
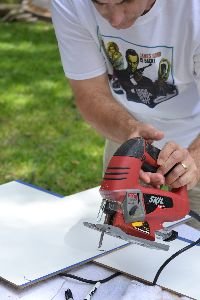
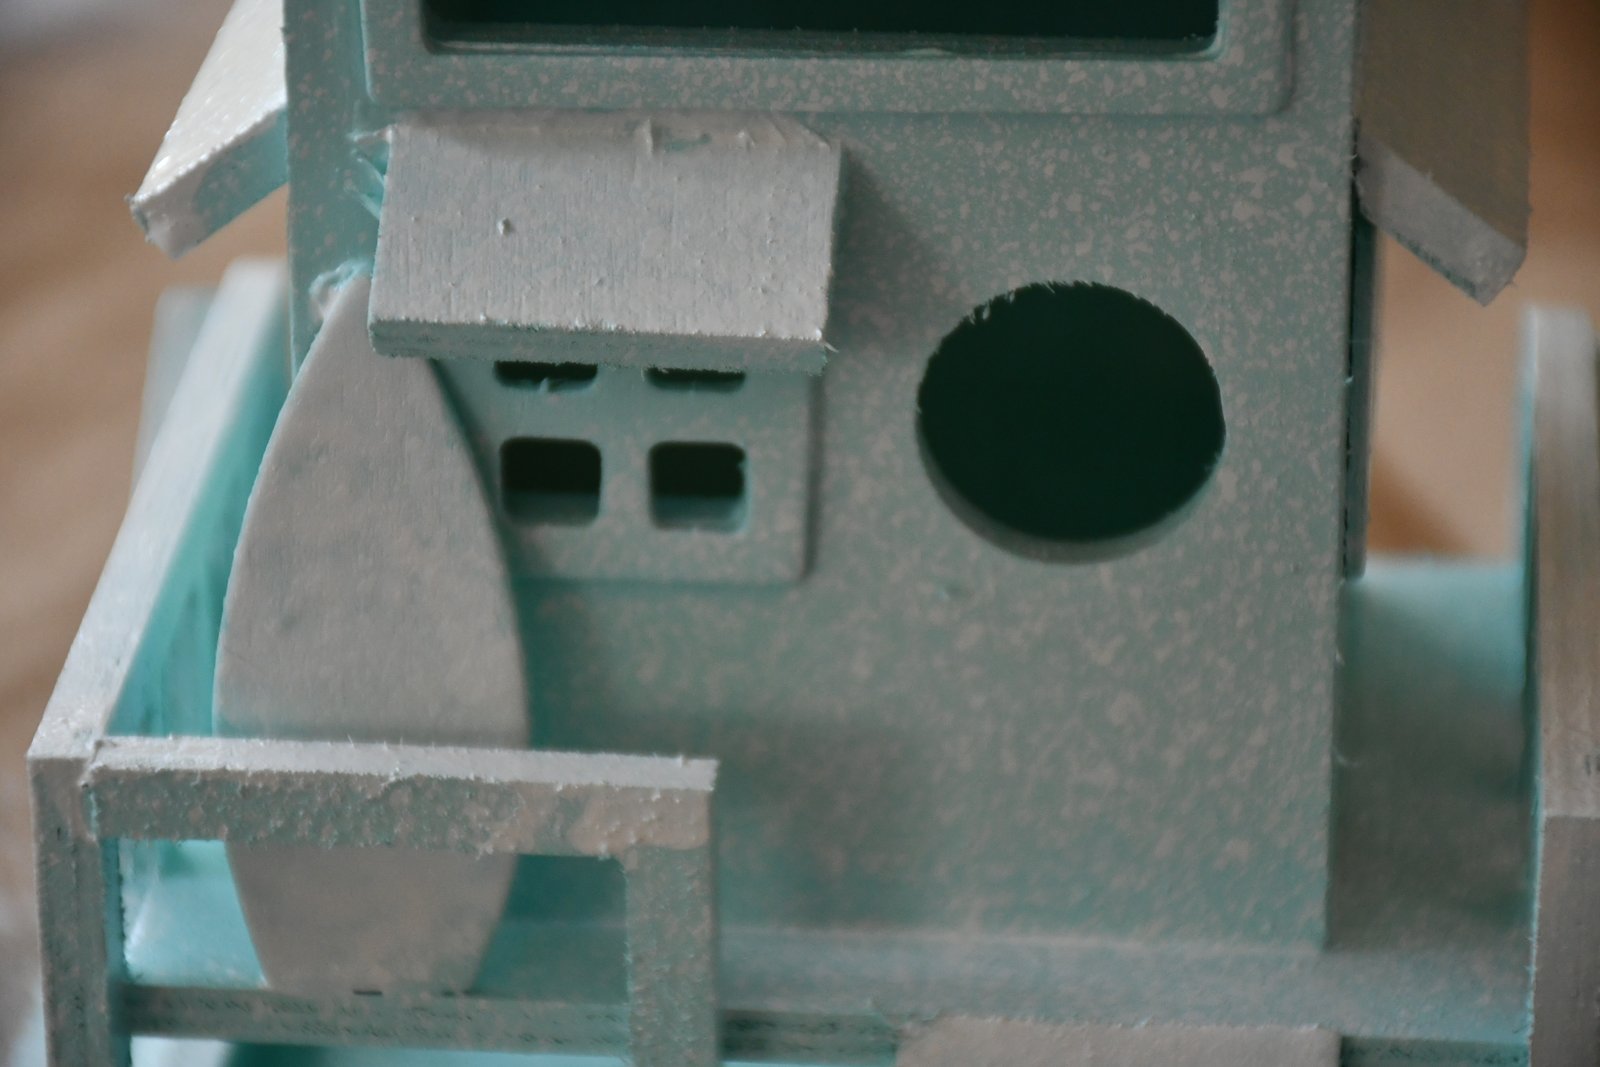
Gordon left before all the windows and skylights could be cut out of my beach house so I knew that I had to do it. I didn’t like Gordon’s big Skillsaw that he wanted me to use. I wanted something smaller and hand held. I had pictured in my mind something with a saw that had a serrated knife at the end, kind of like an electric turkey carver. Or even an electric pumpkin carver. But NO! There is nothing like that in the male world of power tools. But, I did find this Dremel 200. It is small, hand held, but it has some round saw. I decided to give it a try.
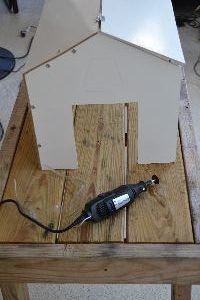
See the small glass shaped like a rectangle?
That is the window shape that I wanted to carve out above that door there.
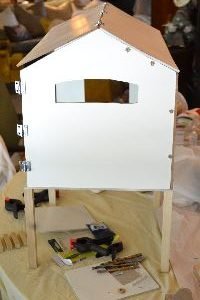
Gordon had already carved this window shape out of the other end of my beach house. It is an exact replica of the window above our bedroom.
I knew to take my power tool outside and use it there. That is hard to see in the photos is my safely goggles.

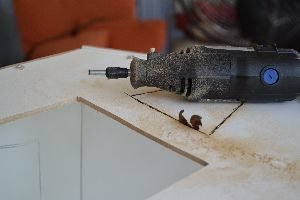
I drew around the shape of the glass window that I wanted and then started to use the power tool to carve out the shape.
It smelled as if it were on fire!
I then noticed that the blade had totally broken! You can see the round blade broken in half in the photo above right.
That could have been shrapnel embedded in my body!!! Luckily for me it embedded itself into the window cutting!
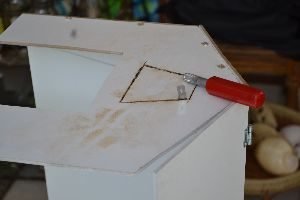
With my blade broken in half I then turned to my exacto knife to try and finish the job.
It did! Right before it broke in half as well.
I decided that I need to just forget about any power tool and focus on the fact that my beach house can look great just the way it is.
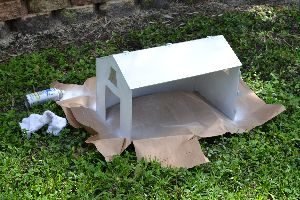
So, I spray painted it white everywhere. That is the base color.
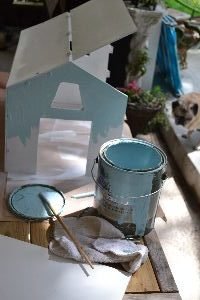
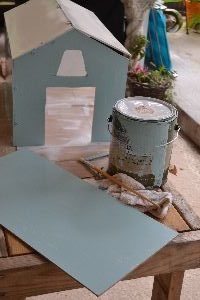
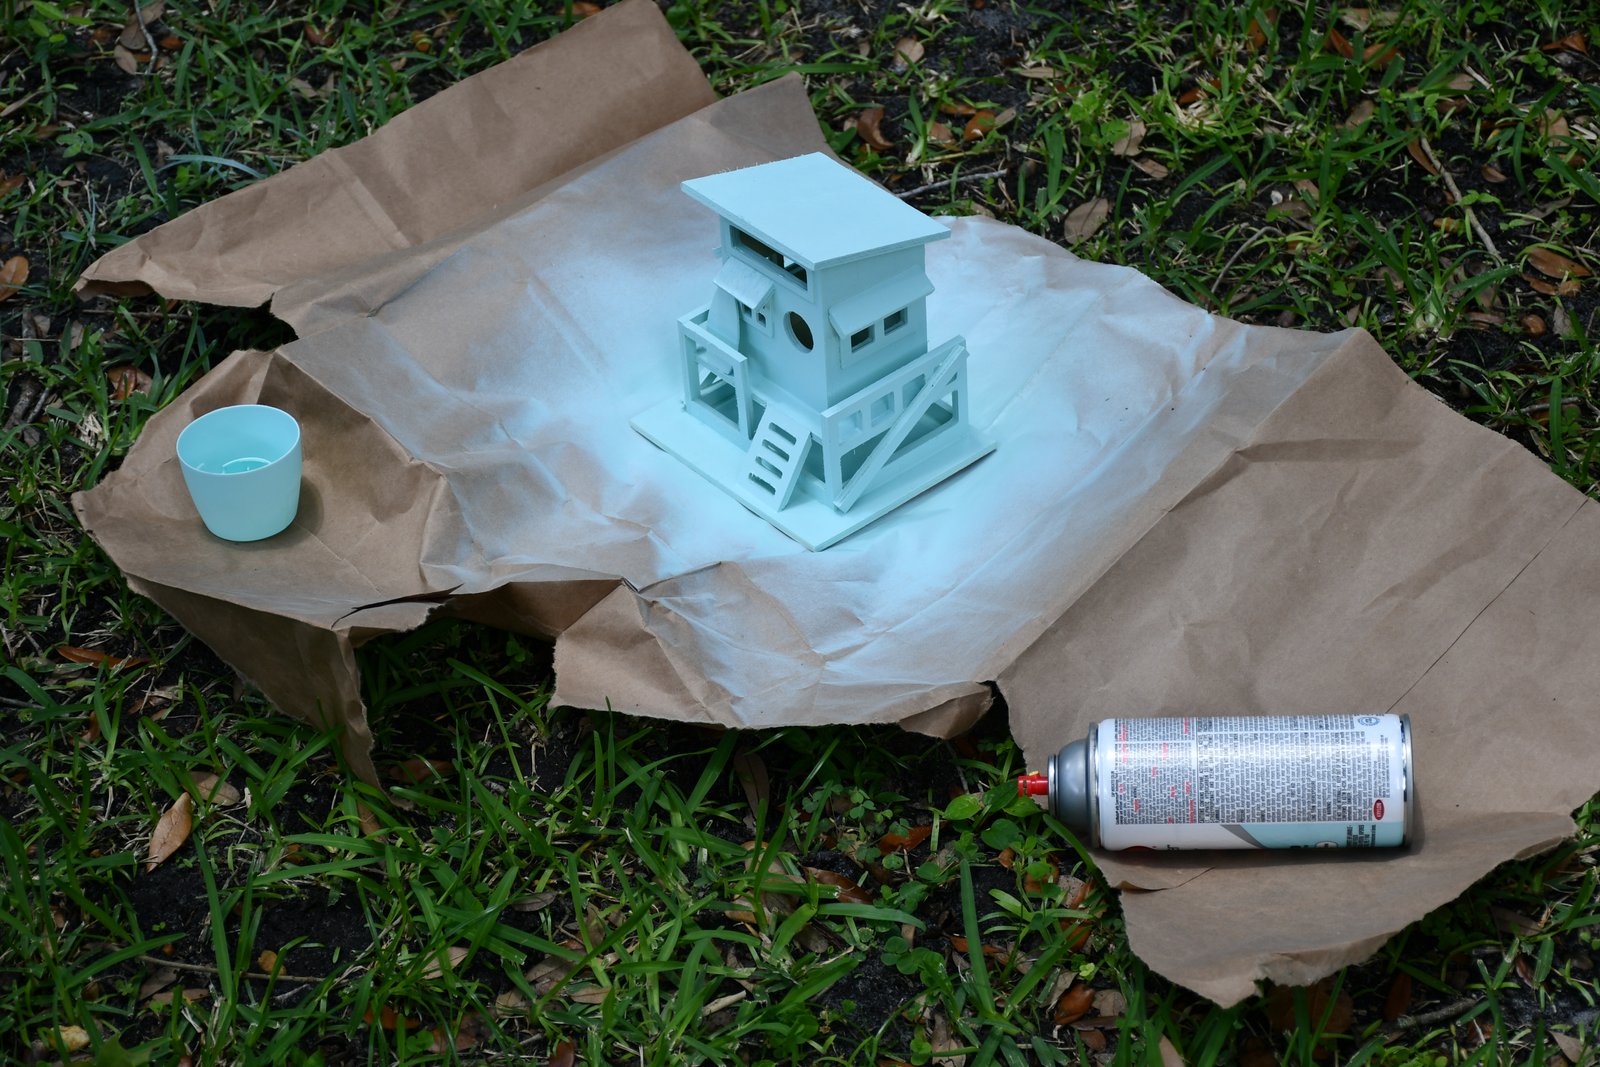
Blue Beach House
Ideas come to me all the time and in different situations but while I was laying in bed I remembered the old blue paint in the garage that we used to paint our kitchen and nook area. I really liked that color. So I decided that I wanted to paint the entire outside of the beach house blue and leave the inside white.
I painted it blue the first coat and I noticed that it wasn’t totally covered so I came back to give it a second coat. That was when I noticed how nice it looked with just one coat of paint. You could see the white paint show through underneath. In the same way that a weathered beach house would look. I was so excited! So, I kept it like it was.
The more I think about what all I can do with this beach house, the happier I get!
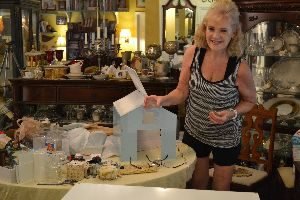
I will be gluing the glass windows into these slots that both Gordon and I cut out. Very excited to get to that.
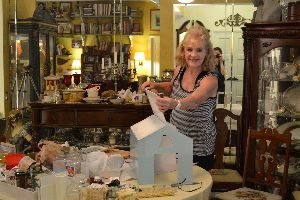
I also plan on “tiling” this roof with some lovely sea shells.
——————————————–
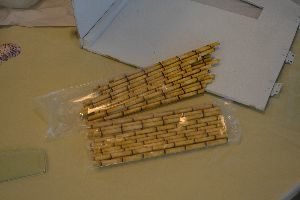
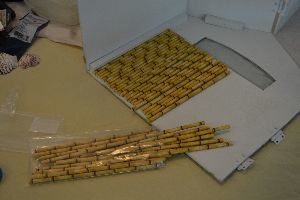
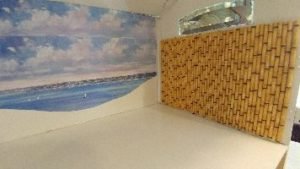
But for now I am creating a “Bamboo” wall.
These are bamboo drinking straws made out of sturdy paper.
I am placing them here underneath the bedroom window of my beach house.
I literally painted Elmer’s Glue all over the side and then placed the bamboo looking straws all along the wall.

I placed heavy books down to ensure that they didn’t warp and not adhere correctly.
I actually got this idea from a James Bond movie where there was this beautiful bamboo wall. It was something that I wanted to emulate in our own backyard when I wanted a backyard studio. However, the HOA nixed our backyard studio, but they can’t interfere with my miniature beach house. 🙂
——————————————-
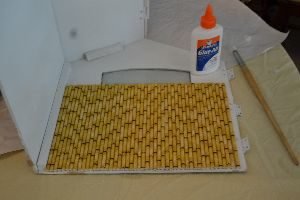
The Bamboo Wall turned out great!
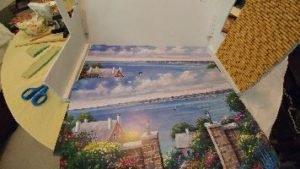
Now I am debating how to create a “view” out the back of the beach house by using a print I found at Tuesday Morning for only $3.00 each. I will most likely cut it up and use it as a view. This is my current project with the beach house.

What I REALLY want is to cut 2 sections out the back of the beach house as large windows, see the glass panels in photo below. I just need for Gordon to cut the wood and then we can place the windows in. He is currently working overseas. But for now I am using a temporary view, the beach prints.
———————————-
I tried it the full view as the background but that looks more like some lovely Italian villa overlooking the Amalfi Coast, and I wanted my beach house to look like a beach house here in Florida with a view of our ocean.
I did try experimenting with some of the mini furniture just to get an idea. I realized that none of it will work the way it is. I will have to tweak it and create new.
—————————————–
Back to the Prints…….
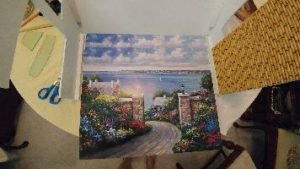
So, I started experimenting with the two identical prints I bought and how I wanted to cut them up to look like what I had in mind.
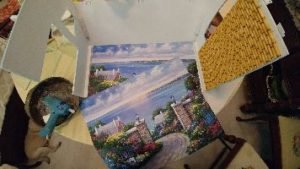
I like the sky and the water but not the rest of the print. At least not for this project.
I ended up using both of the skies in each print and the ocean with the lovely sailboats in the distance.
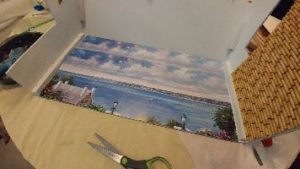
The photo at right, is what I settled with. I didn’t want to adhere it fully to the back of the beach house so I just did a few dots of glue here and there so that it would adhere.
————————————–
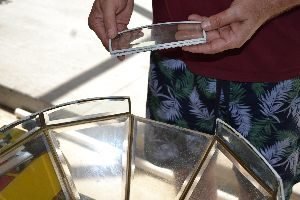
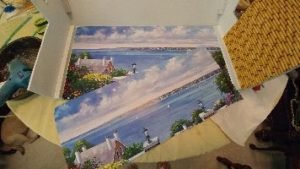
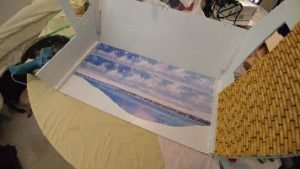
Glass Windows
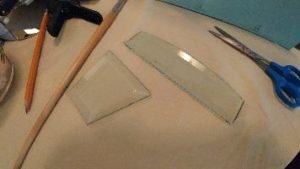
The two windows that can be placed in the beach house.
I used hot glue all around the edges in order to adhere them and keep them in place. I love the beveled glass.
—————————————-
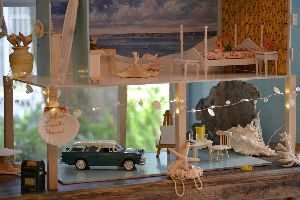
At this point we have our ocean view and our bamboo wall.
———————————————-
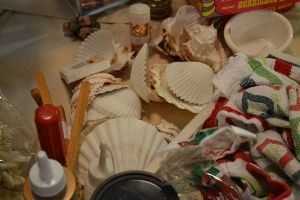
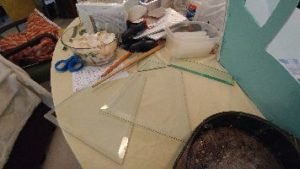
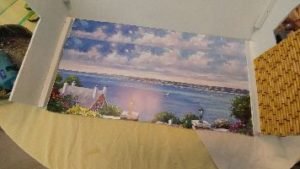
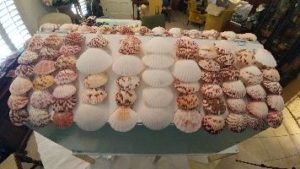
My Scallop Shell (Tile) Roof
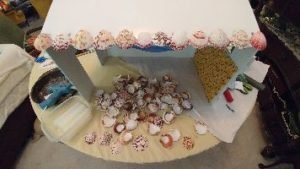
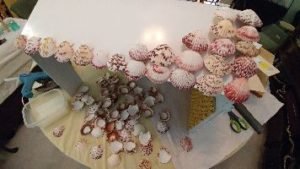
Everyone of these shells I found on our beach out in Indian Shores, Florida. I think that’s what makes this project so special. There is a lot of thought and time and effort into gathering these gems.
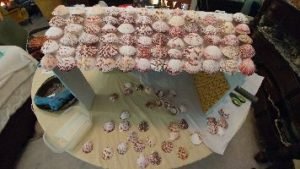
I wanted this to look like a tile roof where the tiles overlap each other and even hang over the side of a roof.
I used hot glue to adhere them together.
There are even places where I used a few broken scallop shells in order to emulate a real tile roof with their broken tiles as well.
——————————————-
I used a round dowel just to prop the roof up as I worked. The shells are pretty heavy now.
——————————————–
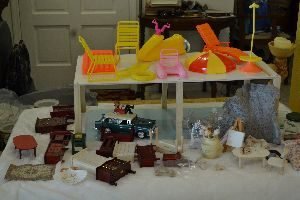
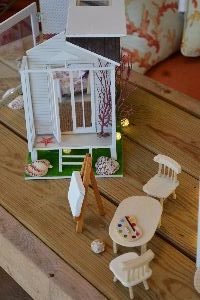
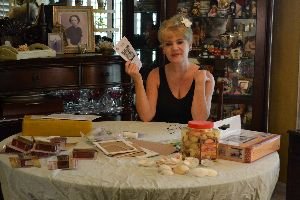
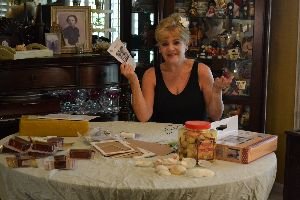
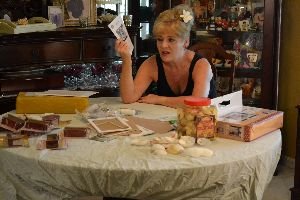
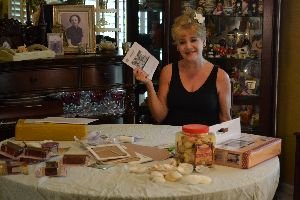
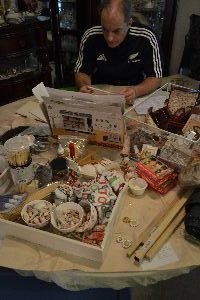
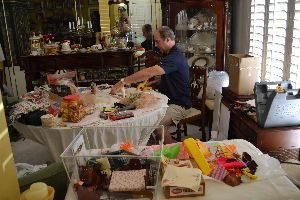
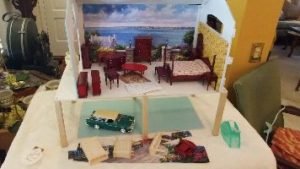
Here is all the furniture and accessories that I had to chose from. Most of it I bought at the Dollar Tree. Some of it I found in thrift stores, and the beachy colorful items I found on Ebay as they are Barbie items. I decided against most of the Barbie stuff as it was just too big in scale for what I had in mind with my Beach House.
———————————–
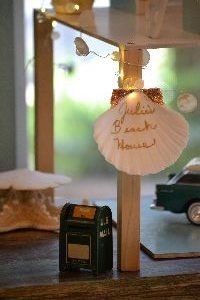
The Door Bell
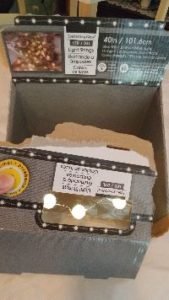
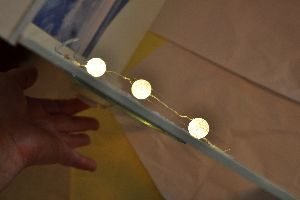
Last Christmas I found these great battery operated lights that I can easily drape anywhere that I like. There were probably about 12 in this container. I ended up buying the entire box of them that they came in. As you can see they come with a “try me” button so that you know what they look like before you buy them. I was not about to throw that little jewel away and I kept it knowing that I would do something with it in the future. I just didn’t know what, until now…………………..
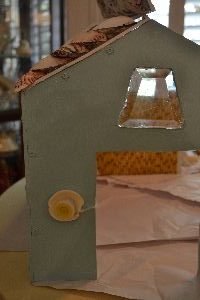
I realized that it would make a great door bell that would light up when someone rang it. I believe that the hearing impaired have these kinds of doorbells as they cannot hear them, but they can see them.
So, how I ended up adhering it to make a doorbell was that I first glued a shell onto the outer wall. The shell had something of a little “ledge” in it that I knew the button could sit in easily. Then I just hot glued the cord in various areas in order to adhere it correctly inside the beach house.
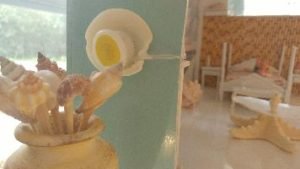
A Unique Doorbell
Whenever there is a “visitor” the lights light up. 🙂
————————————–
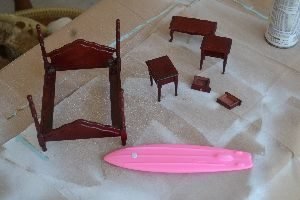
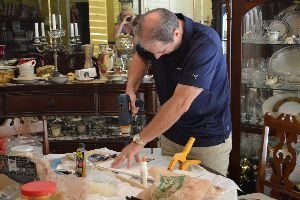
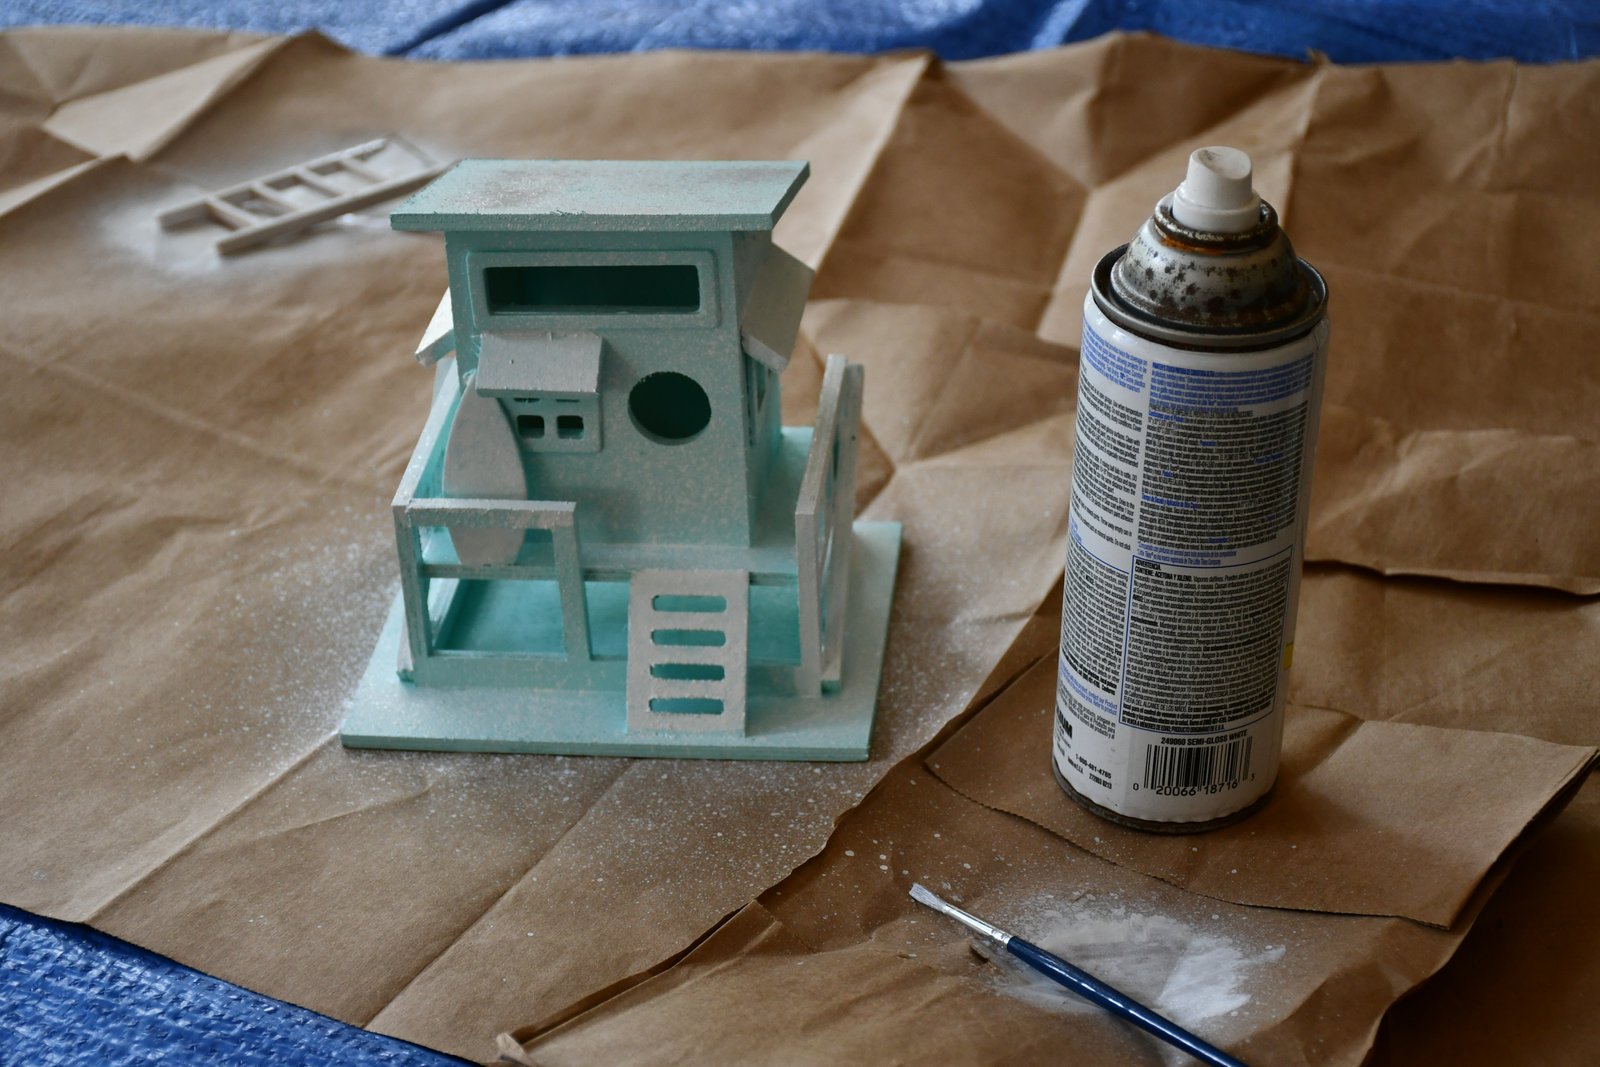
Spray Painting
The main furniture that I wanted to use was this beautiful dark antique color. There is nothing wrong with it except that I knew that it wouldn’t look good here. Neither would the hot pink Barbie surf board. So, I spray painted everything white.
——————————————–
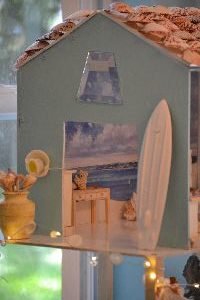
You can see the surfboard here. It looks great painted white.
Also the bedroom furniture, below.
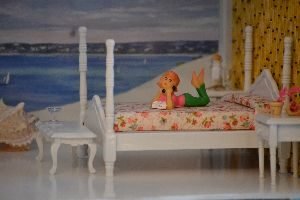
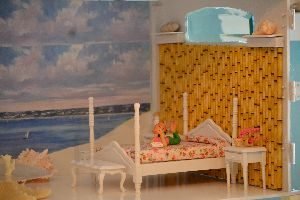
I even glued some white shelves beside the bedroom window and added some sea shells.
The cute girl laying on the bed talking on the phone is a vintage birthday cake topper.
—————————————–
The Coffee Table
I wasn’t particularly happy with some of the doll house furniture that I had so I decided to be a bit creative and make my own beach house furniture out of various shells and star fish that I had.
I made the coffee table above with a star fish, and a very fragile large shell, and a little bit of coral that I had found years ago.

——————————————
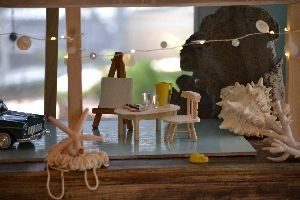
Underneath the Beach House
One thing that I particularly loved about some of the local’s in Hawaii was how they used the space underneath their homes. Those that were built on stilts. They seemed to live more below their homes than above them. Usually, you would see an area with a refrigerator, a stove, a table, chairs, their surfboards, boogie boards, beachy things, and you just knew that they lived there more than they did in their actual house.
I tried to recreate a little bit of the “below the house” living here.
————————————
Almost finished, just a bit more.
——————————————
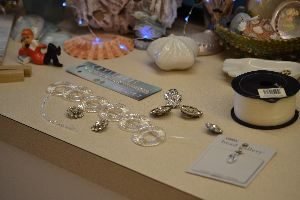
The “Chandelier”
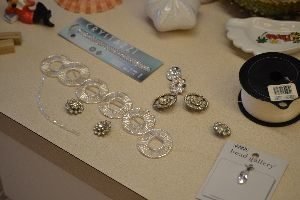
My original idea was for this to resemble a vintage chandelier in the beach house. Some of the items I bought from Micheal’s crafts store a few years ago, and the rest I found at thrift stores. I wanted it to sparkle but not necessarily light up.

I ended up using only these.
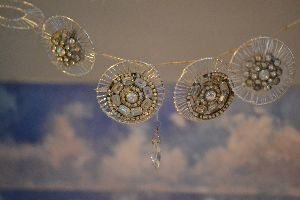
I actually hot glued the vintage buttons onto the round things and hung a faux jewel in the center. I just used fishing line to rig it up and I like the results.
You can see it here.
—————————————
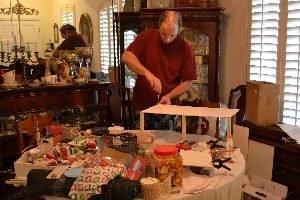
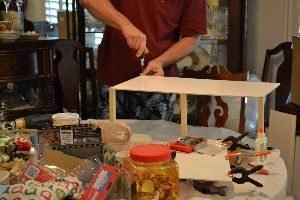
The Stairs
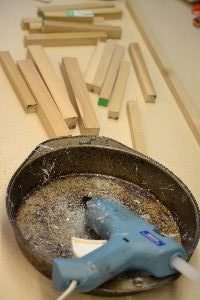

Gordon had some dowels in the garage that he had bought at Home Depot for various projects so I decided to claim them as use them as stairs. I like using things that we already have as opposed to buying something new. So, I marked them off in inches and then I asked my son Brodie to saw them apart for me. He did!
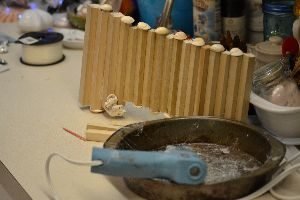
I then started to hot glue them one on top of the other, thus creating stairs. I used the hot glue and placed a line of it along the back of each piece of wood thus creating the steps.
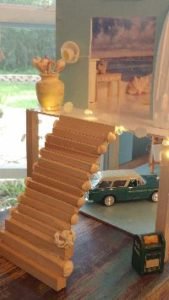

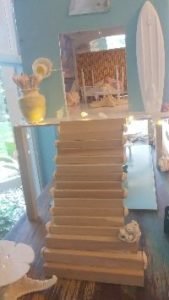
I think they turned out really well. I did glue a piece of coral on the 3rd. step, and I glued button shells that I found in Hawaii on every other step as an accent.
This was a lot of fun and I love just looking at it. Something that Gordon and I both created.
———————————————————————————
A Few Additions……

I saw these two “birdhouses” at Micheal’s craft store and I knew they would be perfect for my Beach House.
Even though they are bird houses they still fit the theme that I was going for.
A Bullet Trailer and a Life Guard Stand on the Beach

If you know anything about the beach then you know that everything is very sun faded, and weather worn. I didn’t mind the bullet trailer being all silver as that is how they are anyway. So, I spray painted it all silver. But, I didn’t want the Life Guard stand to be all solid blue. That is when I got out the only white paint that I had. Some white spray paint.
That is when I sprayed some of the white spray paint onto a cut up brown paper bag and then quickly used a paint brush to brush the paint around the life guard station. I wanted it to look a bit messy as everything is very sun and weather worn at the beach.
I also liked the fact that I was running out of spray paint and it was literally spraying dots of white here and there. Kind of in a spotted pattern. I loved it!
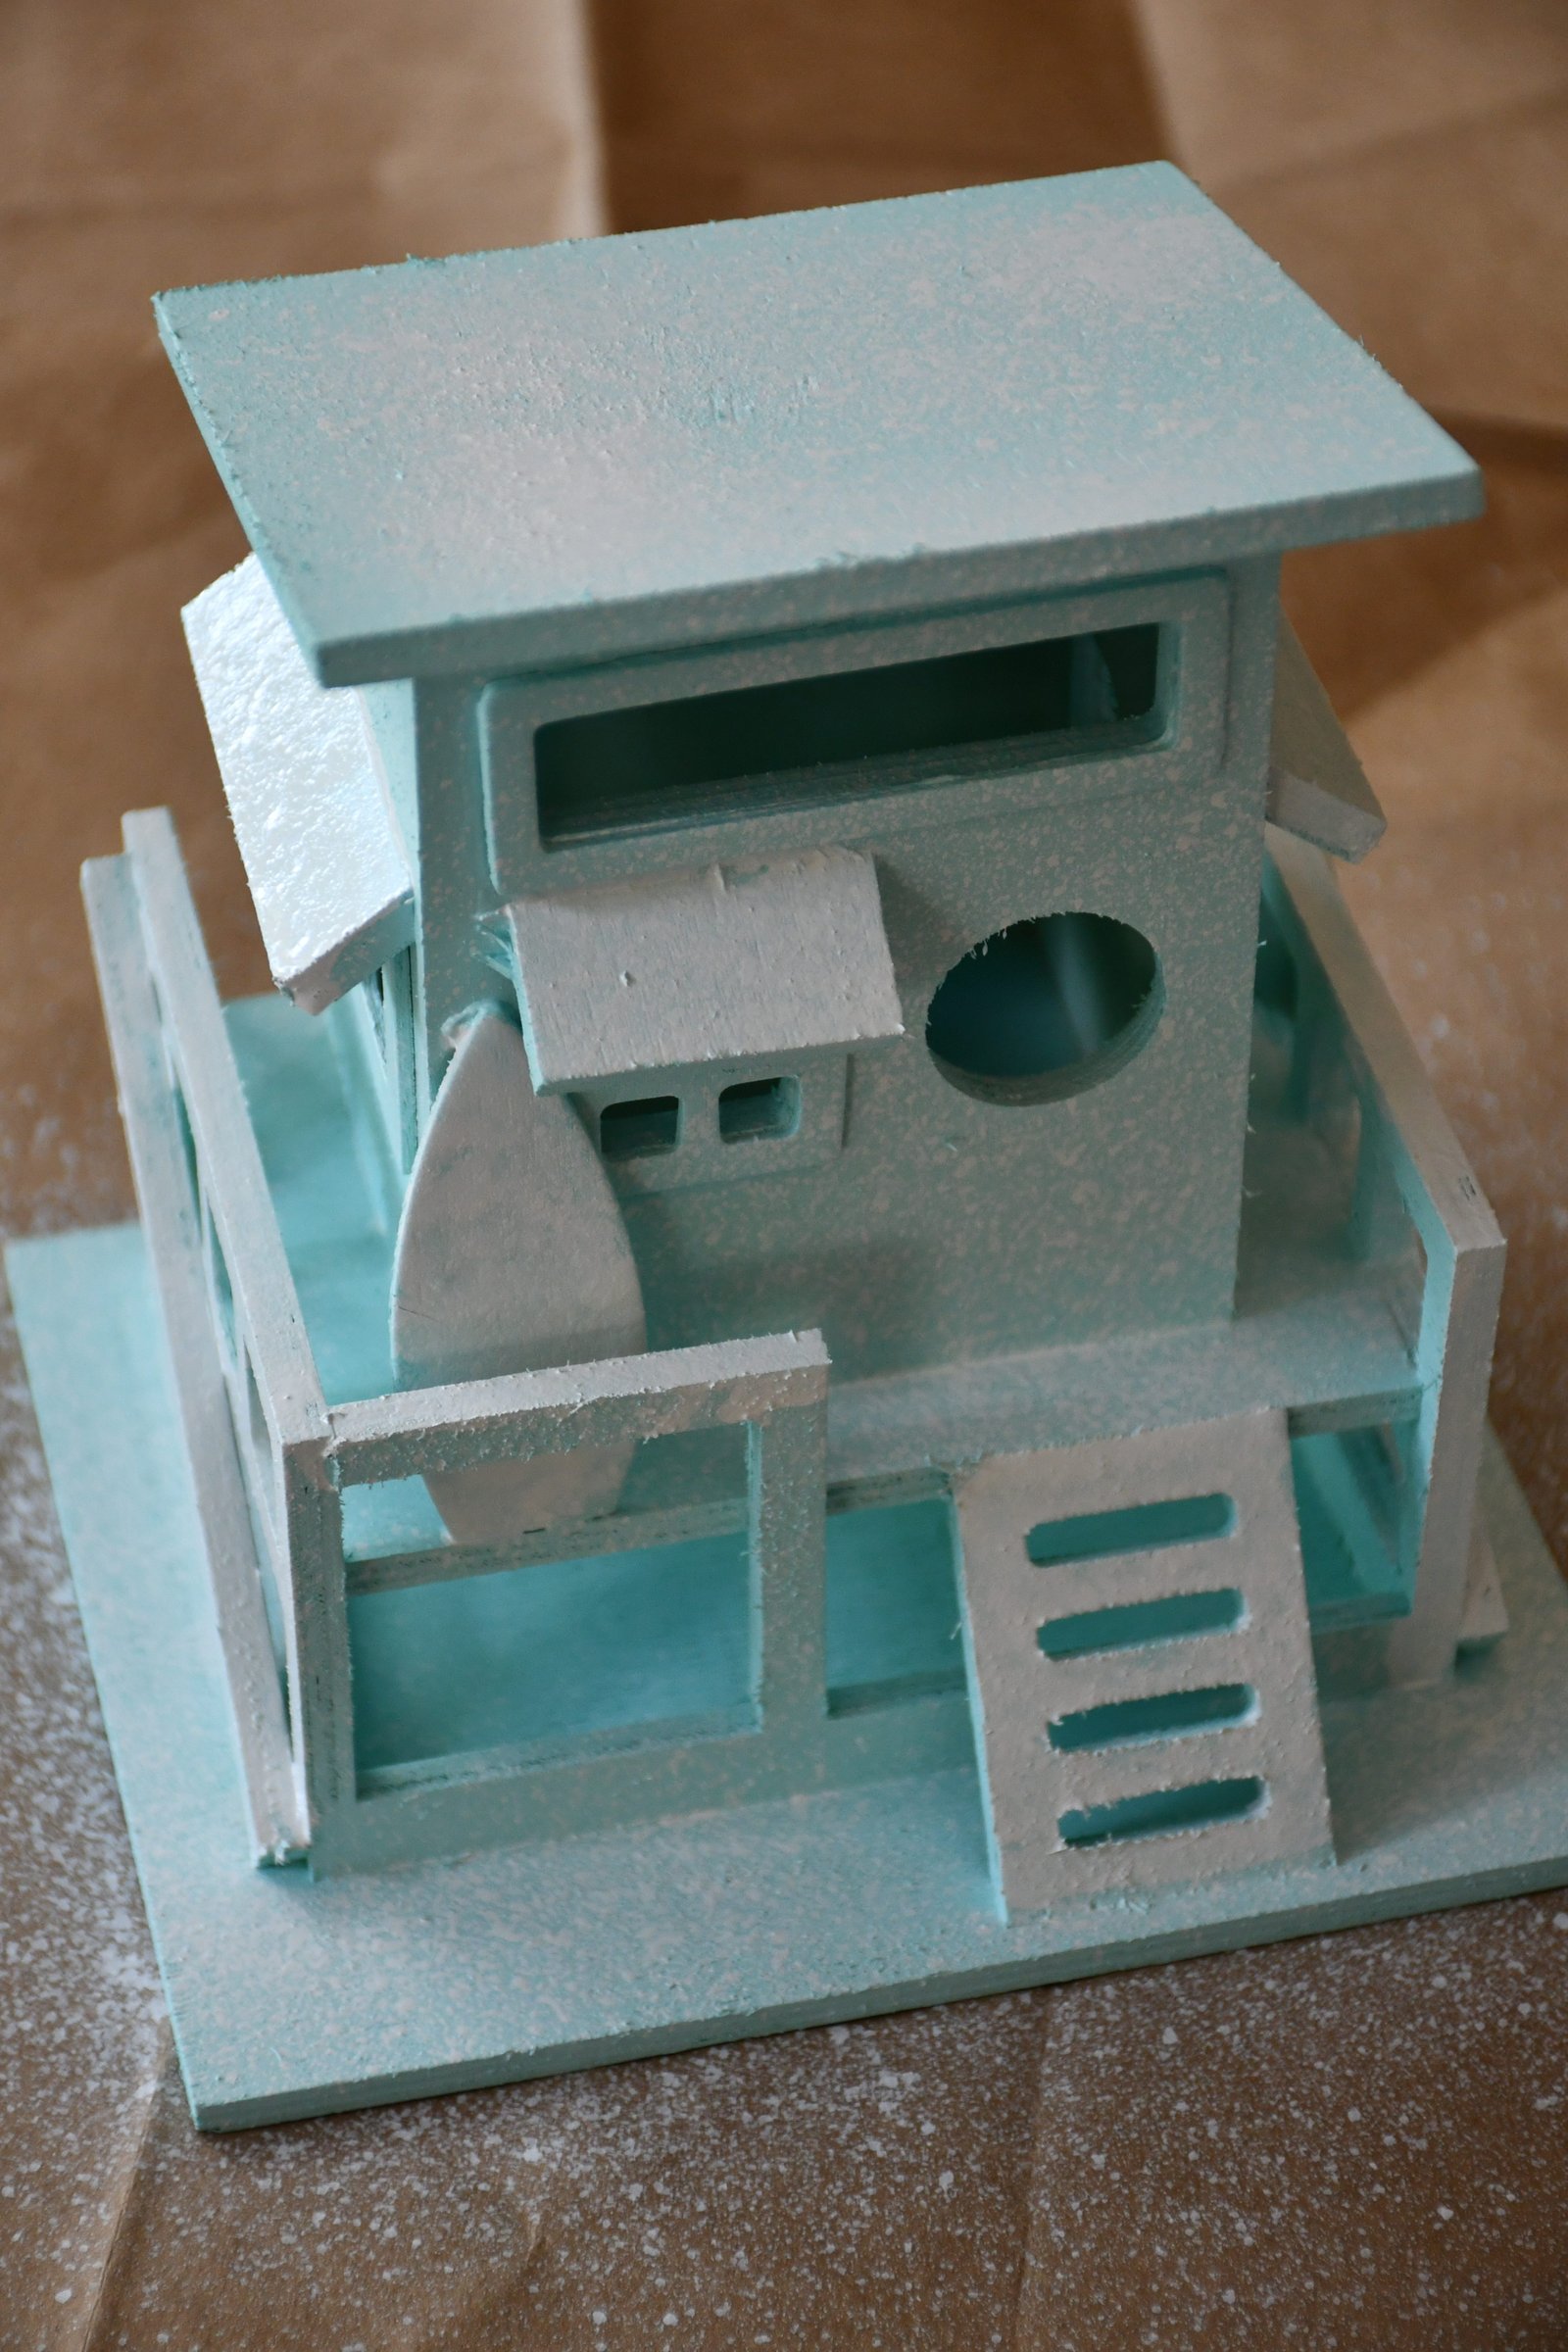
Now it’s ready to add to my beach house. 🙂
See you at the beach!
Julie
——————————————————————–
Also Check Out:
Stay Out Of The Water! JAWS Week
How to Make a Beachy Cheese Cake