ThanksGrillin’
THANKSGRILLIN’
2020
Welcome to our Home Renovations Thanksgiving
A.K.A. Our Thanksgiving During our Home Renovations
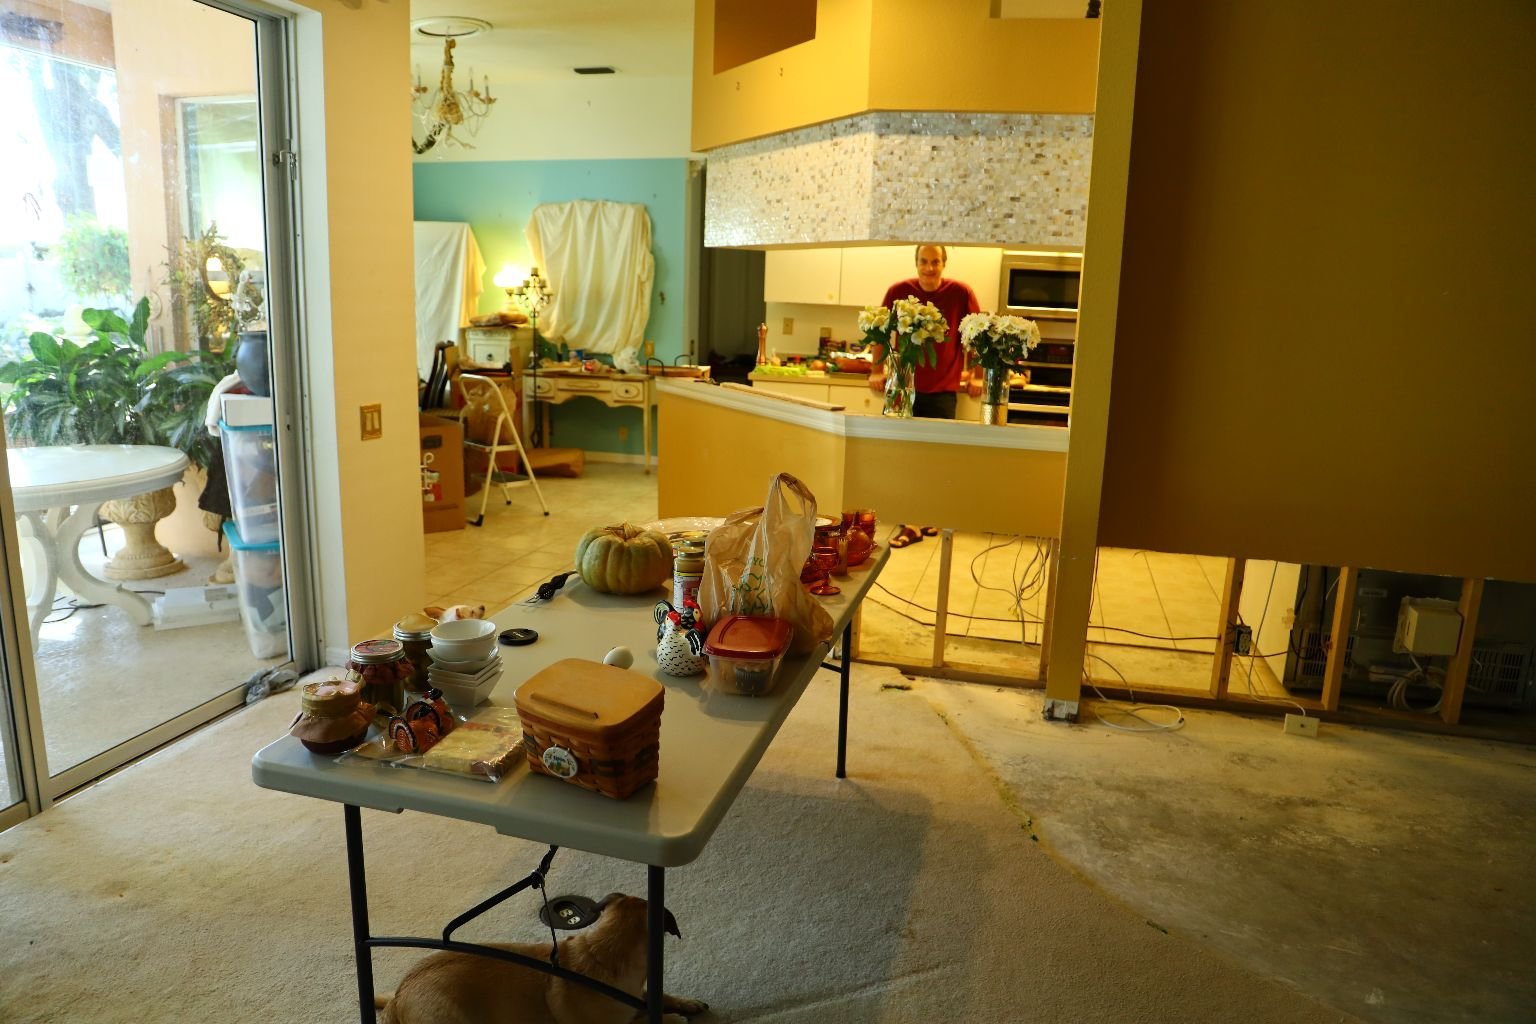
With our kitchen under construction, it fell to the outside grill to deliver us our turkey from evil. (Or something to that affect.)
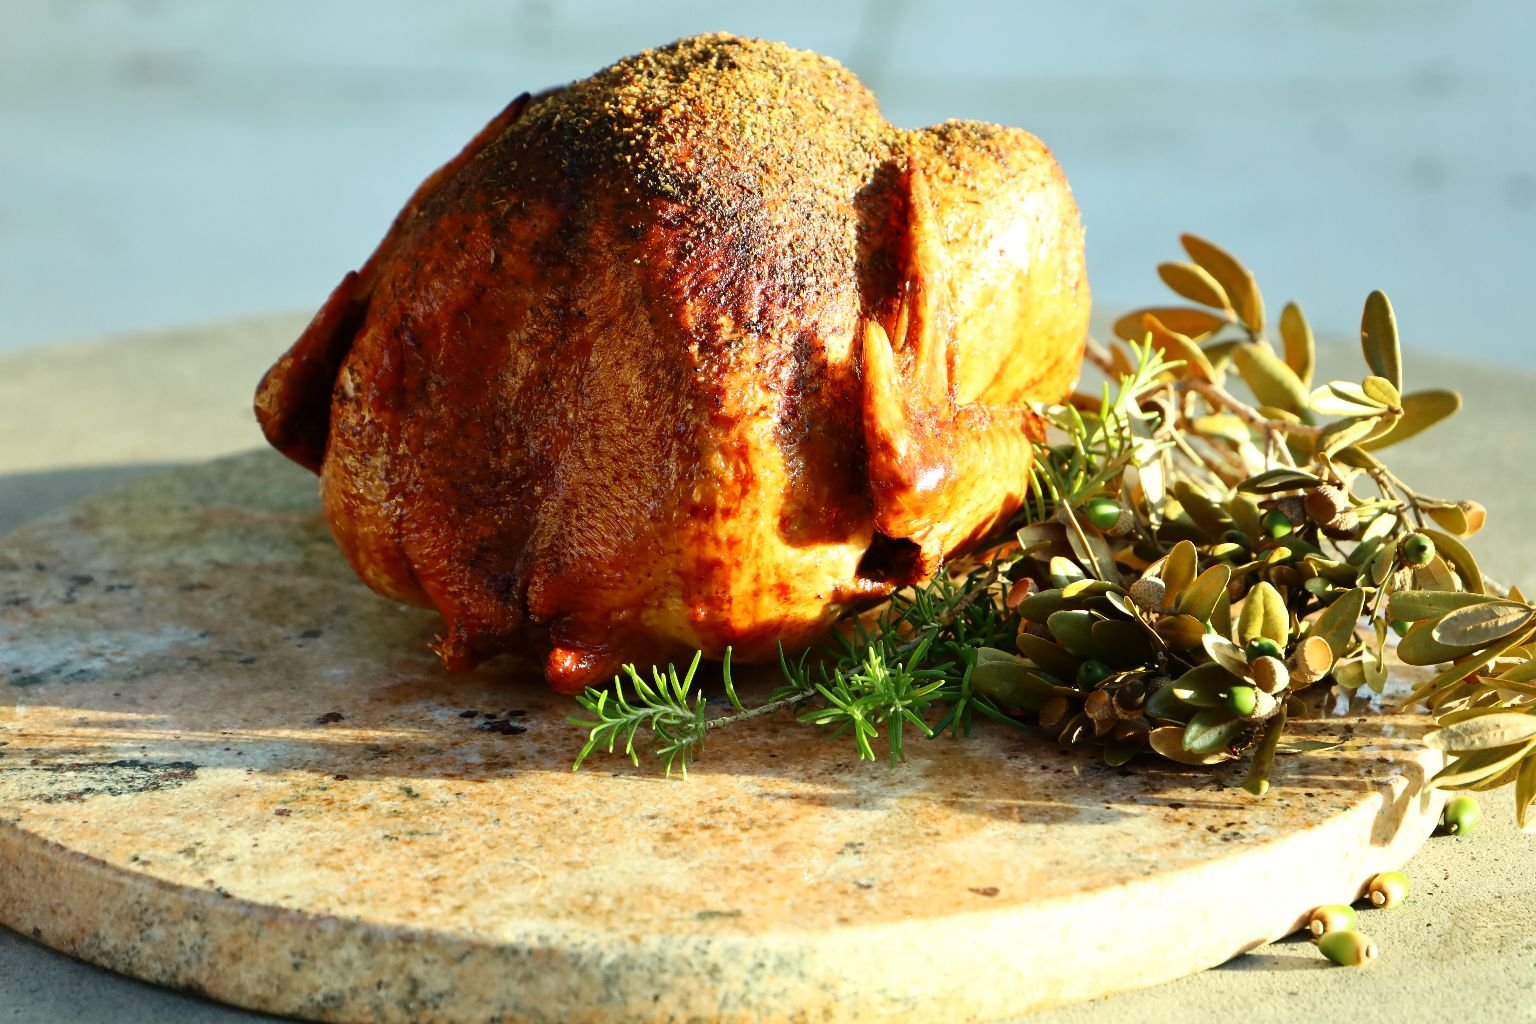
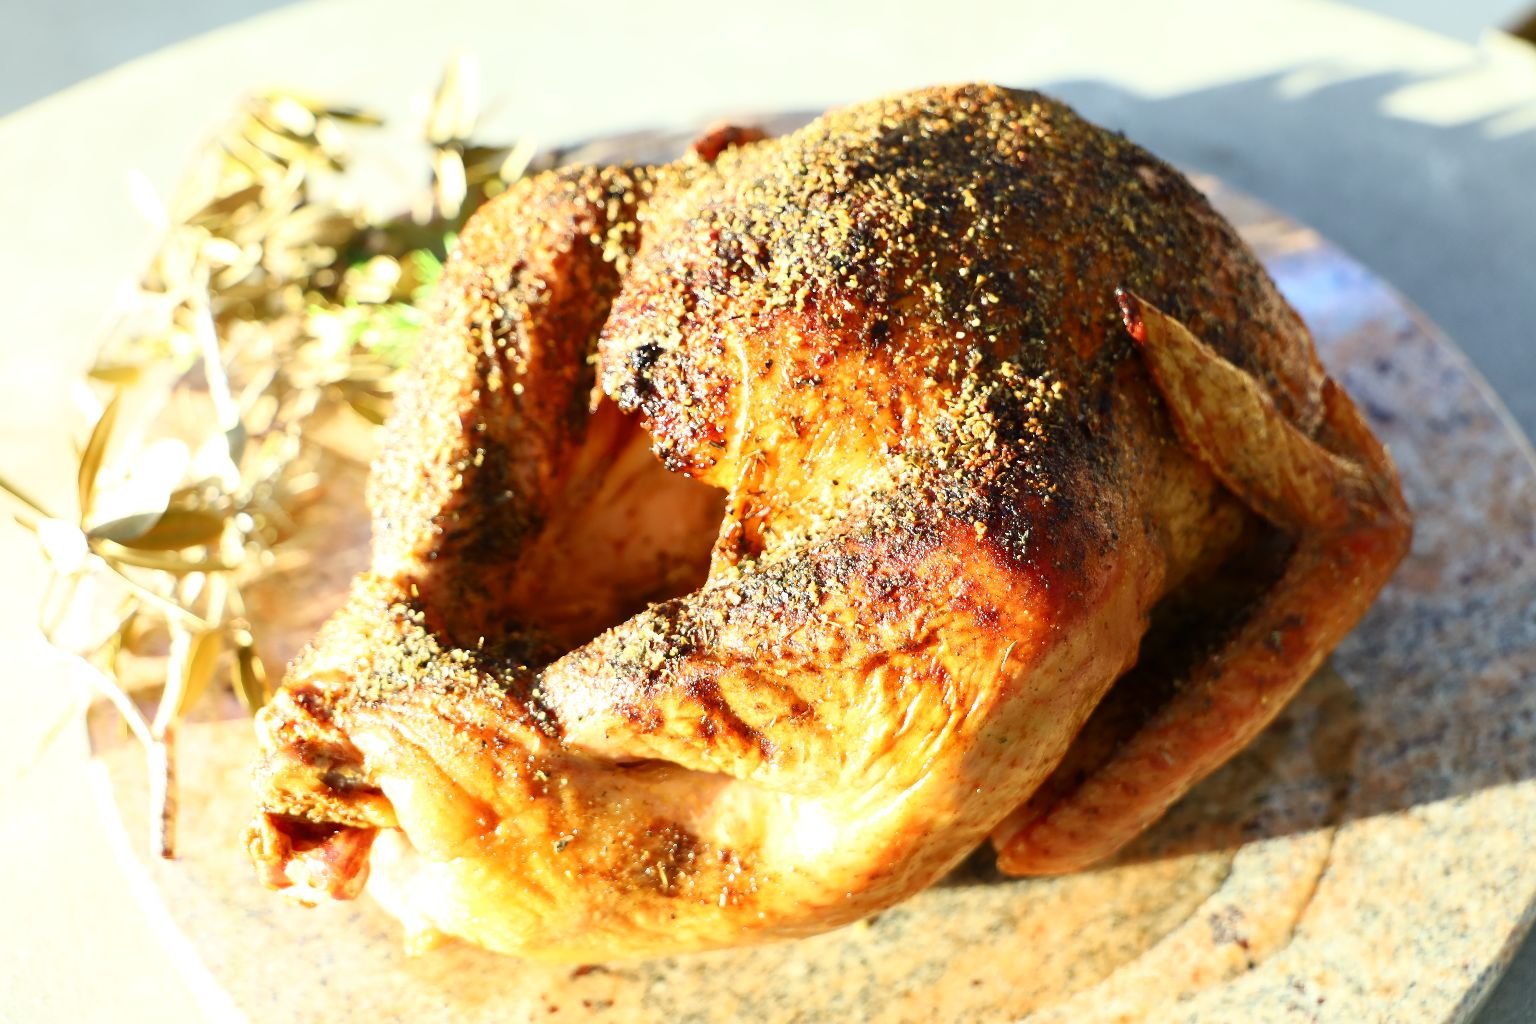
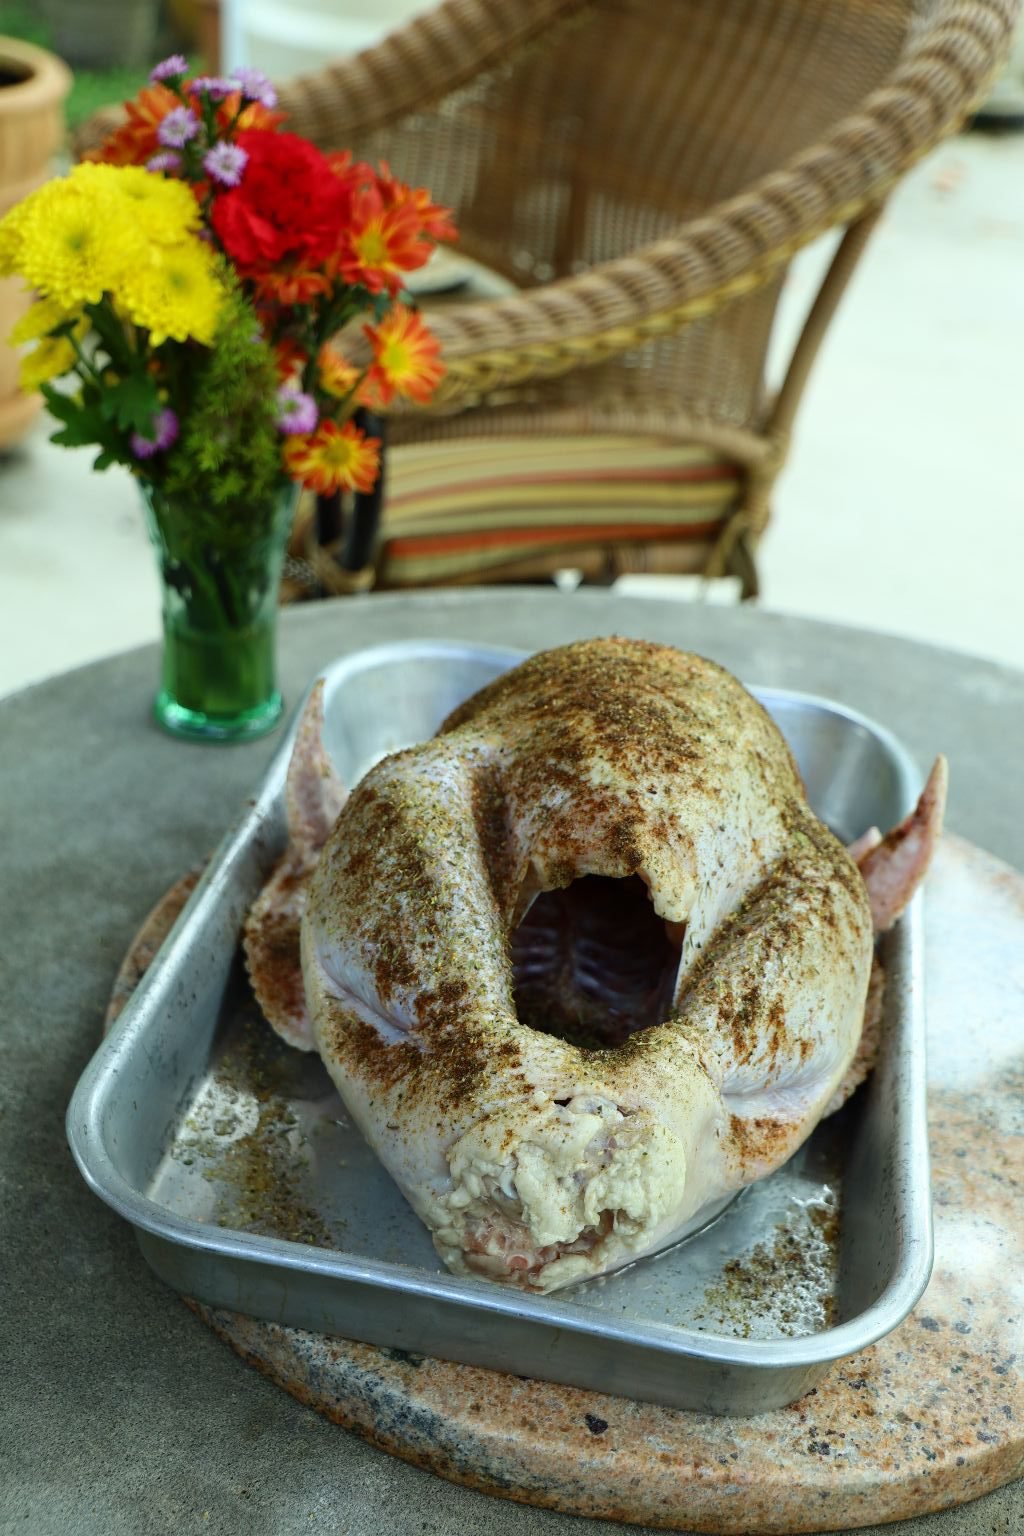
Check Out That Turkey!
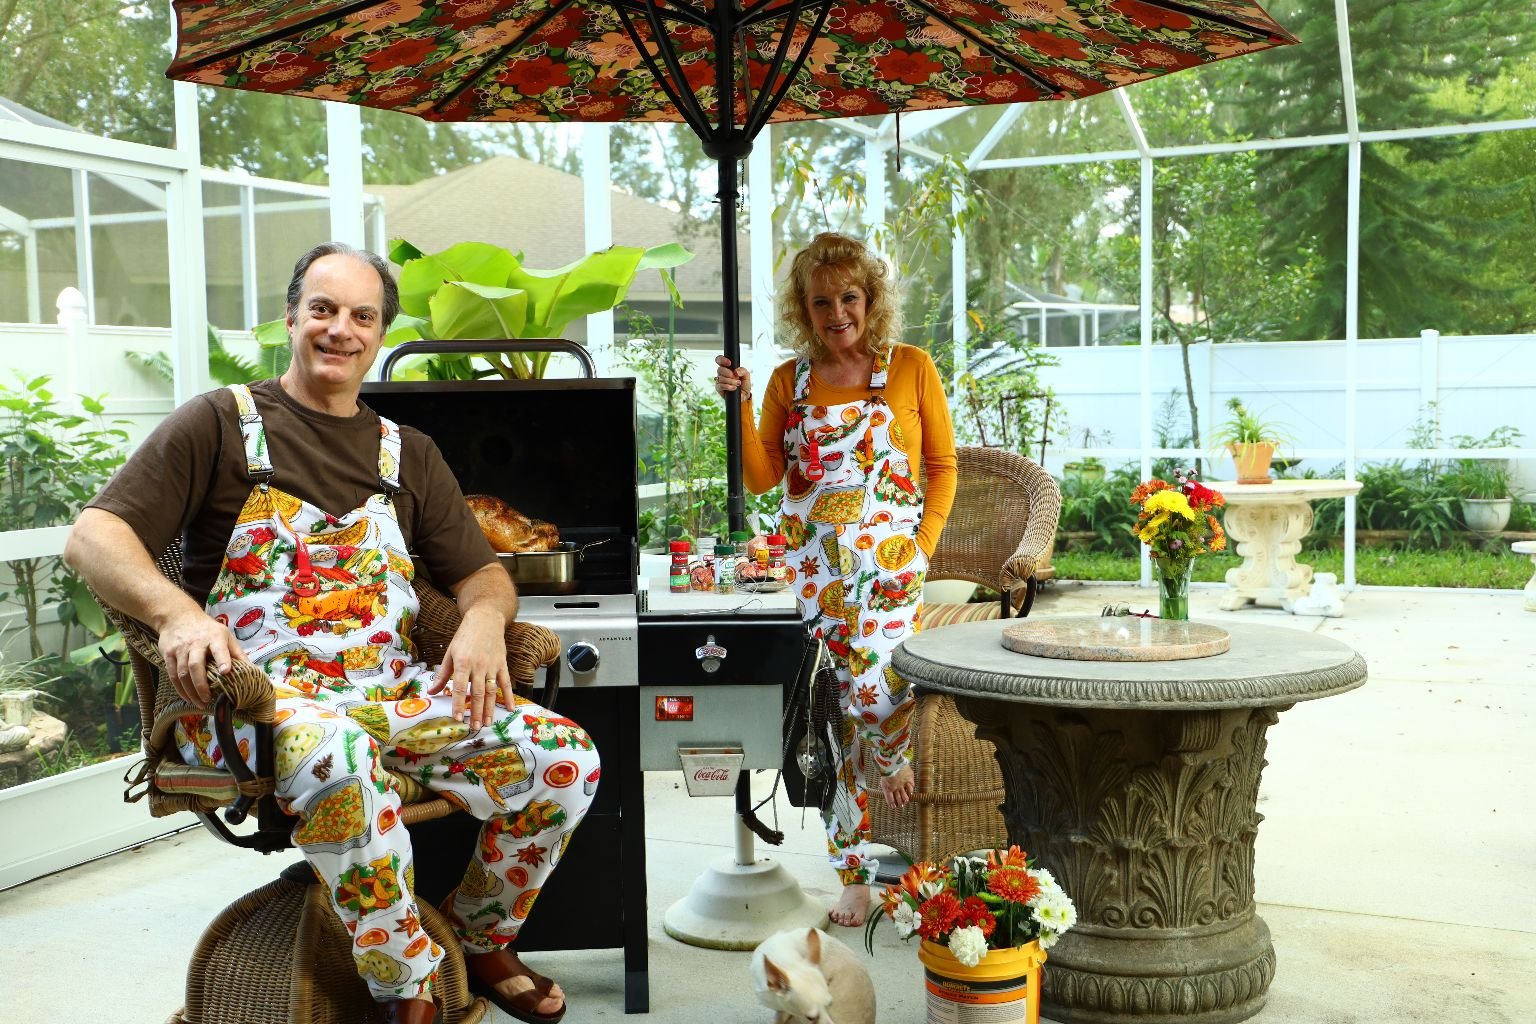
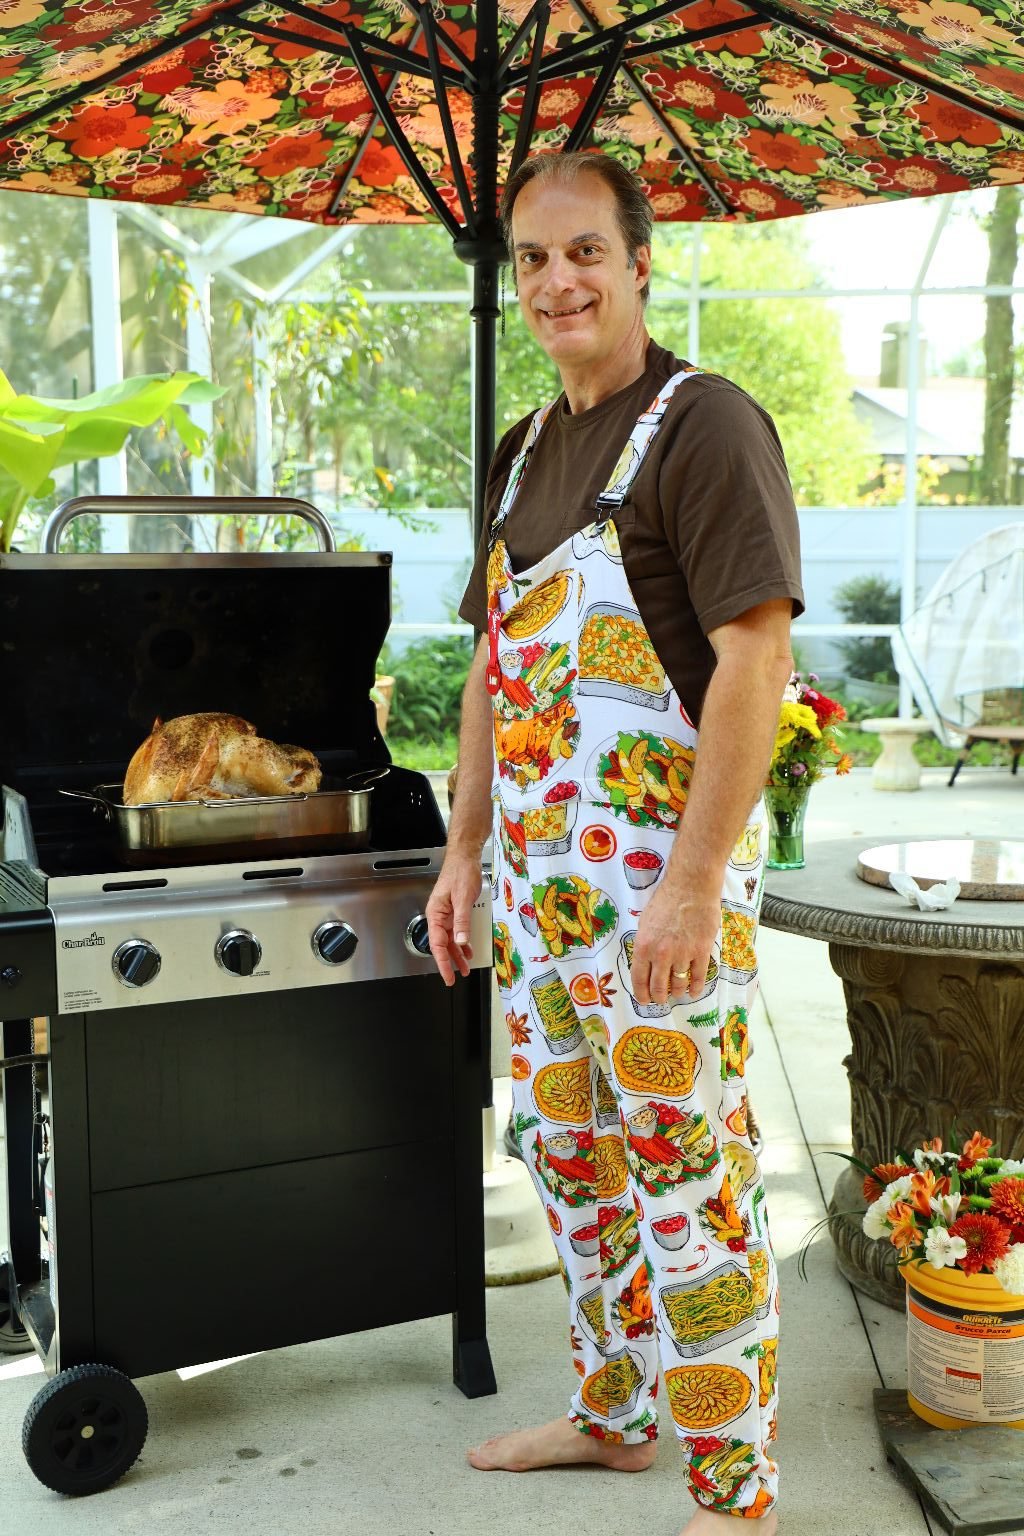
Check Out Our Matching Thanksgiving Pajamas

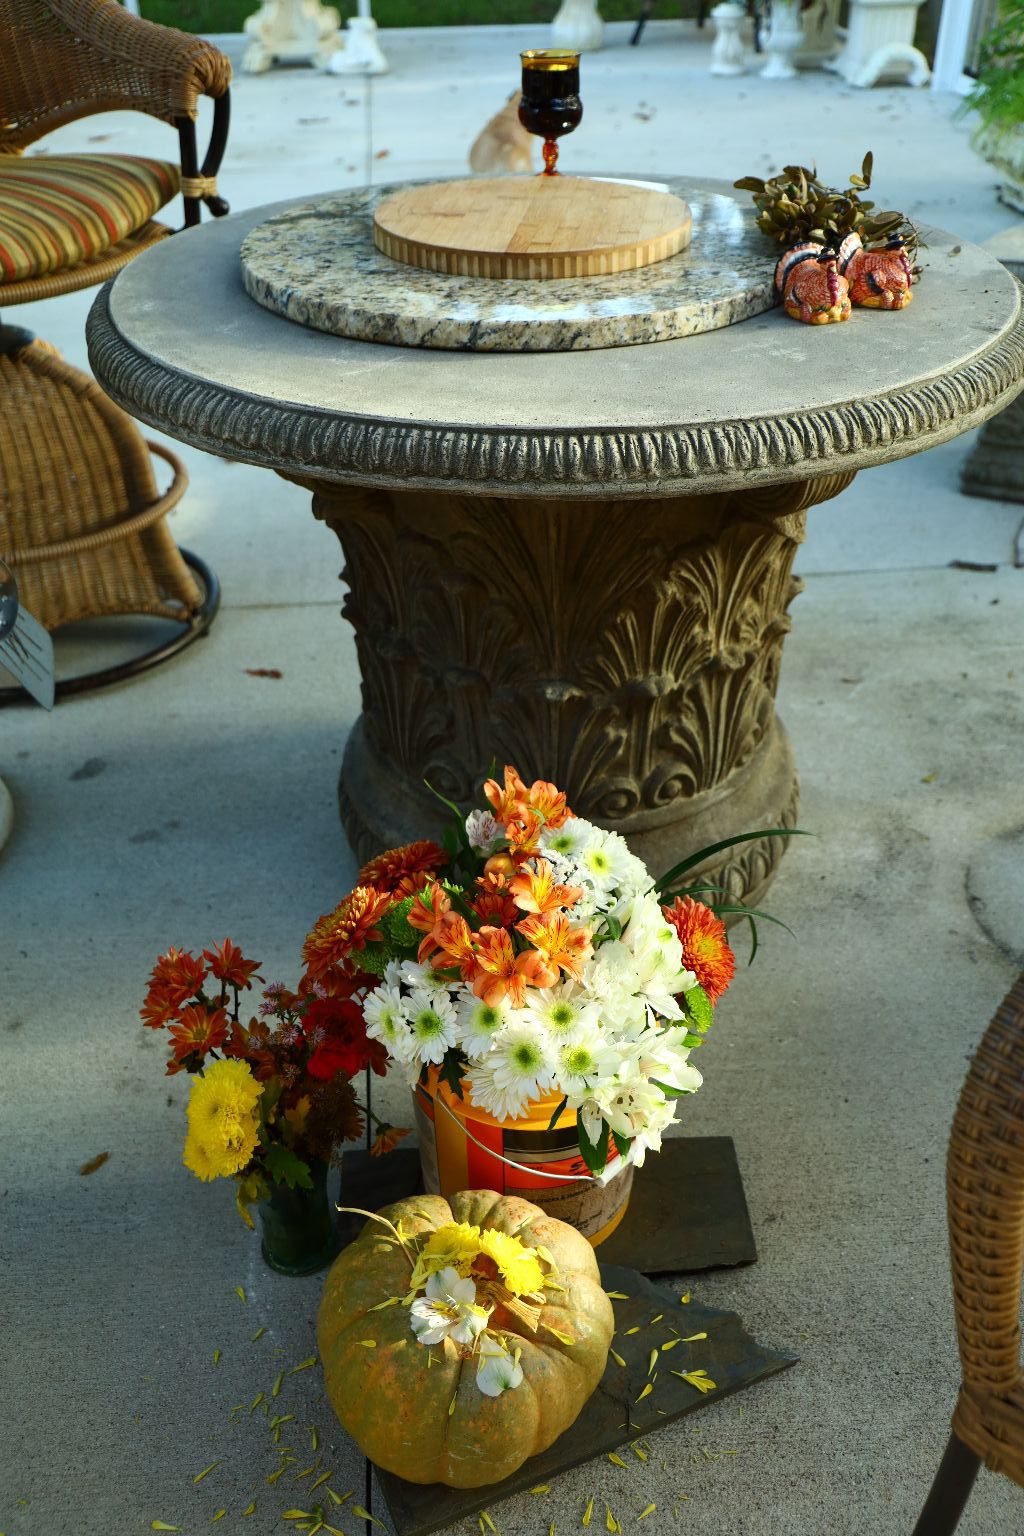
And Check Out The Vase I Used, A Bucket
—————————————————
(Keep Reading for our Recipes)
—————————————————————–
We managed to fit in a lovely Thanksgiving in spite of our Home Renovations.
If you would like to take a look:
Click Here For: Our Home Renovations

———————————————————————————-

Our The Money Pit/Home Renovations Thanksgiving
We based this excellent Thanksgiving on the movie, The Money Pit.
(I realize this is probably the strangest Thanksgiving we’ve ever had, and you’ve ever seen, but here we go!)


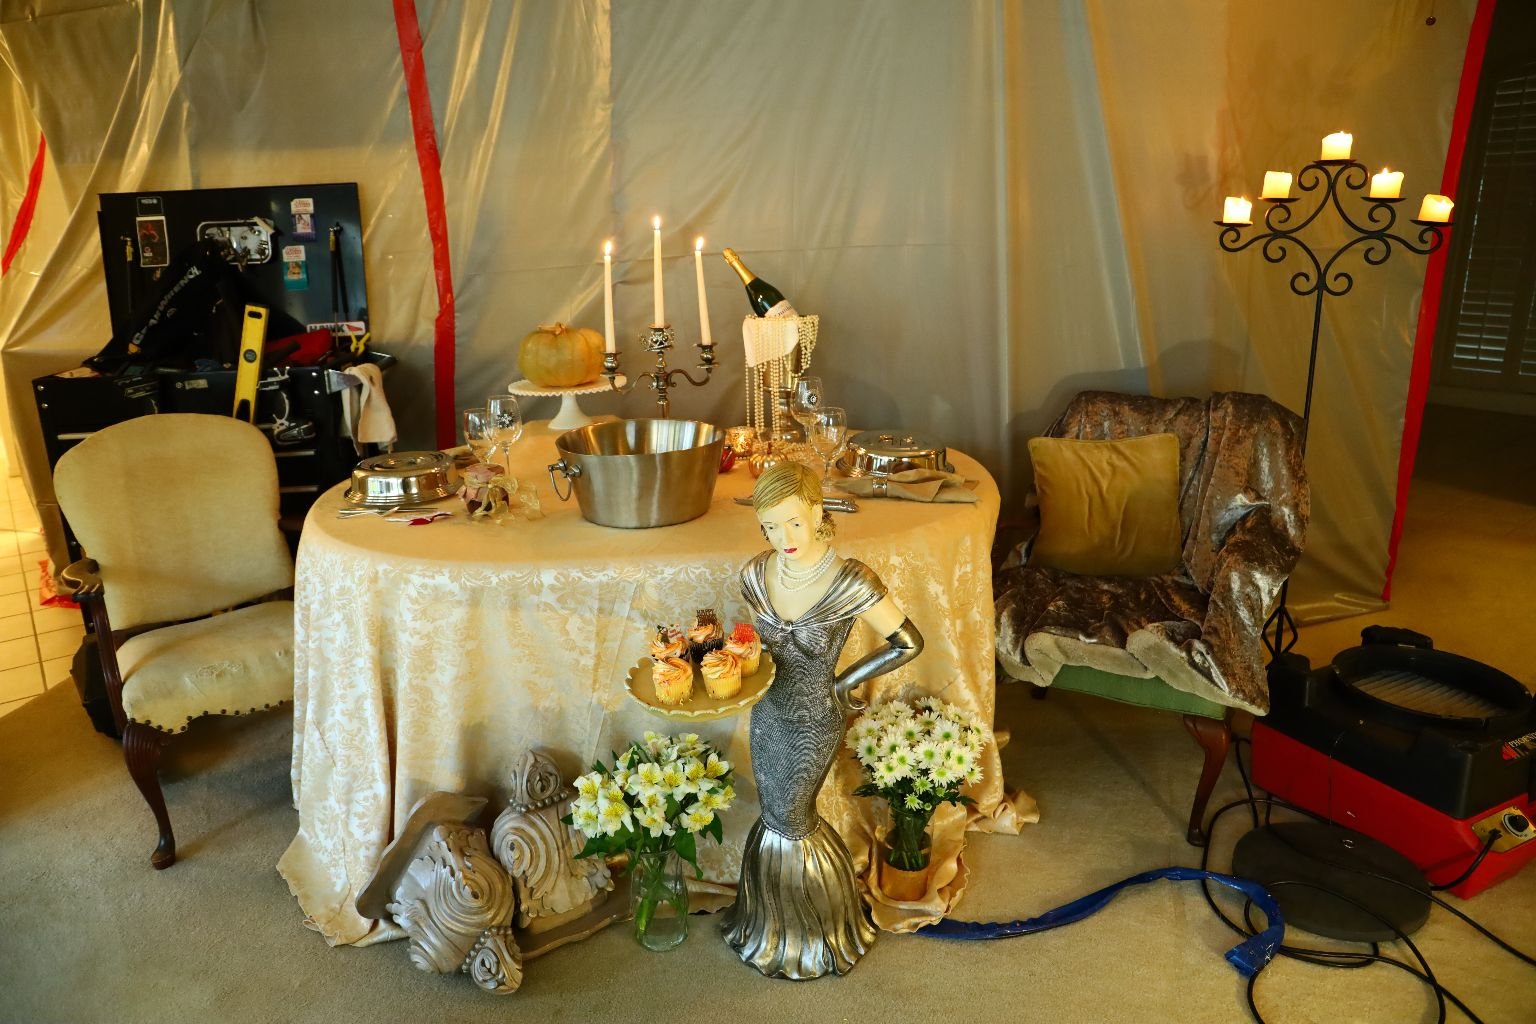
Mae Played a Very Important Role
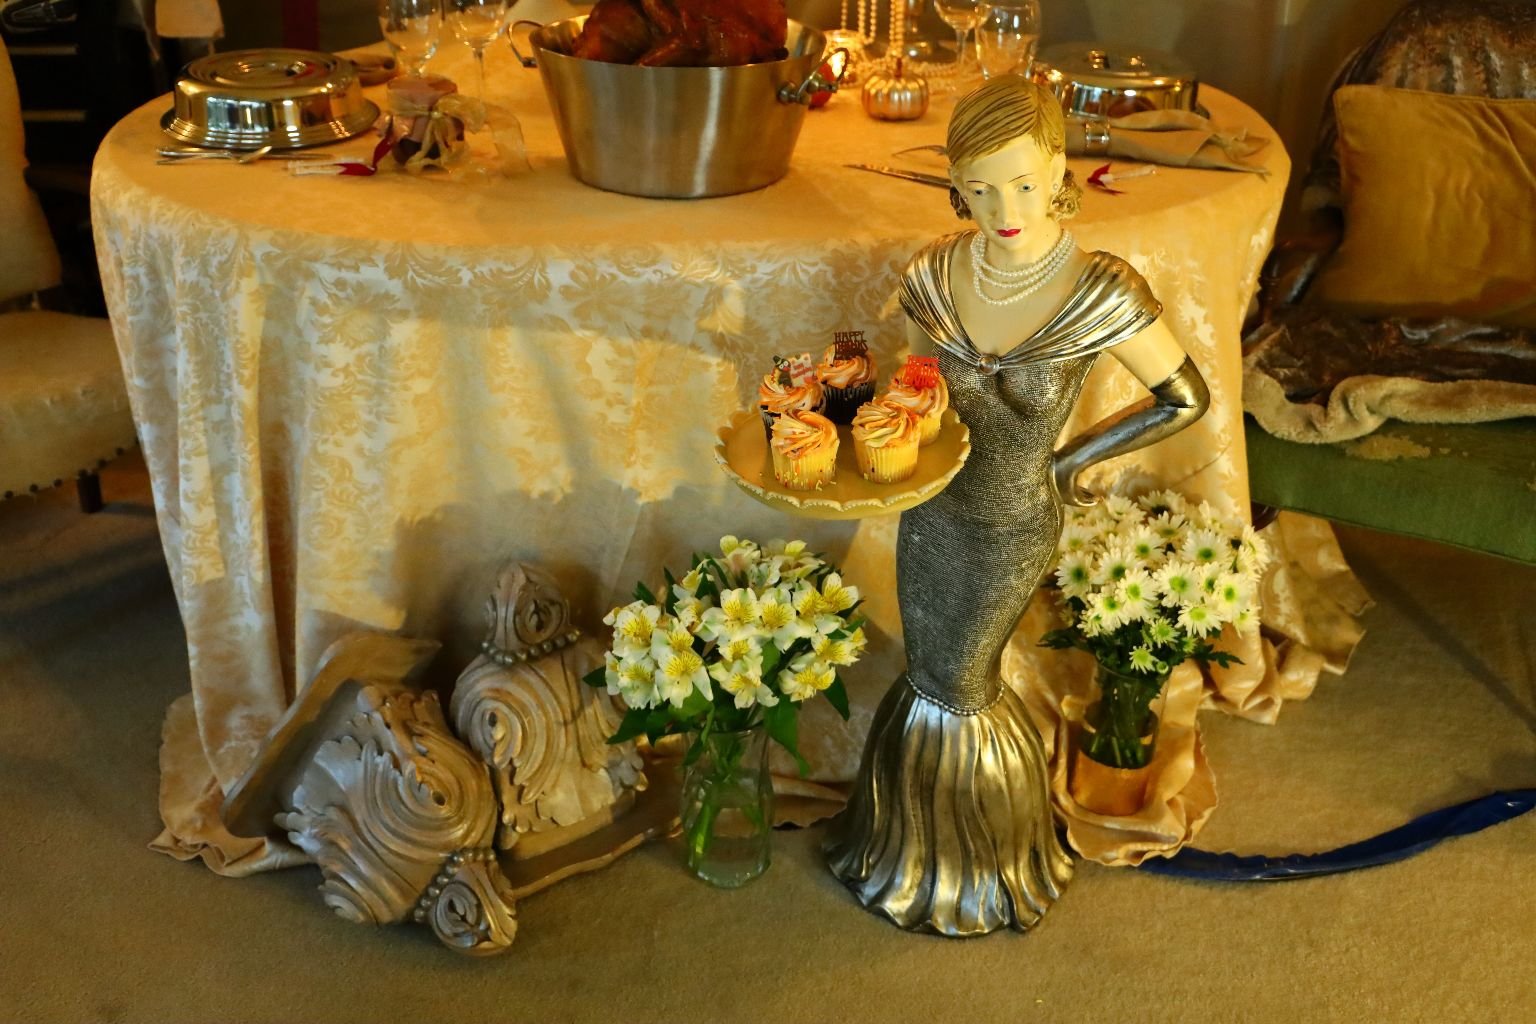
She Added a Bit of Glamour and Held our Cupcakes

Hi! Just Testing the Camera

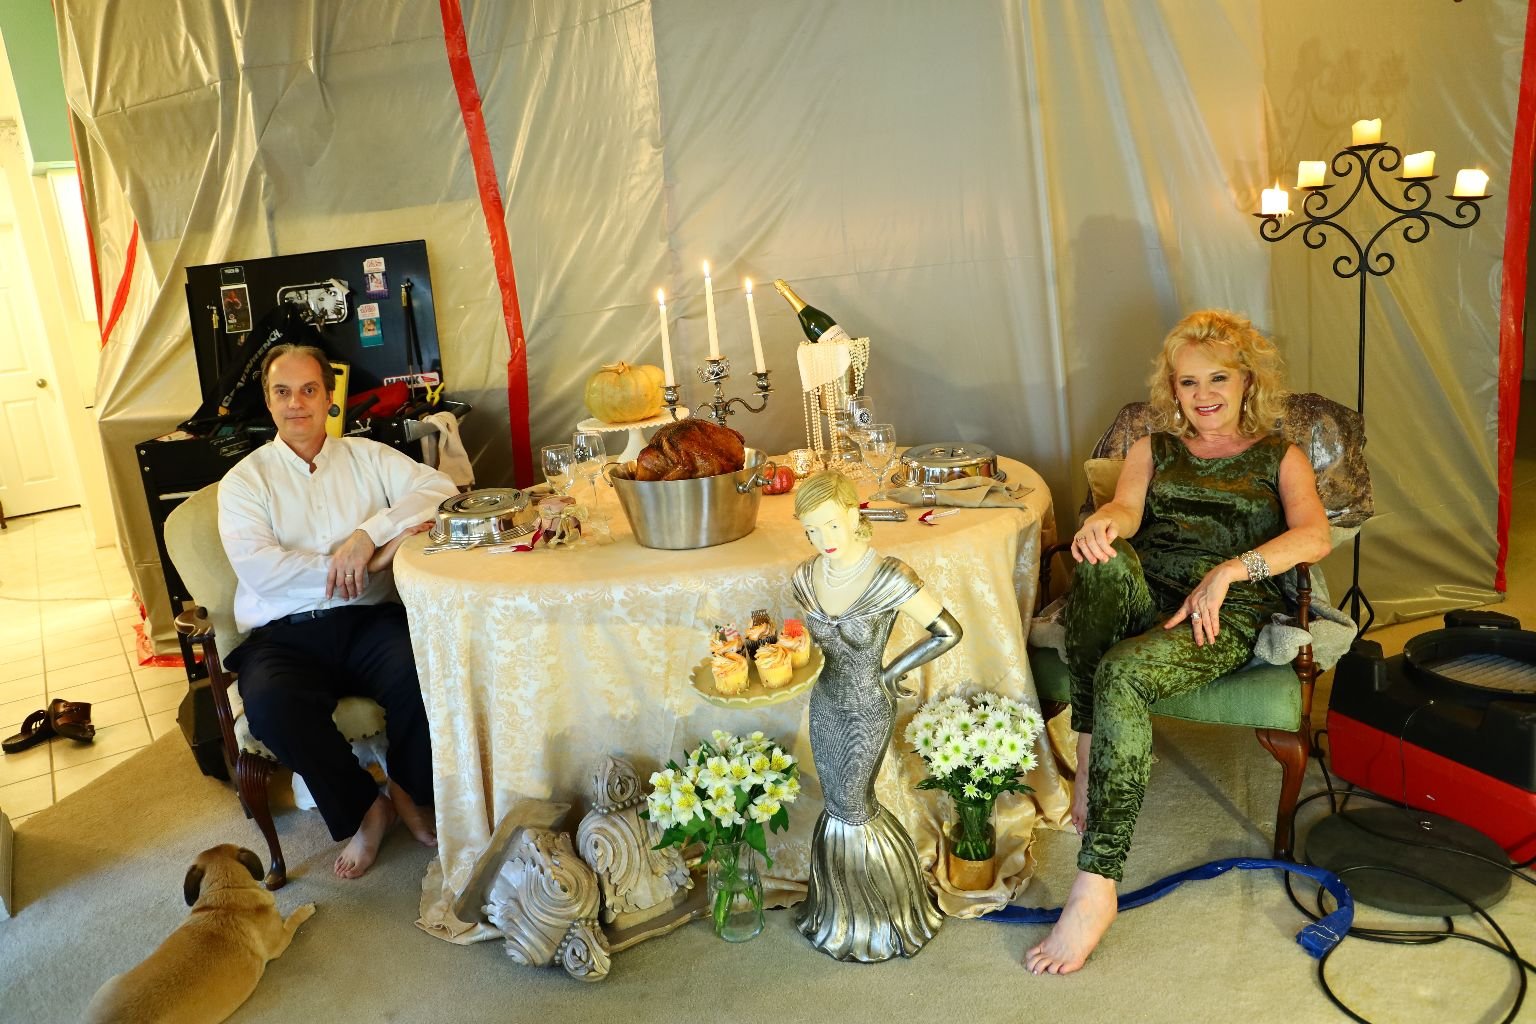
I Loved our “Formal” Thanksgiving Table
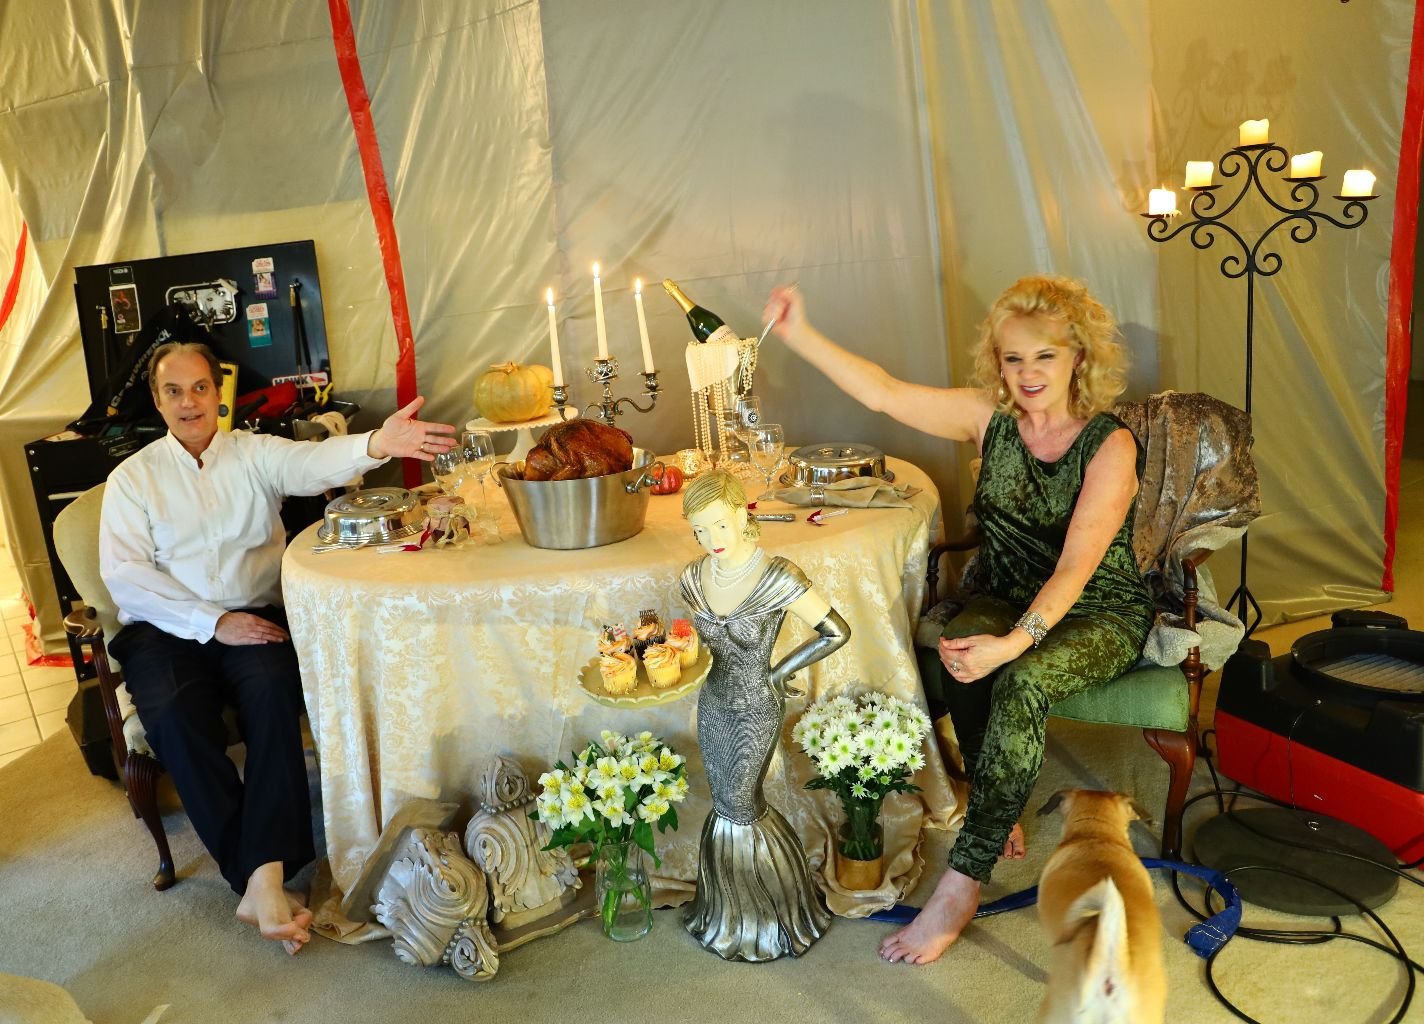
Ready to Dig into That Turkey
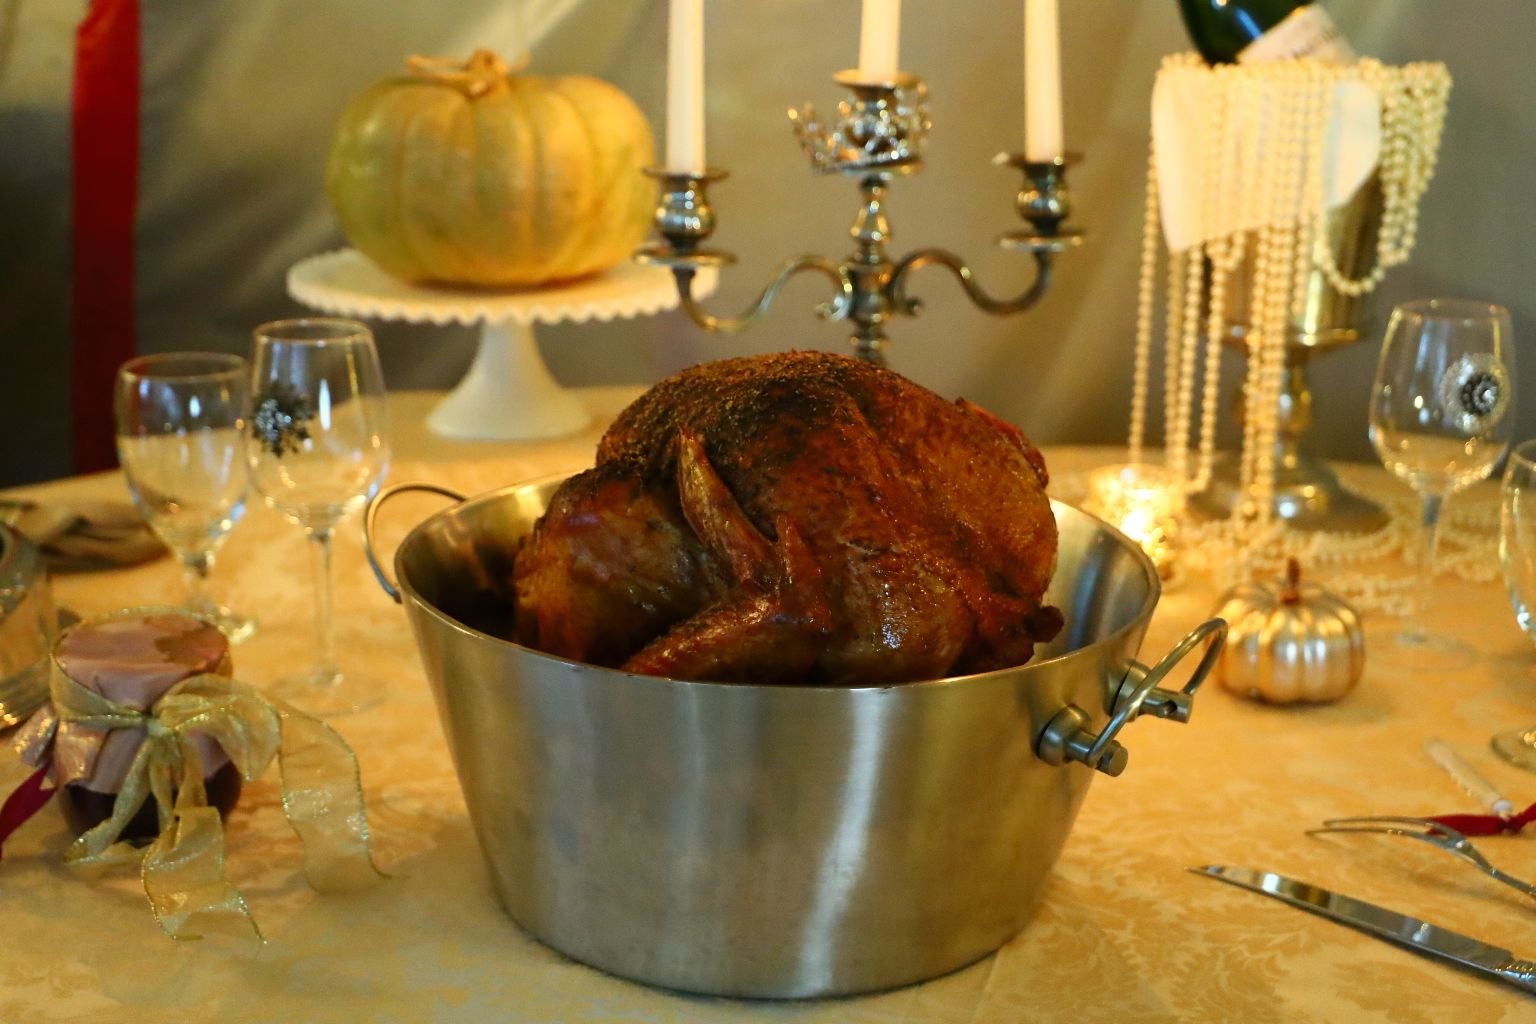
Turkey in a Bucket

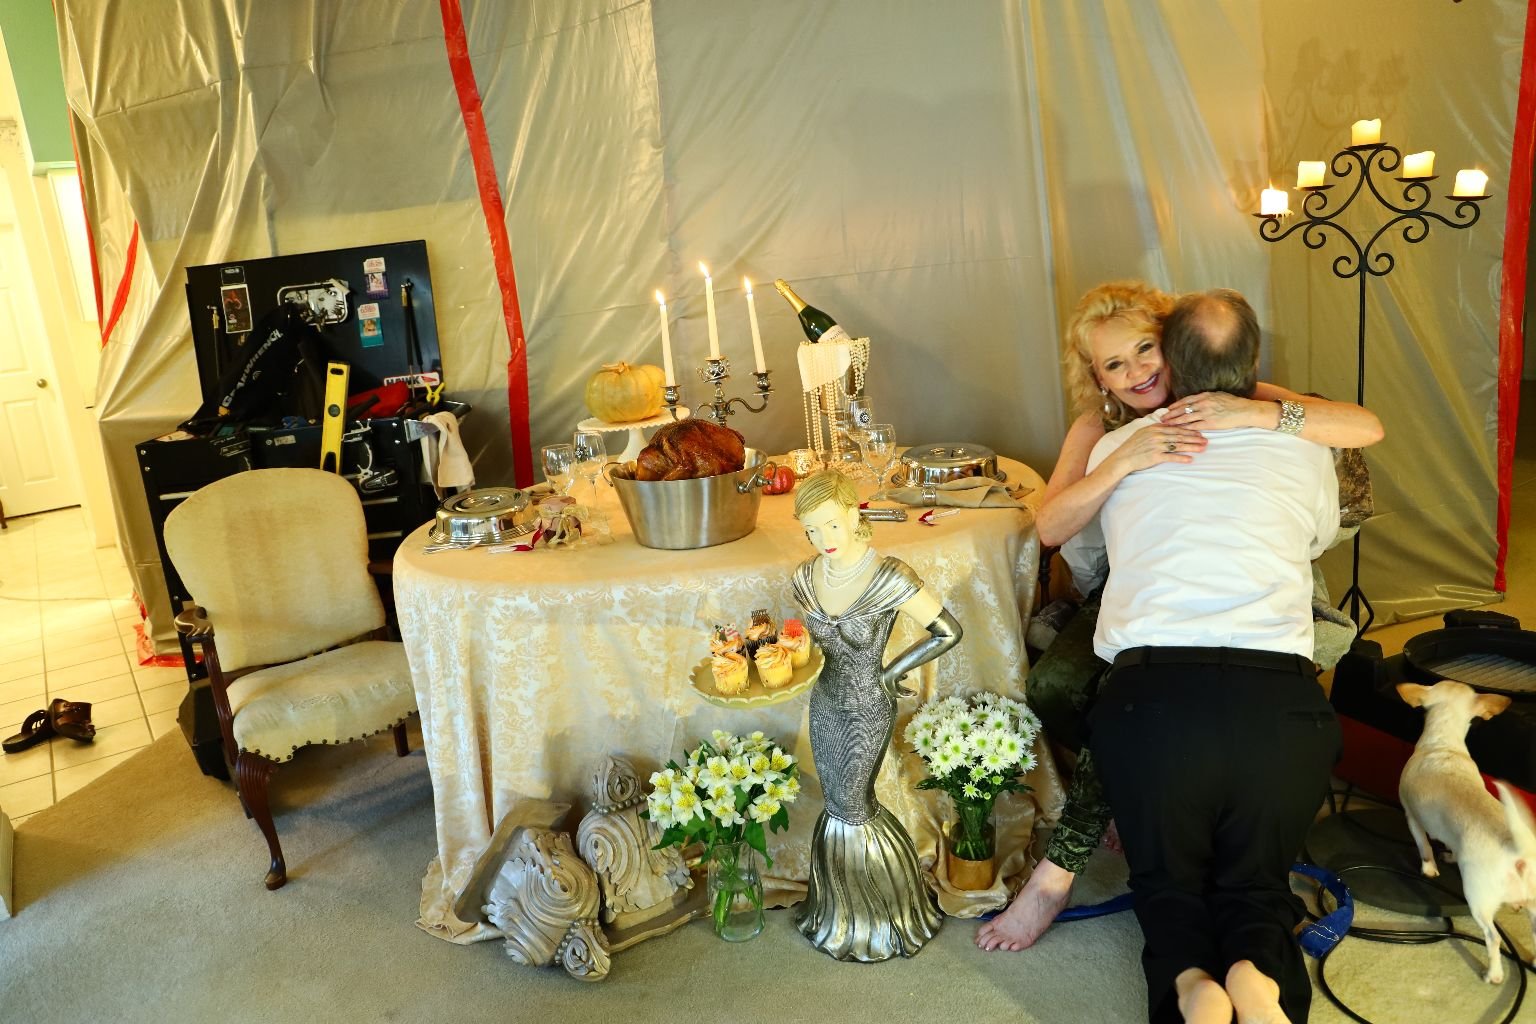
Just When You Think The Timer on the Camera Is Done
—————————————————————-
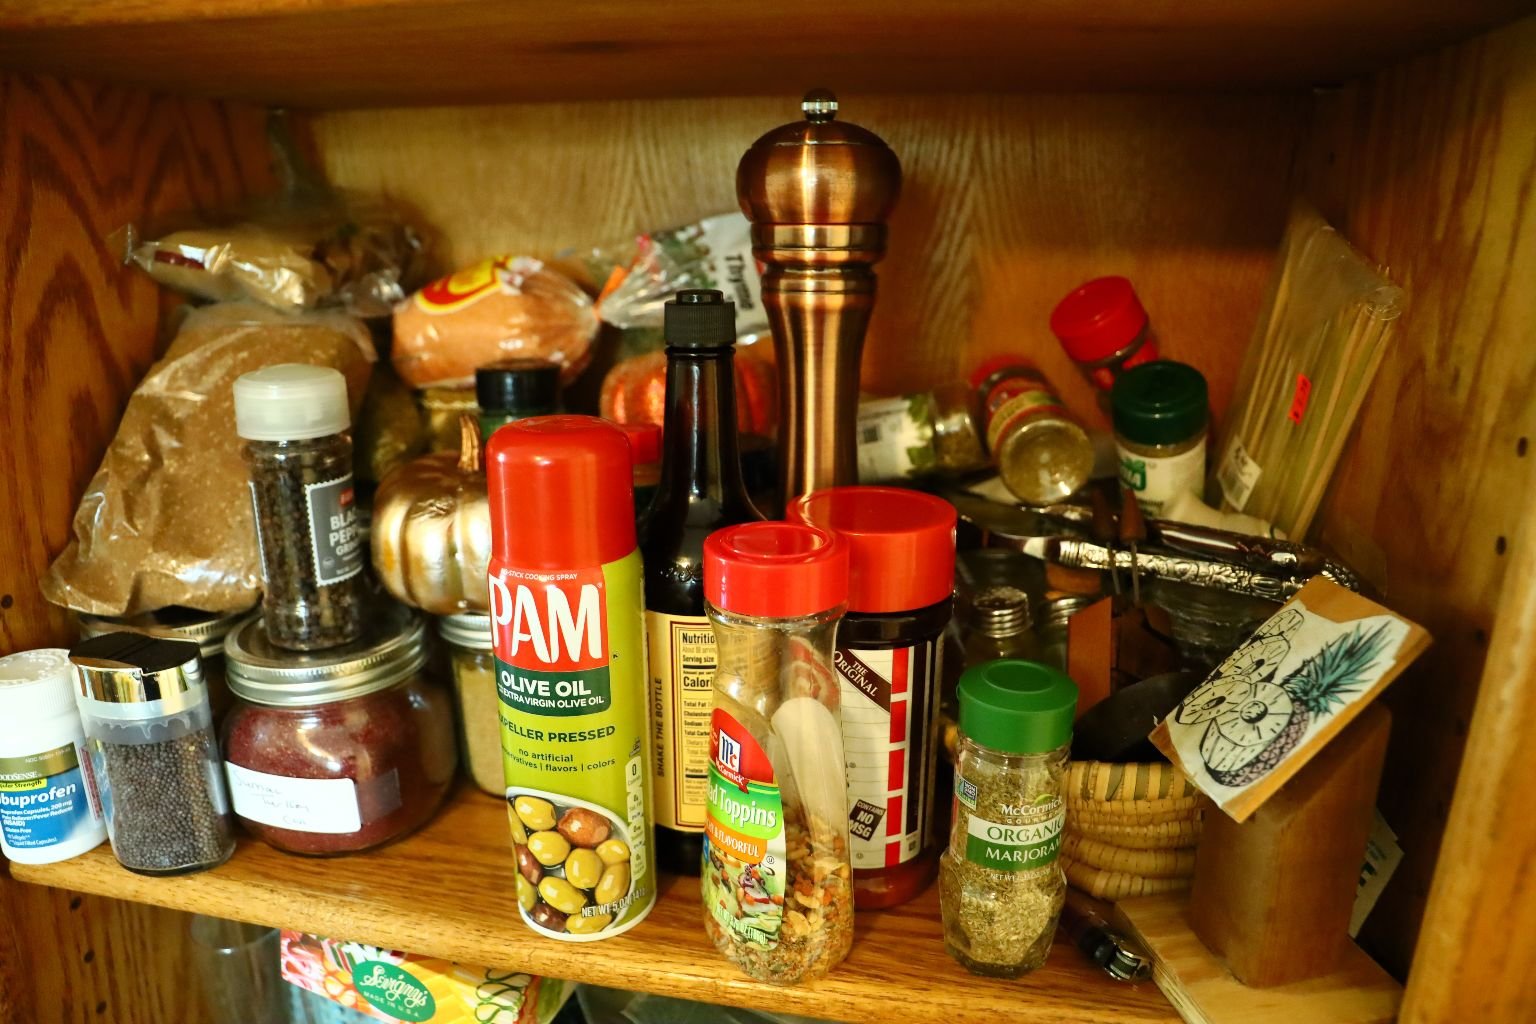
Our Den Bookcase Shelf Used For Storing our Thanksgiving Spices During our Reno
(At least we thought ahead on this one.) 🙂
——————————————————————
We may have cooked the turkey on Thanksgiving Day, but it wasn’t until that Saturday that we were able to have our Thanksgiving Dinner.
We wanted our Thanksgiving to be simple and easy.
We knew that we just wanted turkey sandwiches with the works!
So, Here We Go!
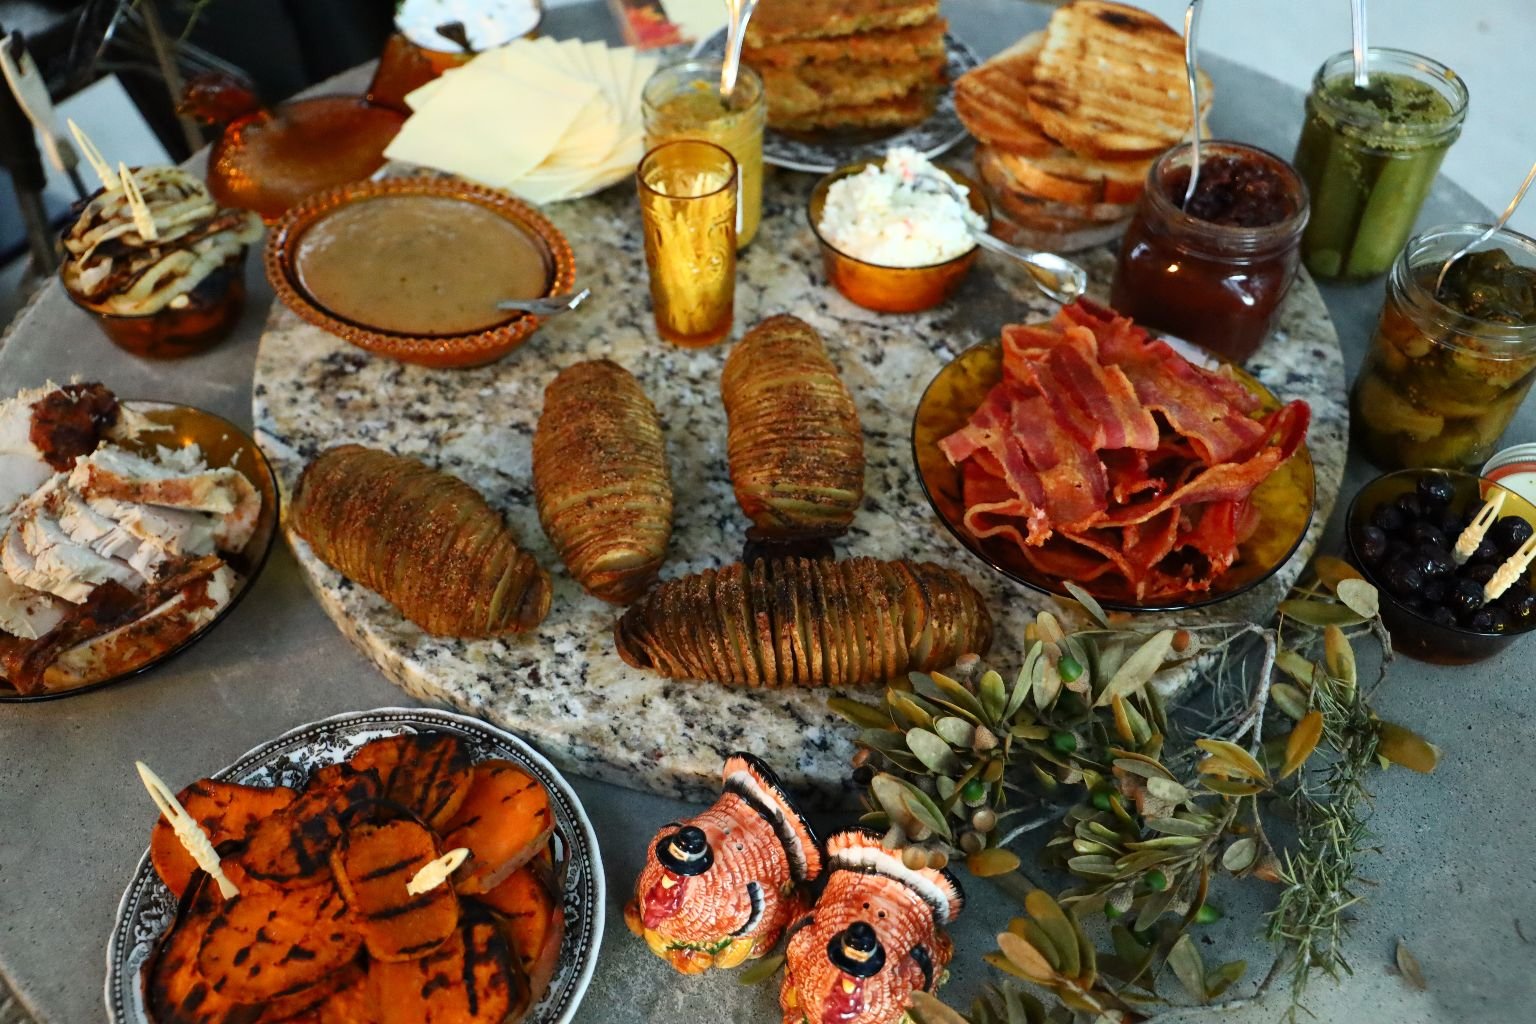
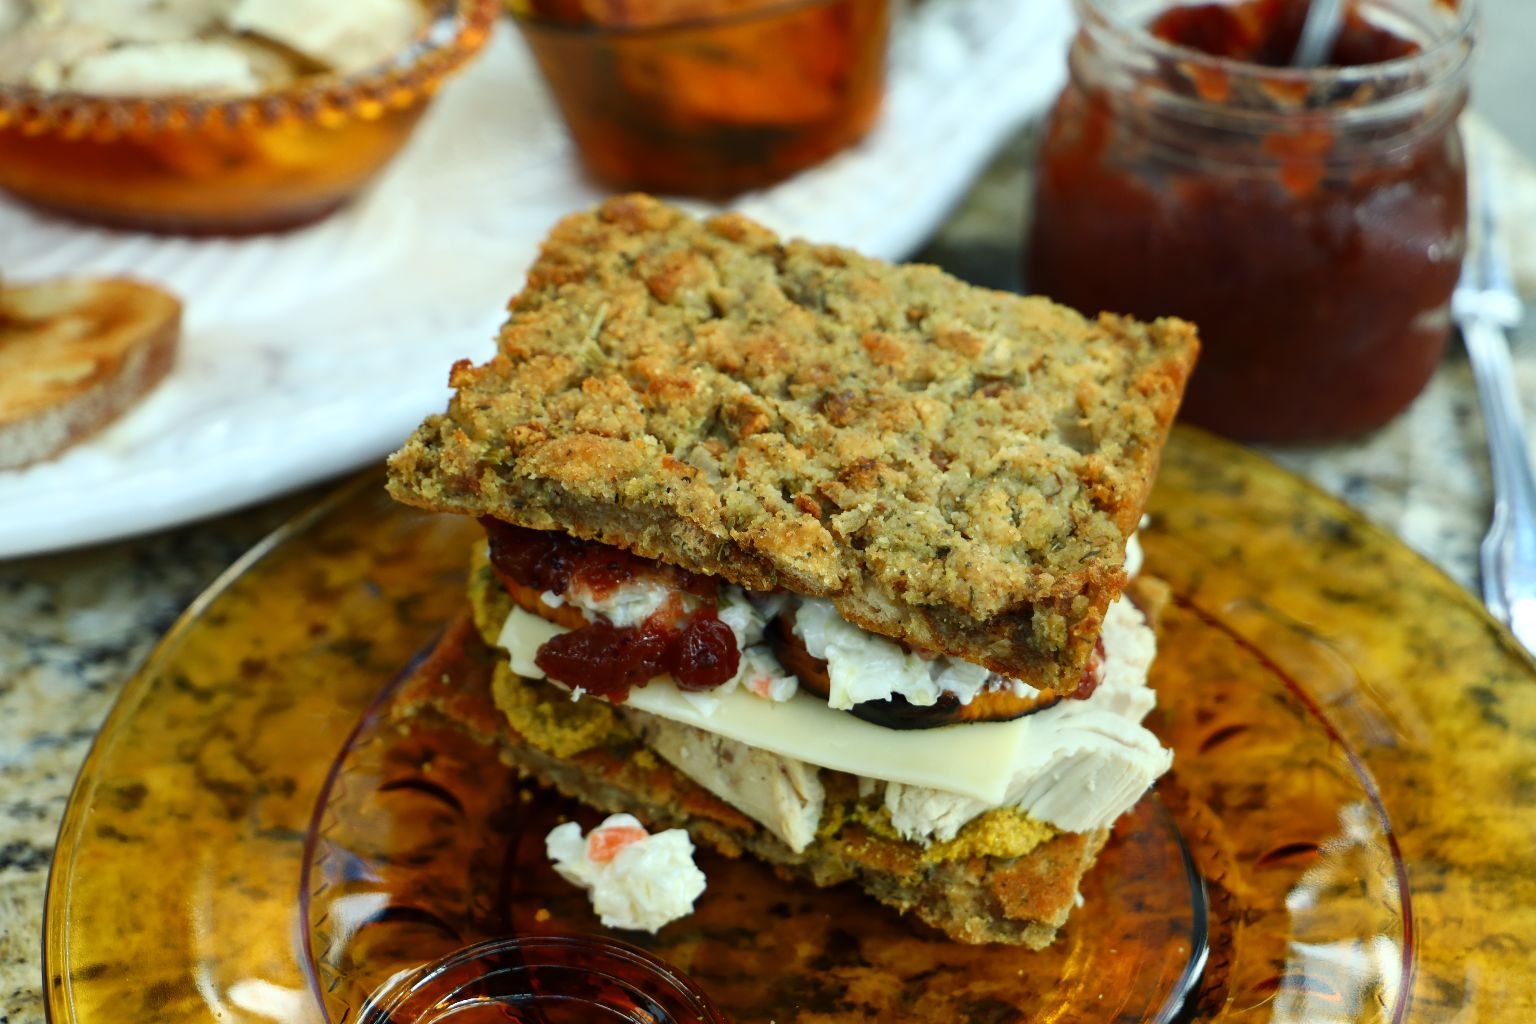
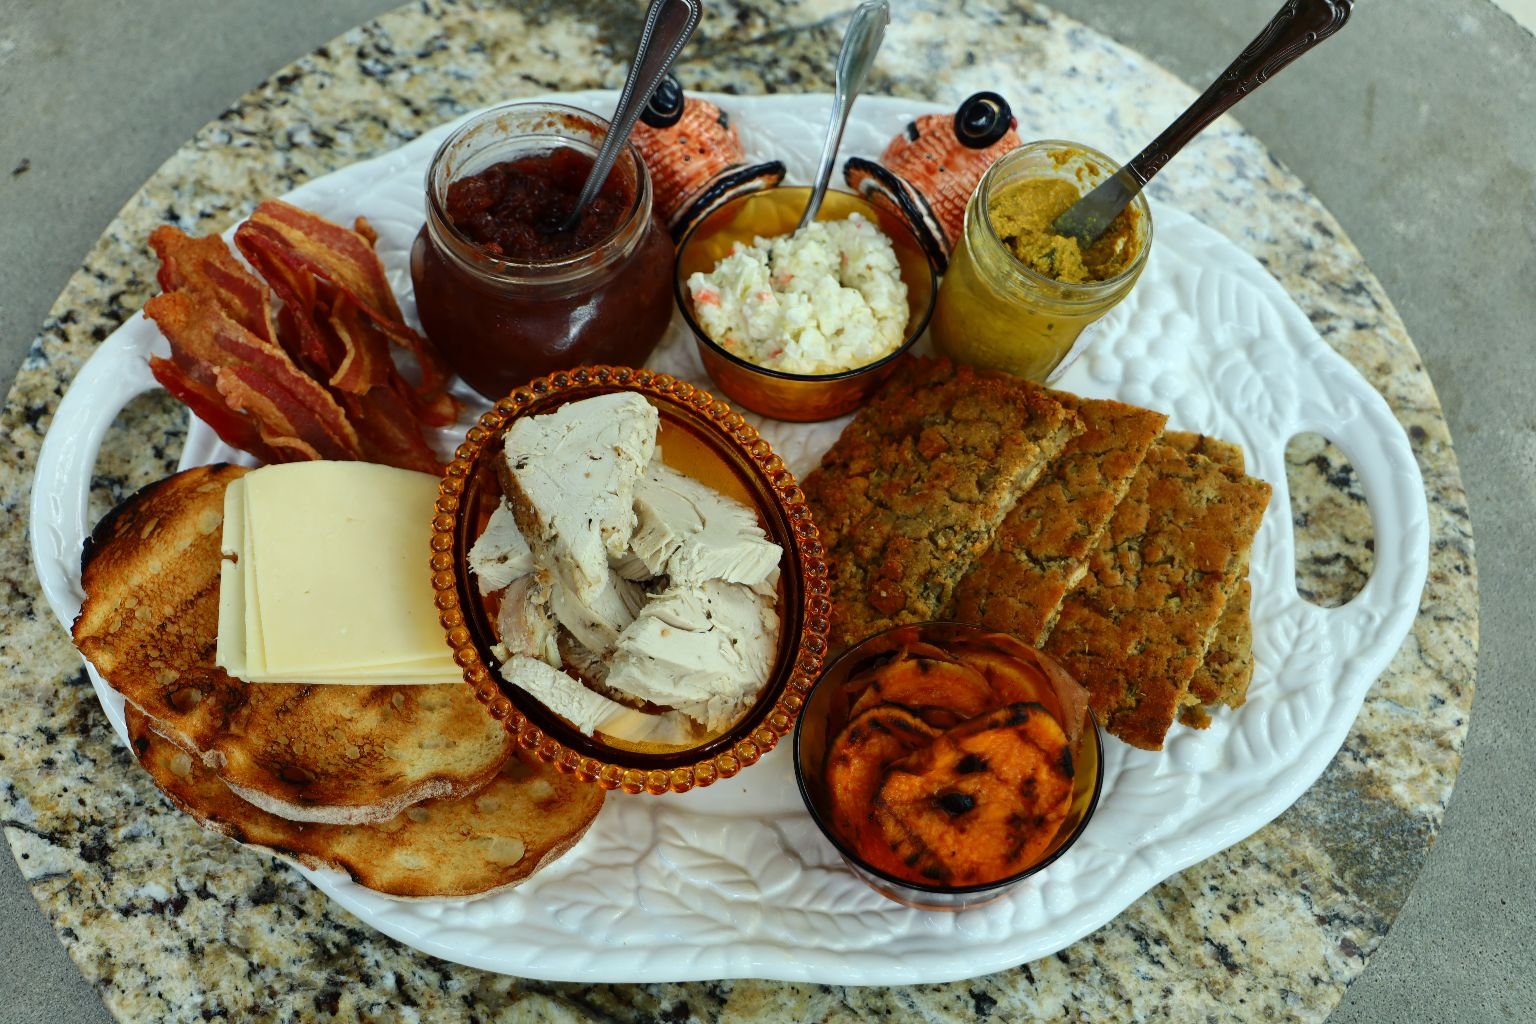
Our Thanksgiving Dinner consists of Turkey Sandwiches made on either Sour Dough Bread slices, or our Cornbread Dressing that we made into bread slices by spreading it out on a baking sheet and then baking it until done, then slicing it into sandwich sized bread, and then placed back into the oven to brown a little bit.
Like so:


This is my Grandmother’s (Julie) Southern Cornbread Dressing
We simply spread it out onto a baking sheet that was sprayed with vegetable oil, and then baked it until it was done in a 350F oven for probably 25 -30 minutes.
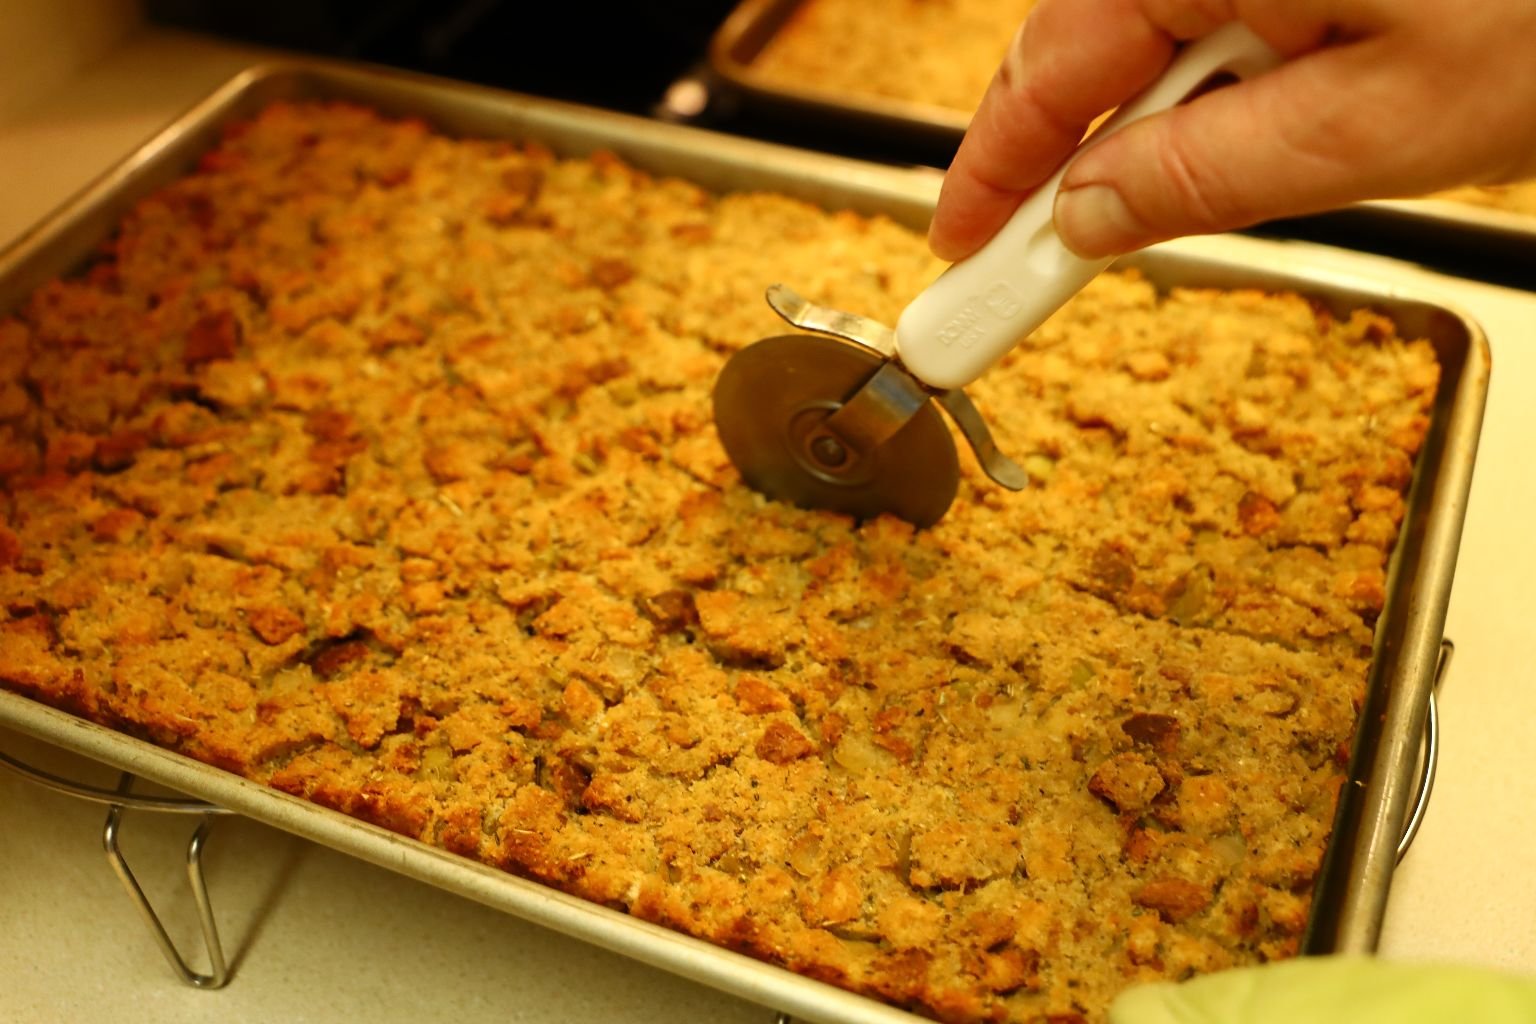

When done we then used a pizza cutter to cut the Dressing into bread sized slices. Then placed them onto a large baking sheet so that they could then toast up well enough to act as slices of bread in order to hold everything we were going to cram between those slices.
————————————————————
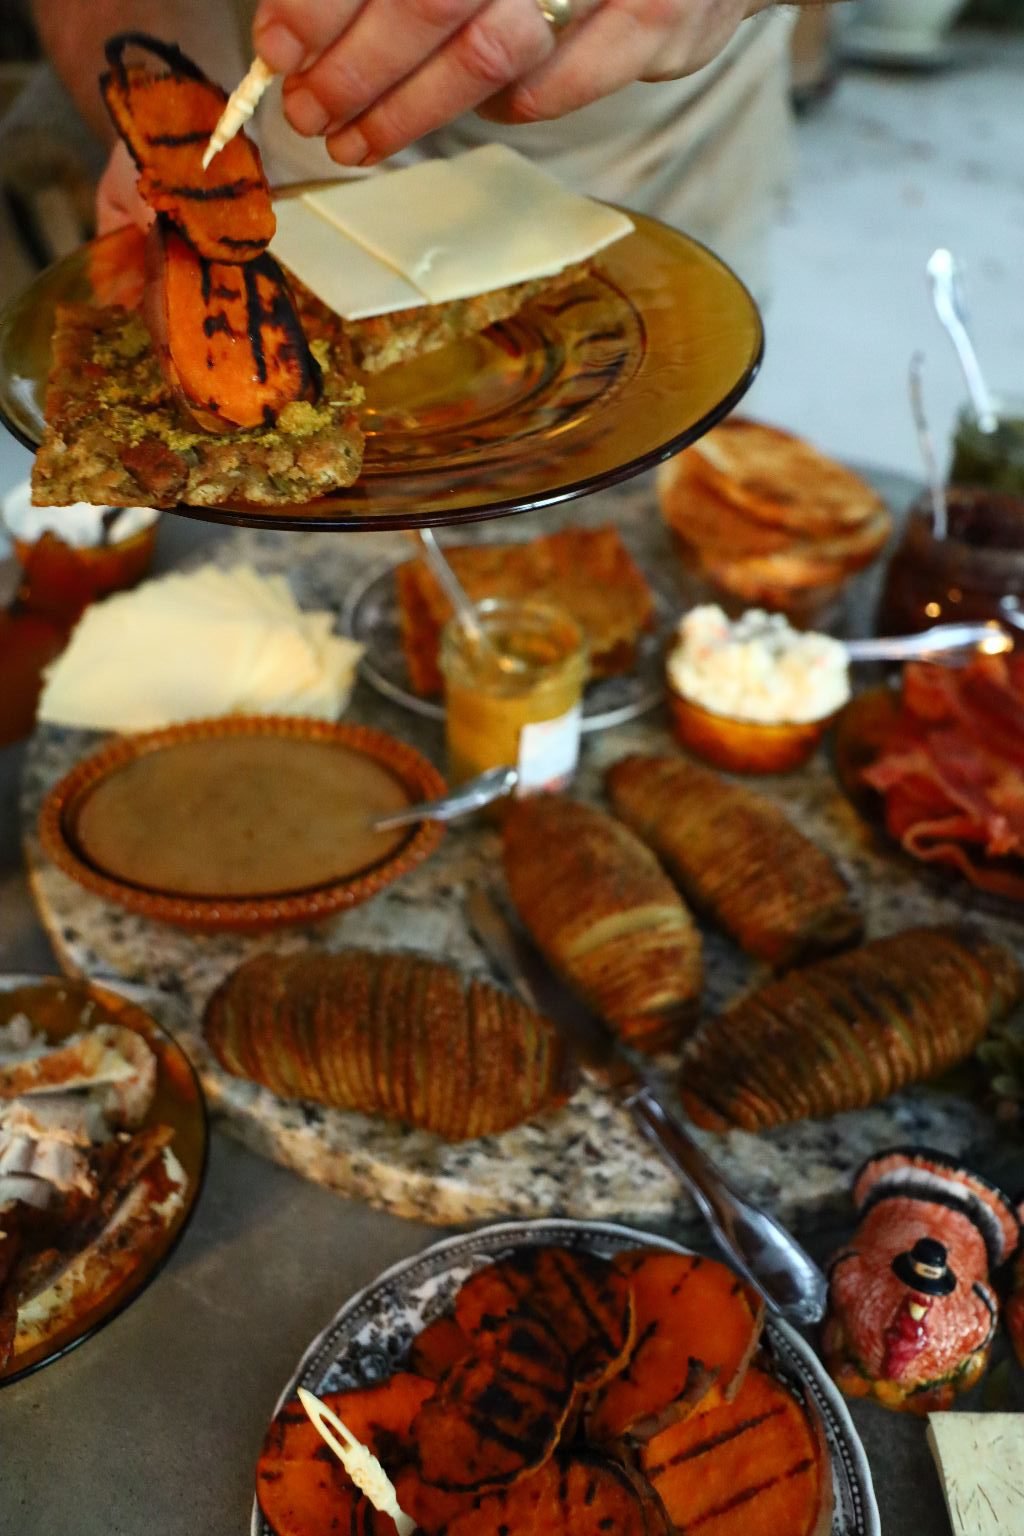
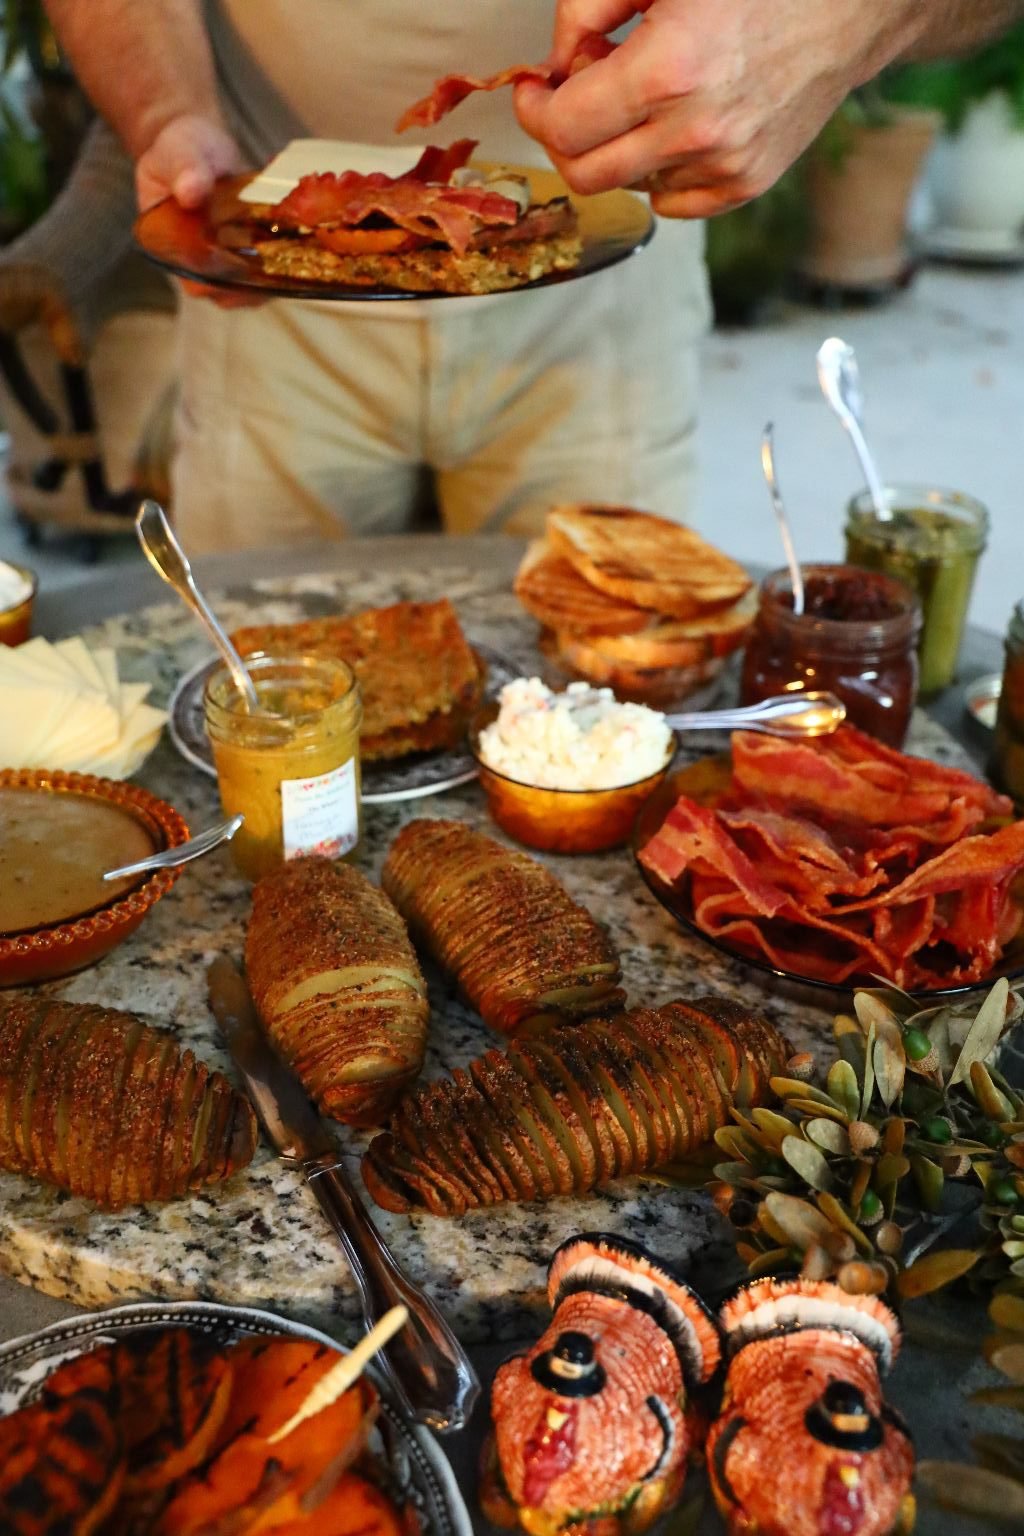
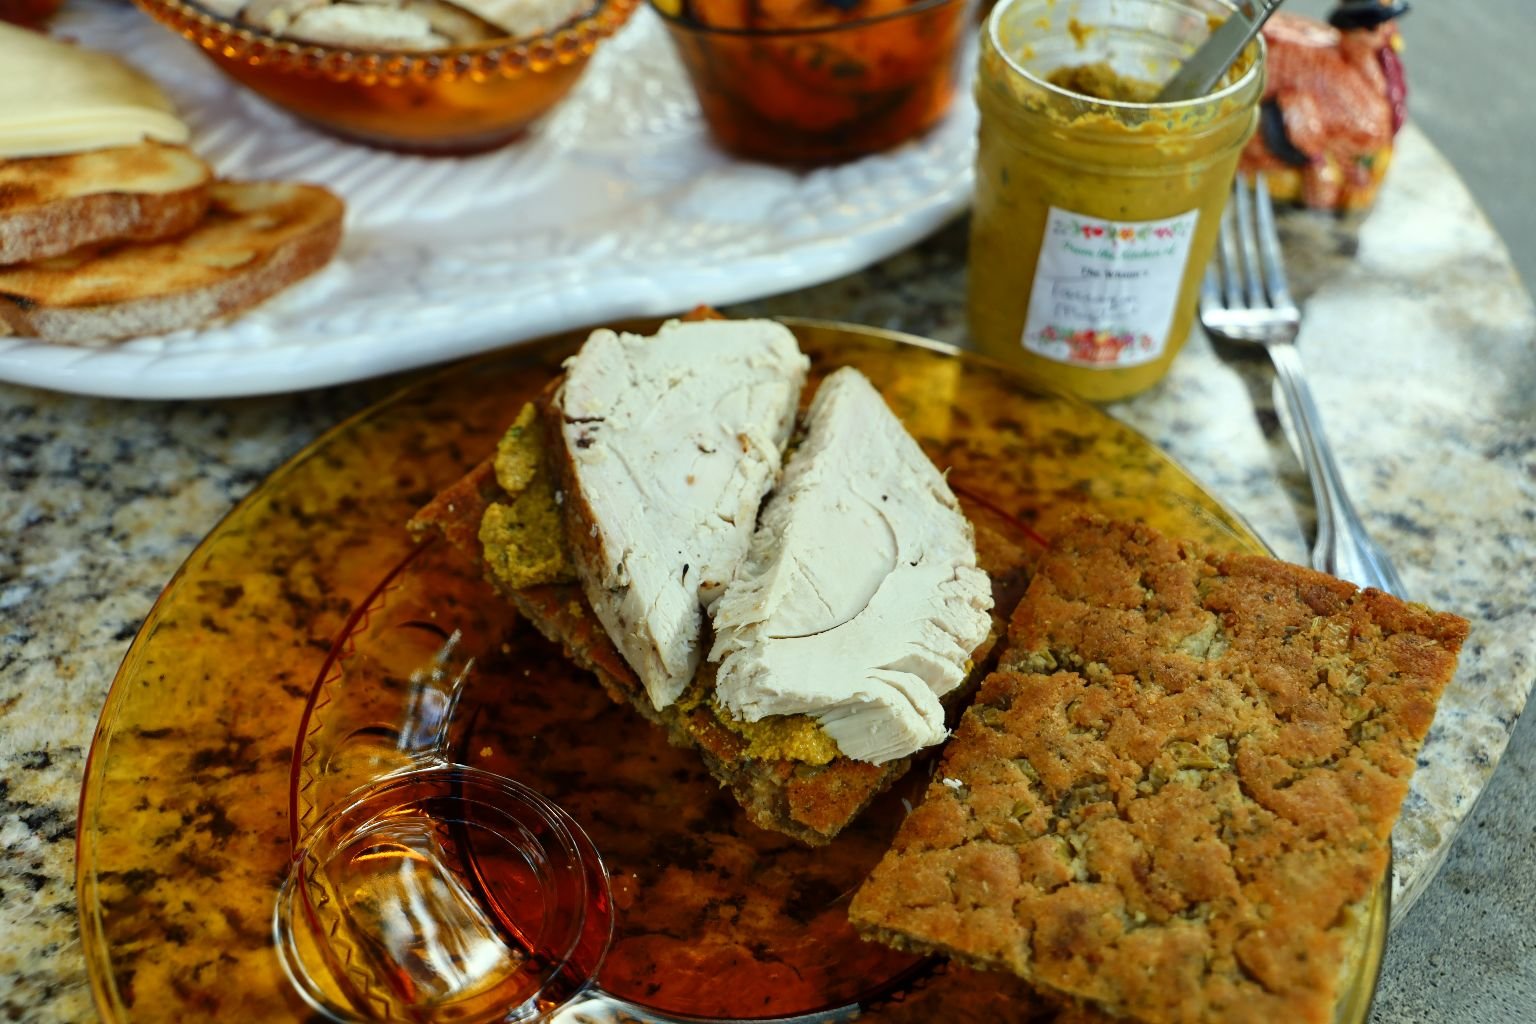
Here Gordon is fixing his sandwich using our Cornbread Dressing as the bread slices.
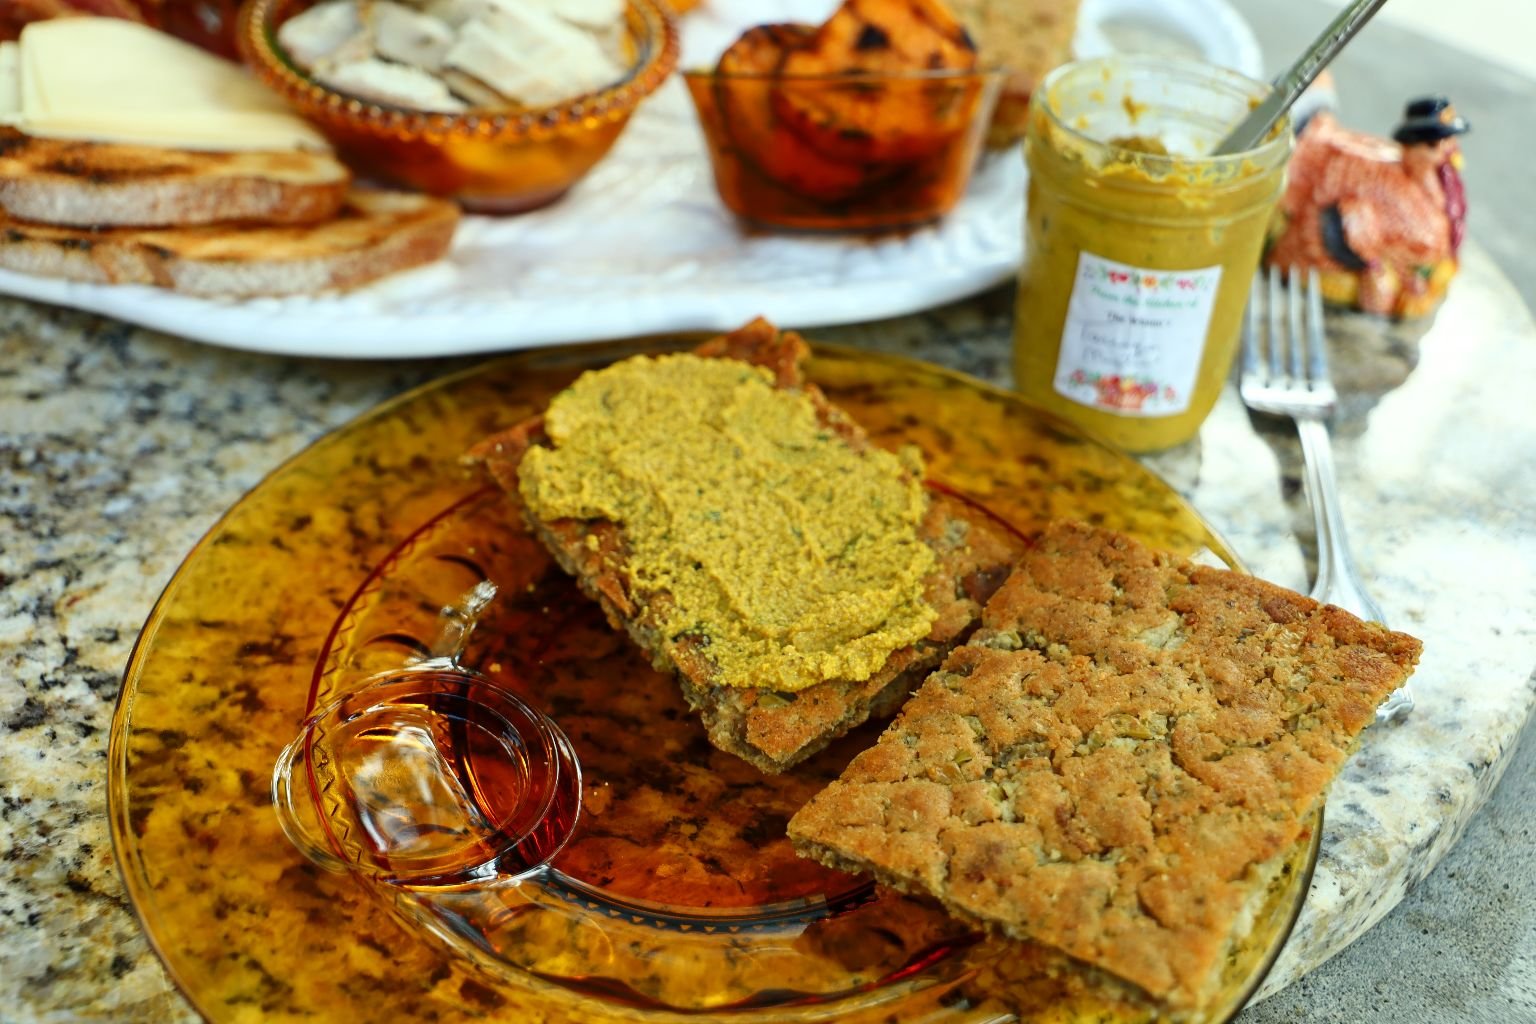
To build the sandwich Gordon first started with our homemade mustard.
Click Here For: Pork, Sausage, and Mustard
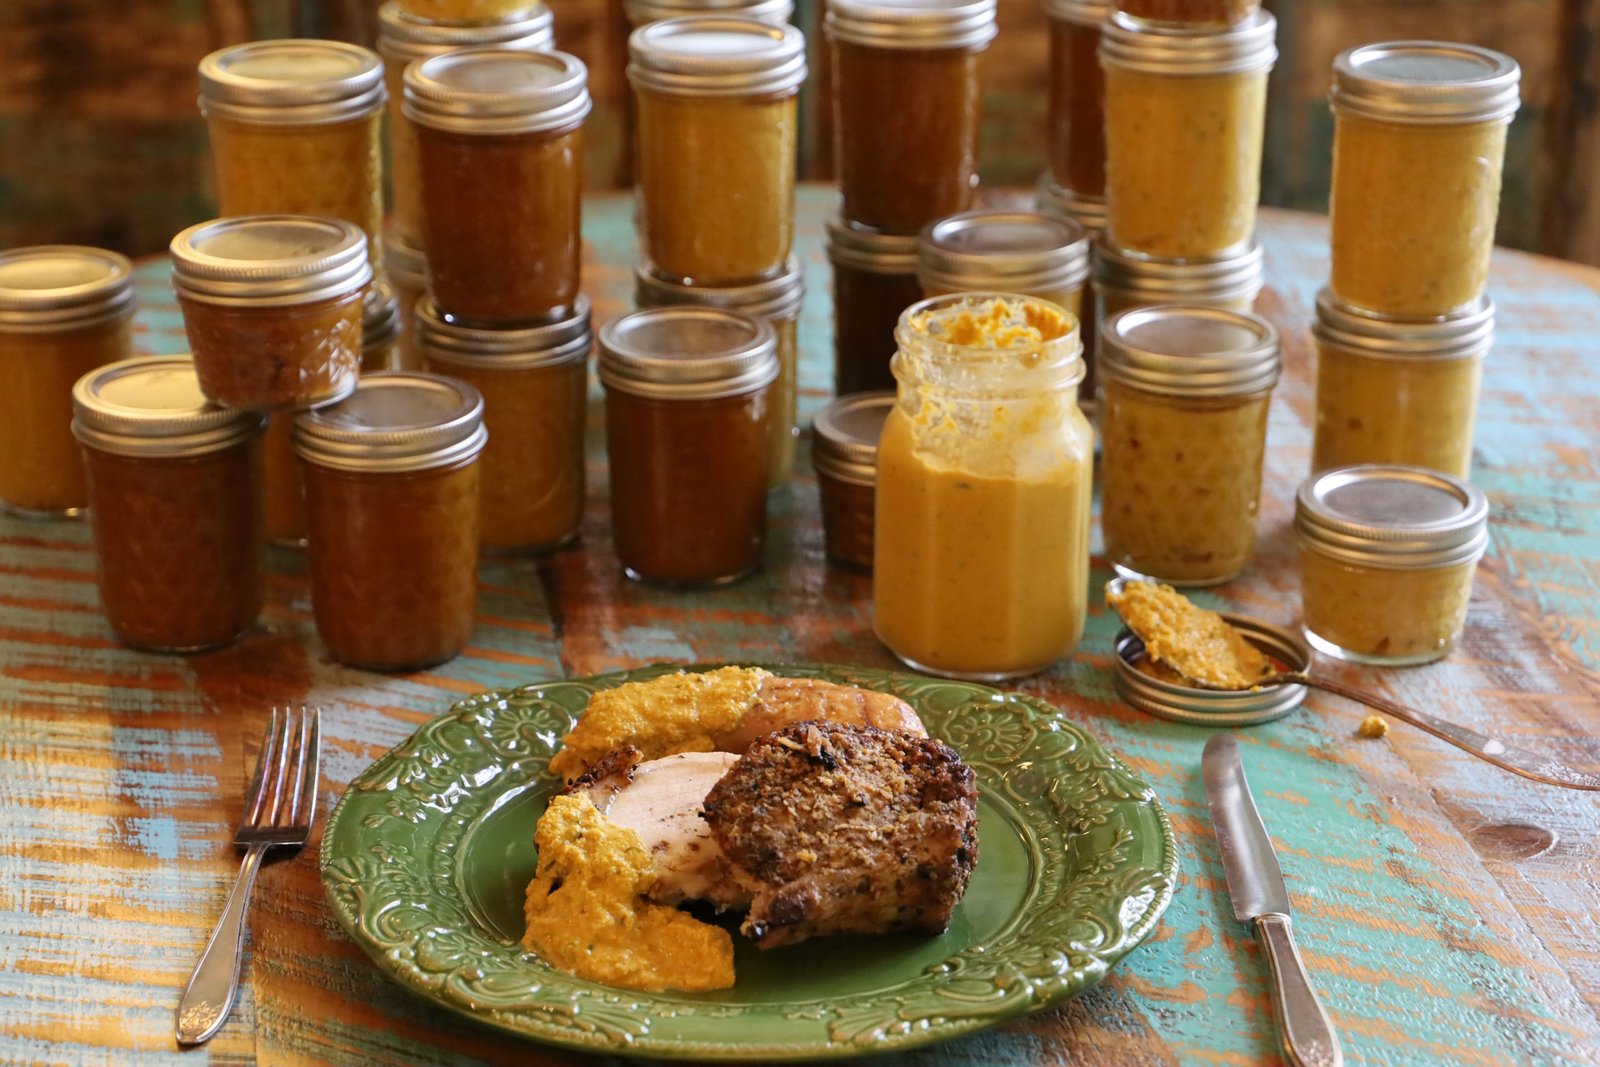
If you would like to see how to make our mustard’s.
——————————————————————-
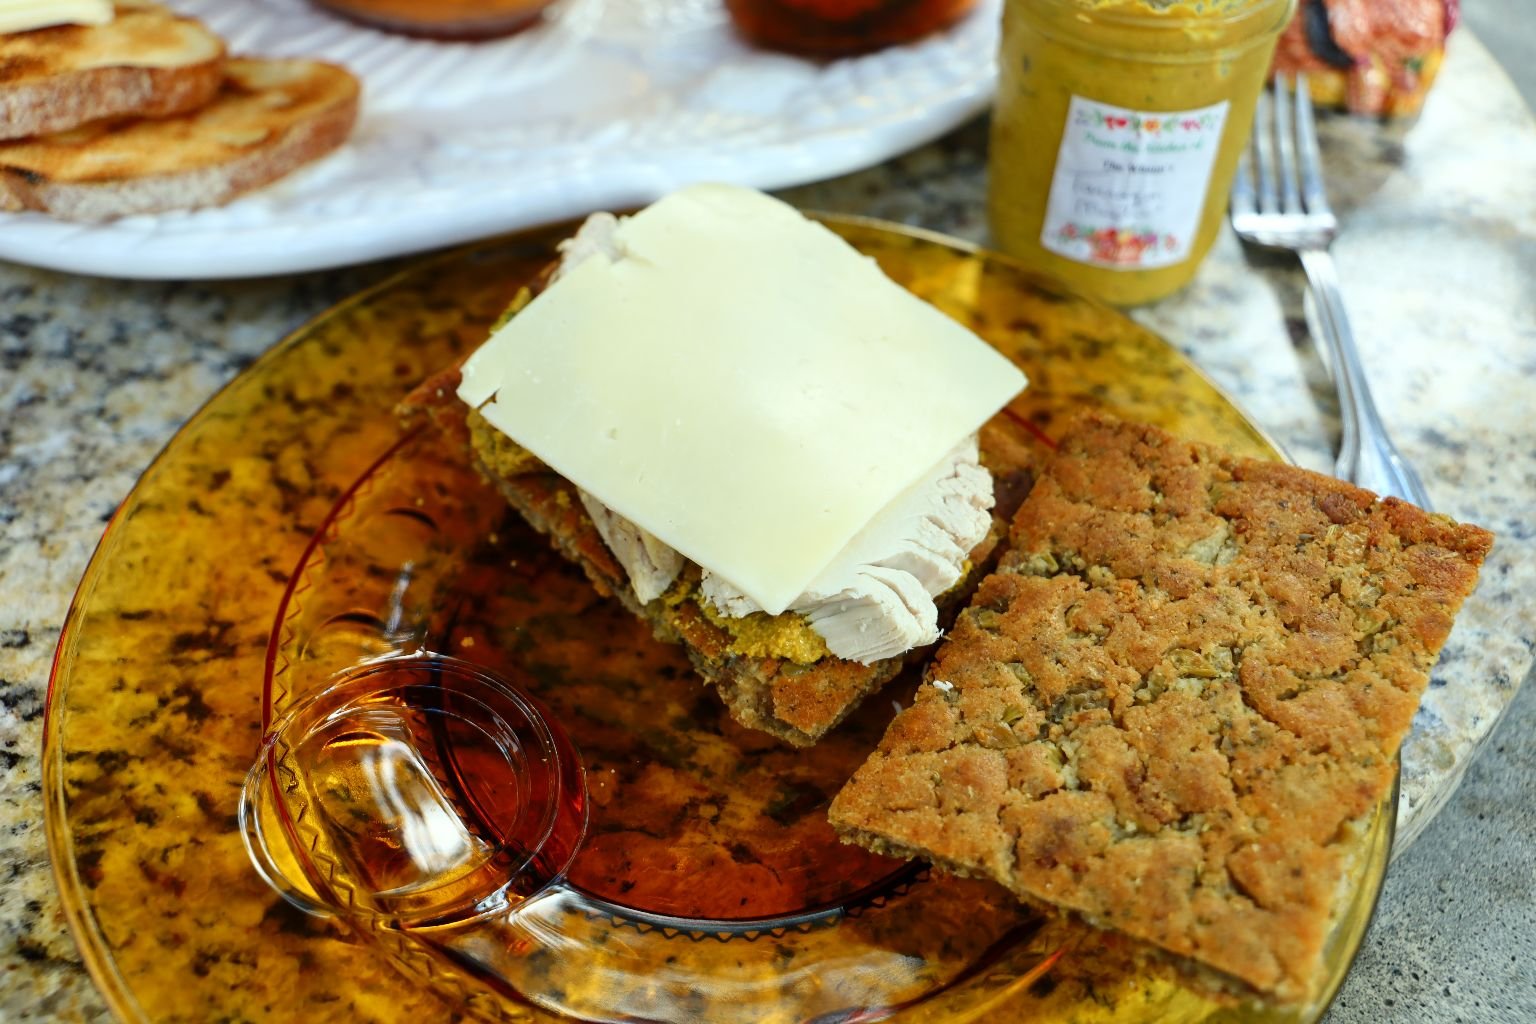
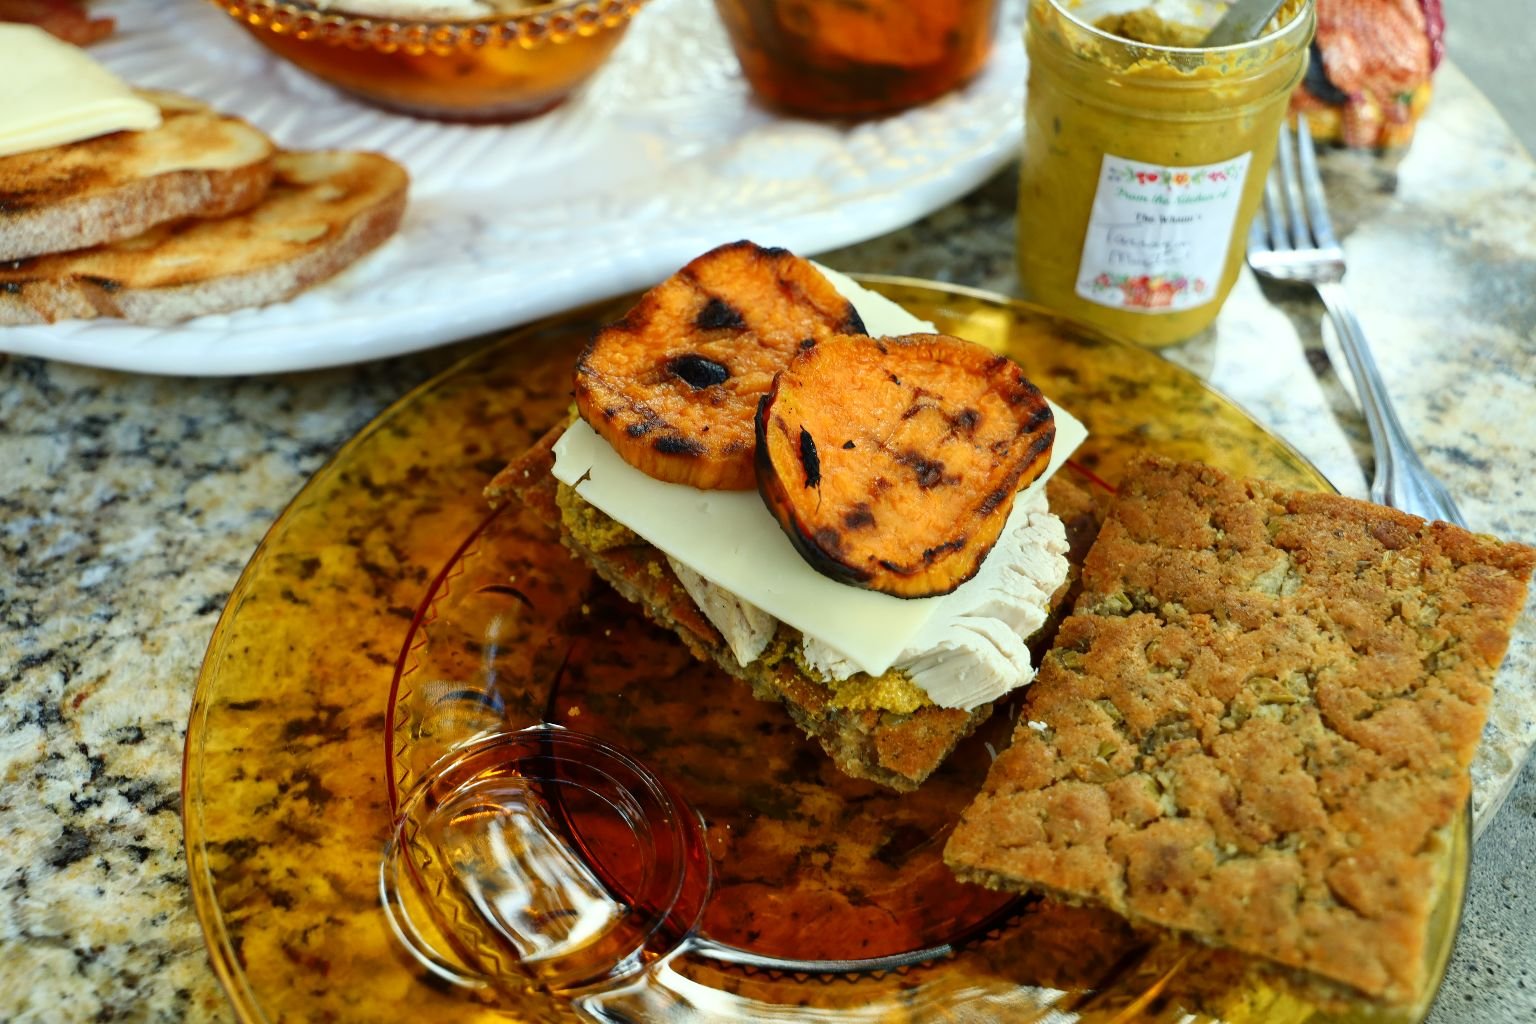
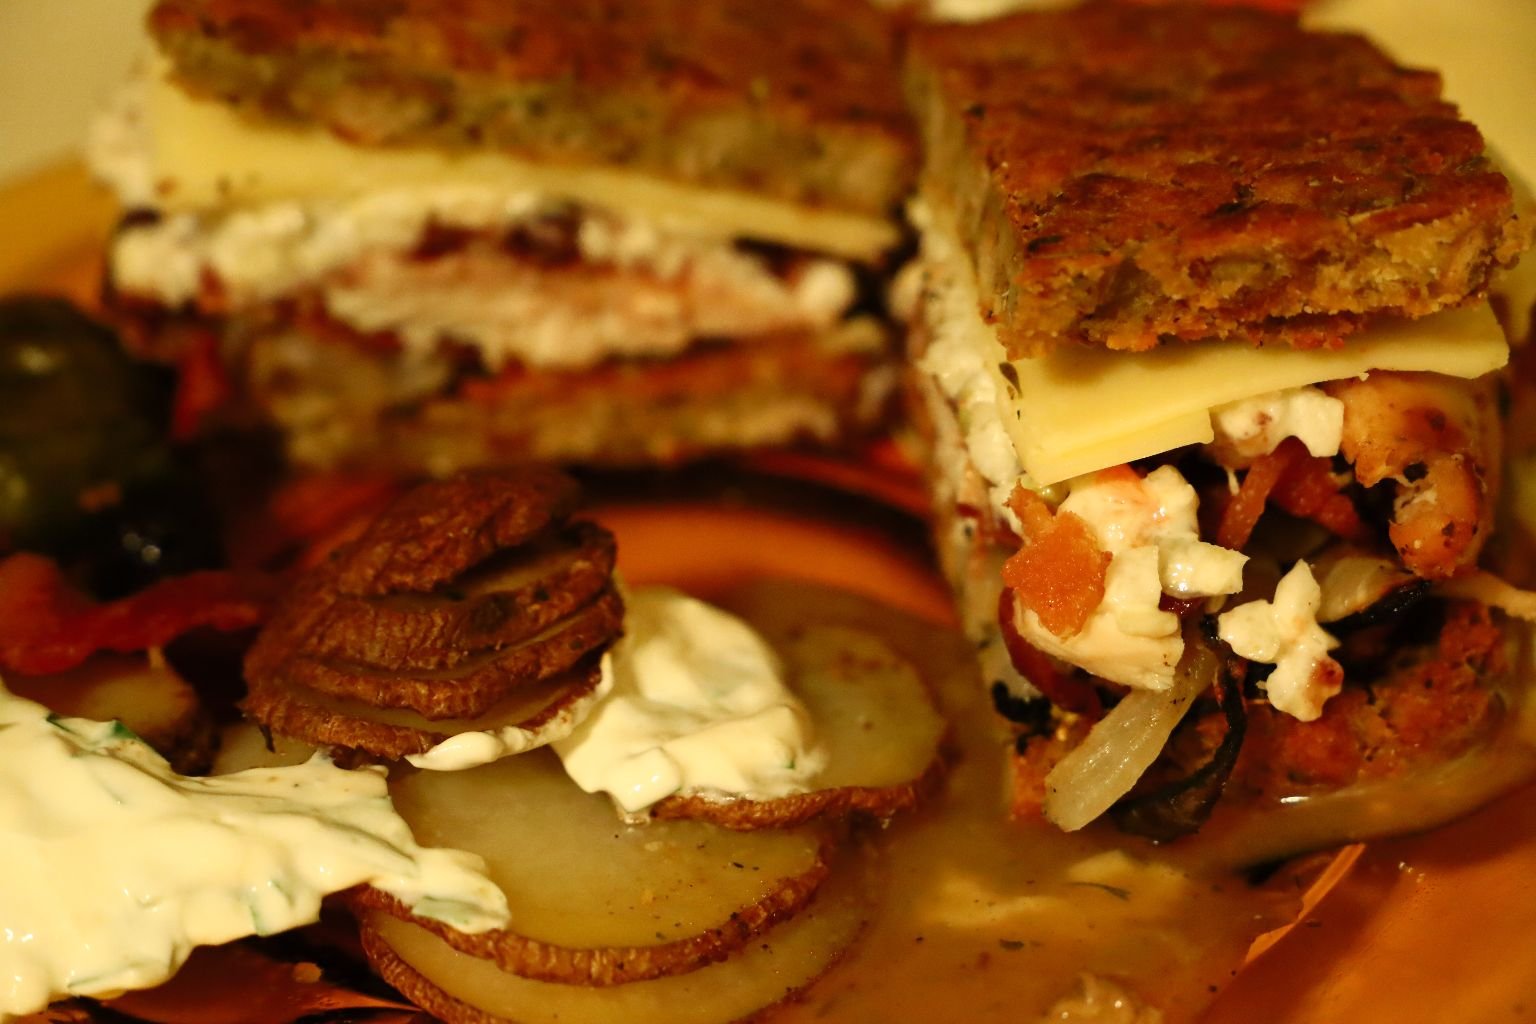
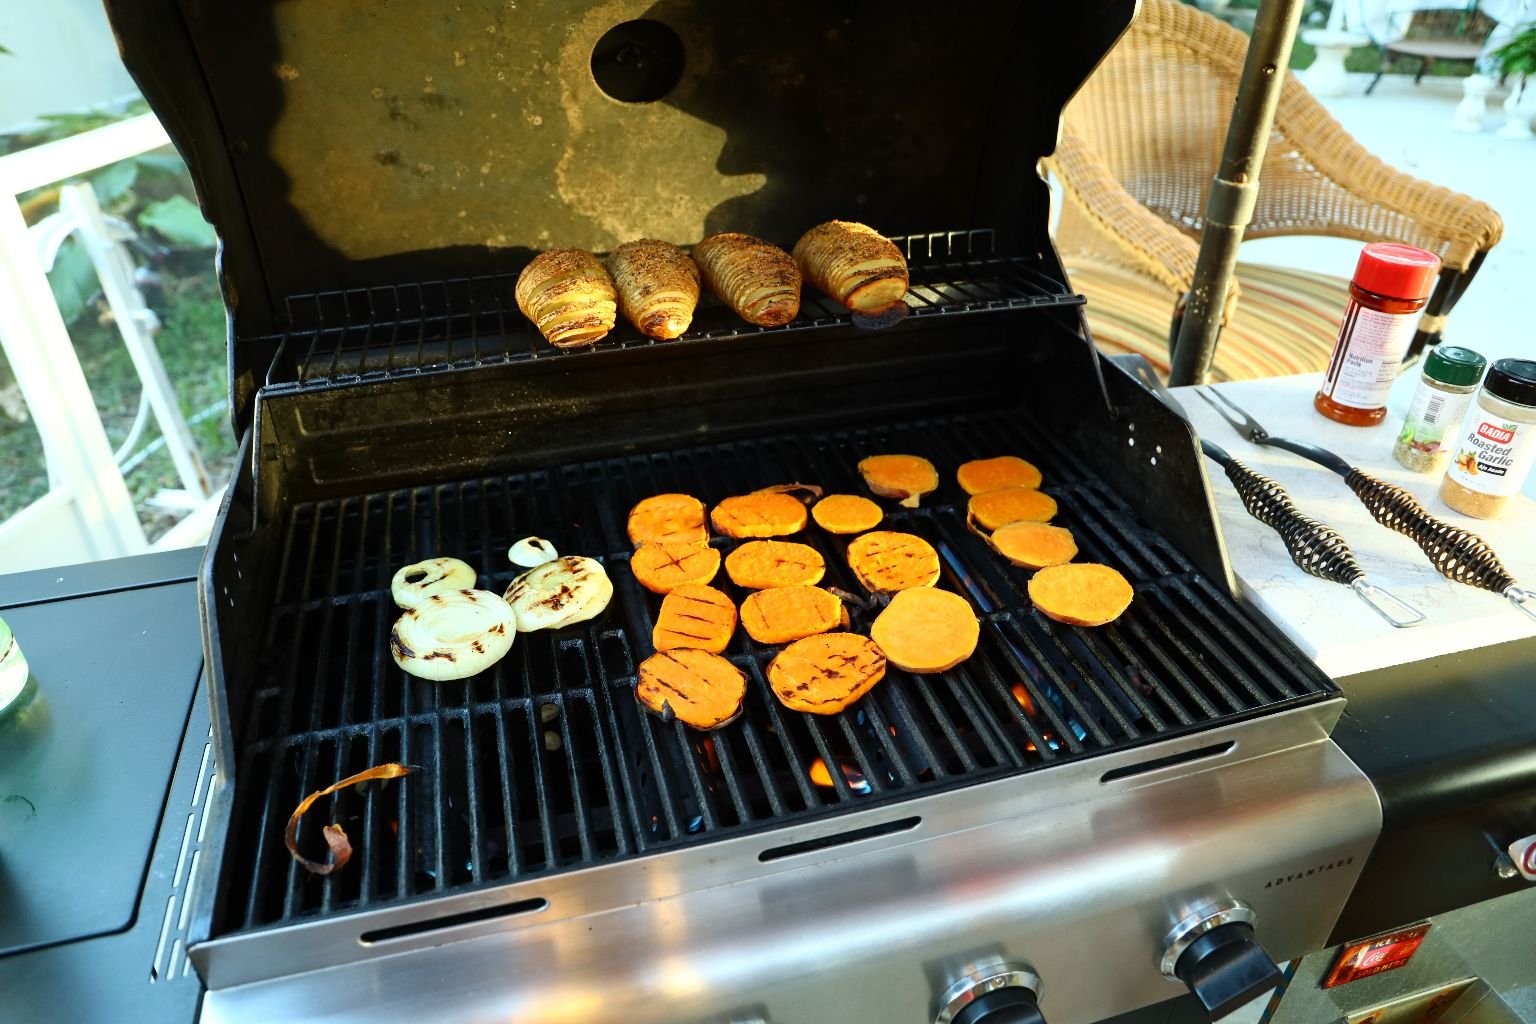
Gordon then Added some Turkey, Cheese Slices, and Grilled Sweet Potatoes
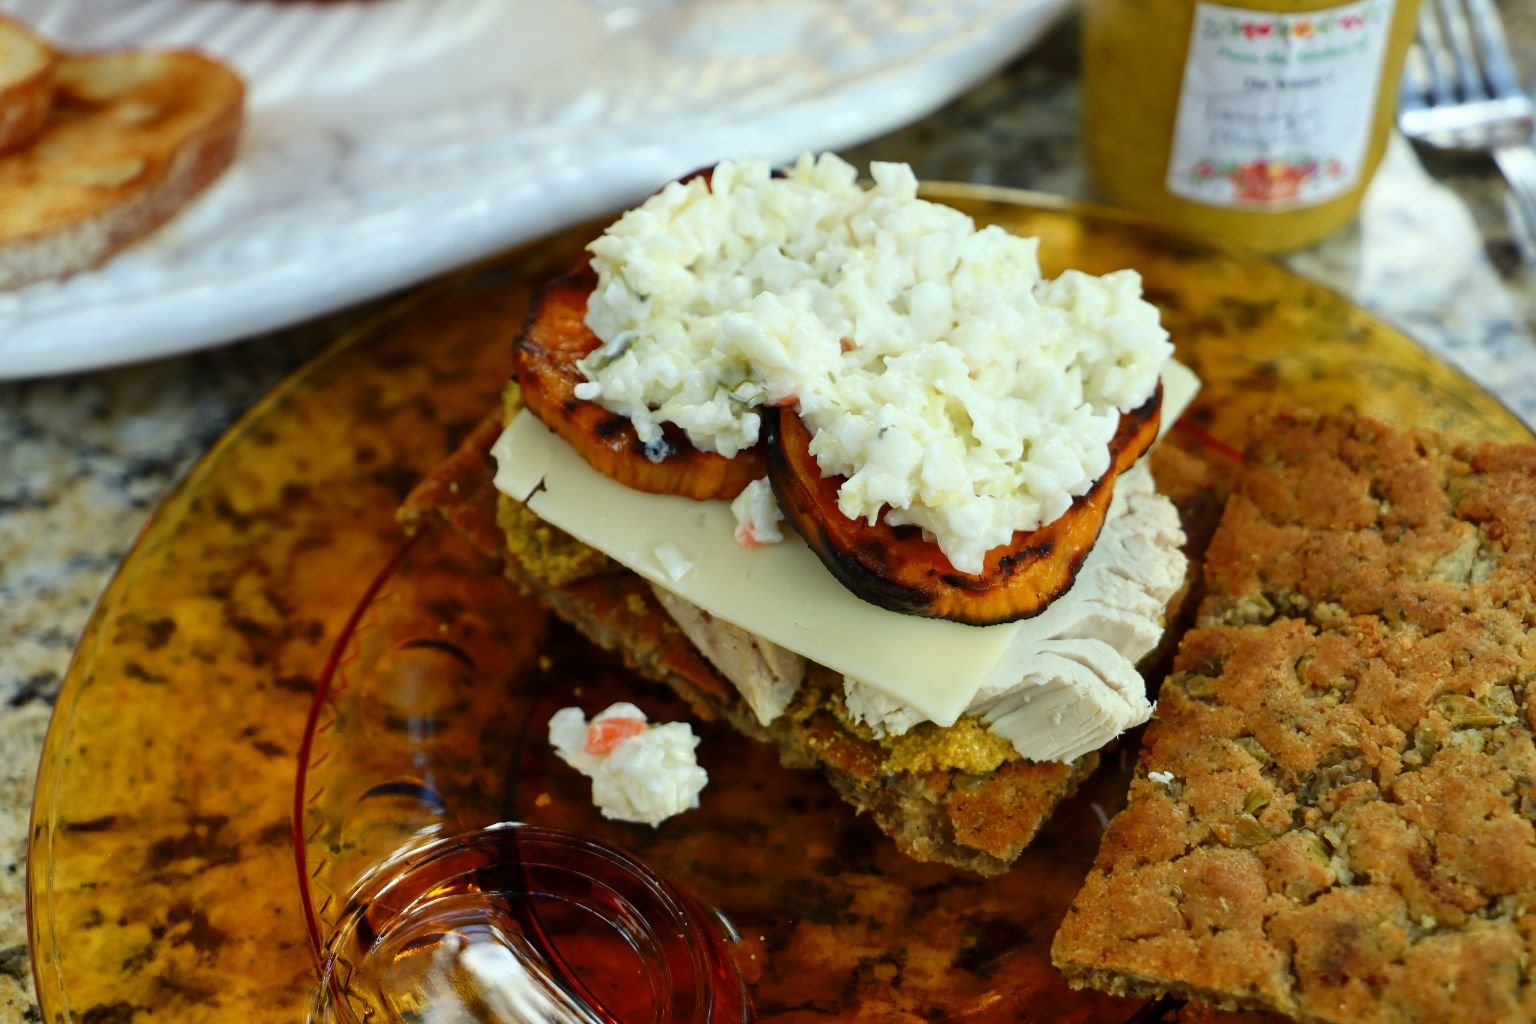
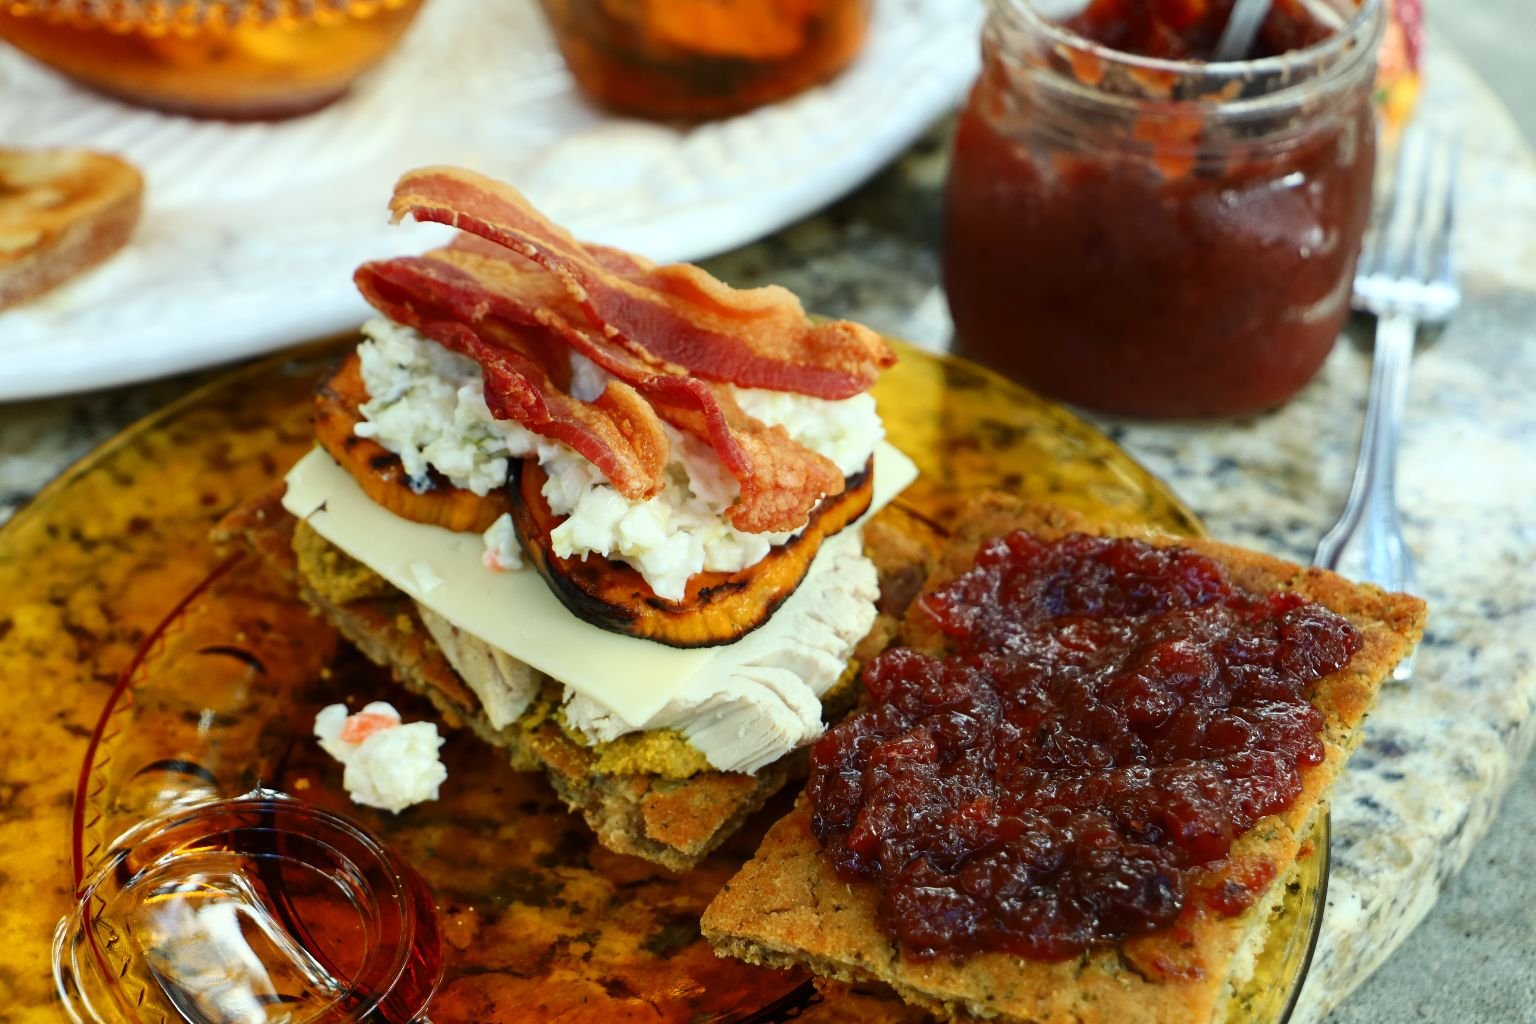
Then He Added Some Coleslaw, Bacon, and our Cranberry Sauce
Viola!
Thanksgiving Turkey, Bacon, our homemade Tarragon Mustard, White Cheddar Cheese slices, Grilled Yams, Grilled Onions, store bought Cole Slaw, and our last jar of homemade Florida Christmas Cranberry Sauce.
Gordon dolloping the last of our:
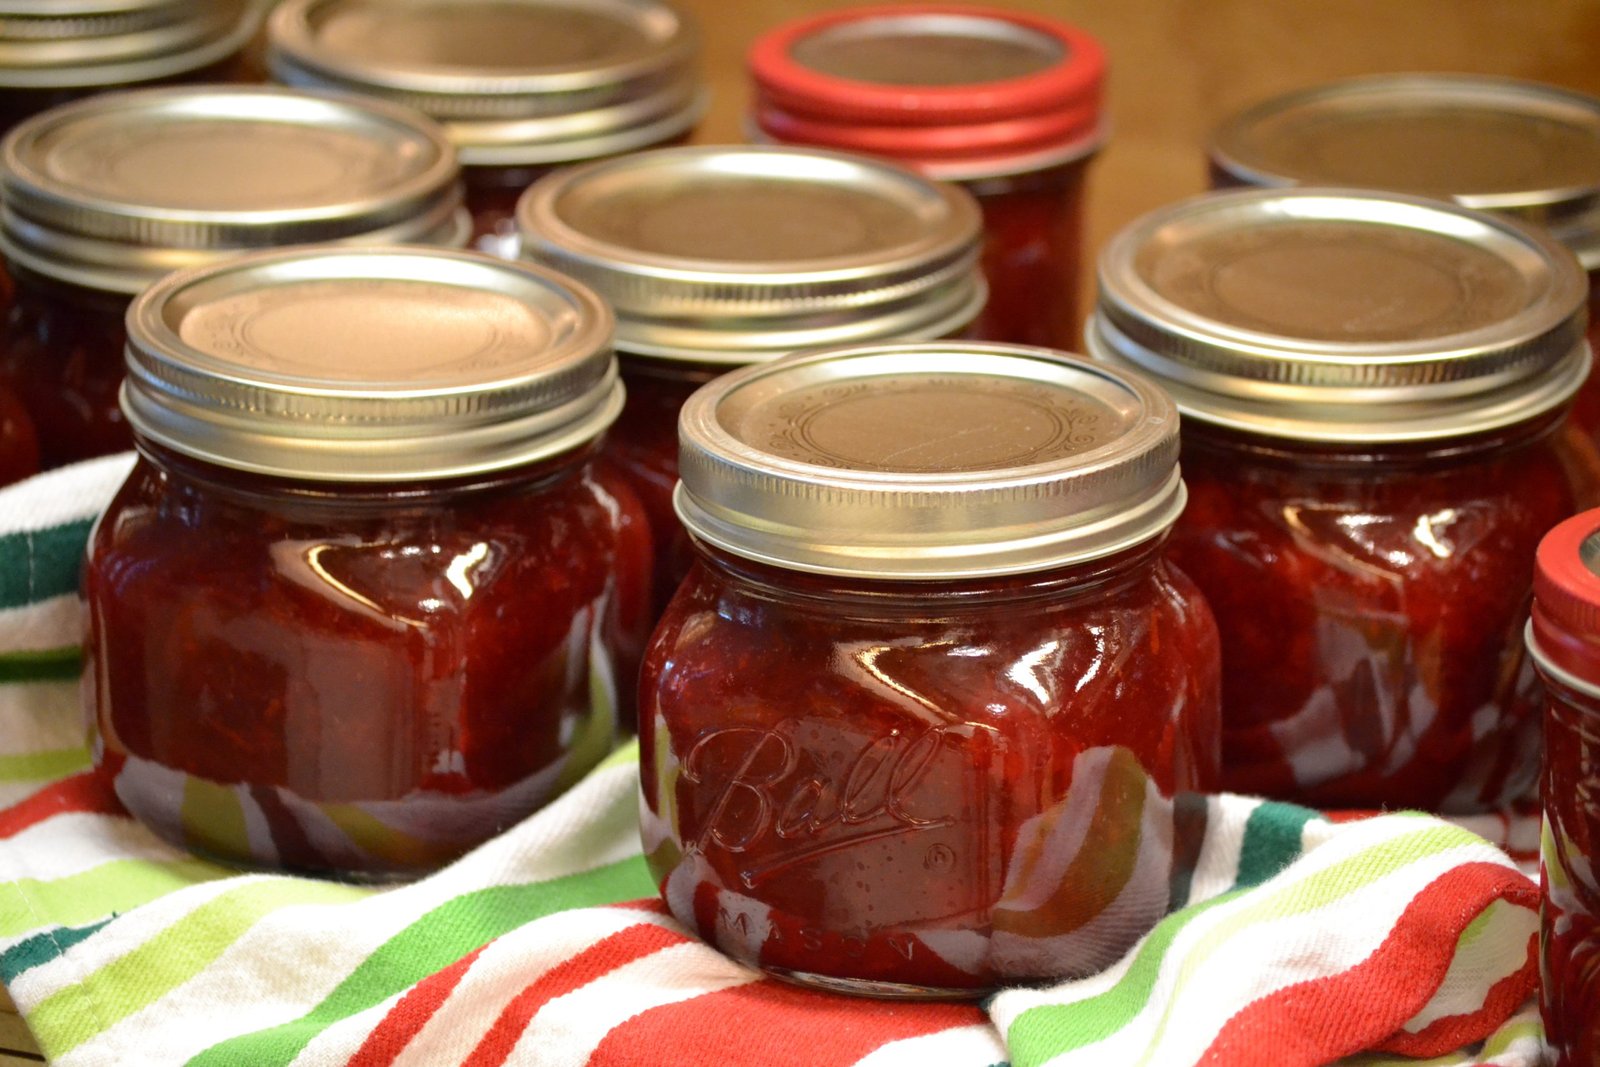
An Excellent Recipe if you care to take a Look
————————————————————–
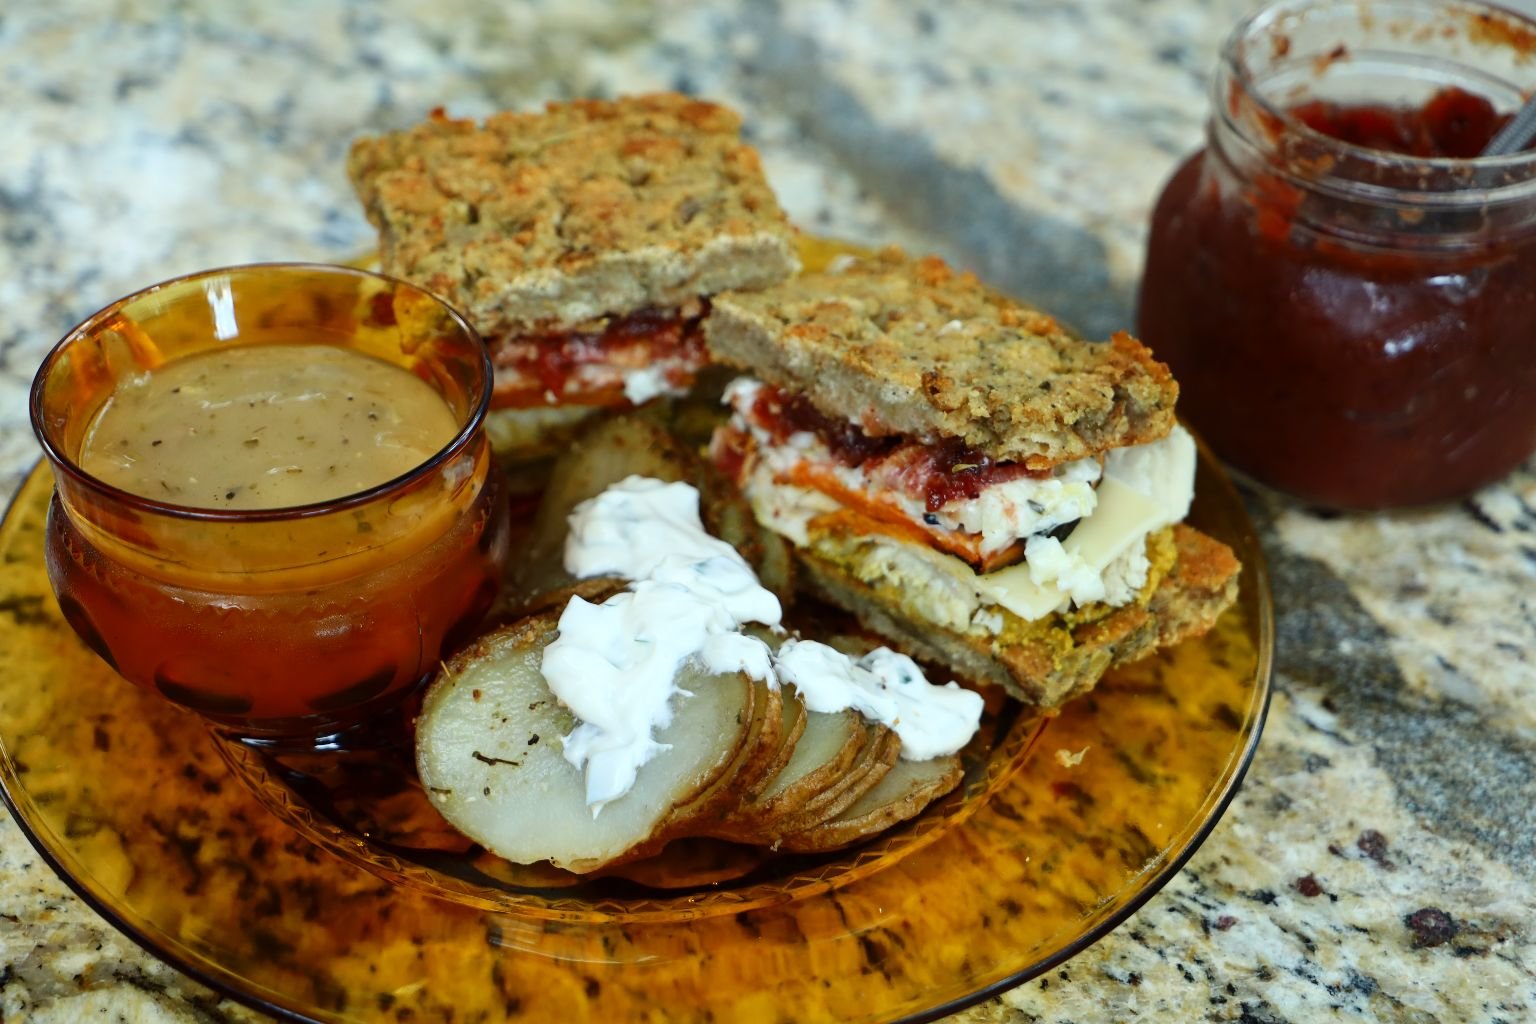
Our Sides are the Hasselback Potatoes cut into medallions to resemble Potato Chips.
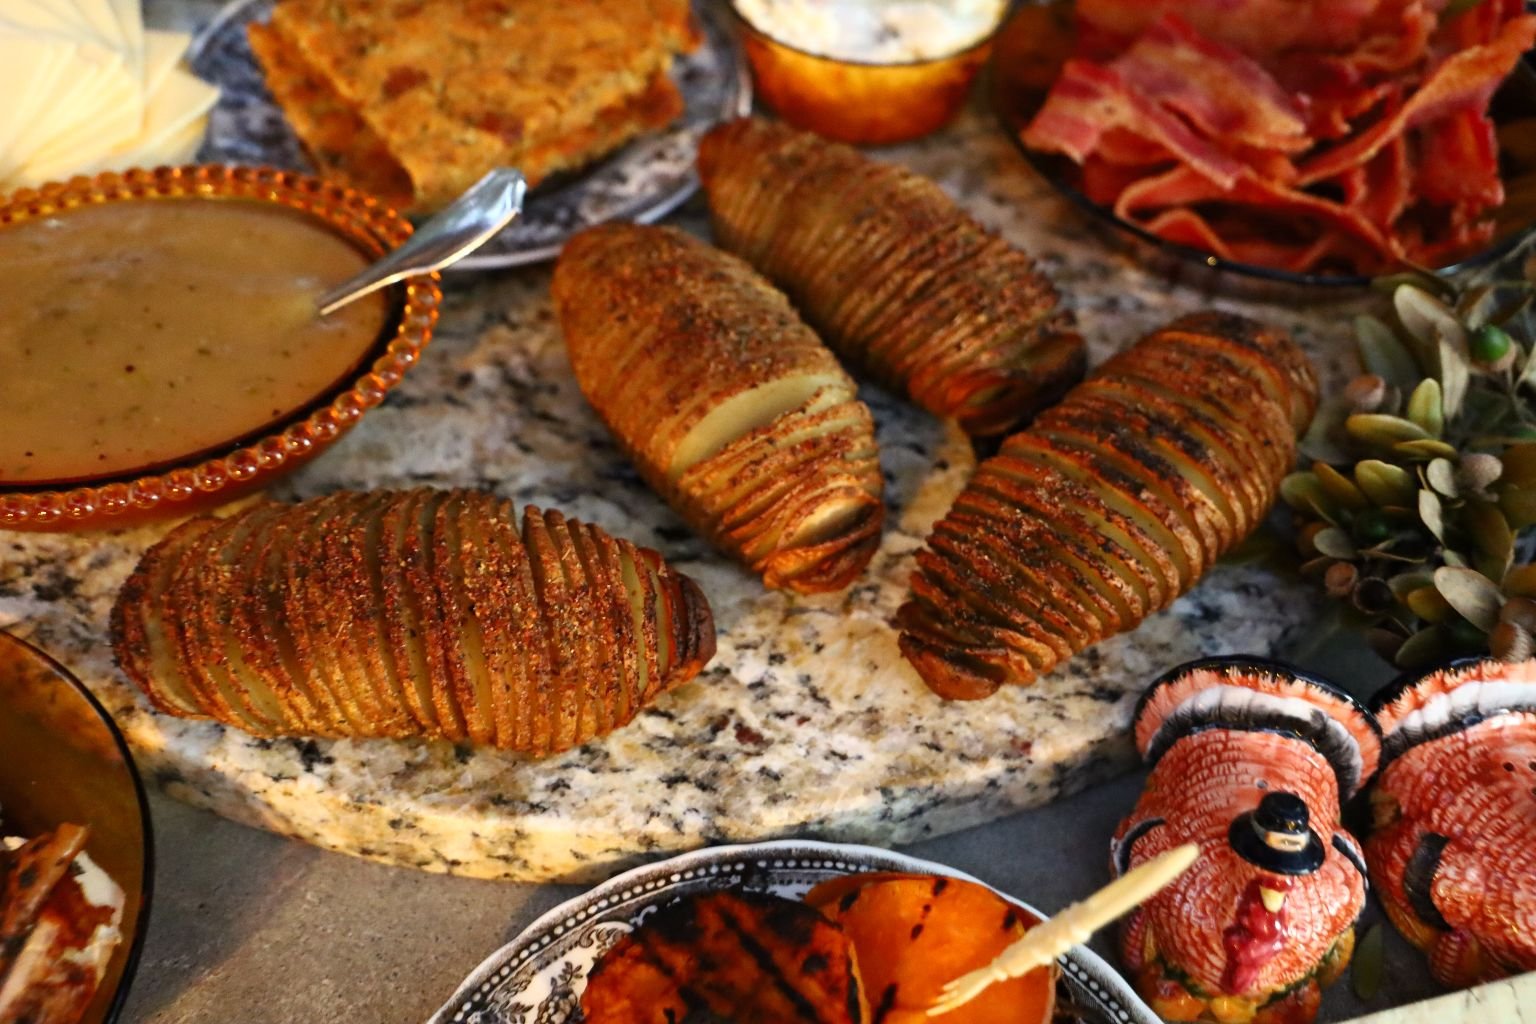
With a nice drizzle of Sour Cream and Chives.
Also, our homemade Dill Pickle slices and some store bought Salt Cured Olives.
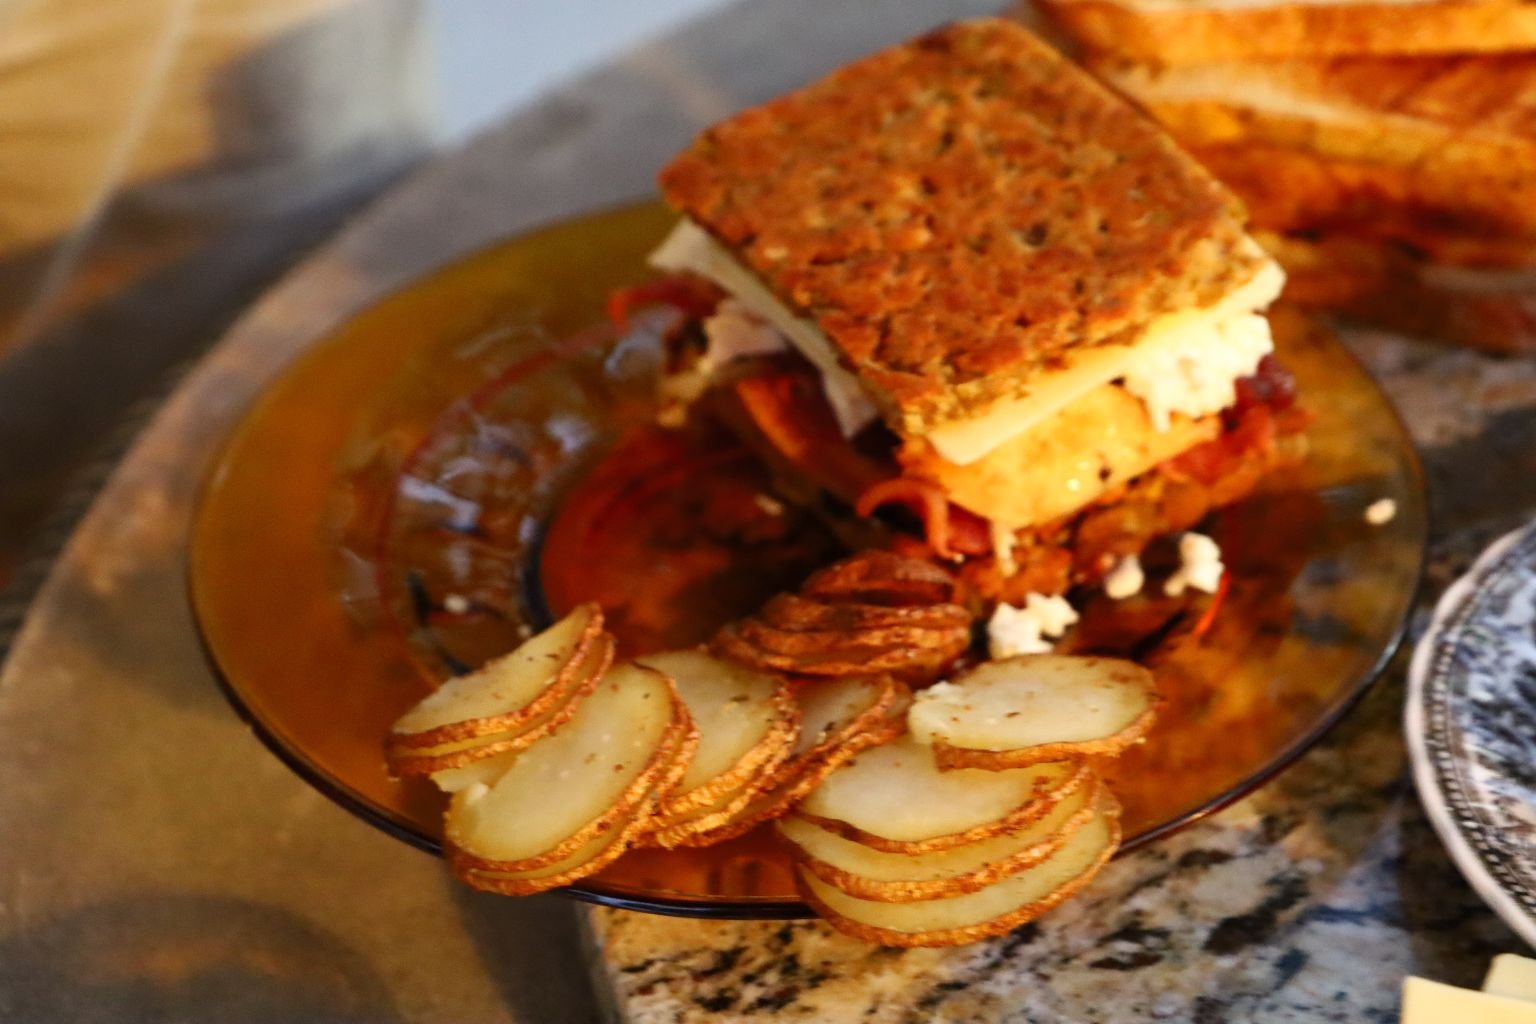
Gordon’s Dinner Plate
(Recipes Down Below)
———————————————————
There is Always Room for Leftovers
The Last Taste of Thanksgiving

Try dipping your sandwich into a side of gravy.
————————————————————————
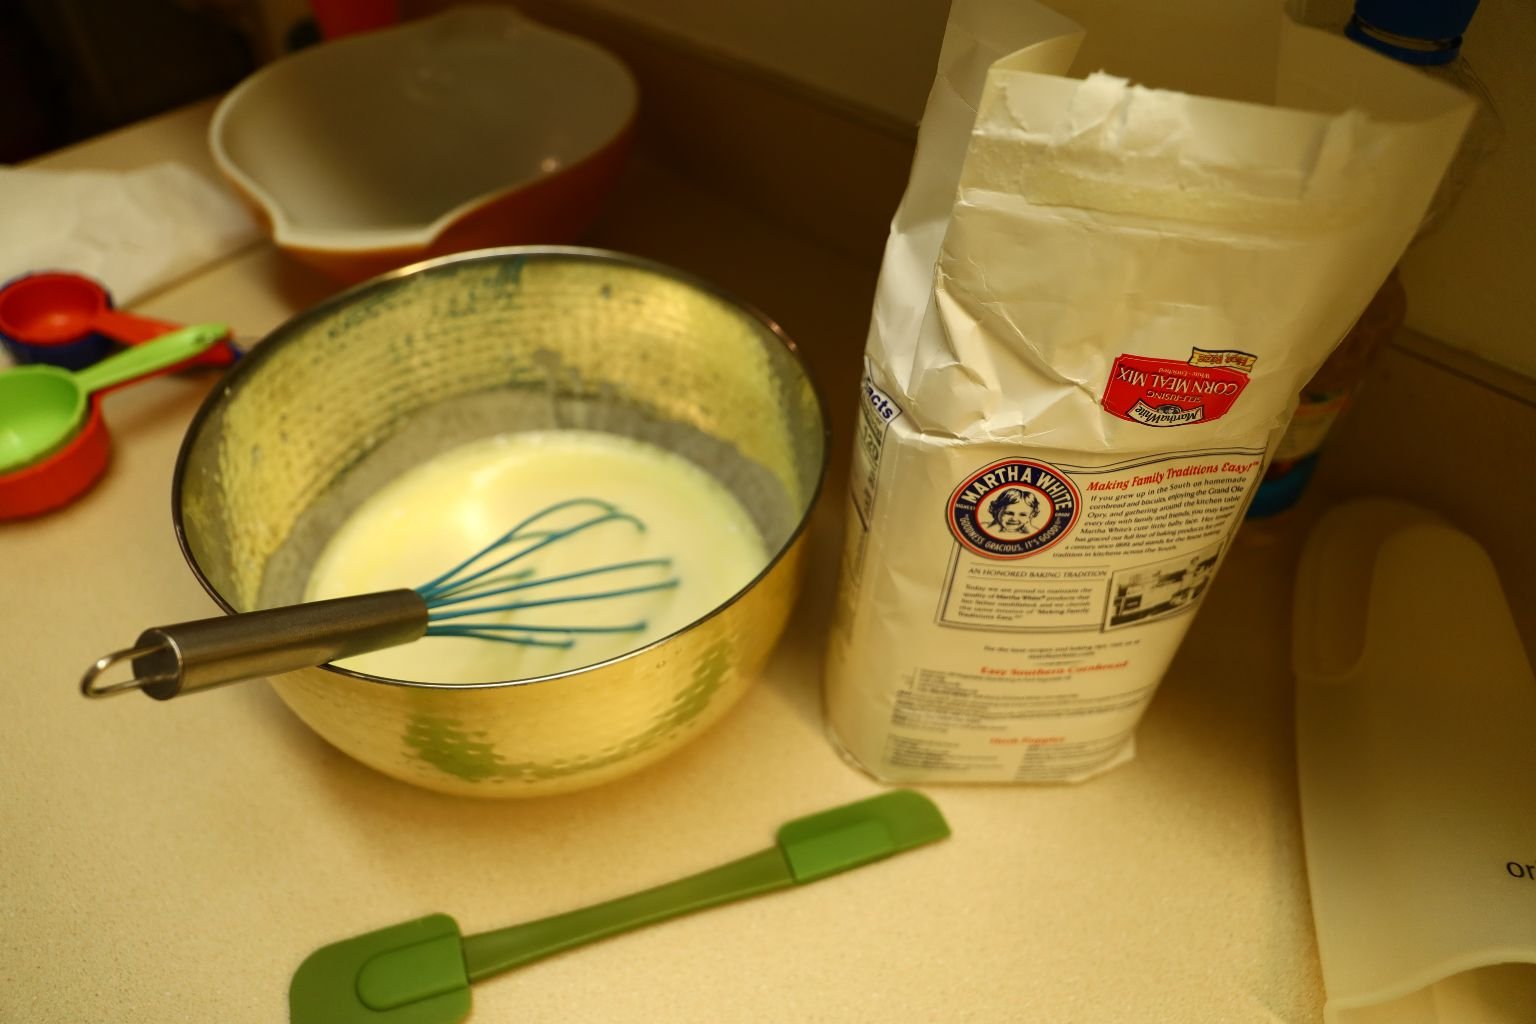
Now Time For The Recipes
—————————————————————-
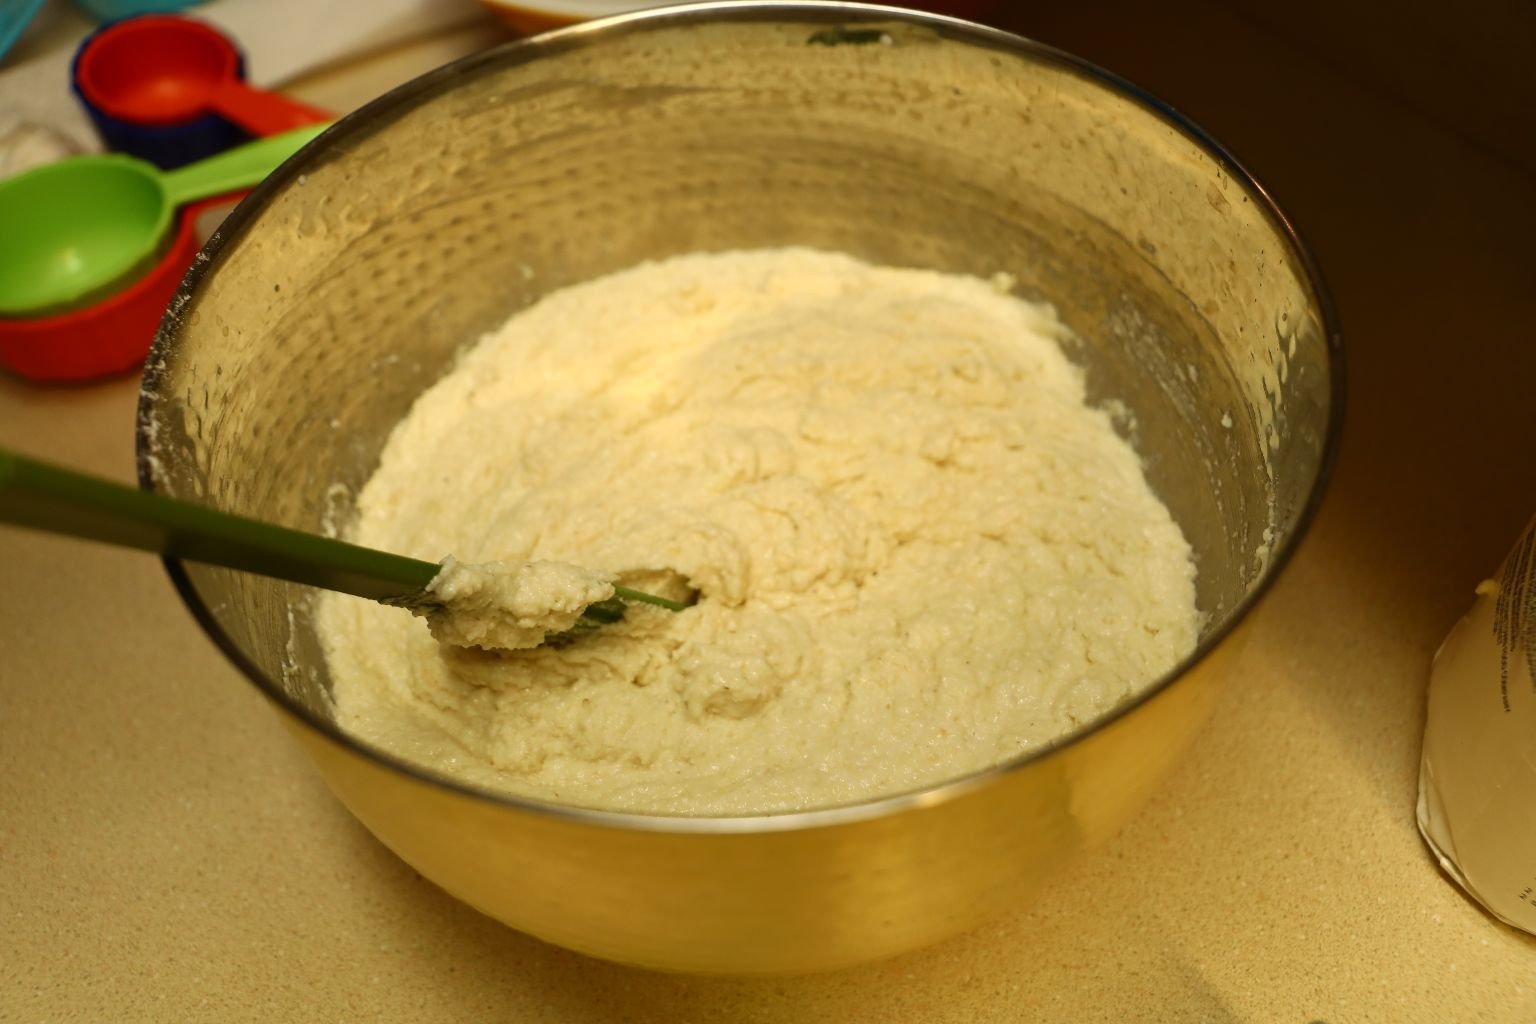
Making The Cornbread
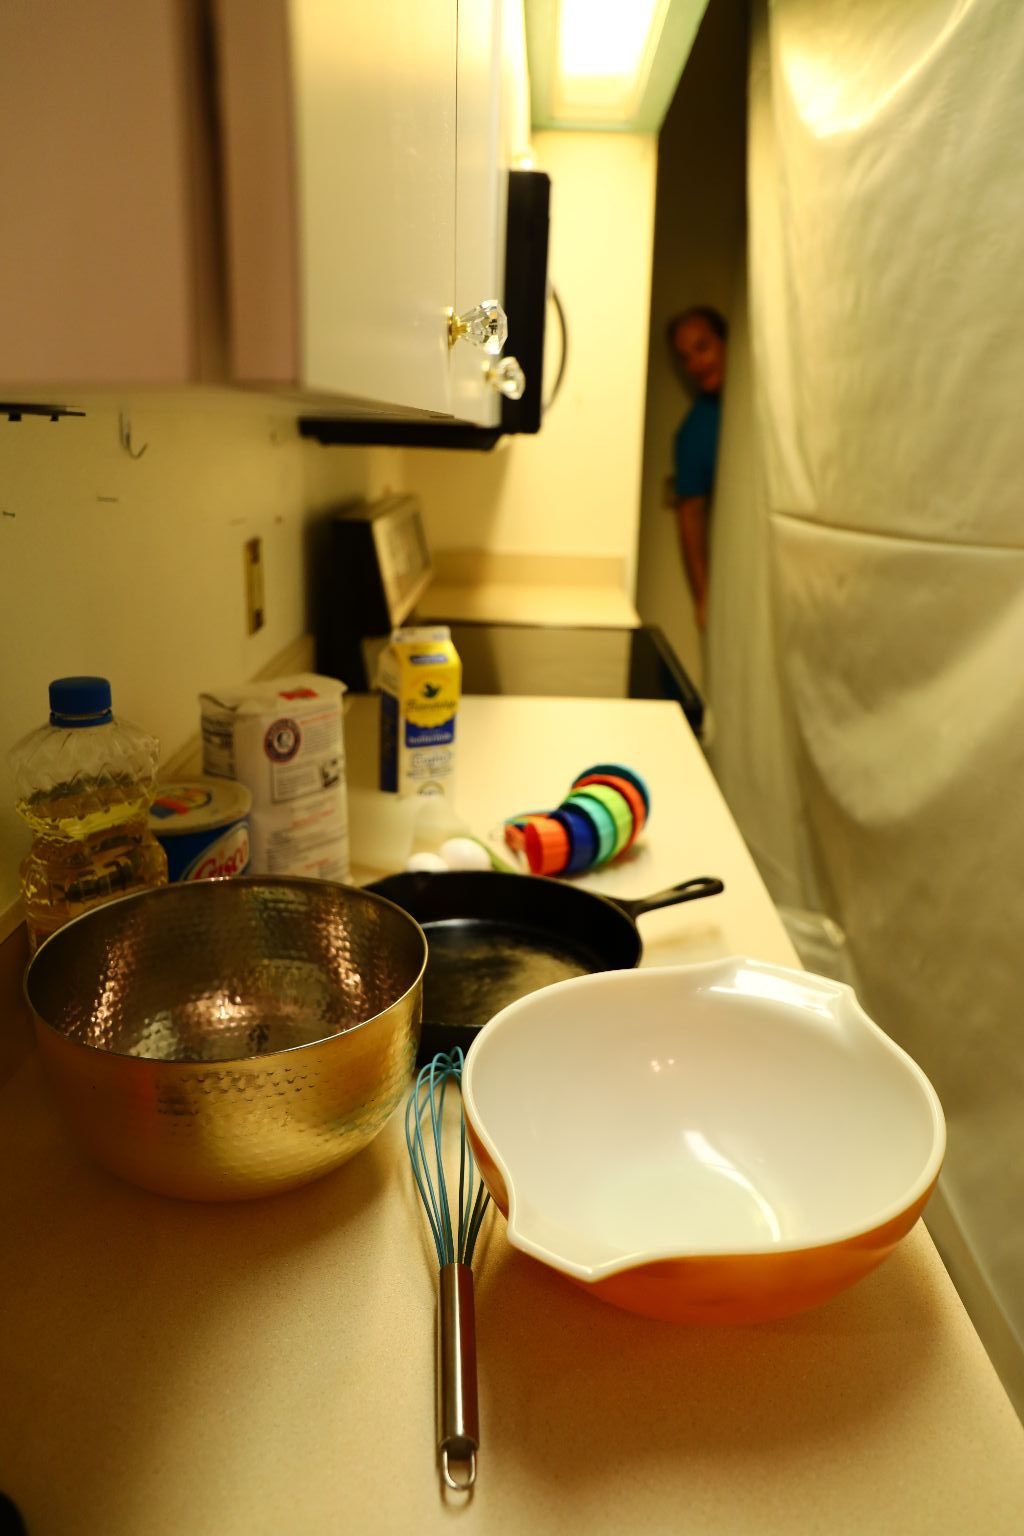
(See Gordon Peeking Around The Corner?) 🙂
The point of this isn’t to give you some unique recipe. It is to demonstrate to you how we had to make our cornbread during renovations. We probably did this on the day before Thanksgiving. Normally, I Julie, would have made it two days prior. But, we just had too much activity going on in this area that I couldn’t.
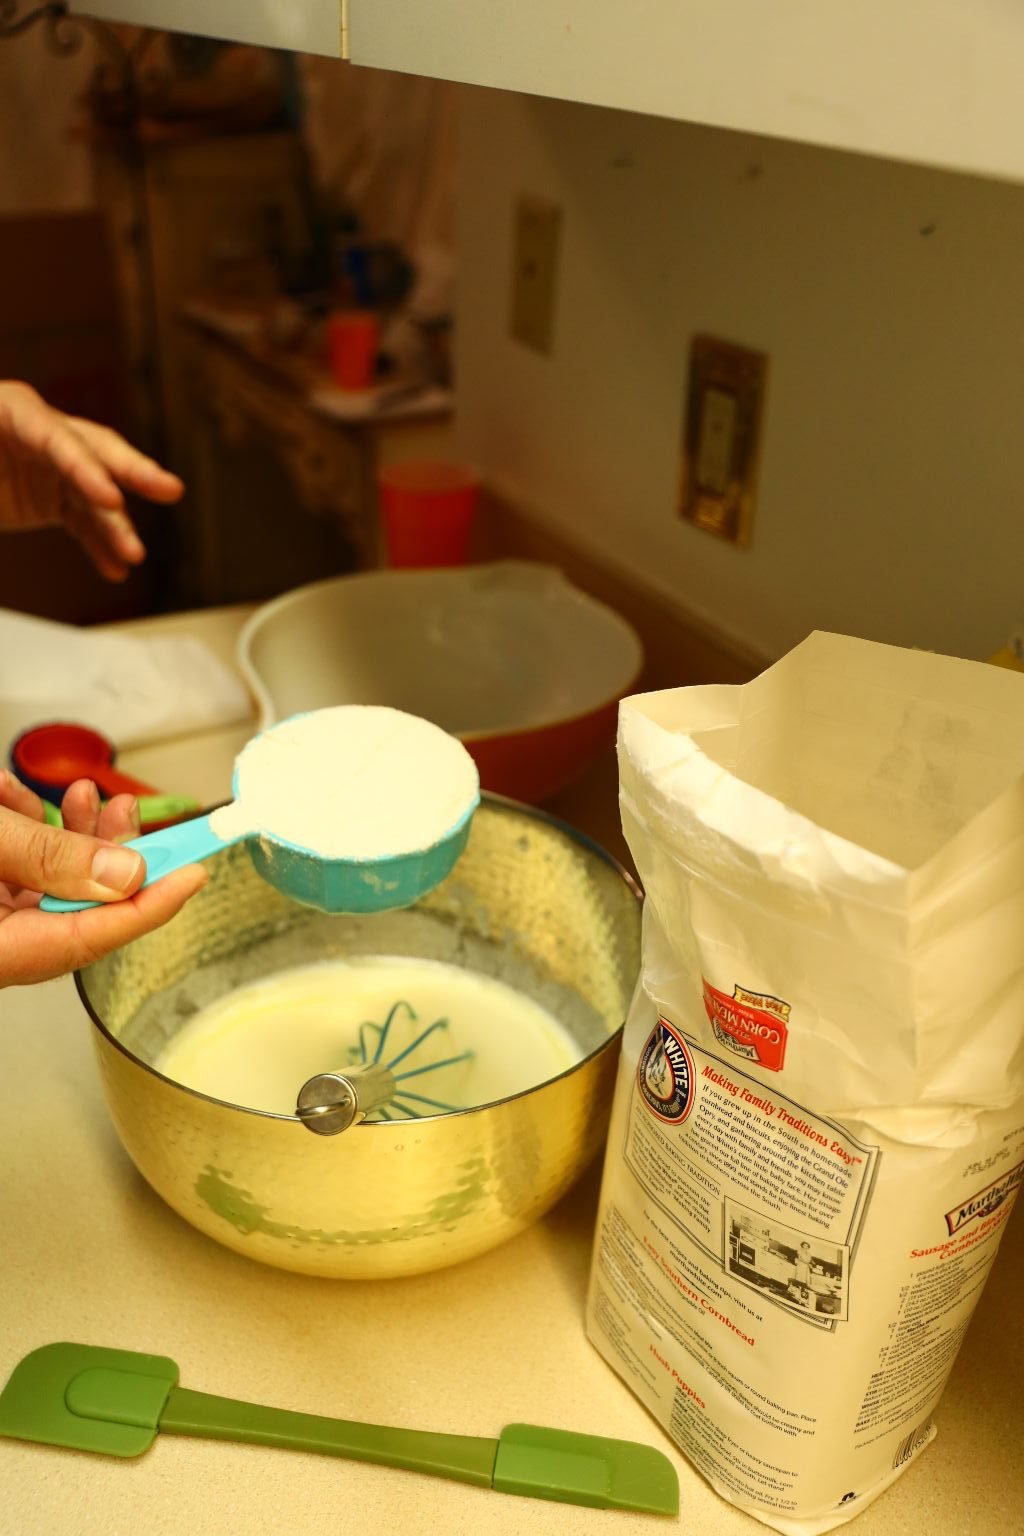
Here Gordon is Making our Cornbread
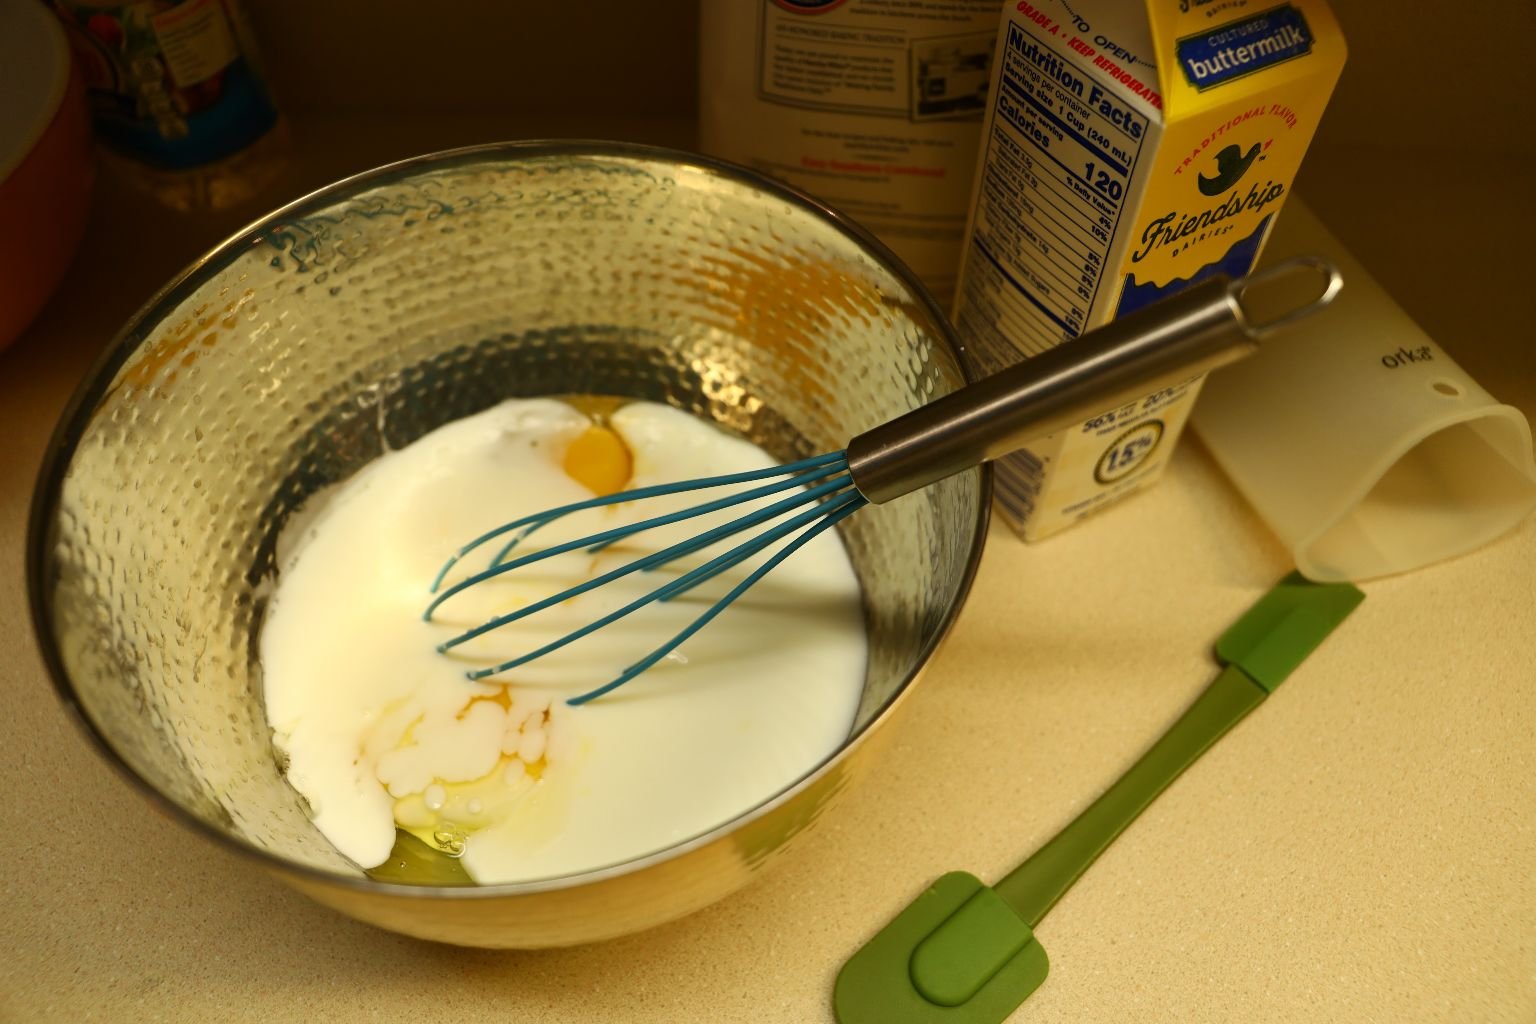
Honestly, the recipe is from a Martha White bag. It is delicious though. But, this is a great base for our Southern Cornbread Dressing.
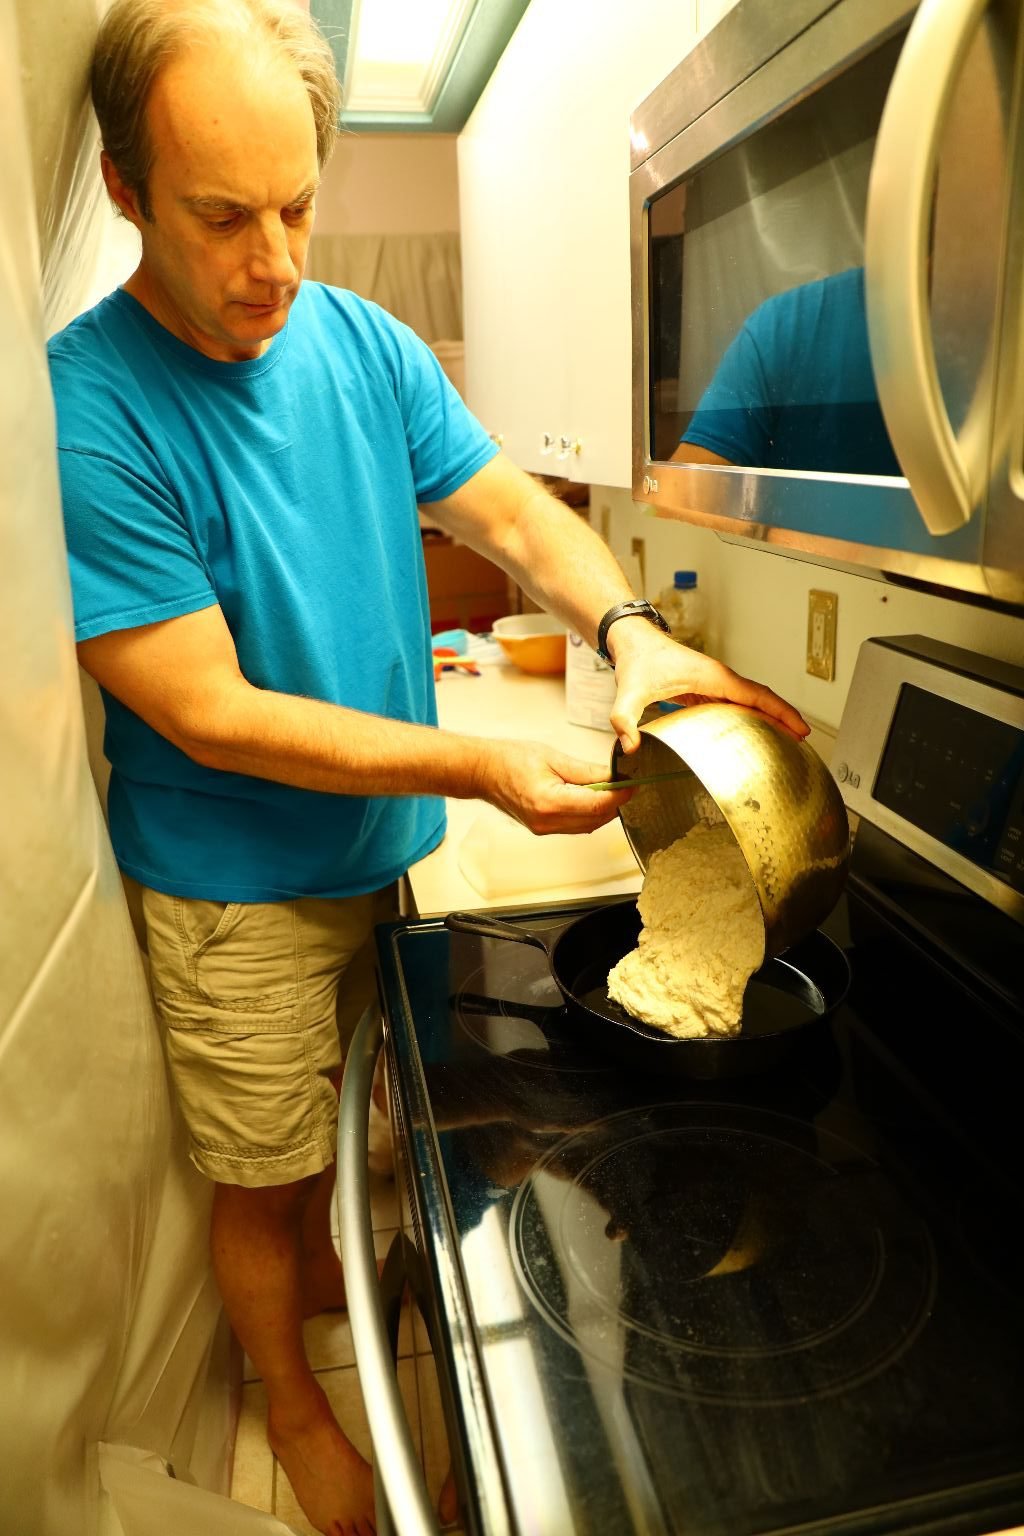
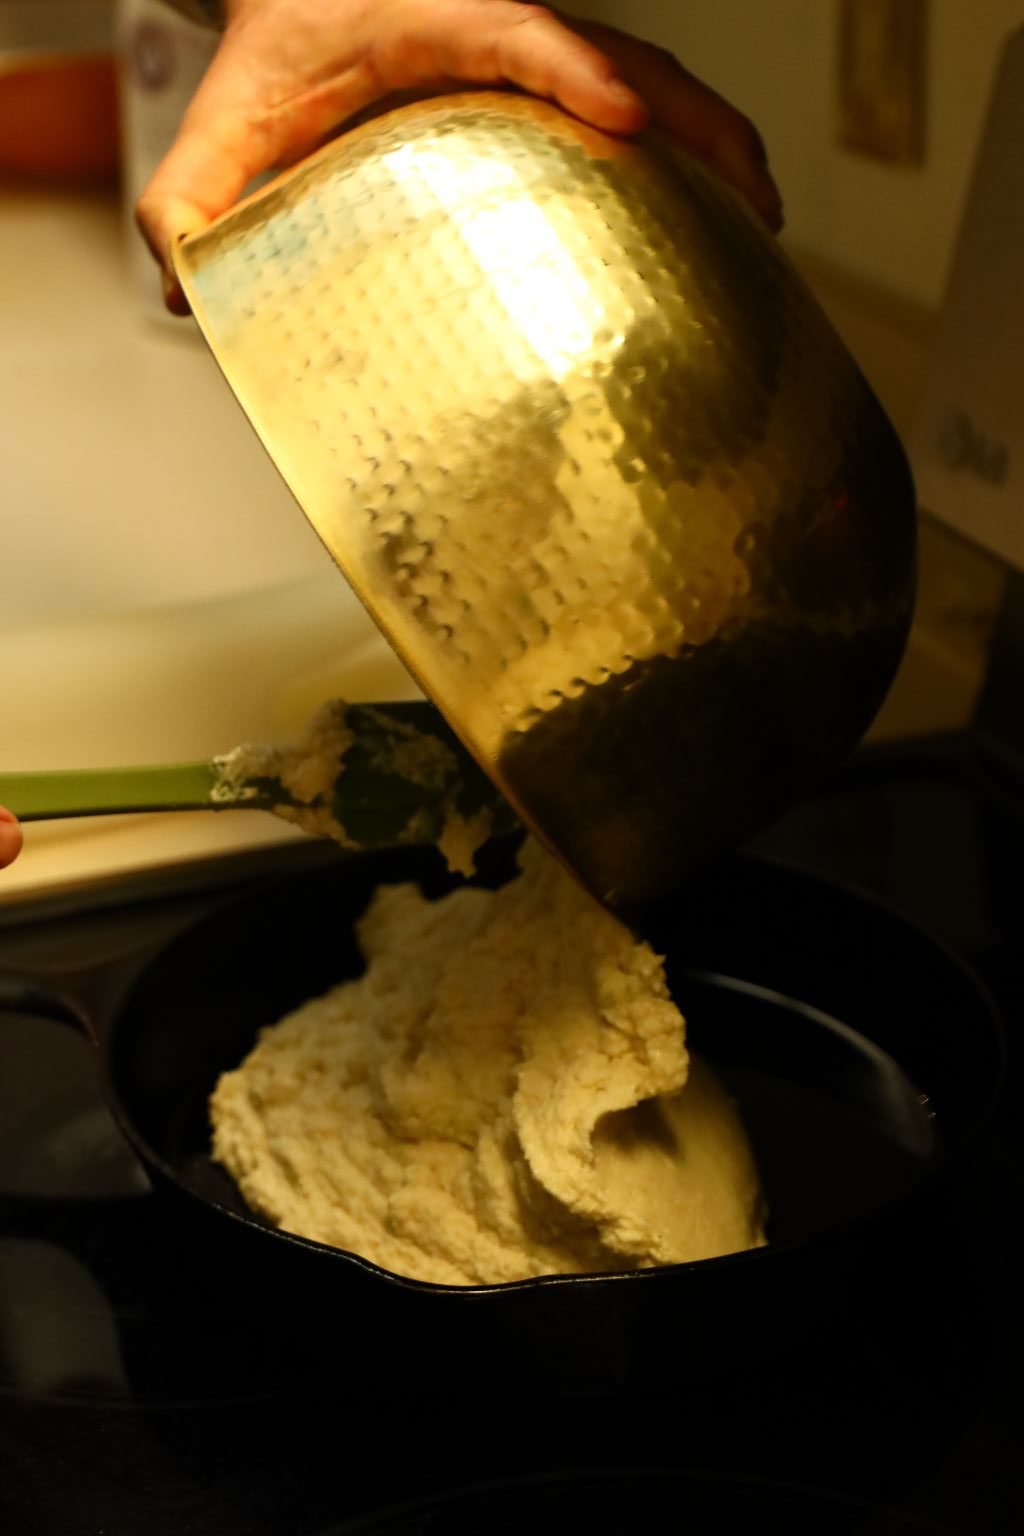
Here Gordon is placing the batter into our Cast Iron Skillet.
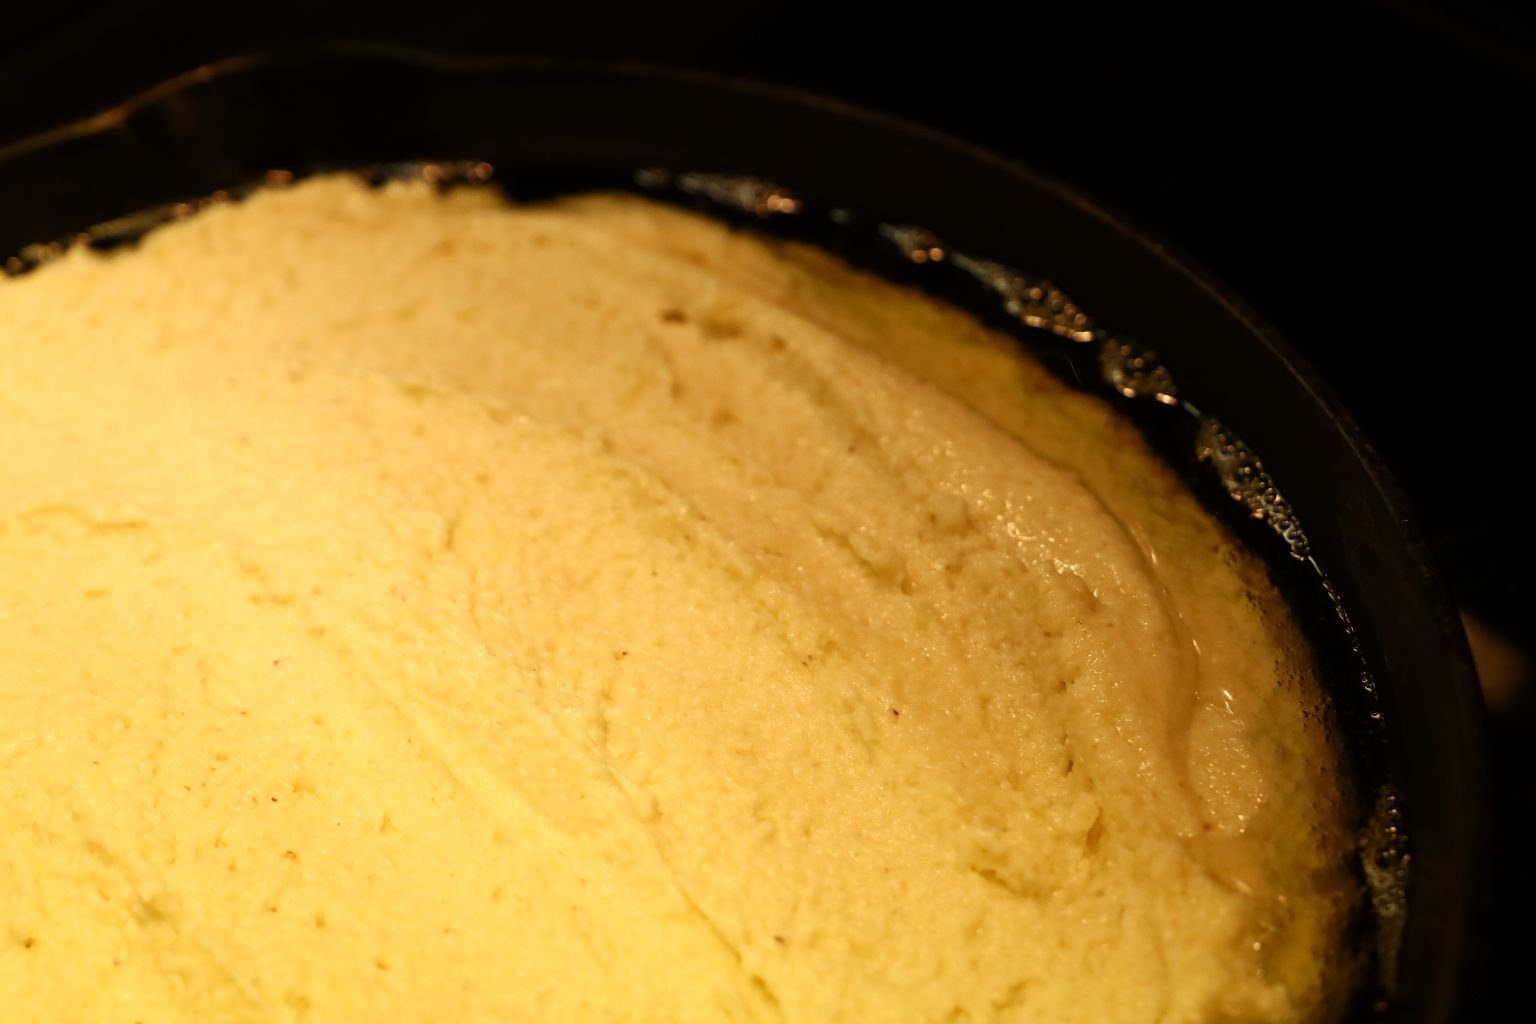
Now, Into The Oven To Bake
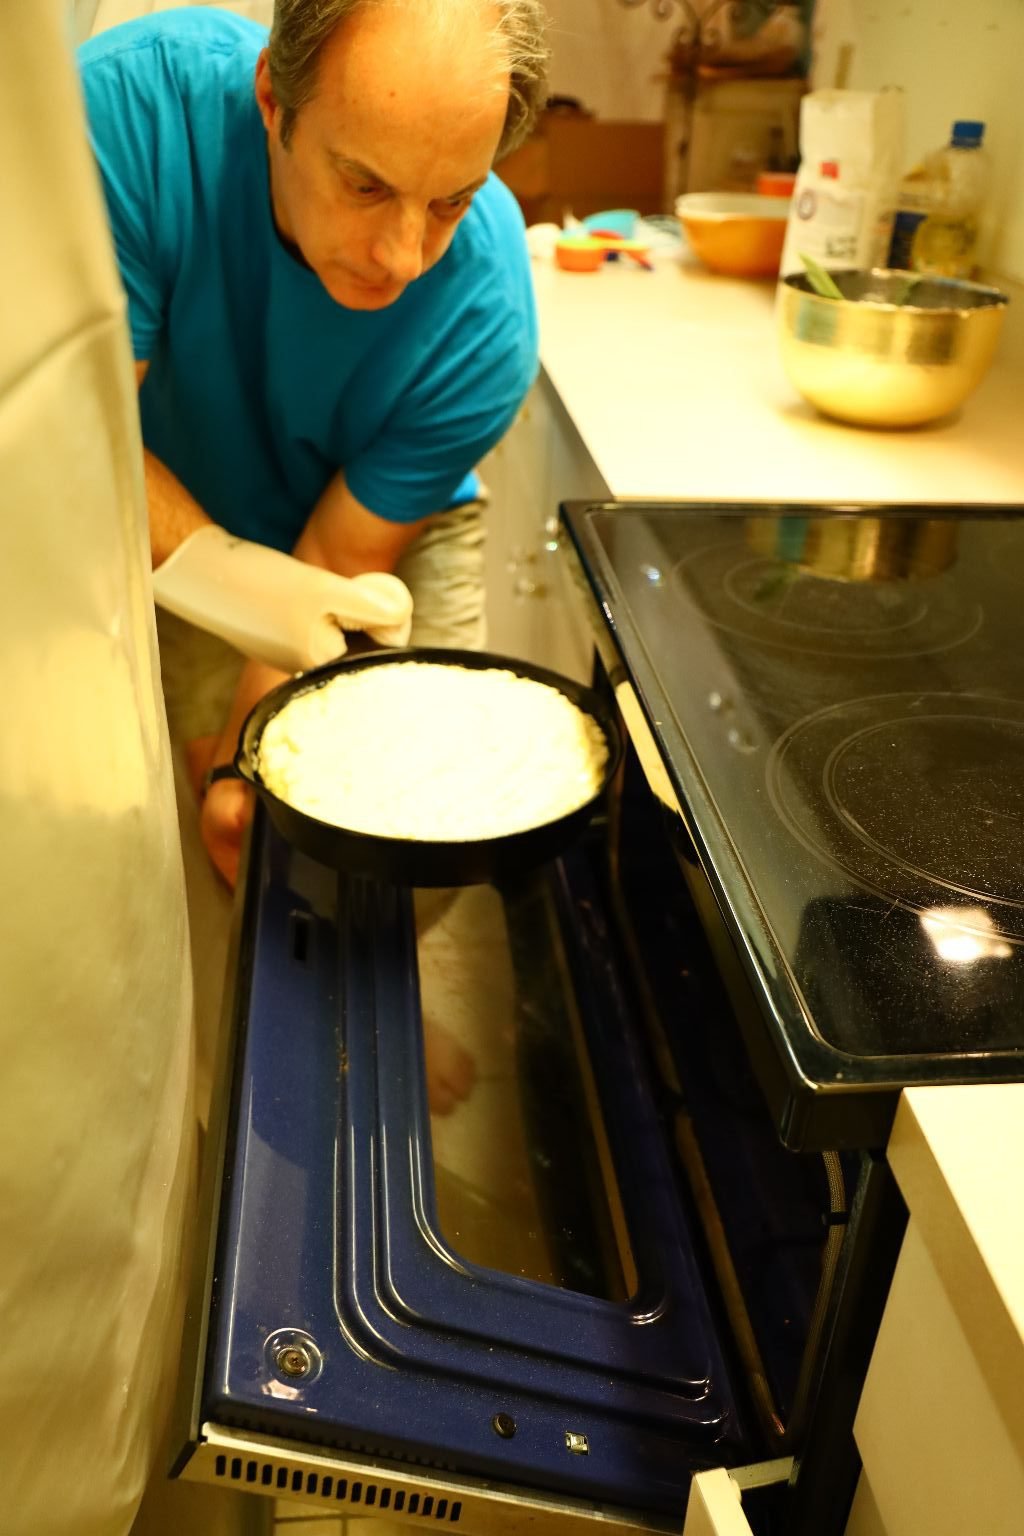
Just Following The Package Instructions
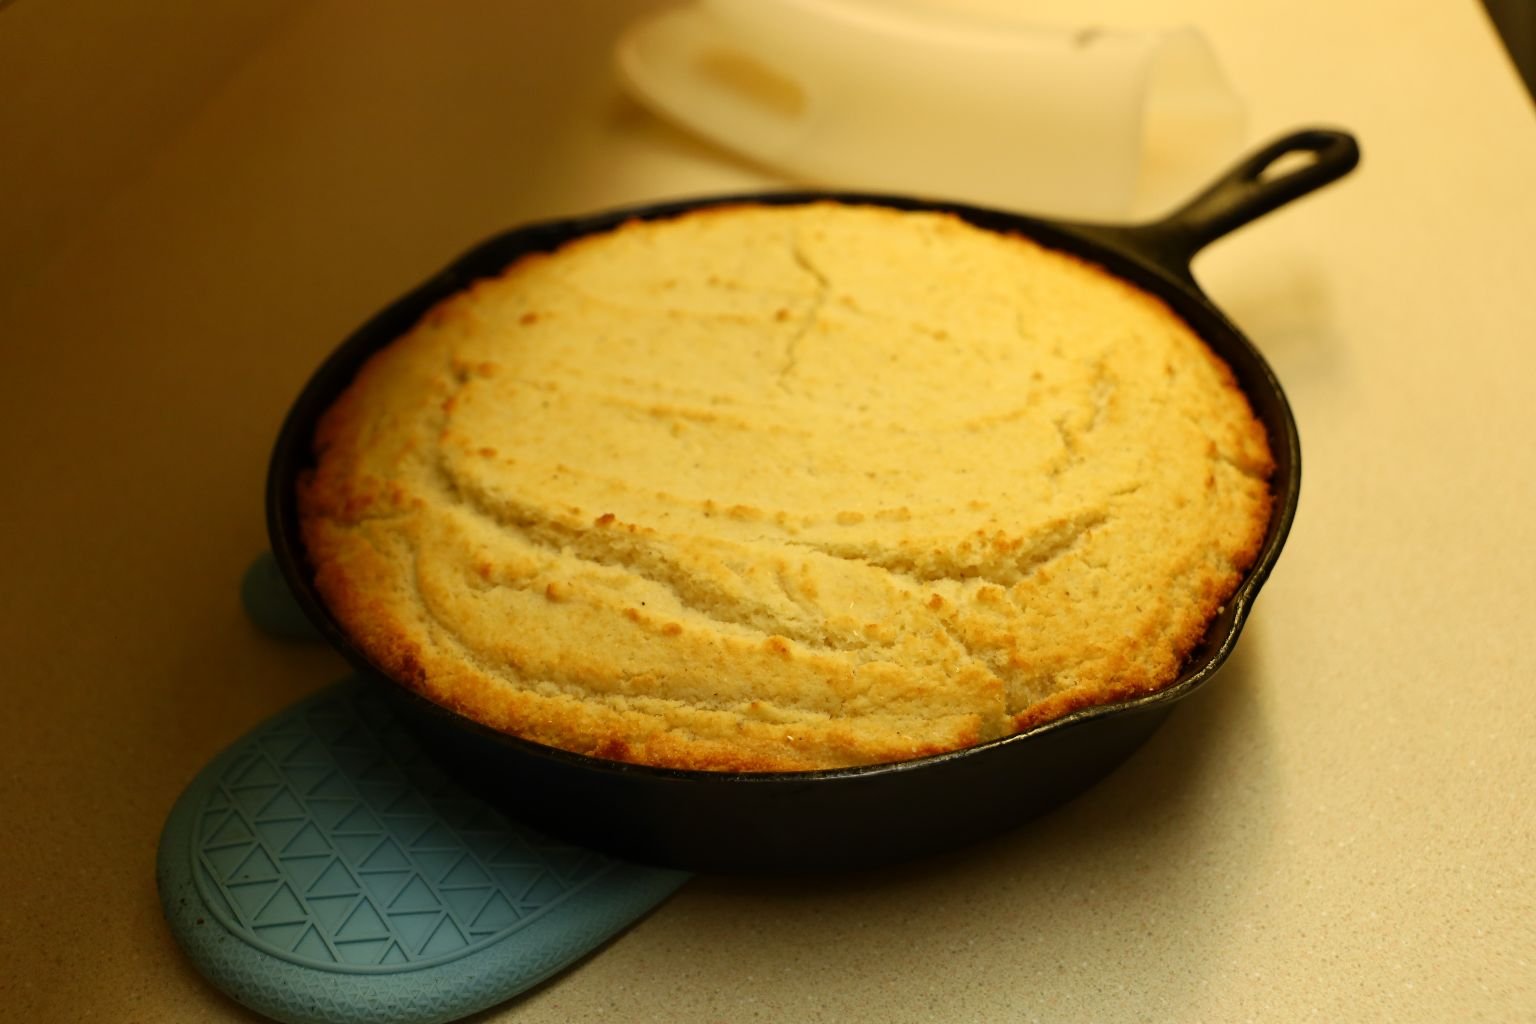
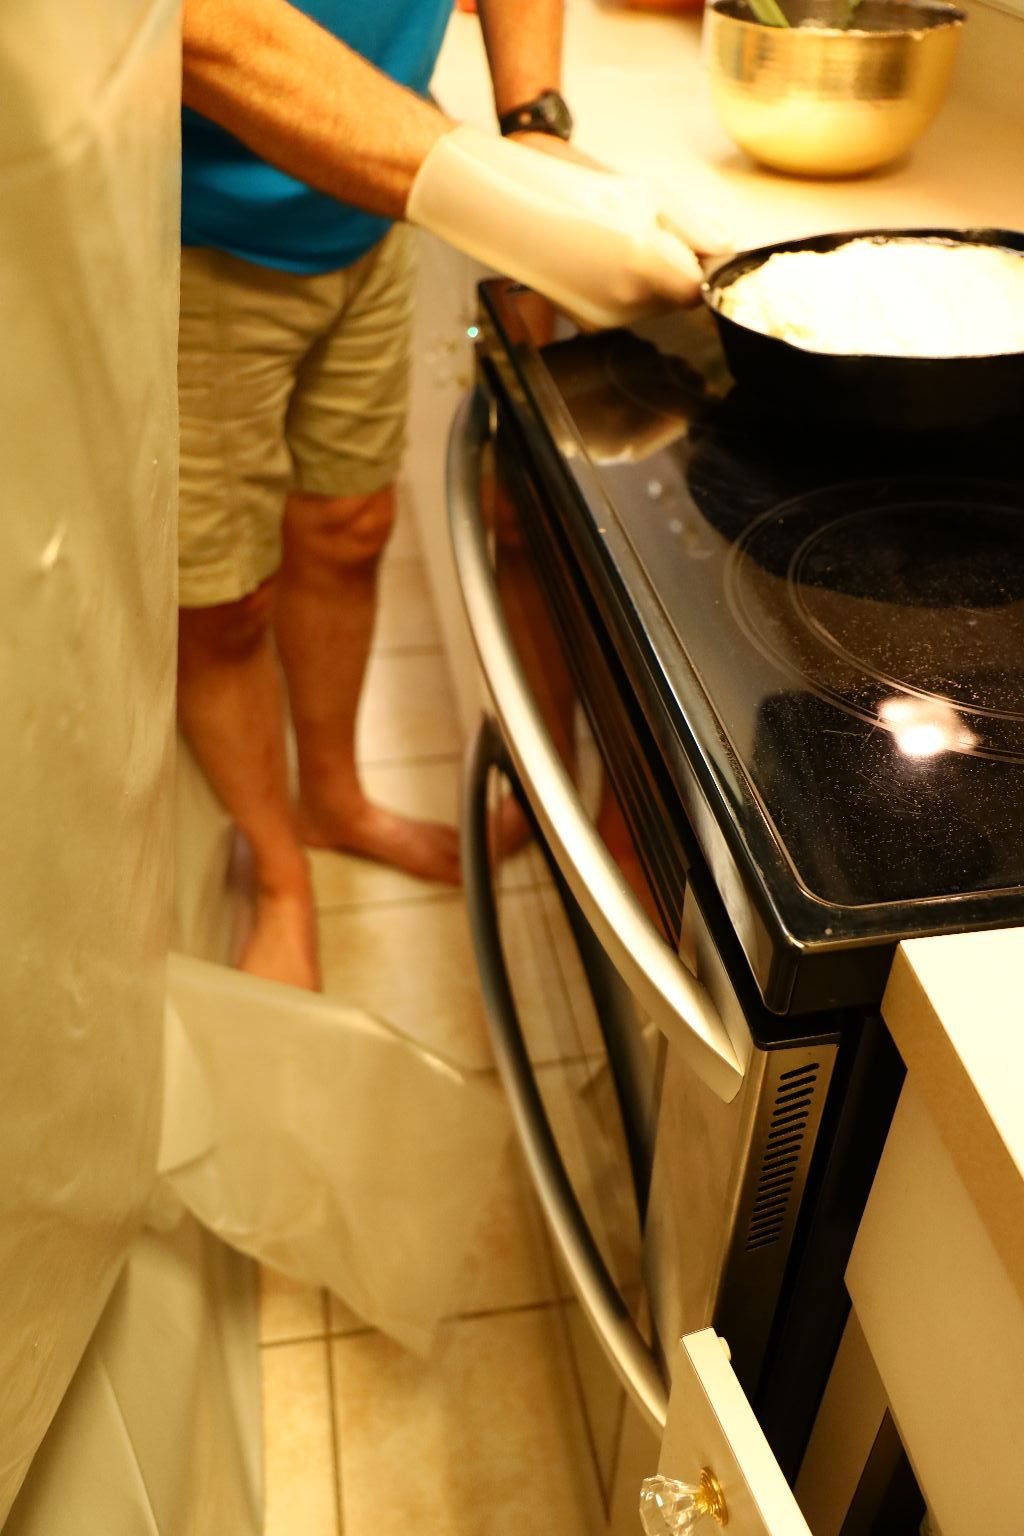
Out of the Oven and Cooling
I Julie, placed the cornbread into a bowl and am venting it with some Aluminum Foil. You want the Cornbread to dry out in order to make a great Cornbread Dressing. I have it vented on my desk that we moved into our bedroom for renovations. This is on a Wednesday evening.
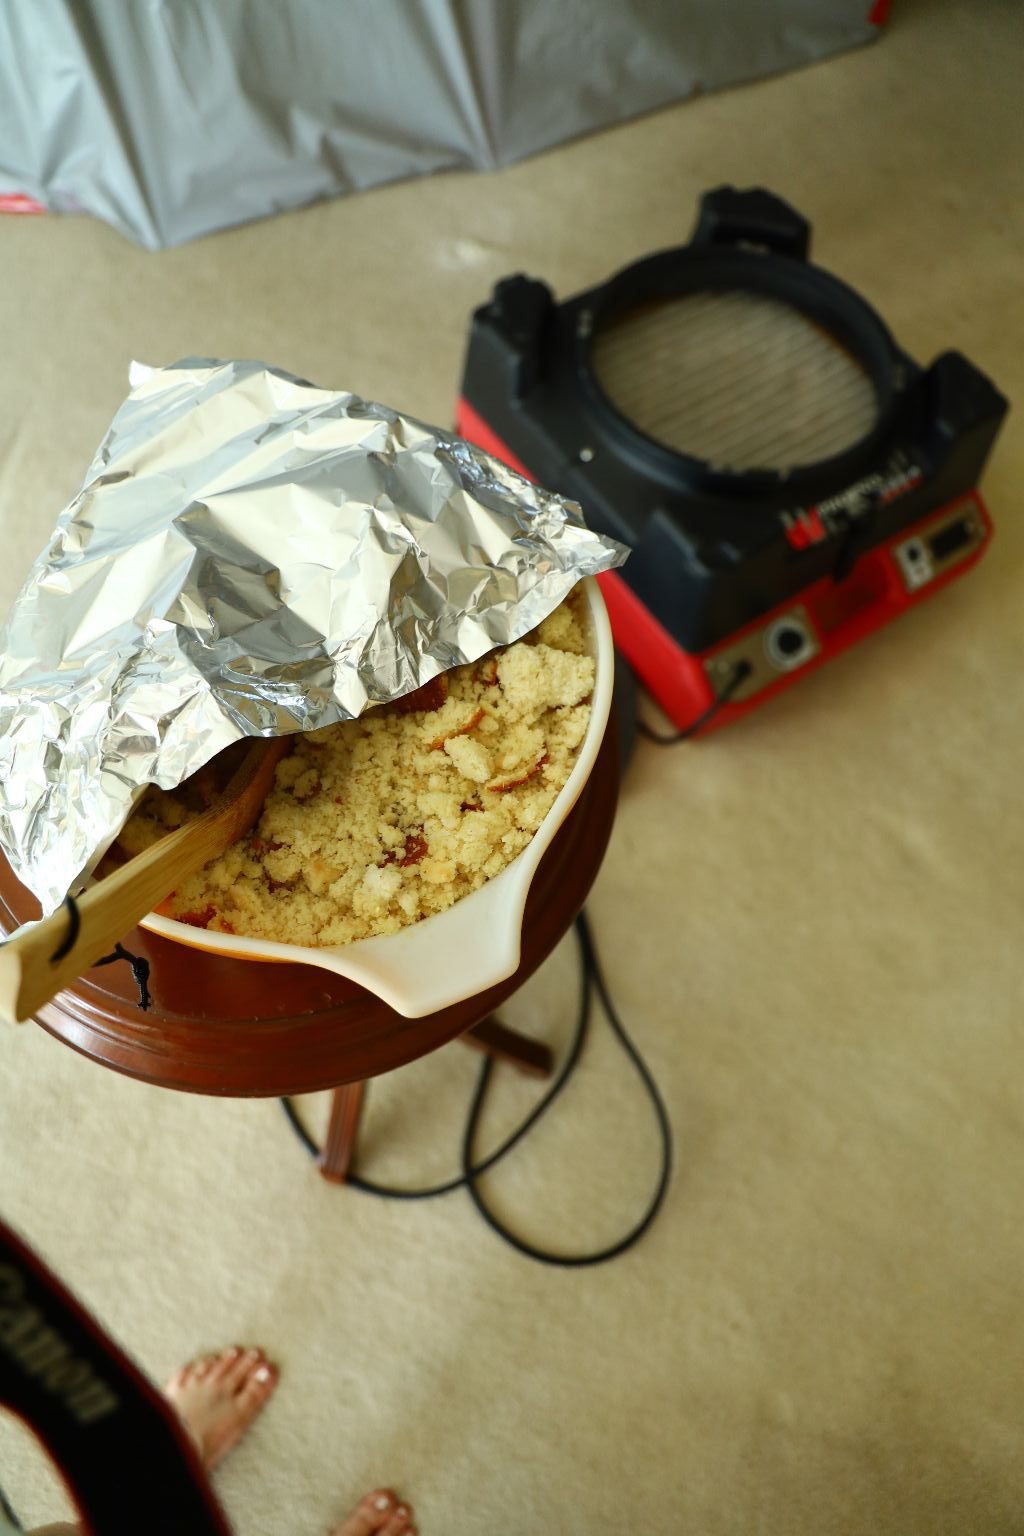
Cornbread and the Dehumidifier
This is Thursday, Thanksgiving Day
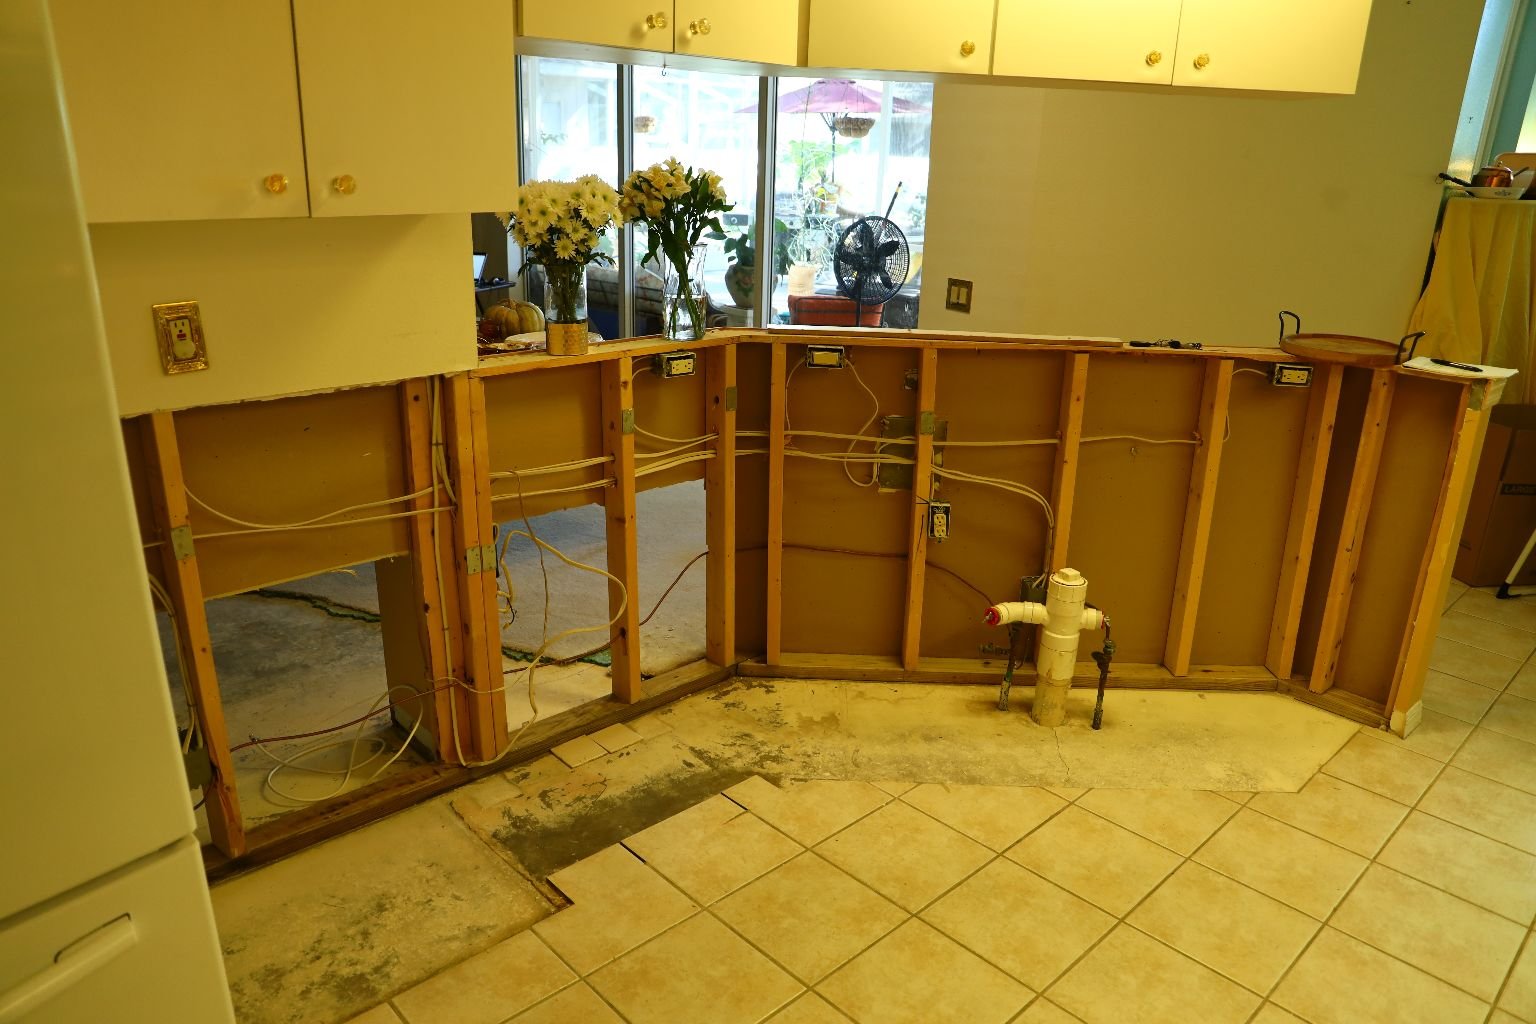
That red thing is a dehumidifier. It’s purpose is to suck the moisture out of the air to dry out our house because of all the moisture that we had due to our dishwasher leaking and ruining the kitchen walls and our living room carpet.
We could not have asked for a better way to dry out our cornbread. That is why we placed it beside the dehumidifier.
Genius, huh? 🙂
——————————————————————
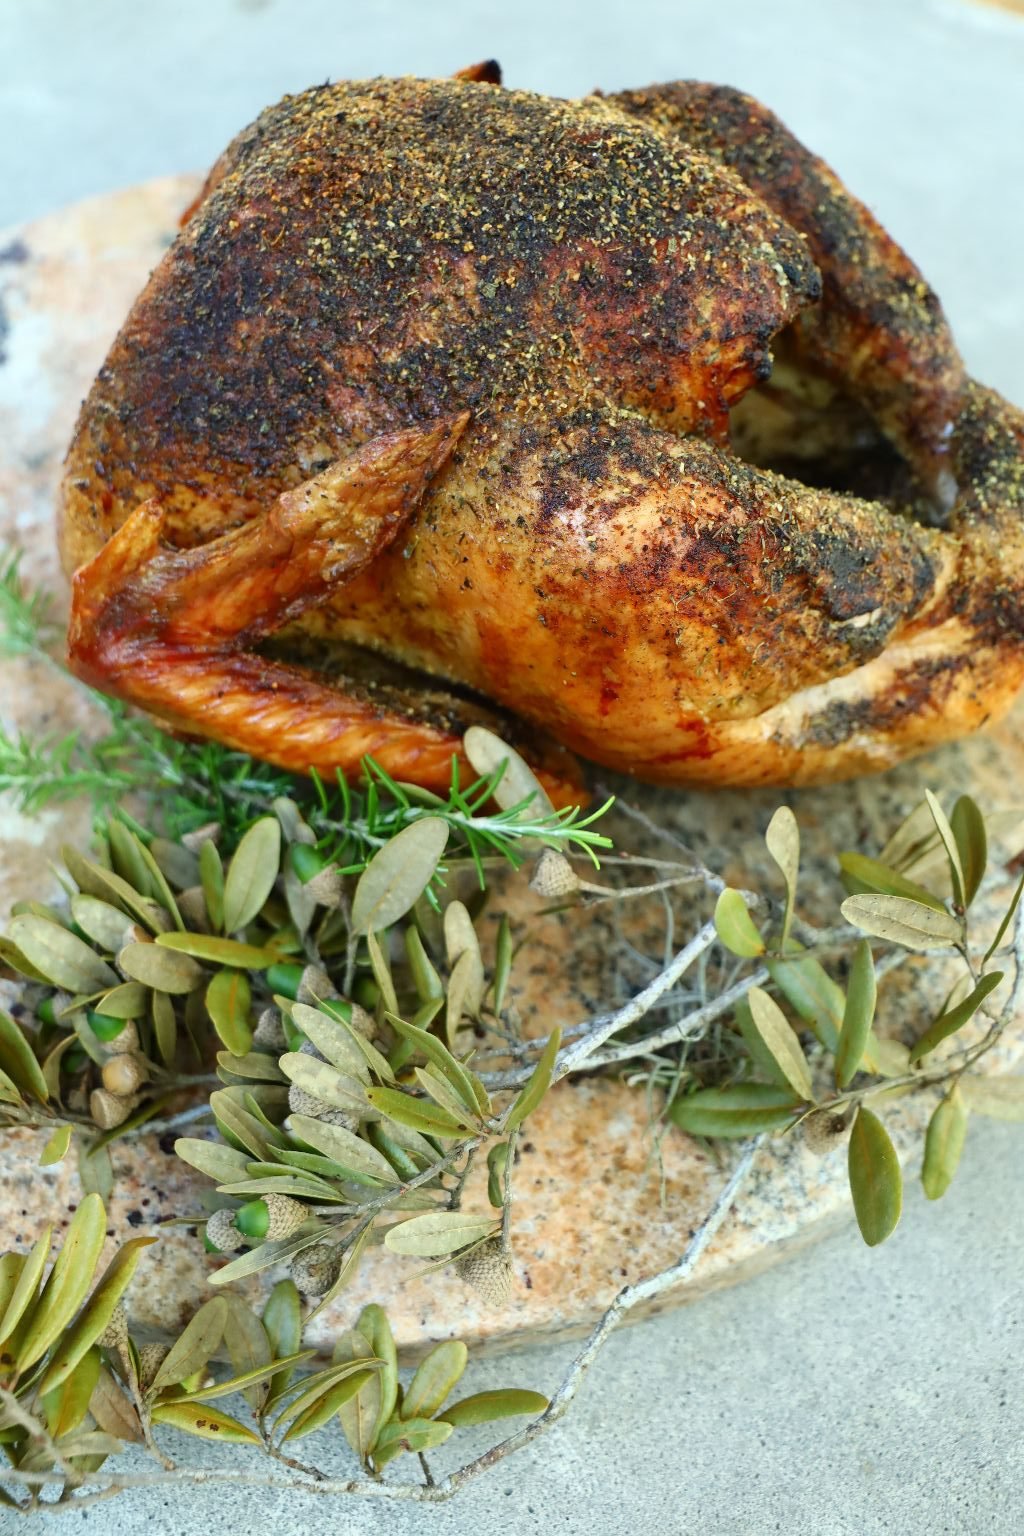
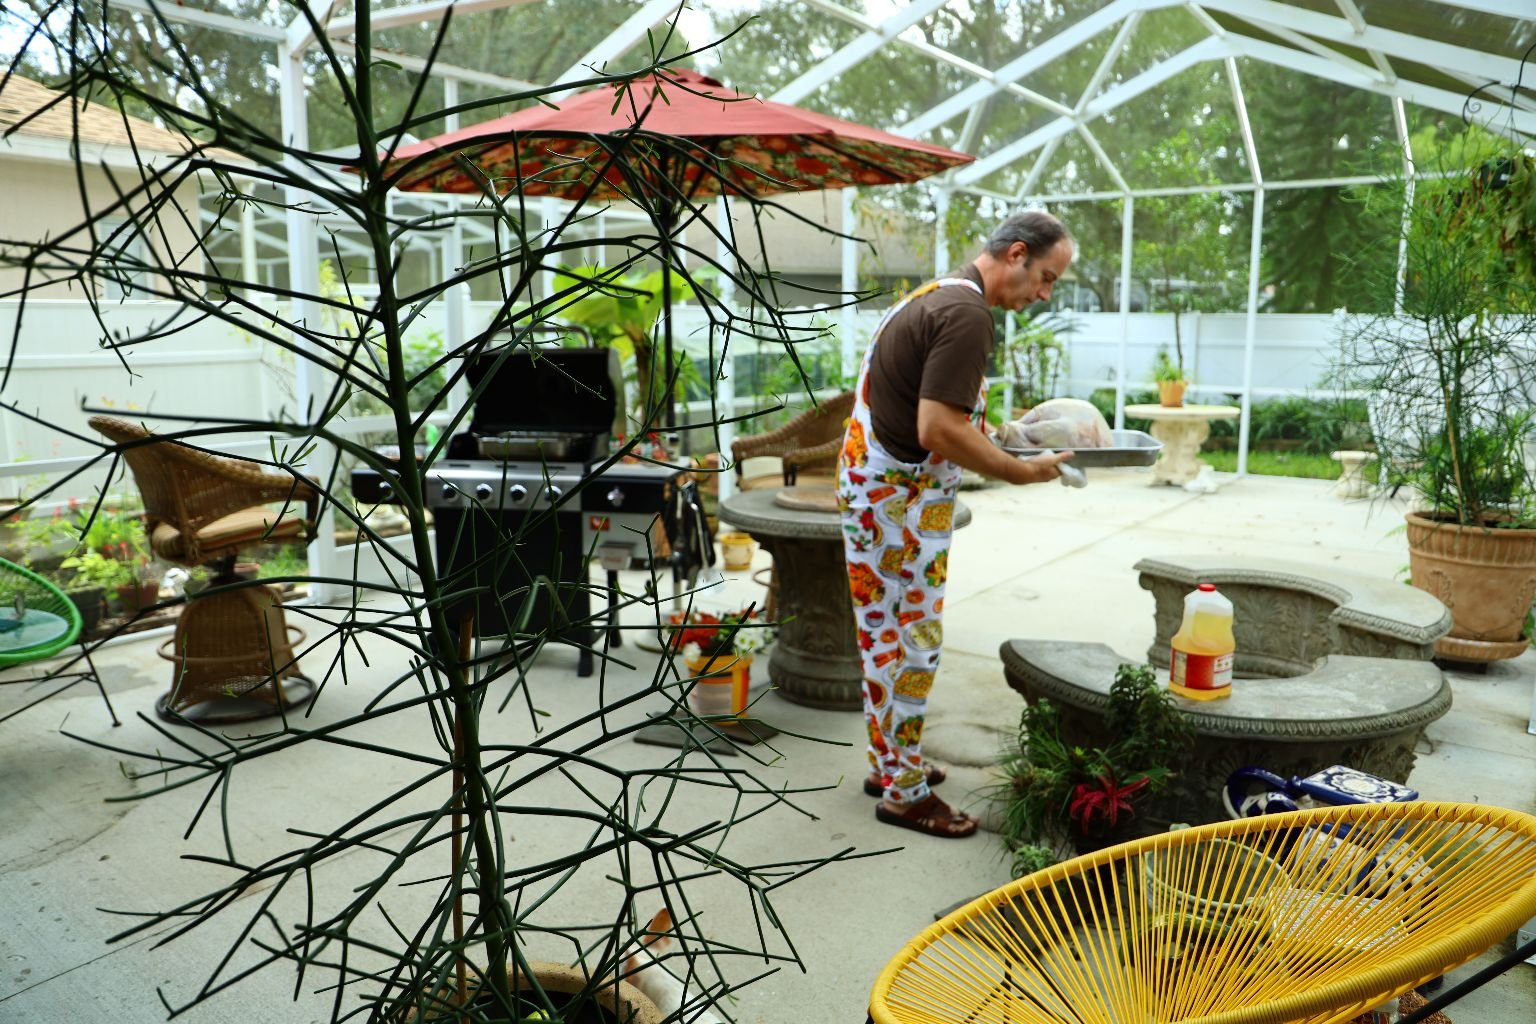
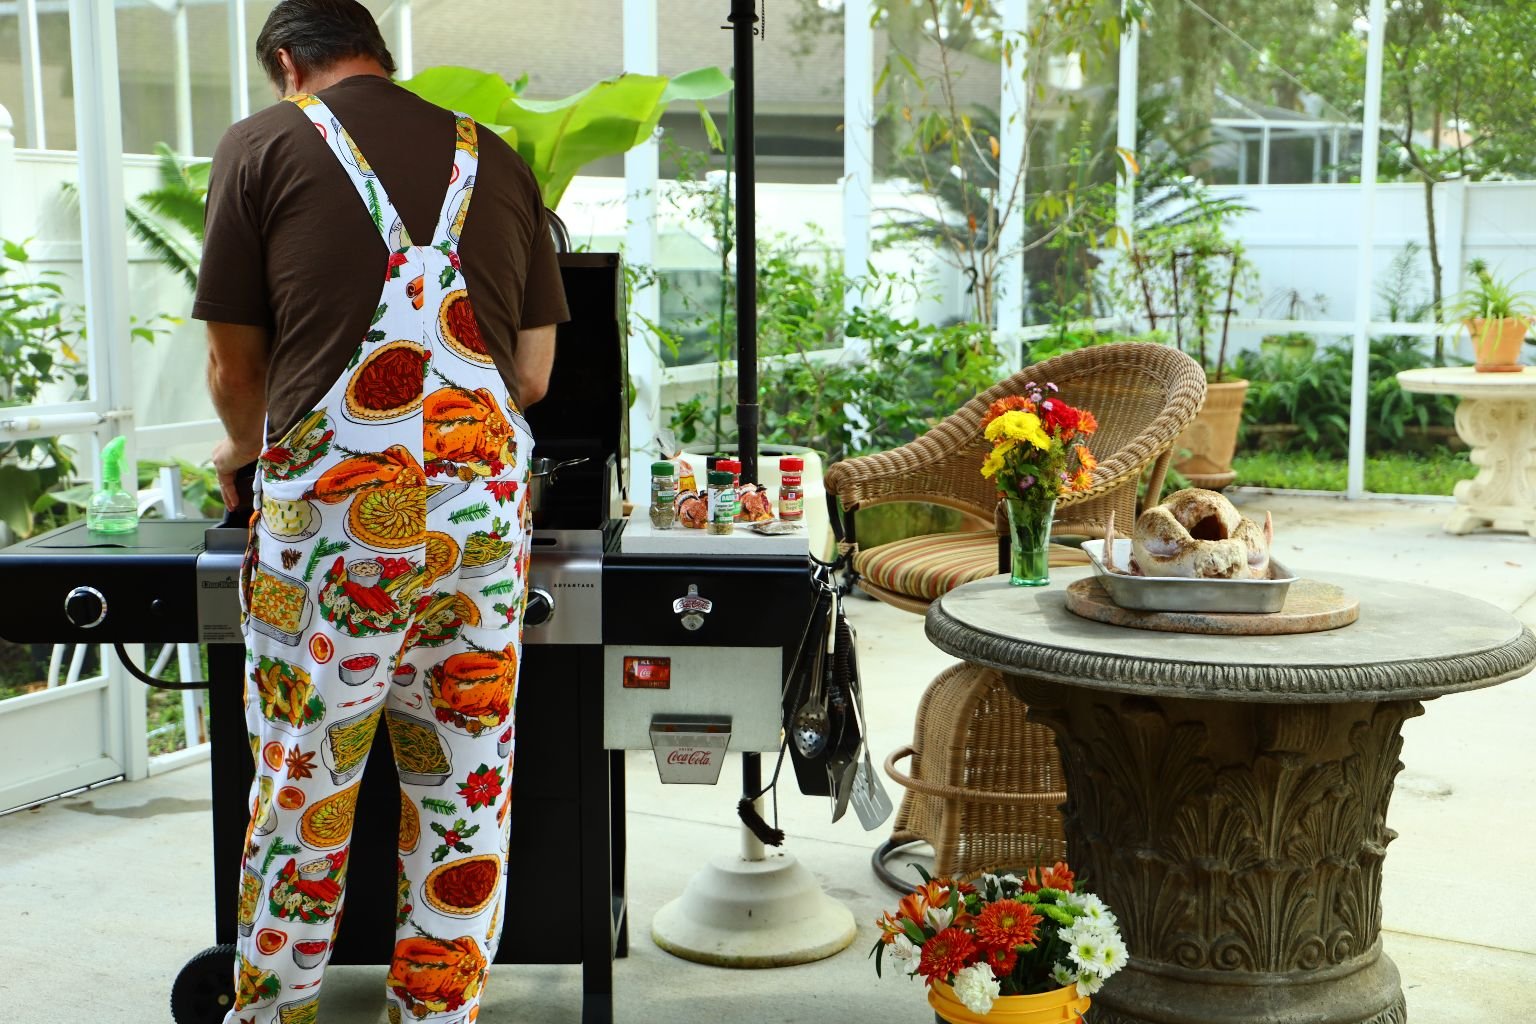
Time to Cook the Turkey
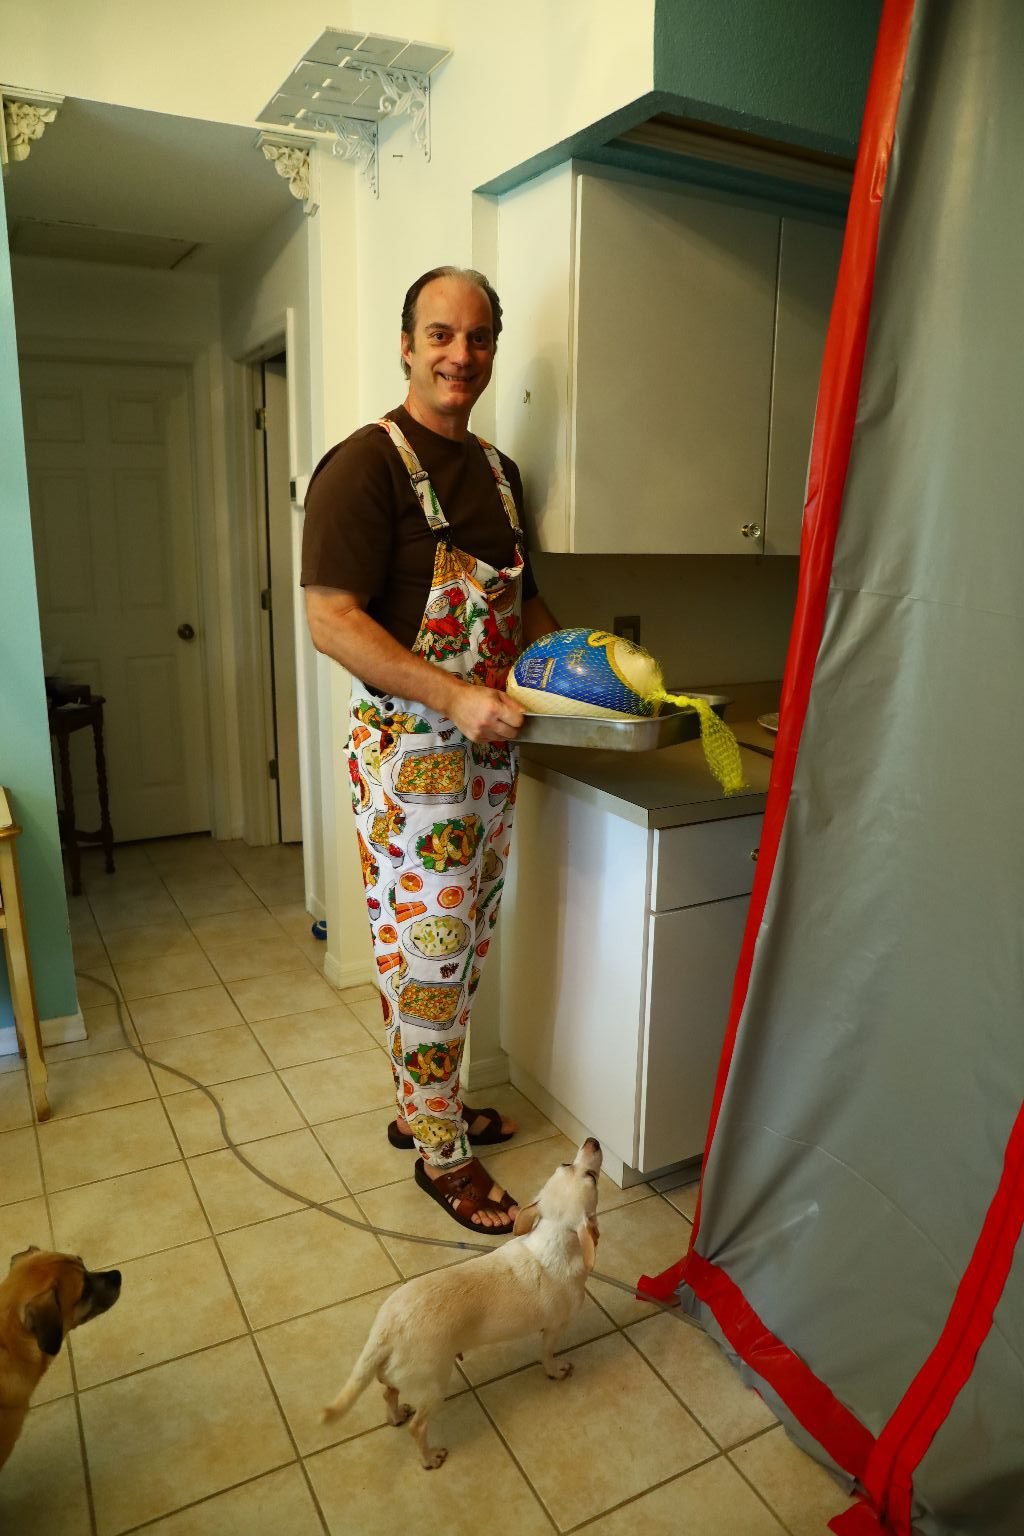
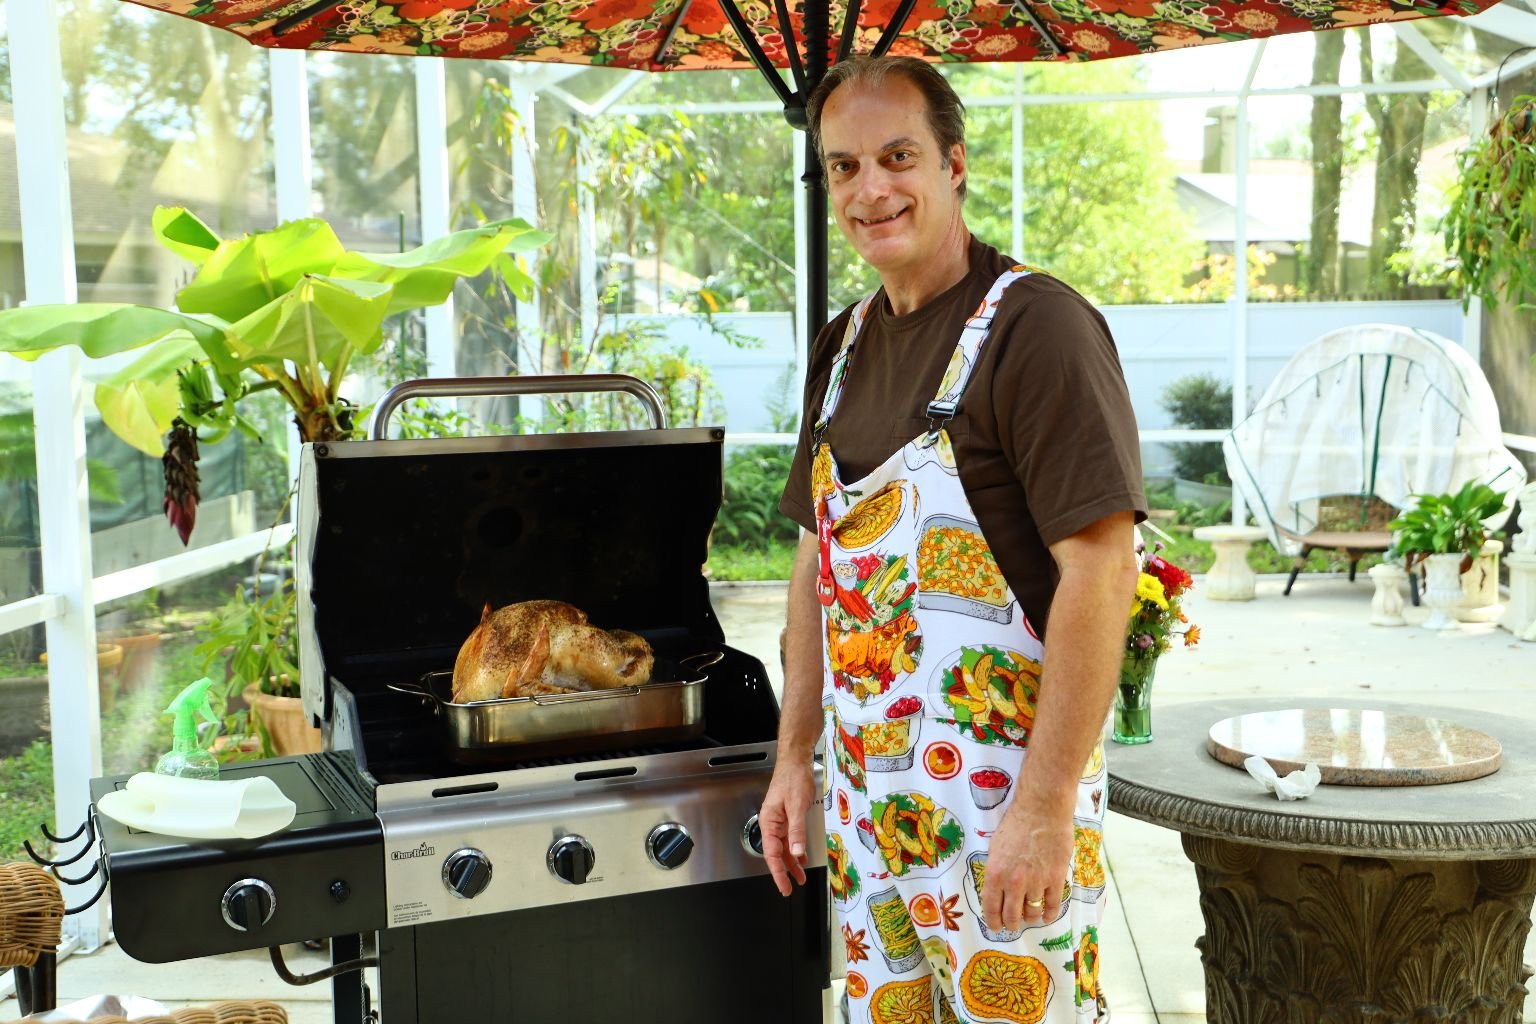
Even major renovations to our house due to a leaking dishwasher which leaked over a long period of time, won’t stop us from having our Thanksgiving. I even got dressed for the occasion with my Thanksgiving overall pajamas. 🙂
Be sure to thaw your Turkey in the refrigerator days ahead of time.
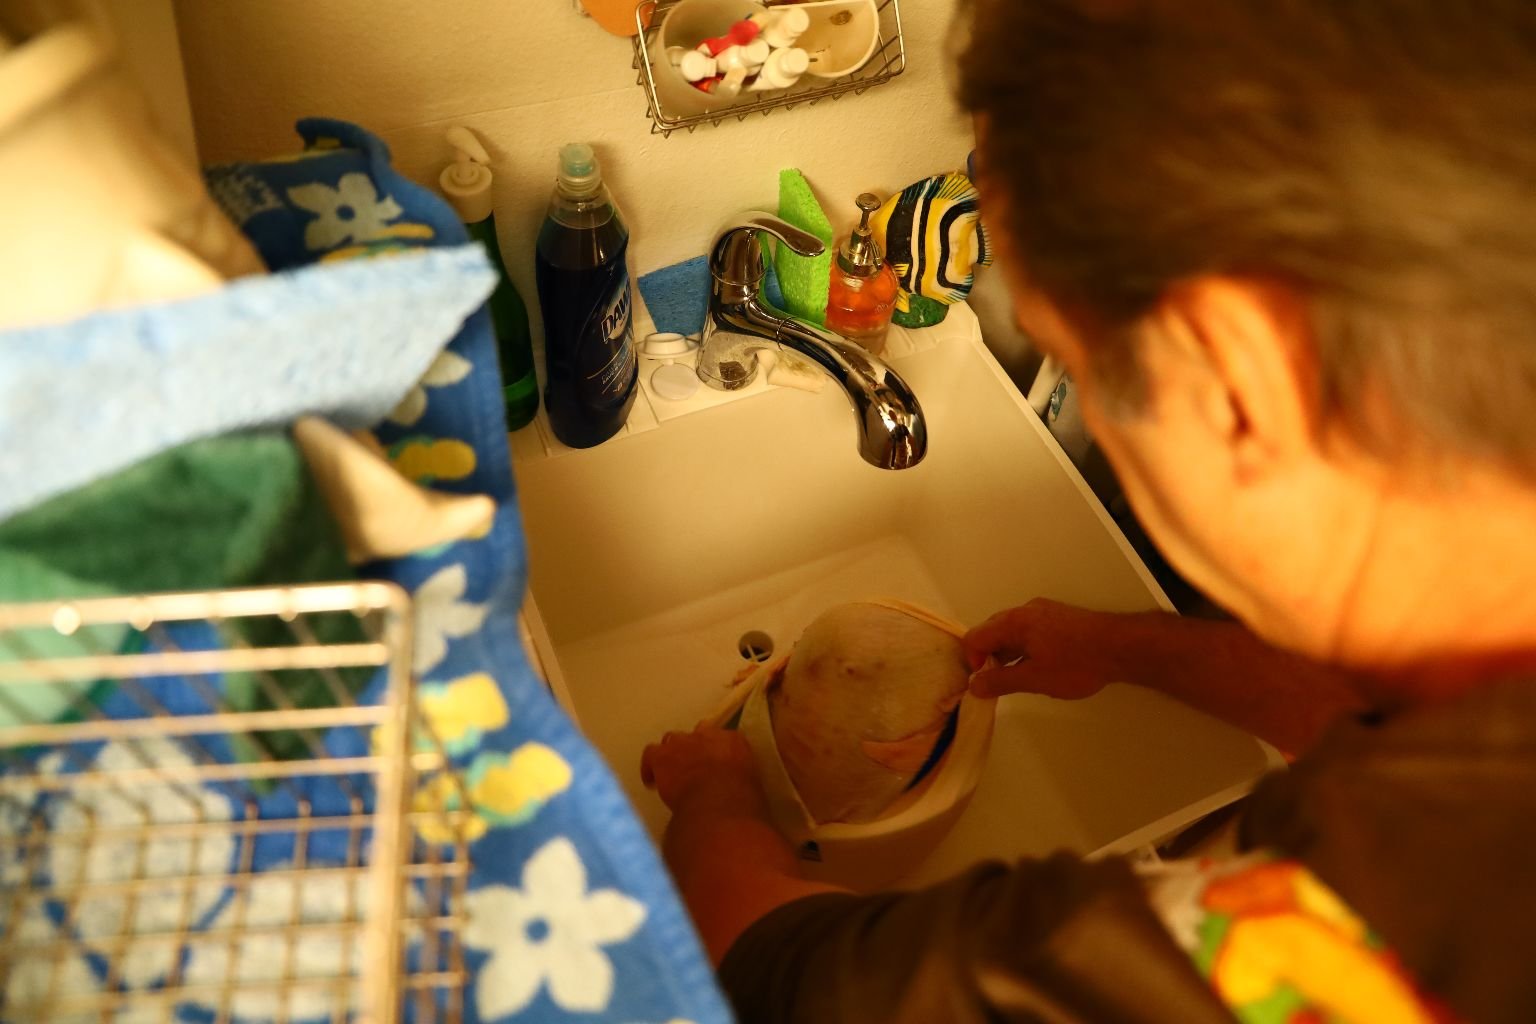
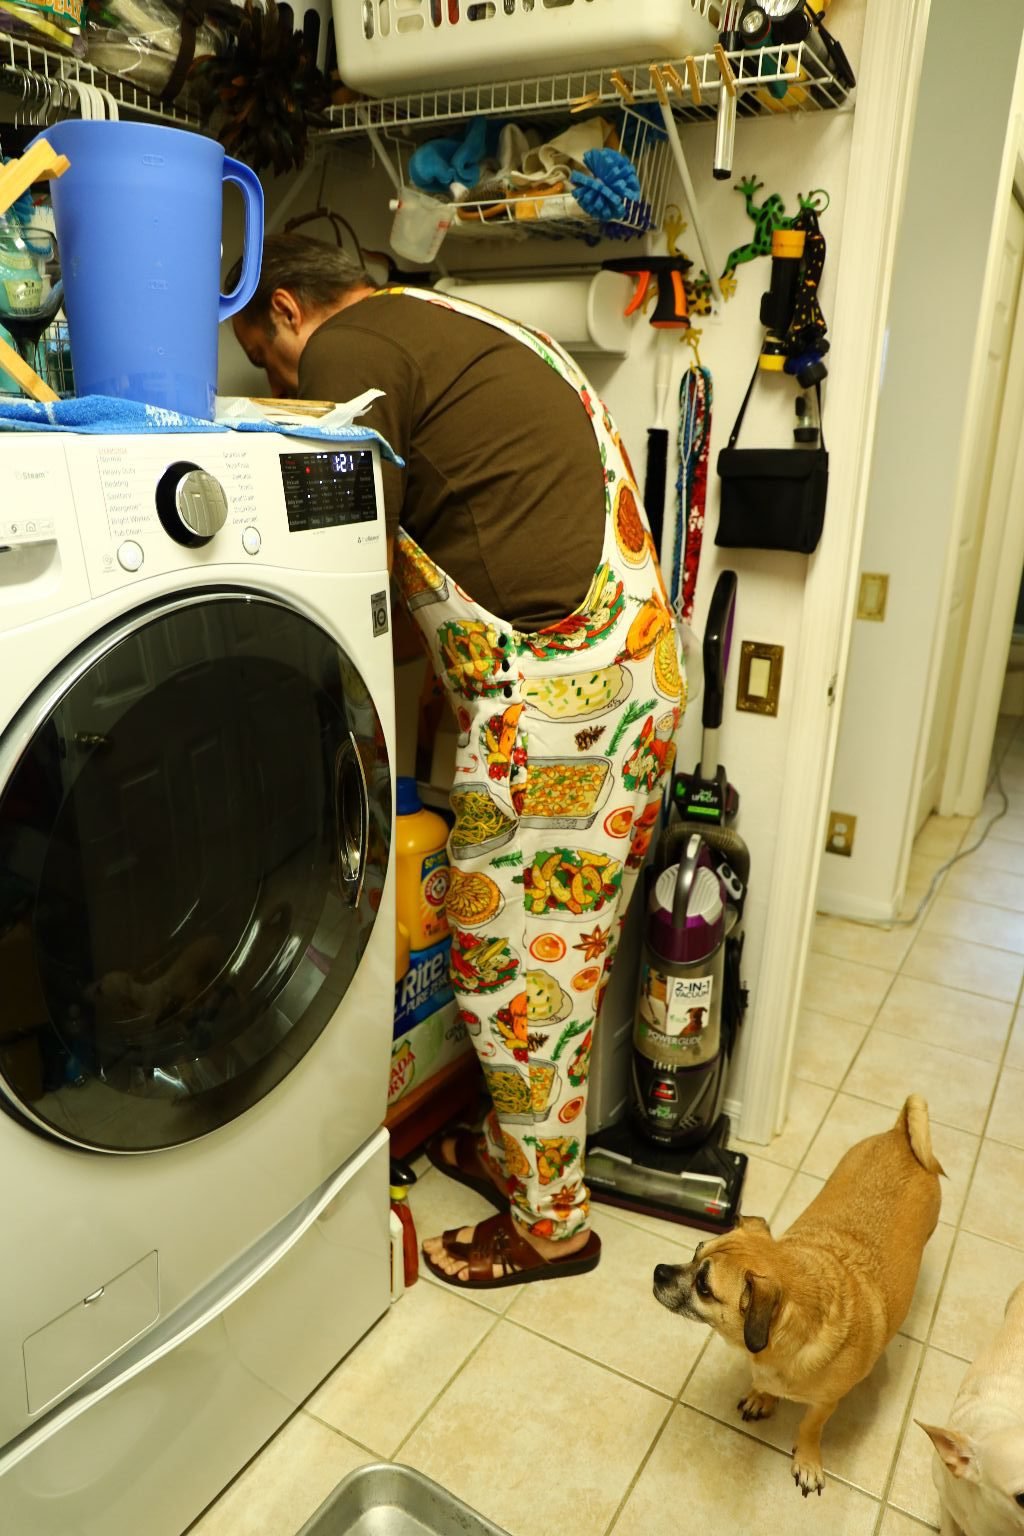
We Have No Kitchen Sink So We Are Using Our Laundry Room Sink
Wash the blood and any residual feathers off the turkey. Here you can see I am using our laundry room sink as we don’t have a kitchen sink.
This is Something of an Adventure

Drain the turkey well and be sure to remove the neck and giblets from the cavity. These can be used to make a giblet gravy or nice soup.
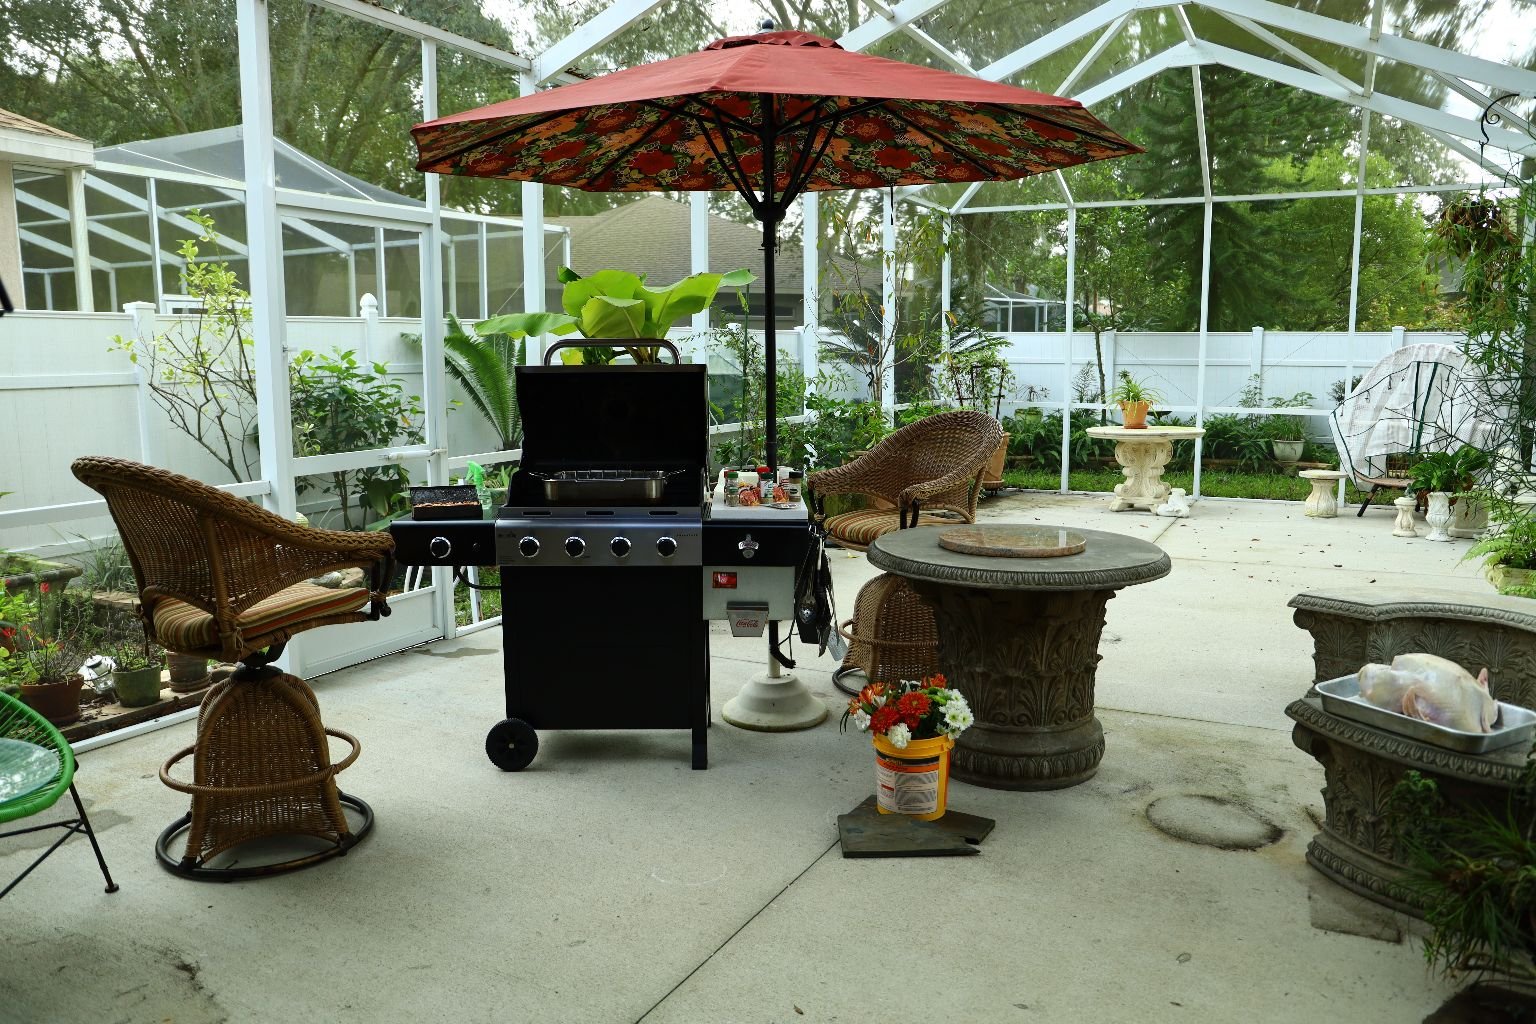
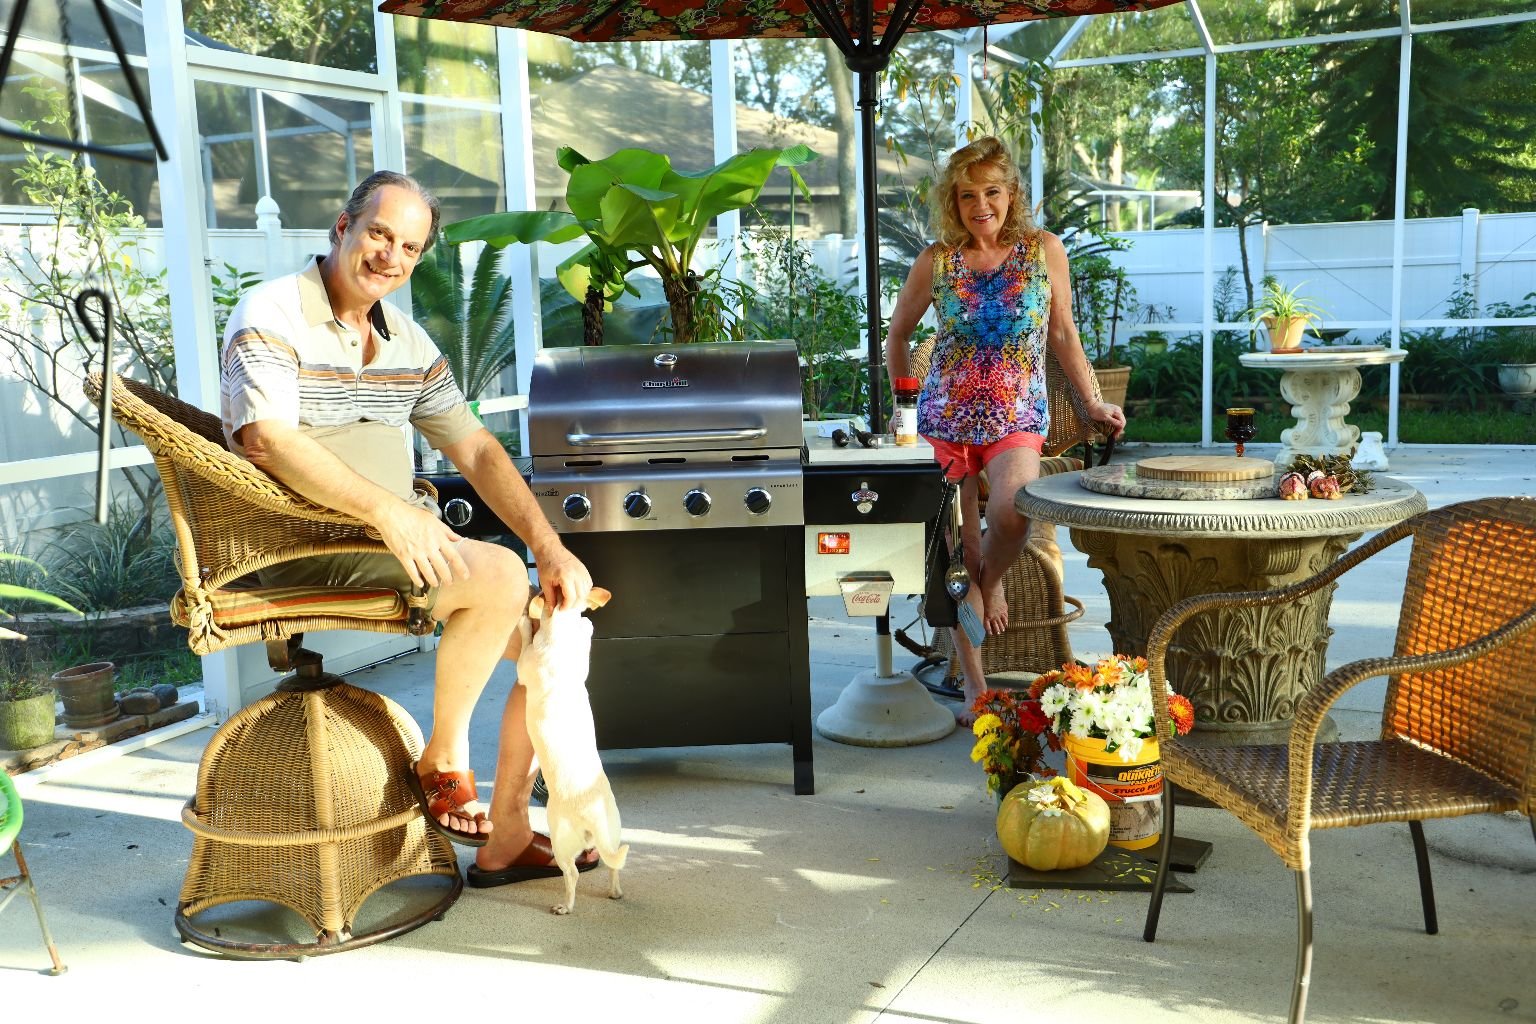
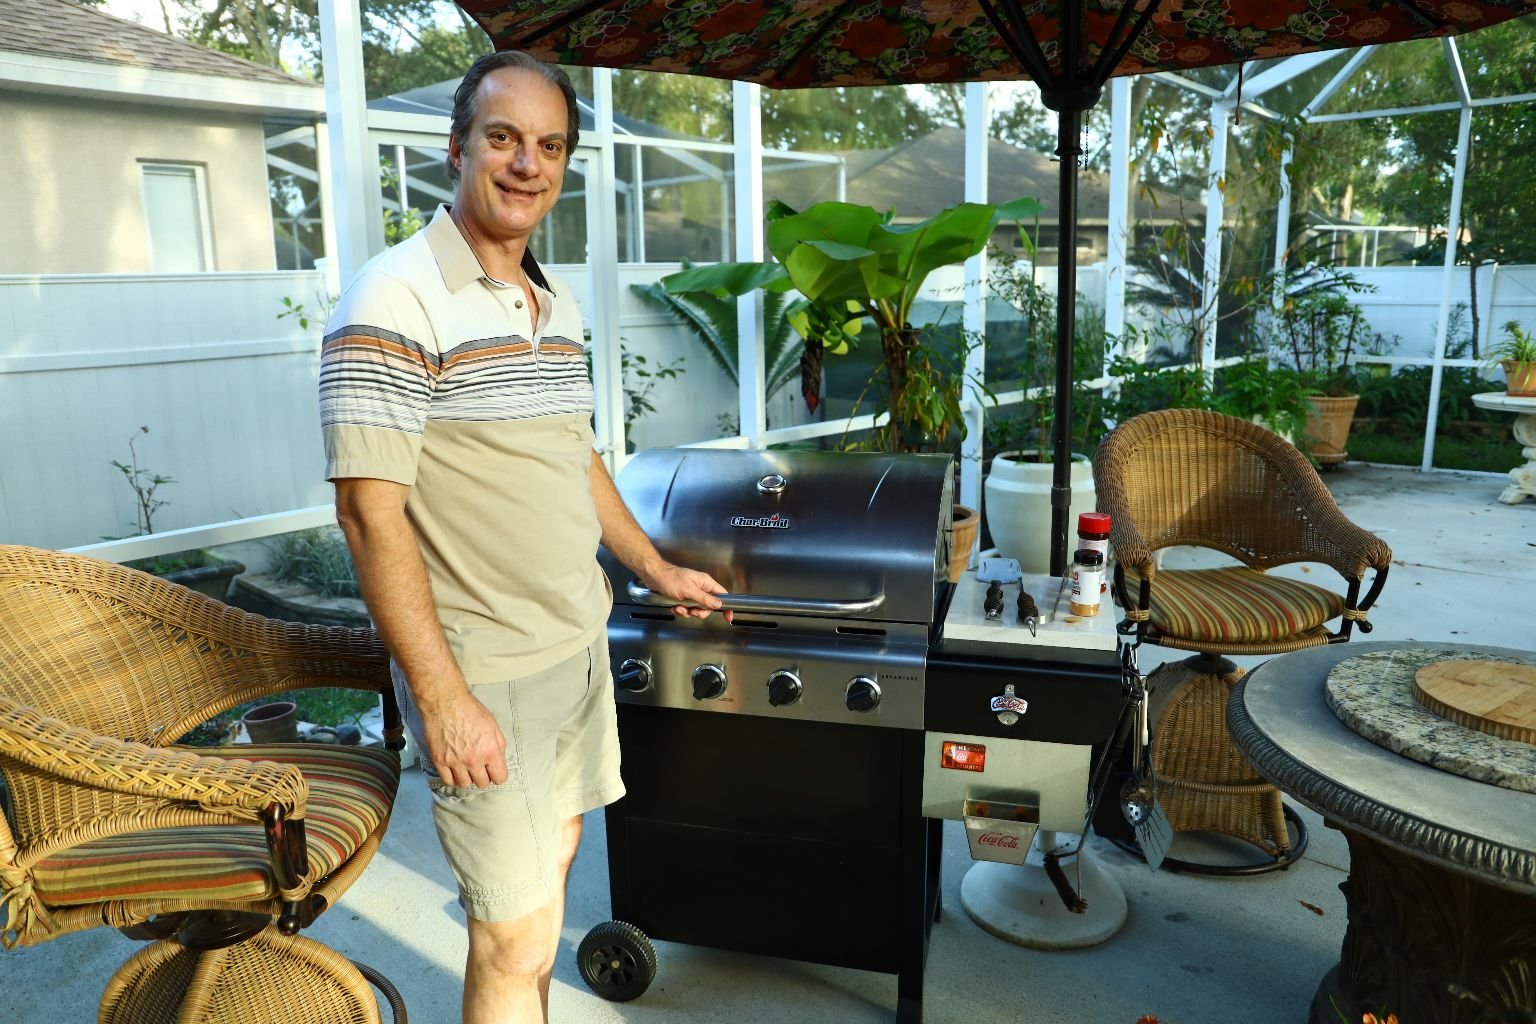
We Will Be Grilling The Turkey
Here is our setting outside on our screened lanai.
Pat the turkey with paper towels to ensure the skin will accept the oil and get nice and crispy.

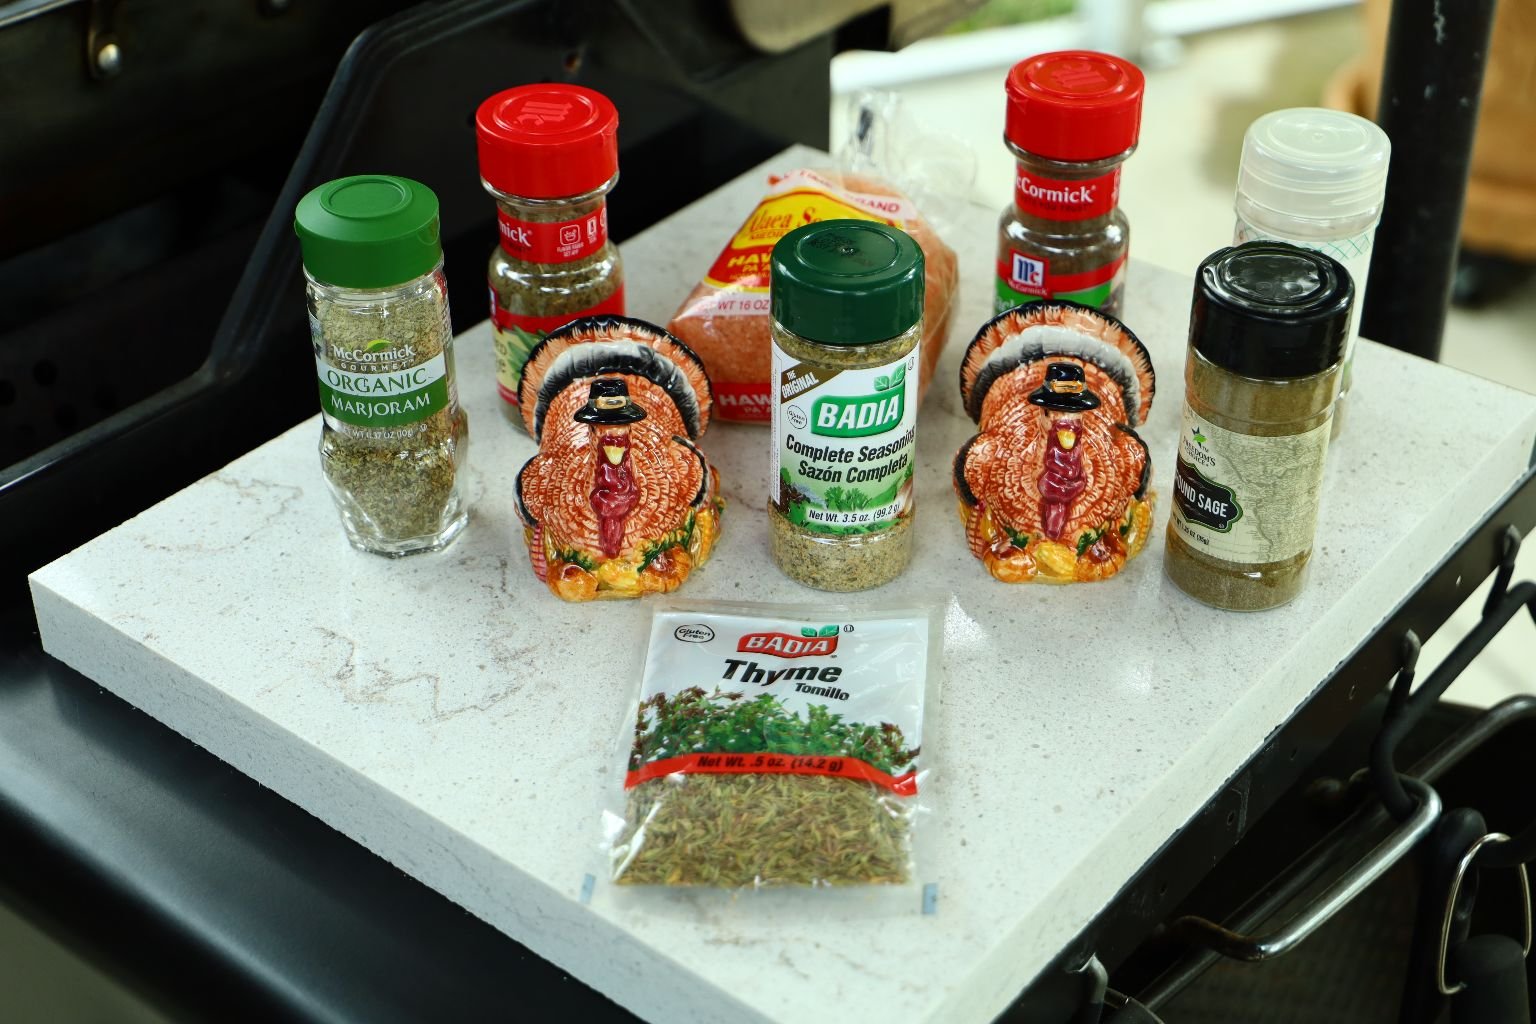
Pictured is the setup of my grill along with the smoking chips on the left and the spices to be used on the right.
———————————————————–
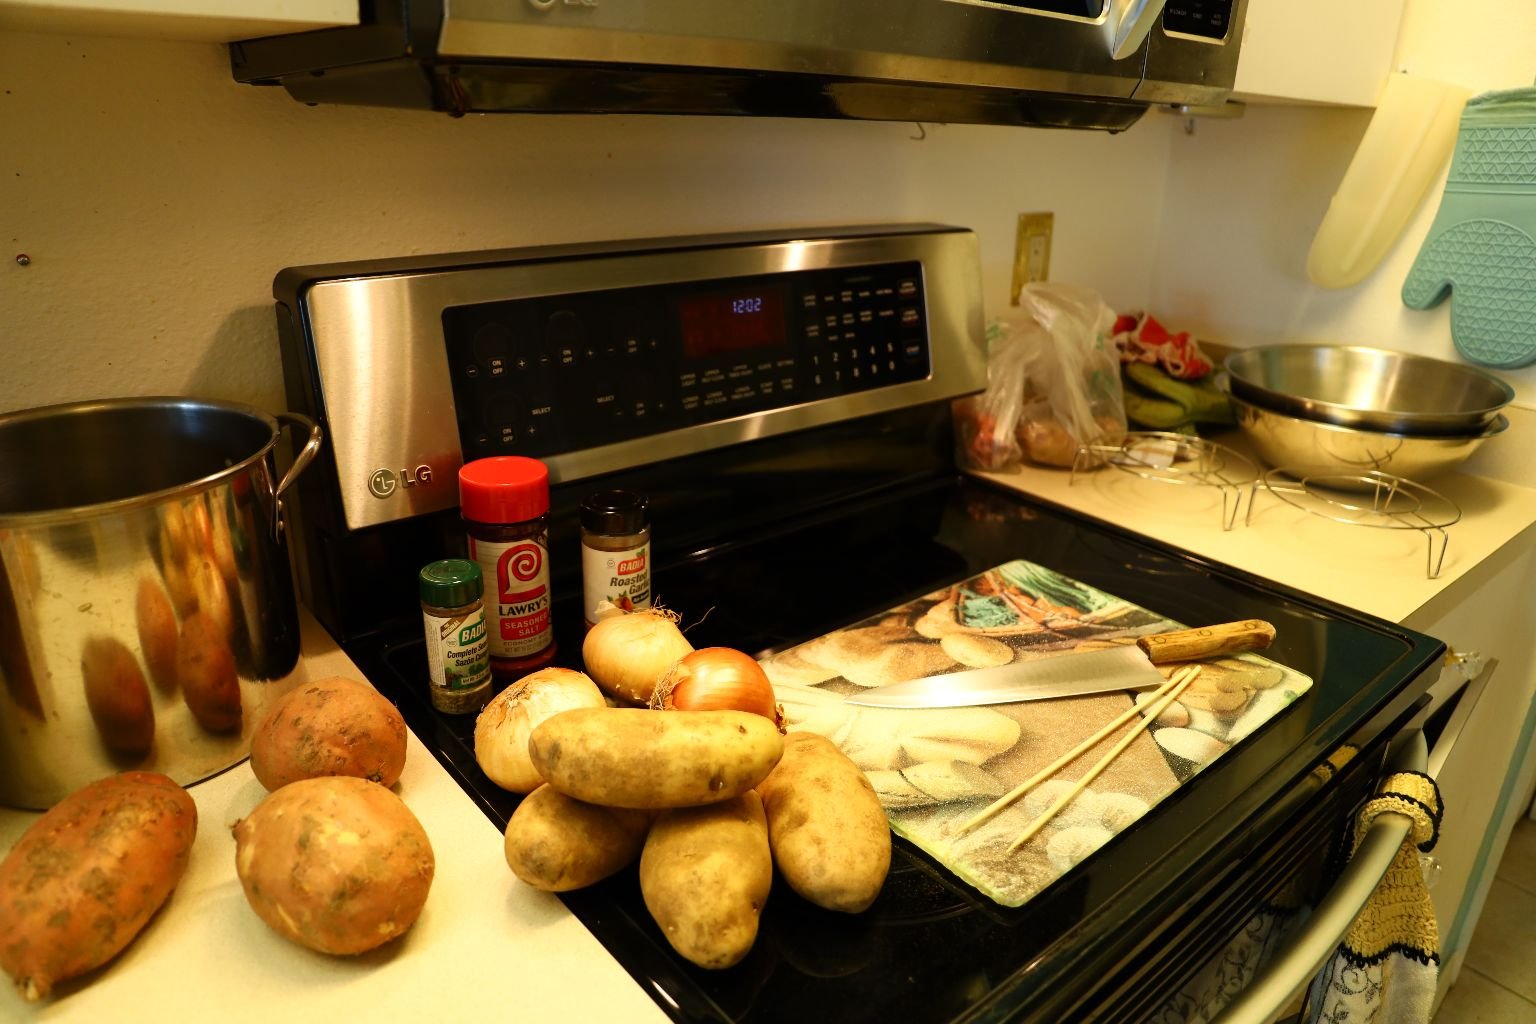
Ingredients:
~ 10 Lb. Butterball Turkey
~ 1/2 Cup Peanut Oil
~ 2 Tbsp. Thyme
~ 2 Tbsp. Ground Sage
~ 1 Tbsp. Hawaiian Alaea Sea Salt
~ 1 1/2 Tbsp. Sazon Complete Seasoning
~ 1 Tbsp. Black Garlic Powder
~ 1 Tbsp. Tarragon
~ 1 Tbsp. Onion Powder
Ground Pepper to taste
—————————————————————

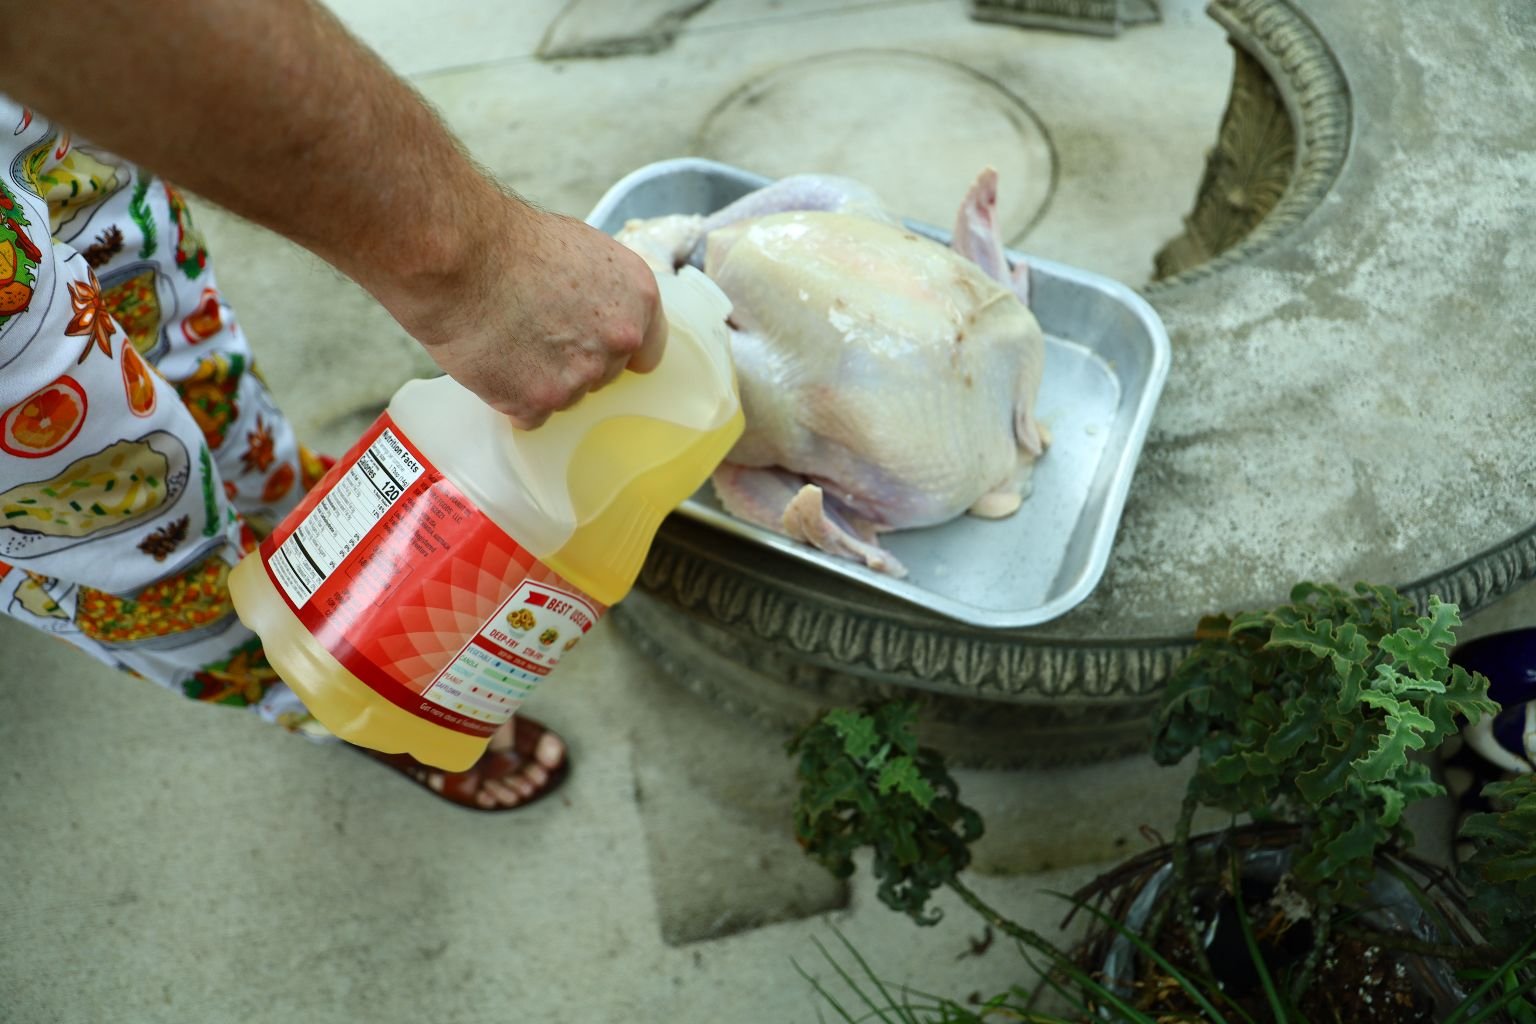
Place your turkey in a roasting pan and pour your Peanut oil over it as shown. Rub the oil all over the turkey’s skin to help it brown and become crispy.
———————————————————————-
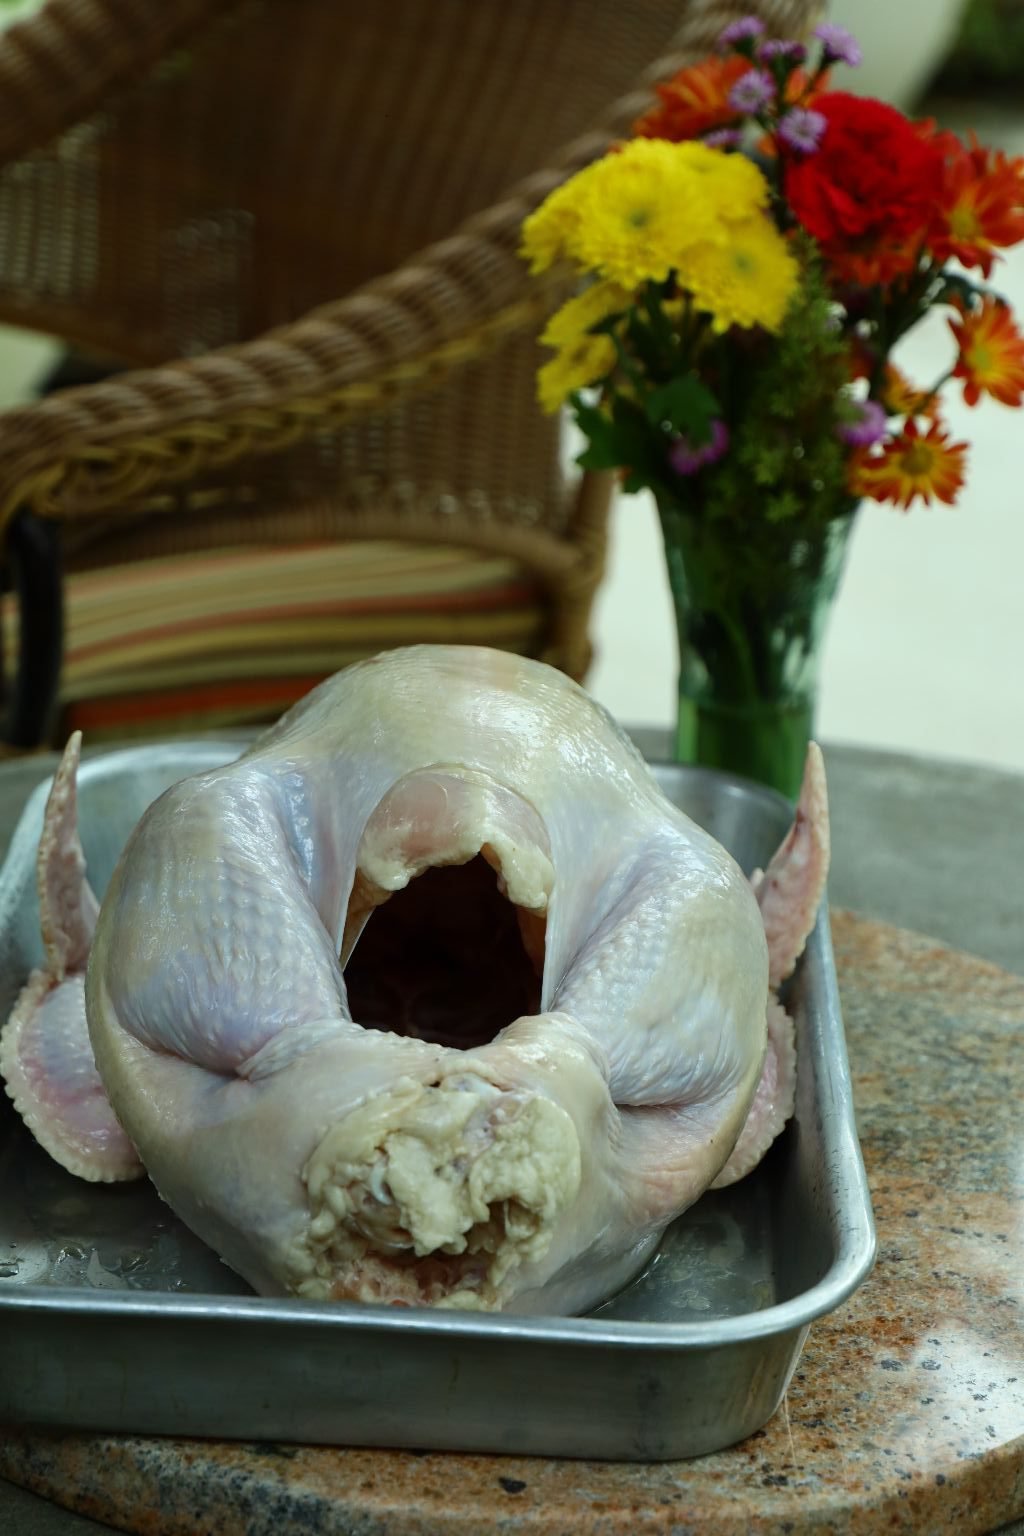
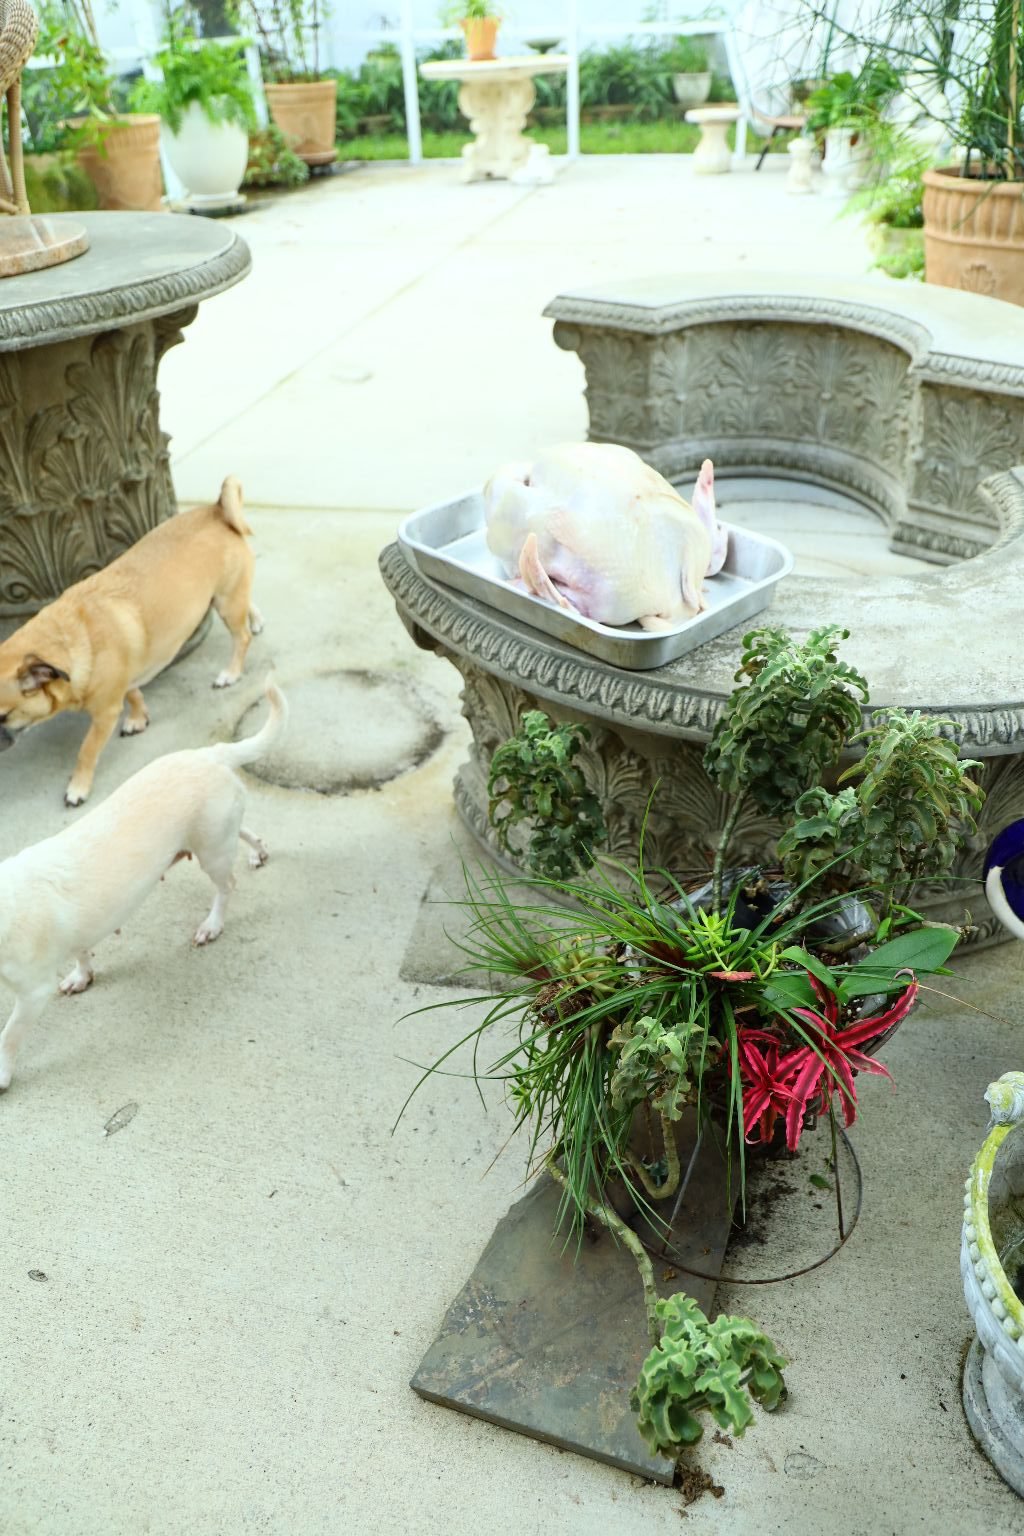
The Turkey….
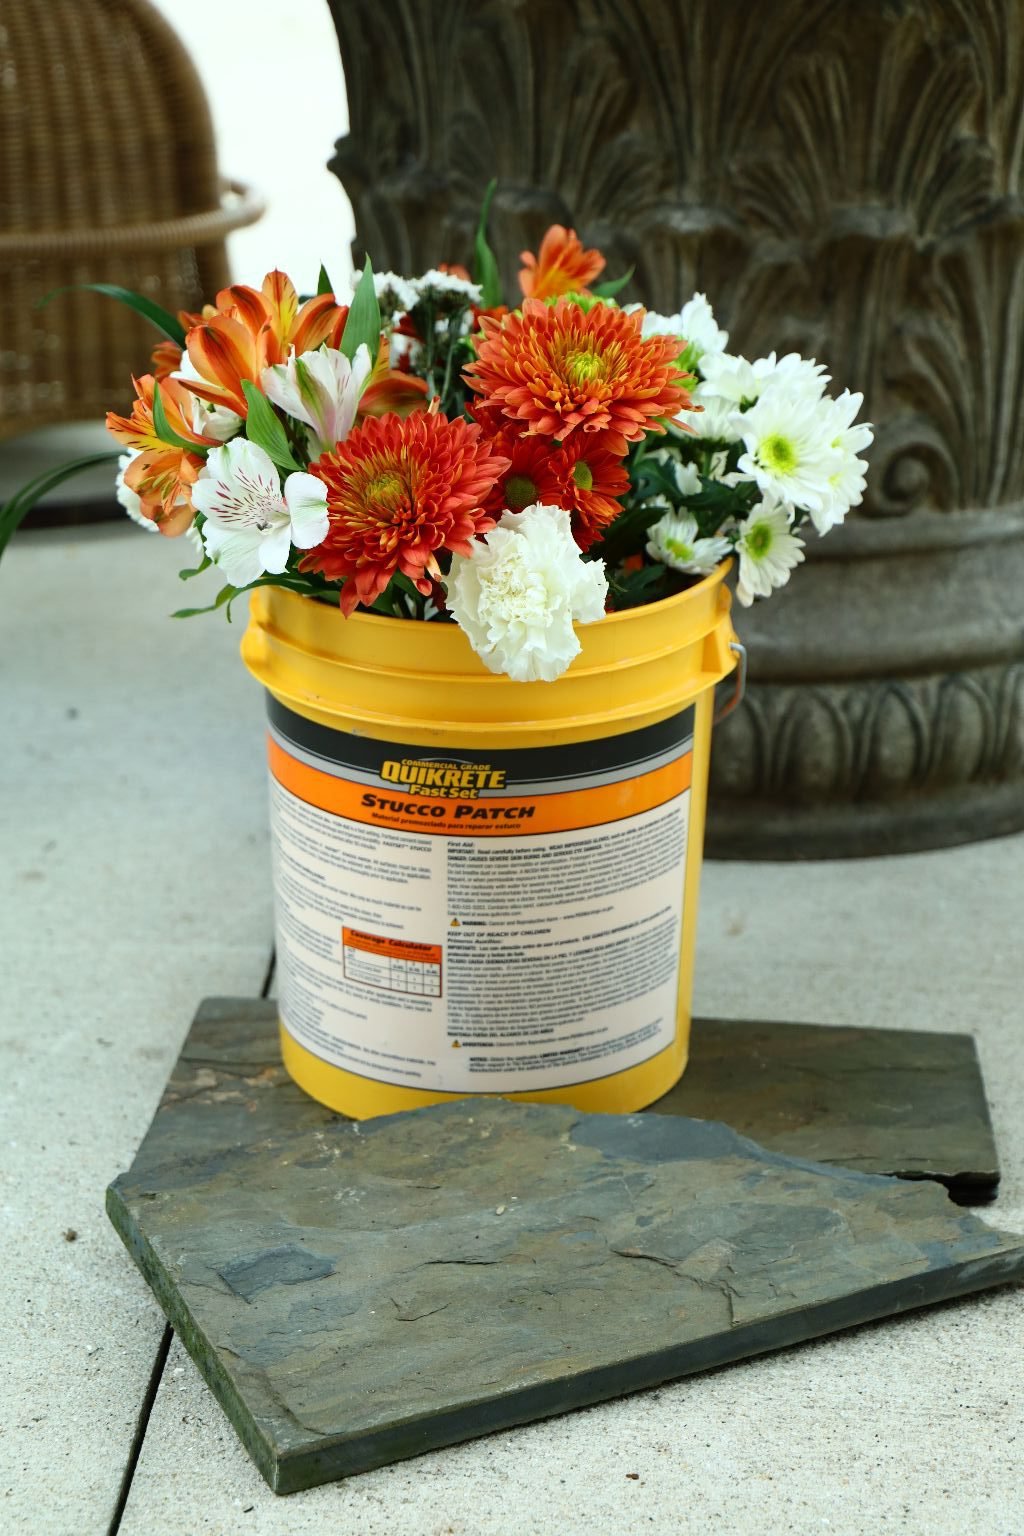
The Flowers in a Bucket….
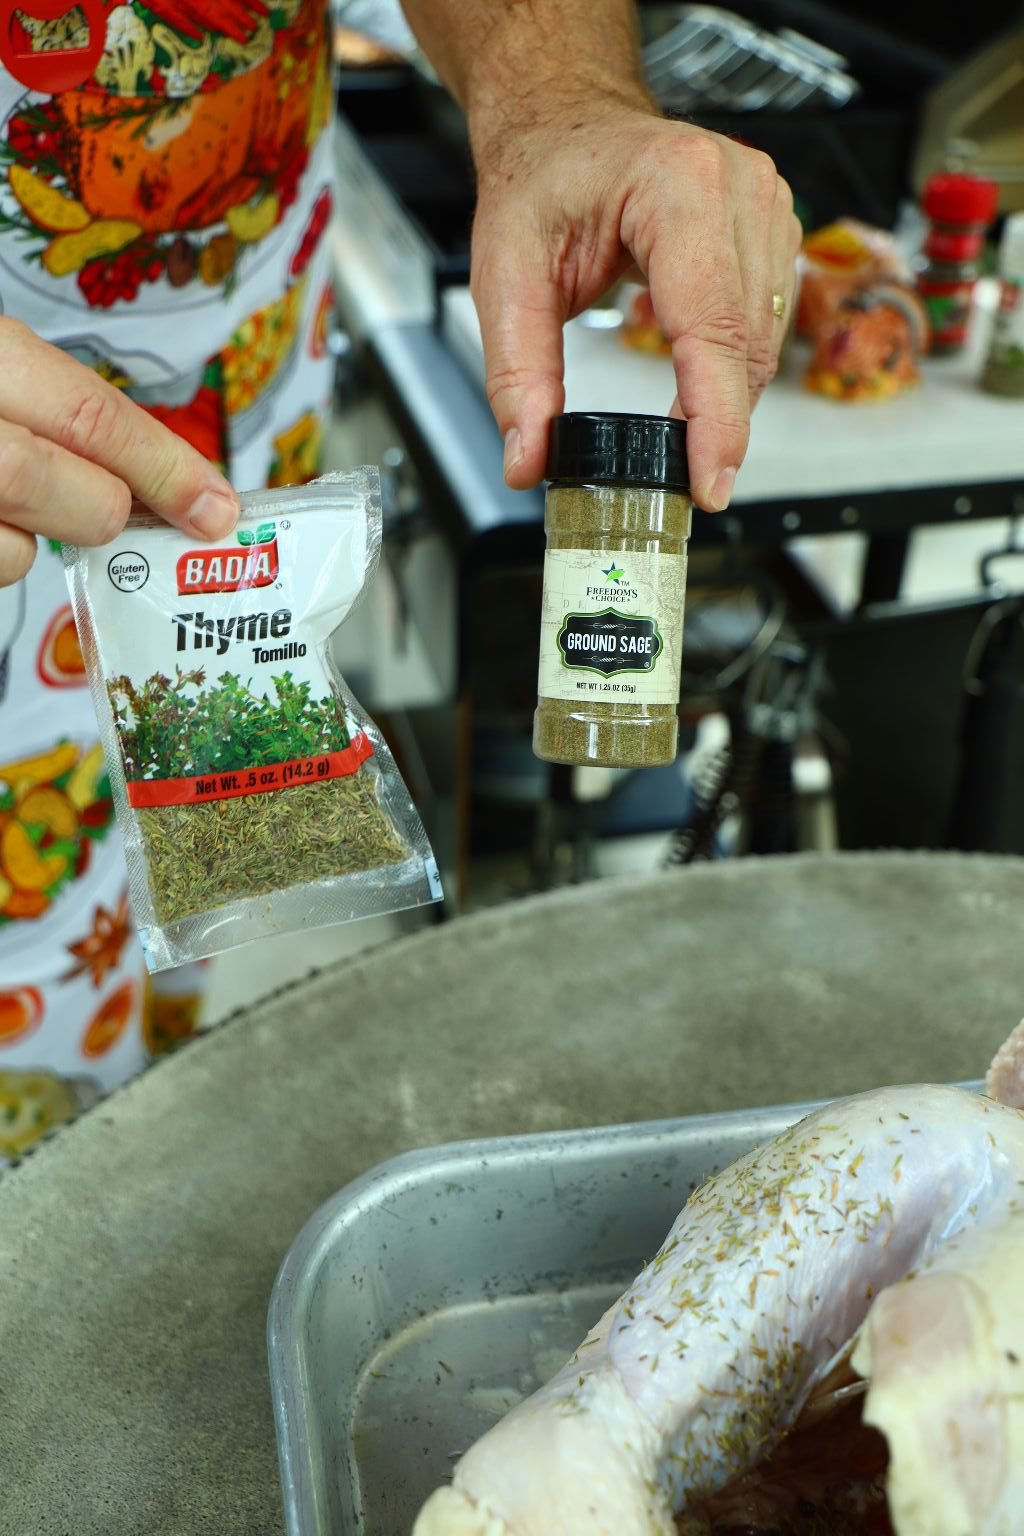

Here I am dousing the Thyme and Sage spices over the turkey and placing some in the cavity as well.

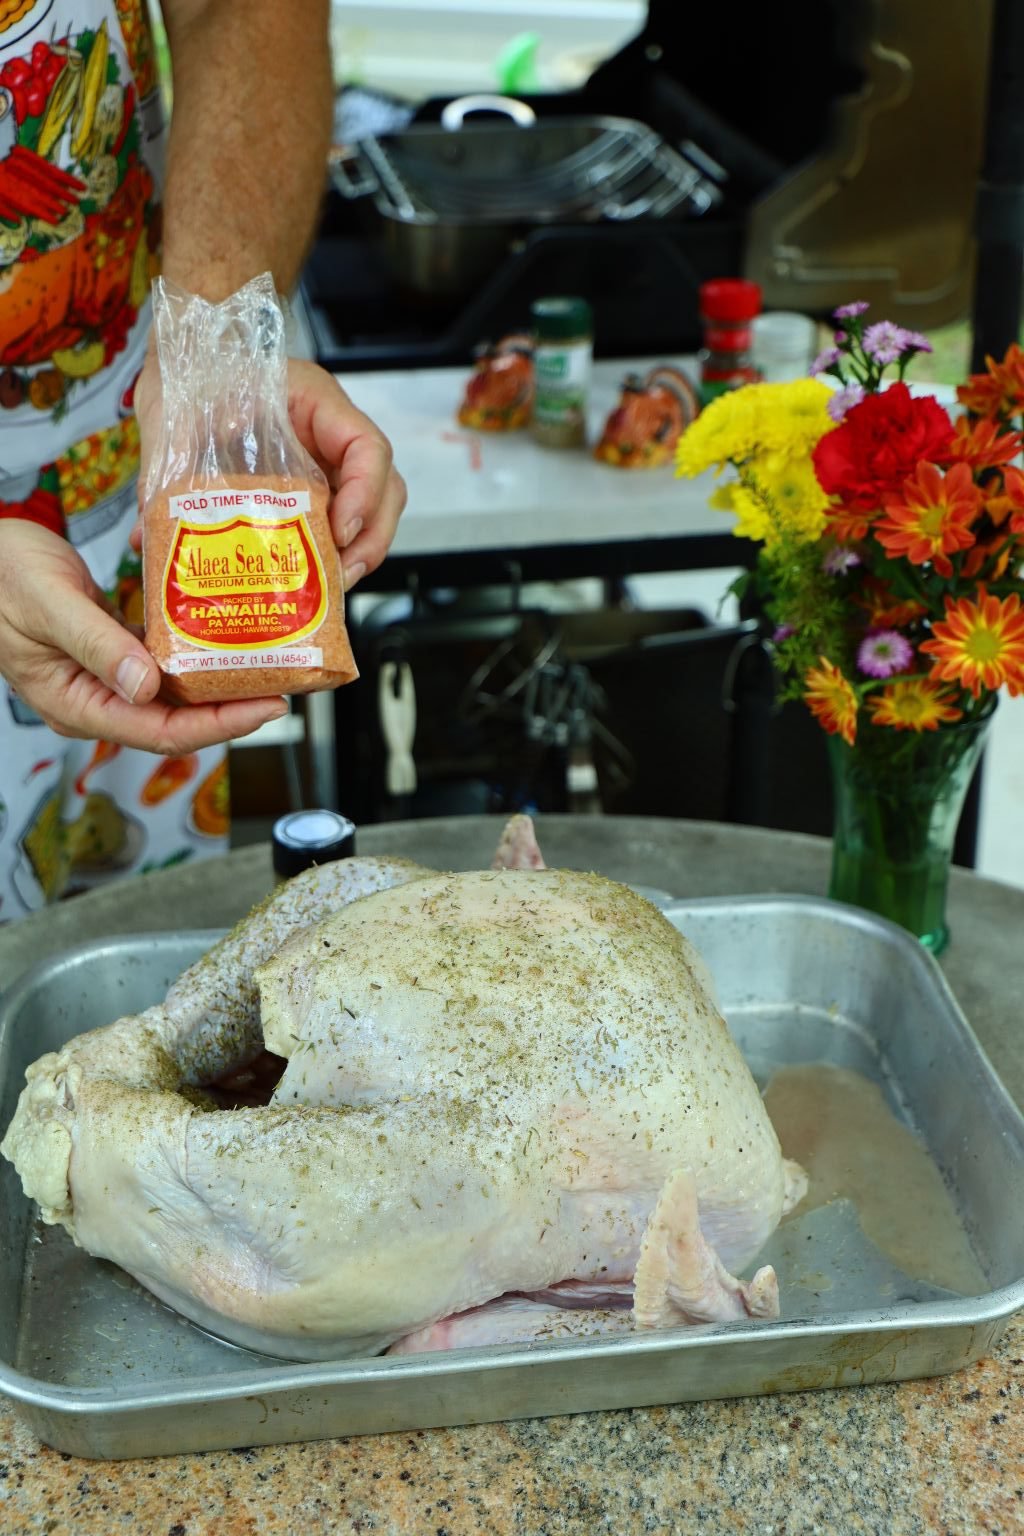
This is a great salt that has a light flavor. You don’t need much as the Sazon is also salty.
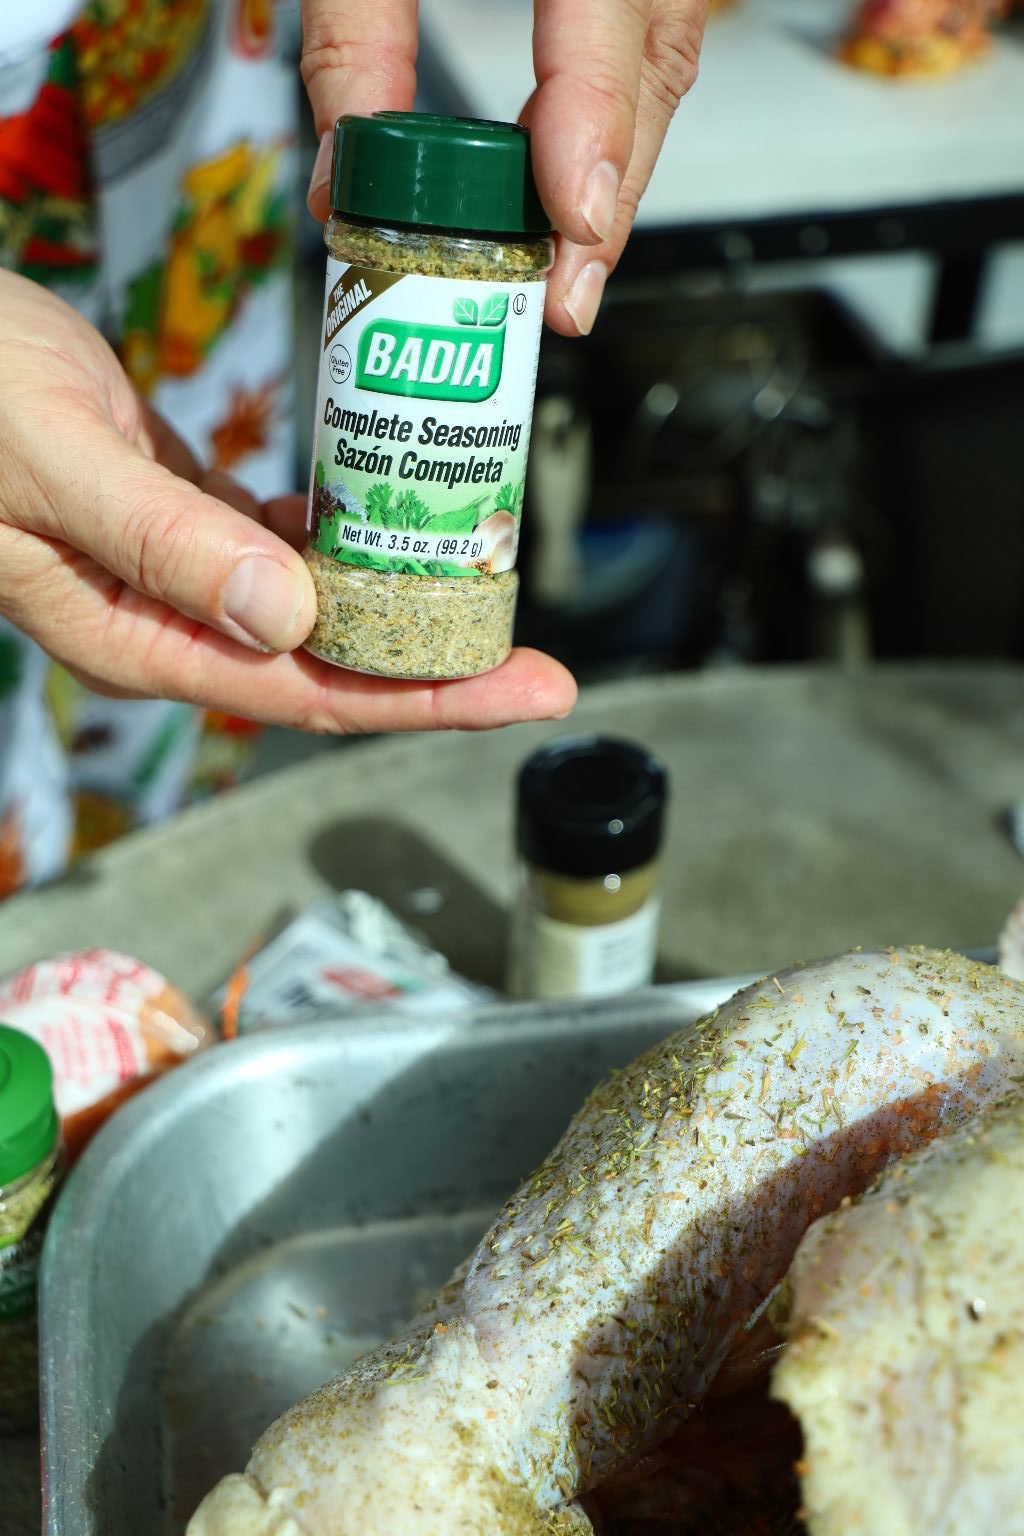

Sazon is a Spanish seasoning that has an herbaceous slightly salty unique flavor, which goes nicely with Turkey.
———————————————————————–

Gordon Ready To Get Started
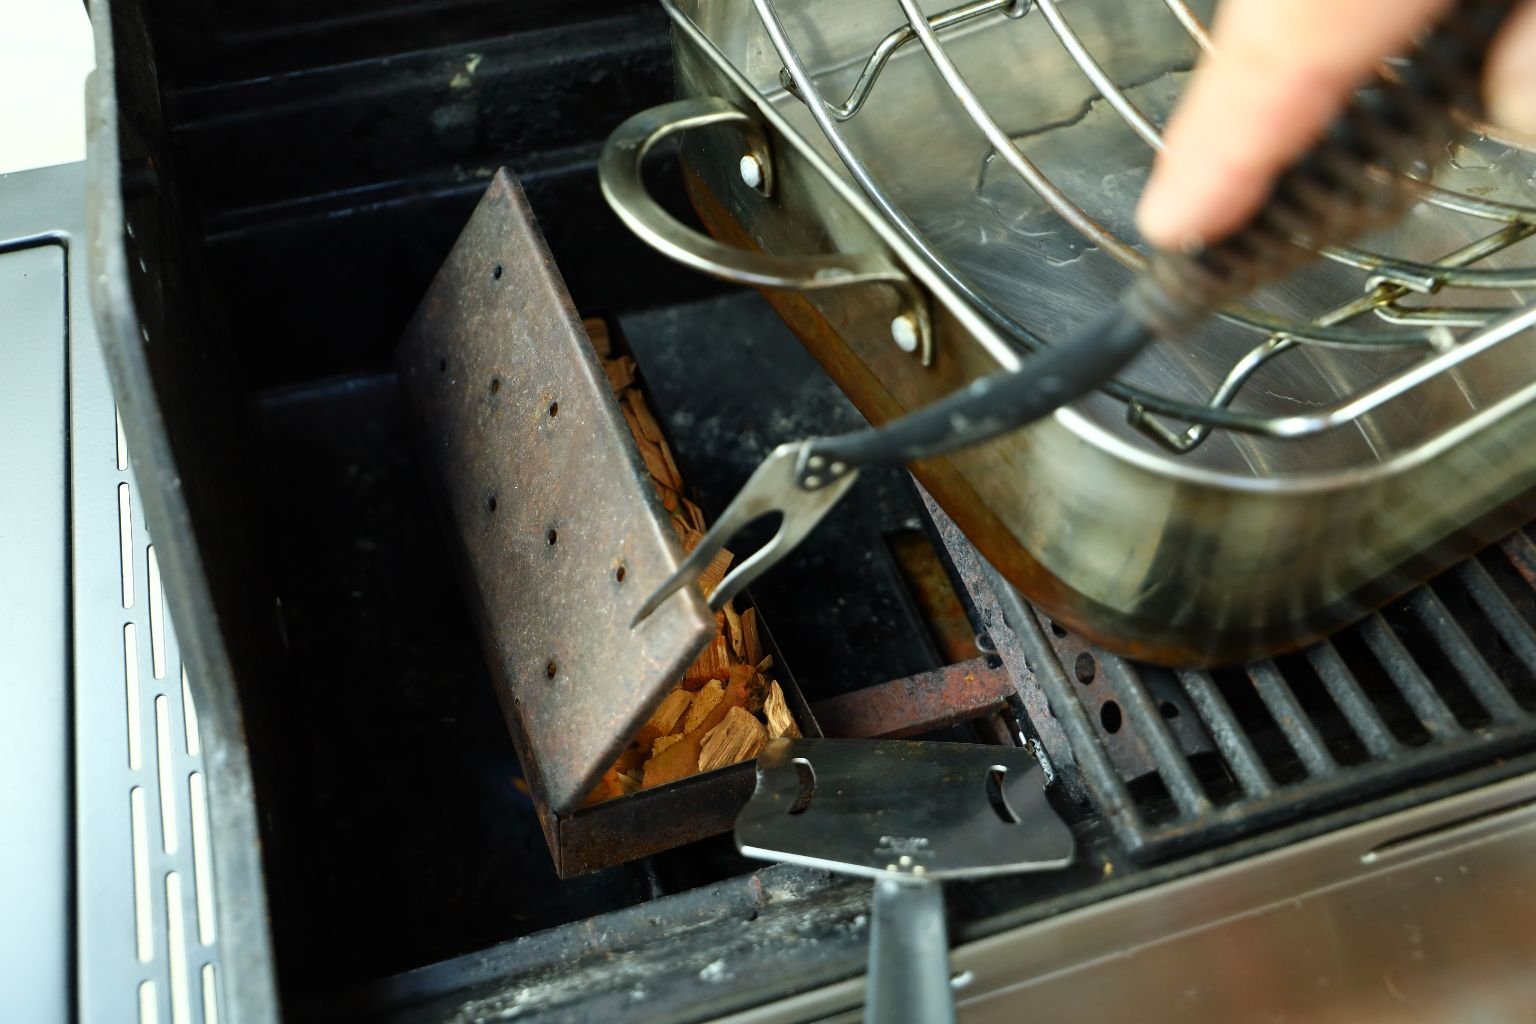

Here I am getting my Hickory wood chips ready using the side burner to heat the chips. I place the smoking box directly on the burner turning it to medium temperature. Once the chips start to smoke, I turn the temperature under the chips to low.
All Spiced and Ready for the Grill
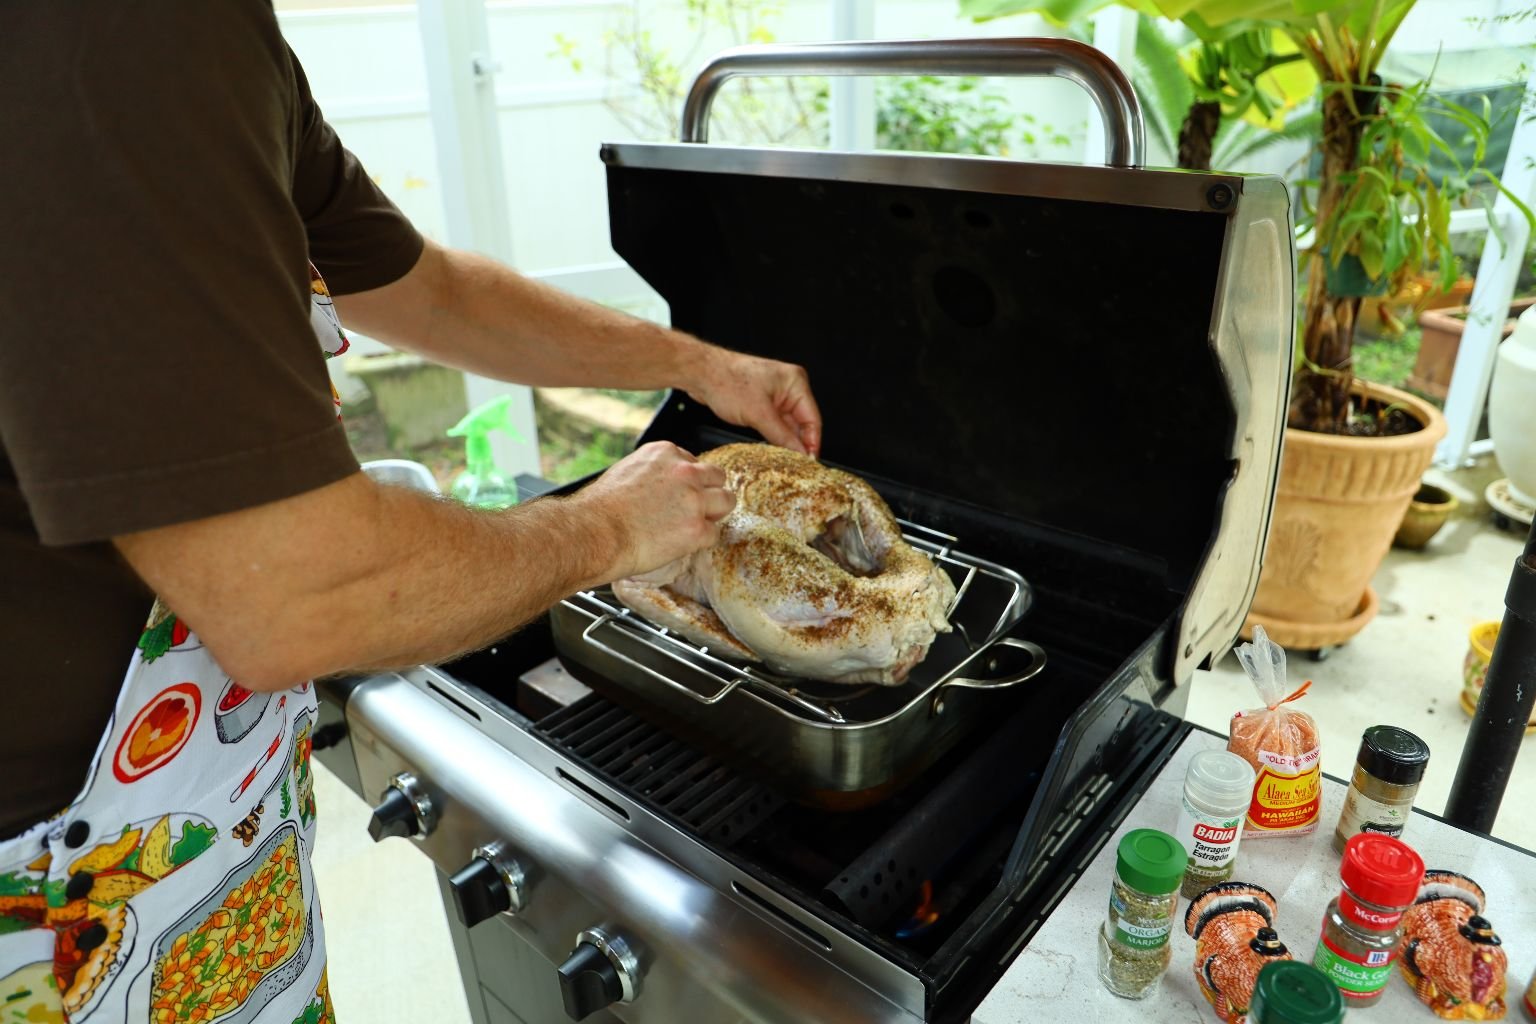
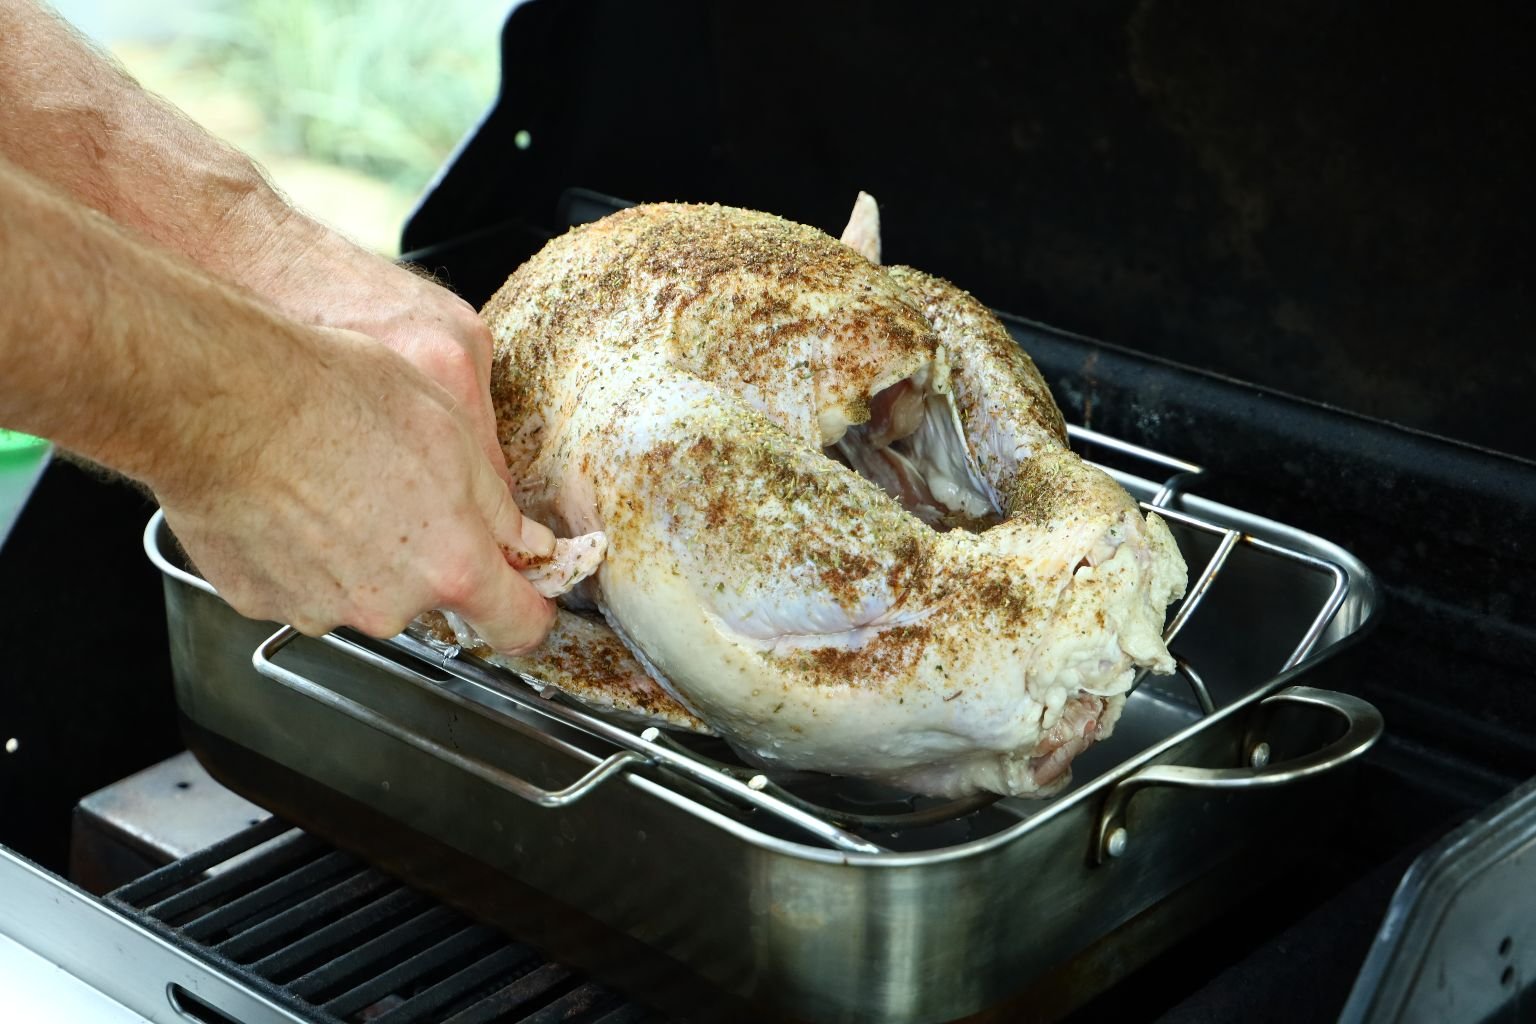
Now, place the rack in your roasting pan and place the turkey on top of the rack. Bend both wing tips behind the leg so they don’t burn. My particular grill has four burners. I turn the outside burners on medium and leave the middle burners off. Place a bit of water in the roasting pan, so the turkey drippings don’t burn.
———————————————————————

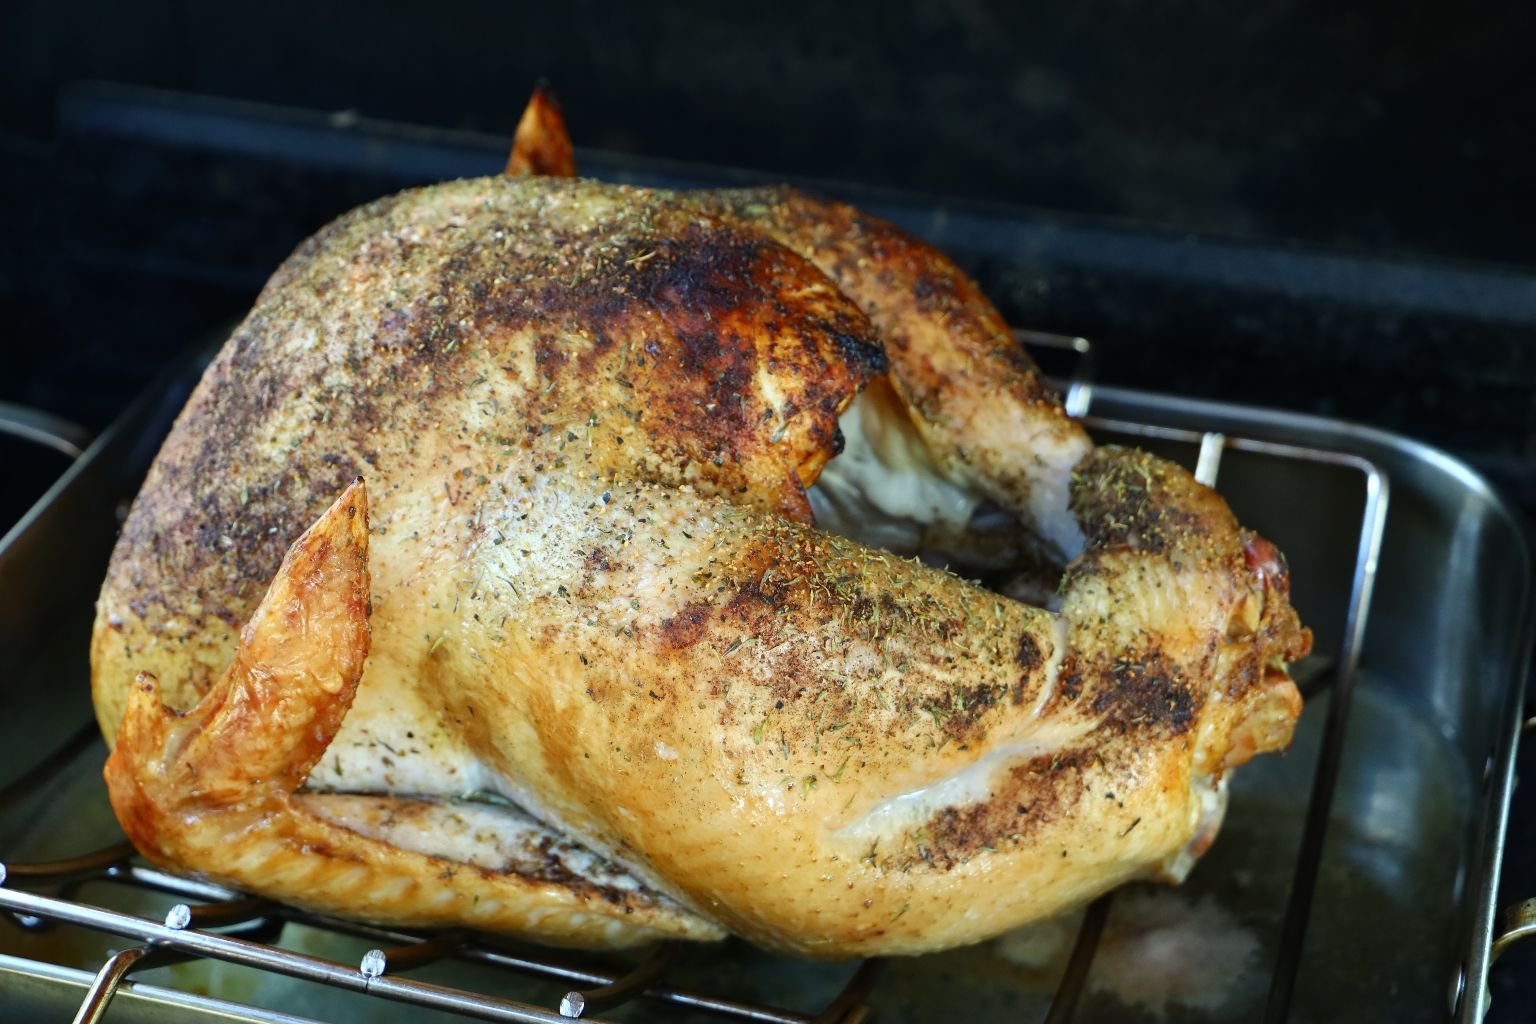
Here you can see a wisp of smoke on the left as the turkey starts to brown.
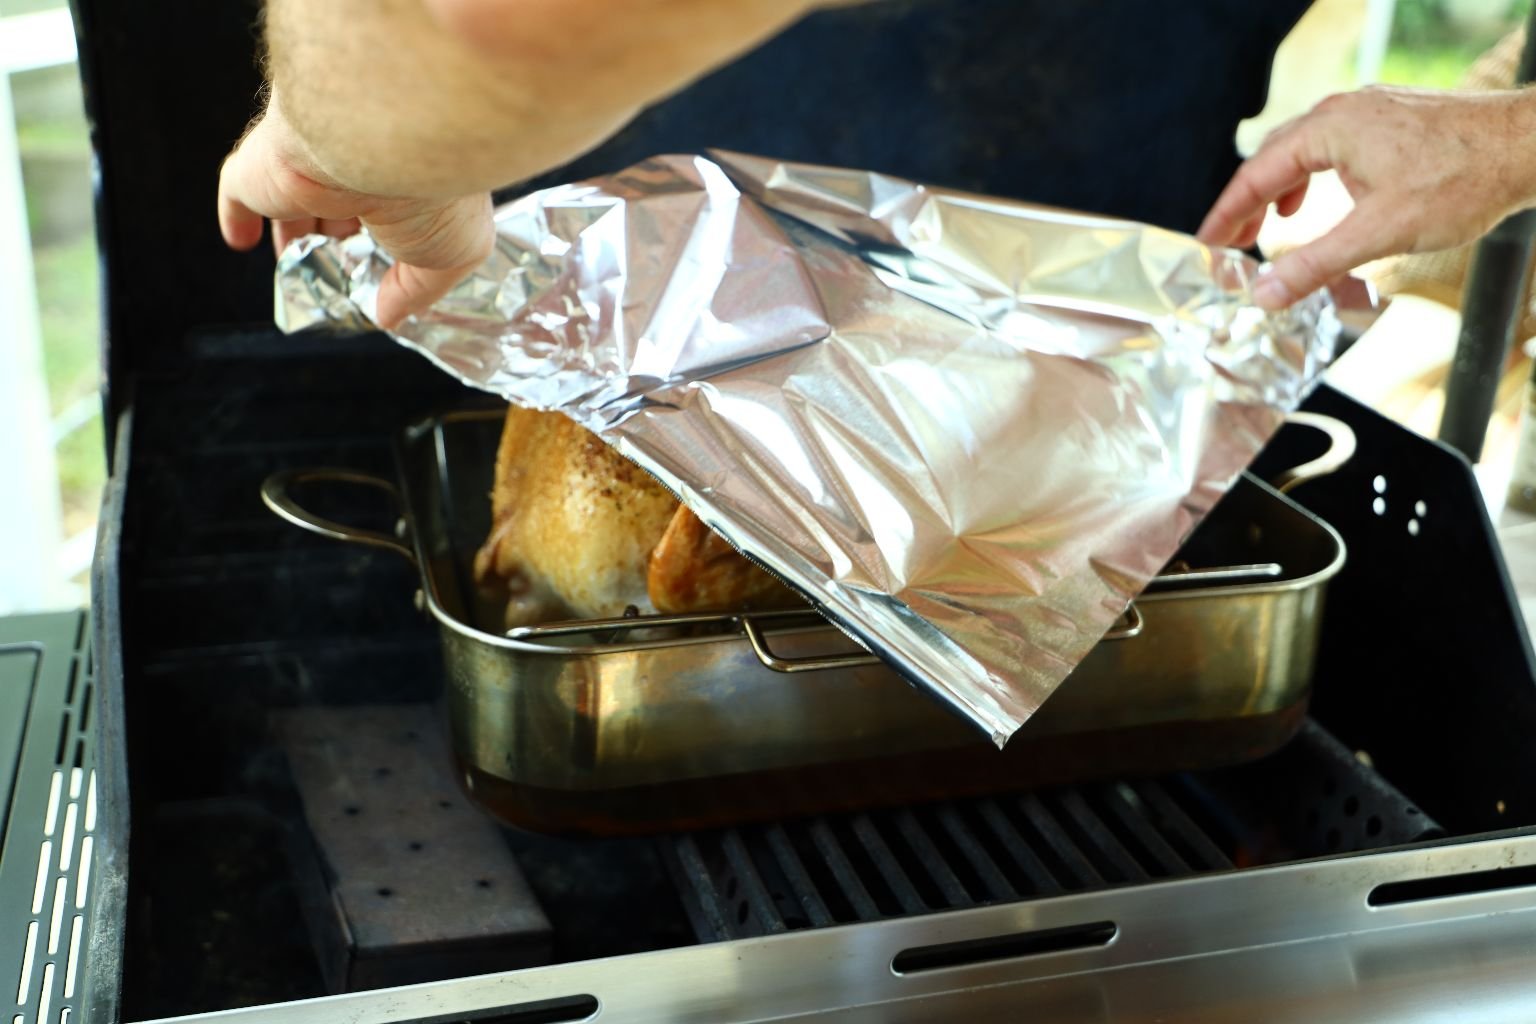
After about 2 hours, at this point I like to cover the turkey with aluminum foil, so it doesn’t brown too much.
—————————————————————-
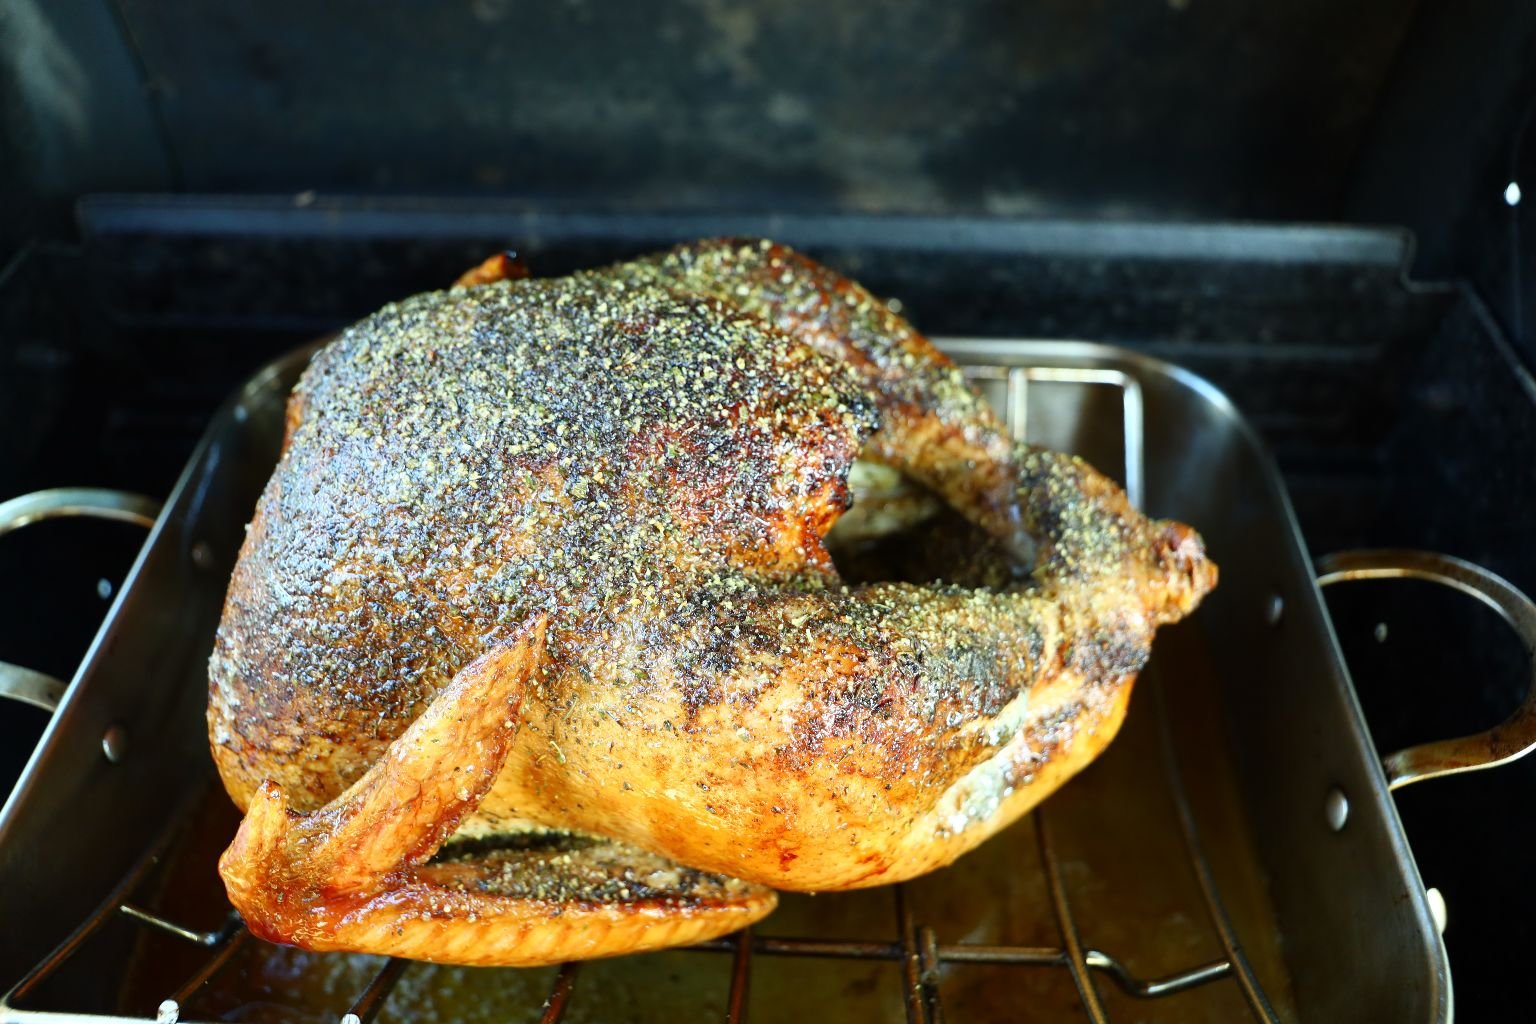
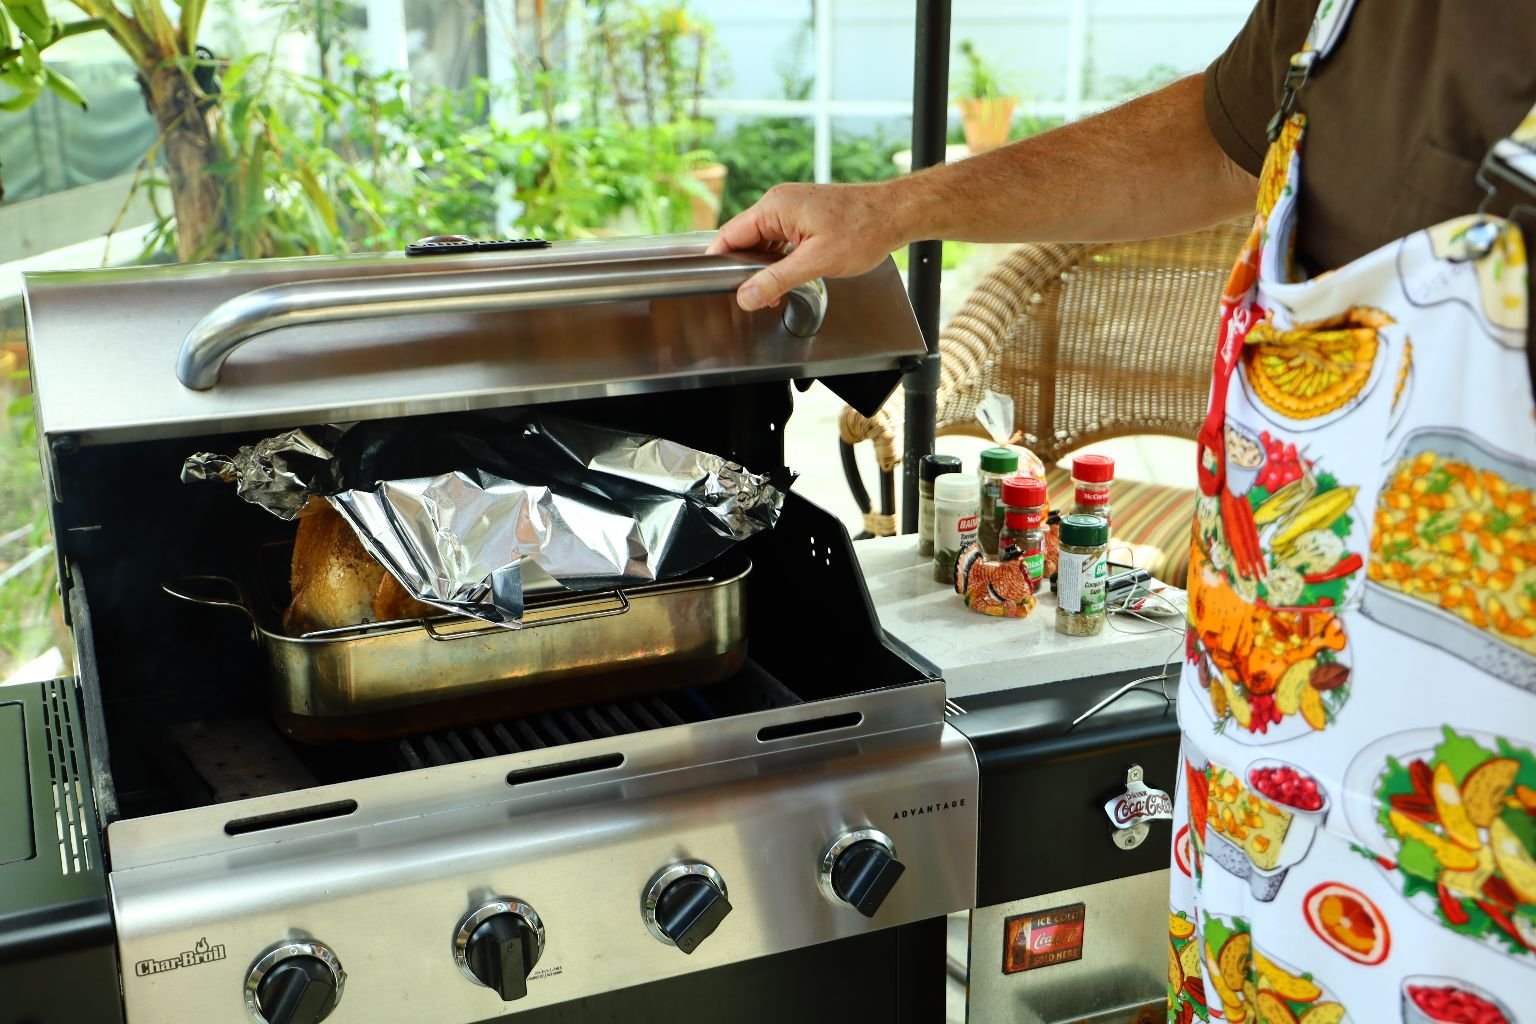
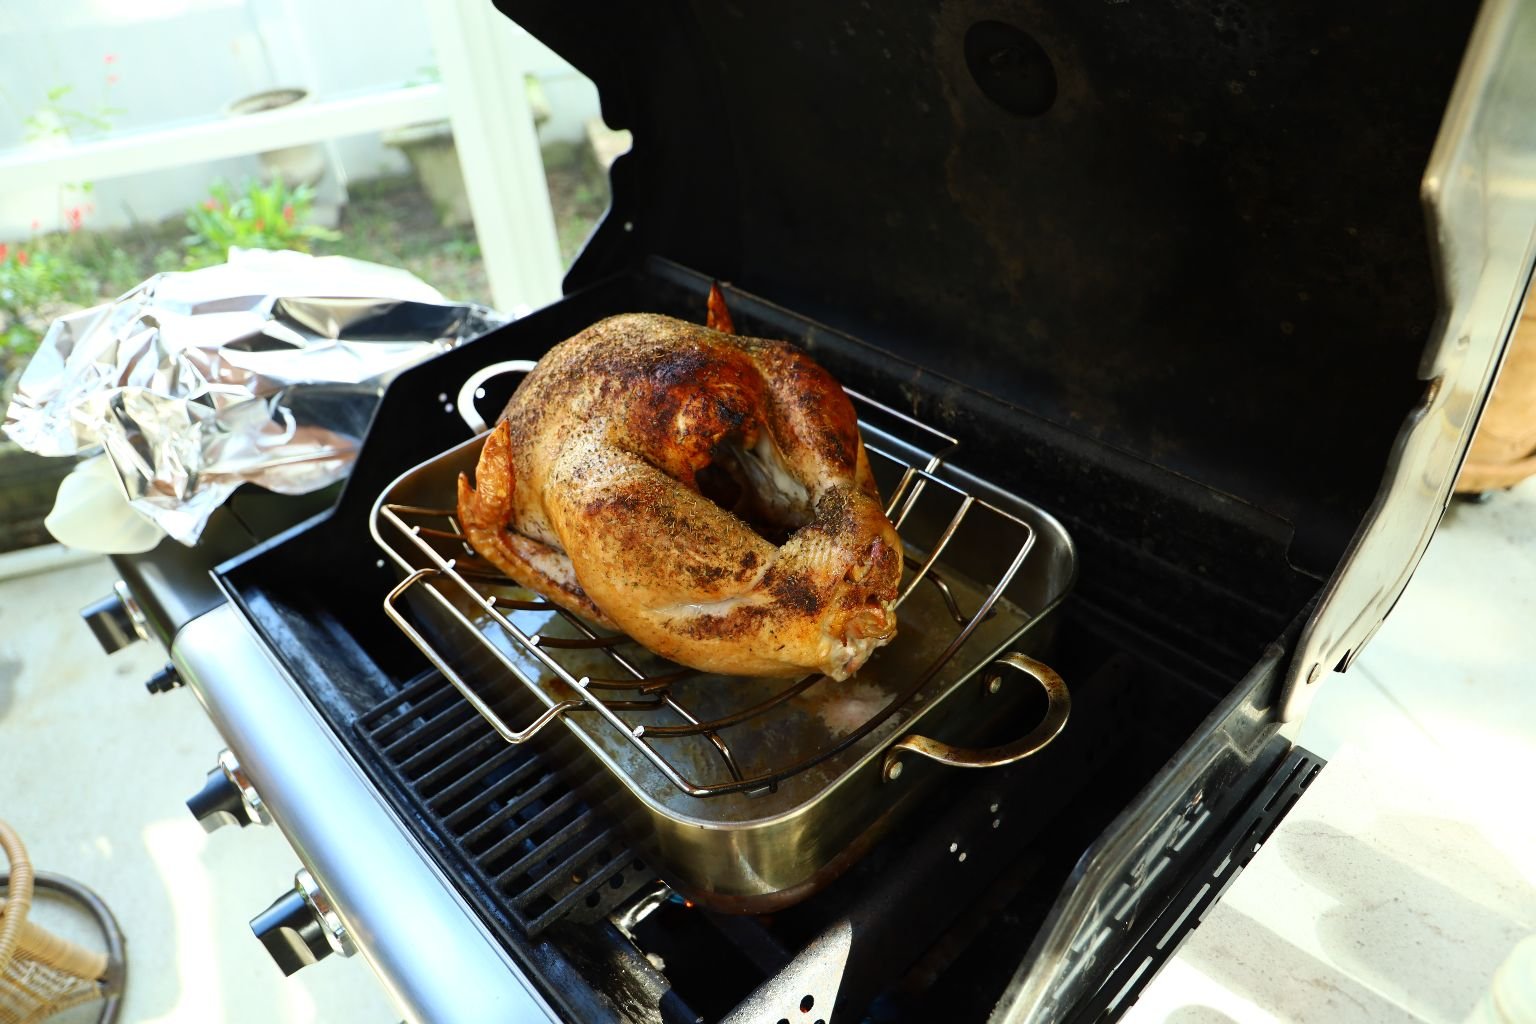
After about 3 hours of cooking you can see the turkey is getting there and looking good.
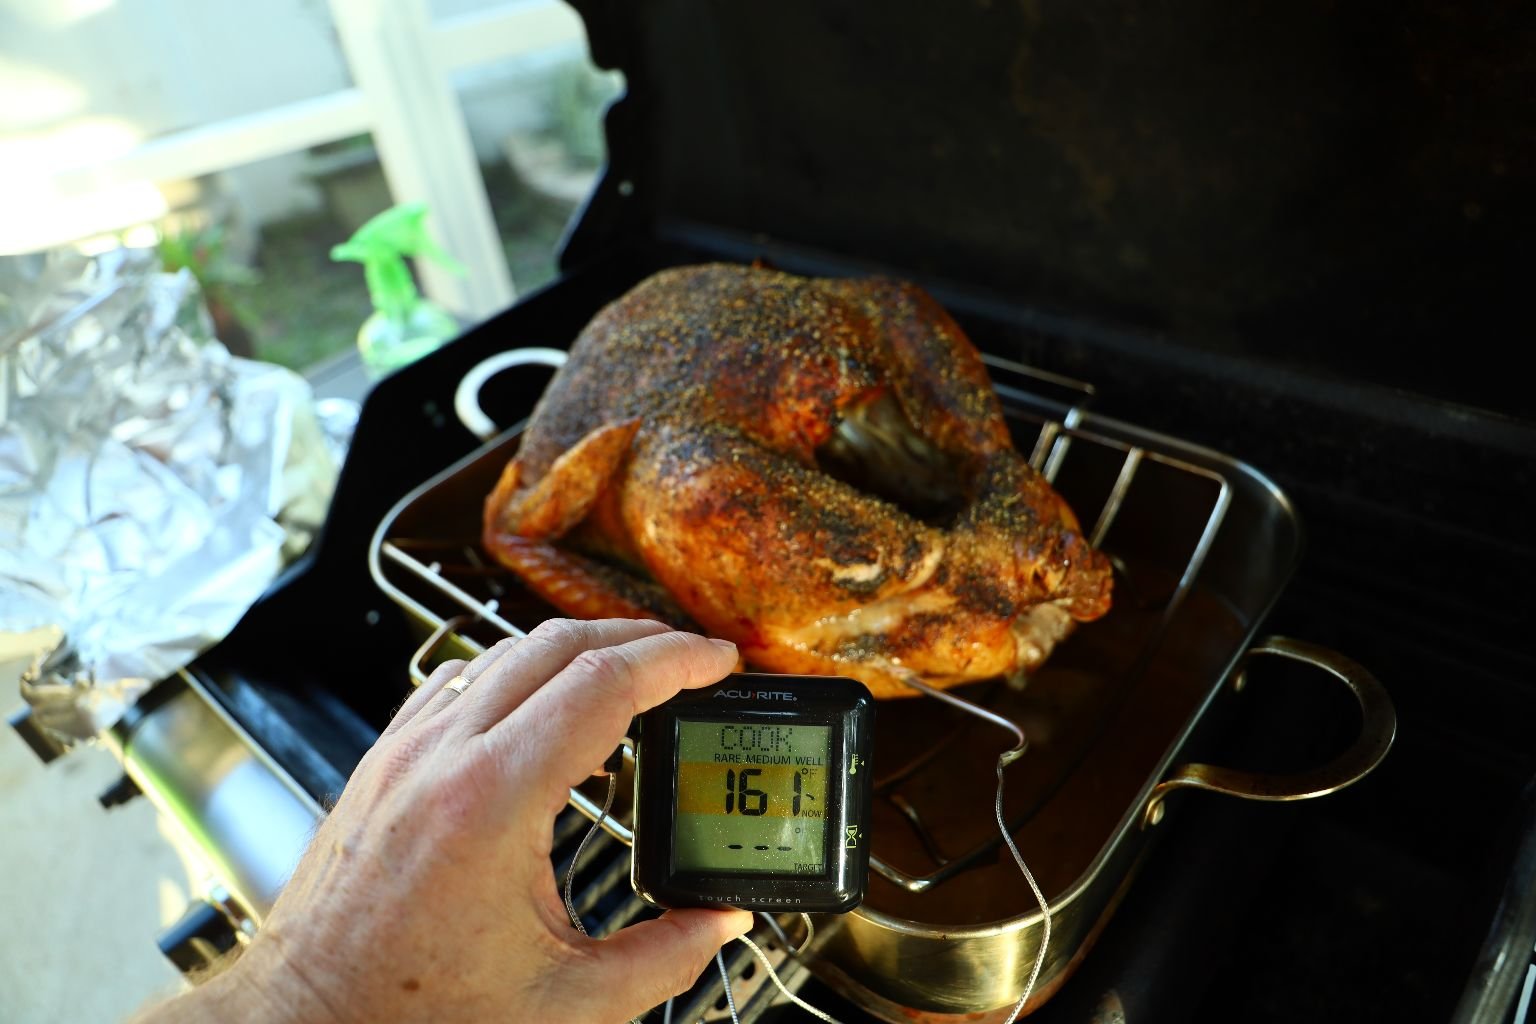
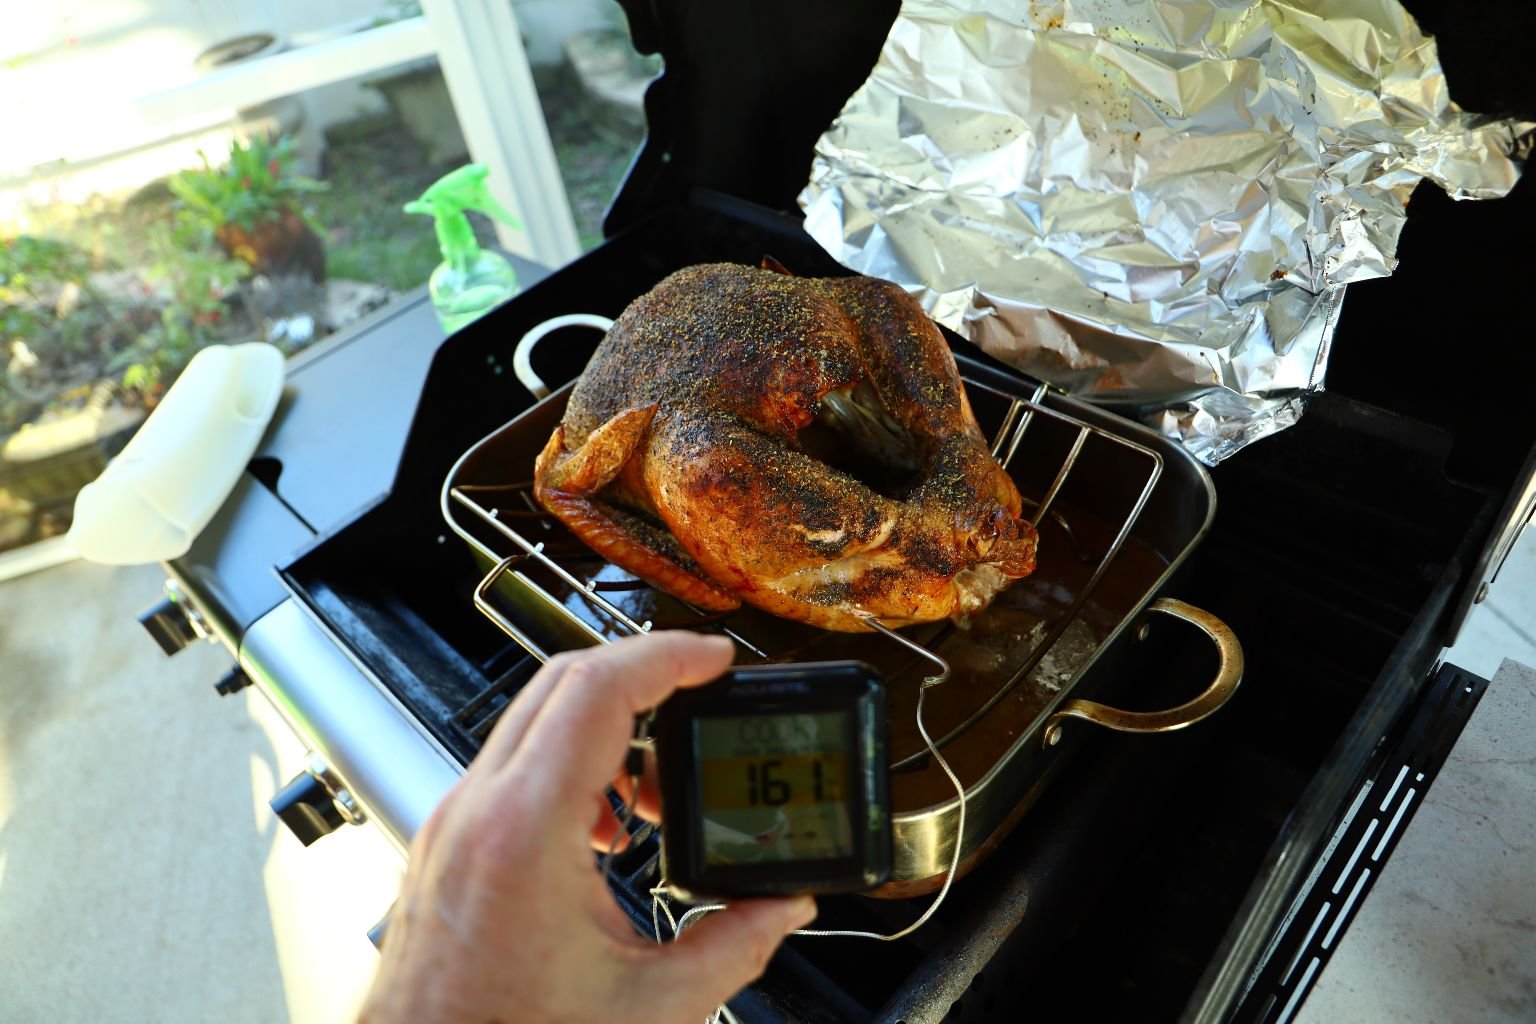
Cooking the turkey is NOT a timed event as many factors come into play. Your turkey is done when it reaches an internal temperature of 165’F in the thickest part of the thigh. This turkey cooked for around 4 hours and at the 3 1/2 hour point, I inserted my digital thermometer into the thigh being sure not to touch a bone. You can see the internal temperature is at 161’F… Perfect. I will now let the turkey rest for about 20 min. Doing this will allow the turkeys super heated external juices (The juices near the skin heated to about 300’F) to sink back into and distribute evenly into the internal meat, which will bring the internal temperature up at least 5-10’F to 165’F.

Here, Julie and I are enjoying a beautiful day outside on our lanai as the turkey is cooking. I love the smoke smell in the air.

———————————————————————-
Cute Doggie Break

I’m pretty sure they are dog tired. 🙂
————————————————————-
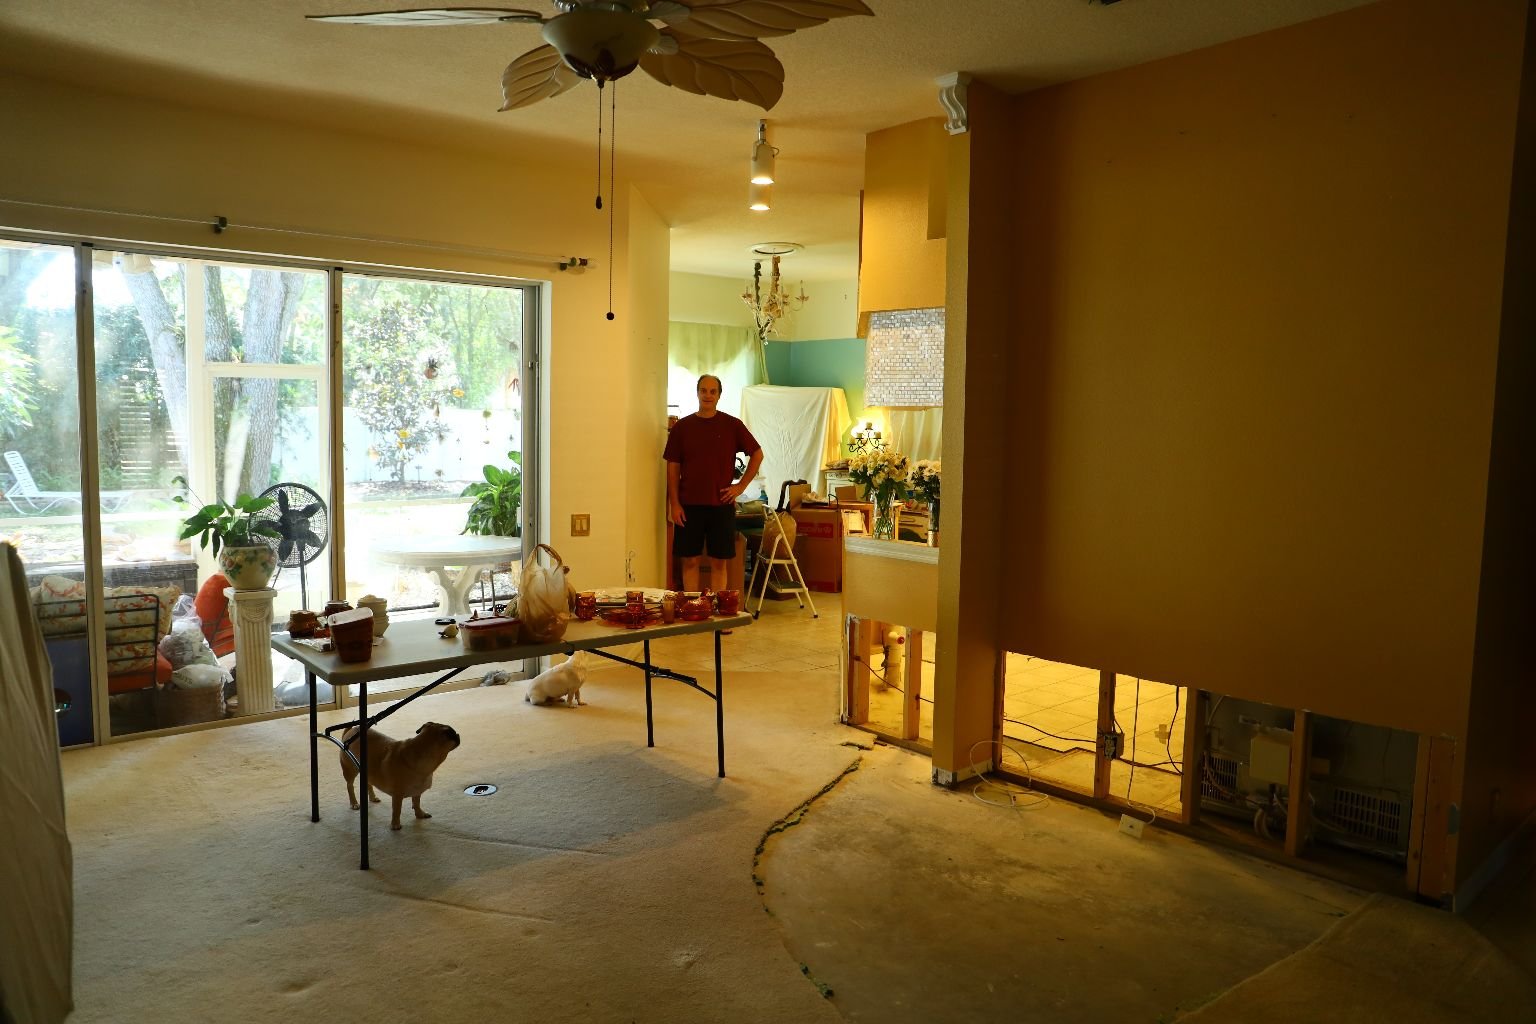
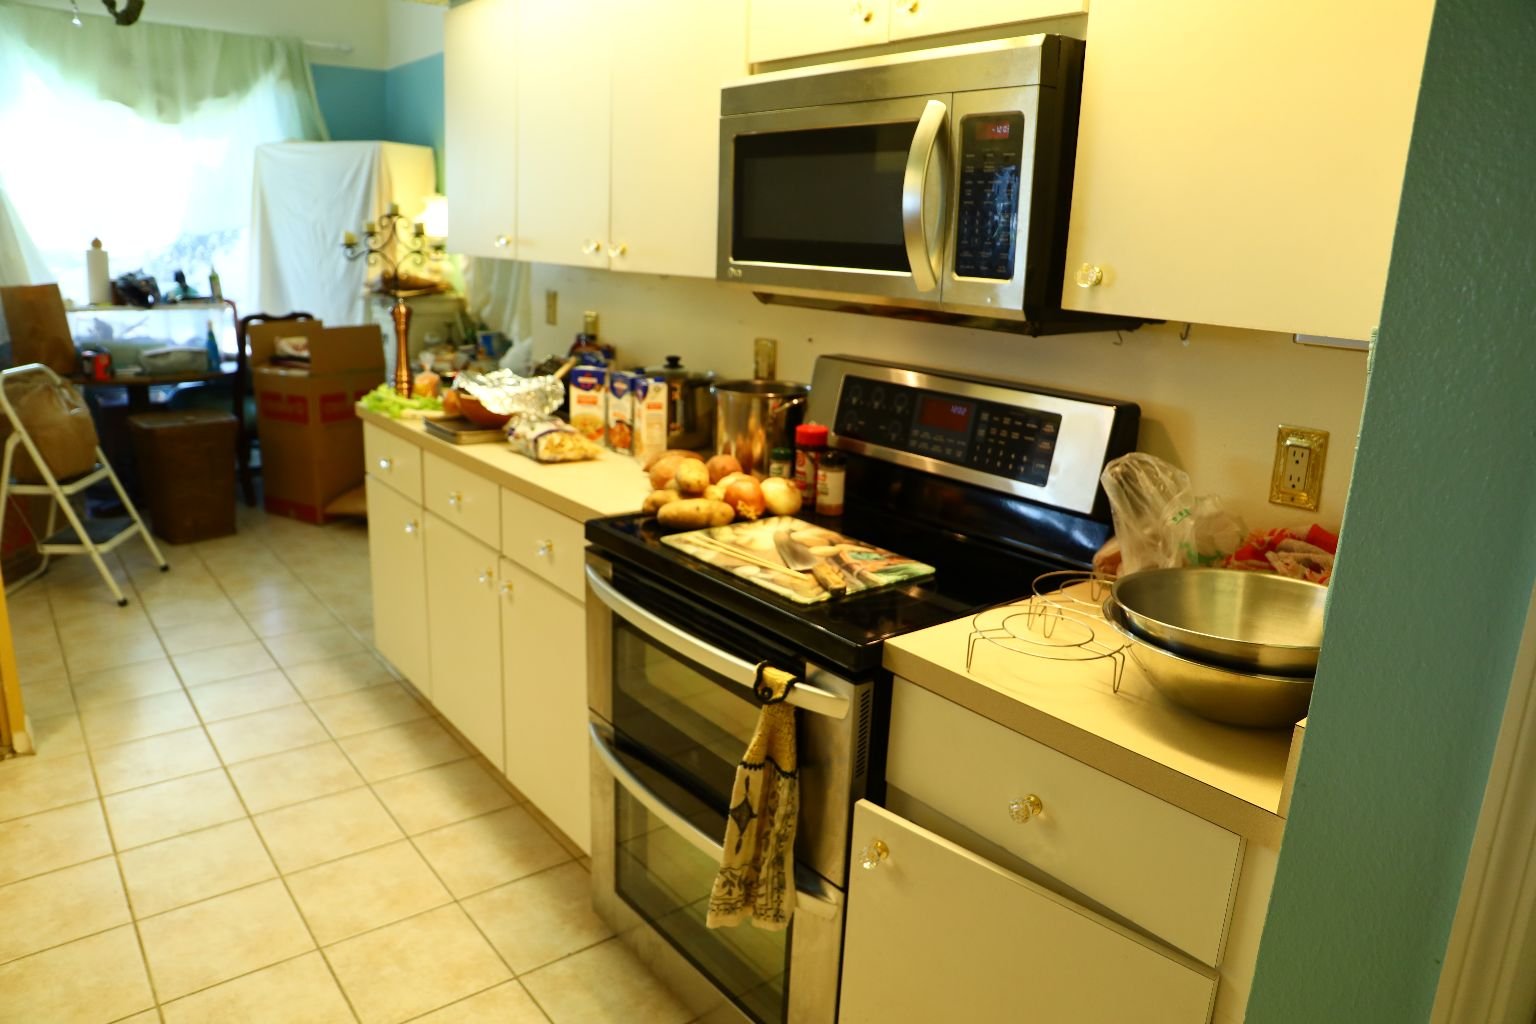
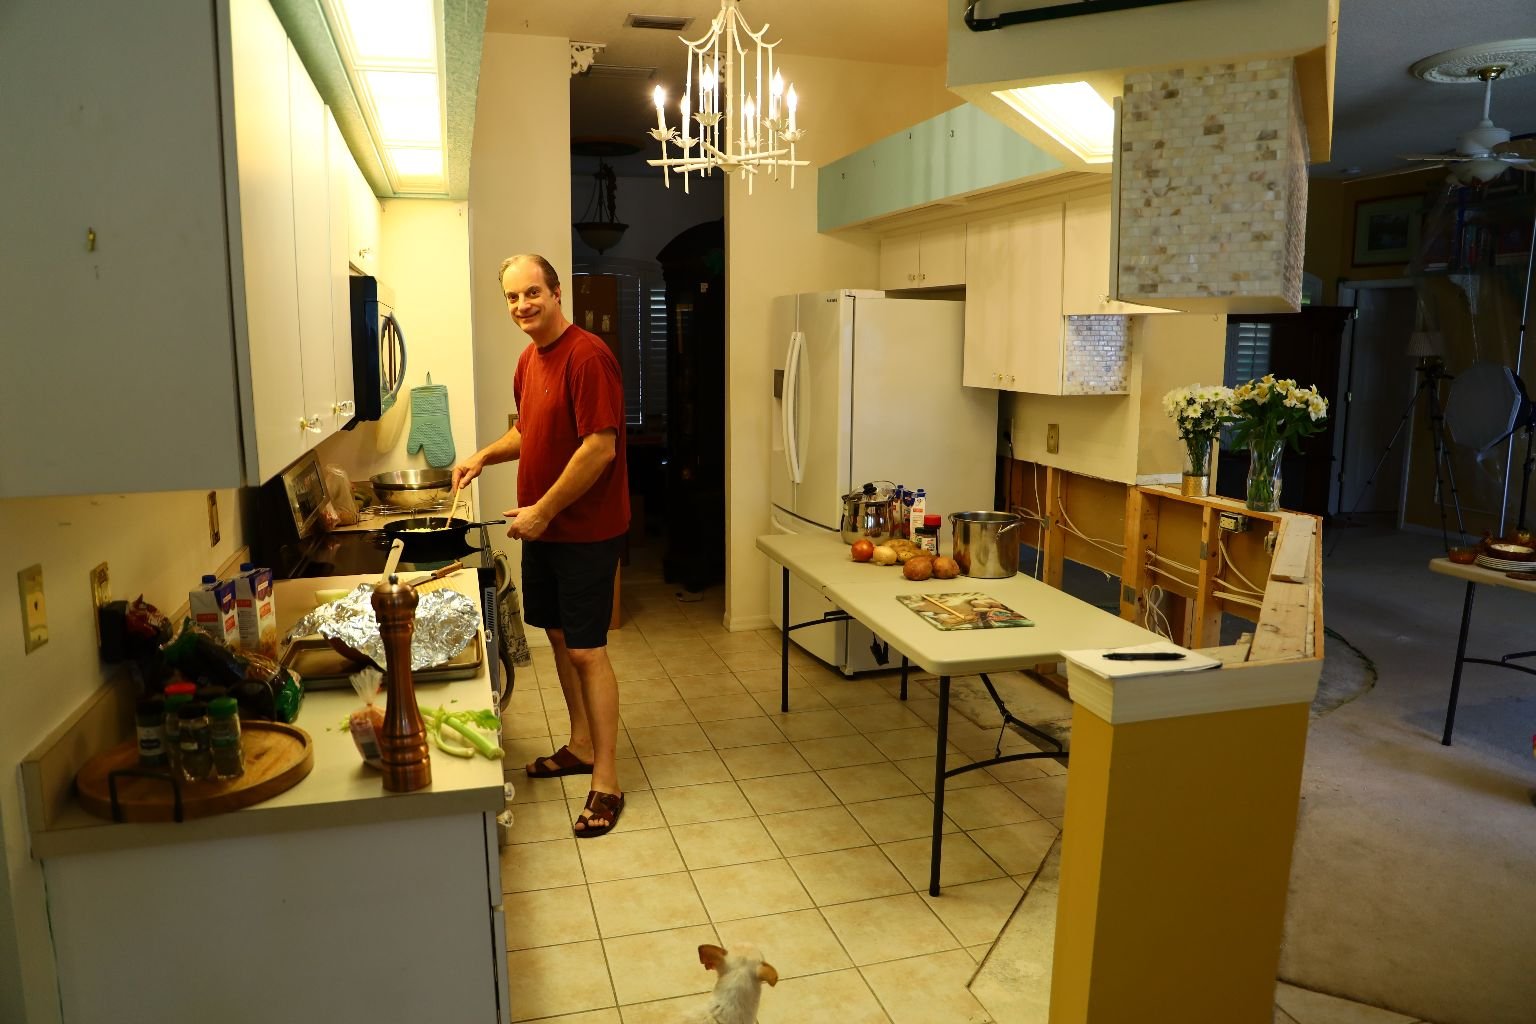
This is Saturday, after Thanksgiving Thursday.
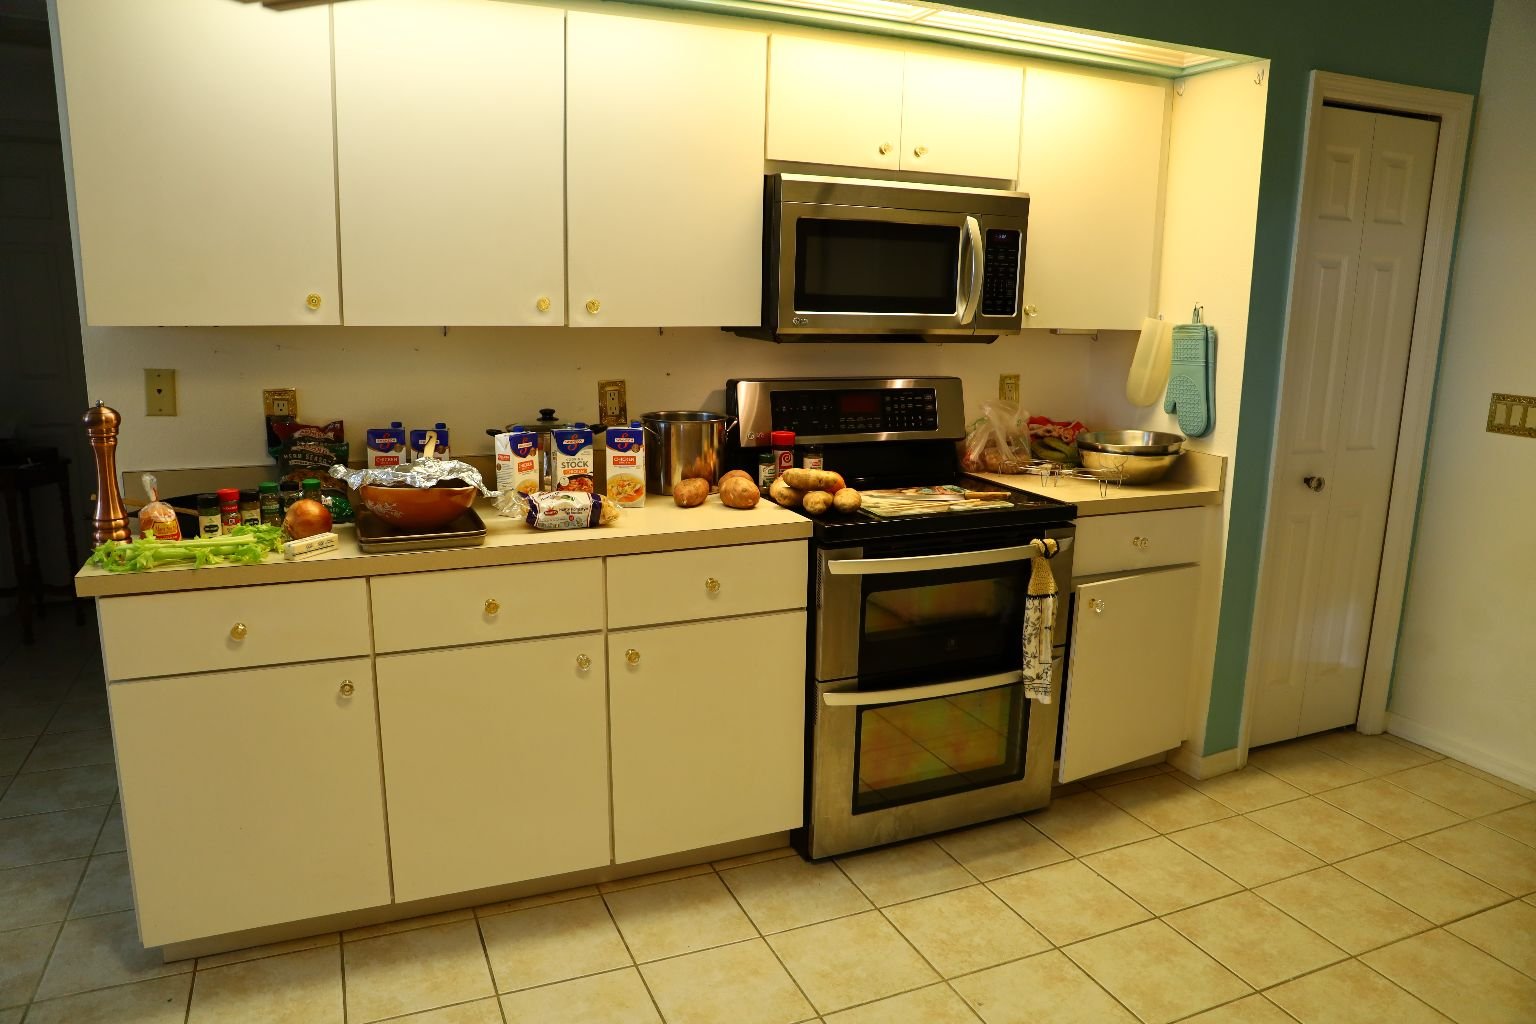
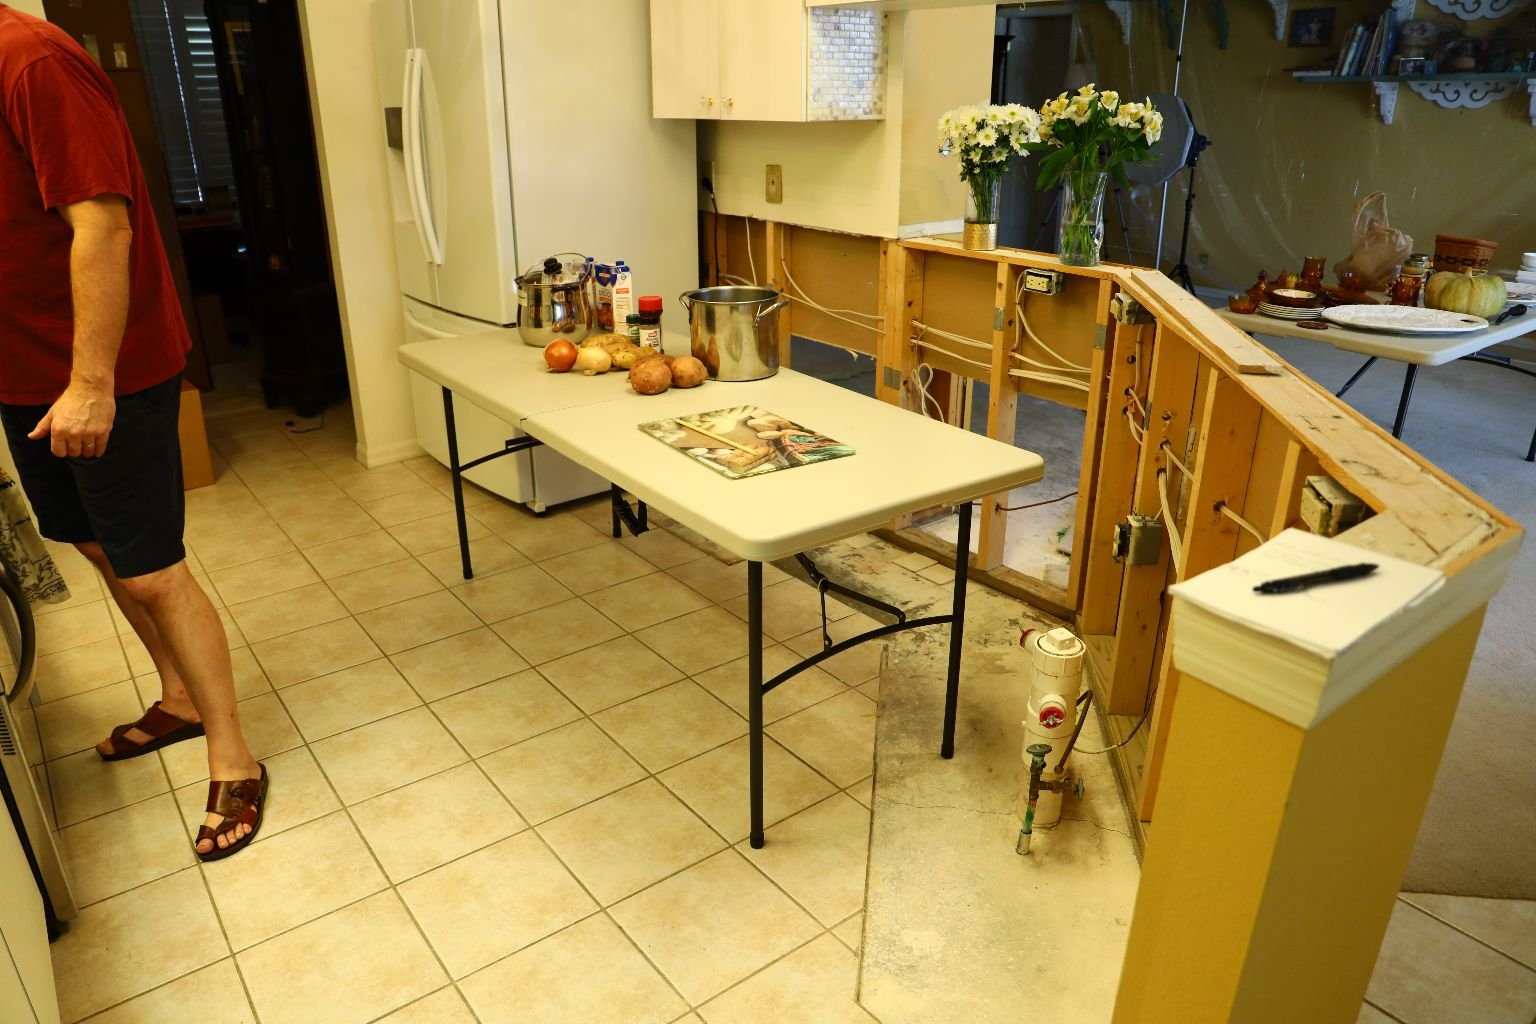
Our renovation crew came on Friday, after Thanksgiving, and took down all the plastic dividers. Finally, we had more access to what kitchen that we had. Still no sink, or dishwasher, but just more room. They also removed all the dehumidifier’s.
This finally gave us more room to maneuver around our kitchen.
But, due to our home renovations, we may have cooked our turkey on Thanksgiving Day, but we didn’t actually eat our Thanksgiving Dinner until Saturday when we were able to better utilize our kitchen.
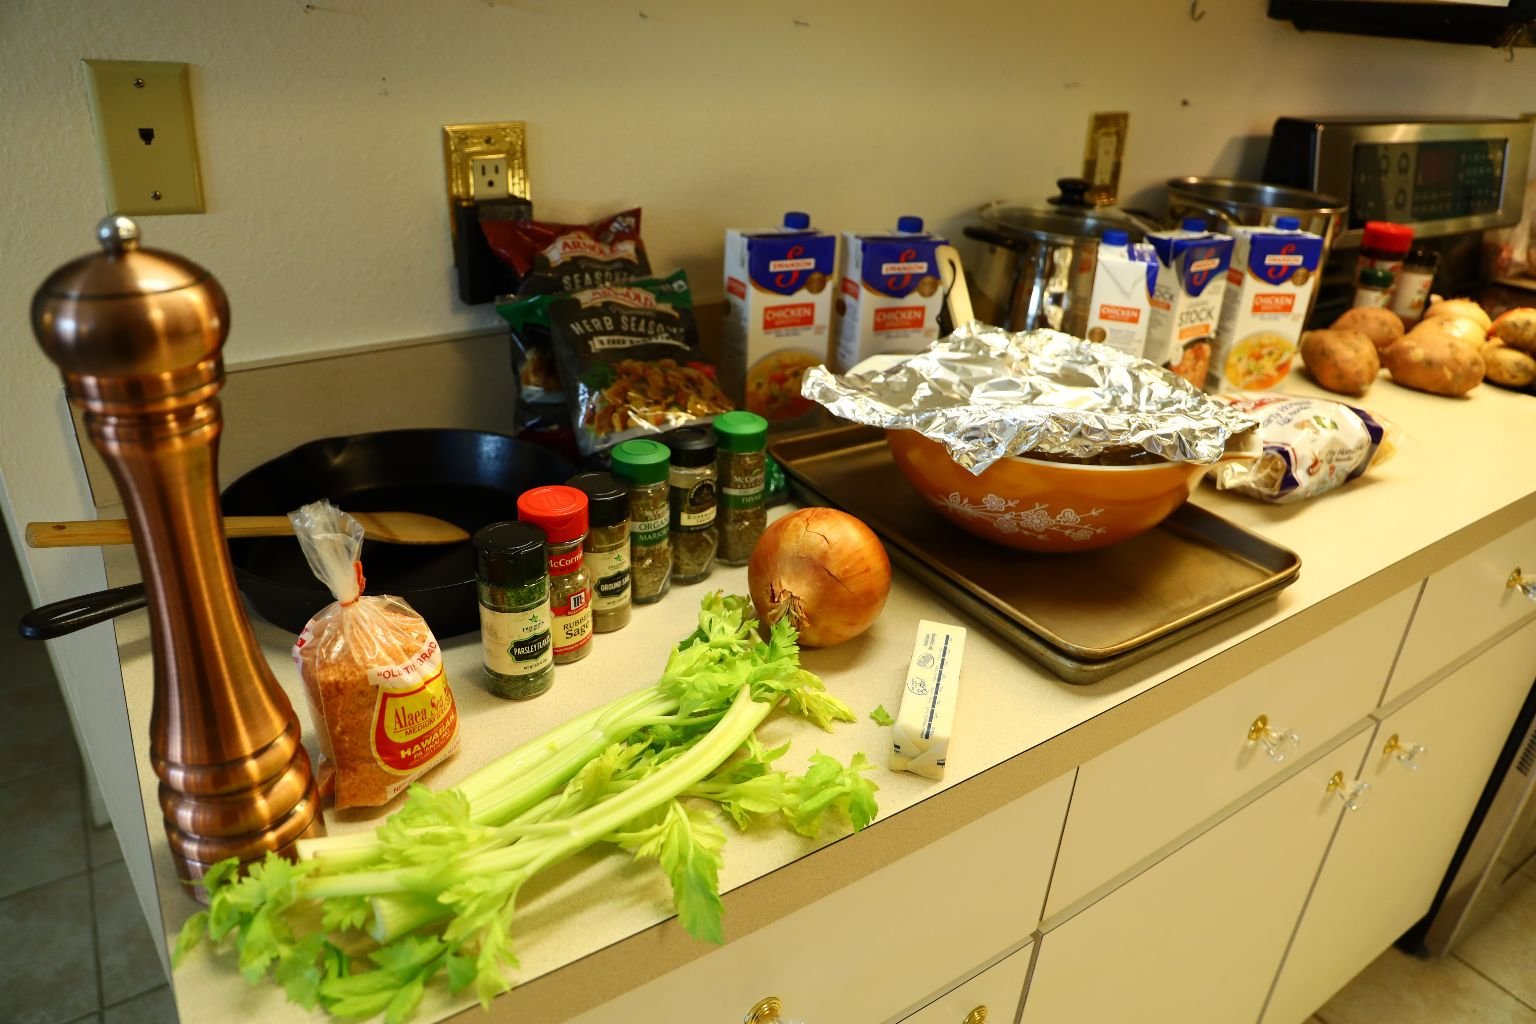
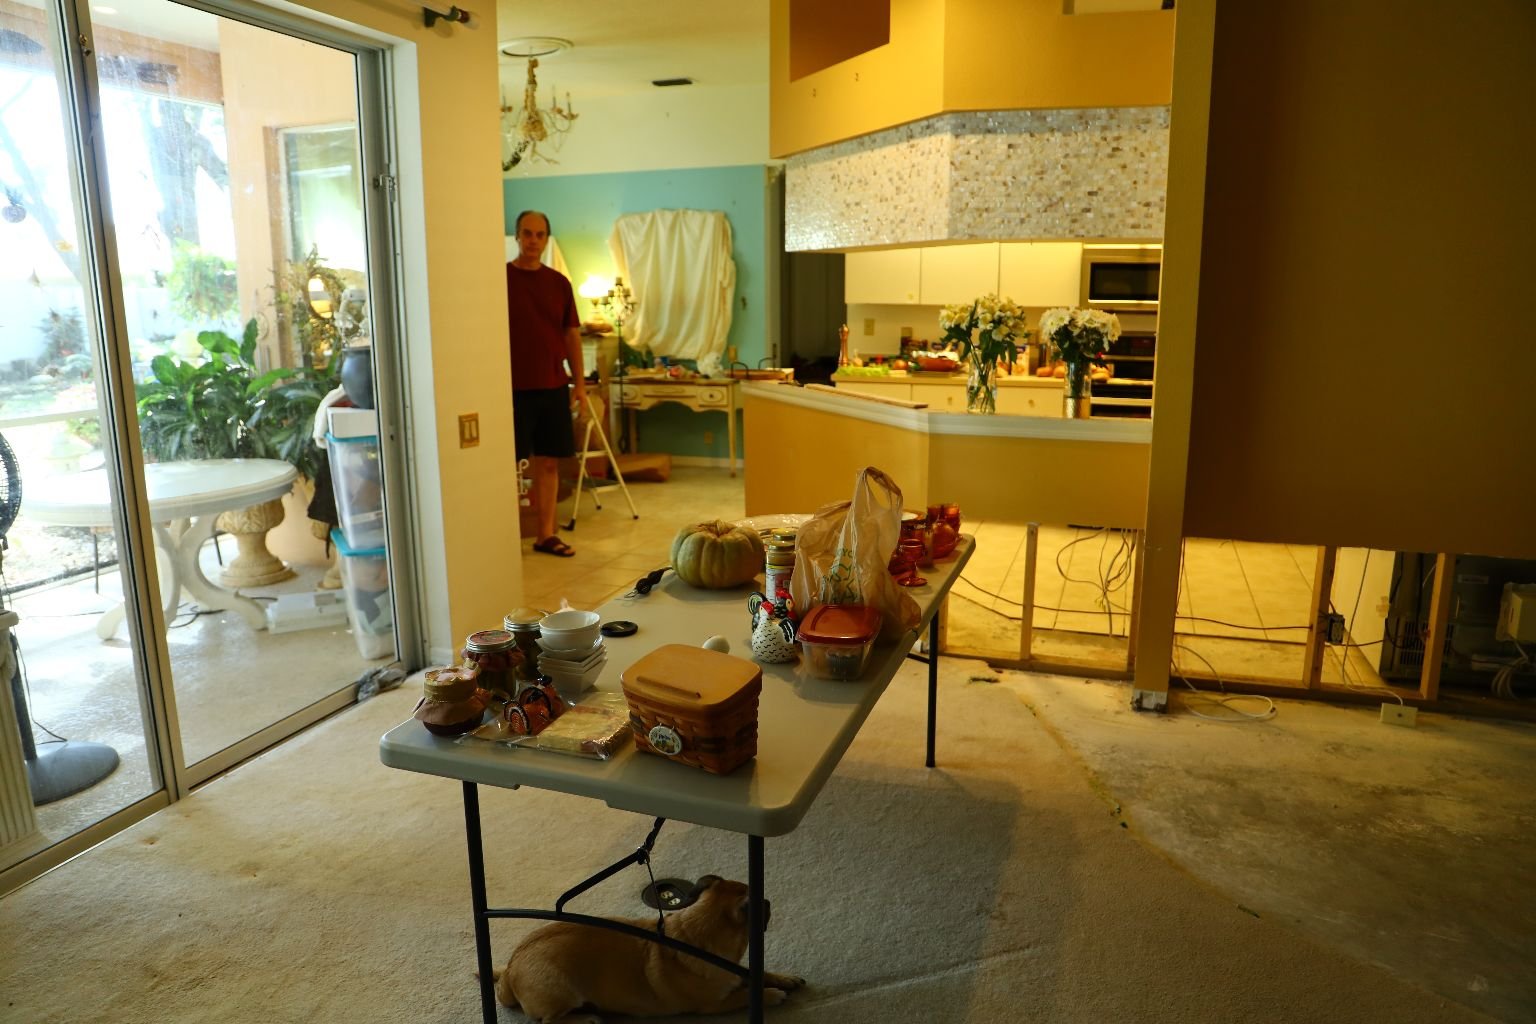
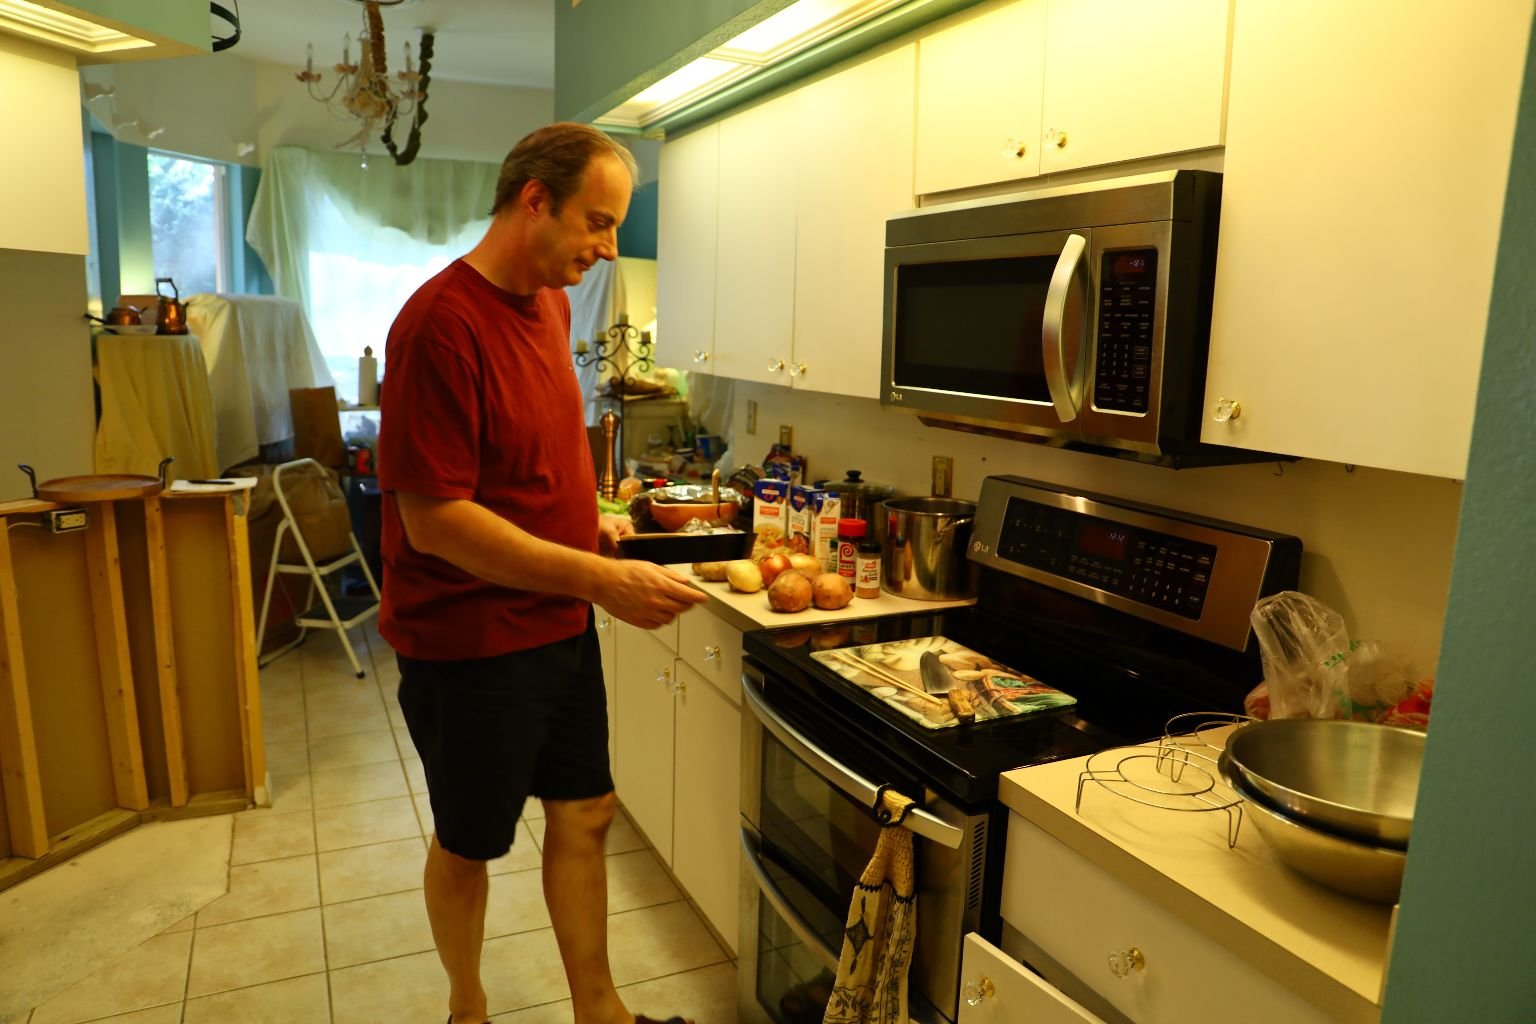
Here We Are Working on Our Thanksgiving Sides
——————————————————————–

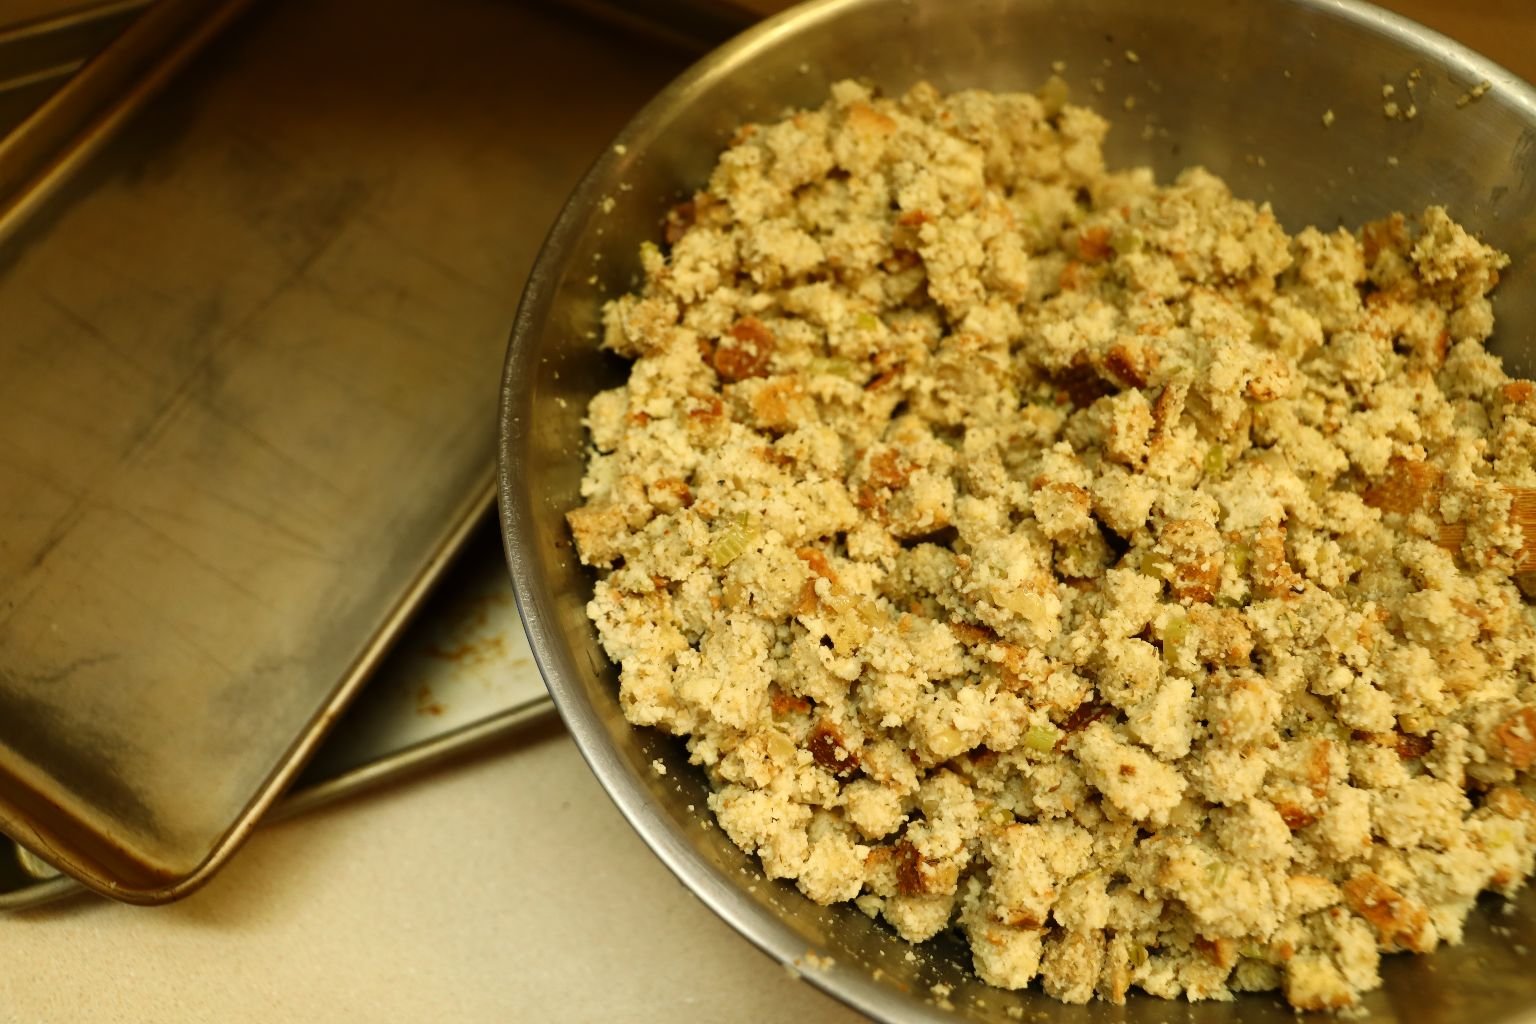
Making My Grandmother’s Southern Cornbread Dressing
We have given this recipe on so many Thanksgiving and Christmas pages of ours that I am not going to re-write it here. But, you can now better see our kitchen.
Check Out Our New Island, Huh? 🙂
Gordon Cooking
Making the Cornbread Dressing
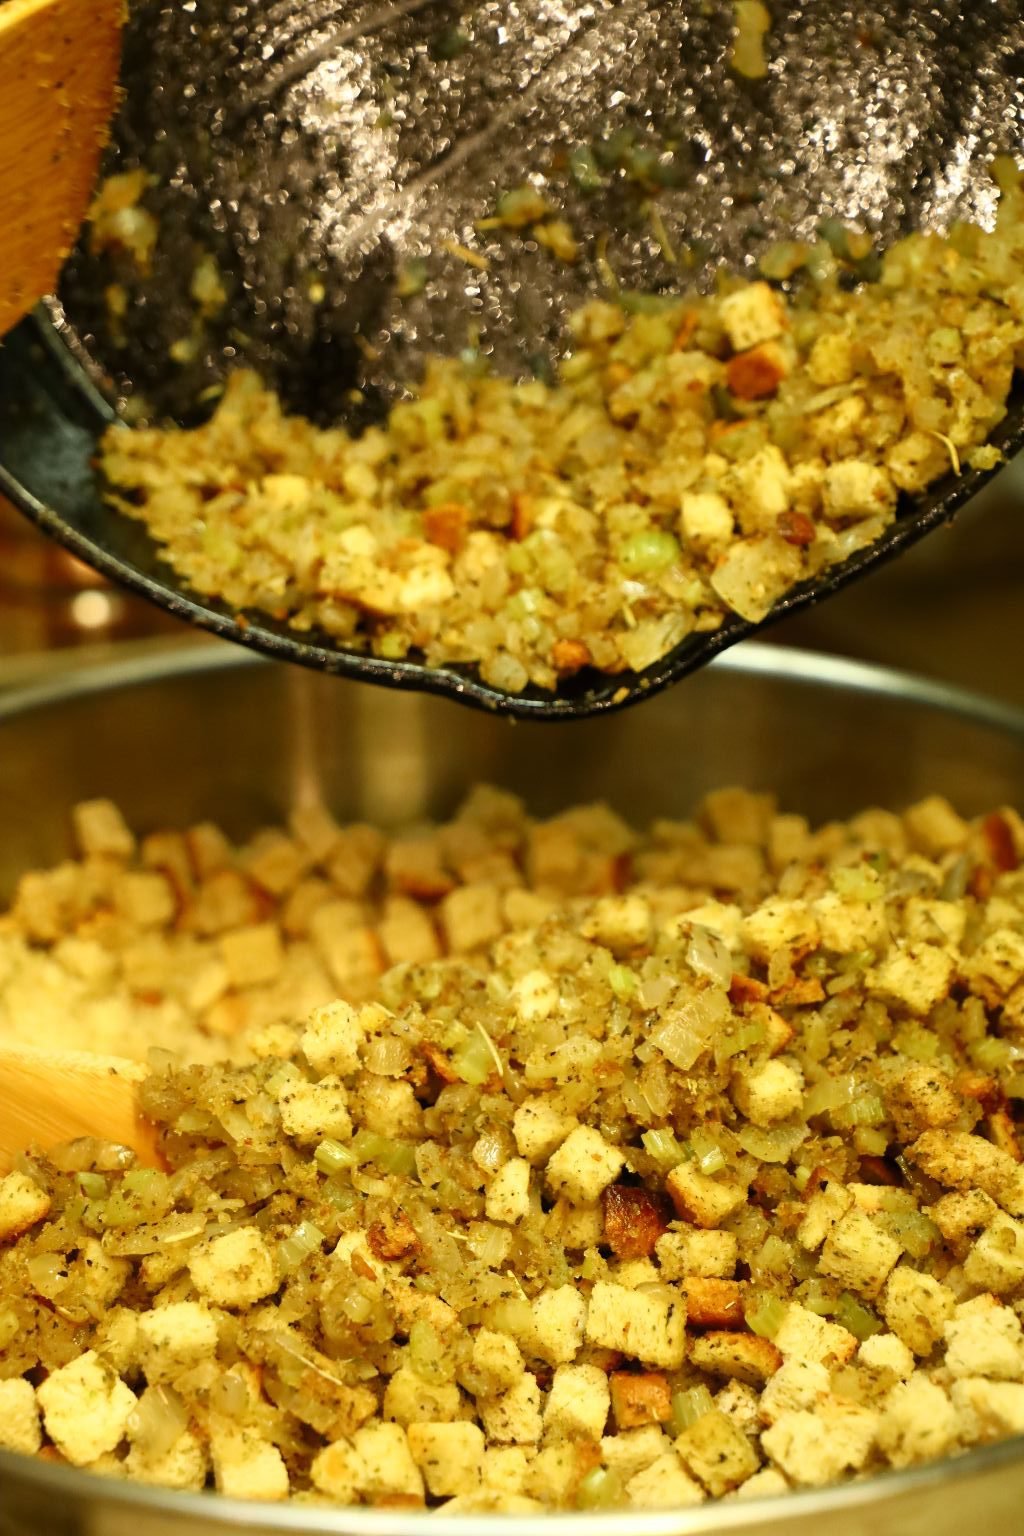
It’s Coming Together Nicely
——————————————————————
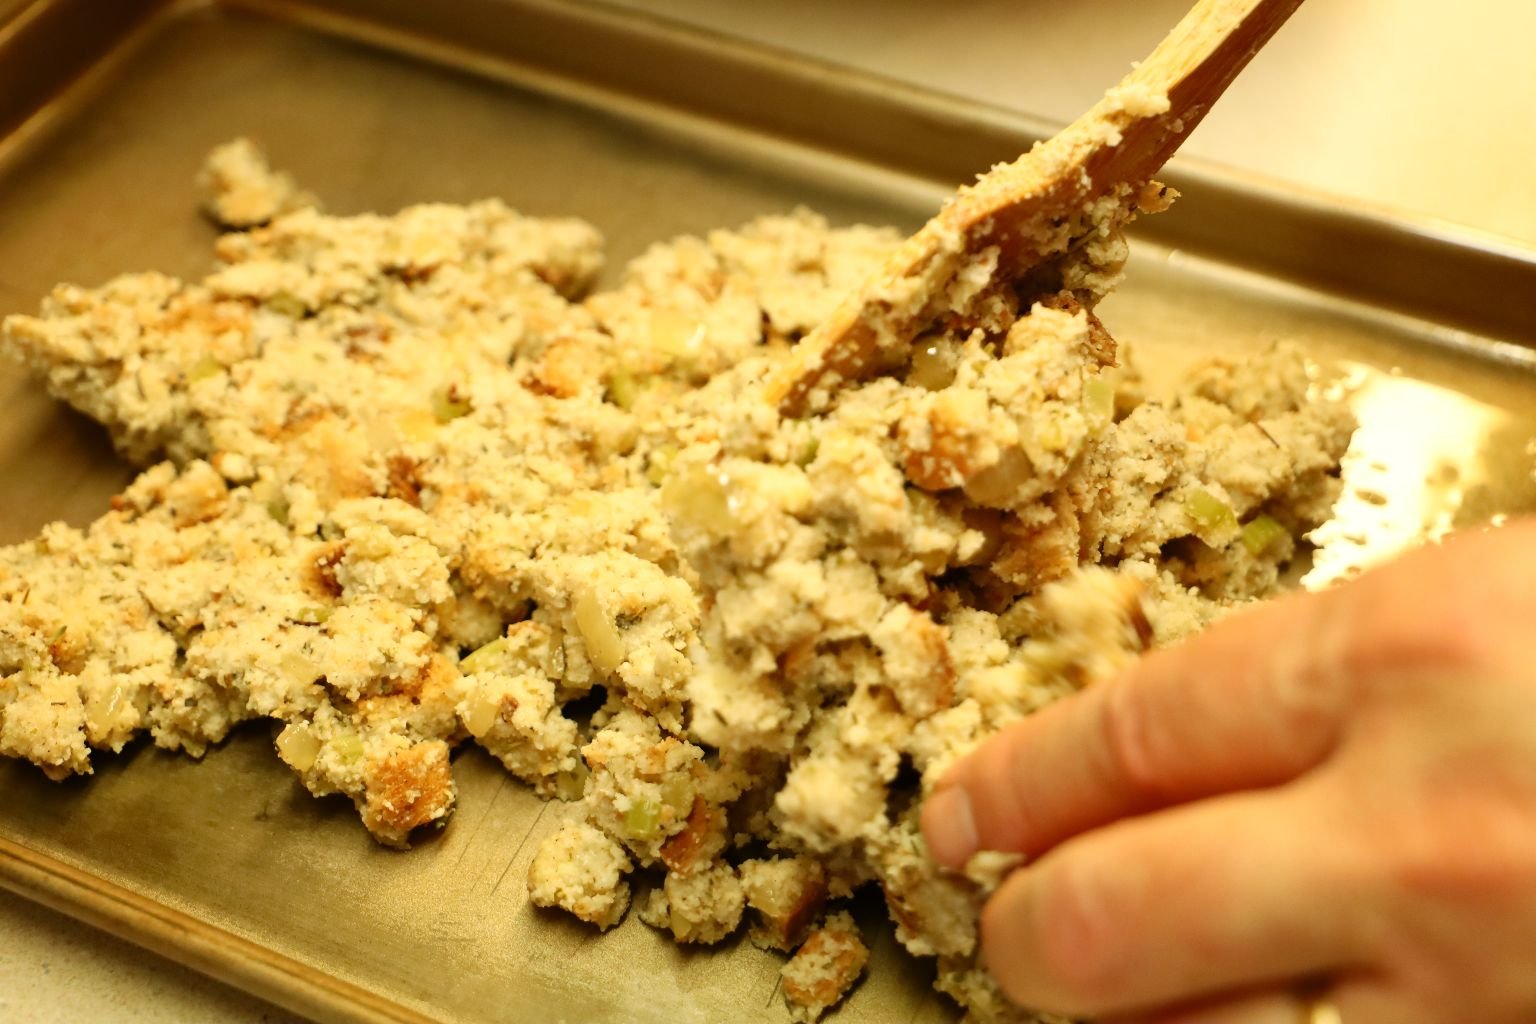
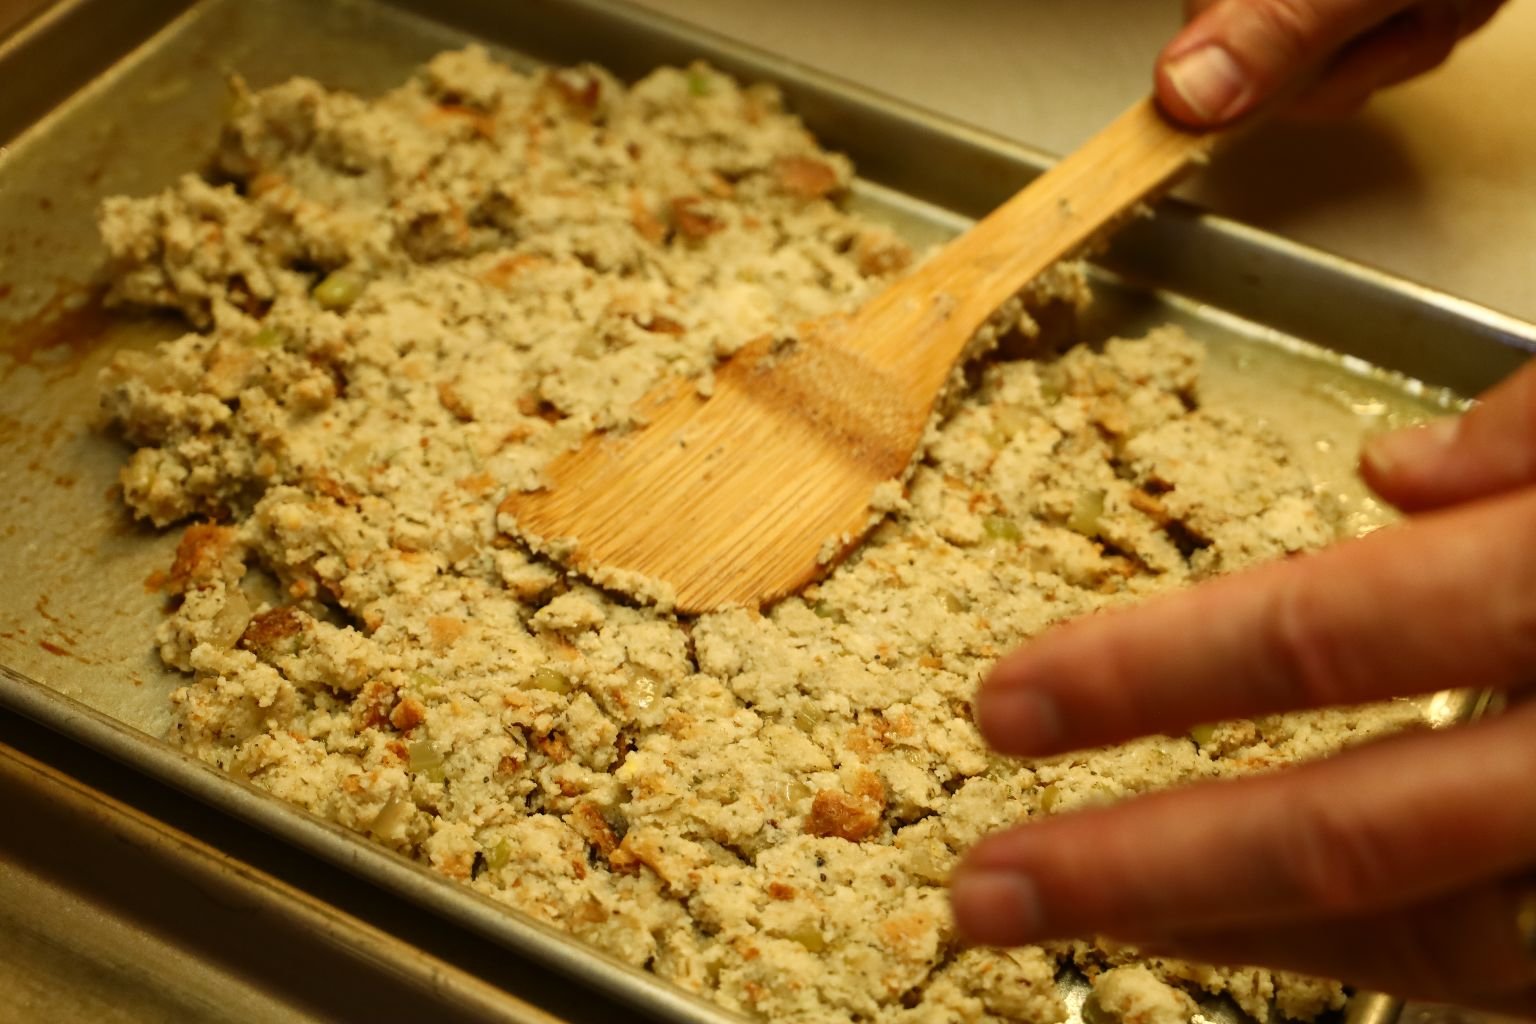
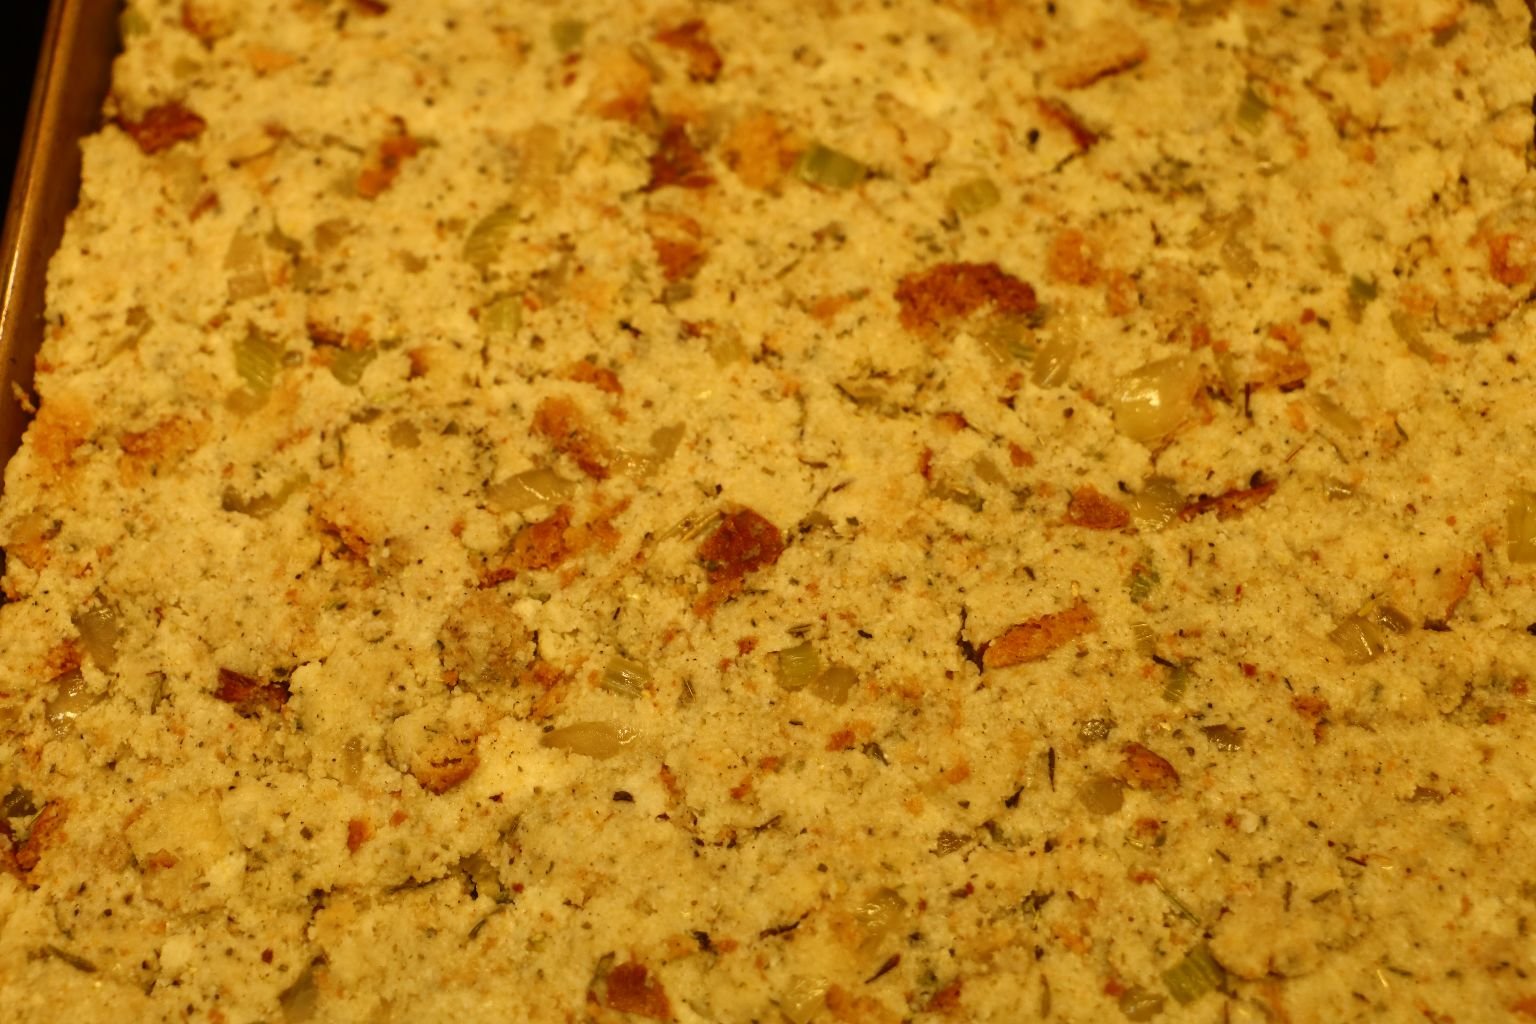
Here Gordon is Spreading our Cornbread Dressing Onto a Greased Sheet Pan
Now, we are going to cook it in a 350F oven for about 25 minutes, or so until done.
——————————————————————–
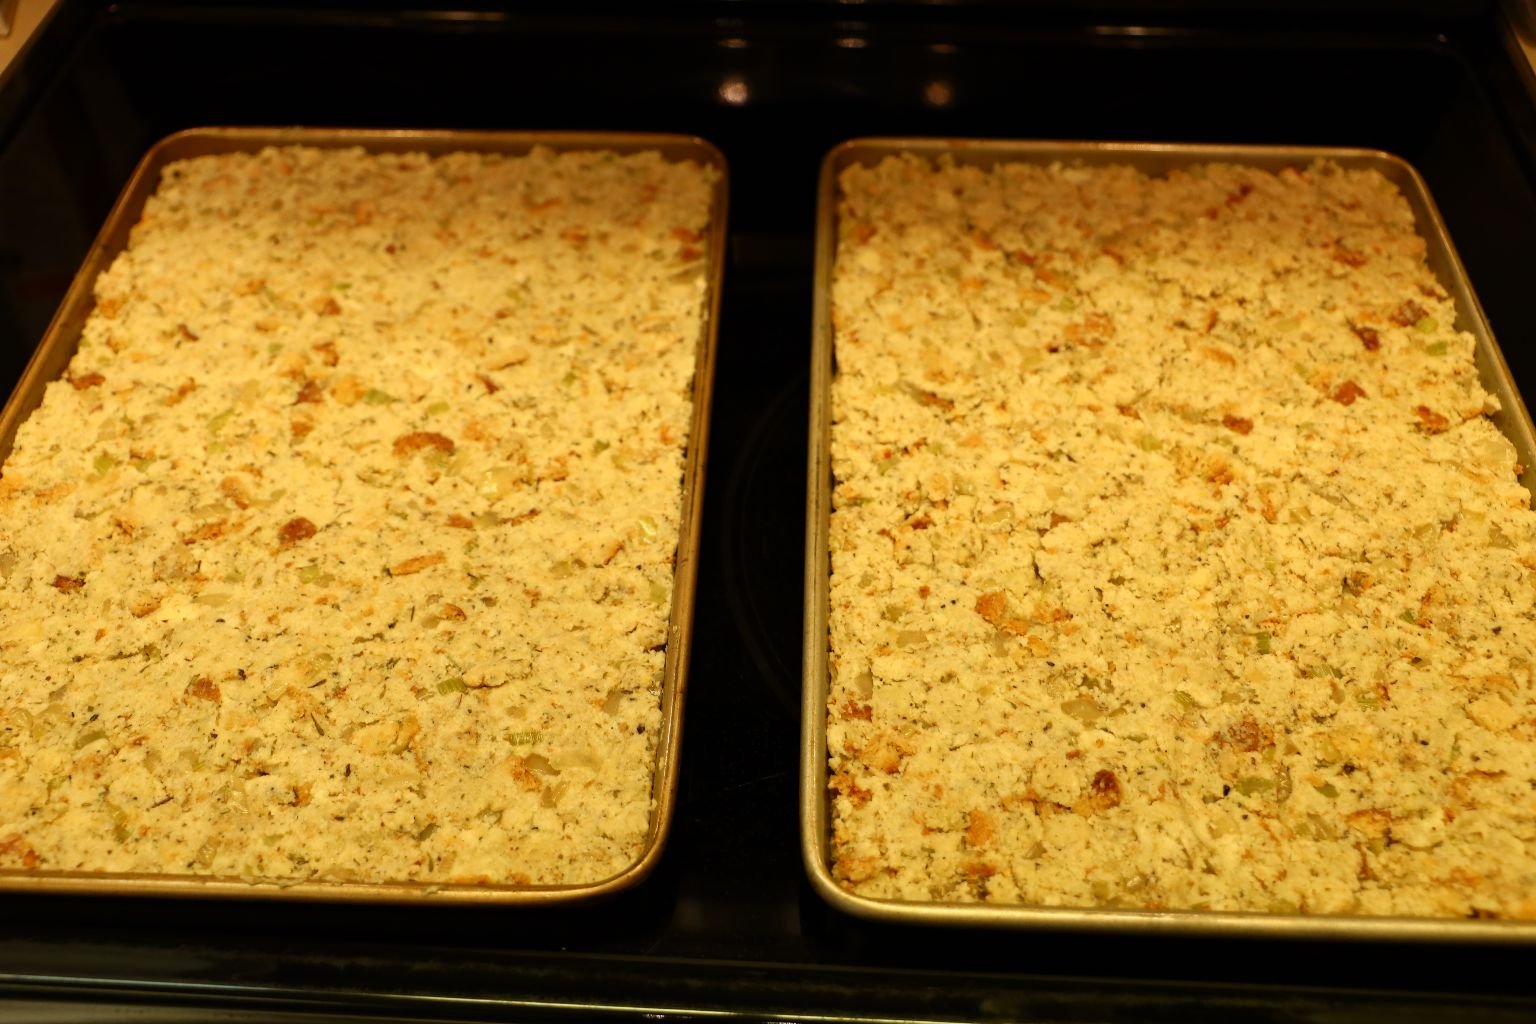
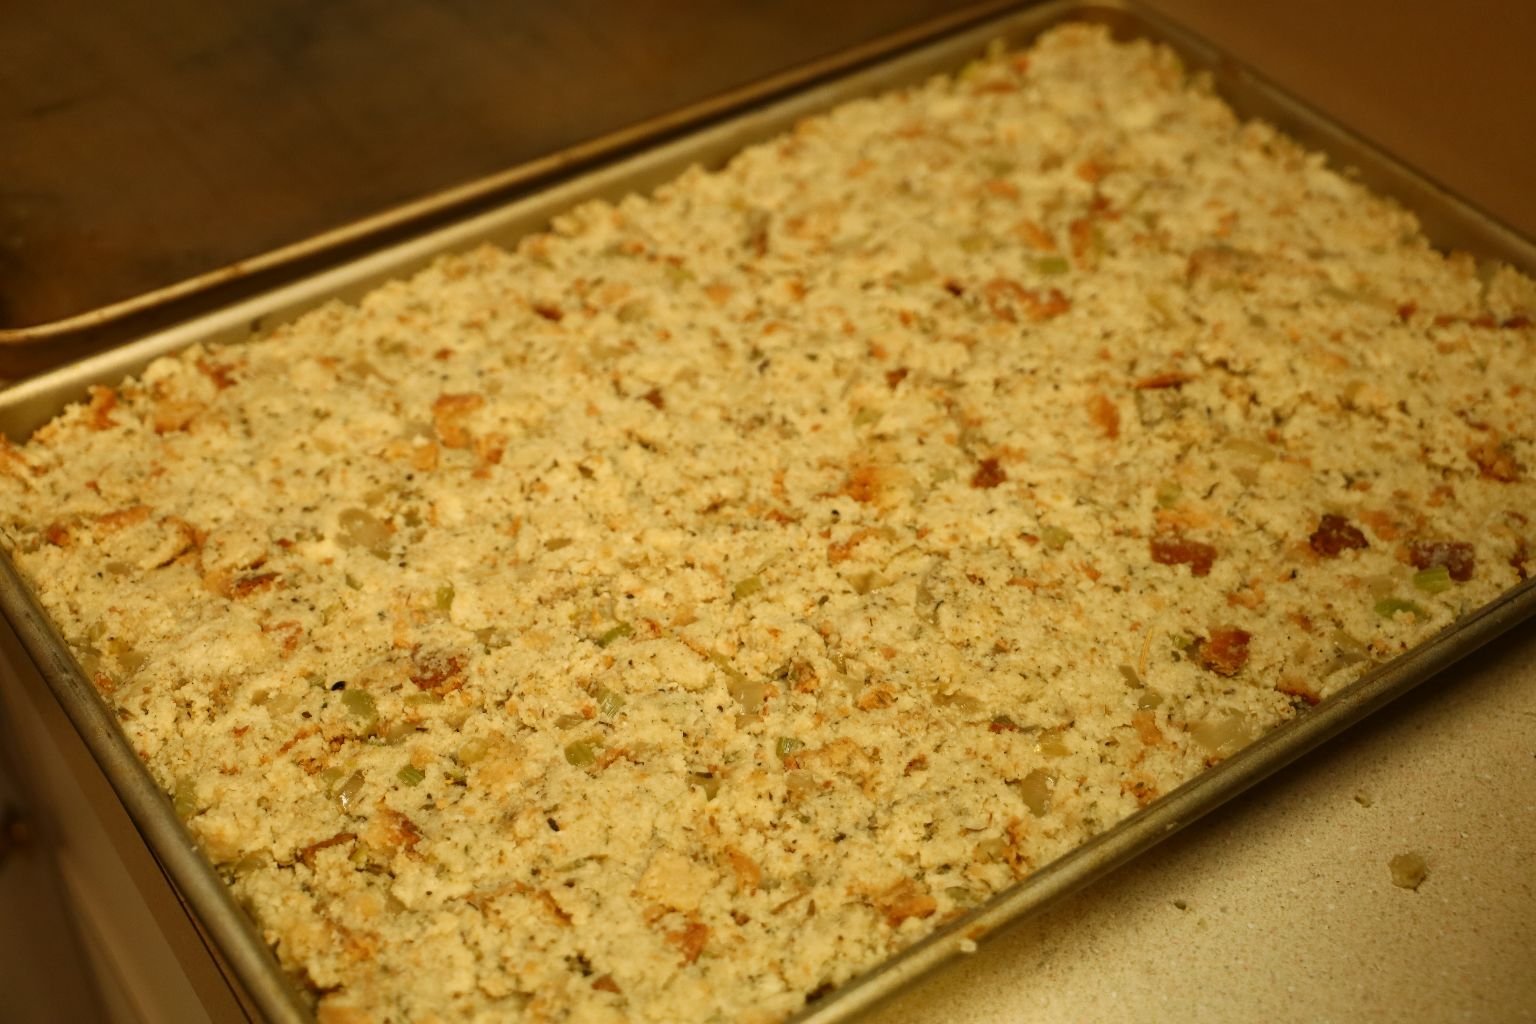
Into The Oven It Goes
———————————————————————

When done, remove from the oven and set aside to cool.
Getting Ready for Another Recipe

When Cooled, use a pizza cutter to make slices the size of bread slices.
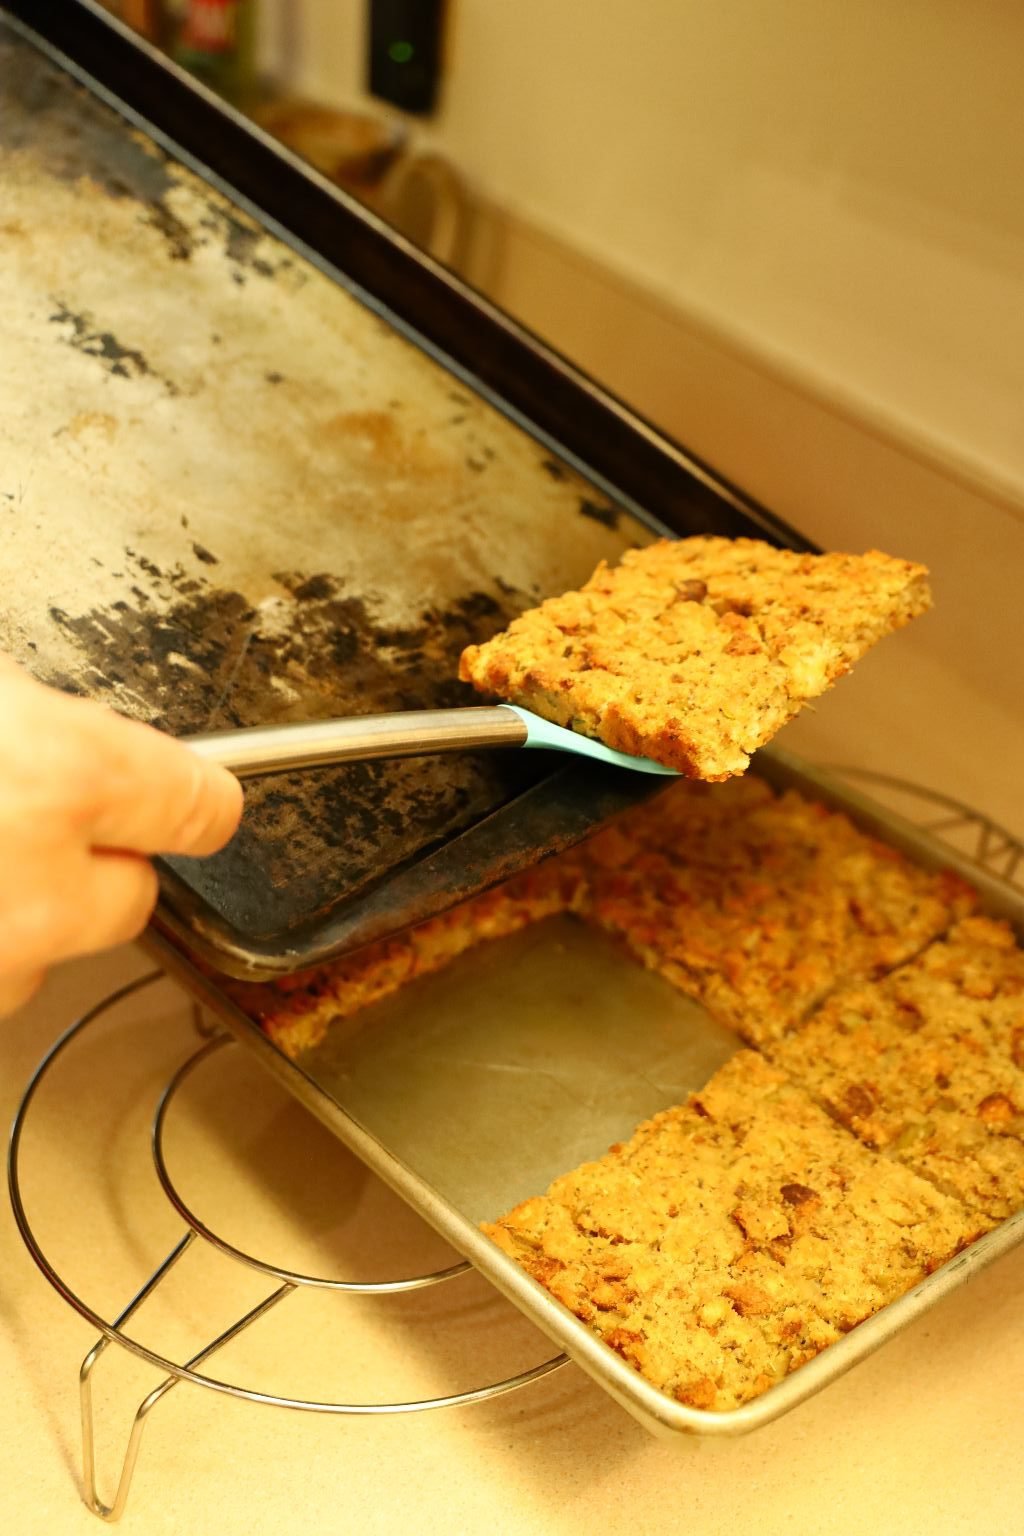
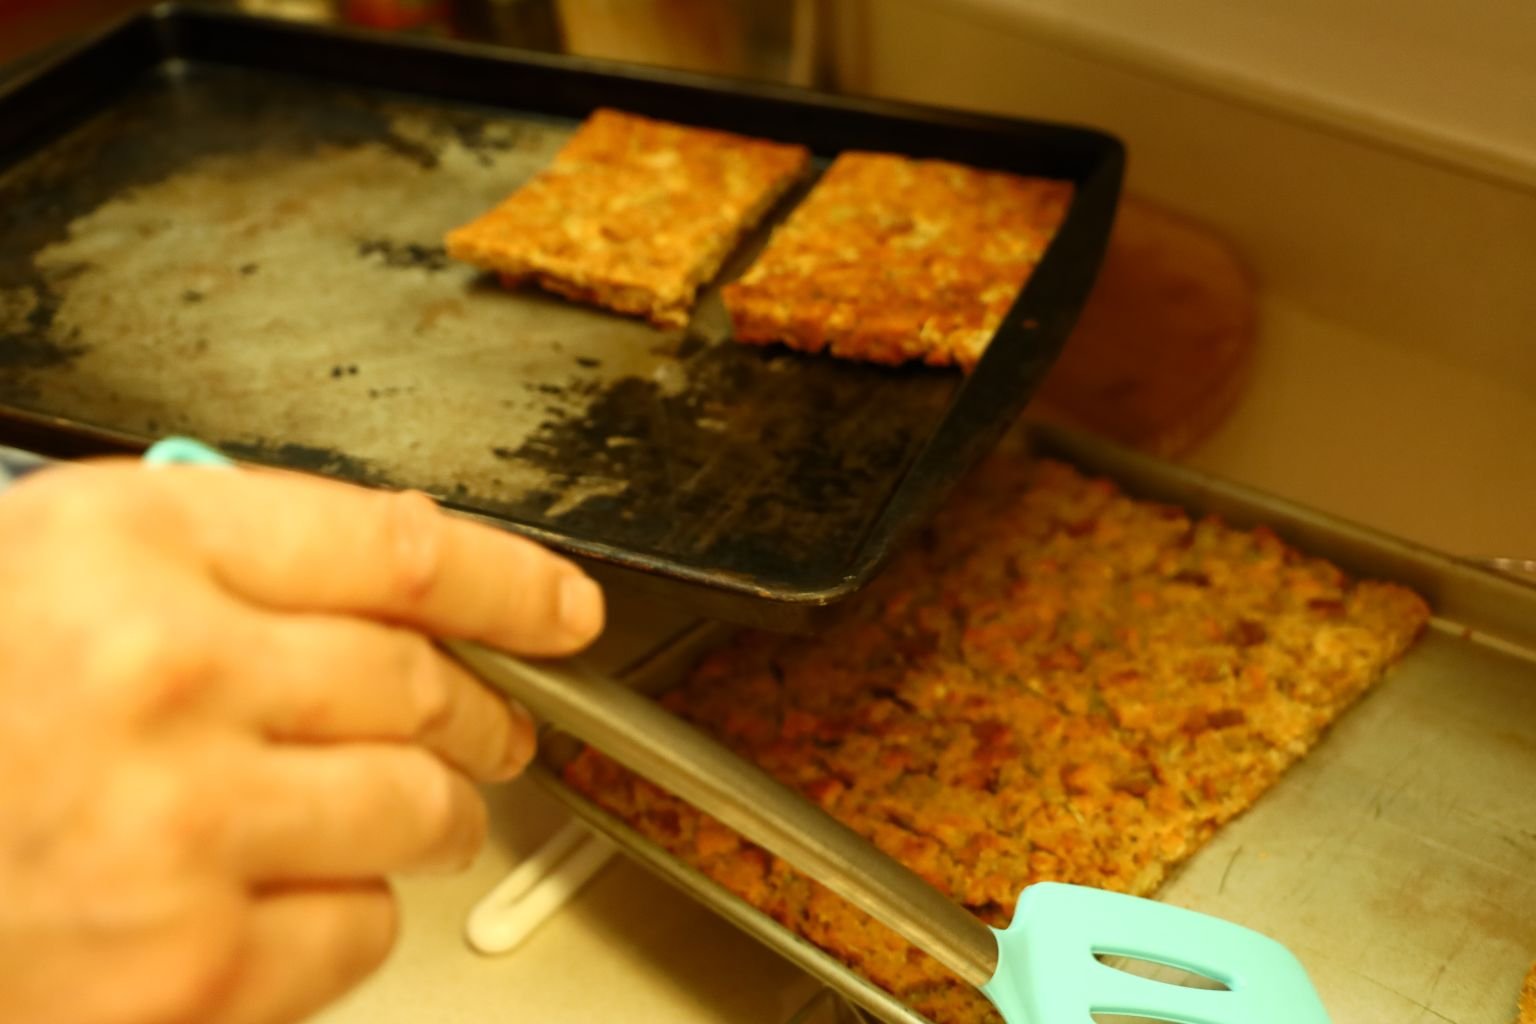
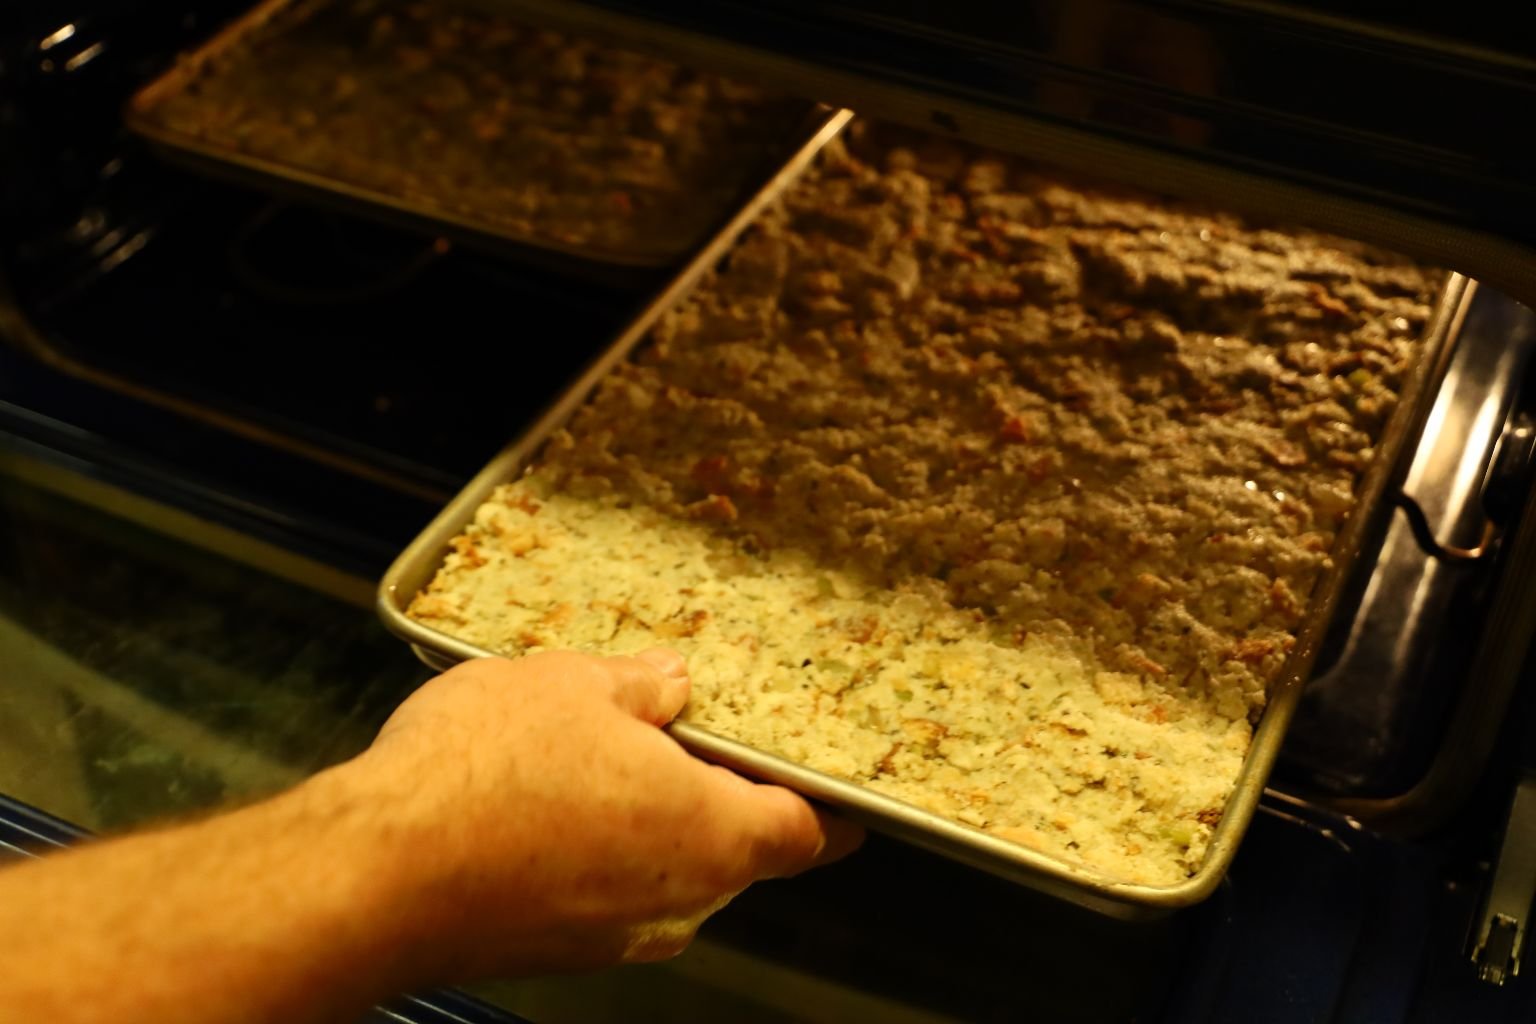
Then place the slices onto a larger baking sheet and then place back into the oven on 350F…..
for about 10-15 minutes.
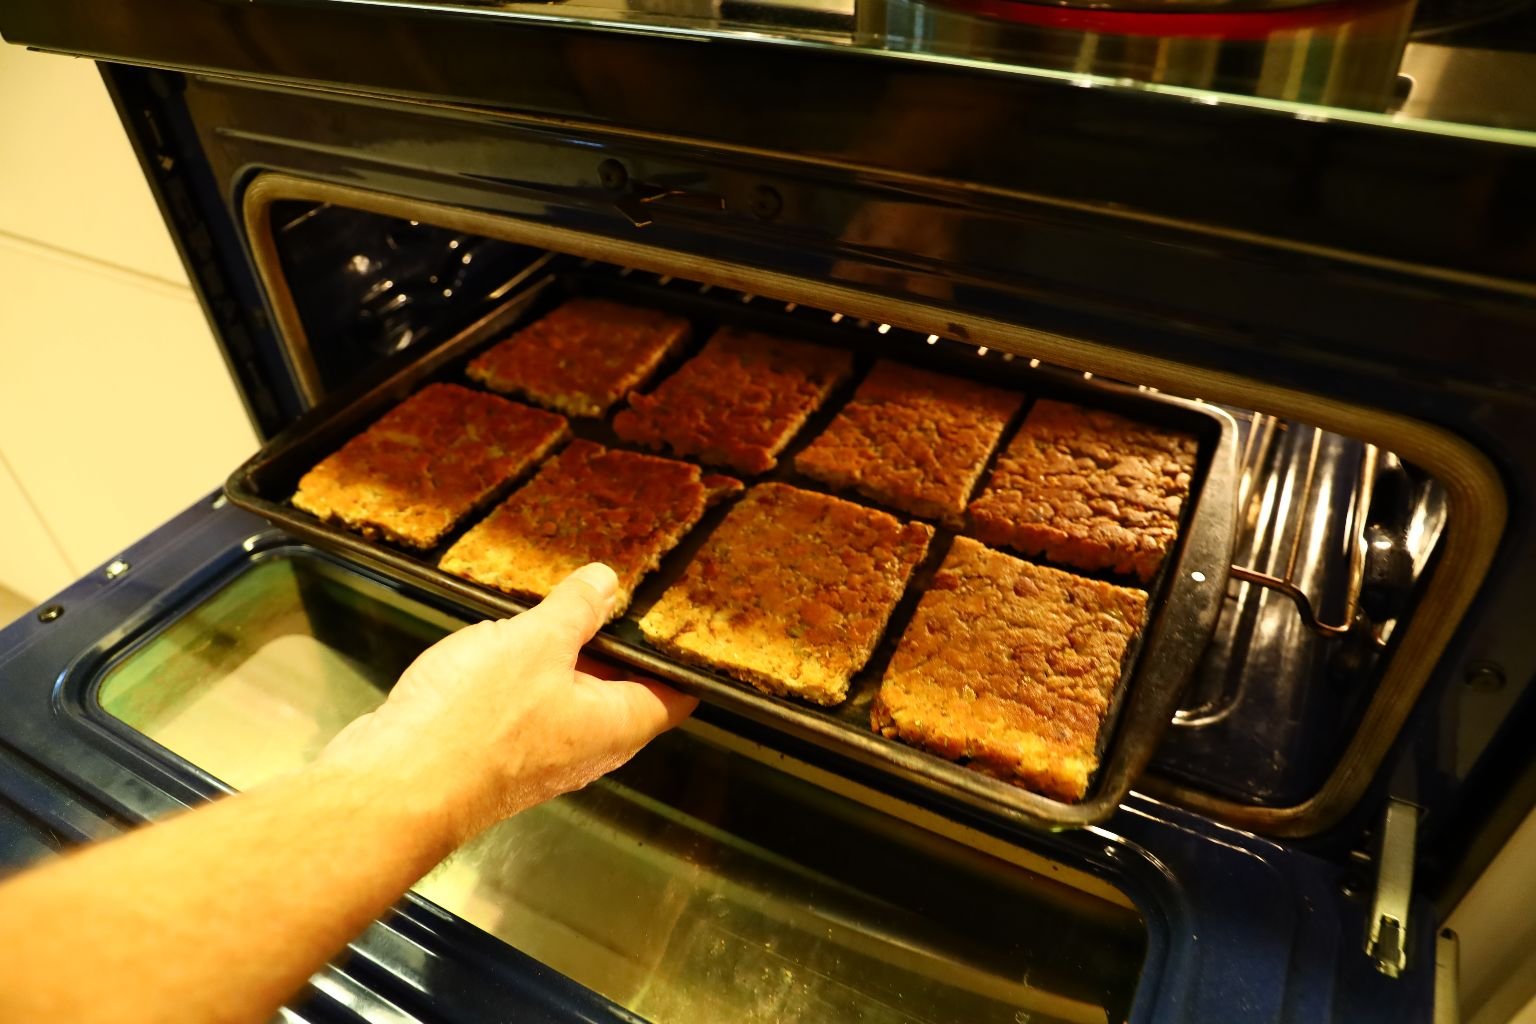
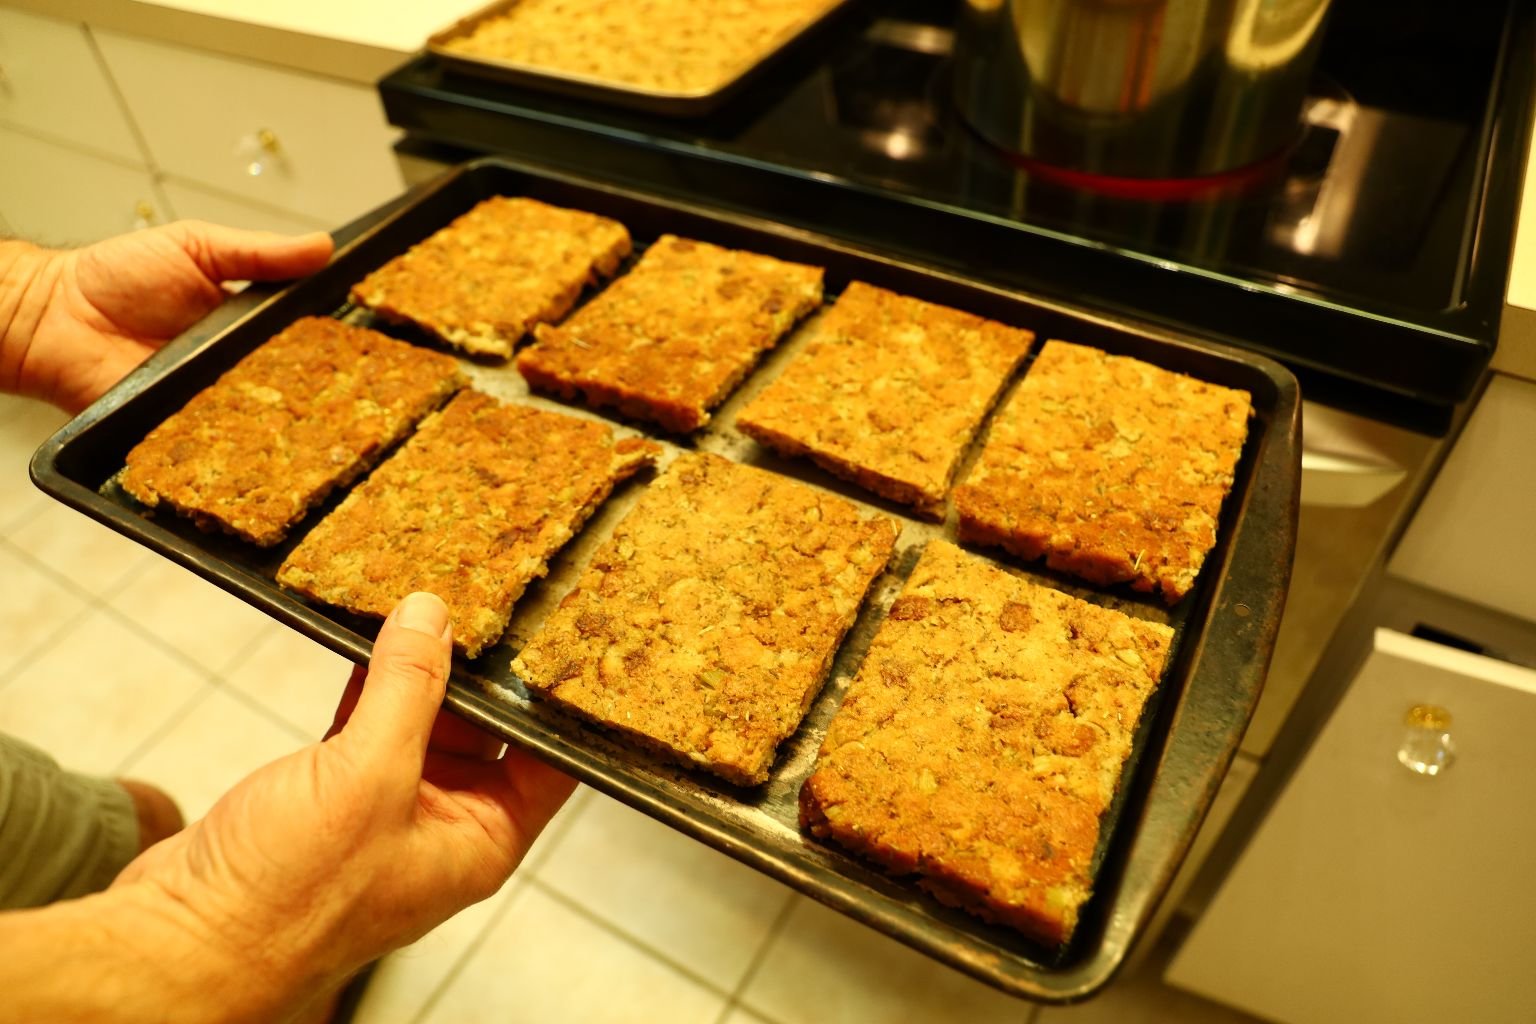
Like So…..

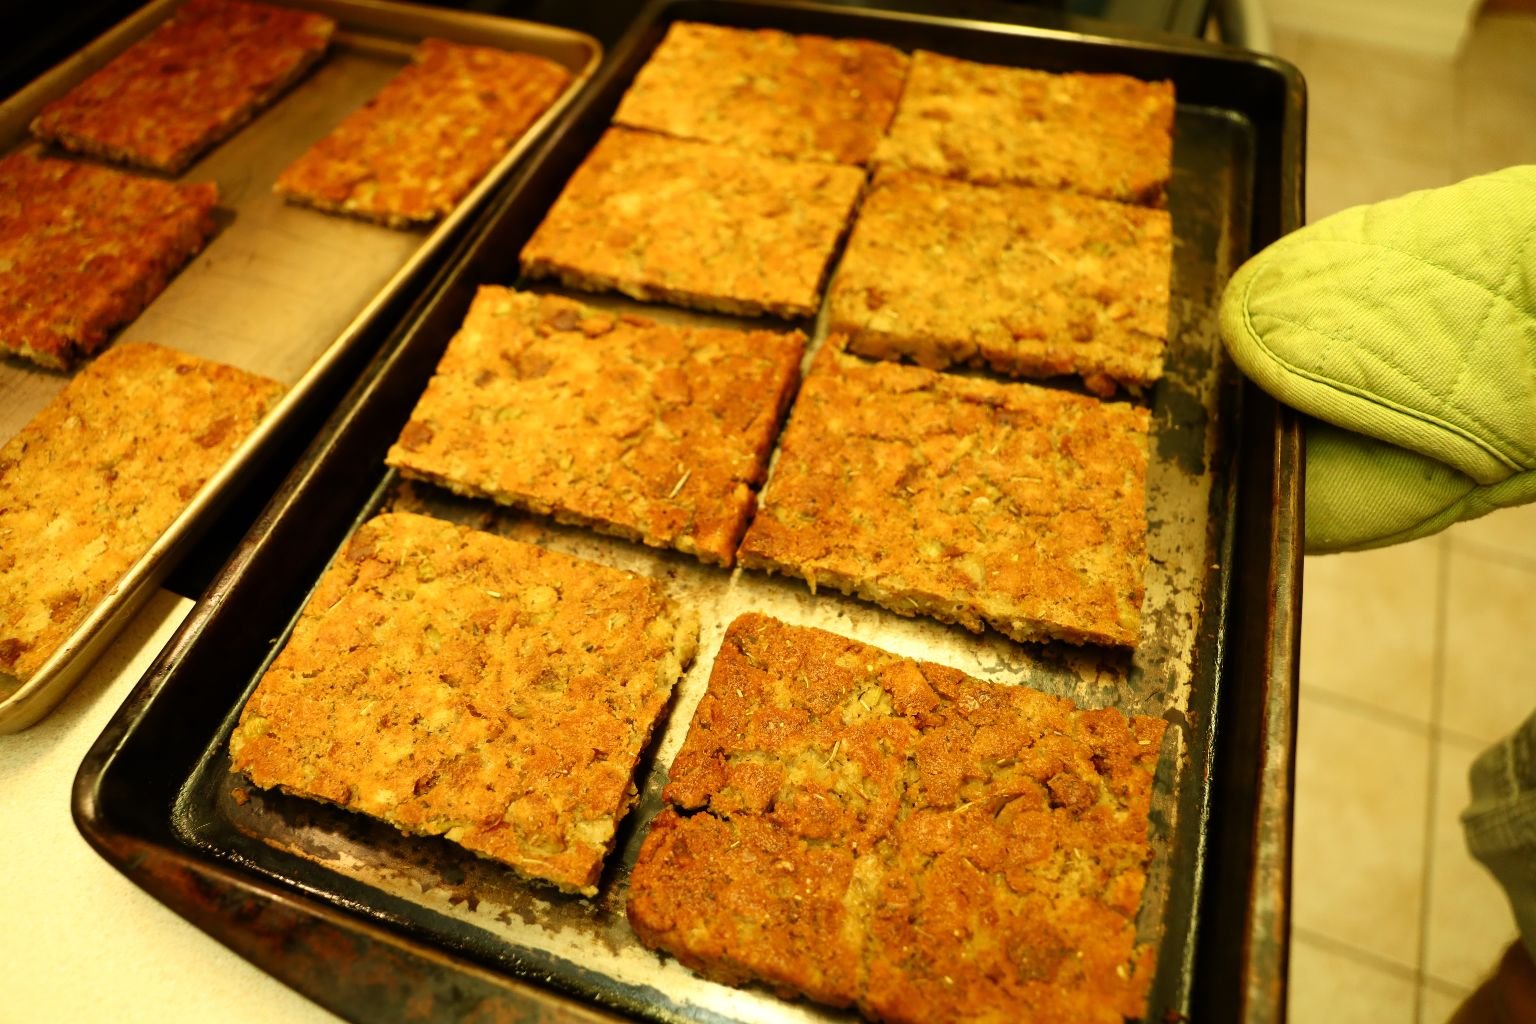
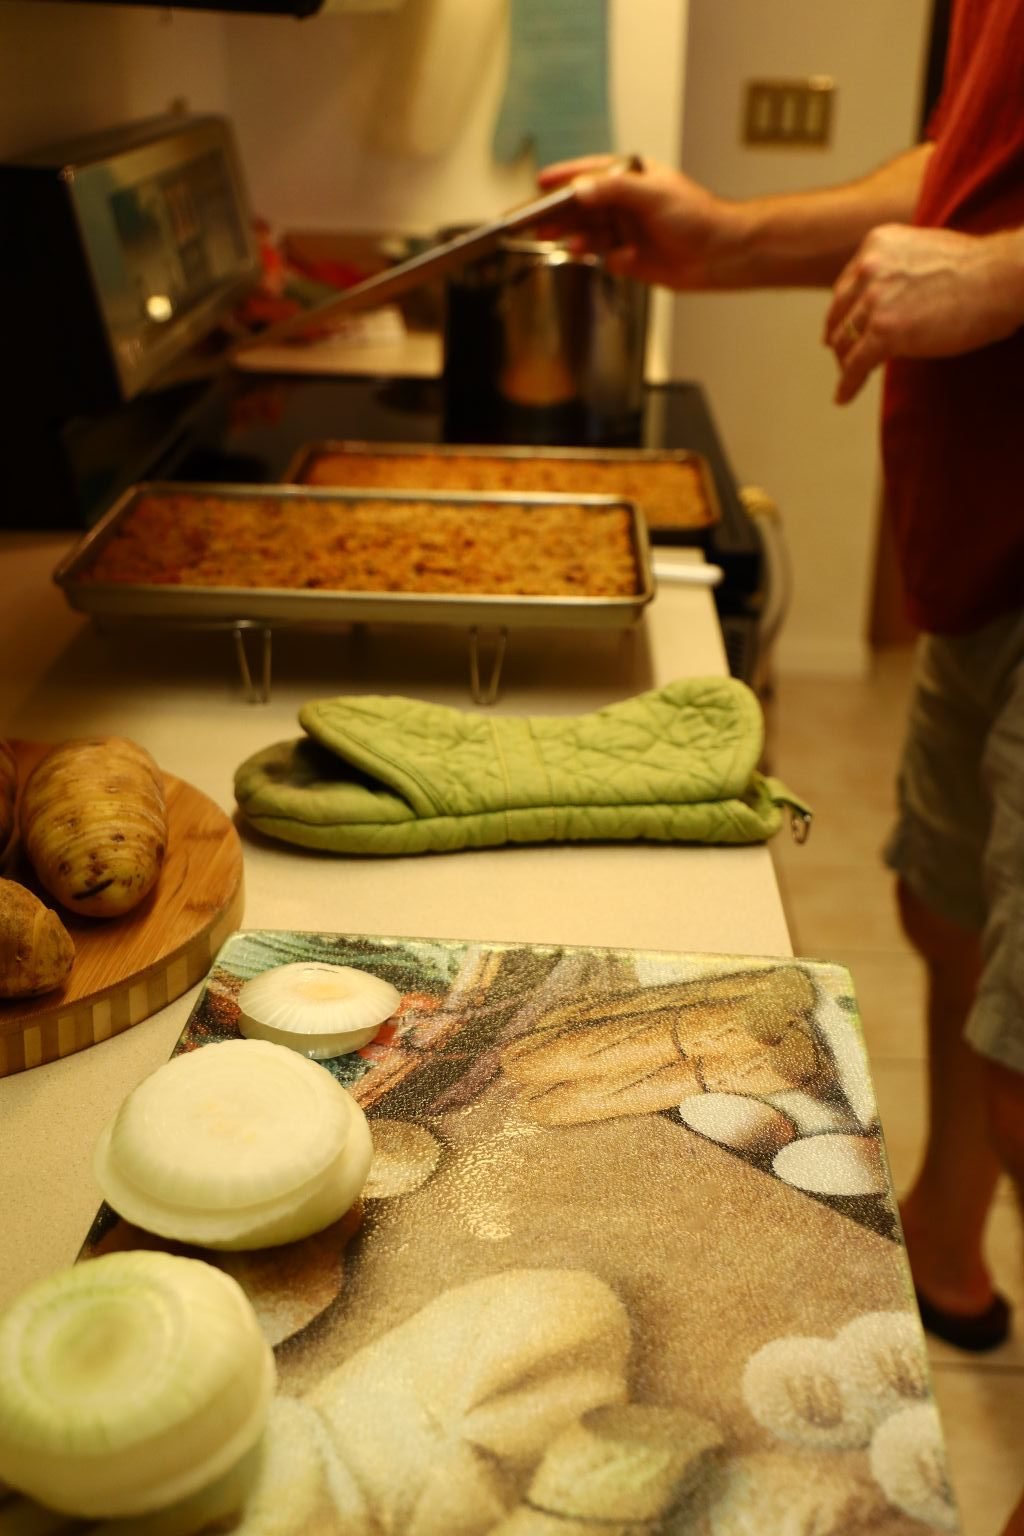
Now We Have Our Bread Slices
————————————————————

————————————————————-
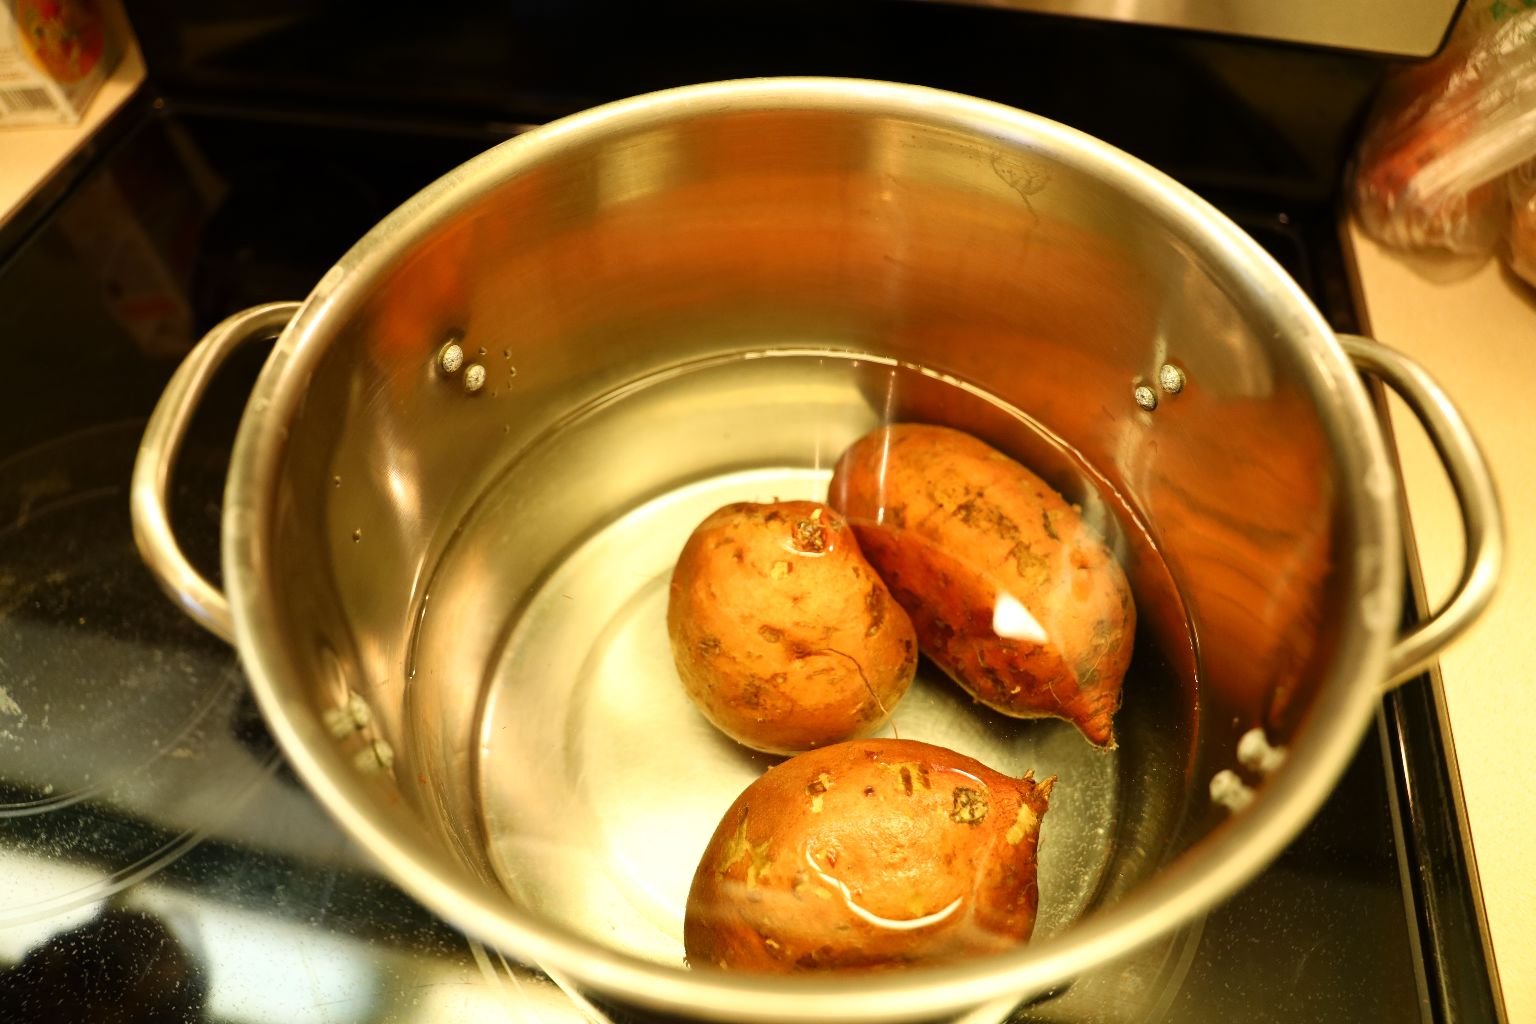
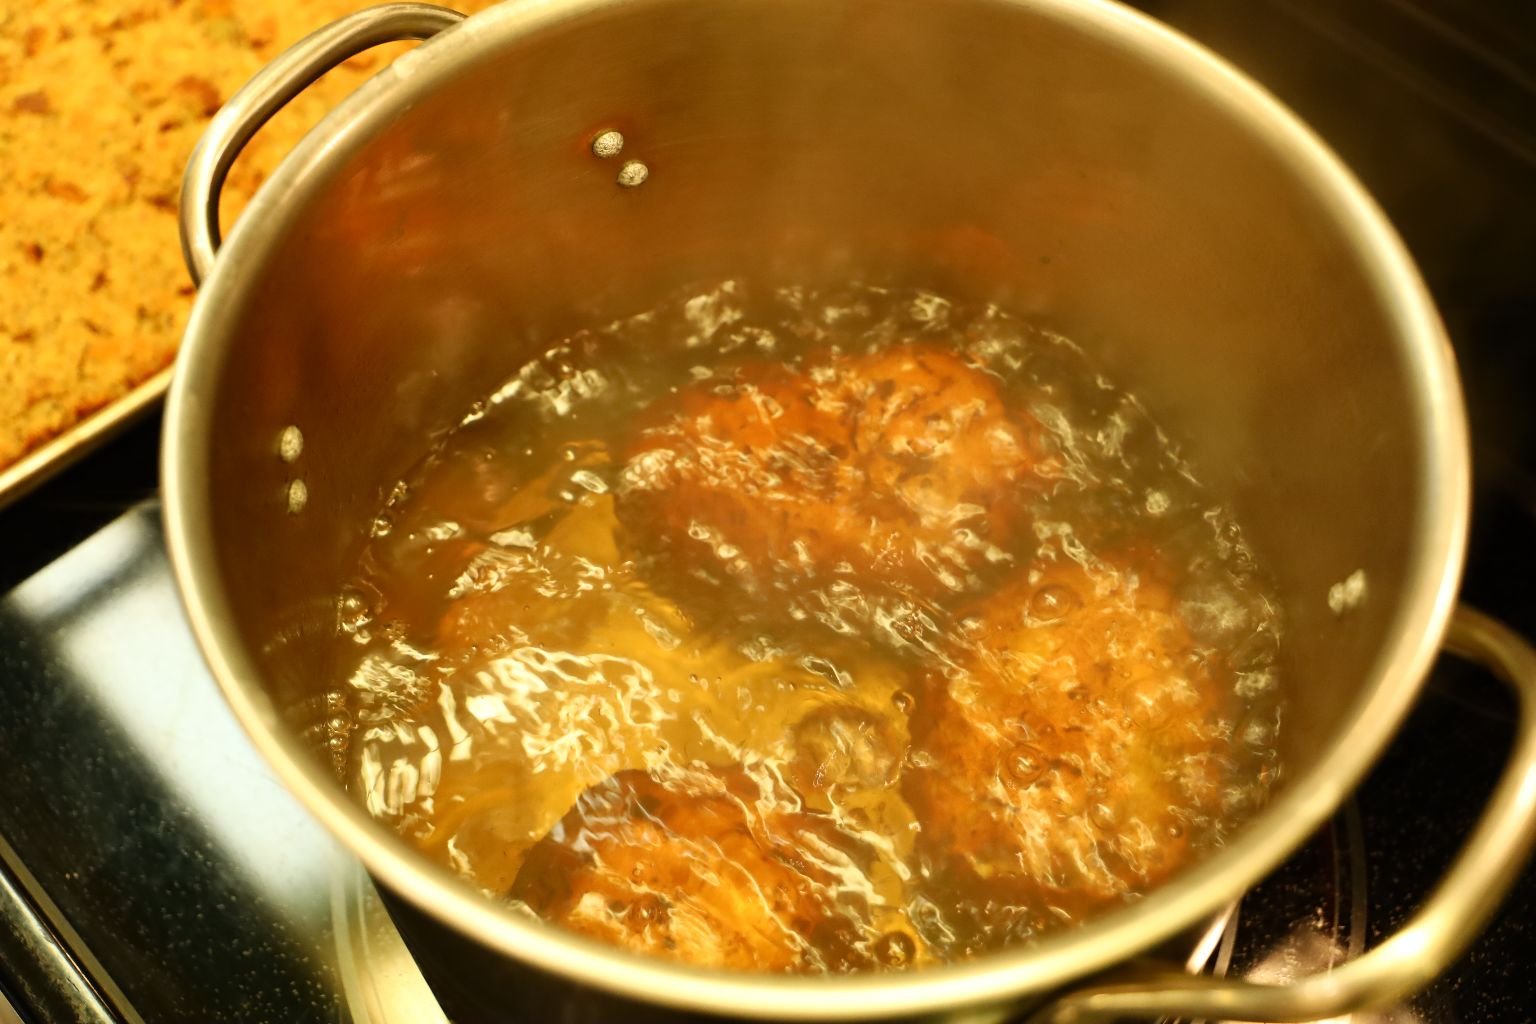
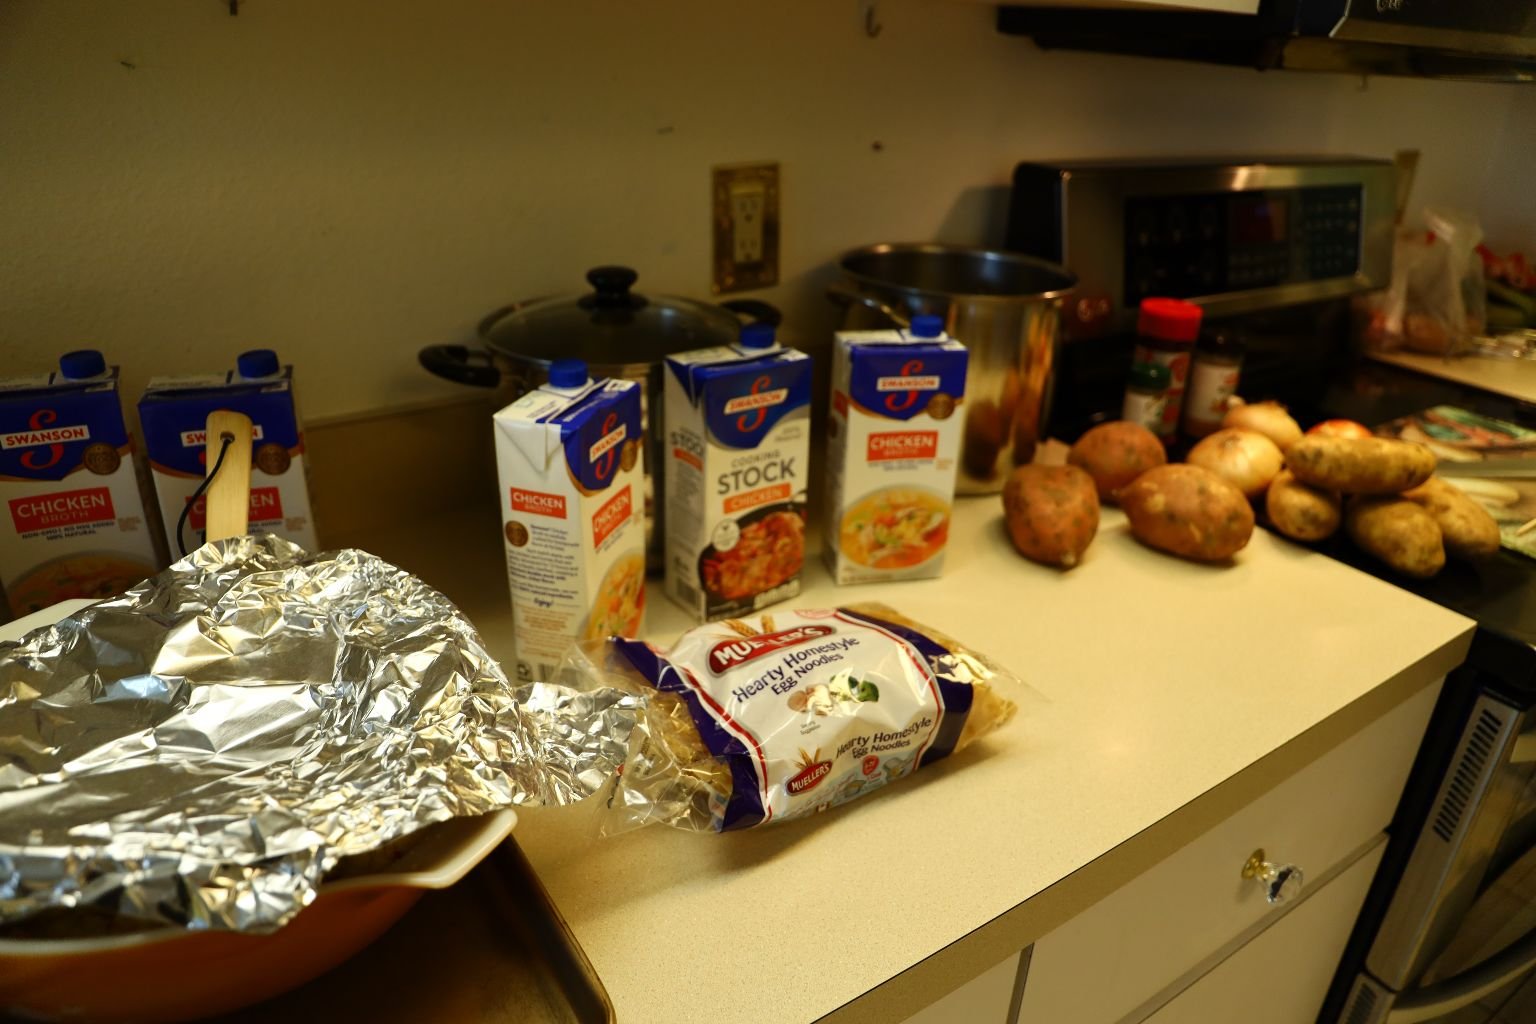
For our Sweet potatoes… we boiled three sweet potatoes for about 20 min. or until just softened.
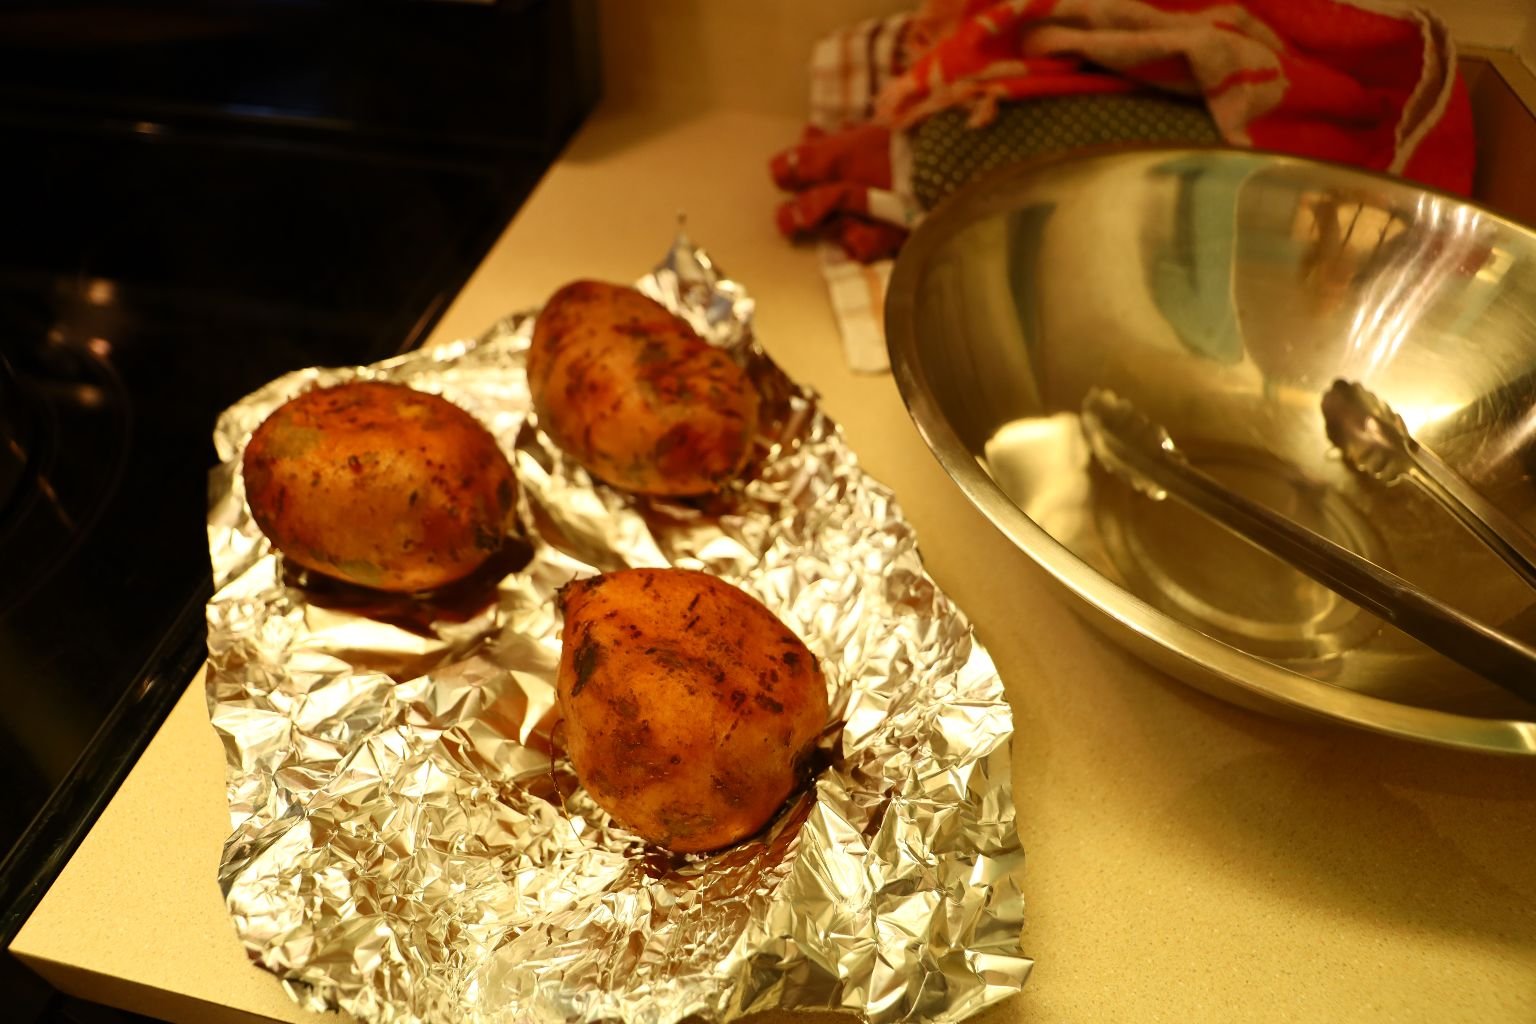
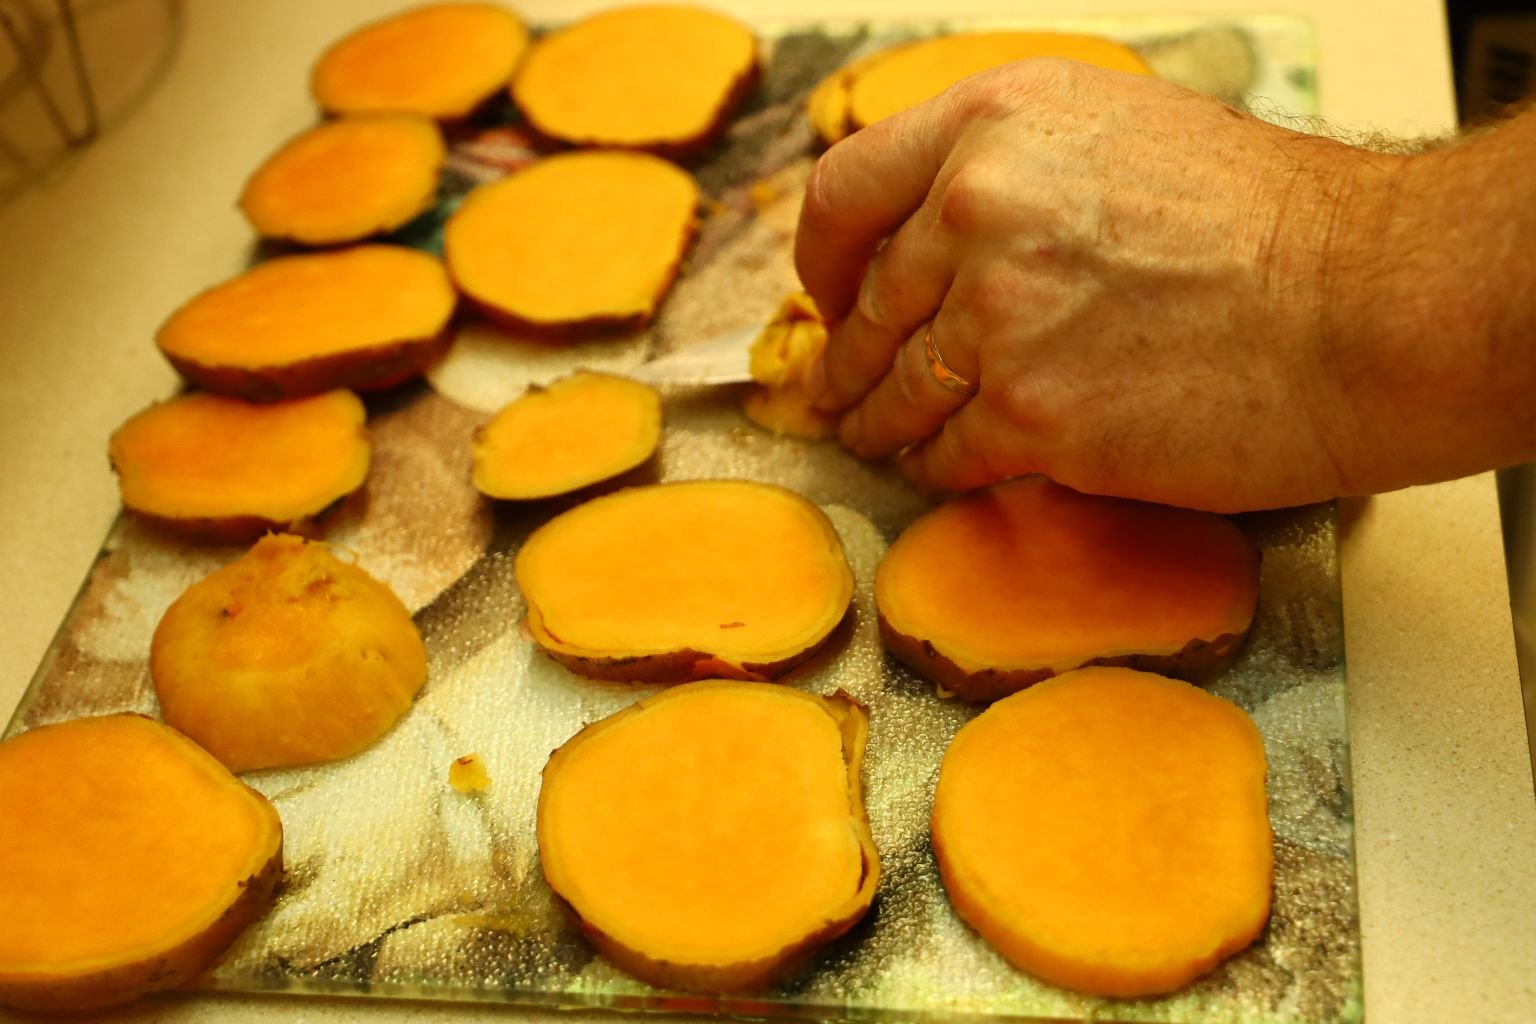
I removed them then sliced them into 1/2 inch thick slices.

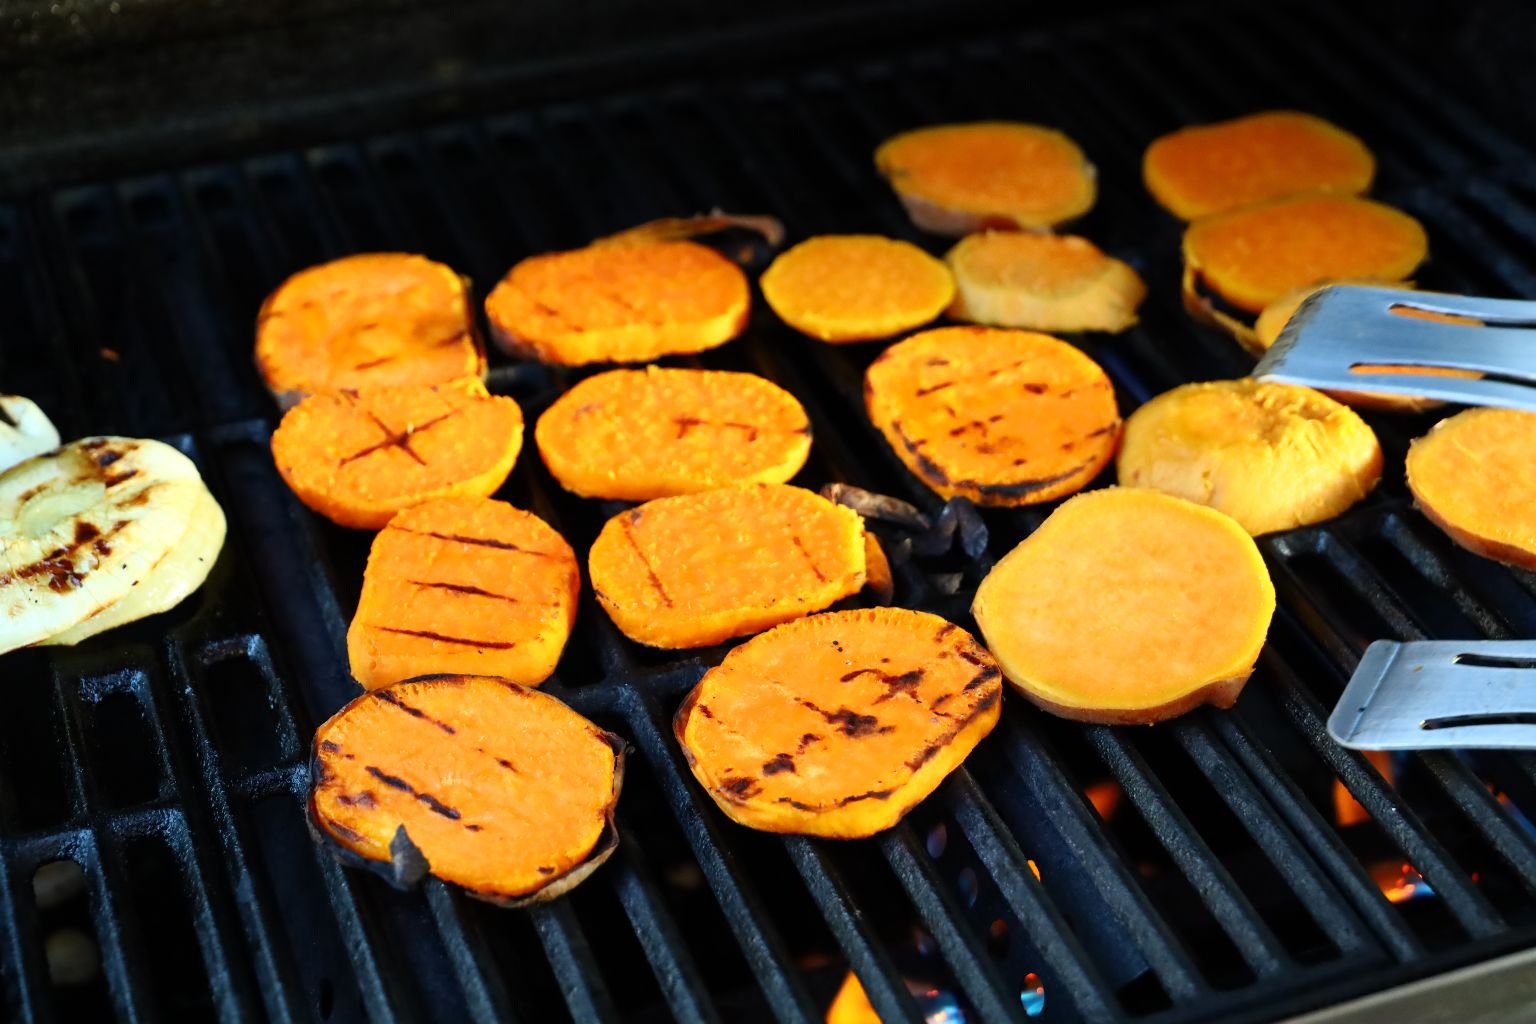
Grill the slices over medium temperature until cooked and softened.
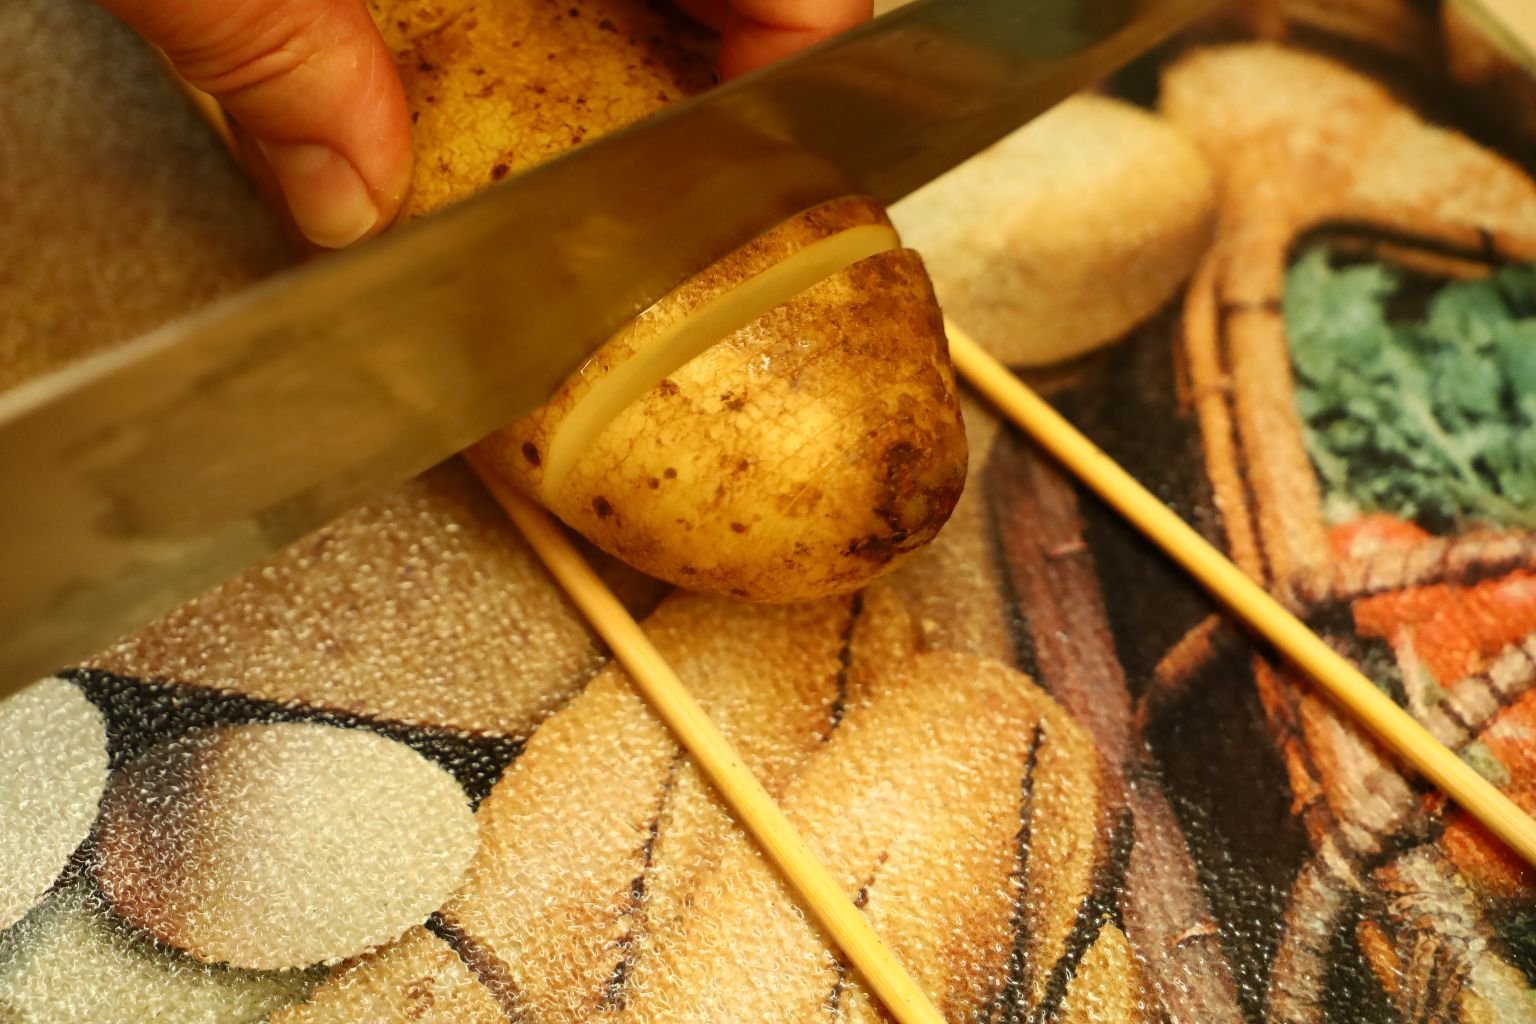
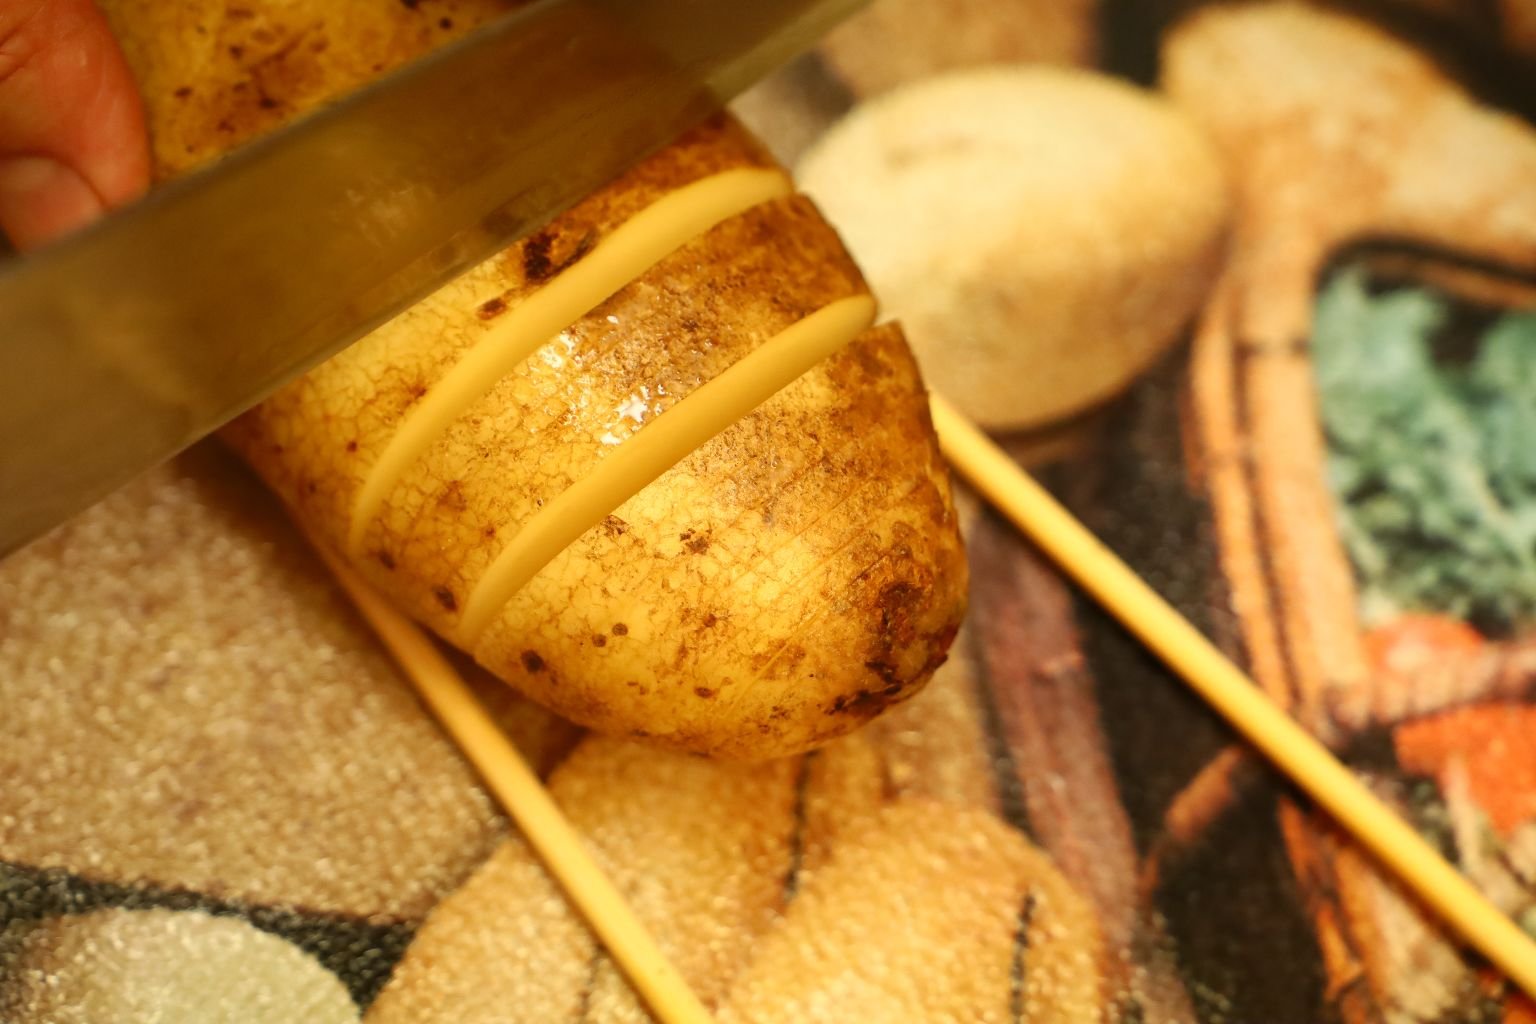
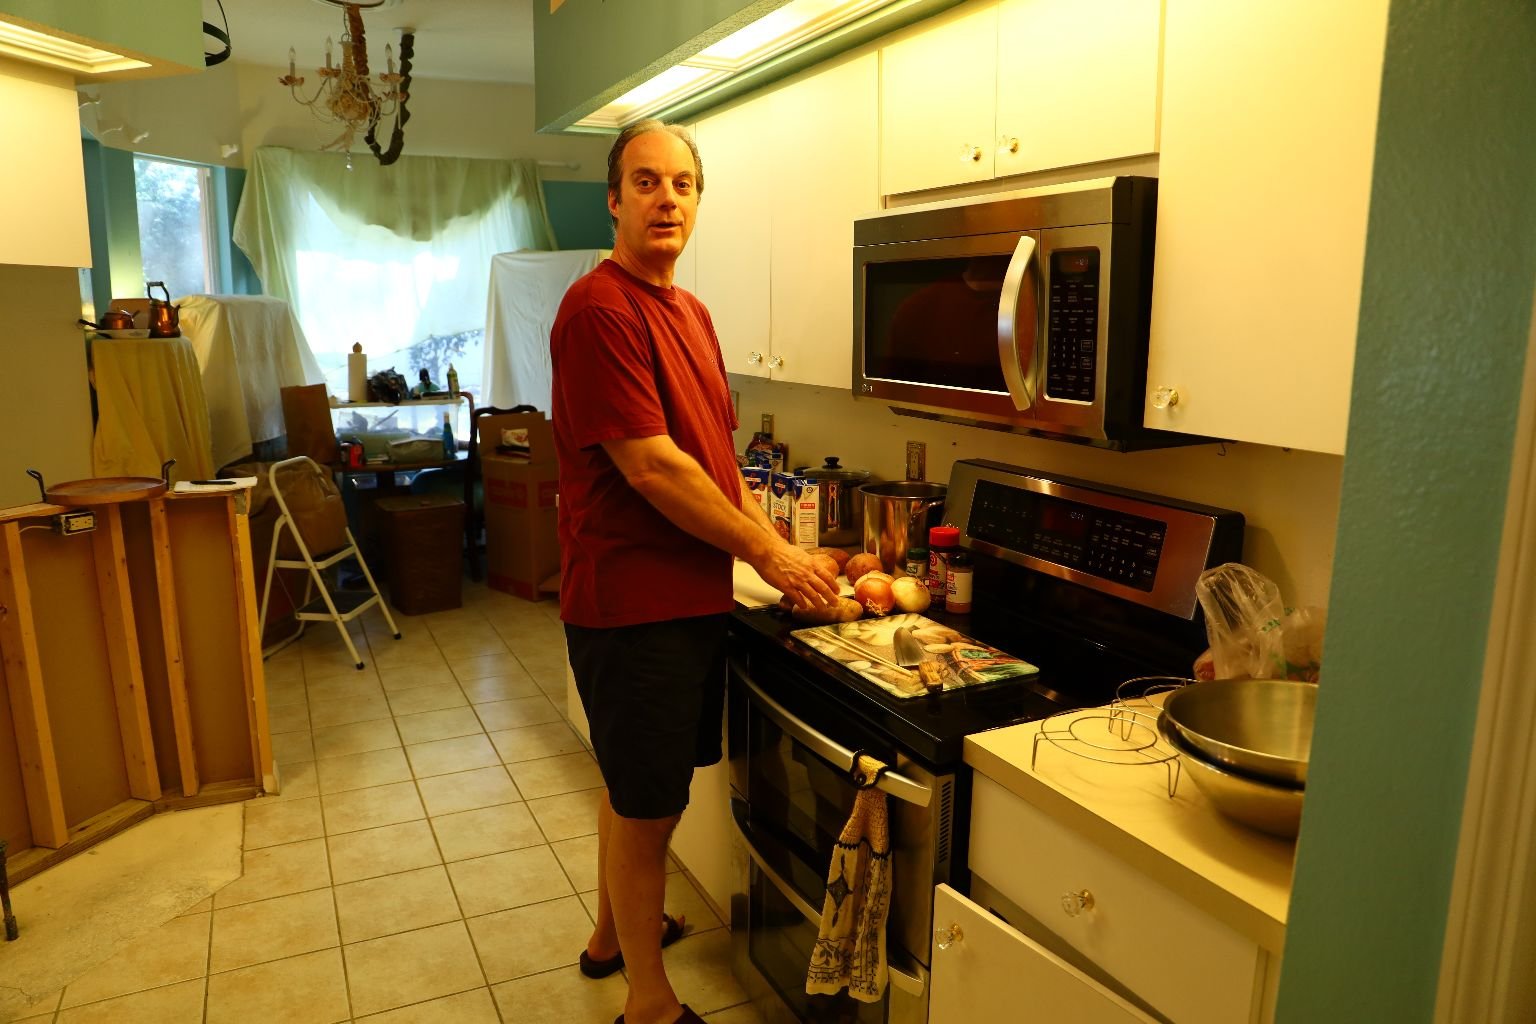
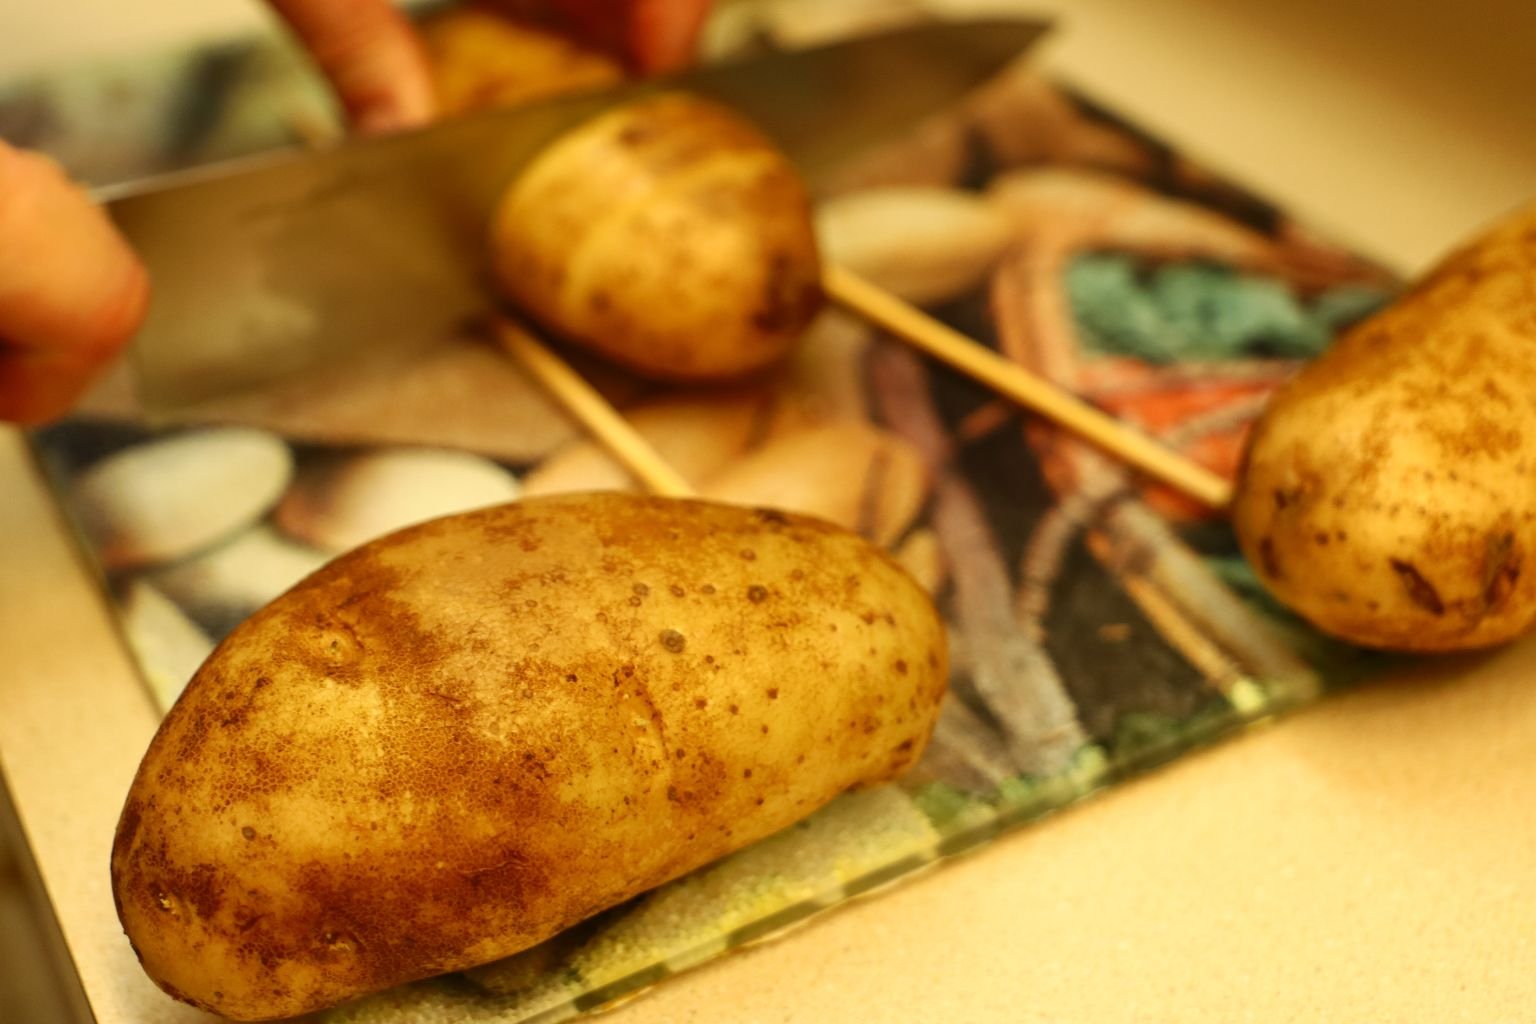
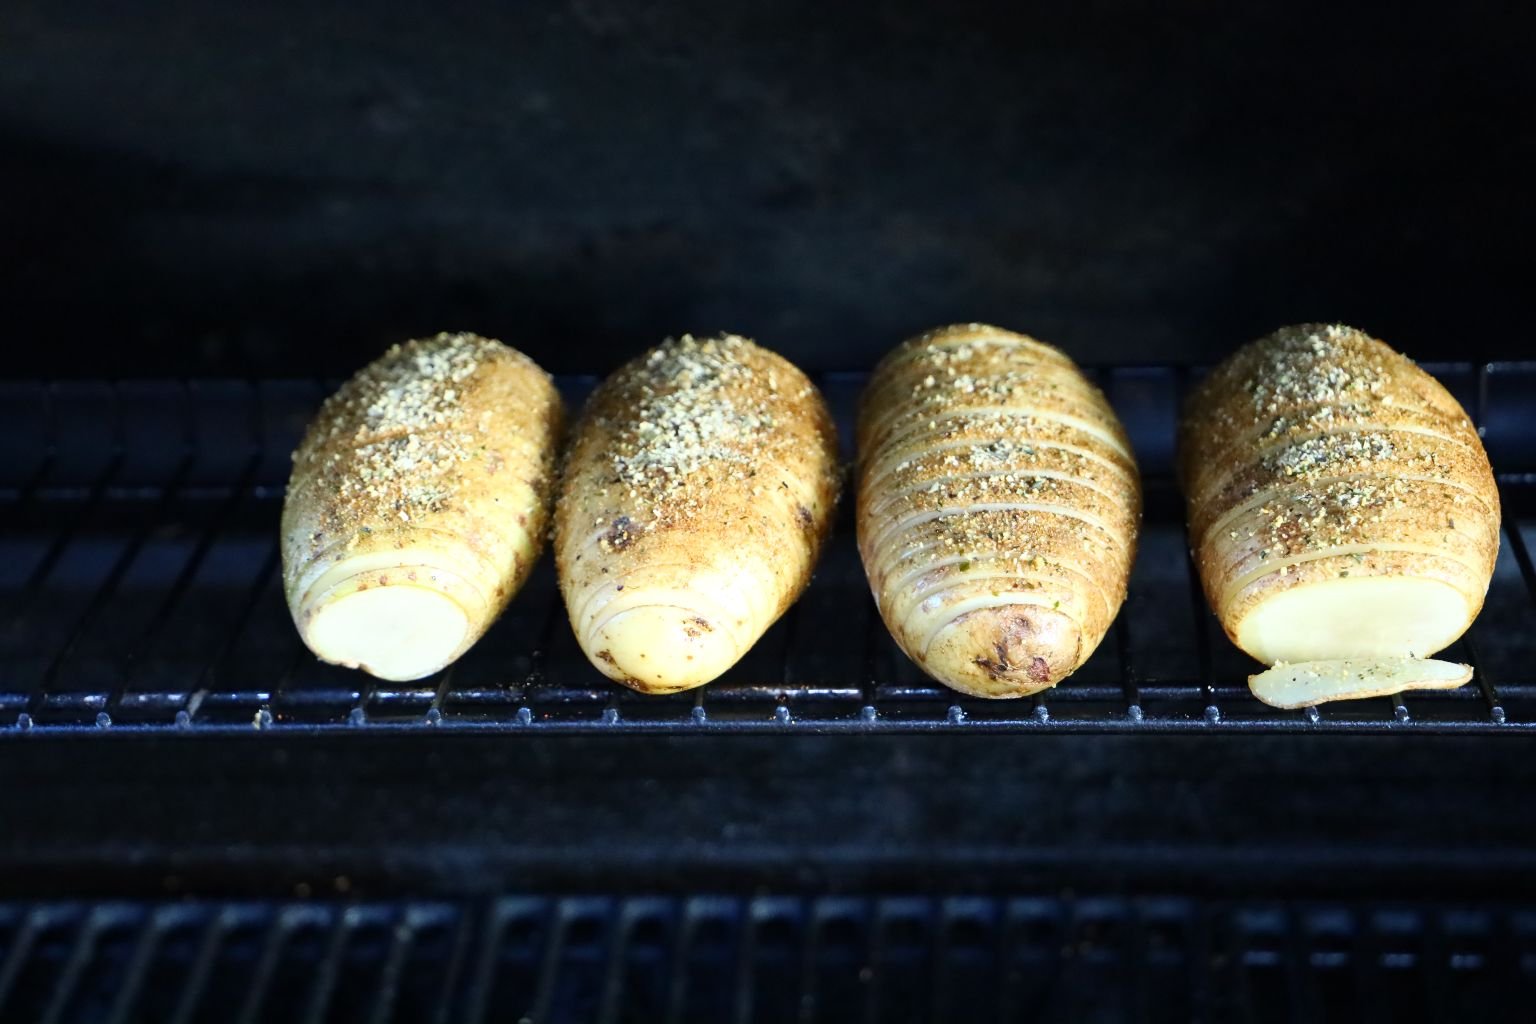
Hasselback Potatoes. Use two chopsticks placed on the sides of the potato, so your knife won’t slice all the way through the potato. Make your slices all the way down the potato and about 1/4 inch thick.
Here Gordon is Grilling Our Sides

——————————————————————

Add some salt and pepper to taste and using the upper rack of your grill, bake the potatoes until done. This will take about 45 min. depending upon the temperature of your grill.


The Beautiful Sweet Potatoes Grilling
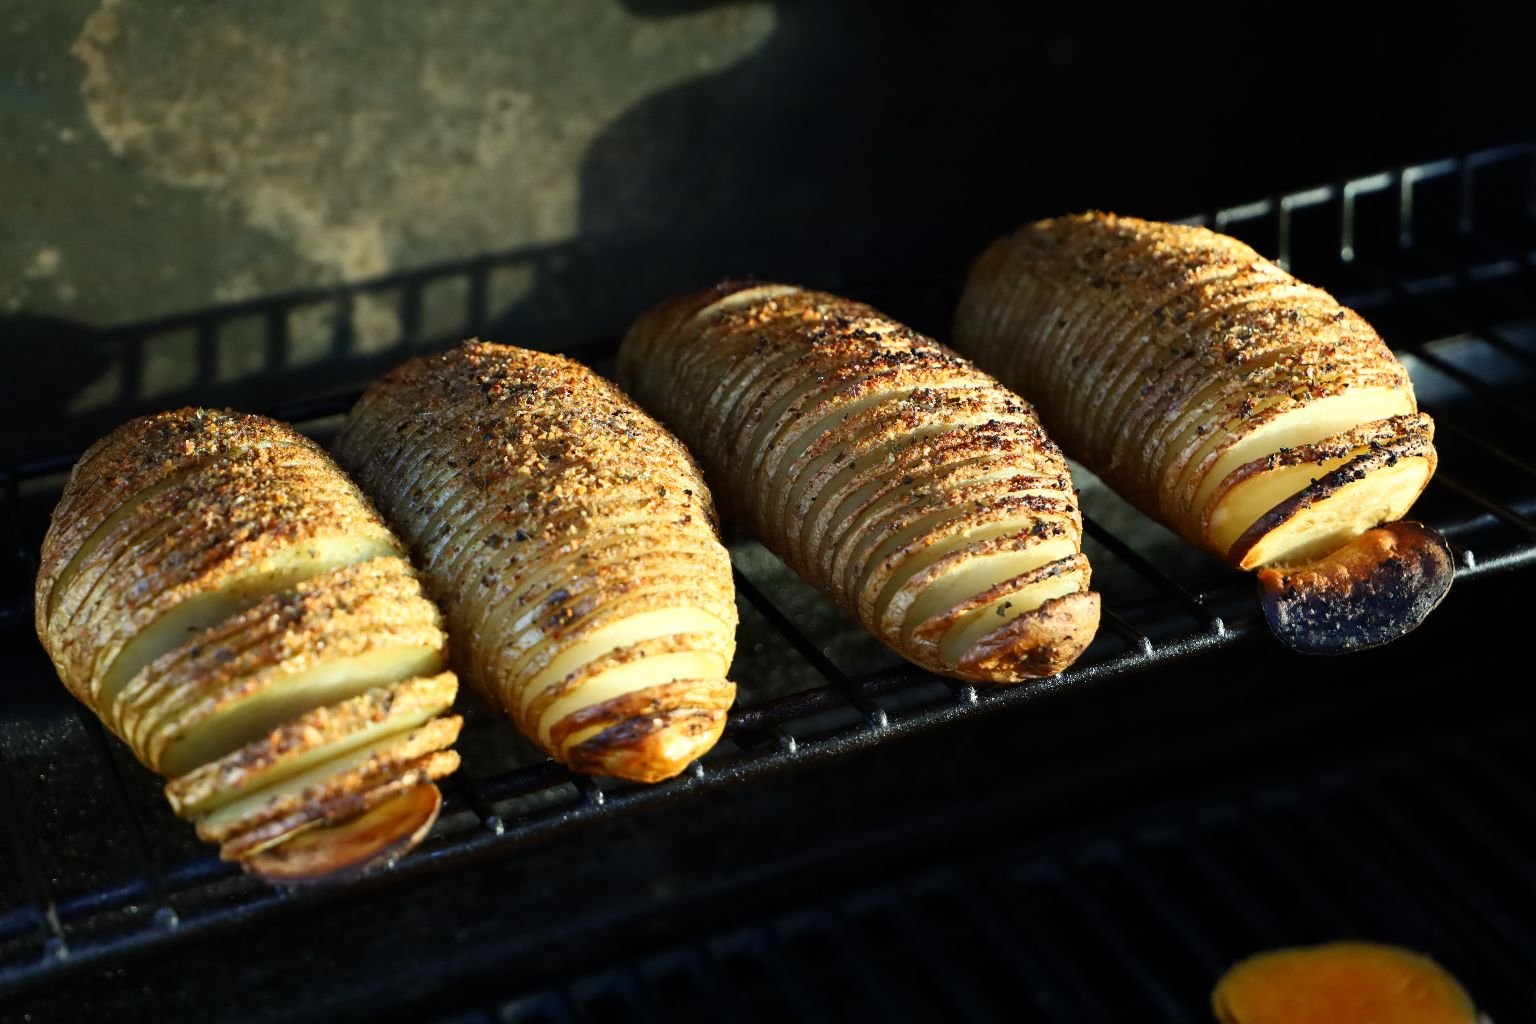
Here you can see the potatoes are crispy on the outside and tender on the inside.

Here is the before and after shot… nice Julie!
—————————————————————————–
Now It’s Just Time To Make The Sandwiches
————————————————————————-
———————————————————
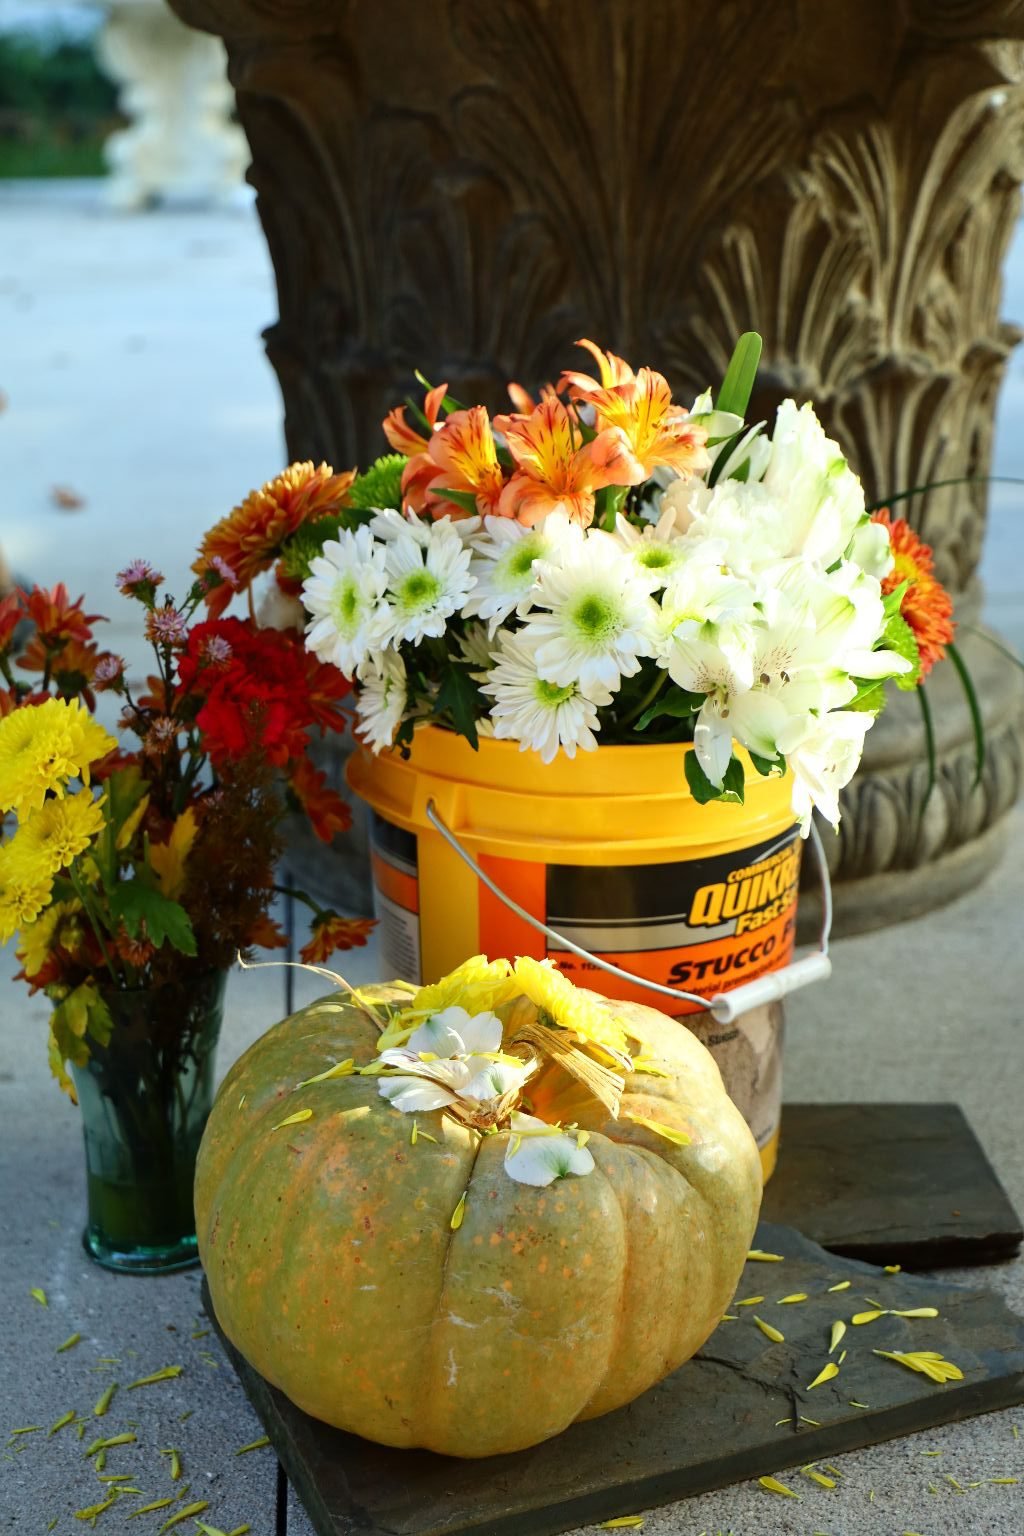
Decorations were simple. A pumpkin with some flowers in a bucket. 🙂
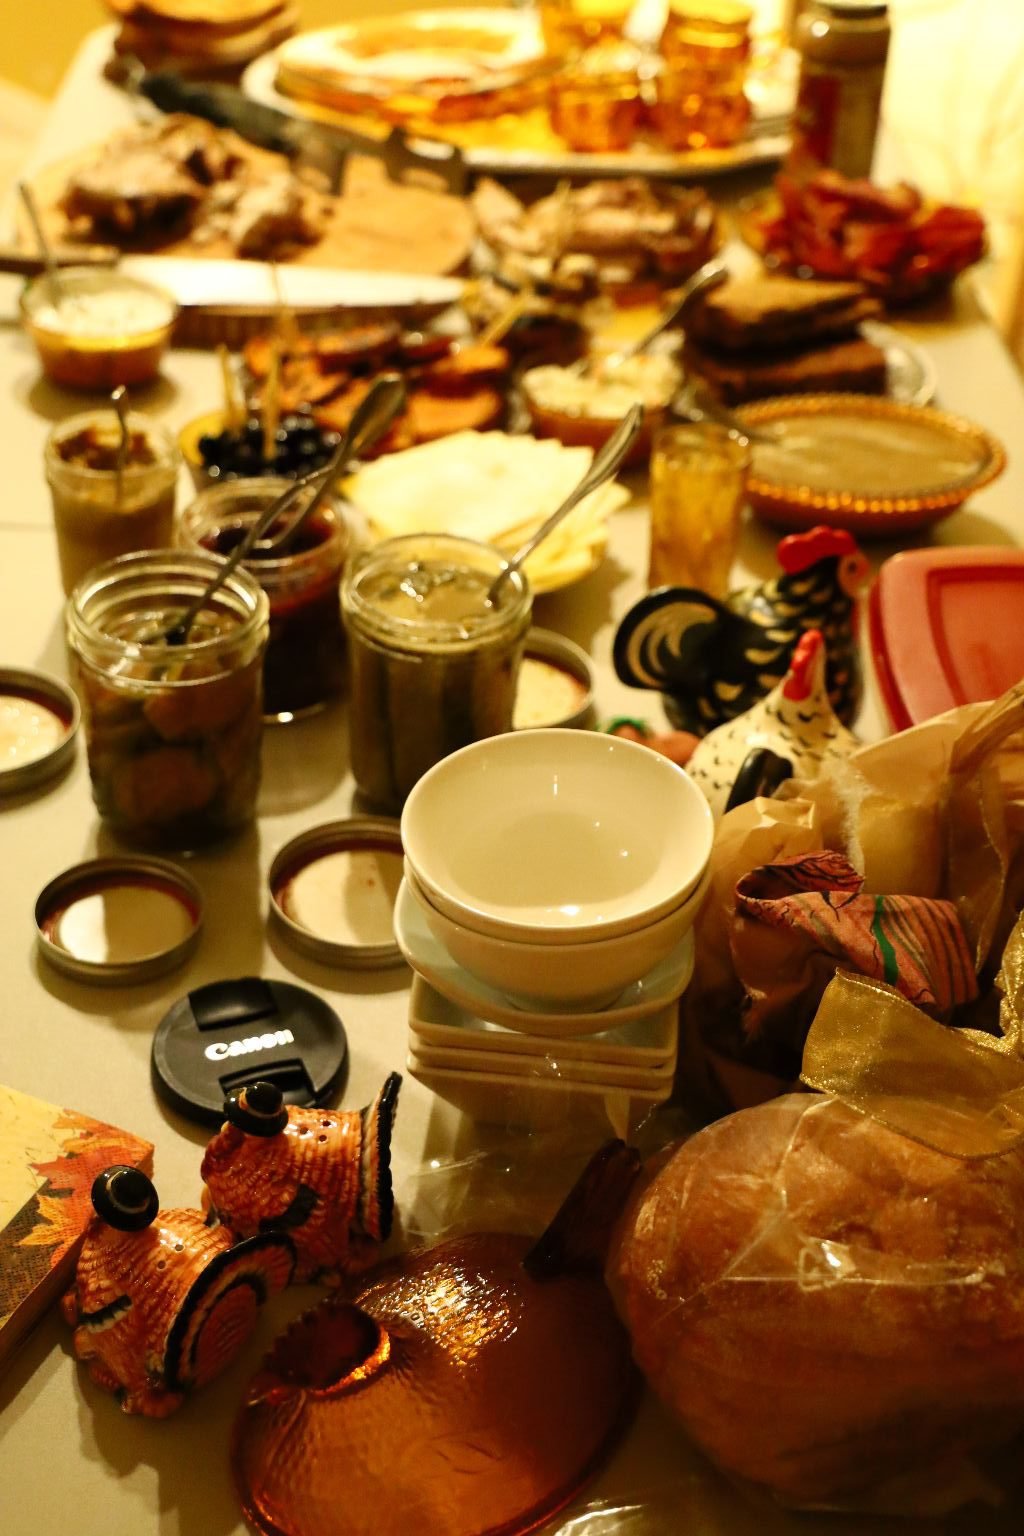
Putting all the food away was actually quite easy because dinner was easy.
We hope everyone had a lovely Thanksgiving!
Thanksgiving isn’t about some big and fancy dinner, it’s about you, and yours and whatever you have in store for it.
Julie and Gordon